19 Isgard Land of Snow Flowers/it: Difference between revisions
Machine translation (deepseek-flash) |
Machine translation (deepseek-flash) |
||
| Line 1: | Line 1: | ||
<languages/> | <languages/> | ||
<br> | <br> | ||
{{:Temporal Tina}} | {{:Temporal Tina}} | ||
= | =Requisiti= | ||
* | * Livello richiesto: 200 | ||
* | * Prerequisito quest: | ||
** [[18_Direction_of_Prayer|Episode 18]] | ** [[18_Direction_of_Prayer|Episode 18]] | ||
= | =Quest della storia principale= | ||
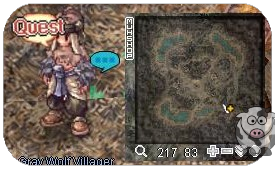
# {{#navi:wolfvill|223|83}} <br> [[File: Step 1.png]] <br> | # {{#navi:wolfvill|223|83}} <br> [[File: Step 1.png]] <br>Parla con Grey Wolf Villager che dice che Maram ti stava cercando. Maram appare e Miriam e Suad si uniscono poco dopo per discutere il prossimo passo per inseguire Bagot. Menzionano che Elly è riuscita a tracciare i passi di Bagot e ha trovato una rotta verso le regioni settentrionali grazie al tuo aiuto. Decidete tutti di andare a Varmundt's Mansion per incontrare Elly. Tuttavia, Suad non può unirsi perché deve coordinare una riunione del parlamento con Niren per la pace tra Grey Wolf Village e Rachel. | ||
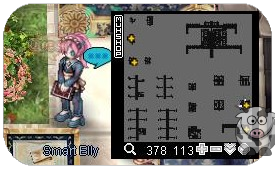
# {{#navi:ba_in01|341|369}} <br> [[File: Step 2.png]] <br> | # {{#navi:ba_in01|341|369}} <br> [[File: Step 2.png]] <br>Parla con Elly che spiega la sua raccolta di dati mentre tracciava Bagot. Dice che è andato nelle regioni settentrionali e ha menzionato il leggendario Jörmungandr. L'unico continente settentrionale associato a Jörmungandr è Isgard. Spiega anche che l'Illusion ha rubato i registri dall'aeronave che ha navigato verso Isgard. Elly sta lavorando per ottenere un Airship per navigare verso Isgard, ma la tecnica, Ginger, riferisce che c'è un muro attorno a Isgard di alto flusso energetico che blocca l'ingresso. Crux consiglia di cercare aiuto dalla famiglia reale. La famiglia Gaebolg avrebbe informazioni su Jörmungandr. | ||
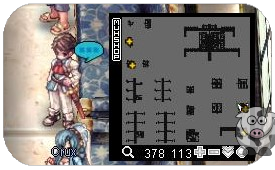
# {{#navi:ba_in01|386|110}} <br> [[File: Step 3.png]] <br> | # {{#navi:ba_in01|386|110}} <br> [[File: Step 3.png]] <br>Parla con Crux per tornare a Prontera Castle con Lazy mentre Elly e Ginger si occuperanno dell'airship. | ||
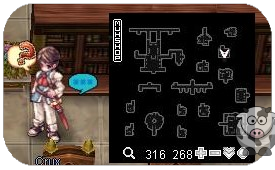
# {{#navi:prt_cas|320|270}} <br> [[File: Step 4.png]] <br> | # {{#navi:prt_cas|320|270}} <br> [[File: Step 4.png]] <br>Parla con Crux e Nyhill. Nyhill ricapitola che la famiglia Gaebolg è stata maledetta da Jörmungandr. Quando la Jörmungandr Church è svanita da Midgard, non tutti sono morti e scomparsi. Invece, i seguaci di un tempo furono intrappolati in una terra di ghiaccio oltre il mare e la terra fu sigillata da una forza sconosciuta dove i guardiani proteggevano il sigillo. Nyhill menziona che alcuni membri della famiglia Gaebolg una volta viaggiavano da e per Isgard. La regina, Catherine D. Gaebolg, arriva per dare ulteriori spiegazioni. Menziona che Tristan III ha tre sorelle, due delle quali risiedono a Isgard, incaricate di trovare un modo per spezzare la maledizione di Jörmungandr. Nyhill menziona che è richiesto il permesso per entrare a Isgard e ti chiede il motivo per cui vuoi entrare. Racconti a Nyhill la storia dell'Illusion e Nyhill è d'accordo con il tuo piano di fermarla. Dice che può scrivere una lettera d'invito speciale.<br>''Nota: Per entrare nel castello in qualsiasi momento, Crux apparirà nella stanza degli ospiti, a {{#navi:ba_in01|48|146}}.'' | ||
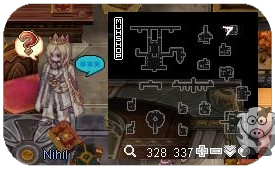
# {{#navi:prt_cas|331|343}} ( | # {{#navi:prt_cas|331|343}} (esci dalla stanza verso l'alto, poi gira a destra) <br> [[File: Step 5.png]] <br>Parla con Nyhill alla sua scrivania. Nyhill spiega che il libro dall'aspetto comune sulla sua scrivania è una Guardian's Box. Aprendo la copertina si rivela un vuoto nel libro che benedice qualsiasi lettera al suo interno da parte dei Guardiani. Solo i discendenti diretti delle sette famiglie reali possono usarla. La scatola fu lasciata dal Primo Tristan Gaebolg. Nyhill scrive e dà a te e ai tuoi amici un {{#item:1000607}}. Vieni poi teletrasportato di nuovo a Varmundt's Mansion. | ||
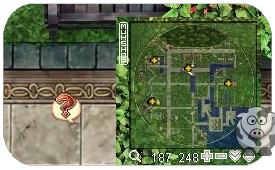
# {{#navi:ba_maison|186|251}} <br> [[File: Step 6.png]] <br> | # {{#navi:ba_maison|186|251}} <br> [[File: Step 6.png]] <br>Ti incontri con il resto della squadra. Ginger dice che l'airship è pronta per viaggiare verso Isgard. | ||
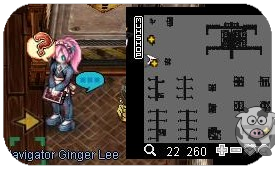
# {{#navi:ba_in01|30|264}} <br> [[File: Step 7.png]] <br> | # {{#navi:ba_in01|30|264}} <br> [[File: Step 7.png]] <br>Parla con Ginger per salire sull'airship. | ||
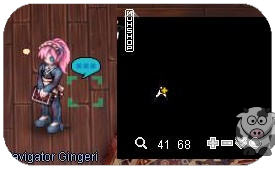
# {{#navi:air_if|46|71}} <br> [[File: Step 8.png]] <br> | # {{#navi:air_if|46|71}} <br> [[File: Step 8.png]] <br>Parla con Ginger sull'airship e dalle il tuo invito. Ginger esamina la lettera e rileva uno specifico codice di lunghezza d'onda emesso dall'invito. | ||
# {{#navi:air_if|32|63}} <br> [[File: Step 9.png]] <br> | # {{#navi:air_if|32|63}} <br> [[File: Step 9.png]] <br>Parla con Lehar e i tuoi amici. Lehar si presenta come membro della St. Capitolina Abbey. Sua madre era la sorella del re precedente e la principessa più giovane dei Gaebolg. Era preoccupata per la maledizione della loro famiglia e gli affidò l'incarico di essere cresciuto al monastero. Tuttavia, la maledizione si manifestò nel figlio diretto del re precedente. Il figlio era determinato a spezzare da solo la maledizione della famiglia e si recò lui stesso a Isgard. Lehar descrive Isgard come una terra di solo neve, ghiaccio e ghiacciai. Tuttavia, c'è un castello fatto di ghiaccio, ma all'interno rimane caldo con una sorta di potere magico. Lazy chiede se c'è qualcosa di cui preoccuparsi dato che l'Illusion deve aver preso contatto per circa 4 mesi. Lehar ricorda solo che il numero di Rgan aumenta drasticamente. Ginger interrompe per annunciare che l'airship atterrerà presto e di prepararsi a scosse impreviste. | ||
# {{#navi:air_if|46|71}} <br> [[File: Step 10.png]] <br> | # {{#navi:air_if|46|71}} <br> [[File: Step 10.png]] <br>Parla con Ginger per lasciare l'airship ed entrare a Isgard. | ||
# {{#navi:jor_tail|221|53}} <br> [[File: Step 11.png]] <br> | # {{#navi:jor_tail|221|53}} <br> [[File: Step 11.png]] <br>Parla con Lehar che afferma che siamo vicini a Ice Castle e dovremmo andare lì. <br> Per trovare Ice Castle, cammina fino in cima alla mappa, entra nel portale, nella mappa successiva esci dal lato destro. {{#navi:jor_back1|381|229}} | ||
# {{#navi:icas_in|141|216}} <br> [[File: Step 12.png]] <br> | # {{#navi:icas_in|141|216}} <br> [[File: Step 12.png]] <br>Parla con Lehar nel Ice Castle che presenta Leon Petit e Aurelie Petit. La famiglia Petit ha assunto il ruolo di supervisionare il Ice Castle e proteggerlo. Spieghi la situazione di Illusion e Bagot. Aurelie afferma che c'è un'alta possibilità che l'Illusion abbia interferito con gli Rgan. Le zie di Lehar, Voglinde Gaebolg e Vellgunde Gaebolg, appaiono e si presentano. Voglinde e Vellgunde sono entrambe qui per studiare Jörmungandr e la magia degli Rgan nel tentativo di spezzare la maledizione sulla loro famiglia. Entrambe tornano alle loro ricerche in una delle capanne degli Iwin. | ||
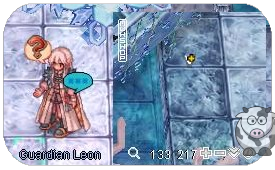
# {{#navi:icas_in|138|220}} <br> [[File: Step 13.png]] <br> | # {{#navi:icas_in|138|220}} <br> [[File: Step 13.png]] <br>Parla con Leon che spiega di più su Isgard. La terra stessa è formata dal corpo congelato di Jörmungandr. Gli Rgan erano i principali seguaci di Jörmungandr e sono legati qui. Chiedi del barriera. Leon afferma che la barriera non sigilla Jörmungandr, ma impedisce agli Rgan di andarsene. Lazy chiede degli uccelli giganti attorno al castello. Aurelie spiega che gli Iwin erano originariamente uccelli migratori che si spostavano da e per Oreum Mountains. Tuttavia, una volta posizionata la barriera, la razza Iwin rimase bloccata a Isgard. Da allora, gli Iwin hanno aiutato a proteggere il Ice Castle e monitorare la barriera. Leon vorrebbe che tu incontrassi gli Iwin dato che non hanno mai incontrato un estraneo da Varmundt. Aurelie decide di darti alcuni {{#item:1000608}} affermando che è la valuta principale in questa regione. Un potere magico cristallizzato in una forma simile a un fiore. Ricompensa: 40 {{#item:1000608}} e 50 Ice Castle Reputation. | ||
#; | #; Sbloccato: Iwin Patrol Instance e Purification Saint Side Quest.<br>Warper / @go to Ice Castle | ||
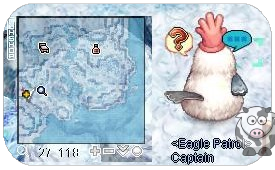
# {{#navi:icecastle|23|115}} <br> [[File: Step 14.png]] <br> | # {{#navi:icecastle|23|115}} <br> [[File: Step 14.png]] <br>Parla con Marshall Gigi Happy Rev Eve Alice Llyod Broad-Minded Tess Vortex, Capitano della Iwin Patrol, ed esegui una Iwin Patrol con gli Iwin. Al primo completamento dell'instance, troverai un giovane uomo che ha bisogno di aiuto per fuggire dall'area. Dici a quest'uomo che assomiglia molto a Morning. L'uomo non sa chi sia Morning. Menzioni che hai trovato Morning a Rudus. L'uomo ti dice che Rudus è un luogo di esemplari scartati e dice che Morning è un modello precedente di se stesso. Egli è un esemplare di test più nuovo e migliorato creato dagli scienziati di Illusion. Aiuti Lunch ad attraversare Frozen Scale Hills fino alle Plains dove sarà più al sicuro. Continua a completare la Iwin Patrol. Ricompensa: 2 {{#item:1000608}} e 5 Ice Castle Reputation. | ||
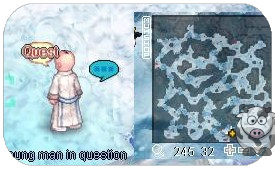
# {{#navi:jor_back2|250|30}} <br> [[File: Step 15.png]] <br> | # {{#navi:jor_back2|250|30}} <br> [[File: Step 15.png]] <br>Parla con l'uomo che hai trovato nella Iwin Patrol. Si presenta come HU-210426, che è il codice a barre inciso sulla sua testa. Dici che è un nome difficile da ricordare. Suggerisci il nome “Lunch” dato che è simile a Morning. L'uomo accetta di essere chiamato Lunch. Chiedi a Lunch come è arrivato qui? Lunch dice che ricorda solo gli esperimenti fatti in una “Large Mansion” ma all'improvviso gli scienziati si stavano preparando a partire. Lo scienziato gettò via molti esemplari, ma Lunch riuscì a unirsi allo scienziato nell'Airship. Tuttavia, lo scienziato perse interesse per Lunch e decise di sperimentare con la razza Rgan. Nel frattempo, Lunch voleva di nuovo l'attenzione dello scienziato così si trasformò in un Rgan. Chiedi come si fa a trasformarsi così. Lunch spiega che una delle sue abilità è trasformarsi in un altro essere. Chiedi se può trasformare anche te. Lunch afferma che può aiutare e di tornare se ne hai bisogno. Ricompensa: 1 {{#item:101162}} e 2 {{#item:1000608}}. | ||
#; | #; Nota: Puoi ottenere altri {{#item:101162}} da questo NPC. | ||
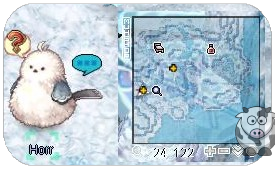
# {{#navi:icecastle|27|126}} <br> [[File: Step 16_a.png]] <br> | # {{#navi:icecastle|27|126}} <br> [[File: Step 16_a.png]] <br>Parla con l'Iwin che si presenta come Horr. Dice che ti accompagnerà al Ice Castle. | ||
# {{#navi:icas_in|34|189}} <br> [[File: Step 17.png]] <br> | # {{#navi:icas_in|34|189}} <br> [[File: Step 17.png]] <br>Parla con Aurelie e la squadra che afferma che l'attività attorno a Isgard è sempre più sospetta. Potrebbe essere un segno della rinascita di Jörmungandr in connessione con Illusion. Leon dice che la Jörmungandr Church deve essere fermata. Miriam consiglia che non solo il sigillo dovrebbe essere protetto, ma anche recuperare il cuore di Ymir dall'Illusion. Voglinde dice che sarà difficile entrare nel nido degli Rgan. Mostri il tuo {{#item:101162}} e spieghi dove l'hai ottenuto. La squadra conclude che la pergamena di trasformazione è la chiave per infiltrarsi nella razza Rgan. | ||
# {{#navi:jor_back3|99|318}} <br> [[File: Step 18.png]] <br> | # {{#navi:jor_back3|99|318}} <br> [[File: Step 18.png]] <br>Usa una {{#item:101162}} e parla con la squadra che è anche tutta travestita da Rgan. Horr menziona che c'è un problema con la trasformazione di Lazy e che sembra ancora più umano. Lazy menziona che anche tu sembri più umano rispetto al resto della squadra. Deduci che deve essere la pergamena di trasformazione che si armonizza con i poteri magici di certe persone. Horr e Miriam dicono che tu e Lazy dovreste fingere di essere Rgan appena nati mentre vi avventurate nel nido. Ricompensa: 25 {{#item:1000608}} e 30 Ice Castle Reputation. | ||
# | # Entra nel dungeon sul lato sinistro attraverso il portale. | ||
# {{#navi:jor_dun02|263|170}} <br> [[File: Step 19.png]] <br> | # {{#navi:jor_dun02|263|170}} <br> [[File: Step 19.png]] <br>Parla con Miriam vicino alle uova. Horr menziona di stare attenti e di comportarsi davvero come un appena nato non menzionando alcuna conoscenza esterna. Appare un Rgan Priest e urla freneticamente a Horr e Miriam chiedendo loro perché c'è un vescovo qui. Horr dice al prete che tu e Lazy siete appena nati e che stavano sorvegliando le uova. Il Rgan Priest chiede di seguirlo nel nido. Ricompensa: 25 {{#item:1000608}} e 30 Ice Castle Reputation. | ||
# {{#navi:jor_nest|185|49}} <br> [[File: Step 20.png]] <br> | # {{#navi:jor_nest|185|49}} <br> [[File: Step 20.png]] <br>Parla con Rgan Priest che annuncia al resto del nido che è nato un Bishop. È un miracolo e un segno della resurrezione di Jörmungandr. Altri Rgan appaiono per lodare Lazy e benedirlo. Appare un Bishop Rgan e spiega che tu e Lazy dovreste ricevere un battesimo di benedizione. | ||
#; | #; Sbloccato: Warper to Snake's Nest | ||
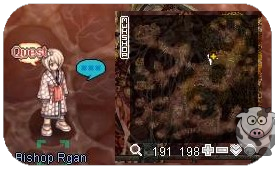
# {{#navi:jor_nest|196|202}} <br> [[File: Step 21.png]] <br> | # {{#navi:jor_nest|196|202}} <br> [[File: Step 21.png]] <br>Parla con Bishop Rgan che dice a te e Lazy che questa particolare area è il vivaio delle uova. È il luogo abituale dove nascono i preti e gli altri vescovi. Dice che l'insolito “punto di nascita” da cui tu e Lazy siete “schiusi” deve essere una benedizione di Jörmungandr. Lazy chiede di tutti gli strani dispositivi vicino alle uova. Il Bishop dice che sono macchine installate dagli umani per iniettare più energia magica nelle uova. Chiedi quali umani ma Bishop Rgan dice che non lo sa, se non che vengono da oltre la barriera. | ||
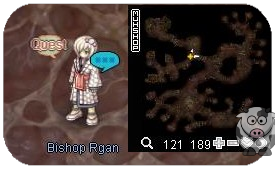
# {{#navi:jor_nest|115|187}} <br> [[File: Step 22.png]] <br> | # {{#navi:jor_nest|115|187}} <br> [[File: Step 22.png]] <br>Parla con Bishop Rgan che spiega che l'area vicina è dove risiedono gli umani e ti chiede di evitare l'area poiché ci sono molti strani dispositivi fatti da umani sporchi. Invece, Bishop Rgan ti chiede di seguirlo per incontrare Rasgand. | ||
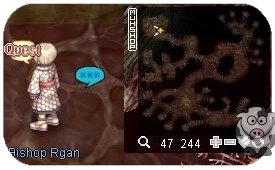
# {{#navi:jor_nest|53|244}} <br> [[File: Step 23.png]] <br> | # {{#navi:jor_nest|53|244}} <br> [[File: Step 23.png]] <br>Parla con Bishop Rgan che ti presenta Sarekhgand. Sarekhgand guarda te e Lazy e annuncia che Rasgand sarà felice della notizia. Bishop Rgan vede che l'umano si sta avvicinando e vuole mostrarti a lui. Bagot appare e tu sei sorpreso. Sarekhgand spiega a Bagot come siete nati. Bagot è impressionato dalla situazione e vuole tornare ai suoi esperimenti. Tuttavia, Sarekhgand non vuole che Bagot esegua esperimenti su questo caso miracoloso. Sarekhgand vuole che tu faccia un controllo medico da Juneau. | ||
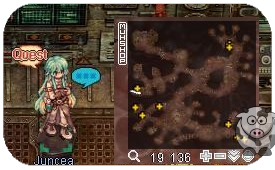
# {{#navi:jor_nest|22|141}} <br> [[File: Step 24.png]] <br> | # {{#navi:jor_nest|22|141}} <br> [[File: Step 24.png]] <br>Parla con Juncea che è infastidita dalla tua presenza senza preavviso. Le dici che sei qui per un controllo medico ma fingi di non sapere cosa sia un controllo medico. Juncea è scioccata che tu sia un Rgan anziano mentre il vivaio non ha mostrato segni. Procede eseguendo un controllo medico durante il quale fai domande. Chiedi cosa sia quest'area ma lei elude la domanda. Dici a Juncea che hai paura degli umani. Ti dice di stare fermo mentre esegue i test. Chiedi come è arrivata qui e lei spiega come funziona un'airship. Le dici che hai incontrato un altro umano di recente. Juncea dice che l'altro umano è Bagot che si è unito di recente. Chiedi se lei e Bagot sono amici, ma Juncea dice che condividevano un laboratorio ma i loro campi sono diversi e non è interessata. Si è accidentalmente conficcata troppo in profondità e chiede una pausa. | ||
# {{#navi:jor_nest|22|141}} <br> | # {{#navi:jor_nest|22|141}} <br> Parla con Juncea per continuare il controllo. Chiedi del suo lavoro e se verrai sperimentato. Dice di no perché ha fatto una promessa con la razza Rgan di non eseguire esperimenti su Rgan superiori come soggetti di test. Ma le viene un'idea di esaminare i gusci d'uovo da cui sei schiuso e ti chiede i pezzi. | ||
# {{#navi:jor_dun02 263|170}} <br> [[File: Step 26.png]] <br> | # {{#navi:jor_dun02 263|170}} <br> [[File: Step 26.png]] <br>Parla con Miriam e spiega che hai bisogno di gusci d'uovo. Miriam ricorda che queste uova sono di vivaio di basso livello e che dobbiamo trovare le uova di grado superiore nel nido. | ||
# {{#navi:jor_nest|23|58}} <br> [[File: Step 27.png]] <br> | # {{#navi:jor_nest|23|58}} <br> [[File: Step 27.png]] <br>Parla con Bishop Rgan al vivaio delle uova di grado superiore. Chiedi di aver bisogno di un pezzo del tuo guscio d'uovo ma il Bishop sa che non sei schiuso qui. Un rumore si verifica nelle vicinanze da Horr che rompe accidentalmente un uovo. L'Rgan trova Horr e chiede i nomi di questi due Rgan sospetti. Horr si presenta come Horrgand e Lehar si presenta come Leharchangand. Il Bishop Rgan chiede a Leharchangand di educare Horrgand sulla pratica e lo porta via. Riesci a trovare l'opportunità di raccogliere 1 {{#item:1000606}}. | ||
# {{#navi:jor_nest|22|141}} <br> [[File: Step 28.png]] <br> | # {{#navi:jor_nest|22|141}} <br> [[File: Step 28.png]] <br>Riporta il guscio d'uovo a Juncea. Lo ispeziona ed è perplessa dalla mancanza di alta energia magica. Le dici che non capisci. Spiega che gli Rgan nascono con energia magica pari alla quantità che hanno assorbito nello stato di uovo. Se un uovo assorbe abbastanza energia, nascerà un Bishop o un Priest. Chiedi a Juncea come fa a saperne così tanto. Afferma che la sua area di competenza è quella dell'energia magica e degli strumenti magici. Dice che gli umani non possono farlo. È semplicemente qui per eseguire l'iniezione di energia magica e inviare un'airship oltre la barriera su richiesta dell'altro umano. Appaiono Lazy e Bagot. | ||
# {{#navi:jor_nest|26|142}} <br> [[File: Step 29.png]] <br> | # {{#navi:jor_nest|26|142}} <br> [[File: Step 29.png]] <br>Parla con Bagot che discute con Juncea dei suoi risultati. Bagot vuole sapere dei dati riguardanti la tua nascita in un vivaio di livello inferiore. Juncea dice a Bagot che sta ancora ricercando e non ha nulla da riferire. Scontento, Bagot pretende i dati ora. Juncea insiste che non ci sono ancora dati. Bagot annuncia che ha apportato modifiche alle priorità di lavoro e dice che la sua ricerca è ora la massima priorità. Juncea è scioccata dicendo che il suo lavoro è iniziato prima. Sarekhgand si unisce per dire che Rasgand è d'accordo con il nuovo ordine di priorità. Bagot chiede di nuovo che i dati gli siano consegnati e se ne va. | ||
# {{#navi:jor_nest|22|141}} <br> [[File: Step 30.png]] <br> | # {{#navi:jor_nest|22|141}} <br> [[File: Step 30.png]] <br>Parla con Juncea che è estremamente furiosa. Si infuria con te e Lazy riguardo ai nuovi ordini di Bagot. Chiedi del suo studio rispetto a quello di Bagot ma Juncea risponde che deve essere qualcosa che ha soddisfatto Rasgand. Sospetta che debba riguardare l'Heart of Ymir e trovare un modo per usarlo sulle uova nel tentativo di far rivivere Jörmungandr. Juncea finisce i suoi test e ti chiede di andare a fare un po' di lavoro al nido. | ||
# {{#navi:jor_nest|87|164}} <br> [[File: Step 31.png]] <br> | # {{#navi:jor_nest|87|164}} <br> [[File: Step 31.png]] <br>Incontra Lazy per scambiare le vostre scoperte. Dici a Lazy che non hai scoperto molto altro oltre alla posizione dell'Airship usata dall'Illusion ma dovresti indagare ulteriormente e poi incontrarvi di nuovo al Ice Castle. Andrai con Lehar a trovare l'airship e a cercare Horr che è stato portato via per aver accidentalmente rotto l'uovo. | ||
# {{#navi:jor_nest|24|252}} <br> [[File: Step 32_a.png]] <br> | # {{#navi:jor_nest|24|252}} <br> [[File: Step 32_a.png]] <br>Parla con Lazy vicino alla posizione del molo dell'airship. Lazy chiede se questo è il posto, ma tu dici che ci sono troppe guardie per indagare ulteriormente con solo due persone. Preferisci trovare il resto della squadra e sviluppare un nuovo piano. | ||
# {{#navi:jor_dun02|153|239}} <br> [[File: Step 33.png]] <br> | # {{#navi:jor_dun02|153|239}} <br> [[File: Step 33.png]] <br>Parla con il Guard Rgan. Ti ferma te e Lazy dicendo che questo non è un posto per persone nobili come voi. Rispondi dicendo che sei un appena nato che cerca di studiare come funzionano le persone. Il Guard Rgan lo permette e ti lascia passare. | ||
# {{#navi:jor_dun02|150|269}} <br> [[File: Step 34.png]] <br> | # {{#navi:jor_dun02|150|269}} <br> [[File: Step 34.png]] <br>Parla con gli Rgan che lavorano al vivaio di grado inferiore. Scopri che sono Miriam, Lehar e Horr. Miriam dice che ha visto molti umani entrare e lavorare con gli Rgan inferiori affermando che potrebbero essere stati rapiti qui tramite l'Airship. Gli umani erano ammanettati e lavoravano qui. Lehar sospetta che possano essere usati come soggetti di test simili a Lunch. Decidete tutti di tornare al Ice Castle per riferire le vostre scoperte. | ||
# {{#navi:icas_in|34|189}} <br> [[File: Step 35.png]] <br> | # {{#navi:icas_in|34|189}} <br> [[File: Step 35.png]] <br>Parla con Aurelie e la tua squadra ricapitola la situazione. Lehar spiega gli Rgan e i loro ranghi. Anche gli Rgan di rango più basso sono più forti degli umani comuni grazie all'energia magica che possiedono. Lehar condivide anche che il leader degli Rgan è Rasgand, l'ultimo sopravvissuto della passata battaglia di Jörmungandr. Ha un vasto seguito ed è in assoluto controllo degli Rgan. Leon suggerisce che Rasgand dovrebbe essere il bersaglio prioritario per fermare la situazione. Lehar è d'accordo e dice che siamo fortunati ad avere Lazy capace di trasformarsi in Bishop Rgan con la pergamena di trasformazione. Leon chiede come può Illusion, estranea, essere in grado di contattare Rasgand così facilmente. Lazy suggerisce che potrebbe esserci una relazione simbiotica tra i due gruppi e Rasgand desidera la ricerca. Aurelie è preoccupata per il numero di Illusion, ma tu dici di aver visto solo Bagot, Juncea e gli Heart Hunters. Miriam chiede dell'Heart of Ymir e di dove possa essere. Lazy suggerisce che Bagot deve averlo dato che Rasgand ha dato priorità alla sua ricerca. Il nuovo piano è tornare al nido ed esplorare più vulnerabilità, distruggere l'airship e salvare eventuali umani catturati. Ricompensa: 50 {{#item:1000608}} e 60 Ice Castle Reputation. | ||
#; | #; Sbloccato Airship Destruction Instance. <br>Nota: Puoi parlare con l'NPC Sharara a {{#navi:icastle|55|123}} per andare direttamente allo Snake's Nest. | ||
# {{#navi:jor_nest|127|207}} <br> [[File: Step 36.png]] <br> | # {{#navi:jor_nest|127|207}} <br> [[File: Step 36.png]] <br>Nei panni di Rgan trasformato, incontra Lazy al nido. Ti dice di esplorare il Laboratorio di Juncea, il Laboratorio di Bagot e le aree della Guardia Rgan. | ||
# {{#navi:jor_nest|21|195}} <br> [[File: Step 37.png]] <br> | # {{#navi:jor_nest|21|195}} <br> [[File: Step 37.png]] <br>Raccogli i documenti di ricerca dal Laboratorio di Juncea. Leggi alcune note su un metodo usato su un oggetto già nato. Può rinascere come individuo migliore. Una guardia ti nota e chiede cosa ci fai qui. Fingi di essere il nuovo nato che esplora e che non conoscevi le restrizioni dell'area. La guardia si presenta come Yugrungand, incaricato di monitorare gli umani poiché non ci si può fidare. Menziona che solo gli scienziati usano questo posto, ma sembra che Juncea pensi che Bagot le abbia rubato il posto. Fingi di essere perplesso e ringrazi la guardia per la spiegazione. | ||
# {{#navi:jor_nest|66|260}} <br> [[File: Step 38.png]] <br> | # {{#navi:jor_nest|66|260}} <br> [[File: Step 38.png]] <br>Cammina fino alla porta per entrare nel Laboratorio di Bagot. | ||
# {{#navi:jor_dun03|74|71}} <br> [[File: Step 39.png]] <br> | # {{#navi:jor_dun03|74|71}} <br> [[File: Step 39.png]] <br>Raccogli i documenti di ricerca. Li sfogli brevemente e leggi le stesse note su un metodo per rendere più forti oggetti già nati. Senti una forte presenza dagli esemplari del laboratorio circostante equivalente a quella di Twisted God Freyja. | ||
# {{#navi:jor_dun03|49|80}} <br> [[File: Step 40.png]] <br> | # {{#navi:jor_dun03|49|80}} <br> [[File: Step 40.png]] <br>Raccogli il documento top secret. Leggi informazioni su mutazioni che avvengono a livello cellulare basate sull'esperimento a Rachel. Ci sono ipotesi elencate su come correggere il problema tramite iniezione di energia magica, ma non c'è bisogno di riportare un esemplare alla sua forma originale. | ||
# {{#navi:jor_nest|181|173}} <br> [[File: Step 41.png]] <br> | # {{#navi:jor_nest|181|173}} <br> [[File: Step 41.png]] <br>Parla con la pila di documenti di ricerca vicino alle Guardie Rgan. Frughi tra i documenti e raccogli un {{#item:1000845}}. Il libro descrive una grande quantità di energia che fluisce nel laboratorio di Bagot. | ||
# {{#navi:jor_nest|19|142}} <br> [[File: Step 42.png]] <br> | # {{#navi:jor_nest|19|142}} <br> [[File: Step 42.png]] <br>Parla con i documenti di ricerca vicino all'area di lavoro di Juncea. Descrivono eventi di potenziamento artificiale dei livelli Rgan prima che si schiudano dalle uova. | ||
# {{#navi:jor_nest|173|177}} <br> [[File: Step 43.png]] <br> | # {{#navi:jor_nest|173|177}} <br> [[File: Step 43.png]] <br>Senti di nascosto una conversazione tra la Guardia Rgan e il Capitano della Guardia Rgan. Parlano del fatto che Bagot visita spesso Rasgand ma il Capitano non si fida davvero di lui. La Guardia chiede al Capitano cosa fare. Il Capitano dice di stare all'erta mentre riassegna i suoi uomini. | ||
# {{#navi:jor_nest|127|207}} <br> [[File: Step 44.png]] <br> | # {{#navi:jor_nest|127|207}} <br> [[File: Step 44.png]] <br>Riferisci a Lazy le tue scoperte. Affermi che Juncea sembra essere ignorata ora rispetto a Bagot. Tuttavia, gli esperimenti di Bagot sono più pericolosi, specialmente scoprendo che gli esemplari nel suo laboratorio sono simili al Twisted God Freyja. I due Illusion che lavorano insieme possono essere un grosso problema. Lazy menziona che Juncea e Bagot hanno avuto un litigio quindi potrebbe essere utile separarli ulteriormente. Dice che dovresti parlare con Juncea dato che le piacciono gli avventurieri come te, mentre lui andrà da Bagot. | ||
# {{#navi:jor_nest|31|140}} <br> [[File: Step 45.png]] <br> | # {{#navi:jor_nest|31|140}} <br> [[File: Step 45.png]] <br>Parla con Juncea. Noti che è collegata alle sue macchine. Le chiedi perché sta sperimentando su se stessa. È frustrata perché non ha soggetti di test quindi farà qualsiasi cosa per portare avanti la sua ricerca. Offri a Juncea di eseguire un esperimento segreto su di te. È lusingata ma rifiuta. Afferma che i risultati corretti si basano sulla documentazione e non può nascondere i suoi esperimenti. Non vuole essere disturbata ulteriormente dato che non ha l'energia per parlare con te. Leggi i monitor che indicano basso zucchero nel sangue e chiedi cosa significhi. Juncea lo spiega semplicemente come voglia mangiare qualcosa di dolce. Ti dice che continuerà a rispondere alle tue domande se riesci a portarle qualcosa di dolce. | ||
# {{#navi:icas_in 245|197}} <br> [[File: Step 46.png]] <br> | # {{#navi:icas_in 245|197}} <br> [[File: Step 46.png]] <br>Parla con l'Iwin che sta mangiando un Ice Candy. Chiedi se puoi averne uno e lui ti dà 1 {{#item:1000846}} | ||
# {{#navi:jor_nest|31|140}} <br> [[File: Step 47_a.png]] <br> | # {{#navi:jor_nest|31|140}} <br> [[File: Step 47_a.png]] <br>Torna da Juncea e dalle l'Ice Cookie. Chiede come l'hai ottenuto e tu inventi una storia su come hai salvato un grande uccello. Juncea è impressionata dai tuoi sforzi e inizia ad apprezzarti di più. Chiedi perché Juncea non va da Rasgand per chiedere aiuto, ma lei risponde che i fondi per i suoi progetti stanno lentamente diminuendo. Provi a fare più domande ma lei è occupata a meno che tu non riesca a portarle un altro Ice Cookie o 10 {{#item:1000707}}. | ||
# {{#navi:jor_nest|31|140}} <br> | # {{#navi:jor_nest|31|140}} <br> Parla con Juncea e dalle o un Ice Cookie (Opzione 1) o 10 {{#item:1000707}} (Opzione 2). Inizia a sfogarsi con te sul non riuscire a portare avanti la sua ricerca. Chiedi se il guscio d'uovo che le hai portato prima fosse sufficiente, ma lei dice che ha bisogno di Rgan vivi per provare la sua teoria sull'iniezione di energia magica in un Rgan già nato. Le dici che vuoi diventare più forte e offri di nuovo di sperimentare su di te. Provi a fare più domande ma lei è occupata a meno che tu non riesca a portarle un altro Ice Cookie o 10 {{#item:1000707}}. | ||
# {{#navi:jor_nest|31|140}} <br> | # {{#navi:jor_nest|31|140}} <br>Parla con Juncea e dalle o un Ice Cookie (Opzione 1) o 10 {{#item:1000707}} (Opzione 2). È grata per lo sforzo ripetuto, ma ha davvero bisogno di produrre risultati. Spiega che i dati sono scarsi e sembra non esserci speranza di progresso. | ||
# {{#navi:jor_nest|31|140}} <br> | # {{#navi:jor_nest|31|140}} <br> Parla con Juncea. Inizi a fidarti di lei e decidi di darle il {{#item:1000845}} fingendo di averlo trovato accidentalmente mentre giocavi con altri Rgan e di aver notato che era testo umano. Legge i documenti e si infuria. Nota quanti esemplari avesse Bagot mentre lei non ne aveva nessuno. Si lamenta così forte che Bagot appare e indaga su di te e Juncea chiedendo cosa sia questo rumore. Chiede chi sei e tu continui a fingere il tuo ruolo di Priest Rgan appena nato. Juncea interrompe chiedendo a Bagot di parlarle. Bagot chiede agli Rgan di andarsene per parlare in privato. Decidi a malincuore di andartene e tornare al Ice Castle per evitare qualsiasi sospetto rimanendo. | ||
# {{#navi:icas_in|245|197}} <br> [[File: Step 51.png]] <br> | # {{#navi:icas_in|245|197}} <br> [[File: Step 51.png]] <br>Parla con Lazy e la squadra per scambiare le tue scoperte. Menzioni a Lazy che ti sei avvicinato a Juncea rivelando quanto supporto gli Rgan hanno dato a Bagot rispetto a lei. Tuttavia, vuoi risolvere questo più velocemente. | ||
# {{#navi:icas_in|249|199}} <br> [[File: Step 52.png]] <br> | # {{#navi:icas_in|249|199}} <br> [[File: Step 52.png]] <br>Parla con Miriam che è d'accordo nell'agire tempestivamente. Dice di rifornirsi di {{#item:101162}} e tornare al nido per scoprire di più. | ||
# {{#navi:jor_nest|19|190}} <br> [[File: Step 53.png]] <br> | # {{#navi:jor_nest|19|190}} <br> [[File: Step 53.png]] <br>Parla con la scatola nell'area di lavoro di Juncea. Noti che Juncea non è più qui, ma trovi un sospetto esperimento di liquido gorgogliante. Vuoi esaminarlo ulteriormente ma ti serve qualcosa per contenerlo. | ||
# {{#navi:jor_nest|20|194}} <br> [[File: Step 54.png]] <br> | # {{#navi:jor_nest|20|194}} <br> [[File: Step 54.png]] <br>Prendi un {{#item:1000604}} dal tavolo. | ||
# {{#navi:jor_nest|19|190}} <br> [[File: Step 55.png]] <br> | # {{#navi:jor_nest|19|190}} <br> [[File: Step 55.png]] <br>Raccogli il liquido sospetto nella provetta per ottenere {{#item:1000605}} e appare un Rgan. | ||
# {{#navi:jor_nest|24|185}} <br> [[File: Step 56.png]] <br> | # {{#navi:jor_nest|24|185}} <br> [[File: Step 56.png]] <br>Parla con l'Rgan. Dice che Juncea ti sta cercando nel laboratorio di Bagot e che dovresti incontrarla lì. Sei perplesso su come Juncea sappia che saresti stato qui. | ||
# {{#navi:jor_nest|66|260}} <br> | # {{#navi:jor_nest|66|260}} <br> Vai verso il Laboratorio di Bagot per trovare Juncea. | ||
# {{#navi:jor_dun03|57|63}} <br> [[File: Step 58.png]] <br> | # {{#navi:jor_dun03|57|63}} <br> [[File: Step 58.png]] <br>Parla con Juncea che dice che voleva parlarti da sola. Verrà creata un'instance forzata in solitaria e non puoi portare membri del party. | ||
# | # Parla con Juncea dentro l'instance. Mette in dubbio l'amicizia e sospetta che tu abbia spettegolato con Bagot su di lei alle sue spalle. Noti che c'è qualcosa di strano in lei, forse qualcosa a che fare con Bagot. Provi a confortarla, ma è già troppo tardi. Lei subisce una trasformazione in un essere superiore. | ||
# | # Sottometti Juncea trasformata. Ti chiedi se Bagot l'ha fatta impazzire. Decidi di riportare Juncea al Ice Castle. Esci dall'instance.<br>Nota: Se hai difficoltà a sconfiggere Juncea, una bathory card o una evil druid card ti renderanno completamente immune al suo attacco più dannoso, Dark Grand Cross | ||
# {{#navi:icecastle|27|126}} <br> [[File: Step 61.png]] <br> | # {{#navi:icecastle|27|126}} <br> [[File: Step 61.png]] <br>Parla con Horr. Ti chiede perché hai portato un Rgan al Ice Castle. Chiedi un posto per riposare e spiegherai la situazione più tardi. | ||
# {{#navi:icas_in|247|116}} <br> [[File: Step 62.png]] <br> | # {{#navi:icas_in|247|116}} <br> [[File: Step 62.png]] <br>Parla con Horr e il resto della squadra nella locanda che ti chiede cosa sta succedendo con questo Rgan. Spieghi che questa è Juncea e che hai dovuto portarla fuori dal nido in sicurezza. Sono stupiti dalla sua forma e dalle ali. Rispondi che potrebbe avere a che fare con l'esperimento di Bagot simile a Twisted God Freyja. La tua squadra vuole svegliare Juncea ma non c'è risposta. Mostri la provetta di liquido alla squadra ma nessuno di voi riesce a capire cosa sia. Lehar dice che sua zia Vellgunde, la scienziata, potrebbe essere in grado di decifrarlo e creare un antidoto per riportare Juncea alla normalità. Mentre Lehar va a prendere sua zia, Horr solleva una preoccupazione sull'uso della {{#item:101162}}. A questo punto, gli Rgan hanno molta familiarità con le vostre forme trasformate e ora sono scettici specialmente per Lazy e te stesso dato che ci sono pochissimi Priest e Bishop. Vellgunde arriva ed esamina il liquido ma richiede 20 {{#item:1000707}}. | ||
# {{#navi:icas_in|244|117}} <br> [[File: Step 63.png]] <br> | # {{#navi:icas_in|244|117}} <br> [[File: Step 63.png]] <br>Riporta i materiali a Vellgunde. Li combina con il liquido e inietta Juncea con esso. Juncea si sveglia lentamente e nota il suo io trasformato. Urla che Bagot l'ha usata per un esperimento. Chiede dove si trova e la tua squadra spiega cosa è successo. Lazy e tu le dite che non siete esseri Rgan superiori, ma solo umani. Juncea ti accusa di averla ingannata e di cercare di sbarazzarti di lei, ma tu dici che non è così. La squadra dice che sarebbe morta se non fosse stato per te che sei fuggito dal nido e l'hai riportata indietro. Lazy spiega la situazione dell'Illusion che cerca di controllare i Tre Regni del Continente di Midgard e che siete qui per fermarli infiltrandovi nel nido. Lei chiede come gli umani possano trasformarsi così facilmente in Rgan. Vellgunde offre di scambiare conoscenze se Juncea coopera. Ricompensa: 25 {{#item:1000608}}. | ||
# {{#navi:icas_in|243|120}} <br> [[File: Step 64.png]] <br> | # {{#navi:icas_in|243|120}} <br> [[File: Step 64.png]] <br>Parla con Juncea che ha accettato l'offerta. Chiedi del potere della Jörmungandr Church. Juncea spiega che gli Rgan si schiudono assorbendo l'energia magica residua che li circonda. Ma la fonte si sta esaurendo lentamente quindi le prospettive future degli Rgan sono cupe. C'è un tempo finito rimasto per gli Rgan. Vellgunde sospetta che questo sia il motivo per cui Rasgand deve essere disperato al punto da raggiungere il Continente di Midgard e collaborare con l'Illusion. Juncea elabora ulteriormente affermando che Rasgand è molto potente, essendo l'ultimo sopravvissuto. La maggior parte degli Rgan superiori nasce dal suo sangue. Voleva studiare Rasgand ma non le è stato nemmeno permesso di vederlo. Vellgunde dice che Rasgand è colui che ha maledetto la famiglia reale e chiede a Juncea quali fossero gli obiettivi di Rasgand. Juncea dice che era lì per studiare il corpo di Jörmungandr e la sua energia magica che fluisce anche anni dopo la sua morte, ma ha perso l'opportunità. Lazy chiede cosa abbia offerto Bagot a Rasgand. Lei giunge alla conclusione che potrebbe essere la resurrezione di Jörmungandr con il corpo rimanente e l'Heart of Ymir, forse anche provare a riprodurlo interamente. La tua squadra ha realizzato la circostanza simile a Rachel. Tuttavia, Miriam chiede se la resurrezione è per Rasgand, cosa guadagnerà Bagot da questo esperimento? Juncea risponde che la spinta di Bagot è unicamente per la scienza e la sua ricerca. Vellgunde è estremamente preoccupata per la possibilità di una resurrezione. L'intero continente cadrà in una grande crisi se accadrà. La squadra decide di agire rapidamente e chiede a Juncea di più sul Rgan Nest e sulla posizione del corpo di Jörmungandr. Dice che conosce solo un ingresso vicino alla regione degli Rgan di livello inferiore. Aurelie appare per dare il suo rapporto. | ||
# {{#navi:icas_in|249|113}} <br> [[File: Step 65.png]] <br> | # {{#navi:icas_in|249|113}} <br> [[File: Step 65.png]] <br>Parla con Aurelie che dice che il movimento degli Rgan è stato insolito di recente. Coloro che erano in ricognizione sui Frozen Scale Glaciers si sono precipitati di nuovo al nido. Lazy e Horr sono d'accordo che dobbiamo agire rapidamente per scoprire e fermarlo. | ||
# {{#navi:jor_dun01|8|238}} <br> | # {{#navi:jor_dun01|8|238}} <br>Usa una pergamena di trasformazione per entrare nell'area speciale del nido Rgan. | ||
# {{#navi:jor_que|271|88}} <br> [[File: Step 67.png]] <br> | # {{#navi:jor_que|271|88}} <br> [[File: Step 67.png]] <br>Incontra Horr trasformato e la squadra. Arriva un Iwin Soldier e rivela che la maggior parte degli Rgan di alto livello si è spostata in un'area diversa lasciando solo gli Rgan di livello intermedio e inferiore nelle vicinanze. Ha riportato alcuni umani che ha trovato mentre cercavano di fuggire. Horr chiede agli altri di scortare i rifugiati fuori in sicurezza mentre Lazy suggerisce di dividersi e continuare a cercarne altri. Ricompensa: 25 {{#item:1000608}} e 25 Ice Castle Reputation. | ||
# {{#navi:jor_que|144|253}} <br> [[File: Step 68.png]] <br> | # {{#navi:jor_que|144|253}} <br> [[File: Step 68.png]] <br> Parla con Miriam che ha anche trovato altri schiavi umani che hanno paura di te. Lehar spiega loro che anche voi siete umani travestiti da Rgan. Non c'è tempo per le domande ora e li guidi fuori dal nido. Lazy se ne va a cercare Rasgand mentre tu continui a cercare. | ||
# {{#navi:jor_que|131|148}} <br> [[File: Step 69.png]] <br> | # {{#navi:jor_que|131|148}} <br> [[File: Step 69.png]] <br>Parla con Horr che sta cercando di interrogare altri Rgan di basso livello per ottenere informazioni, ma non gli parlano e continuano a lavorare al vivaio. Tu ti presenti e gli altri Rgan ti salutano gentilmente dato che sei un Priest. Inizi a chiedere dove sono andati gli altri Bishop e Priest Rgan. Rivelano solo che il Signore ha richiesto che tutti gli Rgan avanzati si radunassero. Chiedi se questo è l'ordine di Rasgand e dove sia il punto di raduno. Ti indicano l'area sopra e dicono di affrettarti. Decidi di controllare mentre gli altri cercano altri schiavi umani. | ||
# {{#navi:jor_que|32|37}} <br> [[File: Step 70.png]] <br> | # {{#navi:jor_que|32|37}} <br> [[File: Step 70.png]] <br>Parla con Lehar e la squadra che ha trovato l'ingresso al raduno. Tuttavia, è bloccato. Aurelie chiede se questo è dove potrebbero essere Bagot e Rasgand e Lehar lo sospetta. Lazy ha scoperto che quest'area è effettivamente dove sono andati Rasgand, Bagot e gli altri Rgan di rango superiore, ma anche dove gli Illusion hanno eseguito esperimenti. Horr vuole entrare nell'area e comanda ai suoi soldati di abbattere il piccolo ingresso in modo che tu possa entrare. L'area è un'instance (membri del party ammessi). | ||
# {{#navi:1@jorchs|261|34}} <br> | # {{#navi:1@jorchs|261|34}} <br>Incontra Voglinde, Aurelie, Leon, Miriam e alcuni Iwin Soldiers. L'obiettivo ora è trovare Rasgand e Bagot e mettere al sicuro l'Heart of Ymir. Ci sono molti potenti Rgan mutati attorno all'area. Iwin avverte che questi Rgan sono diversi da quelli fuori. Tutti i nemici erranti devono essere sconfitti per procedere. | ||
# {{#navi:1@jorchs|249|79}} <br> | # {{#navi:1@jorchs|249|79}} <br>Sconfiggi lo speciale Rgan che sorveglia l'area. | ||
# {{#navi:1@jorchs|114|20}} <br> | # {{#navi:1@jorchs|114|20}} <br> Sconfiggi lo speciale Rgan che sorveglia l'area. | ||
# {{#navi:1@jorchs|142|58}} <br> | # {{#navi:1@jorchs|142|58}} <br> Dopo aver sconfitto tutti i nemici rimanenti, incontra di nuovo la squadra. Gli Iwin sono sorpresi dai nuovi Rgan mutati. Miriam sospetta che l'Illusion debba aver già eseguito esperimenti su di loro. | ||
# {{#navi:1@jorchs|23|57}} <br> | # {{#navi:1@jorchs|23|57}} <br> Sconfiggi lo speciale Rgan che sorveglia l'area. | ||
# {{#navi:1@jorchs|21|97}} <br> | # {{#navi:1@jorchs|21|97}} <br> Sconfiggi lo speciale Rgan che sorveglia l'area. | ||
# {{#navi:1@jorchs|112|119}} <br> | # {{#navi:1@jorchs|112|119}} <br> Dopo aver sconfitto tutti i nemici rimanenti, parla con i soldati Iwin che notano una linea di Rgan che blocca l'area davanti. Cercano di sfondare le linee ma sono troppo potenti. Appaiono gli Heart Hunters AT che sono sorpresi che tu e la tua squadra siate riusciti a inseguirli fino a Isgard. Comandano agli Rgan mutati di attaccare. Sconfiggi tutti i nemici e continua più avanti nell'area. | ||
# {{#navi:1@jorchs|249|170}} <br> | # {{#navi:1@jorchs|249|170}} <br> Incontra Voglinde e Miriam che sta anche cercando di superare un'altra difesa di Rgan Mutati. Dici loro che sono controllati dagli Heart Hunters. Appaiono altri Heart Hunters AT e dicono che è inutile fermare le mutazioni degli Rgan. Finché l'energia magica fluisce attraverso le loro speciali macchine di iniezione, altri Rgan verranno mutati. Sconfiggi tutti i nemici e cerca un modo per disattivare il dispositivo di mutazione. | ||
# {{#navi:1@jorchs|219|148}} <br> | # {{#navi:1@jorchs|219|148}} <br> Disattiva il dispositivo e appariranno Heart Hunter AT che cercheranno di fermarti. Sconfiggili. | ||
# {{#navi:1@jorchs|191|203}} <br> | # {{#navi:1@jorchs|191|203}} <br> Disattiva il dispositivo. | ||
# {{#navi:1@jorchs|226|244}} <br> | # {{#navi:1@jorchs|226|244}} <br> Disattiva il dispositivo e sconfiggi tutti i nemici erranti rimanenti. | ||
# {{#navi:1@jorchs|151|179}} <br> | # {{#navi:1@jorchs|151|179}} <br> Incontra Aurelie e Leon che hanno catturato due Heart Hunters che hanno riavviato le macchine. Aurelie ti chiede di andare a spegnere di nuovo la macchina. | ||
# {{#navi:1@jorchs|191|203}} <br> | # {{#navi:1@jorchs|191|203}} <br> Disattiva di nuovo il dispositivo. | ||
# {{#navi:1@jorchs|151|179}} <br> | # {{#navi:1@jorchs|151|179}} <br> Torna da Aurelie e Leon che iniziano a interrogare gli Heart Hunters. Chiedono dov'è l'ingresso e se ce n'è più di uno. Gli Heart Hunters supplicano dicendo che conoscono solo 1 ingresso dritto davanti. Gli Heart Hunters si liberano e comandano il loro attacco. Sconfiggi tutti i nemici e continua più avanti. | ||
# {{#navi:1@jorchs|24|142}} <br> | # {{#navi:1@jorchs|24|142}} <br> Vai nell'area del laboratorio e cerca i dati di ricerca, ma non trovi nulla. Appariranno nemici. Sconfiggili tutti. | ||
# {{#navi:1@jorchs|20|195}} <br> | # {{#navi:1@jorchs|20|195}} <br> Vai nella successiva area del laboratorio. Trovi alcuni estratti che si riferiscono all'Heart of Ymir ma nient'altro di utile. Appaiono altri Heart Hunters. Sconfiggili. | ||
# {{#navi:1@jorchs|39|251}} <br> | # {{#navi:1@jorchs|39|251}} <br> Incontrati all'ultima linea di difesa degli Heart Hunter e degli Rgan. Bagot appare e non si preoccupa dei vostri sforzi. Rivela che è lui che ha provocato Juncea all'estremo. È irritato che parassiti come te continuino a comparire nel mondo che sta cercando di creare. Bagot nota che Rasgand è molto arrabbiato con gli umani per averlo ingannato. Inietta energia magica negli Rgan circostanti per renderli più potenti e si dirige nella Jörmungandr Church. Sconfiggi tutti i nemici. | ||
# {{#navi:1@jorchs|38|272}} <br> | # {{#navi:1@jorchs|38|272}} <br> Dirigiti verso l'ingresso della Jörmungandr Church e incontra la tua squadra che è contenta che tu stia bene. La porta è bloccata e sospetti che sia dove si trovano Bagot e l'Illusion. I soldati Iwin non sono riusciti ad aprire la porta. Voglinde prova a usare la chiave che ha ottenuto dagli Heart Hunters ma non ha funzionato. Aurelie prova a usare la sua magia per aprire la porta ma non ha funzionato neanche quello. Voglinde dice che dovremmo semplicemente impostare una sorveglianza attorno all'area del nido e andarcene. Aurelie è d'accordo dato che potrebbe essere comunque l'unica uscita per loro. Prima o poi, la porta dovrà essere aperta. Tu e la tua squadra decidete di andarvene. | ||
# {{#navi:icas_in|34|189}} <br> [[File:Step 89.png]] <br> | # {{#navi:icas_in|34|189}} <br> [[File:Step 89.png]] <br> Parla con Aurelie e la squadra al Ice Castle. Sono tutti scoraggiati dal fatto che siamo tornati a mani vuote. Leon suggerisce che potrebbe essere creato un nuovo ingresso alla Jörmungandr Church e che dovremmo essere alla ricerca di quando ciò accadrà. Horr assegnerà Iwin Soldiers al servizio di guardia. Leon dice che per poter eventualmente fuggire verso il continente di Midgard, dovrà essere usata un'airship che è molto evidente. Vellgunde appare con Juncea dicendo che può aiutare. Juncea accetta di collaborare pienamente dato che ha promesso. Dice che Bagot ha preso tutti i materiali di ricerca dal suo laboratorio quindi c'è poco da guadagnare lì. Mette in dubbio l'abilità di Bagot. Lazy le spiega che è molto capace in base agli incontri precedenti. Leon si chiede perché il combattimento alla fine sia stato troppo facile. Aurelie sospetta che Bagot abbia trattenuto la sua abilità per risparmiare forze per la resurrezione di Jörmungandr. Gli altri Heart Hunters e gli Rgan mutati erano semplicemente una distrazione per guadagnare tempo per sigillare la porta. Juncea è preoccupata riguardo ai suoi dati di ricerca sull'iniezione di energia magica sugli Rgan superiori. La squadra si calma e accetta di continuare a monitorare la situazione per eventuali notizie sull'apertura della porta e sulla violazione della barriera. Ricompensa: 50 {{#item:1000608}} e 50 Ice Castle Reputation. | ||
=Missioni secondarie= | |||
Devi completarle per sbloccare le missioni giornaliere. [[Side Quests|Missioni secondarie]] | |||
=Missioni giornaliere= | |||
* Tutte le missioni giornaliere richiedono il livello 200, salvo diversa indicazione. | |||
* | * Le missioni giornaliere si resettano alle 00:00 ora del server. | ||
* | * Le ricompense aumentano con il livello di reputazione | ||
* | |||
{|class="wikitable" | {|class="wikitable" | ||
|NPC | |NPC | ||
| | |Missione | ||
| | |Ricompensa oggetti | ||
| | |Reputazione | ||
|- | |- | ||
|{{#navi:icecastle|27|126}} <br> [[File:Daily Quest NPC 1 wiki.png]] | |{{#navi:icecastle|27|126}} <br> [[File:Daily Quest NPC 1 wiki.png]] | ||
|Finding an Underground Hideout | |Finding an Underground Hideout | ||
* | * Seppellisci 10 {{#item:1000842}} in jor_back2 e jor_back3. | ||
|2x {{#item:1000608}} | |2x {{#item:1000608}} | ||
|5 | |5 | ||
| Line 128: | Line 123: | ||
|{{#navi:icecastle|123|168}} <br> {{#navi:icas_in|241|66}} <br> [[File:Daily Quest NPC 2 wiki.png]] | |{{#navi:icecastle|123|168}} <br> {{#navi:icas_in|241|66}} <br> [[File:Daily Quest NPC 2 wiki.png]] | ||
|Happy Lunch Time with Zoryara | |Happy Lunch Time with Zoryara | ||
* | * Raccogli 15x {{#item:1000830}}. | ||
|2x {{#item:1000608}} | |2x {{#item:1000608}} | ||
|5 | |5 | ||
| Line 134: | Line 129: | ||
|{{#navi:icecastle|186|218}} <br> {{#navi:icas_in|33|53}} <br> [[File:Daily Quest NPC 3 wiki.png]] | |{{#navi:icecastle|186|218}} <br> {{#navi:icas_in|33|53}} <br> [[File:Daily Quest NPC 3 wiki.png]] | ||
|Secret Fun | |Secret Fun | ||
* | * Raccogli 10 Piume di un tipo. Le piume accettate sono: | ||
{{#item:6393}}, {{#item:7063}}, {{#item:6691}}, {{#item:7440}}, {{#item:916}}, {{#item:6405}}, {{#item:7101}}, {{#item:7441}}, {{#item:7115}} | {{#item:6393}}, {{#item:7063}}, {{#item:6691}}, {{#item:7440}}, {{#item:916}}, {{#item:6405}}, {{#item:7101}}, {{#item:7441}}, {{#item:7115}} | ||
|2x {{#item:1000608}} | |2x {{#item:1000608}} | ||
| Line 141: | Line 136: | ||
|{{#navi:icas_in|185|63}} <br> [[File:Daily Quest NPC 4 wiki.png]] | |{{#navi:icas_in|185|63}} <br> [[File:Daily Quest NPC 4 wiki.png]] | ||
|Procurement of Research Materials for Vellgunde | |Procurement of Research Materials for Vellgunde | ||
* | * Raccogli 3x {{#item:1000706}}. | ||
* | * Vai da Freiderike {{#navi:icas_in|35|121}} e seleziona la seconda opzione: | ||
* | * Converte 10x {{#item:1000707}} in 1x {{#item:1000706}} | ||
|2x {{#item:1000608}} | |2x {{#item:1000608}} | ||
|5 | |5 | ||
| Line 149: | Line 144: | ||
|{{#navi:jor_back2|250|30}} <br> [[File:Daily Quest NPC 5 wiki.png]] | |{{#navi:jor_back2|250|30}} <br> [[File:Daily Quest NPC 5 wiki.png]] | ||
|Select Menu for Lunch | |Select Menu for Lunch | ||
* | * Raccogli 10 oggetti per il pranzo. Possono essere richiesti i seguenti oggetti: | ||
{{#item:7162}}, {{#item:7158}}, {{#item:7150}}, {{#item:6405}}, {{#item:7299}}, {{#item:25285}}, {{#item:7762}}, {{#item:7266}}, {{#item:6498}}, {{#item:7171}} | {{#item:7162}}, {{#item:7158}}, {{#item:7150}}, {{#item:6405}}, {{#item:7299}}, {{#item:25285}}, {{#item:7762}}, {{#item:7266}}, {{#item:6498}}, {{#item:7171}} | ||
|2x {{#item:1000608}} | |2x {{#item:1000608}} e 1x {{#item:101162}} | ||
|0 | |0 | ||
|- | |- | ||
|{{#navi:icecastle|62|212}} <br> {{#navi:icas_in|27|116}} <br> [[File:Daily Quest NPC 6 7 8 wiki.png]] | |{{#navi:icecastle|62|212}} <br> {{#navi:icas_in|27|116}} <br> [[File:Daily Quest NPC 6 7 8 wiki.png]] | ||
|Abandoned Pit Floor 1 Level 220+: | |Abandoned Pit Floor 1 Level 220+: Uccidi 40x Mostri in jor_ab01 e raccogli 20x {{#item:1000708}}. | ||
|2x {{#item:1000608}} | |2x {{#item:1000608}} | ||
|5 | |5 | ||
|- | |- | ||
|{{#navi:icecastle|62|212}} <br> {{#navi:icas_in|27|116}} <br> [[File:Daily Quest NPC 6 7 8 wiki.png]] | |{{#navi:icecastle|62|212}} <br> {{#navi:icas_in|27|116}} <br> [[File:Daily Quest NPC 6 7 8 wiki.png]] | ||
|Abandoned Pit Floor 2 Level 240+: | |Abandoned Pit Floor 2 Level 240+: Uccidi 40x Mostri in jor_ab02 e raccogli 20x {{#item:1000708}}. | ||
|2x {{#item:1000608}} | |2x {{#item:1000608}} | ||
|5 | |5 | ||
| Line 166: | Line 161: | ||
|{{#navi:icecastle|62|212}} <br> {{#navi:icas_in|27|116}} <br> [[File:Daily Quest NPC 6 7 8 wiki.png]] | |{{#navi:icecastle|62|212}} <br> {{#navi:icas_in|27|116}} <br> [[File:Daily Quest NPC 6 7 8 wiki.png]] | ||
|Dig and Dig | |Dig and Dig | ||
* | * Esamina le tracce inquietanti in jor_ab01 e jor_ab02. | ||
|2x {{#item:1000608}} | |2x {{#item:1000608}} | ||
|5 | |5 | ||
| Line 172: | Line 167: | ||
|{{#navi:icecastle|62|212}} <br> {{#navi:icas_in|27|122}} <br> [[File:Daily Quest NPC 9 10 wiki.png]] | |{{#navi:icecastle|62|212}} <br> {{#navi:icas_in|27|122}} <br> [[File:Daily Quest NPC 9 10 wiki.png]] | ||
|Do we need a refrigerator? | |Do we need a refrigerator? | ||
* | * Uccidi 20x Mostri in jor_back2 e raccogli 20x {{#item:1000708}}. | ||
|3x {{#item:1000608}} | |3x {{#item:1000608}} | ||
|5 | |5 | ||
| Line 178: | Line 173: | ||
|{{#navi:icecastle|62|212}} <br> {{#navi:icas_in|27|122}} <br> [[File:Daily Quest NPC 9 10 wiki.png]] | |{{#navi:icecastle|62|212}} <br> {{#navi:icas_in|27|122}} <br> [[File:Daily Quest NPC 9 10 wiki.png]] | ||
|Cirspy Tools | |Cirspy Tools | ||
* | * Assicurati che le Frozen Traps funzionino in jor_back2. | ||
|2x {{#item:1000608}} | |2x {{#item:1000608}} | ||
|5 | |5 | ||
| Line 184: | Line 179: | ||
|{{#navi:icecastle|62|212}} <br> {{#navi:icas_in|35|121}} <br> [[File:Daily Quest NPC 11 wiki.png]] | |{{#navi:icecastle|62|212}} <br> {{#navi:icas_in|35|121}} <br> [[File:Daily Quest NPC 11 wiki.png]] | ||
|Friederike's Days | |Friederike's Days | ||
* | * Uccidi 10x Primitive Rgan e 10x Lowest Rgan. | ||
* | * Raccogli 10x {{#item:1000705}} | ||
|2x {{#item:1000608}} | |2x {{#item:1000608}} | ||
|5 | |5 | ||
| Line 191: | Line 186: | ||
|{{#navi:icecastle|97|177}} <br> [[File:Daily Quest NPC 12 wiki.png]] | |{{#navi:icecastle|97|177}} <br> [[File:Daily Quest NPC 12 wiki.png]] | ||
|Do not Feed Wildlife | |Do not Feed Wildlife | ||
* | * Recupera 1x {{#item:528}} da un cumulo di sabbia in jor_back1. | ||
|2x {{#item:1000608}} | |2x {{#item:1000608}} | ||
|5 | |5 | ||
| Line 197: | Line 192: | ||
|{{#navi:icas_in|48|252}} <br> [[File:Daily Quest NPC 13 wiki.png]] | |{{#navi:icas_in|48|252}} <br> [[File:Daily Quest NPC 13 wiki.png]] | ||
|Searching for Survivors | |Searching for Survivors | ||
* | * Trova i superstiti in jor_back3 e poi torna da Maram {{#navi:icas_in|262|179}}. | ||
|2x {{#item:1000608}} | |2x {{#item:1000608}} | ||
|5 | |5 | ||
| Line 203: | Line 198: | ||
|{{#navi:jor_tail|48|241}} <br> [[File:Daily Quest NPC 14 wiki.png]] | |{{#navi:jor_tail|48|241}} <br> [[File:Daily Quest NPC 14 wiki.png]] | ||
|Help Moryara Fish | |Help Moryara Fish | ||
* | * Uccidi 20x Shining Seaweed | ||
|2x {{#item:1000608}} | |2x {{#item:1000608}} | ||
|5 | |5 | ||
| Line 209: | Line 204: | ||
|{{#navi:jor_nest|239|244}} <br> [[File:Daily Quest NPC 15 wiki.png]] | |{{#navi:jor_nest|239|244}} <br> [[File:Daily Quest NPC 15 wiki.png]] | ||
|Rgan to Work | |Rgan to Work | ||
* | * Uccidi 20x Primitive Rgan. | ||
| | |Prima completata: 10x {{#item:1000608}} <br> Giornaliera: 2x {{#item:1000608}} | ||
|0 | |0 | ||
|- | |- | ||
|{{#navi:jor_nest|37|75}} <br> [[File:Daily Quest NPC 16 wiki.png]] | |{{#navi:jor_nest|37|75}} <br> [[File:Daily Quest NPC 16 wiki.png]] | ||
|Elegant Hobbies | |Elegant Hobbies | ||
* | * Raccogli i seguenti oggetti: 10x {{#item:1000830}}, 10x {{#item:1000829}}, 10x {{#item:1000824}}, 10x {{#item:7326}} | ||
|2x {{#item:1000608}} | |2x {{#item:1000608}} | ||
|0 | |0 | ||
| Line 221: | Line 216: | ||
|{{#navi:jor_nest|235|57}} <br> [[File:Daily Quest NPC 17 wiki.png]] | |{{#navi:jor_nest|235|57}} <br> [[File:Daily Quest NPC 17 wiki.png]] | ||
|Priest, Have Mercy?? | |Priest, Have Mercy?? | ||
* | * Raccogli 30x {{#item:1000822}} | ||
| | |Prima completata: 10x {{#item:1000608}} <br> Giornaliera: 2x {{#item:1000608}} | ||
|0 | |0 | ||
|- | |- | ||
|{{#navi:jor_nest|34|79}} <br> [[File:Daily Quest NPC 18 wiki.png]] | |{{#navi:jor_nest|34|79}} <br> [[File:Daily Quest NPC 18 wiki.png]] | ||
|Our Precious Food | |Our Precious Food | ||
* | * Raccogli 30x {{#item:1000707}} dai Rgan. | ||
| | |Prima completata: 10x {{#item:1000608}} <br> Giornaliera: 2x {{#item:1000608}} | ||
|0 | |0 | ||
|- | |- | ||
|{{#navi:jor_nest|257|26}} <br> [[File:Safework19.png]] | |{{#navi:jor_nest|257|26}} <br> [[File:Safework19.png]] | ||
|For Safe Work | |For Safe Work | ||
* Uccidi 20x Limacina e 20x Calmaring | |||
* | |||
|<br> 2x {{#item:1000608}} | |<br> 2x {{#item:1000608}} | ||
|0 | |0 | ||
|} | |} | ||
=Istanze= | |||
Devi completare l'intera Episode 19 - Main Story per ottenere accesso alle istanze. | |||
{|class="wikitable" | {|class="wikitable" | ||
| | |Istanza | ||
| | |Livello richiesto | ||
| | |Numero party | ||
|CD ( | |CD (giorni) | ||
| | |Ricompense possibili | ||
|- | |- | ||
|[[Iwin Patrol]] <br> {{#navi:icecastle|23|115}} <br> [[File:Iwin Patrol NPC Start wiki.png]] | |[[Iwin Patrol]] <br> {{#navi:icecastle|23|115}} <br> [[File:Iwin Patrol NPC Start wiki.png]] | ||
| Line 285: | Line 276: | ||
* Ice Castle Reputation | * Ice Castle Reputation | ||
|} | |} | ||
= Campi/Dungeon = | |||
{| class="wikitable mw-collapsible mw-collapsed" style="width: 50%;text-align:center;" | {| class="wikitable mw-collapsible mw-collapsed" style="width: 50%;text-align:center;" | ||
|- style="background-color:#E1C7C1;" | |- style="background-color:#E1C7C1;" | ||
| | |Mappa | ||
| | |Mostri | ||
|- | |- | ||
| rowspan="2" |Frozen Tail <br> jor_tail | | rowspan="2" |Frozen Tail <br> jor_tail | ||
| Line 369: | Line 358: | ||
|- | |- | ||
|} | |} | ||
= Reputazione = | |||
Parla con l'NPC Hoyoyo per aprire il negozio speciale della reputazione. <br> | |||
[[File:Hoyoyo NPC.png]] | [[File:Hoyoyo NPC.png]] | ||
{{#navi:icas_in|175|63}} | {{#navi:icas_in|175|63}} | ||
<br> | <br> | ||
Ogni livello di reputazione richiede 1.000 punti. Vedi le Daily Quests e le Instances per maggiori informazioni sulla reputazione. | |||
<br> | <br> | ||
{| class="wikitable " style="width: 50%;text-align:center;" | {| class="wikitable " style="width: 50%;text-align:center;" | ||
|- style="background-color:#E1C7C1;" | |- style="background-color:#E1C7C1;" | ||
| | |Livello di reputazione | ||
| | |Sblocca | ||
| | |Quantità valuta | ||
|- | |- | ||
|0 | |0 | ||
| colspan="2"|Hoyoyo | | colspan="2"|Hoyoyo non ti parlerà. | ||
|- | |- | ||
| rowspan="4"|1 | | rowspan="4"|1 | ||
| Line 398: | Line 385: | ||
|x1000 {{#item:1000608}} | |x1000 {{#item:1000608}} | ||
|- | |- | ||
| colspan="2"|Daily Quests | | colspan="2"|Le Daily Quests garantiranno x1 {{#item:1000608}} aggiuntivo | ||
|- | |- | ||
| rowspan="4"|2 | | rowspan="4"|2 | ||
| Line 410: | Line 397: | ||
|x1000 {{#item:1000608}} | |x1000 {{#item:1000608}} | ||
|- | |- | ||
| colspan="2"|Daily Quests | | colspan="2"|Le Daily Quests garantiranno x2 {{#item:1000608}} aggiuntivi | ||
|- | |- | ||
|3 | |3 | ||
| colspan="2"|Daily Quests | | colspan="2"|Le Daily Quests garantiranno x4 {{#item:1000608}} aggiuntivi<br>(portando il bonus totale a x7 {{#item:1000608}}) | ||
|- | |- | ||
|} | |} | ||
= | =Equipaggiamenti= | ||
L'equipaggiamento relativo all'episodio si trova qui: [[Issgard Equipment|Equipaggiamenti di Isgard]] | |||
Latest revision as of 12:31, 15 October 2026
Temporal Tina is an NPC who sells Episode Clear Tickets. She is located in Prontera (prontera 140, 174) and the Main Office (main_office 94, 59).

|

|
| (prontera 140, 174) | (main_office 94, 59) |
Episode Clear Tickets
An Episode Clear Ticket is a consumable item that allows you to skip the main quest of an episode. By using it, you will gain instant access to all NPCs, dungeons, and equipment shops that would normally require you to complete the episode or fulfill certain quests to unlock.
Please note that by using an Episode Clear Ticket, you will miss out on quest rewards such as EXP, Zeny, reputation, and items.
Some Episode Clear Tickets have prerequisites. If it's your first character on the server, you will still have to progress from Episode 17.2 to the last episode normally.
Check the table below to see the requirements and prices for each ticket.
| Episode Clear Tickets | |||
|---|---|---|---|
| Episode Ticket | Level | Zeny Costs | Prerequisites |
 Episode 14 Clear Ticket (1000284) Episode 14 Clear Ticket (1000284)
|
160 | 1,000,000 | None |
 Episode 15 Clear Ticket (1000286) Episode 15 Clear Ticket (1000286)
|
140 | 1,000,000 | None |
 Episode 16 Clear Ticket (1000282) Episode 16 Clear Ticket (1000282)
|
100 | 1,000,000 | None |
 Episode 17.1 Clear Ticket (1000285) Episode 17.1 Clear Ticket (1000285)
|
110 | 2,000,000 | None |
 Episode 17.2 Clear Ticket (1000287) Episode 17.2 Clear Ticket (1000287)
|
130 | 4,000,000 | The current character has cleared Episode 17.1 |
 Episode 18 Clear Ticket (1000288) Episode 18 Clear Ticket (1000288)
|
170 | 9,000,000 | The current character has cleared Episode 17.2 |
 Episode 19 Clear Ticket (1000988) Episode 19 Clear Ticket (1000988)
|
200 | 12,000,000 | The current character has cleared Episode 18 AND one character in the master account has cleared Episode 19 and the side quests "Purification Saint" and "Frozen Sea" |
 Episode 20 Clear Ticket (1001214) Episode 20 Clear Ticket (1001214)
|
215 | 16,000,000 | The current character has cleared Episode 19 AND one character in the master account has cleared Episode 20 |
 Episode 21 Clear Ticket (1001215) Episode 21 Clear Ticket (1001215)
|
230 | 32,000,000 | The current character has cleared Episode 20 AND one character in the master account has cleared Episode 21 |
 Chapter 1 Clear Ticket (50098) Chapter 1 Clear Ticket (50098)
|
265 | 64,000,000 | One character in the master account has cleared Chapter 1 and complete Zero Cell Sector |
How to check which episode I have unlocked?
Right now, we don't have a feature which simply tells you which episode you are.
So here's some things you can do to check it by yourself:
| Episode Quest | ||
|---|---|---|
| Episode | Steps | Description |
| Episode 15 | Click on Warper > Instances > Central Laboratory. | If you can go, you have completed the Episode 15 quest. |
| Episode 16 | Click on Warper > Instances > Heart Hunter War Base. | If you can go, you have completed the Episode 16 quest. |
| Episode 17.1 | Use @go 46. (Cor) | If you can go, you have completed the Episode 17.1 quest. |
| Episode 17.2 | Use @go 47. (Varmundt's Mansion) | If you can go, you have completed the Episode 17.2 quest. |
| Episode 18 | Use @go 51. (Gray Wolf Village) | If you can go, you have completed the Episode 18 quest. |
| Episode 19 | Use @go 53. (Ice Castle) | If you can go, you have completed the Episode 19 quest. |
| Episode 20 | Click on Warper > Instances > The Immortal. | If you can go, you have completed the Episode 20 quest. |
| Episode 21 | Click on Warper > Instances > Final Battle. | If you can go, you have completed the Episode 21 quest. |
Requisiti
- Livello richiesto: 200
- Prerequisito quest:
Quest della storia principale
- (wolfvill 223, 83)
Parla con Grey Wolf Villager che dice che Maram ti stava cercando. Maram appare e Miriam e Suad si uniscono poco dopo per discutere il prossimo passo per inseguire Bagot. Menzionano che Elly è riuscita a tracciare i passi di Bagot e ha trovato una rotta verso le regioni settentrionali grazie al tuo aiuto. Decidete tutti di andare a Varmundt's Mansion per incontrare Elly. Tuttavia, Suad non può unirsi perché deve coordinare una riunione del parlamento con Niren per la pace tra Grey Wolf Village e Rachel. - (ba_in01 341, 369)
Parla con Elly che spiega la sua raccolta di dati mentre tracciava Bagot. Dice che è andato nelle regioni settentrionali e ha menzionato il leggendario Jörmungandr. L'unico continente settentrionale associato a Jörmungandr è Isgard. Spiega anche che l'Illusion ha rubato i registri dall'aeronave che ha navigato verso Isgard. Elly sta lavorando per ottenere un Airship per navigare verso Isgard, ma la tecnica, Ginger, riferisce che c'è un muro attorno a Isgard di alto flusso energetico che blocca l'ingresso. Crux consiglia di cercare aiuto dalla famiglia reale. La famiglia Gaebolg avrebbe informazioni su Jörmungandr. - (ba_in01 386, 110)
Parla con Crux per tornare a Prontera Castle con Lazy mentre Elly e Ginger si occuperanno dell'airship. - (prt_cas 320, 270)
Parla con Crux e Nyhill. Nyhill ricapitola che la famiglia Gaebolg è stata maledetta da Jörmungandr. Quando la Jörmungandr Church è svanita da Midgard, non tutti sono morti e scomparsi. Invece, i seguaci di un tempo furono intrappolati in una terra di ghiaccio oltre il mare e la terra fu sigillata da una forza sconosciuta dove i guardiani proteggevano il sigillo. Nyhill menziona che alcuni membri della famiglia Gaebolg una volta viaggiavano da e per Isgard. La regina, Catherine D. Gaebolg, arriva per dare ulteriori spiegazioni. Menziona che Tristan III ha tre sorelle, due delle quali risiedono a Isgard, incaricate di trovare un modo per spezzare la maledizione di Jörmungandr. Nyhill menziona che è richiesto il permesso per entrare a Isgard e ti chiede il motivo per cui vuoi entrare. Racconti a Nyhill la storia dell'Illusion e Nyhill è d'accordo con il tuo piano di fermarla. Dice che può scrivere una lettera d'invito speciale.
Nota: Per entrare nel castello in qualsiasi momento, Crux apparirà nella stanza degli ospiti, a (ba_in01 48, 146). - (prt_cas 331, 343) (esci dalla stanza verso l'alto, poi gira a destra)
Parla con Nyhill alla sua scrivania. Nyhill spiega che il libro dall'aspetto comune sulla sua scrivania è una Guardian's Box. Aprendo la copertina si rivela un vuoto nel libro che benedice qualsiasi lettera al suo interno da parte dei Guardiani. Solo i discendenti diretti delle sette famiglie reali possono usarla. La scatola fu lasciata dal Primo Tristan Gaebolg. Nyhill scrive e dà a te e ai tuoi amici un Guardian Invitation (1000607). Vieni poi teletrasportato di nuovo a Varmundt's Mansion.
 - (ba_maison 186, 251)
Ti incontri con il resto della squadra. Ginger dice che l'airship è pronta per viaggiare verso Isgard. - (ba_in01 30, 264)
Parla con Ginger per salire sull'airship. - (air_if 46, 71)
Parla con Ginger sull'airship e dalle il tuo invito. Ginger esamina la lettera e rileva uno specifico codice di lunghezza d'onda emesso dall'invito. - (air_if 32, 63)
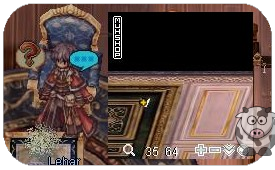
Parla con Lehar e i tuoi amici. Lehar si presenta come membro della St. Capitolina Abbey. Sua madre era la sorella del re precedente e la principessa più giovane dei Gaebolg. Era preoccupata per la maledizione della loro famiglia e gli affidò l'incarico di essere cresciuto al monastero. Tuttavia, la maledizione si manifestò nel figlio diretto del re precedente. Il figlio era determinato a spezzare da solo la maledizione della famiglia e si recò lui stesso a Isgard. Lehar descrive Isgard come una terra di solo neve, ghiaccio e ghiacciai. Tuttavia, c'è un castello fatto di ghiaccio, ma all'interno rimane caldo con una sorta di potere magico. Lazy chiede se c'è qualcosa di cui preoccuparsi dato che l'Illusion deve aver preso contatto per circa 4 mesi. Lehar ricorda solo che il numero di Rgan aumenta drasticamente. Ginger interrompe per annunciare che l'airship atterrerà presto e di prepararsi a scosse impreviste. - (air_if 46, 71)
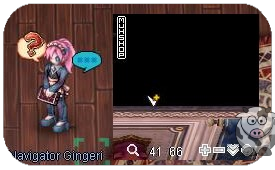
Parla con Ginger per lasciare l'airship ed entrare a Isgard. - (jor_tail 221, 53)
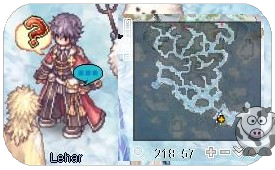
Parla con Lehar che afferma che siamo vicini a Ice Castle e dovremmo andare lì.
Per trovare Ice Castle, cammina fino in cima alla mappa, entra nel portale, nella mappa successiva esci dal lato destro. (jor_back1 381, 229) - (icas_in 141, 216)
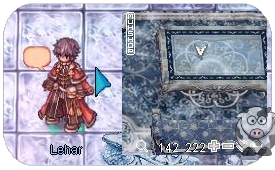
Parla con Lehar nel Ice Castle che presenta Leon Petit e Aurelie Petit. La famiglia Petit ha assunto il ruolo di supervisionare il Ice Castle e proteggerlo. Spieghi la situazione di Illusion e Bagot. Aurelie afferma che c'è un'alta possibilità che l'Illusion abbia interferito con gli Rgan. Le zie di Lehar, Voglinde Gaebolg e Vellgunde Gaebolg, appaiono e si presentano. Voglinde e Vellgunde sono entrambe qui per studiare Jörmungandr e la magia degli Rgan nel tentativo di spezzare la maledizione sulla loro famiglia. Entrambe tornano alle loro ricerche in una delle capanne degli Iwin. - (icas_in 138, 220)
Parla con Leon che spiega di più su Isgard. La terra stessa è formata dal corpo congelato di Jörmungandr. Gli Rgan erano i principali seguaci di Jörmungandr e sono legati qui. Chiedi del barriera. Leon afferma che la barriera non sigilla Jörmungandr, ma impedisce agli Rgan di andarsene. Lazy chiede degli uccelli giganti attorno al castello. Aurelie spiega che gli Iwin erano originariamente uccelli migratori che si spostavano da e per Oreum Mountains. Tuttavia, una volta posizionata la barriera, la razza Iwin rimase bloccata a Isgard. Da allora, gli Iwin hanno aiutato a proteggere il Ice Castle e monitorare la barriera. Leon vorrebbe che tu incontrassi gli Iwin dato che non hanno mai incontrato un estraneo da Varmundt. Aurelie decide di darti alcuni Flower Petals (1000608) affermando che è la valuta principale in questa regione. Un potere magico cristallizzato in una forma simile a un fiore. Ricompensa: 40 Flower Petals (1000608) e 50 Ice Castle Reputation.
- Sbloccato
- Iwin Patrol Instance e Purification Saint Side Quest.
Warper / @go to Ice Castle
- (icecastle 23, 115)
Parla con Marshall Gigi Happy Rev Eve Alice Llyod Broad-Minded Tess Vortex, Capitano della Iwin Patrol, ed esegui una Iwin Patrol con gli Iwin. Al primo completamento dell'instance, troverai un giovane uomo che ha bisogno di aiuto per fuggire dall'area. Dici a quest'uomo che assomiglia molto a Morning. L'uomo non sa chi sia Morning. Menzioni che hai trovato Morning a Rudus. L'uomo ti dice che Rudus è un luogo di esemplari scartati e dice che Morning è un modello precedente di se stesso. Egli è un esemplare di test più nuovo e migliorato creato dagli scienziati di Illusion. Aiuti Lunch ad attraversare Frozen Scale Hills fino alle Plains dove sarà più al sicuro. Continua a completare la Iwin Patrol. Ricompensa: 2 Flower Petals (1000608) e 5 Ice Castle Reputation. - (jor_back2 250, 30)
Parla con l'uomo che hai trovato nella Iwin Patrol. Si presenta come HU-210426, che è il codice a barre inciso sulla sua testa. Dici che è un nome difficile da ricordare. Suggerisci il nome “Lunch” dato che è simile a Morning. L'uomo accetta di essere chiamato Lunch. Chiedi a Lunch come è arrivato qui? Lunch dice che ricorda solo gli esperimenti fatti in una “Large Mansion” ma all'improvviso gli scienziati si stavano preparando a partire. Lo scienziato gettò via molti esemplari, ma Lunch riuscì a unirsi allo scienziato nell'Airship. Tuttavia, lo scienziato perse interesse per Lunch e decise di sperimentare con la razza Rgan. Nel frattempo, Lunch voleva di nuovo l'attenzione dello scienziato così si trasformò in un Rgan. Chiedi come si fa a trasformarsi così. Lunch spiega che una delle sue abilità è trasformarsi in un altro essere. Chiedi se può trasformare anche te. Lunch afferma che può aiutare e di tornare se ne hai bisogno. Ricompensa: 1 Rgan Transformation Scroll (101162) e 2 Flower Petals (1000608).
- Nota
- Puoi ottenere altri Rgan Transformation Scroll (101162) da questo NPC.
- (icecastle 27, 126)
Parla con l'Iwin che si presenta come Horr. Dice che ti accompagnerà al Ice Castle. - (icas_in 34, 189)
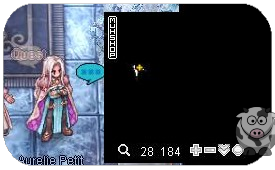
Parla con Aurelie e la squadra che afferma che l'attività attorno a Isgard è sempre più sospetta. Potrebbe essere un segno della rinascita di Jörmungandr in connessione con Illusion. Leon dice che la Jörmungandr Church deve essere fermata. Miriam consiglia che non solo il sigillo dovrebbe essere protetto, ma anche recuperare il cuore di Ymir dall'Illusion. Voglinde dice che sarà difficile entrare nel nido degli Rgan. Mostri il tuo Rgan Transformation Scroll (101162) e spieghi dove l'hai ottenuto. La squadra conclude che la pergamena di trasformazione è la chiave per infiltrarsi nella razza Rgan. - (jor_back3 99, 318)
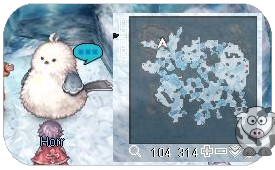
Usa una Rgan Transformation Scroll (101162) e parla con la squadra che è anche tutta travestita da Rgan. Horr menziona che c'è un problema con la trasformazione di Lazy e che sembra ancora più umano. Lazy menziona che anche tu sembri più umano rispetto al resto della squadra. Deduci che deve essere la pergamena di trasformazione che si armonizza con i poteri magici di certe persone. Horr e Miriam dicono che tu e Lazy dovreste fingere di essere Rgan appena nati mentre vi avventurate nel nido. Ricompensa: 25 Flower Petals (1000608) e 30 Ice Castle Reputation. - Entra nel dungeon sul lato sinistro attraverso il portale.
- (jor_dun02 263, 170)
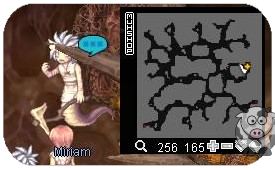
Parla con Miriam vicino alle uova. Horr menziona di stare attenti e di comportarsi davvero come un appena nato non menzionando alcuna conoscenza esterna. Appare un Rgan Priest e urla freneticamente a Horr e Miriam chiedendo loro perché c'è un vescovo qui. Horr dice al prete che tu e Lazy siete appena nati e che stavano sorvegliando le uova. Il Rgan Priest chiede di seguirlo nel nido. Ricompensa: 25 Flower Petals (1000608) e 30 Ice Castle Reputation. - (jor_nest 185, 49)
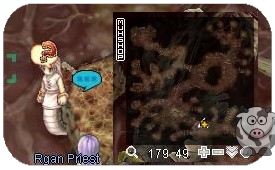
Parla con Rgan Priest che annuncia al resto del nido che è nato un Bishop. È un miracolo e un segno della resurrezione di Jörmungandr. Altri Rgan appaiono per lodare Lazy e benedirlo. Appare un Bishop Rgan e spiega che tu e Lazy dovreste ricevere un battesimo di benedizione.- Sbloccato
- Warper to Snake's Nest
- (jor_nest 196, 202)
Parla con Bishop Rgan che dice a te e Lazy che questa particolare area è il vivaio delle uova. È il luogo abituale dove nascono i preti e gli altri vescovi. Dice che l'insolito “punto di nascita” da cui tu e Lazy siete “schiusi” deve essere una benedizione di Jörmungandr. Lazy chiede di tutti gli strani dispositivi vicino alle uova. Il Bishop dice che sono macchine installate dagli umani per iniettare più energia magica nelle uova. Chiedi quali umani ma Bishop Rgan dice che non lo sa, se non che vengono da oltre la barriera. - (jor_nest 115, 187)
Parla con Bishop Rgan che spiega che l'area vicina è dove risiedono gli umani e ti chiede di evitare l'area poiché ci sono molti strani dispositivi fatti da umani sporchi. Invece, Bishop Rgan ti chiede di seguirlo per incontrare Rasgand. - (jor_nest 53, 244)
Parla con Bishop Rgan che ti presenta Sarekhgand. Sarekhgand guarda te e Lazy e annuncia che Rasgand sarà felice della notizia. Bishop Rgan vede che l'umano si sta avvicinando e vuole mostrarti a lui. Bagot appare e tu sei sorpreso. Sarekhgand spiega a Bagot come siete nati. Bagot è impressionato dalla situazione e vuole tornare ai suoi esperimenti. Tuttavia, Sarekhgand non vuole che Bagot esegua esperimenti su questo caso miracoloso. Sarekhgand vuole che tu faccia un controllo medico da Juneau. - (jor_nest 22, 141)
Parla con Juncea che è infastidita dalla tua presenza senza preavviso. Le dici che sei qui per un controllo medico ma fingi di non sapere cosa sia un controllo medico. Juncea è scioccata che tu sia un Rgan anziano mentre il vivaio non ha mostrato segni. Procede eseguendo un controllo medico durante il quale fai domande. Chiedi cosa sia quest'area ma lei elude la domanda. Dici a Juncea che hai paura degli umani. Ti dice di stare fermo mentre esegue i test. Chiedi come è arrivata qui e lei spiega come funziona un'airship. Le dici che hai incontrato un altro umano di recente. Juncea dice che l'altro umano è Bagot che si è unito di recente. Chiedi se lei e Bagot sono amici, ma Juncea dice che condividevano un laboratorio ma i loro campi sono diversi e non è interessata. Si è accidentalmente conficcata troppo in profondità e chiede una pausa. - (jor_nest 22, 141)
Parla con Juncea per continuare il controllo. Chiedi del suo lavoro e se verrai sperimentato. Dice di no perché ha fatto una promessa con la razza Rgan di non eseguire esperimenti su Rgan superiori come soggetti di test. Ma le viene un'idea di esaminare i gusci d'uovo da cui sei schiuso e ti chiede i pezzi. - (jor_dun02 263 170, )
Parla con Miriam e spiega che hai bisogno di gusci d'uovo. Miriam ricorda che queste uova sono di vivaio di basso livello e che dobbiamo trovare le uova di grado superiore nel nido. - (jor_nest 23, 58)
Parla con Bishop Rgan al vivaio delle uova di grado superiore. Chiedi di aver bisogno di un pezzo del tuo guscio d'uovo ma il Bishop sa che non sei schiuso qui. Un rumore si verifica nelle vicinanze da Horr che rompe accidentalmente un uovo. L'Rgan trova Horr e chiede i nomi di questi due Rgan sospetti. Horr si presenta come Horrgand e Lehar si presenta come Leharchangand. Il Bishop Rgan chiede a Leharchangand di educare Horrgand sulla pratica e lo porta via. Riesci a trovare l'opportunità di raccogliere 1 Greater Rgan Eggshell (1000606).
 - (jor_nest 22, 141)
Riporta il guscio d'uovo a Juncea. Lo ispeziona ed è perplessa dalla mancanza di alta energia magica. Le dici che non capisci. Spiega che gli Rgan nascono con energia magica pari alla quantità che hanno assorbito nello stato di uovo. Se un uovo assorbe abbastanza energia, nascerà un Bishop o un Priest. Chiedi a Juncea come fa a saperne così tanto. Afferma che la sua area di competenza è quella dell'energia magica e degli strumenti magici. Dice che gli umani non possono farlo. È semplicemente qui per eseguire l'iniezione di energia magica e inviare un'airship oltre la barriera su richiesta dell'altro umano. Appaiono Lazy e Bagot. - (jor_nest 26, 142)
Parla con Bagot che discute con Juncea dei suoi risultati. Bagot vuole sapere dei dati riguardanti la tua nascita in un vivaio di livello inferiore. Juncea dice a Bagot che sta ancora ricercando e non ha nulla da riferire. Scontento, Bagot pretende i dati ora. Juncea insiste che non ci sono ancora dati. Bagot annuncia che ha apportato modifiche alle priorità di lavoro e dice che la sua ricerca è ora la massima priorità. Juncea è scioccata dicendo che il suo lavoro è iniziato prima. Sarekhgand si unisce per dire che Rasgand è d'accordo con il nuovo ordine di priorità. Bagot chiede di nuovo che i dati gli siano consegnati e se ne va. - (jor_nest 22, 141)
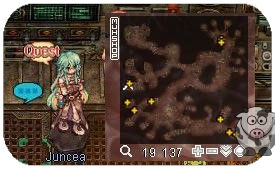
Parla con Juncea che è estremamente furiosa. Si infuria con te e Lazy riguardo ai nuovi ordini di Bagot. Chiedi del suo studio rispetto a quello di Bagot ma Juncea risponde che deve essere qualcosa che ha soddisfatto Rasgand. Sospetta che debba riguardare l'Heart of Ymir e trovare un modo per usarlo sulle uova nel tentativo di far rivivere Jörmungandr. Juncea finisce i suoi test e ti chiede di andare a fare un po' di lavoro al nido. - (jor_nest 87, 164)
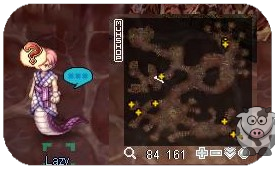
Incontra Lazy per scambiare le vostre scoperte. Dici a Lazy che non hai scoperto molto altro oltre alla posizione dell'Airship usata dall'Illusion ma dovresti indagare ulteriormente e poi incontrarvi di nuovo al Ice Castle. Andrai con Lehar a trovare l'airship e a cercare Horr che è stato portato via per aver accidentalmente rotto l'uovo. - (jor_nest 24, 252)
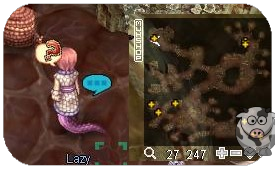
Parla con Lazy vicino alla posizione del molo dell'airship. Lazy chiede se questo è il posto, ma tu dici che ci sono troppe guardie per indagare ulteriormente con solo due persone. Preferisci trovare il resto della squadra e sviluppare un nuovo piano. - (jor_dun02 153, 239)
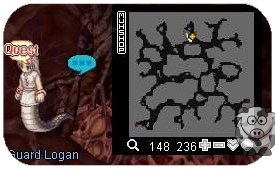
Parla con il Guard Rgan. Ti ferma te e Lazy dicendo che questo non è un posto per persone nobili come voi. Rispondi dicendo che sei un appena nato che cerca di studiare come funzionano le persone. Il Guard Rgan lo permette e ti lascia passare. - (jor_dun02 150, 269)

Parla con gli Rgan che lavorano al vivaio di grado inferiore. Scopri che sono Miriam, Lehar e Horr. Miriam dice che ha visto molti umani entrare e lavorare con gli Rgan inferiori affermando che potrebbero essere stati rapiti qui tramite l'Airship. Gli umani erano ammanettati e lavoravano qui. Lehar sospetta che possano essere usati come soggetti di test simili a Lunch. Decidete tutti di tornare al Ice Castle per riferire le vostre scoperte. - (icas_in 34, 189)
Parla con Aurelie e la tua squadra ricapitola la situazione. Lehar spiega gli Rgan e i loro ranghi. Anche gli Rgan di rango più basso sono più forti degli umani comuni grazie all'energia magica che possiedono. Lehar condivide anche che il leader degli Rgan è Rasgand, l'ultimo sopravvissuto della passata battaglia di Jörmungandr. Ha un vasto seguito ed è in assoluto controllo degli Rgan. Leon suggerisce che Rasgand dovrebbe essere il bersaglio prioritario per fermare la situazione. Lehar è d'accordo e dice che siamo fortunati ad avere Lazy capace di trasformarsi in Bishop Rgan con la pergamena di trasformazione. Leon chiede come può Illusion, estranea, essere in grado di contattare Rasgand così facilmente. Lazy suggerisce che potrebbe esserci una relazione simbiotica tra i due gruppi e Rasgand desidera la ricerca. Aurelie è preoccupata per il numero di Illusion, ma tu dici di aver visto solo Bagot, Juncea e gli Heart Hunters. Miriam chiede dell'Heart of Ymir e di dove possa essere. Lazy suggerisce che Bagot deve averlo dato che Rasgand ha dato priorità alla sua ricerca. Il nuovo piano è tornare al nido ed esplorare più vulnerabilità, distruggere l'airship e salvare eventuali umani catturati. Ricompensa: 50 Flower Petals (1000608) e 60 Ice Castle Reputation.
- Sbloccato Airship Destruction Instance.
Nota: Puoi parlare con l'NPC Sharara a (icastle 55, 123) per andare direttamente allo Snake's Nest.
- Sbloccato Airship Destruction Instance.
- (jor_nest 127, 207)
Nei panni di Rgan trasformato, incontra Lazy al nido. Ti dice di esplorare il Laboratorio di Juncea, il Laboratorio di Bagot e le aree della Guardia Rgan. - (jor_nest 21, 195)
Raccogli i documenti di ricerca dal Laboratorio di Juncea. Leggi alcune note su un metodo usato su un oggetto già nato. Può rinascere come individuo migliore. Una guardia ti nota e chiede cosa ci fai qui. Fingi di essere il nuovo nato che esplora e che non conoscevi le restrizioni dell'area. La guardia si presenta come Yugrungand, incaricato di monitorare gli umani poiché non ci si può fidare. Menziona che solo gli scienziati usano questo posto, ma sembra che Juncea pensi che Bagot le abbia rubato il posto. Fingi di essere perplesso e ringrazi la guardia per la spiegazione. - (jor_nest 66, 260)
Cammina fino alla porta per entrare nel Laboratorio di Bagot. - (jor_dun03 74, 71)
Raccogli i documenti di ricerca. Li sfogli brevemente e leggi le stesse note su un metodo per rendere più forti oggetti già nati. Senti una forte presenza dagli esemplari del laboratorio circostante equivalente a quella di Twisted God Freyja. - (jor_dun03 49, 80)
Raccogli il documento top secret. Leggi informazioni su mutazioni che avvengono a livello cellulare basate sull'esperimento a Rachel. Ci sono ipotesi elencate su come correggere il problema tramite iniezione di energia magica, ma non c'è bisogno di riportare un esemplare alla sua forma originale. - (jor_nest 181, 173)
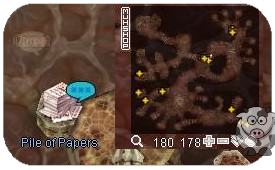
Parla con la pila di documenti di ricerca vicino alle Guardie Rgan. Frughi tra i documenti e raccogli un Ledger (1000845). Il libro descrive una grande quantità di energia che fluisce nel laboratorio di Bagot.
 - (jor_nest 19, 142)
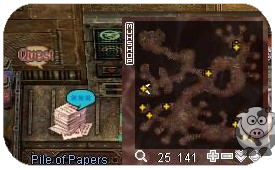
Parla con i documenti di ricerca vicino all'area di lavoro di Juncea. Descrivono eventi di potenziamento artificiale dei livelli Rgan prima che si schiudano dalle uova. - (jor_nest 173, 177)
Senti di nascosto una conversazione tra la Guardia Rgan e il Capitano della Guardia Rgan. Parlano del fatto che Bagot visita spesso Rasgand ma il Capitano non si fida davvero di lui. La Guardia chiede al Capitano cosa fare. Il Capitano dice di stare all'erta mentre riassegna i suoi uomini. - (jor_nest 127, 207)
Riferisci a Lazy le tue scoperte. Affermi che Juncea sembra essere ignorata ora rispetto a Bagot. Tuttavia, gli esperimenti di Bagot sono più pericolosi, specialmente scoprendo che gli esemplari nel suo laboratorio sono simili al Twisted God Freyja. I due Illusion che lavorano insieme possono essere un grosso problema. Lazy menziona che Juncea e Bagot hanno avuto un litigio quindi potrebbe essere utile separarli ulteriormente. Dice che dovresti parlare con Juncea dato che le piacciono gli avventurieri come te, mentre lui andrà da Bagot. - (jor_nest 31, 140)
Parla con Juncea. Noti che è collegata alle sue macchine. Le chiedi perché sta sperimentando su se stessa. È frustrata perché non ha soggetti di test quindi farà qualsiasi cosa per portare avanti la sua ricerca. Offri a Juncea di eseguire un esperimento segreto su di te. È lusingata ma rifiuta. Afferma che i risultati corretti si basano sulla documentazione e non può nascondere i suoi esperimenti. Non vuole essere disturbata ulteriormente dato che non ha l'energia per parlare con te. Leggi i monitor che indicano basso zucchero nel sangue e chiedi cosa significhi. Juncea lo spiega semplicemente come voglia mangiare qualcosa di dolce. Ti dice che continuerà a rispondere alle tue domande se riesci a portarle qualcosa di dolce. - (icas_in 245 197, )
Parla con l'Iwin che sta mangiando un Ice Candy. Chiedi se puoi averne uno e lui ti dà 1 Ice Cookie (1000846)
 - (jor_nest 31, 140)
Torna da Juncea e dalle l'Ice Cookie. Chiede come l'hai ottenuto e tu inventi una storia su come hai salvato un grande uccello. Juncea è impressionata dai tuoi sforzi e inizia ad apprezzarti di più. Chiedi perché Juncea non va da Rasgand per chiedere aiuto, ma lei risponde che i fondi per i suoi progetti stanno lentamente diminuendo. Provi a fare più domande ma lei è occupata a meno che tu non riesca a portarle un altro Ice Cookie o 10 Low-quality Rgan Magic Core (1000707).
 - (jor_nest 31, 140)
Parla con Juncea e dalle o un Ice Cookie (Opzione 1) o 10 Low-quality Rgan Magic Core (1000707) (Opzione 2). Inizia a sfogarsi con te sul non riuscire a portare avanti la sua ricerca. Chiedi se il guscio d'uovo che le hai portato prima fosse sufficiente, ma lei dice che ha bisogno di Rgan vivi per provare la sua teoria sull'iniezione di energia magica in un Rgan già nato. Le dici che vuoi diventare più forte e offri di nuovo di sperimentare su di te. Provi a fare più domande ma lei è occupata a meno che tu non riesca a portarle un altro Ice Cookie o 10 Low-quality Rgan Magic Core (1000707). - (jor_nest 31, 140)
Parla con Juncea e dalle o un Ice Cookie (Opzione 1) o 10 Low-quality Rgan Magic Core (1000707) (Opzione 2). È grata per lo sforzo ripetuto, ma ha davvero bisogno di produrre risultati. Spiega che i dati sono scarsi e sembra non esserci speranza di progresso. - (jor_nest 31, 140)
Parla con Juncea. Inizi a fidarti di lei e decidi di darle il Ledger (1000845) fingendo di averlo trovato accidentalmente mentre giocavi con altri Rgan e di aver notato che era testo umano. Legge i documenti e si infuria. Nota quanti esemplari avesse Bagot mentre lei non ne aveva nessuno. Si lamenta così forte che Bagot appare e indaga su di te e Juncea chiedendo cosa sia questo rumore. Chiede chi sei e tu continui a fingere il tuo ruolo di Priest Rgan appena nato. Juncea interrompe chiedendo a Bagot di parlarle. Bagot chiede agli Rgan di andarsene per parlare in privato. Decidi a malincuore di andartene e tornare al Ice Castle per evitare qualsiasi sospetto rimanendo. - (icas_in 245, 197)
Parla con Lazy e la squadra per scambiare le tue scoperte. Menzioni a Lazy che ti sei avvicinato a Juncea rivelando quanto supporto gli Rgan hanno dato a Bagot rispetto a lei. Tuttavia, vuoi risolvere questo più velocemente. - (icas_in 249, 199)
Parla con Miriam che è d'accordo nell'agire tempestivamente. Dice di rifornirsi di Rgan Transformation Scroll (101162) e tornare al nido per scoprire di più. - (jor_nest 19, 190)
Parla con la scatola nell'area di lavoro di Juncea. Noti che Juncea non è più qui, ma trovi un sospetto esperimento di liquido gorgogliante. Vuoi esaminarlo ulteriormente ma ti serve qualcosa per contenerlo. - (jor_nest 20, 194)
Prendi un Juncea Test Tube (1000604) dal tavolo.
 - (jor_nest 19, 190)
Raccogli il liquido sospetto nella provetta per ottenere Red Liquid Test Tube (1000605) e appare un Rgan.
 - (jor_nest 24, 185)
Parla con l'Rgan. Dice che Juncea ti sta cercando nel laboratorio di Bagot e che dovresti incontrarla lì. Sei perplesso su come Juncea sappia che saresti stato qui. - (jor_nest 66, 260)
Vai verso il Laboratorio di Bagot per trovare Juncea. - (jor_dun03 57, 63)
Parla con Juncea che dice che voleva parlarti da sola. Verrà creata un'instance forzata in solitaria e non puoi portare membri del party. - Parla con Juncea dentro l'instance. Mette in dubbio l'amicizia e sospetta che tu abbia spettegolato con Bagot su di lei alle sue spalle. Noti che c'è qualcosa di strano in lei, forse qualcosa a che fare con Bagot. Provi a confortarla, ma è già troppo tardi. Lei subisce una trasformazione in un essere superiore.
- Sottometti Juncea trasformata. Ti chiedi se Bagot l'ha fatta impazzire. Decidi di riportare Juncea al Ice Castle. Esci dall'instance.
Nota: Se hai difficoltà a sconfiggere Juncea, una bathory card o una evil druid card ti renderanno completamente immune al suo attacco più dannoso, Dark Grand Cross - (icecastle 27, 126)
Parla con Horr. Ti chiede perché hai portato un Rgan al Ice Castle. Chiedi un posto per riposare e spiegherai la situazione più tardi. - (icas_in 247, 116)
Parla con Horr e il resto della squadra nella locanda che ti chiede cosa sta succedendo con questo Rgan. Spieghi che questa è Juncea e che hai dovuto portarla fuori dal nido in sicurezza. Sono stupiti dalla sua forma e dalle ali. Rispondi che potrebbe avere a che fare con l'esperimento di Bagot simile a Twisted God Freyja. La tua squadra vuole svegliare Juncea ma non c'è risposta. Mostri la provetta di liquido alla squadra ma nessuno di voi riesce a capire cosa sia. Lehar dice che sua zia Vellgunde, la scienziata, potrebbe essere in grado di decifrarlo e creare un antidoto per riportare Juncea alla normalità. Mentre Lehar va a prendere sua zia, Horr solleva una preoccupazione sull'uso della Rgan Transformation Scroll (101162). A questo punto, gli Rgan hanno molta familiarità con le vostre forme trasformate e ora sono scettici specialmente per Lazy e te stesso dato che ci sono pochissimi Priest e Bishop. Vellgunde arriva ed esamina il liquido ma richiede 20 Low-quality Rgan Magic Core (1000707). - (icas_in 244, 117)
Riporta i materiali a Vellgunde. Li combina con il liquido e inietta Juncea con esso. Juncea si sveglia lentamente e nota il suo io trasformato. Urla che Bagot l'ha usata per un esperimento. Chiede dove si trova e la tua squadra spiega cosa è successo. Lazy e tu le dite che non siete esseri Rgan superiori, ma solo umani. Juncea ti accusa di averla ingannata e di cercare di sbarazzarti di lei, ma tu dici che non è così. La squadra dice che sarebbe morta se non fosse stato per te che sei fuggito dal nido e l'hai riportata indietro. Lazy spiega la situazione dell'Illusion che cerca di controllare i Tre Regni del Continente di Midgard e che siete qui per fermarli infiltrandovi nel nido. Lei chiede come gli umani possano trasformarsi così facilmente in Rgan. Vellgunde offre di scambiare conoscenze se Juncea coopera. Ricompensa: 25 Flower Petals (1000608). - (icas_in 243, 120)
Parla con Juncea che ha accettato l'offerta. Chiedi del potere della Jörmungandr Church. Juncea spiega che gli Rgan si schiudono assorbendo l'energia magica residua che li circonda. Ma la fonte si sta esaurendo lentamente quindi le prospettive future degli Rgan sono cupe. C'è un tempo finito rimasto per gli Rgan. Vellgunde sospetta che questo sia il motivo per cui Rasgand deve essere disperato al punto da raggiungere il Continente di Midgard e collaborare con l'Illusion. Juncea elabora ulteriormente affermando che Rasgand è molto potente, essendo l'ultimo sopravvissuto. La maggior parte degli Rgan superiori nasce dal suo sangue. Voleva studiare Rasgand ma non le è stato nemmeno permesso di vederlo. Vellgunde dice che Rasgand è colui che ha maledetto la famiglia reale e chiede a Juncea quali fossero gli obiettivi di Rasgand. Juncea dice che era lì per studiare il corpo di Jörmungandr e la sua energia magica che fluisce anche anni dopo la sua morte, ma ha perso l'opportunità. Lazy chiede cosa abbia offerto Bagot a Rasgand. Lei giunge alla conclusione che potrebbe essere la resurrezione di Jörmungandr con il corpo rimanente e l'Heart of Ymir, forse anche provare a riprodurlo interamente. La tua squadra ha realizzato la circostanza simile a Rachel. Tuttavia, Miriam chiede se la resurrezione è per Rasgand, cosa guadagnerà Bagot da questo esperimento? Juncea risponde che la spinta di Bagot è unicamente per la scienza e la sua ricerca. Vellgunde è estremamente preoccupata per la possibilità di una resurrezione. L'intero continente cadrà in una grande crisi se accadrà. La squadra decide di agire rapidamente e chiede a Juncea di più sul Rgan Nest e sulla posizione del corpo di Jörmungandr. Dice che conosce solo un ingresso vicino alla regione degli Rgan di livello inferiore. Aurelie appare per dare il suo rapporto. - (icas_in 249, 113)
Parla con Aurelie che dice che il movimento degli Rgan è stato insolito di recente. Coloro che erano in ricognizione sui Frozen Scale Glaciers si sono precipitati di nuovo al nido. Lazy e Horr sono d'accordo che dobbiamo agire rapidamente per scoprire e fermarlo. - (jor_dun01 8, 238)
Usa una pergamena di trasformazione per entrare nell'area speciale del nido Rgan. - (jor_que 271, 88)
Incontra Horr trasformato e la squadra. Arriva un Iwin Soldier e rivela che la maggior parte degli Rgan di alto livello si è spostata in un'area diversa lasciando solo gli Rgan di livello intermedio e inferiore nelle vicinanze. Ha riportato alcuni umani che ha trovato mentre cercavano di fuggire. Horr chiede agli altri di scortare i rifugiati fuori in sicurezza mentre Lazy suggerisce di dividersi e continuare a cercarne altri. Ricompensa: 25 Flower Petals (1000608) e 25 Ice Castle Reputation. - (jor_que 144, 253)
Parla con Miriam che ha anche trovato altri schiavi umani che hanno paura di te. Lehar spiega loro che anche voi siete umani travestiti da Rgan. Non c'è tempo per le domande ora e li guidi fuori dal nido. Lazy se ne va a cercare Rasgand mentre tu continui a cercare. - (jor_que 131, 148)
Parla con Horr che sta cercando di interrogare altri Rgan di basso livello per ottenere informazioni, ma non gli parlano e continuano a lavorare al vivaio. Tu ti presenti e gli altri Rgan ti salutano gentilmente dato che sei un Priest. Inizi a chiedere dove sono andati gli altri Bishop e Priest Rgan. Rivelano solo che il Signore ha richiesto che tutti gli Rgan avanzati si radunassero. Chiedi se questo è l'ordine di Rasgand e dove sia il punto di raduno. Ti indicano l'area sopra e dicono di affrettarti. Decidi di controllare mentre gli altri cercano altri schiavi umani. - (jor_que 32, 37)
Parla con Lehar e la squadra che ha trovato l'ingresso al raduno. Tuttavia, è bloccato. Aurelie chiede se questo è dove potrebbero essere Bagot e Rasgand e Lehar lo sospetta. Lazy ha scoperto che quest'area è effettivamente dove sono andati Rasgand, Bagot e gli altri Rgan di rango superiore, ma anche dove gli Illusion hanno eseguito esperimenti. Horr vuole entrare nell'area e comanda ai suoi soldati di abbattere il piccolo ingresso in modo che tu possa entrare. L'area è un'instance (membri del party ammessi). - (1@jorchs 261, 34)
Incontra Voglinde, Aurelie, Leon, Miriam e alcuni Iwin Soldiers. L'obiettivo ora è trovare Rasgand e Bagot e mettere al sicuro l'Heart of Ymir. Ci sono molti potenti Rgan mutati attorno all'area. Iwin avverte che questi Rgan sono diversi da quelli fuori. Tutti i nemici erranti devono essere sconfitti per procedere. - (1@jorchs 249, 79)
Sconfiggi lo speciale Rgan che sorveglia l'area. - (1@jorchs 114, 20)
Sconfiggi lo speciale Rgan che sorveglia l'area. - (1@jorchs 142, 58)
Dopo aver sconfitto tutti i nemici rimanenti, incontra di nuovo la squadra. Gli Iwin sono sorpresi dai nuovi Rgan mutati. Miriam sospetta che l'Illusion debba aver già eseguito esperimenti su di loro. - (1@jorchs 23, 57)
Sconfiggi lo speciale Rgan che sorveglia l'area. - (1@jorchs 21, 97)
Sconfiggi lo speciale Rgan che sorveglia l'area. - (1@jorchs 112, 119)
Dopo aver sconfitto tutti i nemici rimanenti, parla con i soldati Iwin che notano una linea di Rgan che blocca l'area davanti. Cercano di sfondare le linee ma sono troppo potenti. Appaiono gli Heart Hunters AT che sono sorpresi che tu e la tua squadra siate riusciti a inseguirli fino a Isgard. Comandano agli Rgan mutati di attaccare. Sconfiggi tutti i nemici e continua più avanti nell'area. - (1@jorchs 249, 170)
Incontra Voglinde e Miriam che sta anche cercando di superare un'altra difesa di Rgan Mutati. Dici loro che sono controllati dagli Heart Hunters. Appaiono altri Heart Hunters AT e dicono che è inutile fermare le mutazioni degli Rgan. Finché l'energia magica fluisce attraverso le loro speciali macchine di iniezione, altri Rgan verranno mutati. Sconfiggi tutti i nemici e cerca un modo per disattivare il dispositivo di mutazione. - (1@jorchs 219, 148)
Disattiva il dispositivo e appariranno Heart Hunter AT che cercheranno di fermarti. Sconfiggili. - (1@jorchs 191, 203)
Disattiva il dispositivo. - (1@jorchs 226, 244)
Disattiva il dispositivo e sconfiggi tutti i nemici erranti rimanenti. - (1@jorchs 151, 179)
Incontra Aurelie e Leon che hanno catturato due Heart Hunters che hanno riavviato le macchine. Aurelie ti chiede di andare a spegnere di nuovo la macchina. - (1@jorchs 191, 203)
Disattiva di nuovo il dispositivo. - (1@jorchs 151, 179)
Torna da Aurelie e Leon che iniziano a interrogare gli Heart Hunters. Chiedono dov'è l'ingresso e se ce n'è più di uno. Gli Heart Hunters supplicano dicendo che conoscono solo 1 ingresso dritto davanti. Gli Heart Hunters si liberano e comandano il loro attacco. Sconfiggi tutti i nemici e continua più avanti. - (1@jorchs 24, 142)
Vai nell'area del laboratorio e cerca i dati di ricerca, ma non trovi nulla. Appariranno nemici. Sconfiggili tutti. - (1@jorchs 20, 195)
Vai nella successiva area del laboratorio. Trovi alcuni estratti che si riferiscono all'Heart of Ymir ma nient'altro di utile. Appaiono altri Heart Hunters. Sconfiggili. - (1@jorchs 39, 251)
Incontrati all'ultima linea di difesa degli Heart Hunter e degli Rgan. Bagot appare e non si preoccupa dei vostri sforzi. Rivela che è lui che ha provocato Juncea all'estremo. È irritato che parassiti come te continuino a comparire nel mondo che sta cercando di creare. Bagot nota che Rasgand è molto arrabbiato con gli umani per averlo ingannato. Inietta energia magica negli Rgan circostanti per renderli più potenti e si dirige nella Jörmungandr Church. Sconfiggi tutti i nemici. - (1@jorchs 38, 272)
Dirigiti verso l'ingresso della Jörmungandr Church e incontra la tua squadra che è contenta che tu stia bene. La porta è bloccata e sospetti che sia dove si trovano Bagot e l'Illusion. I soldati Iwin non sono riusciti ad aprire la porta. Voglinde prova a usare la chiave che ha ottenuto dagli Heart Hunters ma non ha funzionato. Aurelie prova a usare la sua magia per aprire la porta ma non ha funzionato neanche quello. Voglinde dice che dovremmo semplicemente impostare una sorveglianza attorno all'area del nido e andarcene. Aurelie è d'accordo dato che potrebbe essere comunque l'unica uscita per loro. Prima o poi, la porta dovrà essere aperta. Tu e la tua squadra decidete di andarvene. - (icas_in 34, 189)
Parla con Aurelie e la squadra al Ice Castle. Sono tutti scoraggiati dal fatto che siamo tornati a mani vuote. Leon suggerisce che potrebbe essere creato un nuovo ingresso alla Jörmungandr Church e che dovremmo essere alla ricerca di quando ciò accadrà. Horr assegnerà Iwin Soldiers al servizio di guardia. Leon dice che per poter eventualmente fuggire verso il continente di Midgard, dovrà essere usata un'airship che è molto evidente. Vellgunde appare con Juncea dicendo che può aiutare. Juncea accetta di collaborare pienamente dato che ha promesso. Dice che Bagot ha preso tutti i materiali di ricerca dal suo laboratorio quindi c'è poco da guadagnare lì. Mette in dubbio l'abilità di Bagot. Lazy le spiega che è molto capace in base agli incontri precedenti. Leon si chiede perché il combattimento alla fine sia stato troppo facile. Aurelie sospetta che Bagot abbia trattenuto la sua abilità per risparmiare forze per la resurrezione di Jörmungandr. Gli altri Heart Hunters e gli Rgan mutati erano semplicemente una distrazione per guadagnare tempo per sigillare la porta. Juncea è preoccupata riguardo ai suoi dati di ricerca sull'iniezione di energia magica sugli Rgan superiori. La squadra si calma e accetta di continuare a monitorare la situazione per eventuali notizie sull'apertura della porta e sulla violazione della barriera. Ricompensa: 50 Flower Petals (1000608) e 50 Ice Castle Reputation.


Missioni secondarie
Devi completarle per sbloccare le missioni giornaliere. Missioni secondarie
Missioni giornaliere
- Tutte le missioni giornaliere richiedono il livello 200, salvo diversa indicazione.
- Le missioni giornaliere si resettano alle 00:00 ora del server.
- Le ricompense aumentano con il livello di reputazione
| NPC | Missione | Ricompensa oggetti | Reputazione |
(icecastle 27, 126) 
|
Finding an Underground Hideout
|
2x Flower Petals (1000608)
|
5 |
| (icecastle 123, 168) (icas_in 241, 66) 
|
Happy Lunch Time with Zoryara
|
2x Flower Petals (1000608)
|
5 |
| (icecastle 186, 218) (icas_in 33, 53) 
|
Secret Fun
|
2x Flower Petals (1000608)
|
5 |
(icas_in 185, 63) 
|
Procurement of Research Materials for Vellgunde
|
2x Flower Petals (1000608)
|
5 |
(jor_back2 250, 30) 
|
Select Menu for Lunch
|
2x Flower Petals (1000608) e 1x Rgan Transformation Scroll (101162)
|
0 |
| (icecastle 62, 212) (icas_in 27, 116) 
|
Abandoned Pit Floor 1 Level 220+: Uccidi 40x Mostri in jor_ab01 e raccogli 20x  Frozen Meat (1000708). Frozen Meat (1000708).
|
2x Flower Petals (1000608)
|
5 |
| (icecastle 62, 212) (icas_in 27, 116)
|
Abandoned Pit Floor 2 Level 240+: Uccidi 40x Mostri in jor_ab02 e raccogli 20x Frozen Meat (1000708).
|
2x Flower Petals (1000608)
|
5 |
| (icecastle 62, 212) (icas_in 27, 116)
|
Dig and Dig
|
2x Flower Petals (1000608)
|
5 |
| (icecastle 62, 212) (icas_in 27, 122) 
|
Do we need a refrigerator?
|
3x Flower Petals (1000608)
|
5 |
| (icecastle 62, 212) (icas_in 27, 122)
|
Cirspy Tools
|
2x Flower Petals (1000608)
|
5 |
| (icecastle 62, 212) (icas_in 35, 121) 
|
Friederike's Days
|
2x Flower Petals (1000608)
|
5 |
(icecastle 97, 177) 
|
Do not Feed Wildlife
|
2x Flower Petals (1000608)
|
5 |
(icas_in 48, 252) 
|
Searching for Survivors
|
2x Flower Petals (1000608)
|
5 |
(jor_tail 48, 241) 
|
Help Moryara Fish
|
2x Flower Petals (1000608)
|
5 |
(jor_nest 239, 244) 
|
Rgan to Work
|
Prima completata: 10x Flower Petals (1000608) Giornaliera: 2x Flower Petals (1000608)
|
0 |
(jor_nest 37, 75) 
|
Elegant Hobbies
|
2x Flower Petals (1000608)
|
0 |
(jor_nest 235, 57) 
|
Priest, Have Mercy??
|
Prima completata: 10x Flower Petals (1000608) Giornaliera: 2x Flower Petals (1000608)
|
0 |
(jor_nest 34, 79) 
|
Our Precious Food
|
Prima completata: 10x Flower Petals (1000608) Giornaliera: 2x Flower Petals (1000608)
|
0 |
(jor_nest 257, 26) 
|
For Safe Work
|
2x Flower Petals (1000608)
|
0 |


Istanze
Devi completare l'intera Episode 19 - Main Story per ottenere accesso alle istanze.
| Istanza | Livello richiesto | Numero party | CD (giorni) | Ricompense possibili |
| Iwin Patrol (icecastle 23, 115) 
|
200 | 1+ | 1 |
|
| Airship Destruction (jor_nest 22, 255) 
|
200 | 1+ | 1 |
|
| Simulation Battle (jor_nest 66, 260) 
|
200 | 1+ | 1 |
|


Campi/Dungeon
| Mappa | Mostri |
| Frozen Tail jor_tail |
Ice Gangu (21525) |
Shining Seaweed (21524) | |
| Frozen Scale Hills jor_back1 |
Ice Gangu (21525) |
Shining Seaweed (21524) | |
Ice Straw (21523) | |
| Frozen Scale Plains jor_back2 |
Ice Gangu (21525) |
Ice Straw (21523) | |
Unfrost Flower (21521) | |
Limacina (21520) | |
| Frozen Scale Glaciers jor_back3 |
Ice Gangu (21525) |
Cave Calmaring (21540) | |
Primitive Rgan (21526) | |
Lowest Rgan (21527) | |
Limacina (21520) | |
Ultra Limacina (21537) | |
| Abandoned Pit Floor 1 jor_ab01 |
Cave Calmaring (21540) |
Cave Flower (21541) | |
Disposed Native Rgan (21538) | |
Hallucigenia Baby (21543) | |
Renovated Upper Rgan (21600) | |
| Abandoned Pit Floor 2 jor_ab02 |
One Eye Dollocaris (21544) |
Hallucigenia (21542) | |
Piloted Midrange Rgan (21601) | |
Disposed Midrange Rgan (21539) | |
Two Eyes Dollocaris (21545) | |
| Snake God's Warmth Floor 1 jor_dun01 |
Primitive Rgan (21526) |
Heart Hunter AT (21599) | |
Lowest Rgan (21527) | |
Lower Rgan (21528) | |
| Snake God's Warmth Floor 2 jor_dun02 |
Heart Hunter AT (21599) |
Lowest Rgan (21527) | |
Lower Rgan (21528) | |
Midrange Rgan (21529) |
Reputazione
Parla con l'NPC Hoyoyo per aprire il negozio speciale della reputazione.
 (icas_in 175, 63)
Ogni livello di reputazione richiede 1.000 punti. Vedi le Daily Quests e le Instances per maggiori informazioni sulla reputazione.
| Livello di reputazione | Sblocca | Quantità valuta |
| 0 | Hoyoyo non ti parlerà. | |
| 1 |  Snow Flower Armor +9 Refinement Cube (101187) Snow Flower Armor +9 Refinement Cube (101187)
|
x200 Flower Petals (1000608)
|
 Dried Ice Gangu (1100006) Dried Ice Gangu (1100006)
|
x1 Flower Petals (1000608)
| |
 C. Filir Bag (480137) C. Filir Bag (480137)
|
x1000 Flower Petals (1000608)
| |
| Le Daily Quests garantiranno x1 Flower Petals (1000608) aggiuntivo
| ||
| 2 |  Glacier Weapon +9 Refinement Cube (101188) Glacier Weapon +9 Refinement Cube (101188)
|
x500 Flower Petals (1000608)
|
 C. Astra Blessing (480205) C. Astra Blessing (480205)
|
x1000 Flower Petals (1000608)
| |
 C. Raphael's Wings (20579) C. Raphael's Wings (20579)
|
x1000 Flower Petals (1000608)
| |
| Le Daily Quests garantiranno x2 Flower Petals (1000608) aggiuntivi
| ||
| 3 | Le Daily Quests garantiranno x4 Flower Petals (1000608) aggiuntivi (portando il bonus totale a x7 Flower Petals (1000608))
| |
Equipaggiamenti
L'equipaggiamento relativo all'episodio si trova qui: Equipaggiamenti di Isgard