Wind Hawk Guide by Hurt Locker: Difference between revisions
Hurt Locker (talk | contribs) m (Hurt Locker moved page User:Hurt Locker to MuhRO:Wind Hawk Guide by Hurt Locker: Misspelled title) |
Germangamer (talk | contribs) No edit summary |
||
| (127 intermediate revisions by 2 users not shown) | |||
| Line 1: | Line 1: | ||
{| class="wikitable" width="35%" style="background-color:#ffffcc;" | {| class="wikitable" width="35%" style="background-color:#ffffcc;" | ||
|rowspan="2"|[[File:Warning.png |40px|Warning]] | |rowspan="2"|[[File:Warning.png |40px|Warning]] | ||
! style="text-align:center; {{#if:{{{bg|}}} | This guide | ! style="text-align:center; {{#if:{{{bg|}}} | This guide will receive continuous updates | ||
|- | |- | ||
|style="text-align:center;| | |style="text-align:center;| Any questions to the #archer channel<br/> | ||
|- | |- | ||
|} | |} | ||
{| class="wikitable" style="margin-left: 20px; margin-right:0;border-style: solid; border-width: 1px; border-color:#ffffff00; float:right; " | {| class="wikitable" style="margin-left: 20px; margin-right:0;border-style: solid; border-width: 1px; border-color:#ffffff00; float:right;" | ||
! colspan="6" style="background-color:# | ! colspan="6" style="background-color:#FF8512; " | '''Hurt Locker''' | ||
|- | |- | ||
| colspan="6" | | | colspan="6" |https://imgur.com/x4uEZAQ.gif <div style="text-align: center;"> | ||
|- | |- | ||
| colspan="6" style="background-color:# | | colspan="6" style="background-color:#2A76E8;" | <center> '''WindHawk''' </center> | ||
|- | |- | ||
| colspan=" | | colspan="6" |[[File:WindHawk.png|250px]] <div style="text-align: right;"> | ||
|- | |- | ||
! colspan="6" style="background-color:#2A76E8; " |'''4th Job Bonus''' | |||
|- style="background-color:#2B44D6;" | |||
|- style="background-color:# | |||
|<div style="text-align: center;">'''POW'''</div> | |<div style="text-align: center;">'''POW'''</div> | ||
|<div style="text-align: center;">'''STA'''</div> | |<div style="text-align: center;">'''STA'''</div> | ||
| Line 30: | Line 24: | ||
|<div style="text-align: center;">'''CON'''</div> | |<div style="text-align: center;">'''CON'''</div> | ||
|<div style="text-align: center;">'''CRT'''</div> | |<div style="text-align: center;">'''CRT'''</div> | ||
|+ | |+ | ||
| style="text-align: center;" |<nowiki>7</nowiki> | | style="text-align: center;" |<nowiki>7</nowiki> | ||
| style="text-align: center;" |<nowiki>4</nowiki> | | style="text-align: center;" |<nowiki>4</nowiki> | ||
| Line 39: | Line 33: | ||
|} | |} | ||
= Introduction = | |||
Hello! Some of you may already know me (from previous servers), but if not, you will. My name is Hurt Locker, I'm a WH main, been in MuhRO for a long time. I designed this guide not only to update previous guides, but also to offer a fresh perspective on the job based on my experience and acquired knowledge. I hope you find it useful and... enjoy it! | Hello! Some of you may already know me (from previous servers), but if not, you will. My name is Hurt Locker, I'm a WH main, been in MuhRO for a long time. I designed this guide not only to update previous guides, but also to offer a fresh perspective on the job based on my experience and acquired knowledge. I hope you find it useful and... enjoy it! | ||
<br> | <br> | ||
'''Always check the market (prices may vary) and the final damage depends on your build and equipment (progress is different and everyone goes at their own pace, you have to support each other).''' | |||
''' | <br><br><br><br><br> | ||
<br><br><br><br><br> | = Hidden Tips/Damage Boost = | ||
There are ways to increase your damage, do you know which ones? Even some old stuff still works | There are ways to increase your damage, do you know which ones? Even some old stuff still works | ||
{| class="mw-collapsible wikitable" style="width: 100%;" | {| class="mw-collapsible wikitable" style="width: 100%;" | ||
|- | |- | ||
! style="background-color:#40E0D0; color:Black; width: | ! style="background-color:#40E0D0; color:Black; width: 5% "| Gears/Consumables | ||
! style="background-color:#6A5ACD; color:Black; width: 6% "| Note | ! style="background-color:#6A5ACD; color:Black; width: 6% "| Note | ||
|- style="height: 5em;" | |- style="height: 5em;" | ||
| style="background:#E0FFFF;"| | | style="background:#E0FFFF;"| | ||
*{{#item:100232|Red Herb Activator}} Gene Skill/Market | *{{#item:100232|Red Herb Activator}} '''Gene Skill/Market''' | ||
*{{#item:102803|Force Booster}} Eden/Cash Shop | *{{#item:102803|Force Booster}} '''Eden/Cash Shop''' | ||
*{{#item:22758|Collection Of Scrolls Shooting Transformation}} Eden/Cash Shop | *{{#item:22758|Collection Of Scrolls Shooting Transformation}} '''Eden/Cash Shop''' | ||
*{{#item:50035|The One Potion}} Eden/Cash Shop | *{{#item:50035|The One Potion}} '''Eden/Cash Shop''' | ||
*{{#item:9132|Abysmal Knight Egg}} | *{{#item:9132|Abysmal Knight Egg}} '''BIS for Max. Dmg''' | ||
| style="background:#EBEBFF;"| It's all you need to boost your damage (the best arsenal at your disposal). | *{{#item:9193|Mistress Egg}}'''Effect Size Penalty ''' | ||
| style="background:#EBEBFF;"| It's all you need to boost your damage (the best arsenal at your disposal) | |||
|- | |||
| style="background:#E0FFFF;"| | |||
*{{#item:27109 |Jitterburg Card}} | |||
*{{#item:27108 |Singing Pere Card}} | |||
*{{#item:27107 |Playing Pere Card}} | |||
| style="background:#EBEBFF;"| Perfect card combo for neutral objectives, Hol, CT for example (Super necessary for party. You can't leave home without it) | |||
|- | |- | ||
| style="background:#E0FFFF;"| | | style="background:#E0FFFF;"| | ||
*{{#item:12354|Buche De Noel}} | *{{#item:12354|Buche De Noel}} | ||
*{{#item:12321|Buche De Noel}} or {{#item:50051|Buche De Noel}} | |||
*{{#item:12514|Abrasive}} | *{{#item:12514|Abrasive}} | ||
*{{#item:9091|Choco Egg}} | |||
*{{#item:300261 |Galensis Card}} | *{{#item:300261 |Galensis Card}} | ||
| style="background:#EBEBFF;"| If you lack critical rate, these are your options ( | *{{#item:300523 |Yordos Executor Card}} | ||
*{{#item:300557 |Garling Card}} | |||
*{{#item:300526 |Yorker Worker Card}} + {{#item:300527|Yorker Religious Worker Card}} '''Option1''' | |||
*{{#item:300527 |Yorker Religious Worker Card}} + {{#item:300526|Yorker Worker Card}} '''Option2''' | |||
*{{#item:300366 |Lowest Rgan Card}} + {{#item:300368|Midrange Rgan Card}} '''Option3 cheap''' | |||
| style="background:#EBEBFF;"| If you lack critical rate, these are your options | |||
* ''' 100% CRIT doesn't mean having 100 CRIT on the ALT+A. Monster have a CRIT Shield based on their LUK/5. This means that a monster with 120 LUK reduces the CRIT displayed on ALT+A by 24''' | |||
*''' Remember, at the start with Critical Rate you occupy (130+ example Nif), (170+ Venom, Temple, Cogh) and finally (190+ Final Battle, Dep1, Dep2)''' | |||
|- | |- | ||
| style="background:#E0FFFF;"| | | style="background:#E0FFFF;"| | ||
{{#item:4084|Marine Sphere Card}} | *{{#item:4084|Marine Sphere Card}} | ||
| style="background:#EBEBFF;"| It doesn't have much mystery, more damage for a few seconds (if the PC allows it; if not, skip) | | style="background:#EBEBFF;"| It doesn't have much mystery, more damage for a few seconds (if the PC allows it; if not, skip) | ||
|} | |||
= Late Game Gears = | |||
'''Now the questions will be answered. What is the WH late game? Here it is''' | |||
{| class="mw-collapsible wikitable" style="width: 100%;" | |||
|- | |||
! style="background-color:#0FAD41; color:Black; width: 6% "| Gear | |||
! style="background-color:#6A5ACD; color:Black; width: 7% "| Note | |||
|- style="height: 5em;" | |||
| style="background:#E0FFFF;"| | |||
+15 [A] {{#item:400723|Yorscalp Crown of Execution}} With: | |||
*{{#item:313426|Warrant of Arbiter}} | |||
*{{#item:313409|Strength of Yorscalp Lv3-4}} '''Dmg''' or if you need ACD: | |||
*{{#item:313421|Speed of Yorscalp Lv3-4}} or {{#item:313417|Smart of Yorscalp Lv3-4}} | |||
*{{#item:4754|Luk+4}} | |||
| style="background:#EBEBFF;"| If you ask me, this is the best hat to date in terms of damage and ignoring res (10%). It's a huge investment and ''' is only focused on Crescive Bolt, the only compatible build (Gale Storm can do it too, if you don't mind losing some spam).''' | |||
*'''With a recent update the {{#item:1001834|Shape of Fallen Serpent}} They are no longer so rare to obtain, making them much cheaper to produce than the TDRC.''' | |||
|- | |||
| style="background:#E0FFFF;"| | |||
+15 [A] {{#item:400539| Time Dimensions Rune Crown (Wind Hawk)}} With: | |||
*{{#item:312753|Acute Jewel Lv5}} | |||
*{{#item:312712|Time Dimension Jewel (Luck) Lv3}} '''Dmg''' or if you need ACD: | |||
*{{#item:312700|Time Dimension Jewel (Agility) Lv3}} or {{#item:312718|Time Dimension Jewel (Wisdom) Lv3}} | |||
*{{#item:4754|Luk+4}} | |||
| style="background:#EBEBFF;"| It's a good hat, even if you're just starting out late game. It grants you crit rate, fixed damage, and combos with your weapon (either dimension or time gap). | |||
*'''It is RECOMMENDED to have this hat only if you wish to use Gale Storm and Crescive Bolt, as it is currently more expensive than making the Yorscap Crown.''' | |||
|- | |||
| style="background:#E0FFFF;"| | |||
+15 [A] {{#item:400985| Frontier Rune Crown (Wind Hawk)}} With: | |||
*{{#item:312753|Acute Jewel Lv5}} | |||
*{{#item:312712|Time Dimension Jewel (Luck) Lv3}} | |||
*{{#item:4754|Luk+4}} | |||
| style="background:#EBEBFF;"| Hat Late Game, its enormous potential will determine if you want to further refine the Gale Storm build. Recommended? Only if you like mini-maxing. | |||
*'''It is RECOMMENDED to have this hat only if you wish to use Gale Storm, as it is currently more expensive than making the Yorscap Crown or TDRC''' | |||
|- | |||
| style="background:#E0FFFF;"| | |||
{{#item:410233|Gambler's Seal}} | |||
*Reduce AfterCast Delay 5% x2 or Increases Critical Damage 5% x2 | |||
| style="background:#EBEBFF;"| It all depends on whether or not you have a version of Kiel (to go for ACD or Dmg). | |||
|- | |||
| style="background:#E0FFFF;"| | |||
{{#item:420220|Ace of Diamonds in Mouth (Ranged Physical)}} | |||
*Luk +5 or Vit +5 or Dex +5 | |||
*Long ranged physical attack 7% or Critical damage 7% | |||
| style="background:#EBEBFF;"| you can change it for the {{#item:420269|Ace of Clovers in Mouth (Defense)}} if you want some survival | |||
|- | |||
| style="background:#E0FFFF;"| | |||
+15 [A] {{#item:450172|Nebula Suit of Creative}} | |||
*{{#item:310685|Star Cluster of Creative Lv3}} | |||
*{{#item:310735|Nebula of Sharp Lv3}} | |||
*{{#item:4723|Dex+4}} | |||
| style="background:#EBEBFF;"| The best armor for a long time | |||
|- | |||
| style="background:#E0FFFF;"| | |||
+15 [A] {{#item:700127|Demonic Wing}} | |||
*Critical Attack 40-45% | |||
*Critical Attack 10-18% or Long Range Physical Attack 10-18% | |||
*Critical Attack 10-18% or Long Range Physical Attack 10-18% | |||
* [[Chapter_1#Encroached_Weapon_Enchants|Here you can see the enchants of your choice]] | |||
| style="background:#EBEBFF;"| '''BIS bow for Crescive Bolt Build. Now, in the case of using {{#item:400723|Yorscalp Crown of Execution}} yes or yes, you must use one ''' {{#item:300595|Epesto Walther Megas Card}}+{{#item:27361|Polluted Wander Man Card}} x2 or any Card. '''It needs near-perfect enchantments to be BIS; otherwise, it's Dimension Bow.''' | |||
|- | |||
| style="background:#E0FFFF;"| | |||
+15 [A] {{#item:700093|Dimensions Wind Crossbow}} | |||
* [[Dimension_Weapons#Dimensions_Weapons_Enchants|Here you can see the enchants of your choice]] | |||
| style="background:#EBEBFF;"| '''God bow for Crescive Bolt Build. Now, in the case of using {{#item:400723|Yorscalp Crown of Execution}} yes or yes, you must use one ''' {{#item:300595|Epesto Walther Megas Card}}+{{#item:27361|Polluted Wander Man Card}} or any Card. | |||
|- | |||
| style="background:#E0FFFF;"| | |||
+15 [A] {{#item:700108|Time Gap Wind Bow}} | |||
* [[Dimension_Weapons#Dimensions_Weapons_Enchants|Here you can see the enchants of your choice]] | |||
| style="background:#EBEBFF;"| '''BIS bow for the Gale Storm build''', allowing for near-instant spamming. It's great for Dep2 or for farming Venom/Temple. | |||
|- | |||
| style="background:#E0FFFF;"| | |||
+15 [A] {{#item:700119|Frontier Wind Bow}} | |||
*Critical Attack 40-45% | |||
*Critical Attack 10-18% or Long Range Physical Attack 10-18% | |||
*Critical Attack 10-18% or Long Range Physical Attack 10-18% | |||
* [[Chapter_1#Encroached_Weapon_Enchants|Here you can see the enchants of your choice]] | |||
| style="background:#EBEBFF;"| '''BIS bow for the Gale Storm build''', allowing for near-instant spamming. It's great for Dep2 or for farming Venom/Temple. '''It needs near-perfect enchantments to be BIS; otherwise, it's Time Gap Bow.''' | |||
|- | |||
| style="background:#E0FFFF;"| | |||
+14/+15 [A] {{#item:480352|Circulation of Life Winter}} | |||
*{{#item:313023 |Life of Winter (Creative)}} | |||
*{{#item:312538 |Physical Fruit Lv20}} | |||
*{{#item:312513 |Physical Flower Lv5}} | |||
| style="background:#EBEBFF;"|The garment income alone significantly increases everything (it affects your total by 40%). A lot of grinding and patience. | |||
|- | |||
| style="background:#E0FFFF;"| | |||
+14/+15 [A] {{#item:470339 |Dimension World Executioner Boots}} | |||
*{{#item:313932 |Dimension World Crystal (Volti)}} or {{#item:313938|Dimension World Crystal (Will)}} | |||
* Any dmg elemental | |||
* Any dmg race | |||
* Checks enchants [[Chapter_1#Dimension_Shoes_&_Enchants|Click here]] | |||
| style="background:#EBEBFF;"| [[Wind_Hawk_Guide_by_Hurt_Locker#Hidden_Tips/Damage_Boost|Here you can see the cards I recommended earlier]] ''' Based on the tests provided by GM Icecold, {{#item:313932|Dimension World Crystal (Volti)}} is the best option for the WH''', as the difference with {{#item:313938|Dimension World Crystal (Will)}} is less than 1% in any skill. Depending on your preferences, you can choose either one. | |||
*{{#item:470303 |Yorscalp Boots}} or {{#item:470260 |Gaebolg Boots}}'''they are excellent boots in everything (survival, damage, economy) ''' .''' | |||
*{{#item:470175 |Ice Rune Boots}}'''You can also use it to inflict specific damage, like in Dep2, but it's more expensive (at the cost of losing % of HP, you decide). ''' | |||
|- | |||
| style="background:#E0FFFF;"| | |||
{{#item:490486 |Signet of Circulation Winter}} | |||
*{{#item:313006 |Signet of Creative Lv5}} | |||
*{{#item:312981 |Token of Life}} | |||
| style="background:#EBEBFF;"| Combo with the garment and acce , also important too. | |||
|- | |||
| style="background:#E0FFFF;"| | |||
{{#item:490135 |Creative Signet of Star}} | |||
*{{#item:310706 |Star of Sharp Lv.5}} x2 or {{#item:310701|Star of Master Archer Lv.5}} x2 | |||
*{{#item:313033 |Star Cluster of Luck Lv5}} | |||
| style="background:#EBEBFF;"| Combo with acce and armor , also important too. | |||
*Whether you get a {{#item:310701|Star of Master Archer Lv.5}} or {{#item:310706|Star of Sharp Lv.5}} both are good options '''(but Sharp x2 is better in every way).''' | |||
|} | |||
== Cards == | |||
Here you'll find the cards available for you to use, from the most common to the rarest and most expensive (sorted from best to worst). I hope this helps. | |||
{| class="mw-collapsible wikitable" style="width: 100%;" | |||
|- | |||
! style="background-color:#E33B19; color:Black; width: 3% "| OP/Best | |||
! style="background-color:#6A5ACD; color:Black; width: 3% "| Normal | |||
|- style="height: 5em;" | |||
| style="background:#FFC3B8;"| '''Card options in Hat/Mid:''' | |||
*{{#item:300377|[MVP] Ultra Limacina Card}} '''BIS Card for any class physical''' | |||
*{{#item:4403|[MVP] Kiel Card}} '''Good ACD''' | |||
*{{#item:300560|[MVP] Nightmare Piamette Card}} '''Good ACD/VCT''' | |||
*{{#item:4480|[MVP] Sealed Kiel Card}} '''Good ACD too''' | |||
| style="background:#EBEBFF;"| '''Card options in Hat/Mid:''' | |||
*{{#item:300363|Limacina Card}} '''Good Dmg''' | |||
*{{#item:300456|Icewind Egg Card}} '''Extra ACD''' | |||
*{{#item:27396|Isaac Wigner Card}} '''Extra ACD''' | |||
*{{#item:4583|Engkanto Card}} '''Good for Venom''' | |||
*{{#item:300174|Melted Poring Card}} '''Good Hp%''' | |||
*{{#item:300528|Yortus Bishop Card}} '''Good Hp%''' | |||
*{{#item:300664|High Incubus Card}} '''Good vs Neutral''' | |||
*{{#item:300564|Heka Card}} '''Good vs Water''' | |||
*{{#item:300562|Medjay Card}} '''Good vs Earth''' | |||
*{{#item:300612|Hanom Card}} '''Good vs Shadow''' | |||
*{{#item:300636|Vulring Card}} '''Good vs Wind''' | |||
*{{#item:300648|Shadow Jailer Card}} '''Good vs Ghost''' | |||
*{{#item:300642|Polluted Silk Frog Card}} '''Good vs Fire''' | |||
*{{#item:300656|Uncanny Frus Card}} '''Good vs Holy''' | |||
|- | |||
| style="background:#FFC3B8;"| '''Card options in Armor:''' | |||
*{{#item:300533|[MVP] Encroached Tan Card}} '''BIS Card for all''' | |||
*{{#item:4610|[MVP] Sarah Card}} '''GTB for Physical jobs, good for Zerocell''' | |||
*{{#item:300445|[MVP] Gaia Pol Card }} '''Good for Hol, CT, Final Battle''' | |||
*{{#item:300007|[MVP] Jewgoliant Card}} '''Good for Hol, Dep2''' | |||
*{{#item:27126|[MVP] Boitata Card}} '''Good for Dep2''' | |||
*{{#item:300021|[MVP] Bone Detardeurus Card}} '''Good for CT''' | |||
*{{#item:4408|[MVP] Gloom Under Night Card}} '''Good for Valky and Geffen''' | |||
*{{#item:4602|[MVP] Realized Amdarais Card}} '''Good for General dmg''' | |||
*{{#item:4601|[MVP] Amdarais Card}} '''Good for General dmg''' | |||
| style="background:#EBEBFF;"| '''Card options in Armor:''' | |||
*{{#item:300376|Two Eyes Dollocaris Card}} '''Good HP/Dmg''' | |||
*{{#item:300381|Hearthunter AT Card}} '''Max. Dmg''' | |||
*{{#item:4392|Observation Card}} '''Good Dmg but need {{#item:300270|Empathize Card}}''' | |||
*{{#item:300646|Encroached Dimik Card}} '''Good Dmg but need {{#item:300637|Firefloop Card}} ''' | |||
|- | |||
| style="background:#FFC3B8;"| '''Card options in Weapon:''' | |||
*{{#item:4399|[MVP] Thanatos Card}} '''Good in ToT'''(combine it with good Shadow Gear)''' | |||
*{{#item:300532|[MVP] Ghost Ship Capatain Card}} '''Good Vs Boss''' | |||
| style="background:#EBEBFF;"| '''Card options in Weapon:''' | |||
*{{#item:300610|Guerrero Card}} '''Good Critical Rate, Damage and Survivability''' | |||
*{{#item:300519|Yormi Card}} + {{#item:300506|Scalleg Card}} '''All size enemies''' (The Best) | |||
*{{#item:300457|Grey Icewind Card }} + {{#item:300455|Copo Card}} '''Small/Large enemies''' (Good for farming) | |||
*{{#item:27361|Polluted Wander Man Card}} '''Medium/Large enemies''' (It works except small, cheap) | |||
*{{#item:300240|Gan Ceann Card}} '''Large enemies''' (Good for CT; MVP Large) | |||
*{{#item:300241|Brutal Murderer Card}} '''Medium enemies''' (Good for Zerocell; MVP Medium) | |||
*{{#item:4140|Abysmal Knight Card}} '''Good vs Boss''' | |||
|- | |||
| style="background:#FFC3B8;"| '''Card options in Garment:''' | |||
*{{#item:300530|[MVP] Yortus Arbiter Card}} '''Damage OP, without any penalty''' | |||
*{{#item:300473|[MVP] Snow Angel Card}}'''If you have it, it's worth using (if you're not worried about the crit rate)''' | |||
*{{#item:4676| [MVP] Ranger Shecil Card}}'''Good for survival/solo''' | |||
| style="background:#EBEBFF;"| '''Card options in Garment:''' | |||
*{{#item:300261 |Galensis Card}} '''Good Dmg/Critical Rate''' | |||
*{{#item:300637|Firefloop Card}} '''Really Good Dmg''' | |||
*{{#item:300270|Empathize Card}} '''Good Dmg but need {{#item:4392|Observation Card}}''' | |||
*{{#item:300426 |Crux Findel Card}} '''Good Dmg''' | |||
|- | |||
| style="background:#FFC3B8;"| '''Card options in Shoes:''' | |||
*{{#item:300280|[MVP] Broken Thanatos Card}} '''Good for Zerocell''' | |||
*{{#item:300297|[MVP] Gobling King Card}} '''Good vs Brute''' | |||
*{{#item:27383|[MVP] Phantom Amdarais Card }} '''Good if you have {{#item:4601|[MVP] Amdarais Card}} or {{#item:4602|[MVP] Realized Amdarais Card}}''' | |||
| style="background:#EBEBFF;"| '''Card options in Shoes:''' | |||
*{{#item:300380 |Piloted Midrange Rgan Card}} '''BIS Card for all''' | |||
*{{#item:300514 |Yoster Cleaner Card}} '''Good vs Dragon''' (Good for CT) | |||
*{{#item:300516 |Yoster Collector Card}} '''Good vs Formless''' (Good for HOL) | |||
*{{#item:300505 |Seawind Card}} '''Good vs Brute''' | |||
*{{#item:300509 |Letterster Card}} '''Good vs Insect''' | |||
*{{#item:300510 |Cliolima Card}} '''Good vs Demon''' | |||
*{{#item:300511 |Rockstriker Card}} '''Good vs Undead''' | |||
*{{#item:300559 |Liamette Card}} '''Good vs Fish''' | |||
*{{#item:300561 |Medjed Card}} '''Good vs Angel''' | |||
*{{#item:300638 |Firafflesia Card}} '''Good vs Demi Human''' | |||
*{{#item:300640 |Fire Flower Card}} '''Good vs Plant''' | |||
*{{#item:300443 |Hardrock Titan Card}} '''Good vs Earth''' | |||
|- | |||
| style="background:#FFC3B8;"| '''Card options in Accesory:''' | |||
*{{#item:300471|[MVP] Fallen Angel Icelug Card}} '''Good for Dep2''' | |||
*{{#item:300613|[MVP] Peska Card}} '''Good for HOL''' | |||
| style="background:#EBEBFF;"| '''Card options in Accesory:''' | |||
*{{#item:300654|Anemone Card}} + {{#item:300651|Scabiosa Card}} '''Good Dmg''' | |||
*{{#item:300278|Void Mimic Card}} x2 '''Good Dmg''' | |||
*'''Any Card Hp%''' | |||
|- | |||
|} | |||
== Stats == | |||
* '''STR''' 1+ | |||
* '''AGI''' 90 | |||
* '''VIT''' 90+ | |||
* '''INT''' 90 | |||
* '''DEX''' 130 | |||
* '''LUK''' 100+ | |||
</br> | |||
'''Depending on which cards you use in the garment, it will adjust to best suit your needs. There are 4 popular options, such as {{#item:4676|[MVP] Ranger Shecil Card}} , {{#item:300530|[MVP] Yortus Arbiter Card}} , {{#item:300473|[MVP] Snow Angel Card}} and {{#item:300637|Firefloop Card}}.''' | |||
</br> | |||
'''Now you're wondering, who's better? Just look at this (Any option is good. Btw in this test is with all gears +15)''' | |||
{| class="wikitable mw-collapsible mw-collapsed" style="width:85%;" | |||
! style="background-color:#D115EB; |Using | |||
! style="background-color:#E813CE; |Testing | |||
|- style=height:13em | |||
| style="background-color:#EDBDFC; "| '''{{#item:300530|[MVP] Yortus Arbiter Card}} ''' | |||
[[File:aq.arbiter.png|200px]] | |||
*At this point I have 262 Critical | |||
*It's more aggressive, betting on every buff received (and hoping for better cards in a future patch) | |||
*Only need good stats | |||
'''* {{#item:300530|[MVP] Yortus Arbiter Card}} You'll want 120 LUK, but 10 critical rate? We don't need more right now; you can use more convenient stats(at this point you'll have -90k+ hp).''' | |||
| style="background-color:#F5A6E9; " align="center" |[[File:cb.arbiter.png|250px]] | |||
|- | |||
| style="background-color:#EDBDFC; "| '''{{#item:300473|[MVP] Snow Angel Card}} ''' | |||
[[File:aq.snow.png|200px]] | |||
*At this point I have 197 Critical | |||
*It is more balanced, allowing for normal progression | |||
*Need refine +15 garment | |||
'''* {{#item:300473|[MVP] Snow Angel Card}} You'll need to use 99 LUK to avoid losing critical rate. And with the help of multiple consumables, you'll be able to use it.''' | |||
| style="background-color:#F5A6E9; " align="center" |[[File:cb.snow.png|250px]] | |||
|- | |||
| style="background-color:#EDBDFC; "| '''{{#item:4676| [MVP] Ranger Shecil Card}} ''' | |||
[[File:aq.ranger.png|200px]] | |||
*At this point I have 252 Critical | |||
*It is more balanced, allowing for normal progression | |||
*Need good stats | |||
'''* {{#item:4676|[MVP] Ranger Shecil Card}} you can forget about that problem, and you'll have a better chance of survival (at this point you'll have 100k+ hp).''' | |||
| style="background-color:#F5A6E9; " align="center" |[[File:cb.ranger.png|250px]] | |||
|- | |||
| style="background-color:#EDBDFC; "| '''{{#item:300637|Firefloop Card}} ''' | |||
[[File:aq.firefloop.png|200px]] | |||
*At this point I have 227 Critical | |||
*Normal progression | |||
*Need refine +15 garment | |||
| style="background-color:#F5A6E9; " align="center" |[[File:cb.firefloop.png|250px]] | |||
|} | |||
== 4th Job Stats (Traits)== | |||
*'''POW''' 105+ | |||
*'''STA''' 0+ | |||
*'''WIS''' 0+ | |||
*'''SPL''' 0 | |||
*'''CON''' 70+ | |||
*'''CRT''' 105+ | |||
</br> | |||
'''*POW and CRT are the most important, you can distribute the remaining points to STA or WIS (CON is more damage/flee, it's your decision).''' | |||
== Costume Stones == | |||
The recommended stones have changed over time with the arrival of the 4th job stones. These are the best combination: | |||
{| class="mw-collapsible wikitable" style="width: 100%;" | |||
|- | |||
! style="background-color:#FF862E; color:Black; width: 5% "| Stones | |||
! style="background-color:#C5F527; color:Black; width: 6% "| Stones for x1 | |||
! style="background-color:#EAFF2E; color:Black; width: 6% "| Other options | |||
|- style="height: 5em;" | |||
| style="background:#FFD5B8;"| | |||
*{{#item:1001788|WindHawk Stone (Garment)}} | |||
*{{#item:1000855|Critical Stone (Dual)}} | |||
*{{#item:1000860|Ranger Stone (Top)}} | |||
*{{#item:1000861|Ranger Stone (Mid)}} | |||
*{{#item:1000862|Ranger Stone (Low)}} | |||
| style="background:#E3F78F;"| | |||
*{{#item:25171|Exp Stone (Top)}} | |||
*{{#item:25141|Exp Stone (Mid)}} | |||
*{{#item:25015|Exp Stone (Low)}} | |||
*{{#item:1002404|Exp (Garment)}} If you plan to do WH x1, you need at least this set '''(after reaching level 250+ you need all the possible experience boosts).''' | |||
| style="background:#F3FF8A;"| | |||
*{{#item:25228|Teleport Stone (Low)}} | |||
*{{#item:1000525|SP Absorbtion Stone (Dual)}} this more {{#item:9052|Incubus Egg}} good for farming too | |||
*{{#item:1000675|Reload Stone (Dual)}} | |||
*{{#item:25067|Cast Stone (Garment)}} This will help you equip yourself with [[Increase_item_drop_gears#Equipment_that_increases_drop_rate|Full Drop Gears]] (also in early game). | |||
|} | |||
== Shadow Gears == | |||
We already know the classic Shadow Gear, but there are variations. Want to see them? | |||
{| class="mw-collapsible wikitable" style="width: 100%;" | |||
|- | |||
! style="background-color:#BA55D3; color:Black; width: 4% "| Gears | |||
! style="background-color:#6A5ACD; color:Black; width: 6% "| Note | |||
|- style="height: 5em;" | |||
|- | |||
| style="background:#F9E2FF;"| | |||
*+10 {{#item:24679|Maximum Mammoth Shadow Armor}} | |||
*+10 {{#item:24680|Maximum Mammoth Shadow Shoes}} | |||
*+10 {{#item:24386|Infinity Shadow Weapon}} | |||
*+10 {{#item:24767|Mega Blitz Shadow Shield}} | |||
*+10 {{#item:24661|Full Penetration Shadow Earring}} | |||
*+10 {{#item:24662|Full Penetration Shadow Pendant}} | |||
*'''Enchants? C.RATE+5 and CRT/Ranged/Crt dmg''' | |||
| style="background:#EBEBFF;"| '''The standard set''' has not changed much, if you require more acd you have +10 {{#item:24746|Separate Reload Shadow Shield}} | |||
|- | |||
| style="background:#F9E2FF;"| | |||
*+10 {{#item:24912|Crescive Shadow Armor}} | |||
*+10 {{#item:24913|Crescive Shadow Shoes}} | |||
*+10 {{#item:24792|Master Shadow Weapon}} | |||
*+10 {{#item:24793|Master Shadow Shield}} | |||
*+10 {{#item:24910|Gale Shadow Earring}} | |||
*+10 {{#item:24911|Gale Shadow Pendant}} | |||
*'''Enchants? C.RATE+5 and CRT/Ranged/Crt dmg''' | |||
*'''Enchants for Master Set? DEX/POW [[Shadow_Enchanting#Master_Shadow_Gear_Enchanting|Check the list of enchants]]''' | |||
| style="background:#EBEBFF;"| '''The best Shadow gear for WH has finally arrived.''' It's not too mysterious, it meets the 50% ACD requirements, and you should definitely use it {{#item:9193|Mistress Egg}}. | |||
*'''(Build not compatible with {{#item:4399|[MVP] Thanatos Card}})''' | |||
|- | |||
| style="background:#F9E2FF;"| | |||
*+10 {{#item:24679|Maximum Mammoth Shadow Armor}} | |||
*+10 {{#item:24680|Maximum Mammoth Shadow Shoes}} | |||
*+10 {{#item:24792|Master Shadow Weapon}} | |||
*+10 {{#item:24733|Infinity Shadow Shield}} | |||
*+10/+8 {{#item:1270015|Fatal Master Shadow Earring}} | |||
*+7/+9 {{#item:1270016|Fatal Master Shadow Pendant}} | |||
*'''Enchants for Master Weapon/Shield? DEX/POW [[Shadow_Enchanting#Master_Shadow_Gear_Enchanting|Check the list of enchants]]''' | |||
*'''Enchants for rest? C.RATE+5 and CRT/Ranged/Crt dmg''' | |||
*'''How to activate 10% Res? Weapon +10 and acces total refine +17 (10/7 or 8/9)''' | |||
| style="background:#EBEBFF;"| Why is the Fatal Set incomplete? To take advantage of Thanatos and we take advantage of that '''10% Bypass Res (20% with hat, 35% with Demonic Wing), 0% Bypass defense, Size Penalty and Immunity Knock-Back'''. | |||
*'''This set need {{#item:4399|[MVP] Thanatos Card}} and {{#item:400723|Yorscalp Crown of Execution}}.''' | |||
*'''Bypass Res it does NOT affect Thanatos; they are different formulas.''' | |||
*'''A variant is also to use {{#item:24767|Mega Blitz Shadow Shield}}+{{#item:9193|Mistress Egg}}.''' | |||
|} | |||
= Build Traps Late Game Gears (Meme Build) = | |||
'''By popular demand, I bring you this WH variant (you can be a Hybrid with a good setup). The damage? Well, decent actually.''' | |||
{| class="mw-collapsible wikitable" style="width: 100%;" | |||
|- | |||
! style="background-color:#0FAD41; color:Black; width: 6% "| Gear | |||
! style="background-color:#6A5ACD; color:Black; width: 7% "| Note | |||
|- style="height: 5em;" | |||
| style="background:#E0FFFF;"| | |||
+15 [A] {{#item:400723|Yorscalp Crown of Execution}} With: | |||
*{{#item:313426|Warrant of Arbiter}} | |||
*{{#item:313409|Strength of Yorscalp Lv3-4}} '''Dmg''' or {{#item:313425|Defense of Yorscalp Lv3-4}} '''Survival''' | |||
*{{#item:4754|Luk+4}} | |||
| style="background:#EBEBFF;"| If you ask me, this is the best hat to date in terms of damage and ignoring res (10%). | |||
|- | |||
| style="background:#E0FFFF;"| | |||
+15 [A] {{#item:400985| Frontier Rune Crown (Wind Hawk)}} With: | |||
*{{#item:314256|Not- Jewel Lv8}} | |||
*{{#item:314245|Time Dimension Jewel (power) Lv3}} | |||
*{{#item:4744|Vit+5}} | |||
| style="background:#EBEBFF;"| '''Experimental, I don't know if that's the BIS, but it's hard to ignore 100%+ Not-Crit''' | |||
|- | |||
| style="background:#E0FFFF;"| | |||
+12 [A] {{#item:400384| Good of Evil (Wind Hawk)}} With: | |||
*{{#item:312021|Evil}} | |||
*{{#item:29708|Melee lvl3}} | |||
| style="background:#EBEBFF;"| Mid Game. | |||
|- | |||
| style="background:#E0FFFF;"| | |||
{{#item:410233|Gambler's Seal}} | |||
*Increases Melee Damage 5% x2 or HP 5% x2 | |||
| style="background:#EBEBFF;"| It all depends on whether or not you have a version of Kiel (to go for ACD or Dmg). | |||
|- | |||
| style="background:#E0FFFF;"| | |||
{{#item:420210|Ace of Diamonds in Mouth (Melee Physical)}} | |||
*Str +5 or Vit +5 | |||
*Increases Melee Damage 7% | |||
| style="background:#EBEBFF;"| you can change it for the {{#item:420269|Ace of Clovers in Mouth (Defense)}} if you want some survival | |||
|- | |||
| style="background:#E0FFFF;"| | |||
+15 [A] {{#item:450169|Nebula Suit of Power}} | |||
*{{#item:310676|Star Cluster of Power Lv3}} | |||
*{{#item:310744|Nebula of Healt Lv3}} | |||
*{{#item:4744|Vit+5}} | |||
| style="background:#EBEBFF;"| The best armor for a long time | |||
|- | |||
| style="background:#E0FFFF;"| | |||
+12 [A] {{#item:510091|Dagger}} | |||
*{{#item:311388|FS}} | |||
*{{#item:311399|Hit}} | |||
*'''Where is? [[Sinful_Weapons|(click here)]] ''' | |||
| style="background:#EBEBFF;"| '''BIS Weapon for Traps Build.''' | |||
|- | |||
| style="background:#E0FFFF;"| | |||
+12 [C] {{#item:460040|Glacier Shield}} | |||
*{{#item:312095 |Inteli}} | |||
*{{#item:312093 |Defense Magic}} | |||
*{{#item:312090 |Defense}} | |||
| style="background:#EBEBFF;"| '''Over 140+ HP, shield, with the possibility of using GTB+Sarah in WH, a tremendous dream come true''' | |||
|- | |||
| style="background:#E0FFFF;"| | |||
+14/+15 [A] {{#item:480349|Circulation of Life Spring}} | |||
*{{#item:313012 |Life of Winter (Strean)}} | |||
*{{#item:312538 |Physical Fruit Lv20}} | |||
*{{#item:312513 |Physical Flower Lv5}} | |||
| style="background:#EBEBFF;"|The garment income alone significantly increases everything (it affects your total by 40%). A lot of grinding and patience. | |||
|- | |||
| style="background:#E0FFFF;"| | |||
+14/+15 [A] {{#item:470335 |Dimension World Boots}} | |||
*{{#item:313908 |Dimension World Crystal (FS)}} | |||
* Any dmg elemental | |||
* Any dmg race | |||
* Checks enchants [[Chapter_1#Dimension_Shoes_&_Enchants|Click here]] | |||
| style="background:#EBEBFF;"| [[Wind_Hawk_Guide_by_Hurt_Locker#Hidden_Tips/Damage_Boost|Here you can see the cards I recommended earlier]] ''' It's the best option, there's no other way, but I can present you with 2 more variations if you want''' | |||
*{{#item:470303 |Yorscalp Boots}} or {{#item:470260 |Gaebolg Boots}}'''they are excellent boots in everything (survival, damage, economy) ''' .''' | |||
|- | |- | ||
| style="background:#E0FFFF;"| | | style="background:#E0FFFF;"| | ||
{{#item:490483|Signet of Circulation Spring}} | |||
*{{#item: | *{{#item:312986 |Signet of Power}} | ||
*{{#item: | *{{#item:312981 |Token of Life}} | ||
| style="background:#EBEBFF;"| Combo with the garment and acce , also important too. | |||
| style="background:#EBEBFF;"| | |||
|- | |- | ||
| style="background:#E0FFFF;"| | | style="background:#E0FFFF;"| | ||
*{{#item:300505 |Seawind Card}} Brute | {{#item:490132 |Power Signet of Star}} | ||
*{{#item:300509 |Letterster Card}} Insect | *{{#item:310696 |Signet of Power Lv5}} x2 | ||
*{{#item:300510 |Cliolima Card}} Demon | *{{#item:313028 |Star Cluster of Power Lv5}} | ||
*{{#item:300511 |Rockstriker Card}} Undead | | style="background:#EBEBFF;"| Combo with acce and armor , also important too. | ||
*{{#item: | |} | ||
*{{#item: | |||
| style="background:#EBEBFF;"| If you have | == Cards == | ||
Here you'll find the cards available for you to use, from the most common to the rarest and most expensive (sorted from best to worst). I hope this helps. | |||
{| class="mw-collapsible wikitable" style="width: 100%;" | |||
|- | |||
! style="background-color:#E33B19; color:Black; width: 3% "| OP/Best | |||
! style="background-color:#6A5ACD; color:Black; width: 3% "| Normal | |||
|- style="height: 5em;" | |||
| style="background:#FFC3B8;"| '''Card options in Hat/Mid:''' | |||
*{{#item:300377|[MVP] Ultra Limacina Card}} '''BIS Card for any class physical''' | |||
| style="background:#EBEBFF;"| '''Card options in Hat/Mid:''' | |||
*{{#item:300360|Sweet Card}} '''Good Dmg''' | |||
*{{#item:4583|Engkanto Card}} '''Good for Venom''' | |||
*{{#item:300174|Melted Poring Card}} '''Good Hp%''' | |||
*{{#item:300528|Yortus Bishop Card}} '''Good Hp%''' | |||
*{{#item:300664|High Incubus Card}} '''Good vs Neutral''' | |||
*{{#item:300564|Heka Card}} '''Good vs Water''' | |||
*{{#item:300562|Medjay Card}} '''Good vs Earth''' | |||
*{{#item:300612|Hanom Card}} '''Good vs Shadow''' | |||
*{{#item:300636|Vulring Card}} '''Good vs Wind''' | |||
*{{#item:300648|Shadow Jailer Card}} '''Good vs Ghost''' | |||
*{{#item:300642|Polluted Silk Frog Card}} '''Good vs Fire''' | |||
*{{#item:300656|Uncanny Frus Card}} '''Good vs Holy''' | |||
|- | |||
| style="background:#FFC3B8;"| '''Card options in Armor:''' | |||
*{{#item:300533|[MVP] Encroached Tan Card}} '''BIS Card for all''' | |||
*{{#item:4610|[MVP] Sarah Card}} '''GTB for Physical jobs, good for Zerocell''' | |||
*{{#item:300445|[MVP] Gaia Pol Card }} '''Good for Hol, CT, Final Battle''' | |||
*{{#item:300007|[MVP] Jewgoliant Card}} '''Good for Hol, Dep2''' | |||
*{{#item:27126|[MVP] Boitata Card}} '''Good for Dep2''' | |||
*{{#item:300021|[MVP] Bone Detardeurus Card}} '''Good for CT''' | |||
*{{#item:4408|[MVP] Gloom Under Night Card}} '''Good for Valky and Geffen''' | |||
*{{#item:4602|[MVP] Realized Amdarais Card}} '''Good for General dmg''' | |||
*{{#item:4601|[MVP] Amdarais Card}} '''Good for General dmg''' | |||
| style="background:#EBEBFF;"| '''Card options in Armor:''' | |||
*{{#item:300376|Two Eyes Dollocaris Card}} '''Good HP/Dmg''' | |||
*{{#item:300646|Encroached Dimik Card}} '''Good Dmg but need {{#item:300644}} ''' | |||
*{{#item:4393}} + {{#item:300271}} | |||
|- | |||
| style="background:#FFC3B8;"| '''Card options in Weapon:''' | |||
*{{#item:4399|[MVP] Thanatos Card}} '''Good in ToT'''(combine it with good Shadow Gear)''' | |||
*{{#item:300532|[MVP] Ghost Ship Capatain Card}} '''Good Vs Boss''' | |||
| style="background:#EBEBFF;"| '''Card options in Weapon:''' | |||
*{{#item:4608|White Knight Card}} + {{#item:4609|Khali Card}} | |||
*{{#item:300519|Yormi Card}} + {{#item:300506|Scalleg Card}} '''All size enemies''' (The Best) | |||
*{{#item:300457|Grey Icewind Card }} + {{#item:300455|Copo Card}} '''Small/Large enemies''' (Good for farming) | |||
*{{#item:27361|Polluted Wander Man Card}} '''Medium/Large enemies''' (It works except small, cheap) | |||
*{{#item:300240|Gan Ceann Card}} '''Large enemies''' (Good for CT; MVP Large) | |||
*{{#item:300241|Brutal Murderer Card}} '''Medium enemies''' (Good for Zerocell; MVP Medium) | |||
*{{#item:4140|Abysmal Knight Card}} '''Good vs Boss''' | |||
|- | |||
| style="background:#FFC3B8;"| '''Card options in Shield:''' | |||
*{{#item:4128|[MVP] GTB}} | |||
| style="background:#EBEBFF;"| '''Card options in Shield:''' | |||
*{{#item:4609}} + {{#item:4608|White Knight Card}} | |||
*{{#item:300379}} | |||
*{{#item:300465}} | |||
|- | |||
| style="background:#FFC3B8;"| '''Card options in Garment:''' | |||
*{{#item:300474|[MVP] Rgan Chief Card}} '''Damage OP''' | |||
*{{#item:4580|[MVP] Kades Card}} '''Survival OP''' | |||
*{{#item:27224|[MVP] Kades Sealed Card}} '''Survival OP''' | |||
*{{#item:4676| [MVP] Ranger Shecil Card}}'''Good for survival/solo''' | |||
| style="background:#EBEBFF;"| '''Card options in Garment:''' | |||
*{{#item:300644}} '''Good Dmg but need {{#item:300646}}''' | |||
*{{#item:300515}} | |||
*{{#item:300271}} '''Good Dmg but need {{#item:4393}}''' | |||
|- | |||
| style="background:#FFC3B8;"| '''Card options in Shoes:''' | |||
*{{#item:300280|[MVP] Broken Thanatos Card}} '''Good for Zerocell''' | |||
*{{#item:300297|[MVP] Gobling King Card}} '''Good vs Brute''' | |||
*{{#item:27383|[MVP] Phantom Amdarais Card }} '''Good if you have {{#item:4601|[MVP] Amdarais Card}} or {{#item:4602|[MVP] Realized Amdarais Card}}''' | |||
| style="background:#EBEBFF;"| '''Card options in Shoes:''' | |||
*{{#item:300514 |Yoster Cleaner Card}} '''Good vs Dragon''' (Good for CT) | |||
*{{#item:300516 |Yoster Collector Card}} '''Good vs Formless''' (Good for HOL) | |||
*{{#item:300505 |Seawind Card}} '''Good vs Brute''' | |||
*{{#item:300509 |Letterster Card}} '''Good vs Insect''' | |||
*{{#item:300510 |Cliolima Card}} '''Good vs Demon''' | |||
*{{#item:300511 |Rockstriker Card}} '''Good vs Undead''' | |||
*{{#item:300559 |Liamette Card}} '''Good vs Fish''' | |||
*{{#item:300561 |Medjed Card}} '''Good vs Angel''' | |||
*{{#item:300638 |Firafflesia Card}} '''Good vs Demi Human''' | |||
*{{#item:300640 |Fire Flower Card}} '''Good vs Plant''' | |||
*{{#item:300443 |Hardrock Titan Card}} '''Good vs Earth''' | |||
|- | |||
| style="background:#FFC3B8;"| '''Card options in Accesory:''' | |||
*{{#item:300565 |[MVP] Guide of Death Card}} '''BIS Card''' | |||
*{{#item:300471|[MVP] Fallen Angel Icelug Card}} '''Good for Dep2''' | |||
*{{#item:300613|[MVP] Peska Card}} '''Good for HOL''' | |||
| style="background:#EBEBFF;"| '''Card options in Accesory:''' | |||
*{{#item:300653}} + {{#item:300650}} '''Good Dmg''' | |||
*{{#item:300467}} | |||
*'''Any Card Hp%''' | |||
|- | |||
|} | |||
== Costume Stones == | |||
The recommended stones have changed over time with the arrival of the 4th job stones. These are the best combination: | |||
{| class="mw-collapsible wikitable" style="width: 25%;" | |||
|- | |||
! style="background-color:#FF862E; color:Black; width: 5% "| Stones | |||
|- style="height: 5em;" | |||
| style="background:#FFD5B8;"| | |||
*{{#item:1002399|Hit Stone (Garment)}} | |||
*{{#item:1002395|Hit Stone (Dual)}} | |||
*{{#item:1002396|Hit Stone (Top)}} | |||
*{{#item:1002397|Hit Stone (Mid)}} | |||
*{{#item:1002398|Hit Stone (Low)}} | |||
|} | |||
== Stats == | |||
* '''STR''' 90+ | |||
* '''AGI''' 90 | |||
* '''VIT''' 90+ | |||
* '''INT''' 90 | |||
* '''DEX''' 120 | |||
* '''LUK''' 90 | |||
== 4th Job Stats (Traits)== | |||
*'''POW''' 105+ | |||
*'''STA''' 0+ | |||
*'''WIS''' 0+ | |||
*'''SPL''' 0 | |||
*'''CON''' 105+ | |||
*'''CRT''' 70+ | |||
== Shadow Gears == | |||
We already know the classic Shadow Gear, but there are variations. Want to see them? | |||
{| class="mw-collapsible wikitable" style="width: 100%;" | |||
|- | |||
! style="background-color:#BA55D3; color:Black; width: 4% "| Gears | |||
! style="background-color:#6A5ACD; color:Black; width: 6% "| Note | |||
|- style="height: 5em;" | |||
|- | |||
| style="background:#F9E2FF;"| | |||
*+10 {{#item:1270132|Trap Shadow Armor}} | |||
*+10 {{#item:1270133|Trap Shadow Shoes}} | |||
*+10 {{#item:24792|Master Shadow Weapon}} | |||
*+10 {{#item:24793|Master Shadow Shield}} | |||
*+10 {{#item:1270007|Trap Shadow Earring}} | |||
*+10 {{#item:1270008|Trap Shadow Pendant}} | |||
*'''Enchants? POW+5 and STA/ Melee''' | |||
*'''Enchants for Master Set? VIT/POW [[Shadow_Enchanting#Master_Shadow_Gear_Enchanting|Check the list of enchants]]''' | |||
| style="background:#EBEBFF;"| '''You can use some of the previous Shadow gear without any problem.''' [[Wind_Hawk_Guide_by_Hurt_Locker#Shadow_Gears|Just Click here]]''' | |||
*'''(Build not compatible with {{#item:4399|[MVP] Thanatos Card}})''' | |||
*'''This set Need {{#item:9193|Mistress Egg}}.''' | |||
|} | |||
= Answers to frequently asked questions = | |||
I've seen some questions about whether to stick with or invest in that gears. I'll try to answer them all (or the most frequently asked ones). | |||
<br/> | |||
{| class="mw-collapsible wikitable" style="width: 100%;" | |||
|- | |||
! style="background-color:#EBC100; color:Black; width: 2% "| Doubt/Question | |||
! style="background-color:#6A5ACD; color:Black; width: 8% "| Answer | |||
|- style="height: 5em;" | |||
|- | |||
| style="background:#FFF1AB;"| | |||
'''I'm new or want to start using the job''' | |||
| style="background:#EBEBFF;"| | |||
If you are looking for how to start an early game with this class, I suggest you check out '''[[Choi%27s_Prerenewbie_Guide_to_Renewal#Gear_Progression_OR_How_I_Think_About_Gear| This Guide(click here)]]''' very complete and will help you get an idea (especially if you are coming from the pre-renewal and you have no idea what's new). | |||
<br> | |||
'''But you're looking for my opinion, right? I recommend this:''' | |||
<br> | |||
{| class="wikitable mw-collapsible mw-collapsed" style="width:85%;" | |||
!Type | |||
!Early Game | |||
!Mid Game | |||
|- style=height:13em | |||
|'''Upper''' | |||
| +10 {{#item:400022|Hat OSAD}} '''Before Lvl 170''' | |||
<br> | |||
+10 {{#item:400266|Hat OSAD}} '''After Lvl 170+''' | |||
*'''Where is? [[OS_/_OS-LT_Headgears|(Click Here)]] ''' | |||
| | |||
+10 {{#item:19484|Temporal Circlet (Ranger)}} | |||
*{{#item:29085}} | |||
*{{#item:29689}} | |||
*{{#item:4753}} | |||
*{{#item:300528|Yortus Bishop Card}} or {{#item:300363|Limacina Card}} | |||
|- | |||
|'''Mid''' | |||
|{{#item:400002|Victory Wings Ears}} '''if need ACD''' | |||
<br> | |||
{{#item:410093|Sealed Chain}} or {{#item:410094|Sealed Chain}} '''if need Critical Rate''' | |||
*'''Cards? [[Wind_Hawk_Guide_by_Hurt_Locker#Cards|(Click Here)]] ''' | |||
| | |||
{{#item:400002|Victory Wings Ears}} '''if need ACD''' | |||
<br><br> | |||
{{#item:410093|Sealed Chain}} or {{#item:410094|Sealed Chain}} ''' if need Critical Rate''' | |||
*'''Cards? [[Wind_Hawk_Guide_by_Hurt_Locker#Cards|(Click Here)]] ''' | |||
|- | |||
|'''Lower''' | |||
|{{#item:420076|Bondage Necklace}} | |||
| | |||
{{#item:420076|Bondage Necklace}} '''Option 1''' | |||
<br> | |||
{{#item:19147|Drop}} '''Option 2''' | |||
*{{#item:310987}} | |||
|- | |||
|'''Armor''' | |||
| +9 {{#item:450090|Sharp Suit}} | |||
*{{#item:300523 |Yordos Executor Card}} | |||
*'''Where is? [[Grace_Set|(click here)]] ''' | |||
| | |||
+9/+10 {{#item:450264|Glacier Armor}} | |||
*{{#item:312065}} | |||
*{{#item:312062}} | |||
*{{#item:312068}} | |||
*{{#item:300523 |Yordos Executor Card}} | |||
|- | |||
|'''Weapon''' | |||
| +11 {{#item:18174|Illusion Hunter Bow}} '''Before Lvl 210, Option 1''' | |||
*{{#item:300610}} x2 | |||
<br> | |||
+11 {{#item:700054|OSAD}} '''Before Lvl 210, Option 2''' | |||
*{{#item:4836}} | |||
*{{#item:4844}} | |||
*{{#item:300610}} x2 | |||
*'''Where is? [[OS_/_OSAD_Weapons|(Click Here)]] ''' | |||
| | |||
+11 {{#item:18174|Illusion Hunter Bow}} '''Before Lvl 210''' | |||
<br><br> | |||
+9 {{#item:700052|Glacier Bow}} '''After Lvl 210+''' | |||
*{{#item:311348}} | |||
*{{#item:311350}} | |||
*{{#item:311352}} | |||
*{{#item:311344}} | |||
<br><br> | |||
+12 [A] {{#item:700059|Dim Glacier Bow}} '''After Lvl 230+''' | |||
*{{#item:311453}} | |||
*{{#item:311308}} x2 | |||
*{{#item:300610}} | |||
*'''Where is? [[Equipment_Issgard|(Click Here)]] ''' | |||
|- | |||
|'''Garment''' | |||
| +9 {{#item:480018|Grace Manteau}} | |||
*{{#item:300261 |Galensis Card}} | |||
*'''Where is? [[Grace_Set|(click here)]] ''' | |||
| | |||
+11 [C] {{#item:480174|PCC}} '''Option 1''' | |||
*{{#item:300261 |Galensis Card}} | |||
*'''Where is? [[Equipment_Crafting#Pirate_Captain's_Coat,_Moan_of_Corruption,_Crown_of_Beelzebub|(Click Here)]] ''' | |||
<br><br> | |||
+9 {{#item:450266|Glacier Manteau}} '''Option 2''' | |||
*{{#item:312072}} or {{#item:312073}} | |||
*{{#item:312070}} | |||
*{{#item:312056}} | |||
*{{#item:300261 |Galensis Card}} | |||
|- | |||
|'''Shoes''' | |||
| +9 {{#item:470020|Grace Boots}} | |||
*{{#item:27256|Blut Hase Card}} or {{#item:300557 |Garling Card}} | |||
*'''Where is? [[Grace_Set|(click here)]] ''' | |||
| | |||
+9/+10 {{#item:470196|Glacier Boots}} '''Option 1''' | |||
*{{#item:312076}} | |||
*{{#item:27256|Blut Hase Card}} or {{#item:300557 |Garling Card}} | |||
<br> | |||
+9 [B] {{#item:470260 |Gaebolg Boots}} '''Option 2''' | |||
*{{#item:27256|Blut Hase Card}} or {{#item:300557 |Garling Card}} | |||
|- | |||
|'''Accesorys''' | |||
| {{#item:490019|Grace Ring}} | |||
*{{#item:300278|Void Mimic Card}} | |||
*'''Where is? [[Grace_Set|(click here)]] ''' | |||
| | |||
{{#item:490106|Gray Wolf Pendant}} and {{#item:490107|Gray Wolf Ring}} '''Option 1''' | |||
*{{#item:310632}} x2 | |||
*{{#item:300278|Void Mimic Card}} x2 | |||
<br> | |||
+9 [B] {{#item:490302 |Soul ring}} x2 '''Option 2''' too version {{#item:490305 |Soul ring}} '''Left''' + {{#item:490302 |Soul ring}} '''Right''' | |||
*{{#item:311978}} '''any Lvl''' | |||
*{{#item:311953}} or {{#item:311963}} or {{#item:311968}} '''any Lvl''' | |||
*{{#item:300278|Void Mimic Card}} x2 | |||
*'''Where is? [[Varmundt%27s_Biosphere#Rune_Rings|(click here)]] ''' | |||
|- | |||
|'''Stats/Traits''' | |||
| | |||
* '''STR''' 1+ | |||
* '''AGI''' 80 | |||
* '''VIT''' 90 | |||
* '''INT''' 90 | |||
* '''DEX''' 130 | |||
* '''LUK''' 125 | |||
| | |||
Stats are tuned according to your early game and cards, recommended Traits are the same [[Wind_Hawk_Guide_by_Hurt_Locker#4th_Job_Stats_(Traits)|(Click Here)]] | |||
|- | |||
|'''Shadow Gears''' | |||
| | |||
*{{#item:24693}} | |||
*{{#item:24694}} | |||
*{{#item:24695}} | |||
*{{#item:24696}} | |||
*{{#item:24697}} | |||
*{{#item:24708}} | |||
| | |||
Your first Shadow Gear will give you a lot of damage, acd, etc | |||
|} | |||
''' This is the gear I can recommend, your progress is like this: | |||
*'''Remember to progress gradually, doing the quests in 17.1 and 17.2 until you reach Ep21 if possible.''' | |||
*'''Find a place to farm'''. Rudus3-4 and Niff1-2 are excellent places to start, the important thing is to find a comfortable place to start. | |||
*'''Which part of the gear can I start with?''' | |||
'''1-First Weapon''' {{#item:700093|Dimensions Wind Crossbow}} '''You can buy it +12 [A] in approx.200m+''' | |||
<br><br> | |||
'''2-Hat''' is fine with {{#item:19484|Temporal Circlet (Ranger)}} after changing. '''You can buy +10 full in approx.70m+''' | |||
<br><br> | |||
'''3-Armor''' {{#item:450172|Nebula Suit of Creative}} '''You can buy it +9 full enchant in approx. 350m+''' | |||
<br><br> | |||
'''4-Boots''' +9 [B] {{#item:470260 |Gaebolg Boots}} with {{#item:313090}}|{{#item:313094}}|{{#item:313098}} '''You can buy it +12 [A] full enchant in approx. 300m+''' | |||
<br><br> | |||
'''5-Shadow Gears'''.'''You can buy it +10 in approx.250m+ per piece''' | |||
<br><br> | |||
'''The rest will come on its own''' | |||
|- | |||
| style="background:#FFF1AB;"| | |||
'''How do I solve the weight problem?''' | |||
| style="background:#EBEBFF;"| | |||
Don't worry about the low STR, to increase the weight there is the {{#item:7776|Gym Pass}}. It is available at the Muh Shop | |||
|- | |||
| style="background:#FFF1AB;"| | |||
'''What can I use if I don't have any Mvp?''' | |||
| style="background:#EBEBFF;"| | |||
In the guide section I order from best to worst card to use (based on my experience, if it's not in the guide, it's because I don't see it as profitable to use). | |||
|- | |||
| style="background:#FFF1AB;"| | |||
'''What combination can I use for farming? Gears drops''' | |||
| style="background:#EBEBFF;"| | |||
You can use this combination (for more information '''[[Increase_item_drop_gears#Equipment_that_increases_drop_rate|Click Here]]''') | |||
* +9 {{#item:19157|Drop hat}} or +12 {{#item:19136|Chun E}} | |||
* +12 {{#item:15186|Kafra Uniform}} | |||
*{{#item:19147|Drops Balloon}} or {{#item:19095|Happy Balloon}} | |||
*{{#item:19117|Poring Sunglasses}} or {{#item:19118|Poring Sunglasses+}} | |||
* +12 {{#item:20802|Teleport Amistr Bag}} or {{#item:20804|Greed Amistr Bag}} or {{#item:20805|Increase Agility Amistr Bag}} or any version | |||
* +12 {{#item:22049|Sol Shoes}} or any version Shoes | |||
|- | |||
| style="background:#FFF1AB;"| | |||
'''Combo TDRC''' {{#item:400539| Time Dimensions Rune Crown (Wind Hawk)}} | |||
VS | |||
'''Combo Frontier''' {{#item:400985| Frontier Rune Crown (Wind Hawk)}} | |||
*'''1. What is the best?''' | |||
*'''2. Is it the best for everything?''' | |||
*'''3. What does the weapon need to be strong?''' | |||
| style="background:#EBEBFF;"| | |||
*'''R1.''' It depends on how you look at it; both aim for practically the same thing, except one allows for an additional card slot on the weapon (3 in total), which allows for more damage; Warrior, Thanatos, etc. '''Short answer: look at the tests''' | |||
<br> | |||
*'''R2.''' Easy, Combo TDRC = Crescive Bolt and Gale Storm, Combo Frontier is same, just more easy why is 1 bow for both builds '''(but Yorscap Crown + Demonic Wing is better for CB).''' | |||
<br> | |||
*'''R3.''' '''The weapon enchant needs at least 60%/78% critical damage to be effective and 20% Long Range, C. Rate NO good.''' If you don't have that, you can keep what you have and then look for what you need (the choice is yours). | |||
|- | |||
| style="background:#FFF1AB;"| | |||
{{#item:400723|Yorscalp Crown of Execution}} | |||
*'''1. Is it the best for everything?''' | |||
*'''2. What is the best enchant?''' | |||
*'''3. What does the hat need to be strong?''' | |||
| style="background:#EBEBFF;"| | |||
*'''R1.''' Yes and no, for Crescive Bolt is, it's the best, for Gale Storm, it's also good, at the cost of spam (If you prefer spam, use TDRC or Frontier). '''Either way, Crescive Bolt and Gale Storm have almost the same build, just change weapon.''' | |||
*'''R2.''' It's up to you, you can search for a lvl3-4 enchant and then get the {{#item:313426|Warrant of Arbiter}} '''(That's the most important one, that's why the hat is created).''' | |||
'''If you are missing acd, use {{#item:313421|Speed of Yorscalp Lv3-4}} or {{#item:313417|Smart of Yorscalp Lv3-4}} you solve that problem. You wouldn't need any version Kiel''' | |||
<br> | |||
'''If you have any version Kiel use {{#item:313409|Strength of Yorscalp Lv3-4}} or {{#item:313425|Defense of Yorscalp Lv3-4}}''' | |||
<br><br> | |||
*'''R3.''' You can use it from +12 grade A, with {{#item:313426|Warrant of Arbiter}} without needing the {{#item:300595|Epesto Walther Megas Card}} (It's stronger if you have the card). | |||
|- | |||
| style="background:#FFF1AB;"| | |||
'''Crescive Bolt Vs Gale Storm''' | |||
| style="background:#EBEBFF;"| '''Each build serves its purpose: one is perfect for single-target''', ideal for MVPs or concentrating damage, '''while the other is for AoE to clear large groups of enemies.''' But what about the damage difference between the different builds? Here it is: | |||
'''NOTE:This includes all the recommended options from the guide; this helps clarify any doubts and determine the best option. The final decision is yours.''' | |||
*'''Crescive Bolt''' | |||
{| class="wikitable mw-collapsible mw-collapsed" style="width:85%;" | |||
! style="background-color:#D115EB; |Using | |||
! style="background-color:#E813CE; |Testing | |||
|- style=height:13em | |||
| style="background-color:#A6E8F5; "| '''+12 A Combo TDRC ''' | |||
*{{#item:312752|Acute Jewel Lv4}} + {{#item:312700|Agi Jewel lvl3}} | |||
*+12 [A] {{#item:700093|Dimensions Wind Crossbow}} | |||
*{{#item:311934}} + {{#item:312800|Neutral/Poison}} | |||
*{{#item:300519|Yormi Card}} + {{#item:300506|Scalleg Card}} | |||
| style="background-color:#A6E8F5; " align="center" |[[File:combodimension.png|250px]] | |||
|- | |||
| style="background-color:#8CFAF2; "| '''+12 A Combo Frontier ''' | |||
*{{#item:312750|Acute Jewel lvl2}} + {{#item:312700|Agi Jewel lvl3}} | |||
*+12 [A] {{#item:700119|Frontier Wind Bow}} '''45% Critical Damage''' | |||
*{{#item:300519|Yormi Card}}+ {{#item:300506|Scalleg Card}} + {{#item:4140|Abysmal Knight Card}} | |||
*''' With the Frontier buff is 23b+ DPS''' | |||
| style="background-color:#8CFAF2; " align="center" |[[File:combofrontier.png|250px]] | |||
|- | |||
| style="background-color:#8CFA9B; "| '''+15 A {{#item:400723|Yorscalp Crown of Execution}}''' | |||
*+12 [A] {{#item:700127|Dimenonic Wing}} '''78% Critical Damage''' | |||
*{{#item:300519|Yormi Card}}+ {{#item:300506|Scalleg Card}} + {{#item:300595|Epesto Card}} | |||
| style="background-color:#8CFA9B; " align="center" |[[File:yorscalp.demonic.png|250px]] | |||
|- | |||
| style="background-color:#8CFA9B; "| '''+15 A {{#item:400723|Yorscalp Crown of Execution}}''' | |||
*+12 [A] {{#item:700093|Dimensions Wind Crossbow}} | |||
*{{#item:311934}} + {{#item:312800|Neutral/Poison}} | |||
*{{#item:300519|Yormi Card}}+ {{#item:300506|Scalleg Card}} | |||
| style="background-color:#8CFA9B; " align="center" |[[File:yorscalp.dimension.png|250px]] | |||
|} | |||
*'''Gale Storm''' | |||
{| class="wikitable mw-collapsible mw-collapsed" style="width:85%;" | |||
! style="background-color:#D115EB; |Using | |||
! style="background-color:#E813CE; |Testing | |||
|- style=height:13em | |||
| style="background-color:#A6E8F5; "| '''+12 A Combo TDRC ''' | |||
*{{#item:312752|Acute Jewel Lv4}} + {{#item:312700|Agi Jewel lvl3}} | |||
*+12 [A] {{#item:700108|Time Gap Wind Bow}} | |||
*{{#item:311934}} | |||
*{{#item:300519|Yormi Card}} + {{#item:300506|Scalleg Card}} | |||
| style="background-color:#A6E8F5; " align="center" | [[File:test.timegap.png|250px]] | |||
|- | |||
| style="background-color:#8CFAF2; "| '''+12 A Combo Frontier ''' | |||
*{{#item:312750|Acute Jewel lvl2}} + {{#item:312700|Agi Jewel lvl3}} | |||
*+12 [A] {{#item:700119|Frontier Wind Bow}} '''45% Critical Damage''' | |||
*{{#item:300519|Yormi Card}}+ {{#item:300506|Scalleg Card}} + {{#item:4140|Abysmal Knight Card}} | |||
| style="background-color:#8CFAF2; " align="center" |[[File:test.frontier.png|250px]] | |||
|- | |||
| style="background-color:#8CFA9B; "| '''+15 A {{#item:400723|Yorscalp Crown of Execution}}''' | |||
*+12 [A] {{#item:700108|Time Gap Wind Bow}} | |||
*{{#item:311934}} | |||
*{{#item:300519|Yormi Card}} + {{#item:300506|Scalleg Card}} | |||
| style="background-color:#8CFA9B; " align="center" |[[File:yorscalp.timegap.png|250px]] | |||
|- | |- | ||
| style="background-color:#8CFA9B; "| '''+15 A {{#item:400723|Yorscalp Crown of Execution}}''' | |||
*+12 [A] {{#item:700119|Frontier Wind Bow}} '''45% Critical Damage''' | |||
*{{#item:300519|Yormi Card}}+ {{#item:300506|Scalleg Card}} + {{#item:4140|Abysmal Knight Card}} | |||
| style="background-color:#8CFA9B; " align="center" |[[File:yorscalp.frontier.png|250px]] | |||
|} | |||
You might be wondering, why Yorscalp Crown for Gale Storm? Well, it provides a significant damage boost thanks to the resistance omission. The difference becomes noticeable as you progress to content like ToT (in cases like ZeroCell, I would recommend using the Frontier combo for increased speed). As for Crescive Bolt against MVPs, it's the same principle, no mystery there. However, '''both depend on a certain factor: the buff included in each (Fronter Buff and Demonic Buff)'''. It's important to take advantage of these buffs when using them. | |||
*''' Demonic Buff: 15% Range damage, Critical and 15% RES bypass (if you change weapons you lose the buff)''' | |||
*''' Frontier Buff: Critical damage, C. rate, Critical and Gale Storm cooldown reduction (NOTE: The buff is not lost when changing equipment, so you can use it in different ways. You just need to renew it periodically).''' | |||
*'''Frontier Buff''' | |||
{| class="wikitable mw-collapsible mw-collapsed" style="width:35%;" | |||
! style="background-color:#E813CE; |Testing | |||
|- style=height:13em | |||
| style="background-color:#A6E8F5; "| '''+12 A Combo TDRC in Gale Storm''' | |||
[[File:gale.bufffrontier.timegap.png|250px]] | |||
|- | |||
| style="background-color:#8CFAF2; "| '''+12 A Combo Frontier in Gale Storm''' | |||
[[File:gale.bufffrontier.yorscal.png|250px]] | |||
|- | |||
| style="background-color:#8CFA9B; "| '''+15 A {{#item:400723|Yorscalp Crown of Execution}} + {{#item:700108|Time Gap Wind Bow}} in Gale Storm''' | |||
[[File:gale.bufffrontier.yorscal.gap.png|250px]] | |||
|- | |||
| style="background-color:#8CFA9B; "| '''+15 A {{#item:400723|Yorscalp Crown of Execution}} + {{#item:700119|Frontier Wind Bow}} in Gale Storm''' | |||
[[File:gale.bufffrontier.yorscal.fronti.png|250px]] | |||
|- | |||
| style="background-color:#8CFA9B; "| '''+15 A {{#item:400723|Yorscalp Crown of Execution}} + {{#item:700127|Dimenonic Wing}} in Crescive Bolt''' | |||
[[File:Cb.bufffrontier.png|250px]] | |||
|} | |||
*'''Demonic Buff''' | |||
{| class="wikitable mw-collapsible mw-collapsed" style="width:35%;" | |||
! style="background-color:#E813CE; |Testing | |||
|- style=height:13em | |||
| style="background-color:#8CFA9B; "| '''+15 A {{#item:400723|Yorscalp Crown of Execution}} + {{#item:700127|Dimenonic Wing}} in Crescive Bolt''' | |||
[[File:Cb.buffdemonic.png|250px]] | |||
|} | |||
|- | |||
| style="background:#FFF1AB;"| | |||
'''Rune Tablet''' | |||
| style="background:#EBEBFF;"| These are special runes that, when certain requirements are met, can grant a permanent advantage. *'''Where is? [[Rune_Tablet_System#Tablets|(Click Here)]] ''' | |||
{| class="wikitable mw-collapsible mw-collapsed" style="width:85%;" | |||
!Option 1 ''' (Demigod Set) ''' | |||
!Option 2 ''' (Encroachment Set) ''' | |||
!Option 3 ''' (Company Set) ''' | |||
|- style=height:13em | |||
| | |||
*2 '''pieces:''' Damage vs. Boss Class +10% | |||
*3 '''pieces:''' Damage vs. Boss Class +15%, For Each 3 upgrades: Damage vs. Boss Class +3% | |||
| | |||
* '''2 pieces:''' Physical damage vs Boss Class +20%, Physical damage vs Normal Class +5%, For each upgrade: Physical damage vs Normal / Boss Class +1% | |||
| | |||
* '''2 pieces:''' Melee / Ranged physical damage +6%, For each 3 upgrades: Melee / Ranged physical damage +1% | |||
* '''4 pieces:''' P.ATK +20, Melee / Ranged physical damage +4% | |||
* '''6 pieces:''' CRI +15, Critical damage +35%, For each 3 upgrades: Critical damage +5% | |||
|} | |||
* '''Option 1''' It's definitely a BIS. It allows you to deal massive damage to bosses and works for both physical and magical jobs. | |||
* '''Option 2''' The cheapest set among the options, it increases damage for normal and boss attacks while being more generic. It only works for physical jobs. | |||
* '''Option 3''' This one is curious; according to reviews, it's a pretty strong and good set (it might even be the best, but more evidence is needed). | |||
|- | |||
| style="background:#FFF1AB;"| | |||
'''Which card combination is best for the weapon?''' | |||
| style="background:#EBEBFF;"| | |||
It depends a lot on the situation you're in. '''If you're focusing on using Gale Storm''', you can use this: | |||
*{{#item:300519|Yormi Card}} + {{#item:300506|Scalleg Card}} '''All size enemies''' | |||
*{{#item:300610|Guerrero Card}} x2 '''Damage and Survivability''' | |||
*{{#item:300610|Guerrero Card}} + {{#item:27361|Polluted Wander Man Card}} '''Medium/Large enemies''' | |||
*{{#item:300610|Guerrero Card}} + {{#item:300455|Copo Card}} '''Small/Medium enemies''' | |||
<br> | |||
{{#item:300610|Guerrero Card}} It's great to ignore, providing a 15 critical rate, elemental/size damage, and 5% elemental resistance. For us, who don't use shields, it's perfect.''' You can use it to farm or if you want to survive while dealing damage.''' | |||
<br><br> | |||
Now, '''in the case of Crescive Bolt''', it's somewhat "similar" since it's a single-target weapon; you have to concentrate on which enemy you want to damage. And of course, it depends on what you use. | |||
'''Only if you use {{#item:400723|Yorscalp Crown of Execution}}''' | |||
*{{#item:300519|Yormi Card}} + {{#item:300506|Scalleg Card}} '''All size enemies''' if you have {{#item:700127|Demonic Wing}} | |||
*{{#item:300595|Epesto Walther Megas Card}} + {{#item:300610|Guerrero Card}} '''Damage and Survivability''' | |||
*{{#item:300595|Epesto Walther Megas Card}} + {{#item:27361|Polluted Wander Man Card}} '''Medium/Large enemies''' | |||
*{{#item:300595|Epesto Walther Megas Card}} + {{#item:300240|Gan Ceann Card}} '''Large enemies''' | |||
*{{#item:300595|Epesto Walther Megas Card}} + {{#item:300241|Brutal Murderer Card}} '''Medium enemies''' | |||
*{{#item:300595|Epesto Walther Megas Card}} + {{#item:300455|Copo Card}} '''Small/Medium enemies''' | |||
|- | |||
| style="background:#FFF1AB;"| | |||
'''Which enchants combination is best for the Dimension/Time gap weapon?''' | |||
| style="background:#EBEBFF;"| | |||
Depending on the combination, you can have a large increase in damage, you can use this: | |||
<br> | |||
'''Instance''' | |||
*{{#item:311928|Dragon/Fish}} + {{#item:312800|Neutral/Poison}}'''Good for CT''' | |||
*{{#item:311934|Formless/Angel}} + {{#item:312800|Neutral/Poison}}'''Good for HOL''' | |||
*{{#item:311937|DemiHuman/Insect}} + {{#item:312800|Neutral/Poison}}'''Good for Final Battle/Tan''' | |||
*{{#item:311934|Formless/Angel}} + {{#item:311864|Fire/Shadow}}'''Good for Recreated Dark Whisper/Ch1''' | |||
<br> | |||
'''Farming''' | |||
*{{#item:311934|Formless/Angel}} + {{#item:311864|Fire/Shadow}} '''Good for Dep1/Dep2,Valky Dun''' or {{#item:311874|Wind/Earth}} '''Good for Dep2''' | |||
*{{#item:311934|Formless/Angel}} + {{#item:311869|Water/Holy}} '''Good for Temple''' | |||
*{{#item:311940|Brute/Undead}} + {{#item:312800|Neutral/Poison}} '''Good for Venom''' | |||
<br> | |||
''' Remember, you can make multiple combinations, but these are the "most popular" ones currently.''' | |||
|} | |||
=Honorable Mention= | |||
Special thanks to the following individuals/guild. Without them, I wouldn't have been able to obtain so much privileged information. | |||
<br> | |||
*'''Meer (BlackIntels)''' | |||
*'''Zumi''' | |||
*'''Kain''' | |||
*'''Zoraka''' | |||
*'''IceFeather''' | |||
*'''Eneru''' | |||
*'''Pixel Legends (Guild)''' | |||
*'''Donylicious''' | |||
[[Category:Wind Hawk]] | [[Category:Wind Hawk]] | ||
Latest revision as of 19:14, 5 May 2026
| This guide will receive continuous updates | |
|---|---|
| Any questions to the #archer channel |
| Hurt Locker | |||||
|---|---|---|---|---|---|
 | |||||
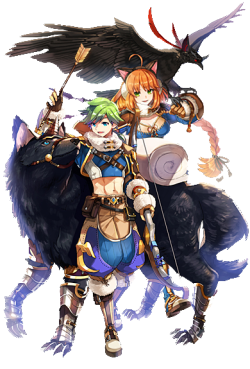 | |||||
| 4th Job Bonus | |||||
POW
|
STA
|
WIS
|
SPL
|
CON
|
CRT
|
| 7 | 4 | 5 | 4 | 9 | 4 |
Introduction
Hello! Some of you may already know me (from previous servers), but if not, you will. My name is Hurt Locker, I'm a WH main, been in MuhRO for a long time. I designed this guide not only to update previous guides, but also to offer a fresh perspective on the job based on my experience and acquired knowledge. I hope you find it useful and... enjoy it!
Always check the market (prices may vary) and the final damage depends on your build and equipment (progress is different and everyone goes at their own pace, you have to support each other).
Hidden Tips/Damage Boost
There are ways to increase your damage, do you know which ones? Even some old stuff still works
| Gears/Consumables | Note |
|---|---|
|
It's all you need to boost your damage (the best arsenal at your disposal) |
|
Perfect card combo for neutral objectives, Hol, CT for example (Super necessary for party. You can't leave home without it) |
|
If you lack critical rate, these are your options
|
|
It doesn't have much mystery, more damage for a few seconds (if the PC allows it; if not, skip) |
Late Game Gears
Now the questions will be answered. What is the WH late game? Here it is
| Gear | Note |
|---|---|
|
+15 [A]
|
If you ask me, this is the best hat to date in terms of damage and ignoring res (10%). It's a huge investment and is only focused on Crescive Bolt, the only compatible build (Gale Storm can do it too, if you don't mind losing some spam).
|
|
+15 [A]
|
It's a good hat, even if you're just starting out late game. It grants you crit rate, fixed damage, and combos with your weapon (either dimension or time gap).
|
|
+15 [A]
|
Hat Late Game, its enormous potential will determine if you want to further refine the Gale Storm build. Recommended? Only if you like mini-maxing.
|
|
|
It all depends on whether or not you have a version of Kiel (to go for ACD or Dmg). |
|
|
you can change it for the |
|
+15 [A]
|
The best armor for a long time |
|
+15 [A]
|
BIS bow for Crescive Bolt Build. Now, in the case of using |
|
+15 [A] |
God bow for Crescive Bolt Build. Now, in the case of using |
|
+15 [A] |
BIS bow for the Gale Storm build, allowing for near-instant spamming. It's great for Dep2 or for farming Venom/Temple. |
|
+15 [A]
|
BIS bow for the Gale Storm build, allowing for near-instant spamming. It's great for Dep2 or for farming Venom/Temple. It needs near-perfect enchantments to be BIS; otherwise, it's Time Gap Bow. |
|
+14/+15 [A]
|
The garment income alone significantly increases everything (it affects your total by 40%). A lot of grinding and patience. |
|
+14/+15 [A]
|
Here you can see the cards I recommended earlier Based on the tests provided by GM Icecold,
|
|
|
Combo with the garment and acce , also important too. |
|
|
Combo with acce and armor , also important too.
|
Cards
Here you'll find the cards available for you to use, from the most common to the rarest and most expensive (sorted from best to worst). I hope this helps.
| OP/Best | Normal |
|---|---|
Card options in Hat/Mid:
|
Card options in Hat/Mid:
|
Card options in Armor:
|
Card options in Armor:
|
Card options in Weapon:
|
Card options in Weapon:
|
Card options in Garment:
|
Card options in Garment:
|
Card options in Shoes:
|
Card options in Shoes:
|
Card options in Accesory:
|
Card options in Accesory:
|
Stats
- STR 1+
- AGI 90
- VIT 90+
- INT 90
- DEX 130
- LUK 100+
Depending on which cards you use in the garment, it will adjust to best suit your needs. There are 4 popular options, such as ![]() [MVP] Ranger Shecil Card (4676) ,
[MVP] Ranger Shecil Card (4676) , ![]() [MVP] Yortus Arbiter Card (300530) ,
[MVP] Yortus Arbiter Card (300530) , ![]() [MVP] Snow Angel Card (300473) and
[MVP] Snow Angel Card (300473) and ![]() Fireloop Card (300637) .
Fireloop Card (300637) .
Now you're wondering, who's better? Just look at this (Any option is good. Btw in this test is with all gears +15)
| Using | Testing |
|---|---|
* |

|
* |

|
* |
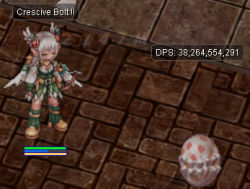
|
|
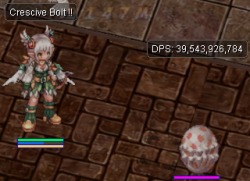
|
4th Job Stats (Traits)
- POW 105+
- STA 0+
- WIS 0+
- SPL 0
- CON 70+
- CRT 105+
*POW and CRT are the most important, you can distribute the remaining points to STA or WIS (CON is more damage/flee, it's your decision).
Costume Stones
The recommended stones have changed over time with the arrival of the 4th job stones. These are the best combination:
| Stones | Stones for x1 | Other options |
|---|---|---|
|
|
|
Shadow Gears
We already know the classic Shadow Gear, but there are variations. Want to see them?
| Gears | Note |
|---|---|
|
The standard set has not changed much, if you require more acd you have +10 |
|
The best Shadow gear for WH has finally arrived. It's not too mysterious, it meets the 50% ACD requirements, and you should definitely use it
|
|
Why is the Fatal Set incomplete? To take advantage of Thanatos and we take advantage of that 10% Bypass Res (20% with hat, 35% with Demonic Wing), 0% Bypass defense, Size Penalty and Immunity Knock-Back.
|
Build Traps Late Game Gears (Meme Build)
By popular demand, I bring you this WH variant (you can be a Hybrid with a good setup). The damage? Well, decent actually.
| Gear | Note |
|---|---|
|
+15 [A]
|
If you ask me, this is the best hat to date in terms of damage and ignoring res (10%). |
|
+15 [A]
|
Experimental, I don't know if that's the BIS, but it's hard to ignore 100%+ Not-Crit |
|
+12 [A]
|
Mid Game. |
|
|
It all depends on whether or not you have a version of Kiel (to go for ACD or Dmg). |
|
|
you can change it for the |
|
+15 [A]
|
The best armor for a long time |
|
+12 [A]
|
BIS Weapon for Traps Build. |
|
+12 [C] |
Over 140+ HP, shield, with the possibility of using GTB+Sarah in WH, a tremendous dream come true |
|
+14/+15 [A]
|
The garment income alone significantly increases everything (it affects your total by 40%). A lot of grinding and patience. |
|
+14/+15 [A]
|
Here you can see the cards I recommended earlier It's the best option, there's no other way, but I can present you with 2 more variations if you want
|
|
|
Combo with the garment and acce , also important too. |
|
|
Combo with acce and armor , also important too. |
Cards
Here you'll find the cards available for you to use, from the most common to the rarest and most expensive (sorted from best to worst). I hope this helps.
| OP/Best | Normal |
|---|---|
Card options in Hat/Mid:
|
Card options in Hat/Mid:
|
Card options in Armor:
|
Card options in Armor:
|
Card options in Weapon:
|
Card options in Weapon:
|
Card options in Shield:
|
Card options in Shield:
|
Card options in Garment:
|
Card options in Garment:
|
Card options in Shoes:
|
Card options in Shoes:
|
Card options in Accesory:
|
Card options in Accesory:
|
Costume Stones
The recommended stones have changed over time with the arrival of the 4th job stones. These are the best combination:
| Stones |
|---|
|
Stats
- STR 90+
- AGI 90
- VIT 90+
- INT 90
- DEX 120
- LUK 90
4th Job Stats (Traits)
- POW 105+
- STA 0+
- WIS 0+
- SPL 0
- CON 105+
- CRT 70+
Shadow Gears
We already know the classic Shadow Gear, but there are variations. Want to see them?
| Gears | Note |
|---|---|
|
You can use some of the previous Shadow gear without any problem. Just Click here
|
Answers to frequently asked questions
I've seen some questions about whether to stick with or invest in that gears. I'll try to answer them all (or the most frequently asked ones).
| Doubt/Question | Answer | ||||||||||||||||||||||||||||
|---|---|---|---|---|---|---|---|---|---|---|---|---|---|---|---|---|---|---|---|---|---|---|---|---|---|---|---|---|---|
|
I'm new or want to start using the job |
If you are looking for how to start an early game with this class, I suggest you check out This Guide(click here) very complete and will help you get an idea (especially if you are coming from the pre-renewal and you have no idea what's new).
This is the gear I can recommend, your progress is like this:
1-First Weapon | ||||||||||||||||||||||||||||
|
How do I solve the weight problem? |
Don't worry about the low STR, to increase the weight there is the | ||||||||||||||||||||||||||||
|
What can I use if I don't have any Mvp? |
In the guide section I order from best to worst card to use (based on my experience, if it's not in the guide, it's because I don't see it as profitable to use). | ||||||||||||||||||||||||||||
|
What combination can I use for farming? Gears drops |
You can use this combination (for more information Click Here)
| ||||||||||||||||||||||||||||
|
Combo TDRC
|
| ||||||||||||||||||||||||||||
|
|
If you are missing acd, use
| ||||||||||||||||||||||||||||
|
Crescive Bolt Vs Gale Storm |
Each build serves its purpose: one is perfect for single-target, ideal for MVPs or concentrating damage, while the other is for AoE to clear large groups of enemies. But what about the damage difference between the different builds? Here it is:
NOTE:This includes all the recommended options from the guide; this helps clarify any doubts and determine the best option. The final decision is yours.
You might be wondering, why Yorscalp Crown for Gale Storm? Well, it provides a significant damage boost thanks to the resistance omission. The difference becomes noticeable as you progress to content like ToT (in cases like ZeroCell, I would recommend using the Frontier combo for increased speed). As for Crescive Bolt against MVPs, it's the same principle, no mystery there. However, both depend on a certain factor: the buff included in each (Fronter Buff and Demonic Buff). It's important to take advantage of these buffs when using them.
| ||||||||||||||||||||||||||||
|
Rune Tablet |
These are special runes that, when certain requirements are met, can grant a permanent advantage. *Where is? (Click Here)
| ||||||||||||||||||||||||||||
|
Which card combination is best for the weapon? |
It depends a lot on the situation you're in. If you're focusing on using Gale Storm, you can use this:
| ||||||||||||||||||||||||||||
|
Which enchants combination is best for the Dimension/Time gap weapon? |
Depending on the combination, you can have a large increase in damage, you can use this:
|
Honorable Mention
Special thanks to the following individuals/guild. Without them, I wouldn't have been able to obtain so much privileged information.
- Meer (BlackIntels)
- Zumi
- Kain
- Zoraka
- IceFeather
- Eneru
- Pixel Legends (Guild)
- Donylicious


