16.2 Terra Gloria
Antes de empezar cualquier misión, ¡haz la New World Quest!
Temporal Tina is an NPC who sells Episode Clear Tickets. She is located in Prontera (prontera 140, 174) and the Main Office (main_office 94, 59).

|

|
| (prontera 140, 174) | (main_office 94, 59) |
Episode Clear Tickets
Un Episode Clear Ticket es un objeto consumible que te permite saltarte la misión principal de un episodio. Al usarlo, obtendrás acceso instantáneo a todos los NPCs, mazmorras y tiendas de equipo que normalmente requerirían que completaras el episodio o cumplieras ciertas misiones para desbloquear.
Ten en cuenta que al usar un Episode Clear Ticket, te perderás las recompensas de las misiones, como EXP, Zeny, reputación y objetos.
Algunos Episode Clear Tickets tienen requisitos previos. Si es tu primer personaje en el servidor, aún tendrás que avanzar desde Episode 17.2 hasta el último episodio normalmente.
Consulta la tabla de abajo para ver los requisitos y precios de cada ticket.
| Episode Clear Tickets | |||
|---|---|---|---|
| Episode Ticket | Nivel | Coste en Zeny | Requisitos |
 Episode 14 Clear Ticket (1000284) Episode 14 Clear Ticket (1000284)
|
160 | 1,000,000 | Ninguno |
 Episode 15 Clear Ticket (1000286) Episode 15 Clear Ticket (1000286)
|
140 | 1,000,000 | Ninguno |
 Episode 16 Clear Ticket (1000282) Episode 16 Clear Ticket (1000282)
|
100 | 1,000,000 | None |
 Episode 17.1 Clear Ticket (1000285) Episode 17.1 Clear Ticket (1000285)
|
110 | 2,000,000 | None |
 Episode 17.2 Clear Ticket (1000287) Episode 17.2 Clear Ticket (1000287)
|
130 | 4,000,000 | The current character has cleared Episode 17.1 |
 Episode 18 Clear Ticket (1000288) Episode 18 Clear Ticket (1000288)
|
170 | 9,000,000 | The current character has cleared Episode 17.2 |
 Episode 19 Clear Ticket (1000988) Episode 19 Clear Ticket (1000988)
|
200 | 12,000,000 | The current character has cleared Episode 18 AND one character in the master account has cleared Episode 19 and the side quests "Purification Saint" and "Frozen Sea" |
 Episode 20 Clear Ticket (1001214) Episode 20 Clear Ticket (1001214)
|
215 | 16,000,000 | The current character has cleared Episode 19 AND one character in the master account has cleared Episode 20 |
 Episode 21 Clear Ticket (1001215) Episode 21 Clear Ticket (1001215)
|
230 | 32,000,000 | The current character has cleared Episode 20 AND one character in the master account has cleared Episode 21 |
 Chapter 1 Clear Ticket (50098) Chapter 1 Clear Ticket (50098)
|
265 | 64,000,000 | One character in the master account has cleared Chapter 1 and complete Zero Cell Sector |
How to check which episode I have unlocked?
Right now, we don't have a feature which simply tells you which episode you are.
So here's some things you can do to check it by yourself:
| Episode Quest | ||
|---|---|---|
| Episode | Steps | Description |
| Episode 15 | Click on Warper > Instances > Central Laboratory. | If you can go, you have completed the Episode 15 quest. |
| Episode 16 | Click on Warper > Instances > Heart Hunter War Base. | If you can go, you have completed the Episode 16 quest. |
| Episode 17.1 | Use @go 46. (Cor) | If you can go, you have completed the Episode 17.1 quest. |
| Episode 17.2 | Use @go 47. (Varmundt's Mansion) | If you can go, you have completed the Episode 17.2 quest. |
| Episode 18 | Use @go 51. (Gray Wolf Village) | If you can go, you have completed the Episode 18 quest. |
| Episode 19 | Use @go 53. (Ice Castle) | If you can go, you have completed the Episode 19 quest. |
| Episode 20 | Click on Warper > Instances > The Immortal. | If you can go, you have completed the Episode 20 quest. |
| Episode 21 | Click on Warper > Instances > Final Battle. | If you can go, you have completed the Episode 21 quest. |
Misión principal
- Necesitas Ritual of Blessing.
En tu habitación personal en el castillo, encontrarás tanto a Nihil M. Heine como al doble de Spica esperándote. Habla con Nihil (prt_cas_q 21, 39).
- La verdadera Spica ha salido a investigar algo y aparecerá en un momento.

Cuando aparezca Spica Nerius, habla con ella (prt_cas_q 23, 36) para descubrir que Crux encontró a la criada que le dio drogas a un miembro de la familia real en su muka juice. La criada reveló que fue uno de los chambelanes quien lo planeó. La investigación de Crux también descubrió que el chambelán era de la República de Schwartzvald. Crux siguió persiguiendo al chambelán traidor y lo siguió hasta Lighthalzen.

Aunque Crux es capaz, sigue siendo solo una persona. Nihil M. Heine está preocupado y te pide que vayas a ayudar a Crux con la investigación debido a tu "libertad" de no ser de la realeza. Skia también irá a Lighthalzen para ayudar con la investigación. Ambos se encontrarán contigo en el aeropuerto de Lighthalzen.
Encuentra a Crux (lhz_airport 189, 39) en el lado derecho del aeropuerto. Skia supone que el chambelán fugitivo hará acto de presencia en Lighthalzen en lugar de Einbroch debido al problema de contaminación industrial de Einbroch. Saben que su nombre es Bruno. Puede que recuerdes haber conocido a Bruno en la parte superior de las escaleras del este en el Banquet. Tu grupo de investigación se divide: Crux revisará el sur de Lighthalzen, Skia revisará las zonas comerciales y tú revisarás el norte y el noreste. El punto de encuentro está cerca de los grandes almacenes centrales.

Camina hasta la esquina trasera norte de la casa más al norte (lighthalzen 184, 292) de la ciudad. Verás a un Man y a un Scientist. El Man intenta intimidar al Scientist para conseguir más dinero porque ya no puede vivir en Rune Midgard ni en la República de Schwartzvald. Ambos acuerdan reunirse después en los barrios bajos para evitar miradas indiscretas. Después de que el Man se marche, el Scientist murmura a alguien más que el Man debe ser asesinado, ya que exigir demasiado dinero es tan malo como exigir demasiado poco.
OPCIONAL: Ve al punto de encuentro afuera de los grandes almacenes (lighthalzen 202, 167). Encontrarás a Skia allí y le contarás lo que escuchaste. Ella te dice que sigas adelante hacia los barrios bajos mientras le cuenta a Crux y ellos te alcanzarán.
El Man está en los barrios bajos (lighthalzen 309, 263) y llamas a "Bruno" y él se sorprende. De repente, aparece un Heart Hunter cerca del Man y lo sorprende. En ese momento, el Man se da cuenta de que el Scientist lo ha estafado, ya que no recibirá el dinero. Crux y Skia aparecen y reconocen que el Heart Hunter es el mismo tipo de mercenario que fue capturado e interrogado antes. Crux está ansioso por capturar a este nuevo sujeto y tener un interrogatorio cara a cara. El Heart Hunter se da cuenta de que no puede hacer mucho ahora que Crux, Skia y tú están allí, así que lleva a cabo un atentado suicida. Skia le dice a Bruno que es mejor que coopere, porque esos Heart Hunters lo perseguirán por el resto de su vida y que al menos Rune Midgard no lo matará si coopera. Crux lleva a Bruno de vuelta al palacio.

Regresa a tu habitación en el castillo y verás tanto a Nihil M. Heine como a Spica Nerius esperándote. Habla con Nihil. Crux ha estado interrogando a Bruno y obtuvo una confesión fácil. Aparentemente hay una "empresa" detrás del origen de los problemas. Bruno fue entregado al gobierno de Schwartz como parte del acuerdo para obtener permiso para investigar una instalación en la República de Schwartzvald. Puedes elegir entre dos opciones. Ambas darán como resultado el mismo diálogo.
- Spica envió a Skia a una tarea, por eso no está en la habitación a pesar de haberte dicho en Lighthalzen que también regresaría al palacio. Además, parece que un objeto importante de la familia Nerius ha sido llevado a una instalación sospechosa en Schwartzvald y necesitan el permiso del gobierno de Schwartzvald para investigar. Parece que el gobierno de Schwartzvald ya estaba al tanto de algunos de los problemas. Debido a que Crux está tan ocupado con las investigaciones, se necesitan más manos. Tu trabajo es escoltar a Spica, lo que libera a Crux para moverse con libertad.
Esta vez viaja al aeropuerto de Juno y encuentra a Crux (y_airport 168, 41). Él y Skia querían tener una reunión en Yuno, pero Spica sintió que su realeza atraería a una multitud y ahora prefiere reunirse en el hotel de Lighthalzen. Él te teletransportará al aeropuerto de Lighthalzen diciendo: Contaré contigo.
La última habitación del hotel es donde encontrarás a Spica Nerius. Ella te presenta al representante del gobierno de Schwartz.
Habla con Philopontess (lhz_in02 239, 148), quien se hace llamar "Tess".
- Escuchémoslo.: Tess dice que el Secret Wing no fue destruido por completo, pero la familia Nerius ayudará a apoyarlos. El objetivo es desactivar la Enterprise. La Rebellion vendrá en tu ayuda usando sus fuerzas para inspeccionar la instalación. Pero la ayuda debe ser a través de ti, y no de la familia real.

Hay un Unusual person (einbroch 239, 269) en el andén del tren de Einbroch. Habla en un código secreto que nunca te mencionaron. Luego admite que es Lazy, la persona que estabas buscando. Después dice que la reunión debía ser en Einbech.

Después de una LARGA conversación, Lazy (einbroch 270, 268) generará automáticamente un /navi para ti a un poco al este del andén del tren para conseguir un "viaje gratis". Para evitar que los rastreen, Lazy quiere llevarte por un túnel en lugar del tren.

Haz clic en el Very small hole para ser transportado a Einbech.

Habla con Lazy (einbech 46, 208) en el andén del tren de Einbech. Después de que termine de parlotear sobre la jubilación, marcará en tu mapa adónde debes ir junto con un /navi.
Lazy (einbech 76, 131) está de pie junto a un montón de arena que cubre a una persona inconsciente. Así que Lazy tiene el poder de los dioses, ya que al parecer ni siquiera un Arch Bishop podría salvar a un Rebel exhausto mediante curación.

Después de encontrar a Lazy (einbech 217, 82), dejas en el suelo al hombre Rebel que cargabas. Lazy dice que alguien ya sintió su llegada, y te dice que dejes a Gonie en la entrada.

Una vez dentro, habla con Lazy (rebel_in 21, 45) y él irrita a los Shopkeepers lo suficiente como para que quieran echarnos. Lazy entonces les habla de Gonie, que está en el suelo afuera. El shopkeeper mete a Gonie y luego llama a Lucky. Lazy empieza a gritarle al shopkeeper que había entrado, bajo amenaza de ser echado. Al final, te dejan entrar.

Dentro hay un lugar para novatos y personas mayores. Encontrarás a Lazy (rebel_in 86, 61) junto al sofá. Les revela a los demás que es un agente de Secret Wings. Lucky revela que su nombre real es "Rookie" y que "Lucky" es un apodo. Se producen muchas discusiones por y sobre el té. Lazy les cuenta a los Rebels ancianos lo que quiere el Presidente. No quieren ayudar porque sienten que volverán a ser traicionados. El anciano se va y Lazy intenta convencer a Lucky/Rookie de que tiene una voz de poder para intentar convencer a los ancianos.

Sube las escaleras de la izquierda y habla con Elena Volkova (rebel_in 70, 78). No quiere dejarte pasar y quiere pelear contigo.

Pelea contra Elena:
- Si eres de la clase Priest (¿quizás Acolyte?), puedes saltarte esta sección, ya que Elena tiene suficiente honor para no pelear contra "clérigos".
- Una vez derrotada, recibes 10 Schwartz's Honor Token.
- Acceso a la misión repetible Fighting Elena
Sube por el pasillo y habla con el líder de Rebellion (rebel_in 122, 71). Intentará que los Young Rebellions te escolten escaleras abajo hasta que menciones a Gonie. Habla sobre cooperación y se ríe de la sugerencia.

Ve al sur desde el líder de Rebellion y habla con el guardia de Rebellion en la entrada al portal de la puerta. No te dejarán entrar aunque Rookie te haya enviado. Sigue preguntando al líder de Rebellion Guard hasta que Larcis oiga tu voz y sigue gritando. Entonces te dejan entrar.

Avanza hacia el interior y Dien (rebel_in 164, 88) empezará a hablar contigo. La conversación gira en torno a Gonie. Luego preguntas sobre la cooperación y Ridsh se pone furioso mientras Dien te escucha con calma. A Ridsh no le importaría que Schwartz colapsara.
Dien decide ayudar a convencer a los demás de que cooperen.

Entrega al comandante de Special Force (rebel_in 210, 89) una carta que escribió Dien. Aunque sorprendido y no muy partidario de lo que ella escribió, aceptará, ya que podría ser el último deseo de Dien.

Vuelve con el líder de Rebellion Rupert (rebel_in 122, 71) en la esquina del pasillo y entrégale la carta de Dien.
Habla con el líder de Rebellion Guard que apareció a su lado. (¿Paso obligatorio? Creo que sí; algunos registros de mis misiones desaparecieron)

Turn around and speak to Rebellion leader Rupert again. He starts making a ruckus and wants to go see Dien, but she appears next to him.
Listen to Dien as she says she will agree to help the Secret Wings. Two against one (Ernst and Dien), and Rupert still will not stand for letting go of all they've endured in order to help.

Rebellion leader Rupert will try and get Dien escorted back to her room until she grabs him by the beard. Speaking truth about how they will get nowhere if they hold onto vengeance, Rupert finally agrees to help. BUT ONLY A LITTLE!
- Receive 10 Schwartz's Honor Token.
- Access to Preparing for the Party repeatable quest
Return downstairs to Lazy and inform them that the Rebellion will help. Then listen to Rookie's story about his childhood; he was small and his family thought he was useless so he left and met Gonie and became a Rebel. The seniors appear and do what seniors do best, complain. Rookie points out that none of the younger members know what happened in their day because they refuse to talk about it (or change). Then you bust out the truth tea and tell them that Rupert and the other ladies upstairs already agreed to help.
- Lazy decides to stay and then you receive EXP and 10 Schwartz's Honor Token.
- Access to Giving Charity to Charity repeatable quest.
- Access to Tea Time Snacks repeatable quest.
- Access to Tracking Down Missing Guns for Master repeatable quest.
- Access to Twinkle Twinkle Shooting Star repeatable quest.
- Access to Ericsson Adler repeatable quest.
- Access to Pamphlet Promotion repeatable quest.
- Access to Side Quests.
Heart Hunter War Base
Rebellion Squadder (rebel_in 65, 46) tells you that Tess is here. You can say Yes to be transported to the Einbech train platform, or you can walk there.

Once in Einbroch, go to the hotel (ein_in01 198, 224). Go to second floor in the room just north of the stairs (ein_in01 273, 276). Tess will invite you in.
Talk to Nihil in the Einbroch hotel room. Apparently wanting to actually do something, he came himself. Skia also managed to leave the banquet. Now begins the plan of attack on the facility. There's no escape route but they suspect a teleport gate.
Travel one map north of Einbroch city to the operation spot and speak to Julian (ein_fild04 281, 337).
Monster taming will interfere with the next portion of the quest. So don't do it. (Though I'm not sure which items you would use to tame...)
Talk to Julian to reserve the instance, and then Striker Unit Commander to enter. Heart Hunter War Base 1 Instance
This is not recommended for characters who are not damage dealers (such as Arch Bishops without Adoramus or Judex).
Walk near Julian at the head of the commandment to begin the instance.
Heart Hunter Guards will spawn. They know Fury (?), Increase Agi, and Bowling Bash, Endure (on chase?), and possibly more...
There's a pile of gunpowder at the north end (1@swat 58, 89). It drops Antique Gunpowder on the ground and sets off an alarm, causing more enemies to spawn.
Give it to Julian on the east side and it will destroy all the monster as well as create an opening.
Continue walking East and speak to Julian again by walking up to him. He will need some time to set up the next explosion.
Walking up north, you will find a Suspicious instrument (1@swat 147, 119). Push the button because you don't follow the rules, the rules follow you!
More Heart Hunter Guards will spawn. Some Upgraded Heart Hunters as well. Defeat all of them to proceed. The regular Heart Hunter guards count for half a kill, and the Upgraded Heart Hunter's count for a full kill. You need 15 kill points to continue.
Walk to Julian after you have cleared the hunters who hate button pushers, and then continue East.
Julian ran out of gunpowder and needs you to find more. Walk back to the previous defense wall you blew up and you will find a Pile of gunpowder ( (@swat 165, 56)being guarded by Heart Hunter guards.

Give Julian the gun powder and proceed east. Walk up to Julian and an announcement says they have taken over the Heart Hunter communication room.
Ebel spawns now. You can not go past the area with the vents; you will get teleported back.
Julian paralyzes Ebel after the fight and tells the guards to capture her for research.
Receive 10 Schwartz's Honor Tokens and be warped back to Einbroch Field 04.
Main Quest continued
After exiting from the instance, speak to Rookie and say you're counting on him. Since you haven't found Terra Gloria yet, Rookie warps you to Heart Hunter War base.
Enter the portal next to Rookie to enter Werner Laboratory
Rebellion squadder will take you back out if you desire.
Yuslan will ask you to help him defeat Chimeras; 10 Material Chimera and 10 Human Chimera.
Werner Laboratory Central Room Instance
Speak to Rookie (slabw01 236, 91) to start the instance. (Supposedly you need to talk to him again to get actual quest where you fight the MVP. I was rushing through this part, and I was getting attacked by the Chimeras on the map)
Rookie wants to go to the Central Room
Click on the device to enter the instance.
Listen to Eisen Werner, then walk all the way up and talk to them again.
To both sides, there's a Security Device at the north end of the rooms. There will be a word in brackets. Choose the appropriate colored version in the dialog choice.
| Choose Red = 1st Option | ||||
| Way Back Home | Loneliness | Contradiction | Rose | Sea |
| Joy | Twilight | Glow | Girl | |
| Choose Blue = 2nd Option | ||||
| Purity | Eternity | Dawn | Dream | |
Return to the center and enter the portal.
Eisen Werner is standing on the opposite end, to the north. This evil villain is revealing their plan because they expect you to die in this laboratory. There's also Security Device on both ends of the room.
Once you've unlocked the Security Devices, enter the portal that Eisen was standing in front of.
Speak to Eisen Werner and they explain that the Heart of Ymir was unutilized so that's why they took it. A portal opens at the door he's standing next to.
Go through that door portal and speak to 'Eisen Werner again. The Heart of Ymir's energy goes into the magic circle on the ground and goes into experiment subjects, some of which have died.
You are then warped back to Heart Hunter War Base.
Main Quest continued again
Talk to Rookie (que_swat 150, 58) and he will want to go back to the hotel. He will warp you back to Einbroch Field 04.

Return to the Einbroch Hotel and talk to Philopontess. You will return the Blessing Star to Nihil and then they want to promptly return to Prontera Castle.
Skia Nerius is inside your room in the castle.
- Do you feel it all the time?: She says when she asked to use the Scroll of Movement in the above step at the hotel
- Love: Spica appears
- When is it most serious?
Kronecker enters and they talk about family matters.
You receive 10 Honor Token (not Schwartz) and 2.5 mil Base and Job EXP (VIP)
Spica says Philopontess is waiting at Werner Laboratory for you.
Go to Werner Laboratory and talk to Philopontess (que_swat 145, 57). He will reward you with 10 Schwartz's Honor Token and 2x  Mysterious Egg (12610) + 2x
  Mysterious Egg II (12871)
- Access to People in the Lab repeatable quest.
- Access to Heart Hunter War Base 2 repeatable quest.
- Access to Cutie Chimera C(K)illing repeatable quest.
This is the end of Episode 16.2: Terra Gloria main quest.
Side Quests
Returning the Relics
- Once using the Small Leather Bag, you receive 6 character-bound items. Below are the locations to turn those items in:
- Old Rings - Knight Windsor in the Prontera pub in the inner ring to the south-east (prt_in 177, 26). He knew something was wrong when he found Seyren's Pecopeco.
- Locket Pendant - Knight Windsor (from above) is upset that his children ended up dead. With no wife or children anymore, he will probably drown his sorrows at the pub he's in.
- Wood Rosary - Sister Margaret at St. Capitolina Abbey (prt_monk 93, 254), the home of the monks. Margaret recalls how Margaretha Sorin was such a tomboy when she was younger. Speaking to her again will give you a chance to be warped directly to Prontera.
- Portable Sewing Box - Hunter Sherine is inside the house to the right of the North Kafra in Payon (payon 187, 233) at the end of the hallway. Cecil asked her sister how to sew so she could put a button on her clothing and appear more feminine.
- Decorated Archer's Thimble - Blacksmith Cleaver is downstairs of the Juno weapon shop (yuno_in01 163, 31) and wonders what happened to Howard. It was a gift that he had trouble making. Howard has an older brother that Cleaver will give the thimble to.
- Assassin's Mark Dagger - Go to the Morroc Bar (morocc 45, 107) Guile Marovitz is in the Morroc pub (que_job01 89, 91). Eremes always hated failed missions and was usually pretty lucky; except this time.
Rachel's Repair Work
- Rachel Smith has had it with people lying they "lost" their weapons when they only merely broke. The weapons have a high defect rate. She requests you to bring Rachel's Revolver to the Blacksmith Guild for them to inspect it.
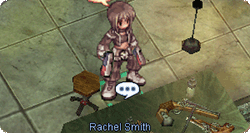
- Travel to Einbroch's Blacksmith Guild and speak to Blacksmith Jack who scrutinizes her work. He concludes that it's the impurity of materials that she is using that is causing the issue.
- Return to Rachel Smith inside the Rebellion base where she says she suspected it might be the materials causing the issue. Grant her favor and say you will come back daily with better materials.

Receive 7 Schwartz's Honor Token. You can now do the daily quest from Rachel Smith.
Enable Teleportation in Schwartz!
Speak to Arinoa Yurhik next to the fireplace (rebel_in 82, 68). Some man appears nearby asking if you were the one making a fuss in Clana Nemieri.
Arivero Yuhrik (rebel_in 78, 66) is self-proclaimed "hot" guy and is seemingly just an obnoxious "bro". There's unspoken communication between the two siblings and then Vero says he wants you to go to four places and destroy things.
You get four options After choosing one, he will disappear.
After waiting (some amount of time), return to Arinoa Yurhik (potentially 4am server time; could depend on previous step's choice in dialog options.
Arivero Yuhrik appears saying the preparation is complete. Schwaltzvalt bans teleportation in the cities due to potential magic overuse. Arivero believes the Schwaltzvalt government installed equipment to protect secret Rekenber research, citing the timeline of events and the disappearance of people in the Slums.
He explains how "H" in a guard suit was patrolling and found an abnormal device and that there was very strong wind that day and H saw something but it quickly vanished.
Guard Clothes: H makes his daughter clean and iron his clothes; because apparently, he can't do it for himself...
Club: Standard unexpected situation preparedness
The way H patrolled: H follows the manual and follows the same course every day Freight train: A coal train stopped at night, it doesn't operate often because of monsters in the mine
A strong Wind: Mountainous areas can sometimes cause strong winds
The turned-off torch: It was strange that it was the first time a torch turned off
Repeating a few times (I think about the torch). Vero's theory is that fire is the strongest right before being turned off. He wants you to bring some fire items to the train to test his theory.
Walk near the end of the freight train (einbech 212, 212) and Arivero Yurhik will appear.
- Things that are known to work here:
- Flame Heart
- ?
The Teleport Prohibition equipment is unscathed so Vero suggests bringing Water based items.
- Things that are known to work here:
- Mystic Frozen
After using the water items, the equipment is destroyed. Return to the Rebellion Base and speak to Arinoa Yurhik to make her younger brother Vero appear.
Arivero Yurhik tells us an agent found another teleport prohibition equipment (Water) in a Lighthalzen mansion. Tell him that Rough Wind is the element stone that is strong against water.
In Lighthalzen (lighthalzen 135, 233), Arivero Yurhik requires 1 Mystic Frozen and 3 Rough Wind to reveal and destroy the equipment.
Return to the base and talk to Arinoa Yurhik to get Arivero Yurhik to appear. You start to wonder if his elder sister is actually pleased, and he says she's just shy. Then the device that prevents the prohibition equipment from disappearing broke. He needs a Star Crumb to fix it.
- Just laugh it off
- Ask him: He gets defensive and you just laugh it off anyway.
Travel to Juno (yuno 204, 226) with 4 Great Natures and 1 Rough Wind and give them to Arivero Yurhik. Rekenber and the government seemed to have caught on. He tells you of the last location in Einbroch and runs away as if being chased.
In the south-east of Einbroch (einbroch 262, 42) is a panicked Arivero Yurhik. He asks you to destroy this one, and as soon as you do, Vero teleports away suspiciously. Inside the base, talk to Arinoa Yurhik and Rebellion leader appears and is confused because there is no large mission that he knows about. You explain the mission but the Rebellion leader doesn't know of any Arivero Yurhik... He tells you that Arinoa's younger brother died in an accident a while ago. Receive 10 Schwartz's Honor Token, Base EXP and Job EXP and a lot of unanswered questions.
If you talk to Arinoa again, you have the chance to say hello and a text-input box appears. If this is a continuation of a quest, we are not sure.
Helping Elena
Choose the second option I am not busy today, I stopped by. when talking to Elena Volkova and she tells you that USU means "Under Seal Unit", kinda like the Suicide Squad; they did bad things, but are given a leash to explore on(?). Elena tells you about these two underage orphans who might be kicked out and requests you to solve their problem.
Go downstairs and talk to Jana Levedeva (rebel_in 109, 54).
Return to Elena Volkova upstairs and Tell her about Lebedev twins.
She tells you to ask Milo and Mason about them:
Speaking to Milo Rivers at the opposite staircase and he tells you they excelled in shooting. Allegedly Jana threw a grenade into a civilian zone. After being moved to the USU unit, they began to disobey the seniors.

Mason Bender at the base entrance thinks nothing positive of the two. Ilya apparently shot Mason with a stray bullet.
- Ask them directly:
- Beat around the bush:
After no luck, return to Elena Volkova upstairs. She sends you to go ask their previous leader.
Downstairs by the fireplace, Ericsson Adler and he gives you Delicious Handmade Cookie to eat and chat with them over.
Walk over to Jana Levedava and Give them the cookie. Tell them that Commander Adler, yourself, and Elena are worried about the two of them. Jana starts breaking down because she wasn't in shape, and Ilya tells you she didn't throw the grenade on purpose. They became scared after they were transferred and begun to act out and get even more scared. They give you permission to tell Elena their feelings.
Tell Elena Volkova that the twins felt they were a burden. Elena mistakenly had treated them as adults, which didn't help.
Return to Jana Levedava and bring them to Elena, saying that you will defend the twins.
Talk to Elena Volkova and say I have brought Lebedev sisters I thought it was male/female twins. Elena yells at them for having run away. Then she apologies to the two. She then tells them that she will not put them in real combat missions so they can make friends or train. After all of this, receive 10 Schwartz's Honor Token, Base EXP and Job EXP.
You now have access to Cookie Delivery (Name not final) daily quest.