16.2 Terra Gloria
Avant de commencer une quête, faites la New World Quest!
Temporal Tina is an NPC who sells Episode Clear Tickets. She is located in Prontera (prontera 140, 174) and the Main Office (main_office 94, 59).

|

|
| (prontera 140, 174) | (main_office 94, 59) |
Episode Clear Tickets
Un Episode Clear Ticket est un objet consommable qui vous permet de sauter la quête principale d'un épisode. En l'utilisant, vous débloquez immédiatement l'accès à tous les PNJ, donjons et boutiques d'équipement qui nécessiteraient normalement que vous terminiez l'épisode ou accomplissiez certaines quêtes.
Veuillez noter qu'en utilisant un Episode Clear Ticket, vous passerez à côté des récompenses de quête telles que l'EXP, les Zeny, la réputation et les objets.
Certains Episode Clear Tickets ont des prérequis. Si c'est votre premier personnage sur le serveur, vous devrez quand même progresser normalement de Episode 17.2 jusqu'au dernier épisode.
Consultez le tableau ci-dessous pour connaître les prérequis et les prix de chaque ticket.
| Episode Clear Tickets | |||
|---|---|---|---|
| Episode Ticket | Niveau | Coût en Zeny | Prérequis |
 Episode 14 Clear Ticket (1000284) Episode 14 Clear Ticket (1000284)
|
160 | 1,000,000 | Aucun |
 Episode 15 Clear Ticket (1000286) Episode 15 Clear Ticket (1000286)
|
140 | 1,000,000 | Aucun |
 Episode 16 Clear Ticket (1000282) Episode 16 Clear Ticket (1000282)
|
100 | 1,000,000 | None |
 Episode 17.1 Clear Ticket (1000285) Episode 17.1 Clear Ticket (1000285)
|
110 | 2,000,000 | None |
 Episode 17.2 Clear Ticket (1000287) Episode 17.2 Clear Ticket (1000287)
|
130 | 4,000,000 | The current character has cleared Episode 17.1 |
 Episode 18 Clear Ticket (1000288) Episode 18 Clear Ticket (1000288)
|
170 | 9,000,000 | The current character has cleared Episode 17.2 |
 Episode 19 Clear Ticket (1000988) Episode 19 Clear Ticket (1000988)
|
200 | 12,000,000 | The current character has cleared Episode 18 AND one character in the master account has cleared Episode 19 and the side quests "Purification Saint" and "Frozen Sea" |
 Episode 20 Clear Ticket (1001214) Episode 20 Clear Ticket (1001214)
|
215 | 16,000,000 | The current character has cleared Episode 19 AND one character in the master account has cleared Episode 20 |
 Episode 21 Clear Ticket (1001215) Episode 21 Clear Ticket (1001215)
|
230 | 32,000,000 | The current character has cleared Episode 20 AND one character in the master account has cleared Episode 21 |
 Chapter 1 Clear Ticket (50098) Chapter 1 Clear Ticket (50098)
|
265 | 64,000,000 | One character in the master account has cleared Chapter 1 and complete Zero Cell Sector |
How to check which episode I have unlocked?
Right now, we don't have a feature which simply tells you which episode you are.
So here's some things you can do to check it by yourself:
| Episode Quest | ||
|---|---|---|
| Episode | Steps | Description |
| Episode 15 | Click on Warper > Instances > Central Laboratory. | If you can go, you have completed the Episode 15 quest. |
| Episode 16 | Click on Warper > Instances > Heart Hunter War Base. | If you can go, you have completed the Episode 16 quest. |
| Episode 17.1 | Use @go 46. (Cor) | If you can go, you have completed the Episode 17.1 quest. |
| Episode 17.2 | Use @go 47. (Varmundt's Mansion) | If you can go, you have completed the Episode 17.2 quest. |
| Episode 18 | Use @go 51. (Gray Wolf Village) | If you can go, you have completed the Episode 18 quest. |
| Episode 19 | Use @go 53. (Ice Castle) | If you can go, you have completed the Episode 19 quest. |
| Episode 20 | Click on Warper > Instances > The Immortal. | If you can go, you have completed the Episode 20 quest. |
| Episode 21 | Click on Warper > Instances > Final Battle. | If you can go, you have completed the Episode 21 quest. |
Quête principale
- Vous avez besoin de Ritual of Blessing.
Dans votre chambre personnelle au château, vous trouverez à la fois Nihil M. Heine et la doublure de Spica qui vous attendent. Parlez à Nihil (prt_cas_q 21, 39).
- La vraie Spica est partie enquêter sur quelque chose et apparaîtra après un court moment.

Une fois que Spica Nerius apparaît, parlez-lui (prt_cas_q 23, 36) pour découvrir que Crux a trouvé la servante qui a donné des drogues à un membre de la famille royale dans son muka juice. La servante a révélé que c'était l'un des chambellans qui avait planifié cela. L'enquête de Crux a aussi révélé que le chambellan venait de la Republic of Schwartzvald. Crux a continué à poursuivre le chambellan traître et l'a suivi jusqu'à Lighthalzen.

Bien que Crux soit compétent, il ne reste qu'une seule personne. Nihil M. Heine est inquiet et vous demande d'aller aider Crux dans son enquête en raison de votre « liberté » de ne pas être de sang royal. Skia ira aussi à Lighthalzen pour aider à l'enquête. Le duo vous retrouvera à l'aéroport de Lighthalzen.
Trouvez Crux (lhz_airport 189, 39) sur le côté droit de l'aéroport. Skia suppose que le chambellan fugitif fera son apparition à Lighthalzen plutôt qu'à Einbroch en raison du problème de pollution industrielle d'Einbroch. Ils savent qu'il s'appelle Bruno. Vous vous souvenez peut-être d'avoir rencontré Bruno en haut de l'escalier est lors du Banquet. Votre groupe d'enquête se sépare : Crux vérifiera le sud de Lighthalzen, Skia vérifiera les zones commerçantes, et vous devez vérifier le nord et le nord-est. Le point de rendez-vous est près du grand magasin central.

Marchez jusqu'au coin arrière nord de la maison la plus au nord (lighthalzen 184, 292) en ville. Vous verrez un Man et un Scientist. Le Man tente d'intimider le Scientist pour obtenir plus d'argent parce qu'il ne peut plus vivre à Rune Midgard ni dans la Republic of Schwartzvald. Les deux acceptent de se retrouver dans les bas quartiers ensuite pour éviter les regards indiscrets. Après le départ du Man, le Scientist marmonne à quelqu'un d'autre que le Man doit être tué, car demander trop d'argent est tout aussi mauvais que d'en demander trop peu.
OPTIONNEL : Allez au point de rendez-vous devant le grand magasin (lighthalzen 202, 167). Vous y trouverez Skia et lui raconterez ce que vous avez entendu. Elle vous dit de continuer devant dans les bas quartiers pendant qu'elle prévient Crux et ils vous rattraperont.
Le Man est dans les bas quartiers (lighthalzen 309, 263) et vous appelez « Bruno », ce qui le surprend. Soudain, un Heart Hunter apparaît près du Man et le surprend. À ce moment, le Man comprend que le Scientist l'a escroqué puisqu'il ne recevra pas l'argent. Crux et Skia arrivent et reconnaissent que le Heart Hunter est le même type de mercenaire que celui qui avait été capturé et interrogé auparavant. Crux est impatient de capturer ce nouveau venu et d'avoir un interrogatoire en tête-à-tête. Le Heart Hunter comprend qu'il ne peut pas faire grand-chose maintenant que Crux, Skia et vous êtes là, alors il commet un attentat suicide. Skia dit à Bruno qu'il vaut mieux coopérer parce que ces Heart Hunter le poursuivront pour le reste de sa vie et qu'au moins Rune Midgard ne le tuera pas s'il coopère. Crux ramène Bruno au palais.

Retournez dans votre chambre au château et vous verrez Nihil M. Heine et Spica Nerius vous attendre. Parlez à Nihil. Crux a interrogé Bruno et a obtenu des aveux faciles. Il y aurait apparemment une « enterprise » derrière la source des problèmes. Bruno a été remis au gouvernement Schwartz dans le cadre de l'accord visant à obtenir la permission d'enquêter sur une installation dans la Republic of Schwartzvald. Vous avez le choix entre deux options. Les deux aboutiront au même dialogue.
- Skia a été envoyée en mission par Spica, c'est pourquoi elle n'est pas dans la pièce alors qu'elle vous avait dit à Lighthalzen qu'elle retournait aussi au palais. En plus de cela, il semble qu'un objet important de la famille Nerius ait été emmené dans une installation suspecte à Schwartzvald et ils ont besoin de la permission du gouvernement de Schwartzvald pour enquêter. Il semble que le gouvernement de Schwartzvald était déjà au courant de certains problèmes. Comme Crux est très occupé par les enquêtes, il faut plus de bras. Votre tâche est d'escorter Spica, ce qui libère Crux pour qu'il puisse se déplacer.
Rendez-vous cette fois à l'aéroport de Juno et rencontrez Crux (y_airport 168, 41). Lui et Skia voulaient faire une réunion à Yuno, mais Spica pensait que son statut royal attirerait une foule et préfère maintenant se réunir à l'hôtel de Lighthalzen. Il vous téléportera à l'aéroport de Lighthalzen en disant « Je compte sur vous ».
La dernière chambre de l'hôtel est l'endroit où vous trouverez Spica Nerius. Elle vous présente le représentant du gouvernement Schwartz.
Parlez à Philopontess (lhz_in02 239, 148) qui se fait appeler « Tess ».
- Écoutons.: Tess dit que le Secret Wing n'a pas été complètement détruit, mais que la famille Nerius aidera à les soutenir. L'objectif est de désactiver l'Enterprise. La Rebellion viendra à votre aide en utilisant ses forces pour inspecter l'installation. Mais l'aide doit passer par vous, et non par la famille royale.

Il y a une Unusual person (einbroch 239, 269) à la plateforme de train d'Einbroch. Il parle dans un code secret dont on ne vous a jamais parlé. Il admet ensuite qu'il est Lazy, la personne que vous recherchiez. Il dit ensuite que la réunion était censée se passer à Einbech.

Après une LONGUE discussion, Lazy (einbroch 270, 268) générera automatiquement un /navi pour vous emmener un peu à l'est de la plateforme de train afin d'obtenir un « trajet gratuit ». Pour éviter d'être suivi, Lazy veut vous faire passer par un tunnel au lieu du train.

Cliquez sur le Very small hole pour être transporté à Einbech.

Parlez à Lazy (einbech 46, 208) sur le quai de la gare d'Einbech. Après avoir fini de radoter sur la retraite, il marquera sur votre carte l'endroit où vous devez aller, avec un /navi.
Lazy (einbech 76, 131) se tient à côté d'un tas de sable qui recouvre une personne évanouie. Lazy a donc le pouvoir des dieux, alors qu'apparemment même un Arch Bishop n'a pas pu sauver un Rebel épuisé en le soignant.

Après avoir trouvé Lazy (einbech 217, 82), vous déposez au sol le Rebel que vous portiez. Lazy dit que quelqu'un a déjà senti son arrivée et il vous dit de simplement laisser le Gonie à l'entrée.

Une fois à l'intérieur, parlez à Lazy (rebel_in 21, 45) et il agace les Shopkeepers au point qu'ils veuillent nous mettre dehors. Lazy leur parle alors de Gonie, qui est au sol dehors. Le shopkeeper ramène Gonie à l'intérieur, puis appelle Lucky. Lazy commence à hurler après le shopkeeper qui était rentré, sous la menace de se faire mettre dehors. Finalement, ils vous laissent entrer.

À l'intérieur se trouve un endroit pour les novices et les personnes âgées. Vous trouverez Lazy (rebel_in 86, 61) à côté du canapé. Il révèle aux autres qu'il est un agent des Secret Wings. Lucky révèle que son vrai nom est « Rookie » et que « Lucky » est un surnom. Beaucoup de chamailleries autour du thé ont lieu. Lazy dit aux anciens Rebels ce que veut le Président. Ils ne veulent pas aider, car ils sentent qu'ils seront à nouveau trahis. L'ancien part et Lazy essaie de convaincre Lucky/Rookie qu'il a une voix influente pour tenter de convaincre les anciens.

Montez les escaliers à gauche et parlez à Elena Volkova (rebel_in 70, 78). Elle ne veut pas vous laisser passer et veut se battre contre vous.

Combattez Elena :
- Si vous êtes de la classe Priest (peut-être Acolyte ?), vous pouvez ignorer cette section, car Elena a assez d'honneur pour ne pas combattre les « clercs ».
- Une fois vaincue, recevez 10 Schwartz's Honor Token.
- Accès à la quête répétable Fighting Elena
Montez la passerelle et parlez au chef de la Rebellion (rebel_in 122, 71). Il essaiera de faire en sorte que les Young Rebellions vous escortent en bas jusqu'à ce que vous mentionniez Gonie. Parlez de coopération et il rit à cette suggestion.

Partez vers le sud depuis le chef de la Rebellion et parlez au garde de la Rebellion à l'entrée du portail. Ils ne vous laisseront pas entrer même si Rookie vous a envoyé. Continuez à demander au chef des gardes de la Rebellion jusqu'à ce que Larcis entende votre voix, et continuez à crier. Vous serez alors laissé entrer.

Avancez à l'intérieur et Dien (rebel_in 164, 88) commencera à vous parler. La conversation tourne autour de Gonie. Puis vous posez la question de la coopération et Ridsh devient furieux tandis que Dien vous écoute calmement jusqu'au bout. Ridsh ne se soucierait pas que Schwartz s'effondre.
Dien choisit d'aider à convaincre les autres de coopérer.

Remettez au commandant de la Special Force (rebel_in 210, 89) une lettre que Dien a écrite. Bien que surpris et peu enthousiasmé par ce qu'elle a écrit, il acceptera, car cela pourrait être le dernier souhait de Dien.

Retournez voir le chef de la Rebellion Rupert (rebel_in 122, 71) dans le coin du couloir et remettez-lui la lettre de Dien.
Parlez au chef des gardes de la Rebellion qui est apparu à côté de lui. (Étape obligatoire ? Je pense que oui, certains de mes journaux de quête ont disparu.)

Retournez-vous et parlez à nouveau au chef de la Rebellion Rupert. Il commence à faire du vacarme et veut aller voir Dien, mais elle apparaît à côté de lui.
Écoutez Dien dire qu'elle acceptera d'aider les Secret Wings. Deux contre un (Ernst et Dien), et Rupert ne tolère toujours pas qu'on renonce à tout ce qu'ils ont enduré pour aider.

Rebellion leader Rupert will try and get Dien escorted back to her room until she grabs him by the beard. Speaking truth about how they will get nowhere if they hold onto vengeance, Rupert finally agrees to help. BUT ONLY A LITTLE!
- Receive 10 Schwartz's Honor Token.
- Access to Preparing for the Party repeatable quest
Return downstairs to Lazy and inform them that the Rebellion will help. Then listen to Rookie's story about his childhood; he was small and his family thought he was useless so he left and met Gonie and became a Rebel. The seniors appear and do what seniors do best, complain. Rookie points out that none of the younger members know what happened in their day because they refuse to talk about it (or change). Then you bust out the truth tea and tell them that Rupert and the other ladies upstairs already agreed to help.
- Lazy decides to stay and then you receive EXP and 10 Schwartz's Honor Token.
- Access to Giving Charity to Charity repeatable quest.
- Access to Tea Time Snacks repeatable quest.
- Access to Tracking Down Missing Guns for Master repeatable quest.
- Access to Twinkle Twinkle Shooting Star repeatable quest.
- Access to Ericsson Adler repeatable quest.
- Access to Pamphlet Promotion repeatable quest.
- Access to Side Quests.
Heart Hunter War Base
Rebellion Squadder (rebel_in 65, 46) tells you that Tess is here. You can say Yes to be transported to the Einbech train platform, or you can walk there.

Once in Einbroch, go to the hotel (ein_in01 198, 224). Go to second floor in the room just north of the stairs (ein_in01 273, 276). Tess will invite you in.
Talk to Nihil in the Einbroch hotel room. Apparently wanting to actually do something, he came himself. Skia also managed to leave the banquet. Now begins the plan of attack on the facility. There's no escape route but they suspect a teleport gate.
Travel one map north of Einbroch city to the operation spot and speak to Julian (ein_fild04 281, 337).
Monster taming will interfere with the next portion of the quest. So don't do it. (Though I'm not sure which items you would use to tame...)
Talk to Julian to reserve the instance, and then Striker Unit Commander to enter. Heart Hunter War Base 1 Instance
This is not recommended for characters who are not damage dealers (such as Arch Bishops without Adoramus or Judex).
Walk near Julian at the head of the commandment to begin the instance.
Heart Hunter Guards will spawn. They know Fury (?), Increase Agi, and Bowling Bash, Endure (on chase?), and possibly more...
There's a pile of gunpowder at the north end (1@swat 58, 89). It drops Antique Gunpowder on the ground and sets off an alarm, causing more enemies to spawn.
Give it to Julian on the east side and it will destroy all the monster as well as create an opening.
Continue walking East and speak to Julian again by walking up to him. He will need some time to set up the next explosion.
Walking up north, you will find a Suspicious instrument (1@swat 147, 119). Push the button because you don't follow the rules, the rules follow you!
More Heart Hunter Guards will spawn. Some Upgraded Heart Hunters as well. Defeat all of them to proceed. The regular Heart Hunter guards count for half a kill, and the Upgraded Heart Hunter's count for a full kill. You need 15 kill points to continue.
Walk to Julian after you have cleared the hunters who hate button pushers, and then continue East.
Julian ran out of gunpowder and needs you to find more. Walk back to the previous defense wall you blew up and you will find a Pile of gunpowder ( (@swat 165, 56)being guarded by Heart Hunter guards.

Give Julian the gun powder and proceed east. Walk up to Julian and an announcement says they have taken over the Heart Hunter communication room.
Ebel spawns now. You can not go past the area with the vents; you will get teleported back.
Julian paralyzes Ebel after the fight and tells the guards to capture her for research.
Receive 10 Schwartz's Honor Tokens and be warped back to Einbroch Field 04.
Main Quest continued
After exiting from the instance, speak to Rookie and say you're counting on him. Since you haven't found Terra Gloria yet, Rookie warps you to Heart Hunter War base.
Enter the portal next to Rookie to enter Werner Laboratory
Rebellion squadder will take you back out if you desire.
Yuslan will ask you to help him defeat Chimeras; 10 Material Chimera and 10 Human Chimera.
Werner Laboratory Central Room Instance
Speak to Rookie (slabw01 236, 91) to start the instance. (Supposedly you need to talk to him again to get actual quest where you fight the MVP. I was rushing through this part, and I was getting attacked by the Chimeras on the map)
Rookie wants to go to the Central Room
Click on the device to enter the instance.
Listen to Eisen Werner, then walk all the way up and talk to them again.
To both sides, there's a Security Device at the north end of the rooms. There will be a word in brackets. Choose the appropriate colored version in the dialog choice.
| Choose Red = 1st Option | ||||
| Way Back Home | Loneliness | Contradiction | Rose | Sea |
| Joy | Twilight | Glow | Girl | |
| Choose Blue = 2nd Option | ||||
| Purity | Eternity | Dawn | Dream | |
Return to the center and enter the portal.
Eisen Werner is standing on the opposite end, to the north. This evil villain is revealing their plan because they expect you to die in this laboratory. There's also Security Device on both ends of the room.
Once you've unlocked the Security Devices, enter the portal that Eisen was standing in front of.
Speak to Eisen Werner and they explain that the Heart of Ymir was unutilized so that's why they took it. A portal opens at the door he's standing next to.
Go through that door portal and speak to 'Eisen Werner again. The Heart of Ymir's energy goes into the magic circle on the ground and goes into experiment subjects, some of which have died.
You are then warped back to Heart Hunter War Base.
Main Quest continued again
Talk to Rookie (que_swat 150, 58) and he will want to go back to the hotel. He will warp you back to Einbroch Field 04.

Return to the Einbroch Hotel and talk to Philopontess. You will return the Blessing Star to Nihil and then they want to promptly return to Prontera Castle.
Skia Nerius is inside your room in the castle.
- Do you feel it all the time?: She says when she asked to use the Scroll of Movement in the above step at the hotel
- Love: Spica appears
- When is it most serious?
Kronecker enters and they talk about family matters.
You receive 10 Honor Token (not Schwartz) and 2.5 mil Base and Job EXP (VIP)
Spica says Philopontess is waiting at Werner Laboratory for you.
Go to Werner Laboratory and talk to Philopontess (que_swat 145, 57). He will reward you with 10 Schwartz's Honor Token and 2x  Mysterious Egg (12610) + 2x
  Mysterious Egg II (12871)
- Access to People in the Lab repeatable quest.
- Access to Heart Hunter War Base 2 repeatable quest.
- Access to Cutie Chimera C(K)illing repeatable quest.
This is the end of Episode 16.2: Terra Gloria main quest.
Side Quests
Returning the Relics
- Once using the Small Leather Bag, you receive 6 character-bound items. Below are the locations to turn those items in:
- Old Rings - Knight Windsor in the Prontera pub in the inner ring to the south-east (prt_in 177, 26). He knew something was wrong when he found Seyren's Pecopeco.
- Locket Pendant - Knight Windsor (from above) is upset that his children ended up dead. With no wife or children anymore, he will probably drown his sorrows at the pub he's in.
- Wood Rosary - Sister Margaret at St. Capitolina Abbey (prt_monk 93, 254), the home of the monks. Margaret recalls how Margaretha Sorin was such a tomboy when she was younger. Speaking to her again will give you a chance to be warped directly to Prontera.
- Portable Sewing Box - Hunter Sherine is inside the house to the right of the North Kafra in Payon (payon 187, 233) at the end of the hallway. Cecil asked her sister how to sew so she could put a button on her clothing and appear more feminine.
- Decorated Archer's Thimble - Blacksmith Cleaver is downstairs of the Juno weapon shop (yuno_in01 163, 31) and wonders what happened to Howard. It was a gift that he had trouble making. Howard has an older brother that Cleaver will give the thimble to.
- Assassin's Mark Dagger - Go to the Morroc Bar (morocc 45, 107) Guile Marovitz is in the Morroc pub (que_job01 89, 91). Eremes always hated failed missions and was usually pretty lucky; except this time.
Rachel's Repair Work
- Rachel Smith has had it with people lying they "lost" their weapons when they only merely broke. The weapons have a high defect rate. She requests you to bring Rachel's Revolver to the Blacksmith Guild for them to inspect it.
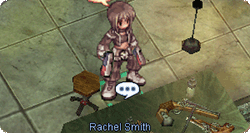
- Travel to Einbroch's Blacksmith Guild and speak to Blacksmith Jack who scrutinizes her work. He concludes that it's the impurity of materials that she is using that is causing the issue.
- Return to Rachel Smith inside the Rebellion base where she says she suspected it might be the materials causing the issue. Grant her favor and say you will come back daily with better materials.

Receive 7 Schwartz's Honor Token. You can now do the daily quest from Rachel Smith.
Enable Teleportation in Schwartz!
Speak to Arinoa Yurhik next to the fireplace (rebel_in 82, 68). Some man appears nearby asking if you were the one making a fuss in Clana Nemieri.
Arivero Yuhrik (rebel_in 78, 66) is self-proclaimed "hot" guy and is seemingly just an obnoxious "bro". There's unspoken communication between the two siblings and then Vero says he wants you to go to four places and destroy things.
You get four options After choosing one, he will disappear.
After waiting (some amount of time), return to Arinoa Yurhik (potentially 4am server time; could depend on previous step's choice in dialog options.
Arivero Yuhrik appears saying the preparation is complete. Schwaltzvalt bans teleportation in the cities due to potential magic overuse. Arivero believes the Schwaltzvalt government installed equipment to protect secret Rekenber research, citing the timeline of events and the disappearance of people in the Slums.
He explains how "H" in a guard suit was patrolling and found an abnormal device and that there was very strong wind that day and H saw something but it quickly vanished.
Guard Clothes: H makes his daughter clean and iron his clothes; because apparently, he can't do it for himself...
Club: Standard unexpected situation preparedness
The way H patrolled: H follows the manual and follows the same course every day Freight train: A coal train stopped at night, it doesn't operate often because of monsters in the mine
A strong Wind: Mountainous areas can sometimes cause strong winds
The turned-off torch: It was strange that it was the first time a torch turned off
Repeating a few times (I think about the torch). Vero's theory is that fire is the strongest right before being turned off. He wants you to bring some fire items to the train to test his theory.
Walk near the end of the freight train (einbech 212, 212) and Arivero Yurhik will appear.
- Things that are known to work here:
- Flame Heart
- ?
The Teleport Prohibition equipment is unscathed so Vero suggests bringing Water based items.
- Things that are known to work here:
- Mystic Frozen
After using the water items, the equipment is destroyed. Return to the Rebellion Base and speak to Arinoa Yurhik to make her younger brother Vero appear.
Arivero Yurhik tells us an agent found another teleport prohibition equipment (Water) in a Lighthalzen mansion. Tell him that Rough Wind is the element stone that is strong against water.
In Lighthalzen (lighthalzen 135, 233), Arivero Yurhik requires 1 Mystic Frozen and 3 Rough Wind to reveal and destroy the equipment.
Return to the base and talk to Arinoa Yurhik to get Arivero Yurhik to appear. You start to wonder if his elder sister is actually pleased, and he says she's just shy. Then the device that prevents the prohibition equipment from disappearing broke. He needs a Star Crumb to fix it.
- Just laugh it off
- Ask him: He gets defensive and you just laugh it off anyway.
Travel to Juno (yuno 204, 226) with 4 Great Natures and 1 Rough Wind and give them to Arivero Yurhik. Rekenber and the government seemed to have caught on. He tells you of the last location in Einbroch and runs away as if being chased.
In the south-east of Einbroch (einbroch 262, 42) is a panicked Arivero Yurhik. He asks you to destroy this one, and as soon as you do, Vero teleports away suspiciously. Inside the base, talk to Arinoa Yurhik and Rebellion leader appears and is confused because there is no large mission that he knows about. You explain the mission but the Rebellion leader doesn't know of any Arivero Yurhik... He tells you that Arinoa's younger brother died in an accident a while ago. Receive 10 Schwartz's Honor Token, Base EXP and Job EXP and a lot of unanswered questions.
If you talk to Arinoa again, you have the chance to say hello and a text-input box appears. If this is a continuation of a quest, we are not sure.
Helping Elena
Choose the second option I am not busy today, I stopped by. when talking to Elena Volkova and she tells you that USU means "Under Seal Unit", kinda like the Suicide Squad; they did bad things, but are given a leash to explore on(?). Elena tells you about these two underage orphans who might be kicked out and requests you to solve their problem.
Go downstairs and talk to Jana Levedeva (rebel_in 109, 54).
Return to Elena Volkova upstairs and Tell her about Lebedev twins.
She tells you to ask Milo and Mason about them:
Speaking to Milo Rivers at the opposite staircase and he tells you they excelled in shooting. Allegedly Jana threw a grenade into a civilian zone. After being moved to the USU unit, they began to disobey the seniors.

Mason Bender at the base entrance thinks nothing positive of the two. Ilya apparently shot Mason with a stray bullet.
- Ask them directly:
- Beat around the bush:
After no luck, return to Elena Volkova upstairs. She sends you to go ask their previous leader.
Downstairs by the fireplace, Ericsson Adler and he gives you Delicious Handmade Cookie to eat and chat with them over.
Walk over to Jana Levedava and Give them the cookie. Tell them that Commander Adler, yourself, and Elena are worried about the two of them. Jana starts breaking down because she wasn't in shape, and Ilya tells you she didn't throw the grenade on purpose. They became scared after they were transferred and begun to act out and get even more scared. They give you permission to tell Elena their feelings.
Tell Elena Volkova that the twins felt they were a burden. Elena mistakenly had treated them as adults, which didn't help.
Return to Jana Levedava and bring them to Elena, saying that you will defend the twins.
Talk to Elena Volkova and say I have brought Lebedev sisters I thought it was male/female twins. Elena yells at them for having run away. Then she apologies to the two. She then tells them that she will not put them in real combat missions so they can make friends or train. After all of this, receive 10 Schwartz's Honor Token, Base EXP and Job EXP.
You now have access to Cookie Delivery (Name not final) daily quest.