16.2 Terra Gloria
Prima di iniziare qualsiasi quest, fai la New World Quest!
Temporal Tina is an NPC who sells Episode Clear Tickets. She is located in Prontera (prontera 140, 174) and the Main Office (main_office 94, 59).

|

|
| (prontera 140, 174) | (main_office 94, 59) |
Episode Clear Tickets
An Episode Clear Ticket is a consumable item that allows you to skip the main quest of an episode. By using it, you will gain instant access to all NPCs, dungeons, and equipment shops that would normally require you to complete the episode or fulfill certain quests to unlock.
Please note that by using an Episode Clear Ticket, you will miss out on quest rewards such as EXP, Zeny, reputation, and items.
Some Episode Clear Tickets have prerequisites. If it's your first character on the server, you will still have to progress from Episode 17.2 to the last episode normally.
Check the table below to see the requirements and prices for each ticket.
| Episode Clear Tickets | |||
|---|---|---|---|
| Episode Ticket | Level | Zeny Costs | Prerequisites |
 Episode 14 Clear Ticket (1000284) Episode 14 Clear Ticket (1000284)
|
160 | 1,000,000 | None |
 Episode 15 Clear Ticket (1000286) Episode 15 Clear Ticket (1000286)
|
140 | 1,000,000 | None |
 Episode 16 Clear Ticket (1000282) Episode 16 Clear Ticket (1000282)
|
100 | 1,000,000 | None |
 Episode 17.1 Clear Ticket (1000285) Episode 17.1 Clear Ticket (1000285)
|
110 | 2,000,000 | None |
 Episode 17.2 Clear Ticket (1000287) Episode 17.2 Clear Ticket (1000287)
|
130 | 4,000,000 | The current character has cleared Episode 17.1 |
 Episode 18 Clear Ticket (1000288) Episode 18 Clear Ticket (1000288)
|
170 | 9,000,000 | The current character has cleared Episode 17.2 |
 Episode 19 Clear Ticket (1000988) Episode 19 Clear Ticket (1000988)
|
200 | 12,000,000 | The current character has cleared Episode 18 AND one character in the master account has cleared Episode 19 and the side quests "Purification Saint" and "Frozen Sea" |
 Episode 20 Clear Ticket (1001214) Episode 20 Clear Ticket (1001214)
|
215 | 16,000,000 | The current character has cleared Episode 19 AND one character in the master account has cleared Episode 20 |
 Episode 21 Clear Ticket (1001215) Episode 21 Clear Ticket (1001215)
|
230 | 32,000,000 | The current character has cleared Episode 20 AND one character in the master account has cleared Episode 21 |
 Chapter 1 Clear Ticket (50098) Chapter 1 Clear Ticket (50098)
|
265 | 64,000,000 | One character in the master account has cleared Chapter 1 and complete Zero Cell Sector |
How to check which episode I have unlocked?
Right now, we don't have a feature which simply tells you which episode you are.
So here's some things you can do to check it by yourself:
| Episode Quest | ||
|---|---|---|
| Episode | Steps | Description |
| Episode 15 | Click on Warper > Instances > Central Laboratory. | If you can go, you have completed the Episode 15 quest. |
| Episode 16 | Click on Warper > Instances > Heart Hunter War Base. | If you can go, you have completed the Episode 16 quest. |
| Episode 17.1 | Use @go 46. (Cor) | If you can go, you have completed the Episode 17.1 quest. |
| Episode 17.2 | Use @go 47. (Varmundt's Mansion) | If you can go, you have completed the Episode 17.2 quest. |
| Episode 18 | Use @go 51. (Gray Wolf Village) | If you can go, you have completed the Episode 18 quest. |
| Episode 19 | Use @go 53. (Ice Castle) | If you can go, you have completed the Episode 19 quest. |
| Episode 20 | Click on Warper > Instances > The Immortal. | If you can go, you have completed the Episode 20 quest. |
| Episode 21 | Click on Warper > Instances > Final Battle. | If you can go, you have completed the Episode 21 quest. |
Quest principale
- Ti serve Ritual of Blessing.
Nella tua stanza personale nel castello, troverai sia Nihil M. Heine sia il sosia di Spica che ti aspettano. Parla con Nihil (prt_cas_q 21, 39).
- La vera Spica è fuori a indagare su qualcosa e apparirà dopo poco.

Quando Spica Nerius appare, parla con lei (prt_cas_q 23, 36) per scoprire che Crux ha trovato la cameriera che ha dato droghe a un membro della famiglia reale nel suo muka juice. La cameriera ha rivelato che a pianificarlo è stato uno dei ciambellani. L'indagine di Crux ha anche scoperto che il ciambellano proveniva dalla Repubblica di Schwartzvald. Crux ha continuato a inseguire il ciambellano traditore e lo ha seguito fino a Lighthalzen.

Anche se Crux è capace, è comunque solo una persona. Nihil M. Heine è preoccupato e ti chiede di andare ad aiutare Crux nelle indagini grazie alla tua "libertà" di non essere di sangue reale. Anche Skia andrà a Lighthalzen per aiutare nelle indagini. La coppia ti incontrerà all'aeroporto di Lighthalzen.
Trova Crux (lhz_airport 189, 39) sul lato destro dell'aeroporto. Skia ipotizza che il ciambellano fuggitivo farà un'apparizione a Lighthalzen invece che a Einbroch a causa del problema di inquinamento industriale di Einbroch. Sanno che il suo nome è Bruno. Potresti ricordarti di aver incontrato Bruno in cima alle scale est durante il Banquet. Il tuo gruppo di indagine si divide: Crux controllerà Lighthalzen meridionale, Skia controllerà le aree commerciali, e tu devi controllare il nord e il nord-est. Il punto d'incontro è vicino al grande magazzino centrale.

Cammina fino all'angolo posteriore settentrionale della casa più a nord (lighthalzen 184, 292) in città. Vedrai un Man e uno Scientist. Il Man cerca di intimidire lo Scientist per ottenere più soldi perché non è più in grado di vivere a Rune Midgard o nella Repubblica di Schwartzvald. I due si accordano per incontrarsi subito dopo nei bassifondi per evitare occhi indiscreti. Dopo che il Man se ne va, lo Scientist borbotta a qualcun altro che il Man deve essere ucciso, perché chiedere troppo denaro è male quanto chiederne troppo poco.
OPZIONALE: Vai al punto d'incontro fuori dal grande magazzino (lighthalzen 202, 167). Troverai Skia lì e le racconterai ciò che hai sentito. Ti dice di andare avanti nei bassifondi mentre lei avvisa Crux e ti raggiungeranno.
Il Man è nei bassifondi (lighthalzen 309, 263) e tu gridi "Bruno" e lui resta sorpreso. All'improvviso, un Heart Hunter appare vicino al Man e lo sorprende. A questo punto, il Man capisce che lo Scientist lo ha truffato dato che non riceverà i soldi. Crux e Skia si presentano e riconoscono che l'Heart Hunter è lo stesso tipo di mercenario che era stato catturato e interrogato prima. Crux è impaziente di catturare questo nuovo tizio e fargli un interrogatorio a cuore aperto. L'Heart Hunter capisce che non può fare molto ora che ci sono Crux, Skia e te, quindi compie un attentato suicida. Skia dice a Bruno che è meglio collaborare perché quegli Heart Hunters lo inseguiranno per il resto della sua vita e che almeno Rune Midgard non lo ucciderà se collabora. Crux riporta Bruno al palazzo.

Torna nella tua stanza nel castello e vedrai sia Nihil M. Heine sia Spica Nerius che ti aspettano. Parla con Nihil. Crux ha interrogato Bruno e ha ottenuto una facile confessione. A quanto pare c'è un'"enterprise" dietro la fonte dei problemi. Bruno è stato consegnato al governo di Schwartz come parte dell'accordo per ottenere il permesso di indagare su una struttura nella Repubblica di Schwartzvald. Puoi scegliere tra due opzioni. Entrambe porteranno allo stesso dialogo.
- Skia è stata mandata da Spica a svolgere un incarico, ecco perché non è nella stanza nonostante ti avesse detto a Lighthalzen che anche lei sarebbe tornata al palazzo. Oltre a questo, sembra che un importante oggetto della famiglia Nerius sia stato portato in una struttura sospetta a Schwartzvald e che serva il permesso del governo di Schwartzvald per indagare. Sembra che il governo di Schwartzvald fosse già a conoscenza di alcuni dei problemi. Dato che Crux è così occupato con le indagini, servono più mani. Il tuo compito è scortare Spica, cosa che libera Crux per muoversi.
Questa volta vai all'aeroporto di Juno e incontra Crux (y_airport 168, 41). Lui e Skia volevano fare un incontro a Yuno, ma Spica riteneva che il suo status reale avrebbe attirato una folla e ora preferisce incontrarsi nell'hotel di Lighthalzen. Ti teletrasporterà all'aeroporto di Lighthalzen dicendo "Conto su di te".
L'ultima stanza dell'Hotel è dove troverai Spica Nerius. Ti presenta al rappresentante del governo Schwartz.
Parla con Philopontess (lhz_in02 239, 148), che si fa chiamare "Tess".
- Sentiamo.: Tess dice che il Secret Wing non è stato distrutto completamente, ma la famiglia Nerius aiuterà a sostenerli. L'obiettivo è disabilitare l'Enterprise. La Rebellion verrà in tuo aiuto usando le sue forze per ispezionare la struttura. Ma l'aiuto deve passare attraverso di te, e non dalla famiglia reale.

C'è un Unusual person (einbroch 239, 269) alla banchina del treno di Einbroch. Parla in un codice segreto di cui non ti è mai stato detto nulla. Poi ammette di essere Lazy, la persona che stavi cercando. Poi dice che l'incontro doveva essere a Einbech.

Dopo una LUNGA chiacchierata, Lazy (einbroch 270, 268) genererà automaticamente un /navi per te poco a est della banchina del treno per ottenere un "passaggio gratis". Per evitare di essere tracciato, Lazy vuole portarti attraverso un tunnel invece che con il treno.

Clicca sul Very small hole per essere trasportato a Einbech.

Parla con Lazy (einbech 46, 208) sulla banchina del treno di Einbech. Dopo che avrà finito di blaterare sulla pensione, segnerà sulla tua mappa dove devi andare insieme a un /navi.
Lazy (einbech 76, 131) è in piedi accanto a un mucchio di sabbia che sta coprendo una persona collassata. Quindi Lazy ha il potere degli dei che a quanto pare nemmeno un Arch Bishop è riuscito a salvare un Rebel esausto con la guarigione.

Dopo aver trovato Lazy (einbech 217, 82), lasci cadere a terra l'uomo Rebel che hai trasportato. Lazy dice che qualcuno ha già percepito il suo arrivo, e ti dice di lasciare semplicemente il Gonie all'ingresso.

Una volta dentro, parla con Lazy (rebel_in 21, 45) e lui irrita i Shopkeepers abbastanza da volerci cacciare. Lazy poi racconta loro di Gonie che è a terra fuori. Il shopkeeper porta Gonie dentro e poi chiama Lucky. Lazy inizia a urlare al shopkeeper che era entrato, minacciando di essere cacciato. Alla fine ti lasciano entrare.

Dentro c'è un posto per novizi e anziani. Troverai Lazy (rebel_in 86, 61) accanto al divano. Rivela agli altri di essere un agente dei Secret Wings. Lucky rivela che il suo vero nome è "Rookie" e che "Lucky" è un soprannome. Si verificano un sacco di battibecchi riguardo al tè. Lazy dice agli anziani Rebel cosa vuole il President. Non vogliono aiutare perché sentono che verranno di nuovo traditi. L'anziano se ne va e Lazy cerca di convincere Lucky/Rookie che ha una voce autorevole per provare a convincere gli anziani.

Sali le scale sulla sinistra e parla con Elena Volkova (rebel_in 70, 78). Non vuole lasciarti passare e vuole combattere con te.

Combatti Elena:
- Se sei della classe Priest (forse Acolyte?), puoi saltare questa sezione perché Elena ha abbastanza onore da non combattere i "chierici".
- Una volta sconfitta, ricevi 10 Schwartz's Honor Token.
- Accesso alla quest ripetibile Fighting Elena
Percorri la passerella e parla con il Rebellion leader (rebel_in 122, 71). Cercherà di farti scortare al piano di sotto dai Young Rebellions finché non menzioni Gonie. Parli di cooperazione e lui ride all'idea.

Vai a sud dal Rebellion leader e parla con la Rebellion guard all'ingresso del portale. Non ti lasceranno entrare nonostante Rookie ti abbia mandato. Continua a chiedere alla Rebellion Guard leader e a gridare finché Larcis non sente la tua voce. Poi ti lasciano entrare.

Cammina in avanti all'interno e Dien (rebel_in 164, 88) inizierà a parlarti. La conversazione si sposta su Gonie. Poi chiedi della cooperazione e Ridsh diventa furioso mentre Dien ti ascolta con calma. A Ridsh non importerebbe se Schwartz crollasse.
Dien sceglie di aiutare a convincere gli altri a cooperare.

Consegna al Special Force commander (rebel_in 210, 89) una lettera che Dien ha scritto. Anche se sorpreso e non entusiasta di ciò che ha scritto, accetterà perché potrebbe essere l'ultimo desiderio di Dien.

Torna dal Rebellion leader Rupert (rebel_in 122, 71) nell'angolo del corridoio e consegnagli la lettera di Dien.
Parla con la Rebellion Guard leader che è apparsa accanto a lui. (Passaggio obbligatorio? Credo di sì, alcuni dei miei registri delle quest sono spariti)

Girati e parla di nuovo con il Rebellion leader Rupert. Inizia a fare chiasso e vuole andare a vedere Dien, ma lei appare accanto a lui.
Ascolta Dien mentre dice che accetterà di aiutare i Secret Wings. Due contro uno (Ernst e Dien), e Rupert ancora non sopporta di lasciar perdere tutto ciò che hanno passato pur di aiutare.

Il Rebellion leader Rupert cercherà di far riportare Dien nella sua stanza finché lei non lo afferra per la barba. Dicendo la verità sul fatto che non andranno da nessuna parte se si aggrappano alla vendetta, Rupert alla fine accetta di aiutare. MA SOLO UN PO'!
- Ricevi 10 Schwartz's Honor Token.
- Accesso alla quest ripetibile Preparing for the Party
Torna al piano di sotto da Lazy e informali che la Rebellion aiuterà. Poi ascolta la storia di Rookie sulla sua infanzia; era piccolo e la sua famiglia pensava che fosse inutile, così se n'è andato, ha incontrato Gonie ed è diventato un Rebel. Appaiono gli anziani e fanno ciò che gli anziani fanno meglio: lamentarsi. Rookie fa notare che nessuno dei membri più giovani sa cosa sia successo ai loro tempi perché si rifiutano di parlarne (o di cambiare). Poi tiri fuori il tè della verità e dici loro che Rupert e le altre signore di sopra hanno già accettato di aiutare.
- Lazy decide di restare e poi ricevi EXP e 10 Schwartz's Honor Token.
- Accesso alla quest ripetibile Giving Charity to Charity.
- Accesso alla quest ripetibile Tea Time Snacks.
- Accesso alla quest ripetibile Tracking Down Missing Guns for Master.
- Accesso alla quest ripetibile Twinkle Twinkle Shooting Star.
- Accesso alla quest ripetibile Ericsson Adler.
- Accesso alla quest ripetibile Pamphlet Promotion.
- Accesso alle Side Quests.
Heart Hunter War Base
Rebellion Squadder (rebel_in 65, 46) ti dice che Tess è qui. Puoi dire Sì per essere trasportato sulla banchina del treno di Einbech, oppure puoi andarci a piedi.

Una volta a Einbroch, vai all'hotel (ein_in01 198, 224). Vai al secondo piano nella stanza appena a nord delle scale (ein_in01 273, 276). Tess ti inviterà a entrare.
Parla con Nihil nella stanza d'hotel di Einbroch. A quanto pare, volendo fare qualcosa di concreto, è venuto di persona. Anche Skia è riuscita a lasciare il banchetto. Ora inizia il piano d'attacco alla struttura. Non c'è via di fuga ma sospettano un cancello di teletrasporto.
Viaggia una mappa a nord della città di Einbroch fino al punto dell'operazione e parla con Julian (ein_fild04 281, 337).
L'addomesticamento dei mostri interferirà con la parte successiva della quest. Quindi non farlo. (Anche se non sono sicuro di quali oggetti useresti per addomesticare...)
Parla con Julian per prenotare l'istanza, poi con Striker Unit Commander per entrare. Heart Hunter War Base 1 Instance
Questo non è consigliato per personaggi che non infliggono danni (come gli Arch Bishops senza Adoramus o Judex).
Cammina vicino a Julian, in testa al comando, per iniziare l'istanza.
Compariranno degli Heart Hunter Guards. Conoscono Fury (?), Increase Agi e Bowling Bash, Endure (mentre inseguono?), e forse altro...
C'è un mucchio di polvere da sparo all'estremità nord (1@swat 58, 89). Lascia cadere a terra Antique Gunpowder e fa scattare un allarme, facendo comparire più nemici.
Daglielo a Julian sul lato est e distruggerà tutti i mostri, creando anche un varco.
Continua a camminare verso est e parla di nuovo con Julian avvicinandoti a lui. Gli servirà un po' di tempo per preparare la prossima esplosione.
Camminando verso nord, troverai un Suspicious instrument (1@swat 147, 119). Premi il pulsante, perché non sei tu a seguire le regole, sono le regole a seguire te!
Spawneranno altri Heart Hunter Guards. Anche alcuni Upgraded Heart Hunters. Sconfiggili tutti per procedere. Gli Heart Hunter Guards normali contano come mezza uccisione, mentre gli Upgraded Heart Hunters contano come un'uccisione completa. Ti servono 15 punti kill per continuare.
Cammina verso Julian dopo aver eliminato i cacciatori che odiano chi preme i pulsanti, poi continua verso est.
Julian ha esaurito la polvere da sparo e ha bisogno che tu ne trovi altra. Torna alla precedente barriera difensiva che hai fatto saltare e troverai un Pile of gunpowder ( (@swat 165, 56) sorvegliato dagli Heart Hunter Guards.

Give Julian the gun powder and proceed east. Walk up to Julian and an announcement says they have taken over the Heart Hunter communication room.
Ebel spawns now. You can not go past the area with the vents; you will get teleported back.
Julian paralyzes Ebel after the fight and tells the guards to capture her for research.
Receive 10 Schwartz's Honor Tokens and be warped back to Einbroch Field 04.
Main Quest continued
After exiting from the instance, speak to Rookie and say you're counting on him. Since you haven't found Terra Gloria yet, Rookie warps you to Heart Hunter War base.
Enter the portal next to Rookie to enter Werner Laboratory
Rebellion squadder will take you back out if you desire.
Yuslan will ask you to help him defeat Chimeras; 10 Material Chimera and 10 Human Chimera.
Werner Laboratory Central Room Instance
Speak to Rookie (slabw01 236, 91) to start the instance. (Supposedly you need to talk to him again to get actual quest where you fight the MVP. I was rushing through this part, and I was getting attacked by the Chimeras on the map)
Rookie wants to go to the Central Room
Click on the device to enter the instance.
Listen to Eisen Werner, then walk all the way up and talk to them again.
To both sides, there's a Security Device at the north end of the rooms. There will be a word in brackets. Choose the appropriate colored version in the dialog choice.
| Choose Red = 1st Option | ||||
| Way Back Home | Loneliness | Contradiction | Rose | Sea |
| Joy | Twilight | Glow | Girl | |
| Choose Blue = 2nd Option | ||||
| Purity | Eternity | Dawn | Dream | |
Return to the center and enter the portal.
Eisen Werner is standing on the opposite end, to the north. This evil villain is revealing their plan because they expect you to die in this laboratory. There's also Security Device on both ends of the room.
Once you've unlocked the Security Devices, enter the portal that Eisen was standing in front of.
Speak to Eisen Werner and they explain that the Heart of Ymir was unutilized so that's why they took it. A portal opens at the door he's standing next to.
Go through that door portal and speak to 'Eisen Werner again. The Heart of Ymir's energy goes into the magic circle on the ground and goes into experiment subjects, some of which have died.
You are then warped back to Heart Hunter War Base.
Main Quest continued again
Talk to Rookie (que_swat 150, 58) and he will want to go back to the hotel. He will warp you back to Einbroch Field 04.

Return to the Einbroch Hotel and talk to Philopontess. You will return the Blessing Star to Nihil and then they want to promptly return to Prontera Castle.
Skia Nerius is inside your room in the castle.
- Do you feel it all the time?: She says when she asked to use the Scroll of Movement in the above step at the hotel
- Love: Spica appears
- When is it most serious?
Kronecker enters and they talk about family matters.
You receive 10 Honor Token (not Schwartz) and 2.5 mil Base and Job EXP (VIP)
Spica says Philopontess is waiting at Werner Laboratory for you.
Go to Werner Laboratory and talk to Philopontess (que_swat 145, 57). He will reward you with 10 Schwartz's Honor Token and 2x  Mysterious Egg (12610) + 2x
  Mysterious Egg II (12871)
- Access to People in the Lab repeatable quest.
- Access to Heart Hunter War Base 2 repeatable quest.
- Access to Cutie Chimera C(K)illing repeatable quest.
This is the end of Episode 16.2: Terra Gloria main quest.
Side Quests
Returning the Relics
- Once using the Small Leather Bag, you receive 6 character-bound items. Below are the locations to turn those items in:
- Old Rings - Knight Windsor in the Prontera pub in the inner ring to the south-east (prt_in 177, 26). He knew something was wrong when he found Seyren's Pecopeco.
- Locket Pendant - Knight Windsor (from above) is upset that his children ended up dead. With no wife or children anymore, he will probably drown his sorrows at the pub he's in.
- Wood Rosary - Sister Margaret at St. Capitolina Abbey (prt_monk 93, 254), the home of the monks. Margaret recalls how Margaretha Sorin was such a tomboy when she was younger. Speaking to her again will give you a chance to be warped directly to Prontera.
- Portable Sewing Box - Hunter Sherine is inside the house to the right of the North Kafra in Payon (payon 187, 233) at the end of the hallway. Cecil asked her sister how to sew so she could put a button on her clothing and appear more feminine.
- Decorated Archer's Thimble - Blacksmith Cleaver is downstairs of the Juno weapon shop (yuno_in01 163, 31) and wonders what happened to Howard. It was a gift that he had trouble making. Howard has an older brother that Cleaver will give the thimble to.
- Assassin's Mark Dagger - Go to the Morroc Bar (morocc 45, 107) Guile Marovitz is in the Morroc pub (que_job01 89, 91). Eremes always hated failed missions and was usually pretty lucky; except this time.
Rachel's Repair Work
- Rachel Smith has had it with people lying they "lost" their weapons when they only merely broke. The weapons have a high defect rate. She requests you to bring Rachel's Revolver to the Blacksmith Guild for them to inspect it.
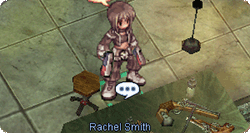
- Travel to Einbroch's Blacksmith Guild and speak to Blacksmith Jack who scrutinizes her work. He concludes that it's the impurity of materials that she is using that is causing the issue.
- Return to Rachel Smith inside the Rebellion base where she says she suspected it might be the materials causing the issue. Grant her favor and say you will come back daily with better materials.

Receive 7 Schwartz's Honor Token. You can now do the daily quest from Rachel Smith.
Enable Teleportation in Schwartz!
Speak to Arinoa Yurhik next to the fireplace (rebel_in 82, 68). Some man appears nearby asking if you were the one making a fuss in Clana Nemieri.
Arivero Yuhrik (rebel_in 78, 66) is self-proclaimed "hot" guy and is seemingly just an obnoxious "bro". There's unspoken communication between the two siblings and then Vero says he wants you to go to four places and destroy things.
You get four options After choosing one, he will disappear.
After waiting (some amount of time), return to Arinoa Yurhik (potentially 4am server time; could depend on previous step's choice in dialog options.
Arivero Yuhrik appears saying the preparation is complete. Schwaltzvalt bans teleportation in the cities due to potential magic overuse. Arivero believes the Schwaltzvalt government installed equipment to protect secret Rekenber research, citing the timeline of events and the disappearance of people in the Slums.
He explains how "H" in a guard suit was patrolling and found an abnormal device and that there was very strong wind that day and H saw something but it quickly vanished.
Guard Clothes: H makes his daughter clean and iron his clothes; because apparently, he can't do it for himself...
Club: Standard unexpected situation preparedness
The way H patrolled: H follows the manual and follows the same course every day Freight train: A coal train stopped at night, it doesn't operate often because of monsters in the mine
A strong Wind: Mountainous areas can sometimes cause strong winds
The turned-off torch: It was strange that it was the first time a torch turned off
Repeating a few times (I think about the torch). Vero's theory is that fire is the strongest right before being turned off. He wants you to bring some fire items to the train to test his theory.
Walk near the end of the freight train (einbech 212, 212) and Arivero Yurhik will appear.
- Things that are known to work here:
- Flame Heart
- ?
The Teleport Prohibition equipment is unscathed so Vero suggests bringing Water based items.
- Things that are known to work here:
- Mystic Frozen
After using the water items, the equipment is destroyed. Return to the Rebellion Base and speak to Arinoa Yurhik to make her younger brother Vero appear.
Arivero Yurhik tells us an agent found another teleport prohibition equipment (Water) in a Lighthalzen mansion. Tell him that Rough Wind is the element stone that is strong against water.
In Lighthalzen (lighthalzen 135, 233), Arivero Yurhik requires 1 Mystic Frozen and 3 Rough Wind to reveal and destroy the equipment.
Return to the base and talk to Arinoa Yurhik to get Arivero Yurhik to appear. You start to wonder if his elder sister is actually pleased, and he says she's just shy. Then the device that prevents the prohibition equipment from disappearing broke. He needs a Star Crumb to fix it.
- Just laugh it off
- Ask him: He gets defensive and you just laugh it off anyway.
Travel to Juno (yuno 204, 226) with 4 Great Natures and 1 Rough Wind and give them to Arivero Yurhik. Rekenber and the government seemed to have caught on. He tells you of the last location in Einbroch and runs away as if being chased.
In the south-east of Einbroch (einbroch 262, 42) is a panicked Arivero Yurhik. He asks you to destroy this one, and as soon as you do, Vero teleports away suspiciously. Inside the base, talk to Arinoa Yurhik and Rebellion leader appears and is confused because there is no large mission that he knows about. You explain the mission but the Rebellion leader doesn't know of any Arivero Yurhik... He tells you that Arinoa's younger brother died in an accident a while ago. Receive 10 Schwartz's Honor Token, Base EXP and Job EXP and a lot of unanswered questions.
If you talk to Arinoa again, you have the chance to say hello and a text-input box appears. If this is a continuation of a quest, we are not sure.
Helping Elena
Choose the second option I am not busy today, I stopped by. when talking to Elena Volkova and she tells you that USU means "Under Seal Unit", kinda like the Suicide Squad; they did bad things, but are given a leash to explore on(?). Elena tells you about these two underage orphans who might be kicked out and requests you to solve their problem.
Go downstairs and talk to Jana Levedeva (rebel_in 109, 54).
Return to Elena Volkova upstairs and Tell her about Lebedev twins.
She tells you to ask Milo and Mason about them:
Speaking to Milo Rivers at the opposite staircase and he tells you they excelled in shooting. Allegedly Jana threw a grenade into a civilian zone. After being moved to the USU unit, they began to disobey the seniors.

Mason Bender at the base entrance thinks nothing positive of the two. Ilya apparently shot Mason with a stray bullet.
- Ask them directly:
- Beat around the bush:
After no luck, return to Elena Volkova upstairs. She sends you to go ask their previous leader.
Downstairs by the fireplace, Ericsson Adler and he gives you Delicious Handmade Cookie to eat and chat with them over.
Walk over to Jana Levedava and Give them the cookie. Tell them that Commander Adler, yourself, and Elena are worried about the two of them. Jana starts breaking down because she wasn't in shape, and Ilya tells you she didn't throw the grenade on purpose. They became scared after they were transferred and begun to act out and get even more scared. They give you permission to tell Elena their feelings.
Tell Elena Volkova that the twins felt they were a burden. Elena mistakenly had treated them as adults, which didn't help.
Return to Jana Levedava and bring them to Elena, saying that you will defend the twins.
Talk to Elena Volkova and say I have brought Lebedev sisters I thought it was male/female twins. Elena yells at them for having run away. Then she apologies to the two. She then tells them that she will not put them in real combat missions so they can make friends or train. After all of this, receive 10 Schwartz's Honor Token, Base EXP and Job EXP.
You now have access to Cookie Delivery (Name not final) daily quest.