16.2 Terra Gloria/th: Difference between revisions
Machine translation (deepseek-flash) |
Machine translation (deepseek-flash) |
||
| Line 50: | Line 50: | ||
[[File:UnusualPerson-Lazy-Einbroch.png|frameless]] | [[File:UnusualPerson-Lazy-Einbroch.png|frameless]] | ||
หลังจากพูดคุยกันยาวนาน Lazy {{#navi:einbroch|270|268}} จะสร้าง /navi ให้คุณโดยอัตโนมัติไปยังจุดที่อยู่ทางตะวันออกเล็กน้อยของชานชาลารถไฟ เพื่อให้ได้ "นั่งฟรี" เพื่อหลีกเลี่ยงการถูกตามรอย Lazy ต้องการพาคุณไปทางอุโมงค์แทนรถไฟ. | |||
[[File:Lazy-Einbroch.png|frameless]] | [[File:Lazy-Einbroch.png|frameless]] | ||
คลิกที่ Very small hole เพื่อถูกส่งไปยัง Einbech. | |||
[[File:VerySmallHole-Einbroch.png|frameless]] | [[File:VerySmallHole-Einbroch.png|frameless]] | ||
พูดคุยกับ Lazy {{#navi:einbech|46|208}} ที่ชานชาลารถไฟ Einbech หลังจากที่เขาพูดพร่ำเรื่องเกษียณจบ เขาจะทำเครื่องหมายบนแผนที่ของคุณว่าต้องไปที่ไหน พร้อมกับ /navi | |||
Lazy {{#navi:einbech|76|131}} ยืนอยู่ข้างกองทรายที่ปกคลุมร่างคนที่ล้มหมดสติอยู่ ดังนั้น Lazy มีพลังจากเหล่าทวยเทพ ซึ่งดูเหมือนว่าแม้แต่ Arch Bishop ก็ยังไม่สามารถช่วย Rebel ที่หมดแรงด้วยการรักษาได้ | |||
Lazy {{#navi:einbech|76|131}} | |||
[[File:Lazy2-Einbech.png|frameless]] | [[File:Lazy2-Einbech.png|frameless]] | ||
หลังจากพบ Lazy {{#navi:einbech|217|82}} คุณวางชาย Rebel ที่หามมาลงบนพื้น Lazy บอกว่ามีบางคนรับรู้ถึงการมาถึงของเขาแล้ว และเขาบอกให้คุณแค่ทิ้ง Gonie ไว้ที่ทางเข้า | |||
[[File:Lazy3-Einbech.png|frameless]] | [[File:Lazy3-Einbech.png|frameless]] | ||
เมื่อเข้ามาข้างในแล้ว พูดคุยกับ Lazy {{#navi:rebel_in|21|45}} และเขาทำให้พวก Shopkeeper เกิดอารมณ์จนอยากไล่พวกเราออก Lazy จึงเล่าให้พวกเขาฟังเกี่ยวกับ Gonie ที่นอนอยู่ข้างนอก พวก Shopkeeper พา Gonie เข้ามาข้างในแล้วเรียก Lucky Lazy เริ่มตะโกนเรียก Shopkeeper ที่เข้าไปข้างใน โดยขู่ว่าจะถูกไล่ออก ในที่สุดพวกเขาก็ยอมให้คุณเข้ามาข้างใน | |||
[[File:Lazy1-Rebel-Inn.png|frameless]] | [[File:Lazy1-Rebel-Inn.png|frameless]] | ||
ข้างในเป็นที่สำหรับมือใหม่และผู้สูงอายุ คุณจะพบ Lazy {{#navi:rebel_in|86|61}} ข้างโซฟา เขาเปิดเผยกับคนอื่นว่าเขาเป็นสายลับของ Secret Wings Lucky เปิดเผยว่าชื่อจริงของเขาคือ "Rookie" และ "Lucky" เป็นชื่อเล่น มีการโต้เถียงกันมากมายเกี่ยวกับน้ำชา Lazy บอกพวก Rebel อาวุโสว่าประธานต้องการอะไร พวกเขาไม่อยากช่วยเพราะรู้สึกว่าจะถูกทรยศอีกครั้ง ผู้อาวุโสออกไป และ Lazy พยายามโน้มน้าว Lucky/Rookie ว่าเขามีเสียงแห่งอำนาจเพื่อลองโน้มน้าวพวกผู้อาวุโส | |||
[[File:Lazy2-Rebel Inn.png|frameless]] | [[File:Lazy2-Rebel Inn.png|frameless]] | ||
ขึ้นบันไดไปทางซ้ายแล้วพูดคุยกับ Elena Volkova {{#navi:rebel_in|70|78}} เธอไม่ยอมให้คุณผ่านและต้องการสู้กับคุณ | |||
[[File:ElenaBolkova-Rebel Inn.png|frameless]] | [[File:ElenaBolkova-Rebel Inn.png|frameless]] | ||
สู้กับ Elena: | |||
* '''ถ้าคุณเป็นคลาส Priest (อาจจะ Acolyte?) คุณข้ามส่วนนี้ได้ เพราะ Elena ให้เกียรติพอที่จะไม่สู้กับ "clerics"''' | |||
* ''' | * เมื่อเอาชนะได้ รับ 10 Schwartz's Honor Token | ||
* | * เข้าถึงเควสแบบทำซ้ำ Fighting Elena | ||
* | |||
เดินขึ้นทางเดินและพูดคุยกับ Rebellion leader {{#navi:rebel_in|122|71}} เขาจะพยายามให้ Young Rebellions พาคุณลงไปชั้นล่างจนกว่าคุณจะพูดถึง Gonie พูดถึงความร่วมมือและเขาหัวเราะเยาะข้อเสนอ | |||
[[File:RebellionLeader-Rebel-Inn.png|frameless]] | [[File:RebellionLeader-Rebel-Inn.png|frameless]] | ||
ไปทางใต้จาก Rebellion leader แล้วพูดคุยกับ Rebellion guard ที่ทางเข้าประตูพอร์ทัล พวกเขาไม่ยอมให้คุณเข้าแม้ว่า Rookie จะส่งคุณมา ถาม Rebellion Guard leader ไปเรื่อย ๆ จนกว่า Larcis จะได้ยินเสียงของคุณ และตะโกนต่อไป จากนั้นคุณจะถูกให้เข้าไปข้างใน | |||
[[File:RebellionGuard-Rebel-Inn.png|frameless]] | [[File:RebellionGuard-Rebel-Inn.png|frameless]] | ||
เดินไปข้างหน้าข้างในแล้ว Dien {{#navi:rebel_in|164|88}} จะเริ่มพูดคุยกับคุณ บทสนทนาเปลี่ยนไปที่ Gonie จากนั้นคุณถามถึงความร่วมมือ Ridsh ก็โกรธจัด ในขณะที่ Dien ฟังคุณอย่างใจเย็น Ridsh ไม่สนหรอกว่า Schwartz จะล่มสลาย | |||
Dien เลือกที่จะช่วยโน้มน้าวคนอื่นให้ร่วมมือ | |||
Dien | |||
[[File:Dien-Rebel-Inn.png|frameless]] | [[File:Dien-Rebel-Inn.png|frameless]] | ||
ยื่นจดหมายที่ Dien เขียนให้ Special Force commander {{#navi:rebel_in|210|89}} แม้จะประหลาดใจและไม่ชอบสิ่งที่เธอเขียน แต่พวกเขาจะตกลงเพราะอาจเป็นความปรารถนาสุดท้ายของ Dien | |||
[[File:SpecialForceCommanderErst-Rebel-Inn.png|frameless]] | [[File:SpecialForceCommanderErst-Rebel-Inn.png|frameless]] | ||
กลับไปหา Rebellion leader Rupert {{#navi:rebel_in|122|71}} ที่มุมทางเดิน แล้วส่งจดหมายของ Dien ให้เขา | |||
พูดคุยกับ Rebellion Guard leader ที่ปรากฏตัวข้าง ๆ เขา (ขั้นตอนบังคับหรือเปล่า? คิดว่านะ เพราะบันทึกเควสของฉันบางส่วนหายไป) | |||
[[File:RebellionGuardLeader-Rebel-Inn.png|frameless]] | [[File:RebellionGuardLeader-Rebel-Inn.png|frameless]] | ||
หันกลับไปแล้วพูดคุยกับ Rebellion leader Rupert อีกครั้ง เขาเริ่มก่อความวุ่นวายและต้องการไปหา Dien แต่เธอปรากฏตัวขึ้นข้าง ๆ เขา | |||
ฟัง Dien ขณะที่เธอบอกว่าเธอจะตกลงช่วย Secret Wings สองต่อหนึ่ง (Ernst กับ Dien) และ Rupert ก็ยังไม่ยอมทนที่จะปล่อยวางทุกสิ่งที่พวกเขาอดทนมาเพื่อช่วย | |||
[[File:DienOutside-Rebel-Inn.png|frameless]] | [[File:DienOutside-Rebel-Inn.png|frameless]] | ||
Rebellion leader Rupert จะพยายามให้คนพา Dien กลับไปที่ห้องของเธอ จนกระทั่งเธอคว้าเคราของเขา พูดความจริงว่าพวกเขาจะไม่ไปถึงไหนถ้ายังยึดติดกับความแค้น สุดท้าย Rupert ก็ตกลงช่วย แต่แค่เพียงเล็กน้อยเท่านั้น! | |||
Rebellion leader Rupert | |||
* รับ 10 Schwartz's Honor Token | |||
* | * เข้าถึงเควสแบบทำซ้ำ Preparing for the Party | ||
* | |||
กลับลงไปชั้นล่างหา Lazy และแจ้งให้พวกเขาทราบว่า Rebellion จะช่วย จากนั้นฟังเรื่องราววัยเด็กของ Rookie เขาตัวเล็กและครอบครัวคิดว่าเขาไร้ประโยชน์ เขาจึงออกไปและพบ Gonie แล้วกลายเป็น Rebel พวกอาวุโสปรากฏตัวและทำสิ่งที่พวกอาวุโสทำได้ดีที่สุด นั่นคือบ่น Rookie ชี้ให้เห็นว่าไม่มีสมาชิกรุ่นใหม่คนไหนรู้ว่าเกิดอะไรขึ้นในสมัยของพวกเขา เพราะพวกเขาปฏิเสธที่จะพูดถึงมัน (หรือเปลี่ยนแปลง) จากนั้นคุณก็งัดชาแห่งความจริงออกมาและบอกพวกเขาว่า Rupert กับพวกสุภาพสตรีคนอื่น ๆ ข้างบนตกลงจะช่วยแล้ว | |||
* Lazy ตัดสินใจอยู่ต่อ จากนั้นคุณได้รับ EXP และ 10 Schwartz's Honor Token | |||
* Lazy | * เข้าถึงเควสแบบทำซ้ำ Giving Charity to Charity | ||
* | * เข้าถึงเควสแบบทำซ้ำ Tea Time Snacks | ||
* | * เข้าถึงเควสแบบทำซ้ำ Tracking Down Missing Guns for Master | ||
* | * เข้าถึงเควสแบบทำซ้ำ Twinkle Twinkle Shooting Star | ||
* | * เข้าถึงเควสแบบทำซ้ำ Ericsson Adler | ||
* | * เข้าถึงเควสแบบทำซ้ำ Pamphlet Promotion | ||
* | * เข้าถึงเควสรอง | ||
* | |||
==== Heart Hunter War Base ==== | ==== Heart Hunter War Base ==== | ||
Rebellion Squadder {{#navi:rebel_in|65|46}} | Rebellion Squadder {{#navi:rebel_in|65|46}} บอกคุณว่า Tess อยู่ที่นี่ คุณสามารถตอบ Yes เพื่อถูกส่งไปยังชานชาลารถไฟ Einbech หรือจะเดินไปที่นั่นก็ได้ | ||
[[File:RebellionSquadder-Rebel-Inn.png|frameless]] | [[File:RebellionSquadder-Rebel-Inn.png|frameless]] | ||
เมื่ออยู่ใน Einbroch ให้ไปที่โรงแรม {{#navi:ein_in01|198|224}} ขึ้นไปชั้นสองในห้องที่อยู่ทางเหนือของบันได {{#navi:ein_in01|273|276}} Tess จะเชิญคุณเข้าไป | |||
พูดคุยกับ Nihil ในห้องโรงแรมที่ Einbroch ดูเหมือนว่าเขาต้องการลงมือทำอะไรจริง ๆ เขาจึงมาด้วยตัวเอง Skia ก็จัดการออกจากงานเลี้ยงได้เช่นกัน ตอนนี้แผนโจมตีสถานที่ก็เริ่มขึ้น ไม่มีเส้นทางหลบหนี แต่พวกเขาสงสัยว่ามีประตูเทเลพอร์ต | |||
เดินทางไปหนึ่งแผนที่ทางเหนือของเมือง Einbroch ไปยังจุดปฏิบัติการ แล้วพูดคุยกับ Julian {{#navi:ein_fild04|281|337}} | |||
Monster Taming จะรบกวนส่วนถัดไปของเควสต์ ดังนั้นอย่าทำ (ถึงแม้จะไม่แน่ใจว่าจะใช้ไอเทมอะไรในการ Tame...) | |||
Monster | |||
คุยกับ Julian เพื่อจองอินสแตนซ์ จากนั้นคุยกับ Striker Unit Commander เพื่อเข้า | |||
Heart Hunter War Base 1 Instance | Heart Hunter War Base 1 Instance | ||
<u>ไม่แนะนำสำหรับตัวละครที่ไม่ใช่สายดาเมจ (เช่น Arch Bishop ที่ไม่มี Adoramus หรือ Judex)</u> | |||
<u> | |||
เดินไปใกล้ Julian ที่หัวหน้าหน่วยบัญชาการเพื่อเริ่มอินสแตนซ์ | |||
Heart Hunter Guards จะสปอว์น พวกมันมีความสามารถ Fury (?), Increase Agi และ Bowling Bash, Endure (ตอนไล่?) และอาจมีมากกว่านั้น... | |||
Heart Hunter Guards | |||
มีกองดินปืนที่ปลายด้านเหนือ {{#navi:1@swat|58|89}} มันจะดรอป Antique Gunpowder ลงบนพื้นและทำให้สัญญาณเตือนดังขึ้น ทำให้ศัตรูสปอว์นเพิ่มขึ้น | |||
มอบมันให้ Julian ทางด้านตะวันออก แล้วมันจะทำลายมอนสเตอร์ทั้งหมดและเปิดช่องทาง | |||
เดินต่อไปทางตะวันออกและเดินเข้าไปหา Julian เพื่อคุยกับเขาอีกครั้ง เขาจะต้องใช้เวลาสักครู่ในการวางระเบิดครั้งถัดไป | |||
เดินขึ้นไปทางเหนือ คุณจะพบ Suspicious instrument {{#navi:1@swat|147|119}} กดปุ่มเลย เพราะถ้าคุณไม่ทำตามกฎ กฎจะทำตามคุณ! | |||
Heart Hunter Guards จะสปอว์นเพิ่มขึ้น รวมถึง Upgraded Heart Hunter บางตัวด้วย กำจัดพวกมันทั้งหมดเพื่อดำเนินต่อ Heart Hunter Guards ปกติจะนับเป็นครึ่งคิล และ Upgraded Heart Hunter จะนับเป็นหนึ่งคิล คุณต้องมี 15 แต้มคิลเพื่อไปต่อ | |||
เดินไปหา Julian หลังจากกำจัดเหล่าฮันเตอร์ที่เกลียดคนกดปุ่มหมดแล้ว จากนั้นเดินต่อไปทางตะวันออก | |||
Julian ใช้ดินปืนหมดและต้องการให้คุณหามาเพิ่ม เดินกลับไปที่กำแพงป้องกันก่อนหน้าที่คุณระเบิด แล้วคุณจะพบ Pile of gunpowder ( {{#navi:@swat|165|56}}ซึ่งมี Heart Hunter Guards เฝ้าอยู่ | |||
Julian | |||
[[File:PileOfGunPowder.png|frameless]] | [[File:PileOfGunPowder.png|frameless]] | ||
มอบดินปืนให้ Julian แล้วเดินต่อไปทางตะวันออก เดินเข้าไปหา Julian แล้วจะมีการประกาศว่าพวกเขายึดห้องสื่อสารของ Heart Hunter ได้แล้ว | |||
Ebel จะสปอว์นตอนนี้ คุณไม่สามารถผ่านพื้นที่ที่มีช่องระบายอากาศได้ จะถูกเทเลพอร์ตกลับ | |||
Ebel | |||
Julian ทำให้ Ebel เป็นอัมพาตหลังการต่อสู้ และสั่งให้เหล่ายามจับตัวเธอไปวิจัย | |||
Julian | |||
รับ Schwartz's Honor Token 10 ชิ้น และถูกวาร์ปกลับไปที่ Einbroch Field 04 | |||
==== ภารกิจหลักดำเนินต่อ ==== | |||
= | หลังจากออกจากอินสแตนซ์แล้ว ให้คุยกับ Rookie และบอกว่าคุณฝากความหวังไว้กับเขา เนื่องจากคุณยังไม่พบ Terra Gloria Rookie จะวาร์ปคุณไปที่ Heart Hunter War Base | ||
เข้าประตูวาร์ปข้าง Rookie เพื่อเข้า Werner Laboratory | |||
Rebellion squadder จะพาคุณกลับออกไป หากคุณต้องการ | |||
Rebellion squadder | |||
Yuslan จะขอให้คุณช่วยเขากำจัด Chimeras; Material Chimera 10 ตัว และ Human Chimera 10 ตัว | |||
Yuslan | |||
==== Werner Laboratory Central Room Instance ==== | ==== Werner Laboratory Central Room Instance ==== | ||
คุยกับ Rookie {{#navi:slabw01|236|91}} เพื่อเริ่มอินสแตนซ์ (คาดว่าต้องคุยกับเขาอีกครั้งเพื่อรับเควสต์จริงที่คุณจะได้สู้กับ MVP ตอนนั้นฉันรีบผ่านส่วนนี้ และถูก Chimeras บนแผนที่โจมตี) | |||
Rookie ต้องการไปที่ Central Room | |||
Rookie | |||
คลิกที่อุปกรณ์ เพื่อเข้าอินสแตนซ์ | |||
<div lang="en" dir="ltr" class="mw-content-ltr"> | <div lang="en" dir="ltr" class="mw-content-ltr"> | ||
Revision as of 12:07, 13 October 2026
ก่อนเริ่มเควสใด ๆ ให้ทำ New World Quest!
Temporal Tina is an NPC who sells Episode Clear Tickets. She is located in Prontera (prontera 140, 174) and the Main Office (main_office 94, 59).

|

|
| (prontera 140, 174) | (main_office 94, 59) |
Episode Clear Tickets
Episode Clear Ticket เป็นไอเทมใช้แล้วหมดไปที่ช่วยให้คุณข้ามเควสหลักของ Episode ได้ เมื่อใช้ไอเทมนี้ คุณจะสามารถเข้าถึง NPC, ดันเจี้ยน และร้านค้าอุปกรณ์ทั้งหมดได้ทันที ซึ่งโดยปกติแล้วคุณจะต้องทำ Episode ให้เสร็จหรือทำเควสบางอย่างเพื่อปลดล็อก
โปรดทราบว่าการใช้ Episode Clear Ticket จะทำให้คุณพลาดรางวัลจากเควส เช่น EXP, Zeny, ชื่อเสียง และไอเทม
Episode Clear Ticket บางใบมีเงื่อนไขที่ต้องมีก่อน หากเป็นตัวละครแรกของคุณในเซิร์ฟเวอร์ คุณยังคงต้องเล่นจาก Episode 17.2 ไปจนถึง Episode สุดท้ายตามปกติ
ตรวจสอบตารางด้านล่างเพื่อดูเงื่อนไขและราคาของตั๋วแต่ละใบ
| Episode Clear Tickets | |||
|---|---|---|---|
| Episode Ticket | เลเวล | ค่า Zeny | เงื่อนไขที่ต้องมีก่อน |
 Episode 14 Clear Ticket (1000284) Episode 14 Clear Ticket (1000284)
|
160 | 1,000,000 | ไม่มี |
 Episode 15 Clear Ticket (1000286) Episode 15 Clear Ticket (1000286)
|
140 | 1,000,000 | ไม่มี |
 Episode 16 Clear Ticket (1000282) Episode 16 Clear Ticket (1000282)
|
100 | 1,000,000 | None |
 Episode 17.1 Clear Ticket (1000285) Episode 17.1 Clear Ticket (1000285)
|
110 | 2,000,000 | None |
 Episode 17.2 Clear Ticket (1000287) Episode 17.2 Clear Ticket (1000287)
|
130 | 4,000,000 | The current character has cleared Episode 17.1 |
 Episode 18 Clear Ticket (1000288) Episode 18 Clear Ticket (1000288)
|
170 | 9,000,000 | The current character has cleared Episode 17.2 |
 Episode 19 Clear Ticket (1000988) Episode 19 Clear Ticket (1000988)
|
200 | 12,000,000 | The current character has cleared Episode 18 AND one character in the master account has cleared Episode 19 and the side quests "Purification Saint" and "Frozen Sea" |
 Episode 20 Clear Ticket (1001214) Episode 20 Clear Ticket (1001214)
|
215 | 16,000,000 | The current character has cleared Episode 19 AND one character in the master account has cleared Episode 20 |
 Episode 21 Clear Ticket (1001215) Episode 21 Clear Ticket (1001215)
|
230 | 32,000,000 | The current character has cleared Episode 20 AND one character in the master account has cleared Episode 21 |
 Chapter 1 Clear Ticket (50098) Chapter 1 Clear Ticket (50098)
|
265 | 64,000,000 | One character in the master account has cleared Chapter 1 and complete Zero Cell Sector |
How to check which episode I have unlocked?
Right now, we don't have a feature which simply tells you which episode you are.
So here's some things you can do to check it by yourself:
| Episode Quest | ||
|---|---|---|
| Episode | Steps | Description |
| Episode 15 | Click on Warper > Instances > Central Laboratory. | If you can go, you have completed the Episode 15 quest. |
| Episode 16 | Click on Warper > Instances > Heart Hunter War Base. | If you can go, you have completed the Episode 16 quest. |
| Episode 17.1 | Use @go 46. (Cor) | If you can go, you have completed the Episode 17.1 quest. |
| Episode 17.2 | Use @go 47. (Varmundt's Mansion) | If you can go, you have completed the Episode 17.2 quest. |
| Episode 18 | Use @go 51. (Gray Wolf Village) | If you can go, you have completed the Episode 18 quest. |
| Episode 19 | Use @go 53. (Ice Castle) | If you can go, you have completed the Episode 19 quest. |
| Episode 20 | Click on Warper > Instances > The Immortal. | If you can go, you have completed the Episode 20 quest. |
| Episode 21 | Click on Warper > Instances > Final Battle. | If you can go, you have completed the Episode 21 quest. |
เควสหลัก
- คุณต้องมี Ritual of Blessing.
ในห้องส่วนตัวของคุณในปราสาท คุณจะพบทั้ง Nihil M. Heine และตัวปลอมของ Spica รอคุณอยู่ พูดคุยกับ Nihil (prt_cas_q 21, 39).
- Spica ตัวจริงออกไปสืบเรื่องบางอย่าง และจะปรากฏตัวหลังจากนั้นไม่นาน

เมื่อ Spica Nerius ปรากฏตัว พูดคุยกับเธอ (prt_cas_q 23, 36) เพื่อพบว่า Crux พบสาวใช้ที่ให้ยาแก่สมาชิกราชวงศ์ใน muka juice ของเขา สาวใช้เปิดเผยว่าหนึ่งในมหาดเล็กเป็นผู้วางแผน การสืบสวนของ Crux ยังพบว่ามหาดเล็กผู้นั้นมาจาก Republic of Schwartzvald. Crux ตามล่ามหาดเล็กทรยศต่อไปและตามเขาไปที่ Lighthalzen.

แม้ว่า Crux จะมีความสามารถ แต่เขาก็ยังเป็นแค่คนคนเดียว Nihil M. Heine กังวลและขอให้คุณไปช่วย Crux สืบสวน เพราะ "อิสรภาพ" ของคุณจากการไม่เป็นราชวงศ์ Skia จะไปที่ Lighthalzen เพื่อช่วยสืบสวนด้วย ทั้งคู่จะพบคุณที่สนามบิน Lighthalzen.
ตามหา Crux (lhz_airport 189, 39) ทางด้านขวาของสนามบิน Skia คาดว่ามหาดเล็กที่หลบหนีจะปรากฏตัวใน Lighthalzen แทน Einbroch เนื่องจากปัญหามลพิษทางอุตสาหกรรมของ Einbroch พวกเขารู้ว่าเขาชื่อ Bruno คุณอาจจำได้ว่าเคยพบ Bruno ที่ด้านบนของบันไดด้านตะวันออกในงาน Banquet กลุ่มสืบสวนของคุณแยกกัน โดย Crux จะตรวจสอบทางใต้ของ Lighthalzen Skia จะตรวจสอบย่านการค้า และคุณต้องตรวจสอบทางเหนือและตะวันออกเฉียงเหนือ จุดนัดพบอยู่ใกล้ห้างสรรพสินค้ากลาง.

เดินไปที่มุมด้านหลังทางเหนือของบ้านหลังที่อยู่เหนือสุด (lighthalzen 184, 292) ในเมือง คุณจะเห็นชายคนหนึ่งและนักวิทยาศาสตร์ ชายคนนั้นพยายามข่มขู่นักวิทยาศาสตร์เพื่อเงินเพิ่ม เพราะเขาไม่สามารถอาศัยอยู่ใน Rune Midgard หรือ Republic of Schwartzvald ได้อีกต่อไป ทั้งสองตกลงที่จะพบกันในสลัมข้าง ๆ เพื่อหลบสายตาผู้คน หลังจากชายคนนั้นจากไป นักวิทยาศาสตร์ก็พึมพำกับคนอื่นว่าชายคนนั้นจะต้องถูกฆ่า เพราะการเรียกร้องเงินมากเกินไปก็แย่พอ ๆ กับการเรียกร้องน้อยเกินไป.
ไม่บังคับ: ไปที่จุดนัดพบนอกห้างสรรพสินค้า (lighthalzen 202, 167) คุณจะพบ Skia ที่นั่นและบอกเธอว่าคุณได้ยินอะไร เธอบอกให้คุณเดินหน้าเข้าไปในสลัมก่อน ในขณะที่เธอจะไปบอก Crux แล้วพวกเขาจะตามคุณไป.
ชายคนนั้นอยู่ในสลัม (lighthalzen 309, 263) และคุณเรียกชื่อ "Bruno" เขาก็ประหลาดใจ ทันใดนั้น Heart Hunter ก็ปรากฏตัวขึ้นใกล้ชายคนนั้นและทำให้เขาตกใจ ในตอนนี้ ชายคนนั้นรู้ตัวว่านักวิทยาศาสตร์หลอกเขา เพราะเขาไม่ได้รับเงิน Crux และ Skia ปรากฏตัวขึ้นและจำได้ว่า Heart Hunter เป็นทหารรับจ้างประเภทเดียวกับที่ถูกจับและสอบปากคำมาก่อน Crux กระตือรือร้นที่จะจับชายคนใหม่คนนี้และสอบปากคำแบบจะ ๆ Heart Hunter รู้ตัวว่าไม่มีอะไรทำได้มากนักในตอนที่ Crux, Skia และคุณอยู่ที่นั่น เขาจึงระเบิดฆ่าตัวตาย Skia บอก Bruno ว่าควรให้ความร่วมมือ เพราะ Heart Hunter พวกนั้นจะตามล่าเขาไปตลอดชีวิต และอย่างน้อย Rune Midgard ก็จะไม่ฆ่าเขาหากเขาร่วมมือ Crux พา Bruno กลับไปที่พระราชวัง.

กลับไปที่ห้องของคุณในปราสาท แล้วคุณจะเห็นทั้ง Nihil M. Heine และ Spica Nerius รอคุณอยู่ พูดคุยกับ Nihil Crux ได้สอบปากคำ Bruno และได้คำสารภาพมาง่าย ๆ ดูเหมือนจะมี "enterprise" อยู่เบื้องหลังต้นตอของปัญหา Bruno ถูกส่งให้รัฐบาล Schwartz เป็นส่วนหนึ่งของข้อตกลงเพื่อขออนุญาตสืบสวนสถานที่แห่งหนึ่งใน Republic of Schwartzvald คุณจะได้เลือกจากสองตัวเลือก ทั้งคู่จะนำไปสู่บทสนทนาเดียวกัน.
- Skia ถูกส่งไปทำภารกิจโดย Spica ซึ่งเป็นเหตุผลว่าทำไมเธอถึงไม่อยู่ในห้อง แม้ว่าเธอจะบอกคุณที่ Lighthalzen ว่าเธอจะกลับไปที่พระราชวังด้วย นอกจากนี้ ดูเหมือนว่าสิ่งของสำคัญของตระกูล Nerius ถูกนำไปยังสถานที่ต้องสงสัยใน Schwartzvald และพวกเขาต้องการอนุญาตจากรัฐบาล Schwartzvald เพื่อสืบสวน ดูเหมือนว่ารัฐบาล Schwartzvald รับรู้ปัญหาบางอย่างอยู่แล้ว เนื่องจาก Crux ยุ่งมากกับการสืบสวน จึงต้องการกำลังคนเพิ่ม งานของคุณคือคุ้มกัน Spica ซึ่งทำให้ Crux ว่างพอจะเคลื่อนไหวได้.
คราวนี้เดินทางไปสนามบิน Juno และพบ Crux (y_airport 168, 41) เขาและ Skia ต้องการประชุมที่ Yuno แต่ Spica รู้สึกว่าความเป็นราชวงศ์ของเธอจะดึงดูดผู้คน จึงอยากพบที่โรงแรม Lighthalzen แทน เขาจะวาร์ปคุณไปสนามบิน Lighthalzen โดยพูดว่า ฉันจะฝากความหวังไว้กับคุณ.
ห้องสุดท้ายในโรงแรมคือที่ที่คุณจะพบ Spica Nerius เธอแนะนำคุณให้รู้จักกับผู้แทนรัฐบาล Schwartz.
พูดคุยกับ Philopontess (lhz_in02 239, 148) ที่ใช้ชื่อว่า "Tess".
- ฟังหน่อยสิ: Tess กล่าวว่า Secret Wing ไม่ได้ถูกทำลายทั้งหมด แต่ตระกูล Nerius จะช่วยสนับสนุนพวกเขา เป้าหมายคือปิดการทำงานของ Enterprise Rebellion จะมาช่วยคุณโดยใช้กำลังของพวกเขาตรวจสอบสถานที่ แต่ความช่วยเหลือต้องผ่านคุณ ไม่ใช่ราชวงศ์.

มี Unusual person (einbroch 239, 269) อยู่ที่ชานชาลารถไฟ Einbroch เขาพูดด้วยรหัสลับที่คุณไม่เคยได้รับแจ้ง จากนั้นเขาก็ยอมรับว่าเขาเป็น Lazy คนที่คุณกำลังตามหา เขาเสริมว่าการประชุมควรจะเป็นที่ Einbech.

หลังจากพูดคุยกันยาวนาน Lazy (einbroch 270, 268) จะสร้าง /navi ให้คุณโดยอัตโนมัติไปยังจุดที่อยู่ทางตะวันออกเล็กน้อยของชานชาลารถไฟ เพื่อให้ได้ "นั่งฟรี" เพื่อหลีกเลี่ยงการถูกตามรอย Lazy ต้องการพาคุณไปทางอุโมงค์แทนรถไฟ.

คลิกที่ Very small hole เพื่อถูกส่งไปยัง Einbech.

พูดคุยกับ Lazy (einbech 46, 208) ที่ชานชาลารถไฟ Einbech หลังจากที่เขาพูดพร่ำเรื่องเกษียณจบ เขาจะทำเครื่องหมายบนแผนที่ของคุณว่าต้องไปที่ไหน พร้อมกับ /navi
Lazy (einbech 76, 131) ยืนอยู่ข้างกองทรายที่ปกคลุมร่างคนที่ล้มหมดสติอยู่ ดังนั้น Lazy มีพลังจากเหล่าทวยเทพ ซึ่งดูเหมือนว่าแม้แต่ Arch Bishop ก็ยังไม่สามารถช่วย Rebel ที่หมดแรงด้วยการรักษาได้

หลังจากพบ Lazy (einbech 217, 82) คุณวางชาย Rebel ที่หามมาลงบนพื้น Lazy บอกว่ามีบางคนรับรู้ถึงการมาถึงของเขาแล้ว และเขาบอกให้คุณแค่ทิ้ง Gonie ไว้ที่ทางเข้า

เมื่อเข้ามาข้างในแล้ว พูดคุยกับ Lazy (rebel_in 21, 45) และเขาทำให้พวก Shopkeeper เกิดอารมณ์จนอยากไล่พวกเราออก Lazy จึงเล่าให้พวกเขาฟังเกี่ยวกับ Gonie ที่นอนอยู่ข้างนอก พวก Shopkeeper พา Gonie เข้ามาข้างในแล้วเรียก Lucky Lazy เริ่มตะโกนเรียก Shopkeeper ที่เข้าไปข้างใน โดยขู่ว่าจะถูกไล่ออก ในที่สุดพวกเขาก็ยอมให้คุณเข้ามาข้างใน

ข้างในเป็นที่สำหรับมือใหม่และผู้สูงอายุ คุณจะพบ Lazy (rebel_in 86, 61) ข้างโซฟา เขาเปิดเผยกับคนอื่นว่าเขาเป็นสายลับของ Secret Wings Lucky เปิดเผยว่าชื่อจริงของเขาคือ "Rookie" และ "Lucky" เป็นชื่อเล่น มีการโต้เถียงกันมากมายเกี่ยวกับน้ำชา Lazy บอกพวก Rebel อาวุโสว่าประธานต้องการอะไร พวกเขาไม่อยากช่วยเพราะรู้สึกว่าจะถูกทรยศอีกครั้ง ผู้อาวุโสออกไป และ Lazy พยายามโน้มน้าว Lucky/Rookie ว่าเขามีเสียงแห่งอำนาจเพื่อลองโน้มน้าวพวกผู้อาวุโส

ขึ้นบันไดไปทางซ้ายแล้วพูดคุยกับ Elena Volkova (rebel_in 70, 78) เธอไม่ยอมให้คุณผ่านและต้องการสู้กับคุณ

สู้กับ Elena:
- ถ้าคุณเป็นคลาส Priest (อาจจะ Acolyte?) คุณข้ามส่วนนี้ได้ เพราะ Elena ให้เกียรติพอที่จะไม่สู้กับ "clerics"
- เมื่อเอาชนะได้ รับ 10 Schwartz's Honor Token
- เข้าถึงเควสแบบทำซ้ำ Fighting Elena
เดินขึ้นทางเดินและพูดคุยกับ Rebellion leader (rebel_in 122, 71) เขาจะพยายามให้ Young Rebellions พาคุณลงไปชั้นล่างจนกว่าคุณจะพูดถึง Gonie พูดถึงความร่วมมือและเขาหัวเราะเยาะข้อเสนอ

ไปทางใต้จาก Rebellion leader แล้วพูดคุยกับ Rebellion guard ที่ทางเข้าประตูพอร์ทัล พวกเขาไม่ยอมให้คุณเข้าแม้ว่า Rookie จะส่งคุณมา ถาม Rebellion Guard leader ไปเรื่อย ๆ จนกว่า Larcis จะได้ยินเสียงของคุณ และตะโกนต่อไป จากนั้นคุณจะถูกให้เข้าไปข้างใน

เดินไปข้างหน้าข้างในแล้ว Dien (rebel_in 164, 88) จะเริ่มพูดคุยกับคุณ บทสนทนาเปลี่ยนไปที่ Gonie จากนั้นคุณถามถึงความร่วมมือ Ridsh ก็โกรธจัด ในขณะที่ Dien ฟังคุณอย่างใจเย็น Ridsh ไม่สนหรอกว่า Schwartz จะล่มสลาย
Dien เลือกที่จะช่วยโน้มน้าวคนอื่นให้ร่วมมือ

ยื่นจดหมายที่ Dien เขียนให้ Special Force commander (rebel_in 210, 89) แม้จะประหลาดใจและไม่ชอบสิ่งที่เธอเขียน แต่พวกเขาจะตกลงเพราะอาจเป็นความปรารถนาสุดท้ายของ Dien

กลับไปหา Rebellion leader Rupert (rebel_in 122, 71) ที่มุมทางเดิน แล้วส่งจดหมายของ Dien ให้เขา
พูดคุยกับ Rebellion Guard leader ที่ปรากฏตัวข้าง ๆ เขา (ขั้นตอนบังคับหรือเปล่า? คิดว่านะ เพราะบันทึกเควสของฉันบางส่วนหายไป)

หันกลับไปแล้วพูดคุยกับ Rebellion leader Rupert อีกครั้ง เขาเริ่มก่อความวุ่นวายและต้องการไปหา Dien แต่เธอปรากฏตัวขึ้นข้าง ๆ เขา
ฟัง Dien ขณะที่เธอบอกว่าเธอจะตกลงช่วย Secret Wings สองต่อหนึ่ง (Ernst กับ Dien) และ Rupert ก็ยังไม่ยอมทนที่จะปล่อยวางทุกสิ่งที่พวกเขาอดทนมาเพื่อช่วย

Rebellion leader Rupert จะพยายามให้คนพา Dien กลับไปที่ห้องของเธอ จนกระทั่งเธอคว้าเคราของเขา พูดความจริงว่าพวกเขาจะไม่ไปถึงไหนถ้ายังยึดติดกับความแค้น สุดท้าย Rupert ก็ตกลงช่วย แต่แค่เพียงเล็กน้อยเท่านั้น!
- รับ 10 Schwartz's Honor Token
- เข้าถึงเควสแบบทำซ้ำ Preparing for the Party
กลับลงไปชั้นล่างหา Lazy และแจ้งให้พวกเขาทราบว่า Rebellion จะช่วย จากนั้นฟังเรื่องราววัยเด็กของ Rookie เขาตัวเล็กและครอบครัวคิดว่าเขาไร้ประโยชน์ เขาจึงออกไปและพบ Gonie แล้วกลายเป็น Rebel พวกอาวุโสปรากฏตัวและทำสิ่งที่พวกอาวุโสทำได้ดีที่สุด นั่นคือบ่น Rookie ชี้ให้เห็นว่าไม่มีสมาชิกรุ่นใหม่คนไหนรู้ว่าเกิดอะไรขึ้นในสมัยของพวกเขา เพราะพวกเขาปฏิเสธที่จะพูดถึงมัน (หรือเปลี่ยนแปลง) จากนั้นคุณก็งัดชาแห่งความจริงออกมาและบอกพวกเขาว่า Rupert กับพวกสุภาพสตรีคนอื่น ๆ ข้างบนตกลงจะช่วยแล้ว
- Lazy ตัดสินใจอยู่ต่อ จากนั้นคุณได้รับ EXP และ 10 Schwartz's Honor Token
- เข้าถึงเควสแบบทำซ้ำ Giving Charity to Charity
- เข้าถึงเควสแบบทำซ้ำ Tea Time Snacks
- เข้าถึงเควสแบบทำซ้ำ Tracking Down Missing Guns for Master
- เข้าถึงเควสแบบทำซ้ำ Twinkle Twinkle Shooting Star
- เข้าถึงเควสแบบทำซ้ำ Ericsson Adler
- เข้าถึงเควสแบบทำซ้ำ Pamphlet Promotion
- เข้าถึงเควสรอง
Heart Hunter War Base
Rebellion Squadder (rebel_in 65, 46) บอกคุณว่า Tess อยู่ที่นี่ คุณสามารถตอบ Yes เพื่อถูกส่งไปยังชานชาลารถไฟ Einbech หรือจะเดินไปที่นั่นก็ได้

เมื่ออยู่ใน Einbroch ให้ไปที่โรงแรม (ein_in01 198, 224) ขึ้นไปชั้นสองในห้องที่อยู่ทางเหนือของบันได (ein_in01 273, 276) Tess จะเชิญคุณเข้าไป
พูดคุยกับ Nihil ในห้องโรงแรมที่ Einbroch ดูเหมือนว่าเขาต้องการลงมือทำอะไรจริง ๆ เขาจึงมาด้วยตัวเอง Skia ก็จัดการออกจากงานเลี้ยงได้เช่นกัน ตอนนี้แผนโจมตีสถานที่ก็เริ่มขึ้น ไม่มีเส้นทางหลบหนี แต่พวกเขาสงสัยว่ามีประตูเทเลพอร์ต
เดินทางไปหนึ่งแผนที่ทางเหนือของเมือง Einbroch ไปยังจุดปฏิบัติการ แล้วพูดคุยกับ Julian (ein_fild04 281, 337)
Monster Taming จะรบกวนส่วนถัดไปของเควสต์ ดังนั้นอย่าทำ (ถึงแม้จะไม่แน่ใจว่าจะใช้ไอเทมอะไรในการ Tame...)
คุยกับ Julian เพื่อจองอินสแตนซ์ จากนั้นคุยกับ Striker Unit Commander เพื่อเข้า Heart Hunter War Base 1 Instance
ไม่แนะนำสำหรับตัวละครที่ไม่ใช่สายดาเมจ (เช่น Arch Bishop ที่ไม่มี Adoramus หรือ Judex)
เดินไปใกล้ Julian ที่หัวหน้าหน่วยบัญชาการเพื่อเริ่มอินสแตนซ์
Heart Hunter Guards จะสปอว์น พวกมันมีความสามารถ Fury (?), Increase Agi และ Bowling Bash, Endure (ตอนไล่?) และอาจมีมากกว่านั้น...
มีกองดินปืนที่ปลายด้านเหนือ (1@swat 58, 89) มันจะดรอป Antique Gunpowder ลงบนพื้นและทำให้สัญญาณเตือนดังขึ้น ทำให้ศัตรูสปอว์นเพิ่มขึ้น
มอบมันให้ Julian ทางด้านตะวันออก แล้วมันจะทำลายมอนสเตอร์ทั้งหมดและเปิดช่องทาง
เดินต่อไปทางตะวันออกและเดินเข้าไปหา Julian เพื่อคุยกับเขาอีกครั้ง เขาจะต้องใช้เวลาสักครู่ในการวางระเบิดครั้งถัดไป
เดินขึ้นไปทางเหนือ คุณจะพบ Suspicious instrument (1@swat 147, 119) กดปุ่มเลย เพราะถ้าคุณไม่ทำตามกฎ กฎจะทำตามคุณ!
Heart Hunter Guards จะสปอว์นเพิ่มขึ้น รวมถึง Upgraded Heart Hunter บางตัวด้วย กำจัดพวกมันทั้งหมดเพื่อดำเนินต่อ Heart Hunter Guards ปกติจะนับเป็นครึ่งคิล และ Upgraded Heart Hunter จะนับเป็นหนึ่งคิล คุณต้องมี 15 แต้มคิลเพื่อไปต่อ
เดินไปหา Julian หลังจากกำจัดเหล่าฮันเตอร์ที่เกลียดคนกดปุ่มหมดแล้ว จากนั้นเดินต่อไปทางตะวันออก
Julian ใช้ดินปืนหมดและต้องการให้คุณหามาเพิ่ม เดินกลับไปที่กำแพงป้องกันก่อนหน้าที่คุณระเบิด แล้วคุณจะพบ Pile of gunpowder ( (@swat 165, 56)ซึ่งมี Heart Hunter Guards เฝ้าอยู่

มอบดินปืนให้ Julian แล้วเดินต่อไปทางตะวันออก เดินเข้าไปหา Julian แล้วจะมีการประกาศว่าพวกเขายึดห้องสื่อสารของ Heart Hunter ได้แล้ว
Ebel จะสปอว์นตอนนี้ คุณไม่สามารถผ่านพื้นที่ที่มีช่องระบายอากาศได้ จะถูกเทเลพอร์ตกลับ
Julian ทำให้ Ebel เป็นอัมพาตหลังการต่อสู้ และสั่งให้เหล่ายามจับตัวเธอไปวิจัย
รับ Schwartz's Honor Token 10 ชิ้น และถูกวาร์ปกลับไปที่ Einbroch Field 04
ภารกิจหลักดำเนินต่อ
หลังจากออกจากอินสแตนซ์แล้ว ให้คุยกับ Rookie และบอกว่าคุณฝากความหวังไว้กับเขา เนื่องจากคุณยังไม่พบ Terra Gloria Rookie จะวาร์ปคุณไปที่ Heart Hunter War Base
เข้าประตูวาร์ปข้าง Rookie เพื่อเข้า Werner Laboratory
Rebellion squadder จะพาคุณกลับออกไป หากคุณต้องการ
Yuslan จะขอให้คุณช่วยเขากำจัด Chimeras; Material Chimera 10 ตัว และ Human Chimera 10 ตัว
Werner Laboratory Central Room Instance
คุยกับ Rookie (slabw01 236, 91) เพื่อเริ่มอินสแตนซ์ (คาดว่าต้องคุยกับเขาอีกครั้งเพื่อรับเควสต์จริงที่คุณจะได้สู้กับ MVP ตอนนั้นฉันรีบผ่านส่วนนี้ และถูก Chimeras บนแผนที่โจมตี)
Rookie ต้องการไปที่ Central Room
คลิกที่อุปกรณ์ เพื่อเข้าอินสแตนซ์
Listen to Eisen Werner, then walk all the way up and talk to them again.
To both sides, there's a Security Device at the north end of the rooms. There will be a word in brackets. Choose the appropriate colored version in the dialog choice.
| Choose Red = 1st Option | ||||
| Way Back Home | Loneliness | Contradiction | Rose | Sea |
| Joy | Twilight | Glow | Girl | |
| Choose Blue = 2nd Option | ||||
| Purity | Eternity | Dawn | Dream | |
Return to the center and enter the portal.
Eisen Werner is standing on the opposite end, to the north. This evil villain is revealing their plan because they expect you to die in this laboratory. There's also Security Device on both ends of the room.
Once you've unlocked the Security Devices, enter the portal that Eisen was standing in front of.
Speak to Eisen Werner and they explain that the Heart of Ymir was unutilized so that's why they took it. A portal opens at the door he's standing next to.
Go through that door portal and speak to 'Eisen Werner again. The Heart of Ymir's energy goes into the magic circle on the ground and goes into experiment subjects, some of which have died.
You are then warped back to Heart Hunter War Base.
Main Quest continued again
Talk to Rookie (que_swat 150, 58) and he will want to go back to the hotel. He will warp you back to Einbroch Field 04.

Return to the Einbroch Hotel and talk to Philopontess. You will return the Blessing Star to Nihil and then they want to promptly return to Prontera Castle.
Skia Nerius is inside your room in the castle.
- Do you feel it all the time?: She says when she asked to use the Scroll of Movement in the above step at the hotel
- Love: Spica appears
- When is it most serious?
Kronecker enters and they talk about family matters.
You receive 10 Honor Token (not Schwartz) and 2.5 mil Base and Job EXP (VIP)
Spica says Philopontess is waiting at Werner Laboratory for you.
Go to Werner Laboratory and talk to Philopontess (que_swat 145, 57). He will reward you with 10 Schwartz's Honor Token and 2x  Mysterious Egg (12610) + 2x
  Mysterious Egg II (12871)
- Access to People in the Lab repeatable quest.
- Access to Heart Hunter War Base 2 repeatable quest.
- Access to Cutie Chimera C(K)illing repeatable quest.
This is the end of Episode 16.2: Terra Gloria main quest.
Side Quests
Returning the Relics
- Once using the Small Leather Bag, you receive 6 character-bound items. Below are the locations to turn those items in:
- Old Rings - Knight Windsor in the Prontera pub in the inner ring to the south-east (prt_in 177, 26). He knew something was wrong when he found Seyren's Pecopeco.
- Locket Pendant - Knight Windsor (from above) is upset that his children ended up dead. With no wife or children anymore, he will probably drown his sorrows at the pub he's in.
- Wood Rosary - Sister Margaret at St. Capitolina Abbey (prt_monk 93, 254), the home of the monks. Margaret recalls how Margaretha Sorin was such a tomboy when she was younger. Speaking to her again will give you a chance to be warped directly to Prontera.
- Portable Sewing Box - Hunter Sherine is inside the house to the right of the North Kafra in Payon (payon 187, 233) at the end of the hallway. Cecil asked her sister how to sew so she could put a button on her clothing and appear more feminine.
- Decorated Archer's Thimble - Blacksmith Cleaver is downstairs of the Juno weapon shop (yuno_in01 163, 31) and wonders what happened to Howard. It was a gift that he had trouble making. Howard has an older brother that Cleaver will give the thimble to.
- Assassin's Mark Dagger - Go to the Morroc Bar (morocc 45, 107) Guile Marovitz is in the Morroc pub (que_job01 89, 91). Eremes always hated failed missions and was usually pretty lucky; except this time.
Rachel's Repair Work
- Rachel Smith has had it with people lying they "lost" their weapons when they only merely broke. The weapons have a high defect rate. She requests you to bring Rachel's Revolver to the Blacksmith Guild for them to inspect it.
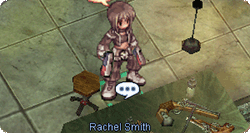
- Travel to Einbroch's Blacksmith Guild and speak to Blacksmith Jack who scrutinizes her work. He concludes that it's the impurity of materials that she is using that is causing the issue.
- Return to Rachel Smith inside the Rebellion base where she says she suspected it might be the materials causing the issue. Grant her favor and say you will come back daily with better materials.

Receive 7 Schwartz's Honor Token. You can now do the daily quest from Rachel Smith.
Enable Teleportation in Schwartz!
Speak to Arinoa Yurhik next to the fireplace (rebel_in 82, 68). Some man appears nearby asking if you were the one making a fuss in Clana Nemieri.
Arivero Yuhrik (rebel_in 78, 66) is self-proclaimed "hot" guy and is seemingly just an obnoxious "bro". There's unspoken communication between the two siblings and then Vero says he wants you to go to four places and destroy things.
You get four options After choosing one, he will disappear.
After waiting (some amount of time), return to Arinoa Yurhik (potentially 4am server time; could depend on previous step's choice in dialog options.
Arivero Yuhrik appears saying the preparation is complete. Schwaltzvalt bans teleportation in the cities due to potential magic overuse. Arivero believes the Schwaltzvalt government installed equipment to protect secret Rekenber research, citing the timeline of events and the disappearance of people in the Slums.
He explains how "H" in a guard suit was patrolling and found an abnormal device and that there was very strong wind that day and H saw something but it quickly vanished.
Guard Clothes: H makes his daughter clean and iron his clothes; because apparently, he can't do it for himself...
Club: Standard unexpected situation preparedness
The way H patrolled: H follows the manual and follows the same course every day Freight train: A coal train stopped at night, it doesn't operate often because of monsters in the mine
A strong Wind: Mountainous areas can sometimes cause strong winds
The turned-off torch: It was strange that it was the first time a torch turned off
Repeating a few times (I think about the torch). Vero's theory is that fire is the strongest right before being turned off. He wants you to bring some fire items to the train to test his theory.
Walk near the end of the freight train (einbech 212, 212) and Arivero Yurhik will appear.
- Things that are known to work here:
- Flame Heart
- ?
The Teleport Prohibition equipment is unscathed so Vero suggests bringing Water based items.
- Things that are known to work here:
- Mystic Frozen
After using the water items, the equipment is destroyed. Return to the Rebellion Base and speak to Arinoa Yurhik to make her younger brother Vero appear.
Arivero Yurhik tells us an agent found another teleport prohibition equipment (Water) in a Lighthalzen mansion. Tell him that Rough Wind is the element stone that is strong against water.
In Lighthalzen (lighthalzen 135, 233), Arivero Yurhik requires 1 Mystic Frozen and 3 Rough Wind to reveal and destroy the equipment.
Return to the base and talk to Arinoa Yurhik to get Arivero Yurhik to appear. You start to wonder if his elder sister is actually pleased, and he says she's just shy. Then the device that prevents the prohibition equipment from disappearing broke. He needs a Star Crumb to fix it.
- Just laugh it off
- Ask him: He gets defensive and you just laugh it off anyway.
Travel to Juno (yuno 204, 226) with 4 Great Natures and 1 Rough Wind and give them to Arivero Yurhik. Rekenber and the government seemed to have caught on. He tells you of the last location in Einbroch and runs away as if being chased.
In the south-east of Einbroch (einbroch 262, 42) is a panicked Arivero Yurhik. He asks you to destroy this one, and as soon as you do, Vero teleports away suspiciously. Inside the base, talk to Arinoa Yurhik and Rebellion leader appears and is confused because there is no large mission that he knows about. You explain the mission but the Rebellion leader doesn't know of any Arivero Yurhik... He tells you that Arinoa's younger brother died in an accident a while ago. Receive 10 Schwartz's Honor Token, Base EXP and Job EXP and a lot of unanswered questions.
If you talk to Arinoa again, you have the chance to say hello and a text-input box appears. If this is a continuation of a quest, we are not sure.
Helping Elena
Choose the second option I am not busy today, I stopped by. when talking to Elena Volkova and she tells you that USU means "Under Seal Unit", kinda like the Suicide Squad; they did bad things, but are given a leash to explore on(?). Elena tells you about these two underage orphans who might be kicked out and requests you to solve their problem.
Go downstairs and talk to Jana Levedeva (rebel_in 109, 54).
Return to Elena Volkova upstairs and Tell her about Lebedev twins.
She tells you to ask Milo and Mason about them:
Speaking to Milo Rivers at the opposite staircase and he tells you they excelled in shooting. Allegedly Jana threw a grenade into a civilian zone. After being moved to the USU unit, they began to disobey the seniors.

Mason Bender at the base entrance thinks nothing positive of the two. Ilya apparently shot Mason with a stray bullet.
- Ask them directly:
- Beat around the bush:
After no luck, return to Elena Volkova upstairs. She sends you to go ask their previous leader.
Downstairs by the fireplace, Ericsson Adler and he gives you Delicious Handmade Cookie to eat and chat with them over.
Walk over to Jana Levedava and Give them the cookie. Tell them that Commander Adler, yourself, and Elena are worried about the two of them. Jana starts breaking down because she wasn't in shape, and Ilya tells you she didn't throw the grenade on purpose. They became scared after they were transferred and begun to act out and get even more scared. They give you permission to tell Elena their feelings.
Tell Elena Volkova that the twins felt they were a burden. Elena mistakenly had treated them as adults, which didn't help.
Return to Jana Levedava and bring them to Elena, saying that you will defend the twins.
Talk to Elena Volkova and say I have brought Lebedev sisters I thought it was male/female twins. Elena yells at them for having run away. Then she apologies to the two. She then tells them that she will not put them in real combat missions so they can make friends or train. After all of this, receive 10 Schwartz's Honor Token, Base EXP and Job EXP.
You now have access to Cookie Delivery (Name not final) daily quest.