16.2 Terra Gloria/pt-br: Difference between revisions
Machine translation (deepseek-flash) |
Machine translation (deepseek-flash) |
||
| Line 148: | Line 148: | ||
Heart Hunter War Base 1 Instance | Heart Hunter War Base 1 Instance | ||
<u>Isso não é recomendado para personagens que não são causadores de dano (como Arch Bishops sem Adoramus ou Judex).</u> | |||
<u> | |||
Ande perto de Julian na frente do comando para iniciar a instância. | |||
Heart Hunter Guards vão surgir. Eles usam Fury (?), Increase Agi, e Bowling Bash, Endure (ao perseguir?), e possivelmente mais... | |||
Heart Hunter Guards | |||
Há uma pilha de pólvora na extremidade norte {{#navi:1@swat|58|89}}. Ela deixa Antique Gunpowder no chão e dispara um alarme, fazendo mais inimigos surgirem. | |||
Entregue para Julian no lado leste e isso vai destruir todos os monstros, além de criar uma abertura. | |||
Continue andando para o leste e fale com Julian novamente ao se aproximar dele. Ele vai precisar de um tempo para preparar a próxima explosão. | |||
Continue | |||
<div lang="en" dir="ltr" class="mw-content-ltr"> | <div lang="en" dir="ltr" class="mw-content-ltr"> | ||
Revision as of 12:05, 13 October 2026
Antes de começar qualquer quest, faça a New World Quest!
Temporal Tina is an NPC who sells Episode Clear Tickets. She is located in Prontera (prontera 140, 174) and the Main Office (main_office 94, 59).

|

|
| (prontera 140, 174) | (main_office 94, 59) |
Episode Clear Tickets
Um Episode Clear Ticket é um item consumível que permite pular a missão principal de um episódio. Ao usá-lo, você ganha acesso instantâneo a todos os NPCs, dungeons e lojas de equipamentos que normalmente exigiriam que você completasse o episódio ou cumprisse certas missões para desbloquear.
Lembre-se de que, ao usar um Episode Clear Ticket, você perderá recompensas de missão como EXP, Zeny, reputação e itens.
Alguns Episode Clear Tickets têm pré-requisitos. Se for seu primeiro personagem no servidor, você ainda terá que progredir do Episódio 17.2 até o último episódio normalmente.
Confira a tabela abaixo para ver os requisitos e preços de cada ingresso.
| Episode Clear Tickets | |||
|---|---|---|---|
| Ingresso do Episódio | Nível | Custos em Zeny | Pré-requisitos |
 Episode 14 Clear Ticket (1000284) Episode 14 Clear Ticket (1000284)
|
160 | 1,000,000 | Nenhum |
 Episode 15 Clear Ticket (1000286) Episode 15 Clear Ticket (1000286)
|
140 | 1,000,000 | Nenhum |
 Episode 16 Clear Ticket (1000282) Episode 16 Clear Ticket (1000282)
|
100 | 1,000,000 | None |
 Episode 17.1 Clear Ticket (1000285) Episode 17.1 Clear Ticket (1000285)
|
110 | 2,000,000 | None |
 Episode 17.2 Clear Ticket (1000287) Episode 17.2 Clear Ticket (1000287)
|
130 | 4,000,000 | The current character has cleared Episode 17.1 |
 Episode 18 Clear Ticket (1000288) Episode 18 Clear Ticket (1000288)
|
170 | 9,000,000 | The current character has cleared Episode 17.2 |
 Episode 19 Clear Ticket (1000988) Episode 19 Clear Ticket (1000988)
|
200 | 12,000,000 | The current character has cleared Episode 18 AND one character in the master account has cleared Episode 19 and the side quests "Purification Saint" and "Frozen Sea" |
 Episode 20 Clear Ticket (1001214) Episode 20 Clear Ticket (1001214)
|
215 | 16,000,000 | The current character has cleared Episode 19 AND one character in the master account has cleared Episode 20 |
 Episode 21 Clear Ticket (1001215) Episode 21 Clear Ticket (1001215)
|
230 | 32,000,000 | The current character has cleared Episode 20 AND one character in the master account has cleared Episode 21 |
 Chapter 1 Clear Ticket (50098) Chapter 1 Clear Ticket (50098)
|
265 | 64,000,000 | One character in the master account has cleared Chapter 1 and complete Zero Cell Sector |
How to check which episode I have unlocked?
Right now, we don't have a feature which simply tells you which episode you are.
So here's some things you can do to check it by yourself:
| Episode Quest | ||
|---|---|---|
| Episode | Steps | Description |
| Episode 15 | Click on Warper > Instances > Central Laboratory. | If you can go, you have completed the Episode 15 quest. |
| Episode 16 | Click on Warper > Instances > Heart Hunter War Base. | If you can go, you have completed the Episode 16 quest. |
| Episode 17.1 | Use @go 46. (Cor) | If you can go, you have completed the Episode 17.1 quest. |
| Episode 17.2 | Use @go 47. (Varmundt's Mansion) | If you can go, you have completed the Episode 17.2 quest. |
| Episode 18 | Use @go 51. (Gray Wolf Village) | If you can go, you have completed the Episode 18 quest. |
| Episode 19 | Use @go 53. (Ice Castle) | If you can go, you have completed the Episode 19 quest. |
| Episode 20 | Click on Warper > Instances > The Immortal. | If you can go, you have completed the Episode 20 quest. |
| Episode 21 | Click on Warper > Instances > Final Battle. | If you can go, you have completed the Episode 21 quest. |
Quest Principal
- Você precisa do Ritual of Blessing.
Em seu quarto pessoal no castelo, você encontrará tanto Nihil M. Heine quanto o sósia de Spica esperando por você. Fale com Nihil (prt_cas_q 21, 39).
- A verdadeira Spica saiu para investigar algo e aparecerá em alguns instantes.

Assim que Spica Nerius aparecer, fale com ela (prt_cas_q 23, 36) para descobrir que Crux encontrou a empregada que deu drogas a um membro da família real no suco de muka. A empregada revelou que foi um dos camareiros que planejou isso. A investigação de Crux também descobriu que o camareiro era da Republic of Schwartzvald. Crux continuou a perseguir o camareiro traidor e o seguiu até Lighthalzen.

Embora Crux seja capaz, ele ainda é apenas uma pessoa. Nihil M. Heine está preocupado e pede que você vá ajudar Crux na investigação por causa da sua "liberdade" de não ser da realeza. Skia também irá para Lighthalzen ajudar na investigação. A dupla se encontrará com você no aeroporto de Lighthalzen.
Encontre Crux (lhz_airport 189, 39) no lado direito do aeroporto. Skia imagina que o camareiro fugitivo aparecerá em Lighthalzen em vez de Einbroch devido ao problema de poluição industrial de Einbroch. Eles sabem que o nome dele é Bruno. Você pode se lembrar de ter conhecido Bruno no topo da escada leste no Banquet. Seu grupo de investigação se divide: Crux verificará o sul de Lighthalzen, Skia verificará as áreas comerciais, e você deve verificar o norte e o nordeste. O ponto de encontro é perto da loja de departamentos central.

Vá até o canto traseiro norte da casa mais ao norte (lighthalzen 184, 292) na cidade. Você verá um Man e um Scientist. O Man tenta intimidar o Scientist por mais dinheiro porque ele não pode mais viver em Rune Midgard ou na Republic of Schwartzvald. Os dois concordam em se encontrar na favela em seguida para evitar olhares curiosos. Depois que o Man sai, o Scientist murmura para outra pessoa que o Man deve ser morto, pois exigir muito dinheiro é tão ruim quanto exigir pouco.
OPCIONAL: Vá até o ponto de encontro do lado de fora da loja de departamentos (lighthalzen 202, 167). Você encontrará Skia lá e contará a ela o que ouviu. Ela diz para você ir na frente para a favela enquanto ela avisa Crux e eles alcançarão você.
O Man está na favela (lighthalzen 309, 263) e você chama "Bruno" e ele se surpreende. De repente, um Heart Hunter aparece perto do Man e o surpreende. Nesse momento, o Man percebe que o Scientist o enganou, pois ele não receberá o dinheiro. Crux e Skia aparecem e reconhecem que o Heart Hunter é o mesmo tipo de mercenário que foi capturado e interrogado antes. Crux está ansioso para capturar esse novo sujeito e ter uma conversa franca. O Heart Hunter percebe que não há muito o que fazer agora que Crux, Skia e você estão lá, então ele realiza um ataque suicida. Skia diz a Bruno que é melhor cooperar, porque aqueles Heart Hunters o perseguirão pelo resto da vida e que pelo menos Rune Midgard não o matará se ele cooperar. Crux leva Bruno de volta ao palácio.

Retorne ao seu quarto no castelo e você verá tanto Nihil M. Heine quanto Spica Nerius esperando por você. Fale com Nihil. Crux tem interrogado Bruno e conseguiu uma confissão fácil. Aparentemente há uma "enterprise" por trás da fonte dos problemas. Bruno foi entregue ao governo Schwartz como parte do acordo para obter permissão para investigar uma instalação na Republic of Schwartzvald. Você pode escolher entre duas opções. Ambas resultarão no mesmo diálogo.
- Skia foi enviada em uma missão por Spica, e é por isso que ela não está no quarto, apesar de ter dito a você em Lighthalzen que também estava voltando para o palácio. Além disso, parece que um objeto importante da família Nerius foi levado para uma instalação suspeita em Schwartzvald e eles precisam da permissão do governo de Schwartzvald para investigar. Parece que o governo de Schwartzvald já estava ciente de alguns dos problemas. Devido a Crux estar tão ocupado com as investigações, mais ajuda é necessária. Sua tarefa é escoltar Spica, o que libera Crux para se movimentar.
Viaje para o aeroporto de Juno desta vez e encontre Crux (y_airport 168, 41). Ele e Skia queriam ter uma reunião em Yuno, mas Spica sentiu que sua realeza atrairia uma multidão e, em vez disso, agora quer se encontrar no hotel de Lighthalzen. Ele vai te teleportar para o aeroporto de Lighthalzen dizendo "Conto com você".
O último quarto do Hotel é onde você encontrará Spica Nerius. Ela apresenta você ao representante do governo Schwartz.
Fale com Philopontess (lhz_in02 239, 148), que atende por "Tess".
- Vamos ouvir.: Tess diz que o Secret Wing não foi destruído completamente, mas a família Nerius ajudará a apoiá-los. O objetivo é desativar a Enterprise. A Rebellion virá em seu auxílio usando suas forças para inspecionar a instalação. Mas a ajuda tem que ser através de você, e não da família real.

Há um Unusual person (einbroch 239, 269) na plataforma de trem de Einbroch. Ele fala em código secreto sobre o qual você nunca foi informado. Ele então admite que é Lazy, a pessoa que você procurava. Ele então diz que o encontro deveria ser em Einbech.

Depois de uma LONGA conversa, Lazy (einbroch 270, 268) vai gerar automaticamente um /navi para você um pouco a leste da plataforma de trem para conseguir uma "carona grátis". Para evitar ser rastreado, Lazy quer levar você por um túnel em vez do trem.

Clique no Very small hole para ser transportado para Einbech.

Fale com Lazy (einbech 46, 208) na plataforma de trem de Einbech. Depois que ele terminar de tagarelar sobre aposentadoria, ele marcará no seu mapa onde você precisa ir, junto com um /navi.
Lazy (einbech 76, 131) está parado ao lado de uma pilha de areia que está cobrindo uma pessoa desmaiada. Então Lazy tem o poder dos deuses que aparentemente nem mesmo um Arch Bishop conseguiu salvar um Rebel exausto através de cura.

Depois de encontrar Lazy (einbech 217, 82), você deixa o homem Rebel que você carregou no chão. Lazy diz que alguém já sentiu sua chegada, e ele te diz para apenas deixar o Gonie na entrada.

Uma vez lá dentro, fale com Lazy (rebel_in 21, 45) e ele irrita os Shopkeepers o suficiente para quererem nos expulsar. Lazy então conta a eles sobre Gonie que está no chão lá fora. O shopkeeper traz Gonie para dentro e então chama por Lucky. Lazy começa a gritar para o shopkeeper que tinha ido para dentro, sob ameaça de ser expulso. Eventualmente eles deixam você entrar.

Lá dentro é um lugar para novatos e idosos. Você encontrará Lazy (rebel_in 86, 61) ao lado do sofá. Ele revela aos outros que é um agente da Secret Wings. Lucky revela que seu nome verdadeiro é "Rookie" e que "Lucky" é um apelido. Muita discussão sobre e a respeito de chá acontece. Lazy conta aos Rebels mais velhos o que o Presidente quer. Eles não querem ajudar, pois sentem que serão traídos novamente. O mais velho sai e Lazy tenta convencer Lucky/Rookie de que ele tem uma voz de poder para tentar convencer os mais velhos.

Suba as escadas à esquerda e fale com Elena Volkova (rebel_in 70, 78). Ela não quer deixar você passar e quer lutar com você.

Lute contra Elena:
- Se você for da classe Priest (talvez Acolyte?), você pode pular esta seção, pois Elena tem honra suficiente para não lutar contra "clérigos".
- Uma vez derrotada, receba 10 Schwartz's Honor Token.
- Acesso à quest repetível Fighting Elena
Suba pela passarela e fale com o líder da Rebellion (rebel_in 122, 71). Ele tentará fazer os Young Rebellions te escoltarem para baixo até você mencionar Gonie. Fale sobre cooperação e ele ri da sugestão.

Vá para o sul a partir do líder da Rebellion e fale com o guarda da Rebellion na entrada do portal. Eles não vão te deixar entrar apesar de Rookie ter te enviado. Continue perguntando ao líder da Guarda da Rebellion até Larcis ouvir sua voz e continue gritando. Então você é deixado entrar.

Ande para frente lá dentro e Dien (rebel_in 164, 88) começará a falar com você. A conversa se volta para Gonie. Então você pergunta sobre cooperação e Ridsh fica furioso enquanto Dien ouve você calmamente. Ridsh não se importaria se Schwartz entrasse em colapso.
Dien escolhe ajudar a convencer os outros a cooperar.

Entregue ao comandante da Força Especial (rebel_in 210, 89) uma carta que Dien escreveu. Embora surpresos e não fãs do que ela escreveu, eles concordarão, pois pode ser o último desejo de Dien.

Volte ao líder da Rebellion Rupert (rebel_in 122, 71) no canto do corredor e entregue a carta de Dien a ele.
Fale com o líder da Guarda da Rebellion que apareceu ao lado dele. (Passo obrigatório? Acho que sim, alguns dos meus registros de quest desapareceram)

Vire-se e fale com o líder da Rebellion Rupert novamente. Ele começa a fazer um escândalo e quer ir ver Dien, mas ela aparece ao lado dele.
Ouça Dien enquanto ela diz que concordará em ajudar a Secret Wings. Dois contra um (Ernst e Dien), e Rupert ainda não vai tolerar abrir mão de tudo o que eles suportaram para ajudar.

O líder da Rebellion Rupert tentará fazer Dien ser escoltada de volta ao quarto dela até que ela o agarre pela barba. Falando a verdade sobre como eles não chegarão a lugar nenhum se mantiverem a vingança, Rupert finalmente concorda em ajudar. MAS SÓ UM POUCO!
- Receba 10 Schwartz's Honor Token.
- Acesso à quest repetível Preparing for the Party
Volte lá para baixo até Lazy e informe a eles que a Rebellion vai ajudar. Então ouça a história de Rookie sobre sua infância; ele era pequeno e sua família achava que ele era inútil, então ele saiu e conheceu Gonie e se tornou um Rebel. Os mais velhos aparecem e fazem o que os mais velhos fazem de melhor, reclamar. Rookie aponta que nenhum dos membros mais jovens sabe o que aconteceu na época deles porque eles se recusam a falar sobre isso (ou mudar). Então você revela o chá da verdade e diz a eles que Rupert e as outras senhoras lá em cima já concordaram em ajudar.
- Lazy decide ficar e então você recebe EXP e 10 Schwartz's Honor Token.
- Acesso à quest repetível Giving Charity to Charity.
- Acesso à quest repetível Tea Time Snacks.
- Acesso à quest repetível Tracking Down Missing Guns for Master.
- Acesso à quest repetível Twinkle Twinkle Shooting Star.
- Acesso à quest repetível Ericsson Adler.
- Acesso à quest repetível Pamphlet Promotion.
- Acesso a Side Quests.
Heart Hunter War Base
Rebellion Squadder (rebel_in 65, 46) te diz que Tess está aqui. Você pode dizer Sim para ser transportado para a plataforma de trem de Einbech, ou você pode ir andando até lá.

Uma vez em Einbroch, vá para o hotel (ein_in01 198, 224). Vá para o segundo andar no quarto logo ao norte das escadas (ein_in01 273, 276). Tess vai te convidar para entrar.
Fale com Nihil no quarto do hotel em Einbroch. Aparentemente querendo realmente fazer algo, ele veio pessoalmente. Skia também conseguiu sair do banquete. Agora começa o plano de ataque à instalação. Não há rota de fuga, mas eles suspeitam de um portão de teleporte.
Viaje um mapa ao norte da cidade de Einbroch até o ponto de operação e fale com Julian (ein_fild04 281, 337).
Domar monstros vai interferir na próxima parte da missão. Então não faça isso. (Embora eu não tenha certeza de quais itens você usaria para domar...)
Fale com Julian para reservar a instância, e depois com Striker Unit Commander para entrar. Heart Hunter War Base 1 Instance
Isso não é recomendado para personagens que não são causadores de dano (como Arch Bishops sem Adoramus ou Judex).
Ande perto de Julian na frente do comando para iniciar a instância.
Heart Hunter Guards vão surgir. Eles usam Fury (?), Increase Agi, e Bowling Bash, Endure (ao perseguir?), e possivelmente mais...
Há uma pilha de pólvora na extremidade norte (1@swat 58, 89). Ela deixa Antique Gunpowder no chão e dispara um alarme, fazendo mais inimigos surgirem.
Entregue para Julian no lado leste e isso vai destruir todos os monstros, além de criar uma abertura.
Continue andando para o leste e fale com Julian novamente ao se aproximar dele. Ele vai precisar de um tempo para preparar a próxima explosão.
Walking up north, you will find a Suspicious instrument (1@swat 147, 119). Push the button because you don't follow the rules, the rules follow you!
More Heart Hunter Guards will spawn. Some Upgraded Heart Hunters as well. Defeat all of them to proceed. The regular Heart Hunter guards count for half a kill, and the Upgraded Heart Hunter's count for a full kill. You need 15 kill points to continue.
Walk to Julian after you have cleared the hunters who hate button pushers, and then continue East.
Julian ran out of gunpowder and needs you to find more. Walk back to the previous defense wall you blew up and you will find a Pile of gunpowder ( (@swat 165, 56)being guarded by Heart Hunter guards.

Give Julian the gun powder and proceed east. Walk up to Julian and an announcement says they have taken over the Heart Hunter communication room.
Ebel spawns now. You can not go past the area with the vents; you will get teleported back.
Julian paralyzes Ebel after the fight and tells the guards to capture her for research.
Receive 10 Schwartz's Honor Tokens and be warped back to Einbroch Field 04.
Main Quest continued
After exiting from the instance, speak to Rookie and say you're counting on him. Since you haven't found Terra Gloria yet, Rookie warps you to Heart Hunter War base.
Enter the portal next to Rookie to enter Werner Laboratory
Rebellion squadder will take you back out if you desire.
Yuslan will ask you to help him defeat Chimeras; 10 Material Chimera and 10 Human Chimera.
Werner Laboratory Central Room Instance
Speak to Rookie (slabw01 236, 91) to start the instance. (Supposedly you need to talk to him again to get actual quest where you fight the MVP. I was rushing through this part, and I was getting attacked by the Chimeras on the map)
Rookie wants to go to the Central Room
Click on the device to enter the instance.
Listen to Eisen Werner, then walk all the way up and talk to them again.
To both sides, there's a Security Device at the north end of the rooms. There will be a word in brackets. Choose the appropriate colored version in the dialog choice.
| Choose Red = 1st Option | ||||
| Way Back Home | Loneliness | Contradiction | Rose | Sea |
| Joy | Twilight | Glow | Girl | |
| Choose Blue = 2nd Option | ||||
| Purity | Eternity | Dawn | Dream | |
Return to the center and enter the portal.
Eisen Werner is standing on the opposite end, to the north. This evil villain is revealing their plan because they expect you to die in this laboratory. There's also Security Device on both ends of the room.
Once you've unlocked the Security Devices, enter the portal that Eisen was standing in front of.
Speak to Eisen Werner and they explain that the Heart of Ymir was unutilized so that's why they took it. A portal opens at the door he's standing next to.
Go through that door portal and speak to 'Eisen Werner again. The Heart of Ymir's energy goes into the magic circle on the ground and goes into experiment subjects, some of which have died.
You are then warped back to Heart Hunter War Base.
Main Quest continued again
Talk to Rookie (que_swat 150, 58) and he will want to go back to the hotel. He will warp you back to Einbroch Field 04.

Return to the Einbroch Hotel and talk to Philopontess. You will return the Blessing Star to Nihil and then they want to promptly return to Prontera Castle.
Skia Nerius is inside your room in the castle.
- Do you feel it all the time?: She says when she asked to use the Scroll of Movement in the above step at the hotel
- Love: Spica appears
- When is it most serious?
Kronecker enters and they talk about family matters.
You receive 10 Honor Token (not Schwartz) and 2.5 mil Base and Job EXP (VIP)
Spica says Philopontess is waiting at Werner Laboratory for you.
Go to Werner Laboratory and talk to Philopontess (que_swat 145, 57). He will reward you with 10 Schwartz's Honor Token and 2x  Mysterious Egg (12610) + 2x
  Mysterious Egg II (12871)
- Access to People in the Lab repeatable quest.
- Access to Heart Hunter War Base 2 repeatable quest.
- Access to Cutie Chimera C(K)illing repeatable quest.
This is the end of Episode 16.2: Terra Gloria main quest.
Side Quests
Returning the Relics
- Once using the Small Leather Bag, you receive 6 character-bound items. Below are the locations to turn those items in:
- Old Rings - Knight Windsor in the Prontera pub in the inner ring to the south-east (prt_in 177, 26). He knew something was wrong when he found Seyren's Pecopeco.
- Locket Pendant - Knight Windsor (from above) is upset that his children ended up dead. With no wife or children anymore, he will probably drown his sorrows at the pub he's in.
- Wood Rosary - Sister Margaret at St. Capitolina Abbey (prt_monk 93, 254), the home of the monks. Margaret recalls how Margaretha Sorin was such a tomboy when she was younger. Speaking to her again will give you a chance to be warped directly to Prontera.
- Portable Sewing Box - Hunter Sherine is inside the house to the right of the North Kafra in Payon (payon 187, 233) at the end of the hallway. Cecil asked her sister how to sew so she could put a button on her clothing and appear more feminine.
- Decorated Archer's Thimble - Blacksmith Cleaver is downstairs of the Juno weapon shop (yuno_in01 163, 31) and wonders what happened to Howard. It was a gift that he had trouble making. Howard has an older brother that Cleaver will give the thimble to.
- Assassin's Mark Dagger - Go to the Morroc Bar (morocc 45, 107) Guile Marovitz is in the Morroc pub (que_job01 89, 91). Eremes always hated failed missions and was usually pretty lucky; except this time.
Rachel's Repair Work
- Rachel Smith has had it with people lying they "lost" their weapons when they only merely broke. The weapons have a high defect rate. She requests you to bring Rachel's Revolver to the Blacksmith Guild for them to inspect it.
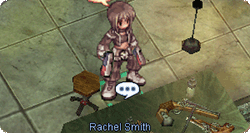
- Travel to Einbroch's Blacksmith Guild and speak to Blacksmith Jack who scrutinizes her work. He concludes that it's the impurity of materials that she is using that is causing the issue.
- Return to Rachel Smith inside the Rebellion base where she says she suspected it might be the materials causing the issue. Grant her favor and say you will come back daily with better materials.

Receive 7 Schwartz's Honor Token. You can now do the daily quest from Rachel Smith.
Enable Teleportation in Schwartz!
Speak to Arinoa Yurhik next to the fireplace (rebel_in 82, 68). Some man appears nearby asking if you were the one making a fuss in Clana Nemieri.
Arivero Yuhrik (rebel_in 78, 66) is self-proclaimed "hot" guy and is seemingly just an obnoxious "bro". There's unspoken communication between the two siblings and then Vero says he wants you to go to four places and destroy things.
You get four options After choosing one, he will disappear.
After waiting (some amount of time), return to Arinoa Yurhik (potentially 4am server time; could depend on previous step's choice in dialog options.
Arivero Yuhrik appears saying the preparation is complete. Schwaltzvalt bans teleportation in the cities due to potential magic overuse. Arivero believes the Schwaltzvalt government installed equipment to protect secret Rekenber research, citing the timeline of events and the disappearance of people in the Slums.
He explains how "H" in a guard suit was patrolling and found an abnormal device and that there was very strong wind that day and H saw something but it quickly vanished.
Guard Clothes: H makes his daughter clean and iron his clothes; because apparently, he can't do it for himself...
Club: Standard unexpected situation preparedness
The way H patrolled: H follows the manual and follows the same course every day Freight train: A coal train stopped at night, it doesn't operate often because of monsters in the mine
A strong Wind: Mountainous areas can sometimes cause strong winds
The turned-off torch: It was strange that it was the first time a torch turned off
Repeating a few times (I think about the torch). Vero's theory is that fire is the strongest right before being turned off. He wants you to bring some fire items to the train to test his theory.
Walk near the end of the freight train (einbech 212, 212) and Arivero Yurhik will appear.
- Things that are known to work here:
- Flame Heart
- ?
The Teleport Prohibition equipment is unscathed so Vero suggests bringing Water based items.
- Things that are known to work here:
- Mystic Frozen
After using the water items, the equipment is destroyed. Return to the Rebellion Base and speak to Arinoa Yurhik to make her younger brother Vero appear.
Arivero Yurhik tells us an agent found another teleport prohibition equipment (Water) in a Lighthalzen mansion. Tell him that Rough Wind is the element stone that is strong against water.
In Lighthalzen (lighthalzen 135, 233), Arivero Yurhik requires 1 Mystic Frozen and 3 Rough Wind to reveal and destroy the equipment.
Return to the base and talk to Arinoa Yurhik to get Arivero Yurhik to appear. You start to wonder if his elder sister is actually pleased, and he says she's just shy. Then the device that prevents the prohibition equipment from disappearing broke. He needs a Star Crumb to fix it.
- Just laugh it off
- Ask him: He gets defensive and you just laugh it off anyway.
Travel to Juno (yuno 204, 226) with 4 Great Natures and 1 Rough Wind and give them to Arivero Yurhik. Rekenber and the government seemed to have caught on. He tells you of the last location in Einbroch and runs away as if being chased.
In the south-east of Einbroch (einbroch 262, 42) is a panicked Arivero Yurhik. He asks you to destroy this one, and as soon as you do, Vero teleports away suspiciously. Inside the base, talk to Arinoa Yurhik and Rebellion leader appears and is confused because there is no large mission that he knows about. You explain the mission but the Rebellion leader doesn't know of any Arivero Yurhik... He tells you that Arinoa's younger brother died in an accident a while ago. Receive 10 Schwartz's Honor Token, Base EXP and Job EXP and a lot of unanswered questions.
If you talk to Arinoa again, you have the chance to say hello and a text-input box appears. If this is a continuation of a quest, we are not sure.
Helping Elena
Choose the second option I am not busy today, I stopped by. when talking to Elena Volkova and she tells you that USU means "Under Seal Unit", kinda like the Suicide Squad; they did bad things, but are given a leash to explore on(?). Elena tells you about these two underage orphans who might be kicked out and requests you to solve their problem.
Go downstairs and talk to Jana Levedeva (rebel_in 109, 54).
Return to Elena Volkova upstairs and Tell her about Lebedev twins.
She tells you to ask Milo and Mason about them:
Speaking to Milo Rivers at the opposite staircase and he tells you they excelled in shooting. Allegedly Jana threw a grenade into a civilian zone. After being moved to the USU unit, they began to disobey the seniors.

Mason Bender at the base entrance thinks nothing positive of the two. Ilya apparently shot Mason with a stray bullet.
- Ask them directly:
- Beat around the bush:
After no luck, return to Elena Volkova upstairs. She sends you to go ask their previous leader.
Downstairs by the fireplace, Ericsson Adler and he gives you Delicious Handmade Cookie to eat and chat with them over.
Walk over to Jana Levedava and Give them the cookie. Tell them that Commander Adler, yourself, and Elena are worried about the two of them. Jana starts breaking down because she wasn't in shape, and Ilya tells you she didn't throw the grenade on purpose. They became scared after they were transferred and begun to act out and get even more scared. They give you permission to tell Elena their feelings.
Tell Elena Volkova that the twins felt they were a burden. Elena mistakenly had treated them as adults, which didn't help.
Return to Jana Levedava and bring them to Elena, saying that you will defend the twins.
Talk to Elena Volkova and say I have brought Lebedev sisters I thought it was male/female twins. Elena yells at them for having run away. Then she apologies to the two. She then tells them that she will not put them in real combat missions so they can make friends or train. After all of this, receive 10 Schwartz's Honor Token, Base EXP and Job EXP.
You now have access to Cookie Delivery (Name not final) daily quest.