17.1 Illusion/ru: Difference between revisions
Machine translation (deepseek-flash) |
Machine translation (deepseek-flash) |
||
| Line 5: | Line 5: | ||
= Серия квестов Illusion 17.1 = | = Серия квестов Illusion 17.1 = | ||
===Rudus Investigation=== | ===Rudus Investigation=== | ||
* '''Примечание:''' Вам не нужно выполнять предварительные квесты 16-го эпизода, чтобы начать цепочку квестов 17-го эпизода. | |||
* ''' | |||
* Базовый уровень 110 | |||
* | * Начало: {{#navi:prontera|156|354}} | ||
* | * Шаг 1 квеста [[Banquet for Heroes#Learning About the Families|Learning About the Families]]<br>Если вы не видите Nyhill в своей комнате, значит, вы уже говорили с ним. Переходите к шагу 3 этого руководства. | ||
* | * Награда: 15 {{#item:25723|Cor Cores}} | ||
* | |||
Вам не нужно выполнять цепочку квестов 16-го эпизода, чтобы пройти цепочку квестов 17.1. Однако вам нужно попасть в свою комнату в замке Prontera, чтобы поговорить с Nyhill, а для этого требуется выполнить шаг 1 квеста [[Banquet for Heroes#Learning About the Families|Learning About the Families]]. Если вы не видите Nyhill в своей комнате, значит, вы уже говорили с ним. Переходите к шагу 3 этого руководства. | |||
# Отправляйтесь в свою комнату в замке Prontera (@go woe, затем идите на север). Ваша комната — нижняя в левом крыле {{#navi:prt_cas_q|30|28}}. | |||
# | # Поговорите с '''Nyhill M. Heine''' в комнате. Он расскажет, что Peter чувствует себя неважно и что теперь он следующий в очереди на трон. | ||
# | # Подойдите к входу в Clana Nemieri в Einbech {{#navi:einbech|215|79}}, и появится член '''Rebellion Crew'''. Поговорите с ним, чтобы собрать информацию о новой базе. | ||
# | |||
#; [[File:000rud.png|frameless]] | #; [[File:000rud.png|frameless]] | ||
# | # Направляйтесь в паб '''Cat on Bullet''' {{#navi:einbroch|302|326}} в Einbroch. | ||
# [[File:001rud.png|frameless]] | # [[File:001rud.png|frameless]] | ||
# | # Войдите внутрь и поговорите с '''Philofontes''' {{#navi:pub_cat|94|104}}. Он расскажет, что нашёл вход в заброшенные пустоши Rudus. | ||
#; [[File:002rud.png|frameless]] | #; [[File:002rud.png|frameless]] | ||
# Rudus | # Вход в Rudus находится здесь: {{#navi:ein_fild05|156|288}}. Поговорите с '''Rebellion Crew''' там, чтобы вас впустили.<br>''Теперь вам доступен ежедневный квест [[Illusion#Morning|Morning]].'' | ||
# | # Поговорите с '''Elena Volkova''' рядом со входом. Она расскажет, что путь преграждает барьер. | ||
#; [[File:003rud.png|frameless]] | #; [[File:003rud.png|frameless]] | ||
# | # Идите на юг и поговорите с '''Rookie''' перед барьером. | ||
#; [[File:004rud.png|frameless]] | #; [[File:004rud.png|frameless]] | ||
# | # На вашей миникарте отмечены 3 места, где нужно собрать информацию: | ||
#* | #* Член Rebellion Crew у {{#navi:sp_rudus|303|266}}. | ||
#*; [[File:005rud.png|frameless]] | #*; [[File:005rud.png|frameless]] | ||
#* | #* Член Rebellion Crew у {{#navi:sp_rudus|121|286}}. | ||
#*; [[File:007rud.png|frameless]] | #*; [[File:007rud.png|frameless]] | ||
#* | #* Small Hole у {{#navi:sp_rudus|27|300}}. | ||
#*; [[File:006rud.png|frameless]] | #*; [[File:006rud.png|frameless]] | ||
# | # Вернитесь к Rookie после того, как проверите все эти места. Ему удалось открыть дверь, так что теперь вы можете поговорить с '''Firmly Closed Door''', чтобы попасть на другую сторону. | ||
#; [[File:004rud.png|frameless]] | #; [[File:004rud.png|frameless]] | ||
# | # За барьером слышны странные звуки, и он хочет, чтобы вы нашли их источник. Вам нужно убить следующих монстров: | ||
#* 10 Dolors. | #* 10 Dolors. | ||
#* 10 Venenums. | #* 10 Venenums. | ||
#* 10 Twin Caputs. | #* 10 Twin Caputs. | ||
# | # Когда закончите, поговорите с Elena Volkova рядом со входом. Вы получите 15 {{#item:25723|Cor Cores}} и немного опыта. | ||
#; [[File:003rud.png|frameless]] | #; [[File:003rud.png|frameless]] | ||
# | # Вы можете продолжить серию квестов, перейдя к Securing Regenschirm. | ||
<br clear="all"> | <br clear="all"> | ||
===Securing Regenschirm=== | ===Securing Regenschirm=== | ||
* Базовый уровень 110 | |||
* | * Начальная точка {{#navi:pub_cat|93|105}} | ||
* | * Награда: 25 {{#item:25669|Unknown Parts}} | ||
* | |||
# Доложите результаты Philofontes внутри '''Cat on Bullet'''. В другой комнате появился новый гость. | |||
# | |||
#; [[File:001reg.png|frameless]] | #; [[File:001reg.png|frameless]] | ||
# | # Поговорите с '''Retired Rebellion''' справа от вас, чтобы войти в комнату. | ||
#; [[File:000reg.png|frameless]] | #; [[File:000reg.png|frameless]] | ||
# | # Поговорите с Philofontes внутри комнаты. Вы узнаёте, что лаборатория Regenschirm захвачена Heart Hunters. | ||
#; [[File:001reg.png|frameless]] | #; [[File:001reg.png|frameless]] | ||
# | # Поговорите с '''Middle-Aged Gentleman''' рядом с Philofontes. Он хочет представиться и говорит, что он вице-президент Rekenber, известный как Kaya Toss. | ||
#; [[File:002reg.png|frameless]] | #; [[File:002reg.png|frameless]] | ||
# | # Идите ко входу в Regenschirm {{#navi:lighthalzen|53|269}}, рядом со штаб-квартирой Rekenber в Lighthalzen. | ||
# | # Поговорите с '''Republic Guard'''. После подготовки к повторному захвату лаборатории Oscar впустит вас. | ||
#; [[File:003reg.png|frameless]] | #; [[File:003reg.png|frameless]] | ||
# | # Находясь в группе, поговорите с '''Rekenber Guard Oscar''' рядом с порталом и выберите '''Generate Regenschirm''', чтобы начать инстанс. Поговорите с ним снова, чтобы войти. | ||
#; [[File:004reg.png|frameless]] | #; [[File:004reg.png|frameless]] | ||
## | ## Поднимитесь немного вверх и поговорите с Ashley. Вас перенесёт в главный зал. | ||
##; [[File:005reg.png|frameless]] | ##; [[File:005reg.png|frameless]] | ||
## | ## Убейте всех врагов в ближайших областях. Не забудьте про общую комнату внизу слева. Чтобы продолжить, нужно убить каждого Special Guard. | ||
## | ## Идите в ресторанную комнату (слева) и затем нажмите на '''Access Controller''' рядом с дверью. | ||
##; [[File:006reg.png|frameless]] | ##; [[File:006reg.png|frameless]] | ||
## | ## Поговорите с '''Researcher''' прямо рядом с вами, чтобы он открыл дверь. Вас перенесёт в коридор. | ||
##; [[File:007reg.png|frameless]] | ##; [[File:007reg.png|frameless]] | ||
## | ## Идите на север и очистите левую сторону от всего Deadly Poisonous Gas. После этого появится объявление о том, что портал разблокирован. | ||
## | ## Войдите в конференц-зал слева и поговорите с Erst. Она даёт код '''0315'''. | ||
##; [[File:008reg.png|frameless]] | ##; [[File:008reg.png|frameless]] | ||
## | ## Используйте код на '''Access Controller''' слева от вас и дождитесь окончания кат-сцены. | ||
##; [[File:009reg.png|frameless]] | ##; [[File:009reg.png|frameless]] | ||
## | ## Выйдите из конференц-зала и направляйтесь в правый нижний угол. Там вы найдёте больше Deadly Poisonous Gas, которое нужно очистить. | ||
## | ## Как только весь газ будет очищен, вы сможете попасть в ближайшие комнаты. | ||
## | ## Начните с первой комнаты по координатам {{#navi:1@rgsr|211|136}} и поговорите с '''Detained Researcher'''. | ||
##; [[File:010reg.png|frameless]] | ##; [[File:010reg.png|frameless]] | ||
## | ## Перейдите в комнату ниже и поговорите с другим '''Detained Researcher'''. | ||
##; [[File:011reg.png|frameless]] | ##; [[File:011reg.png|frameless]] | ||
## | ## Выполните тот же шаг, что и выше, для следующей комнаты.<br>''Третий не исчезает после разговора с ним.'' | ||
##; [[File:012reg.png|frameless]] | ##; [[File:012reg.png|frameless]] | ||
## | ## Идите в последнюю комнату внизу, и вы найдёте Ashley, которая ждёт вас. Поговорите с ней. Не забудьте взять '''Scattered Documents''' на столе, нажав на них. | ||
##; [[File:013reg.png|frameless]][[File:014reg.png|frameless]] | ##; [[File:013reg.png|frameless]][[File:014reg.png|frameless]] | ||
## | ## Выйдите из комнаты и направляйтесь в '''Central Room''', по координатам {{#navi:1@rgsr|125|153}}. Нажмите на Central Room, чтобы появились Ashley и остальные. | ||
## | ## Поговорите с Ashley и посмотрите кат-сцену. Поговорите с ней снова, когда она закончится, и выберите '''Enter'''. | ||
##; [[File:015reg.png|frameless]][[File:016reg.png|frameless]] | ##; [[File:015reg.png|frameless]][[File:016reg.png|frameless]] | ||
## | ## Подойдите ближе к '''Restrained Specimen''', чтобы запустить следующий шаг. | ||
## | ## В этой комнате есть 4 устройства управления. Вот правильный порядок (если ошибётесь, просто повторите тот же шаг, начинать заново не нужно): | ||
##* | ##* Устройство управления справа сверху > Blue Button. | ||
##* | ##* Устройство управления слева снизу > Red button. | ||
##* | ##* Устройство управления слева сверху > White Button. | ||
##* | ##* Устройство управления справа снизу (рядом с Restrained Specimen, на стене) > Yellow Button. | ||
## | ## Restrained Specimen вырвется на свободу, убейте его, чтобы продолжить. | ||
##; [[File:017reg.png|frameless]] | ##; [[File:017reg.png|frameless]] | ||
## Ashley | ## Ashley появится снова к югу от комнаты. Поговорите с ней и выберите '''Move to Einbroch'''. | ||
##; [[File:018reg.png|frameless]] | ##; [[File:018reg.png|frameless]] | ||
# | # Поговорите с Philofontes внутри '''Cat on Bullet'''. Он наградит вас 25 {{#item:25669|Unknown Parts}} и небольшим количеством опыта.<br>''Если вы взяли Scattered Documents ранее, вы можете снова поговорить с Philofontes, чтобы получить больше опыта.<br> Вы можете продолжить задание с Investigating Rekenber.'' | ||
<br clear="all"> | <br clear="all"> | ||
<div lang="en" dir="ltr" class="mw-content-ltr"> | <div lang="en" dir="ltr" class="mw-content-ltr"> | ||
Revision as of 12:05, 13 October 2026
Перед началом любого квеста выполните New World Quest!
Temporal Tina is an NPC who sells Episode Clear Tickets. She is located in Prontera (prontera 140, 174) and the Main Office (main_office 94, 59).

|

|
| (prontera 140, 174) | (main_office 94, 59) |
Талоны очистки эпизодов
Episode Clear Ticket — расходуемый предмет, позволяющий пропустить основной квест эпизода. Используя его, вы мгновенно получите доступ ко всем NPC, подземельям и магазинам снаряжения, для открытия которых обычно требуется пройти эпизод или выполнить определённые задания.
Обратите внимание: используя Episode Clear Ticket, вы не получите награды за задания, такие как EXP, Zeny, репутация и предметы.
У некоторых Episode Clear Ticket есть предварительные требования. Если это ваш первый персонаж на сервере, вам всё равно придётся пройти от Episode 17.2 до последнего эпизода обычным путём.
Проверьте таблицу ниже, чтобы узнать требования и цены для каждого талона.
| Талоны очистки эпизодов | |||
|---|---|---|---|
| Талон эпизода | Уровень | Стоимость в Zeny | Предварительные требования |
 Episode 14 Clear Ticket (1000284) Episode 14 Clear Ticket (1000284)
|
160 | 1,000,000 | Нет |
 Episode 15 Clear Ticket (1000286) Episode 15 Clear Ticket (1000286)
|
140 | 1,000,000 | Нет |
 Episode 16 Clear Ticket (1000282) Episode 16 Clear Ticket (1000282)
|
100 | 1,000,000 | None |
 Episode 17.1 Clear Ticket (1000285) Episode 17.1 Clear Ticket (1000285)
|
110 | 2,000,000 | None |
 Episode 17.2 Clear Ticket (1000287) Episode 17.2 Clear Ticket (1000287)
|
130 | 4,000,000 | The current character has cleared Episode 17.1 |
 Episode 18 Clear Ticket (1000288) Episode 18 Clear Ticket (1000288)
|
170 | 9,000,000 | The current character has cleared Episode 17.2 |
 Episode 19 Clear Ticket (1000988) Episode 19 Clear Ticket (1000988)
|
200 | 12,000,000 | The current character has cleared Episode 18 AND one character in the master account has cleared Episode 19 and the side quests "Purification Saint" and "Frozen Sea" |
 Episode 20 Clear Ticket (1001214) Episode 20 Clear Ticket (1001214)
|
215 | 16,000,000 | The current character has cleared Episode 19 AND one character in the master account has cleared Episode 20 |
 Episode 21 Clear Ticket (1001215) Episode 21 Clear Ticket (1001215)
|
230 | 32,000,000 | The current character has cleared Episode 20 AND one character in the master account has cleared Episode 21 |
 Chapter 1 Clear Ticket (50098) Chapter 1 Clear Ticket (50098)
|
265 | 64,000,000 | One character in the master account has cleared Chapter 1 and complete Zero Cell Sector |
How to check which episode I have unlocked?
Right now, we don't have a feature which simply tells you which episode you are.
So here's some things you can do to check it by yourself:
| Episode Quest | ||
|---|---|---|
| Episode | Steps | Description |
| Episode 15 | Click on Warper > Instances > Central Laboratory. | If you can go, you have completed the Episode 15 quest. |
| Episode 16 | Click on Warper > Instances > Heart Hunter War Base. | If you can go, you have completed the Episode 16 quest. |
| Episode 17.1 | Use @go 46. (Cor) | If you can go, you have completed the Episode 17.1 quest. |
| Episode 17.2 | Use @go 47. (Varmundt's Mansion) | If you can go, you have completed the Episode 17.2 quest. |
| Episode 18 | Use @go 51. (Gray Wolf Village) | If you can go, you have completed the Episode 18 quest. |
| Episode 19 | Use @go 53. (Ice Castle) | If you can go, you have completed the Episode 19 quest. |
| Episode 20 | Click on Warper > Instances > The Immortal. | If you can go, you have completed the Episode 20 quest. |
| Episode 21 | Click on Warper > Instances > Final Battle. | If you can go, you have completed the Episode 21 quest. |
Серия квестов Illusion 17.1
Rudus Investigation
- Примечание: Вам не нужно выполнять предварительные квесты 16-го эпизода, чтобы начать цепочку квестов 17-го эпизода.
- Базовый уровень 110
- Начало: (prontera 156, 354)
- Шаг 1 квеста Learning About the Families
Если вы не видите Nyhill в своей комнате, значит, вы уже говорили с ним. Переходите к шагу 3 этого руководства. - Награда: 15
 Cor Core (25723)
Вам не нужно выполнять цепочку квестов 16-го эпизода, чтобы пройти цепочку квестов 17.1. Однако вам нужно попасть в свою комнату в замке Prontera, чтобы поговорить с Nyhill, а для этого требуется выполнить шаг 1 квеста Learning About the Families. Если вы не видите Nyhill в своей комнате, значит, вы уже говорили с ним. Переходите к шагу 3 этого руководства.
- Отправляйтесь в свою комнату в замке Prontera (@go woe, затем идите на север). Ваша комната — нижняя в левом крыле (prt_cas_q 30, 28).
- Поговорите с Nyhill M. Heine в комнате. Он расскажет, что Peter чувствует себя неважно и что теперь он следующий в очереди на трон.
- Подойдите к входу в Clana Nemieri в Einbech (einbech 215, 79), и появится член Rebellion Crew. Поговорите с ним, чтобы собрать информацию о новой базе.
- Направляйтесь в паб Cat on Bullet (einbroch 302, 326) в Einbroch.
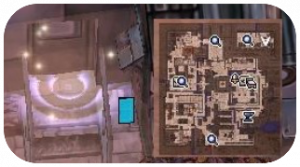
- Войдите внутрь и поговорите с Philofontes (pub_cat 94, 104). Он расскажет, что нашёл вход в заброшенные пустоши Rudus.
- Вход в Rudus находится здесь: (ein_fild05 156, 288). Поговорите с Rebellion Crew там, чтобы вас впустили.
Теперь вам доступен ежедневный квест Morning. - Поговорите с Elena Volkova рядом со входом. Она расскажет, что путь преграждает барьер.
- Идите на юг и поговорите с Rookie перед барьером.
- На вашей миникарте отмечены 3 места, где нужно собрать информацию:
- Член Rebellion Crew у (sp_rudus 303, 266).
- Член Rebellion Crew у (sp_rudus 121, 286).
- Small Hole у (sp_rudus 27, 300).
- Член Rebellion Crew у (sp_rudus 303, 266).
- Вернитесь к Rookie после того, как проверите все эти места. Ему удалось открыть дверь, так что теперь вы можете поговорить с Firmly Closed Door, чтобы попасть на другую сторону.
- За барьером слышны странные звуки, и он хочет, чтобы вы нашли их источник. Вам нужно убить следующих монстров:
- 10 Dolors.
- 10 Venenums.
- 10 Twin Caputs.
- Когда закончите, поговорите с Elena Volkova рядом со входом. Вы получите 15 Cor Core (25723) и немного опыта.
- Вы можете продолжить серию квестов, перейдя к Securing Regenschirm.


Securing Regenschirm
- Базовый уровень 110
- Начальная точка (pub_cat 93, 105)
- Награда: 25
 Unknown Parts (25669)
- Доложите результаты Philofontes внутри Cat on Bullet. В другой комнате появился новый гость.
- Поговорите с Retired Rebellion справа от вас, чтобы войти в комнату.
- Поговорите с Philofontes внутри комнаты. Вы узнаёте, что лаборатория Regenschirm захвачена Heart Hunters.
- Поговорите с Middle-Aged Gentleman рядом с Philofontes. Он хочет представиться и говорит, что он вице-президент Rekenber, известный как Kaya Toss.
- Идите ко входу в Regenschirm (lighthalzen 53, 269), рядом со штаб-квартирой Rekenber в Lighthalzen.
- Поговорите с Republic Guard. После подготовки к повторному захвату лаборатории Oscar впустит вас.
- Находясь в группе, поговорите с Rekenber Guard Oscar рядом с порталом и выберите Generate Regenschirm, чтобы начать инстанс. Поговорите с ним снова, чтобы войти.
- Поднимитесь немного вверх и поговорите с Ashley. Вас перенесёт в главный зал.
- Убейте всех врагов в ближайших областях. Не забудьте про общую комнату внизу слева. Чтобы продолжить, нужно убить каждого Special Guard.
- Идите в ресторанную комнату (слева) и затем нажмите на Access Controller рядом с дверью.
- Поговорите с Researcher прямо рядом с вами, чтобы он открыл дверь. Вас перенесёт в коридор.
- Идите на север и очистите левую сторону от всего Deadly Poisonous Gas. После этого появится объявление о том, что портал разблокирован.
- Войдите в конференц-зал слева и поговорите с Erst. Она даёт код 0315.
- Используйте код на Access Controller слева от вас и дождитесь окончания кат-сцены.
- Выйдите из конференц-зала и направляйтесь в правый нижний угол. Там вы найдёте больше Deadly Poisonous Gas, которое нужно очистить.
- Как только весь газ будет очищен, вы сможете попасть в ближайшие комнаты.
- Начните с первой комнаты по координатам (1@rgsr 211, 136) и поговорите с Detained Researcher.
- Перейдите в комнату ниже и поговорите с другим Detained Researcher.
- Выполните тот же шаг, что и выше, для следующей комнаты.
Третий не исчезает после разговора с ним. - Идите в последнюю комнату внизу, и вы найдёте Ashley, которая ждёт вас. Поговорите с ней. Не забудьте взять Scattered Documents на столе, нажав на них.
- Выйдите из комнаты и направляйтесь в Central Room, по координатам (1@rgsr 125, 153). Нажмите на Central Room, чтобы появились Ashley и остальные.
- Поговорите с Ashley и посмотрите кат-сцену. Поговорите с ней снова, когда она закончится, и выберите Enter.
- Подойдите ближе к Restrained Specimen, чтобы запустить следующий шаг.
- В этой комнате есть 4 устройства управления. Вот правильный порядок (если ошибётесь, просто повторите тот же шаг, начинать заново не нужно):
- Устройство управления справа сверху > Blue Button.
- Устройство управления слева снизу > Red button.
- Устройство управления слева сверху > White Button.
- Устройство управления справа снизу (рядом с Restrained Specimen, на стене) > Yellow Button.
- Restrained Specimen вырвется на свободу, убейте его, чтобы продолжить.
- Ashley появится снова к югу от комнаты. Поговорите с ней и выберите Move to Einbroch.
- Поговорите с Philofontes внутри Cat on Bullet. Он наградит вас 25 Unknown Parts (25669) и небольшим количеством опыта.
Если вы взяли Scattered Documents ранее, вы можете снова поговорить с Philofontes, чтобы получить больше опыта.
Вы можете продолжить задание с Investigating Rekenber.


Investigating Rekenber
- Base Level 110
- Starting point (pub_cat 106, 69)
- Reward 20 Cor Core (25723)
- Speak with Lazy inside the pub, at (pub_cat 106, 69). He's arguing with Kaya Toss about the documents provided and they refuse to believe one another.
- Speak with him again down below to know what's happening.
- Speak with Kaya and make a proposal with him. You're suggesting to bring together Lazy, Kaya and yourself to investigate the issue.
- Talk with Lazy. Kaya joins the discussion and accepts the proposal. You'll be rewarded with some experience.
- Head to the Einbroch Airport at (einbroch 42, 208) and then speak with Lazy. Kaya decided to investigate the whereabouts of Patrick Kaufman.
- Find Lazy in Lighthalzen at (lighthalzen 259, 215).
- Go to Patrick's House at (lighthalzen 336, 266) and speak with Lazy.
- Go near the Rekenber's Headquarters at (lighthalzen 108, 163) and speak with Lazy.
- Go inside the Headquarters up north. Speak with the Staff member after you enter.
- Walk up to the 2nd floor, on the east side and go to (lhz_in01 162, 258). Speak with another Staff member.
- Go to Regenschirm, the building left of the Headquarters (lighthalzen 53, 277).
- Speak with the Laboratory Staff on the right side.
- Go to the common room on the bottom left and speak with the Staff member. He doesn't know where Patrick was transffered, so he sends you back to the Office.
- Go back to the Headquarters and talk to the Secretary at (lhz_in01 80, 210). He tells you to check out the document storage room to find information.
- Go to the top left room and speak with the Staff at (lhz_in01 32, 264). You decide to split your search and you're going with Kaya to the supposed new laboratory that Patrick was transffered to: Section 95-146, District 01, in the Einbroch Mountains.
- The location is at (ein_fild01 95, 146). You'll find Kaya waiting for you over there.
- Speak with Kaya and it turns out there is absolutely nothing there. You'll be rewarded with 20 Cor Core (25723) and some experience.


You can continue the quest with Old Memories.
Old Memories
- Base Level 110
- Starting point (pub_cat 93, 105)
- Reward Unknown Parts (25669)
- Speak with Philofontes inside Cat on Bullet. He asks you to meet with a Rebellion Crew member at the North-West region of Einbroch. The Rebellion elders have decided to help you.
- Speak with the Rebellion Crew member at (ein_fild03 278, 269) . There's another suspicious abandoned mine there and he wants you to look around first.
- Walk near (ein_fild03 347, 219).
- Walk near (ein_fild03 268, 207).
- Walk near (ein_fild03 218, 266).
- Speak with the Rebellion Crew again, you'll be rewarded with some experience.
- While in a party, talk to the Rebellion Crew and select Create instance to start the instance. Talk to him again to enter.
- Speak with Ridsh at the entrance.
- Right to the right a little and kill the 2 monsters that spawned.
- A Suspicious Device will appear on the bottom right. Click on it and select Crush it to proceed.
- Follow the railway until you see an entrance to the camp.
- Remove all 3 Thick Wires to by clicking on them.
- Continue following the railway.
- Walk on the next portal to trigger a short dialogue. Dien will tell you to walk to the right to get back onto the railroad without destroying the door.
- Keep moving to the top right section and you'll meet with Ridsh. Talk to her. After her dialogue the portal will disappear and you can continue.
- Walk to the next section at the top right. Follow the railway until you meet with Dien again.
- Speak with her and you'll be rewarded with 25 Unknown Parts (25669) and some experience.
- Speak with Ridsh at the entrance.
- Go back to Clana Nemieri, in Einbech (einbech 215, 79) , then speak with the Rebellion Crew inside at (rebel_in 68, 41) .
- Enter Dien's room and open the Ornament Box on the desk. Select Just take it. You'll get a
 Dien's Precious Envelope (25665). Just continue with the next step even if you don't get the letter.
- Go back to OS and talk with Dien (ein_fild03 278, 269)> then enter the portal > (sp_os 253, 359). Hand over the picture and you'll be rewarded with some experience.
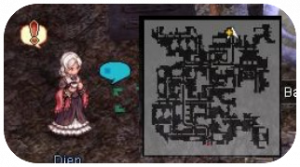
You now have access to the Cor area.
You have unlocked the Mercenary vs Mercenary daily quest.
You have unlocked the OS Mission quest.
You can continue the quest with Helping the Workers.


Helping the Workers
- Base Level 110
- Starting point (sp_cor 168, 81)
- Speak with the Advanced Team near the entrance of Cor (sp_cor 168, 81) . The workers think you've invaded the area and do not want you here.
- Talk to Kaya to let him give his speech. The workers aren't convinced he's really the Vice President of Rekenber.
- Speak with Tess and see if he can perhaps convince them. Elyumina will make an appearance and attack the workers. Some of them are injured and need assistance.
- Speak with Tess at the safe place (sp_cor 122, 141) .
- Speak with Ashley nearby. She tells you many of the workers are very sick. You will be rewarded with some experience.
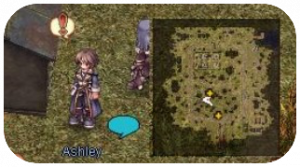
You have unlocked the Finding Patrick quest.
You can continue the quest with Capturing Elyumina.


Capturing Elyumina
- Base Level 110
- Starting point (sp_cor 108, 130)
- Reward 1
 Broken Weapon (25668)
5 Cor Core (25723)
- Speak with the Rebellion at (sp_cor 108, 130). Elena Volkova will appear next to you.
- Speak with Elena Volkova. Elyumina is causing more trouble.
- Meet with Elena Volkova to the next area to prepare for the operation, near (sp_cor 180, 169).
- While in a party, speak with Elena Volkova and choose Create Cor Operation to create the instance. Talk with her again to enter.
- Speak with Elena Volkova at the entrance.
- Investigate the Box device north of you (1@cor 222, 236) and upper (1@cor 220, 170).
- Kill the mobs that spawned and then talk to the Rebellion next to the Box.
- The next area will be marked on your minimap (1@cor 172, 223).
- Talk to Elena Volkova and choose Give signal.
- Enter the portal on the left to start the fight.
- Kill EL1-A17T. In the story version, the mob is very easy and has low HP.
- Elena will appear, talk with her and end the operation.
- Speak with Elena Volkova at the entrance.
- Talk with her again outside of the instance. She will reward you with 1 Broken Weapon (25668), 5 Cor Core (25723) and some experience.
- Speak with Gonie at the Barrack (sp_cor 136, 210). Rookie said he will do the interrogation.
- Talk to Rookie. You learn about how to enter Varmundt's Mansion.
- Go the specified coordinates (sp_cor 255, 285) and speak with Rookie. You will be rewarded with some experience.
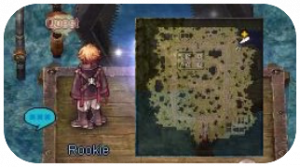
You have completed the Illusion episode quest.
You have unlocked the Cor Mission instance daily quest.
You have unlocked the Helping Farm Worker daily quest.
You have unlocked the Sage's Legacy quests (episode 17.2 quests).


OS Mission
- Base Level 110
- Starting point (sp_cor 163, 56)
- Reward 1 Broken Weapon (25668)
5 Cor Core (25723)
- Speak with Erst at (sp_cor 163, 56). If you do not see her, walk near her location to make her appear.
- While in a party, speak with her again and choose Generate OS Mission. Then one more time to enter the instance.
- Once inside, the briefing will start. Wait for the cutscene a little.
Do not leave the area, as the poison clouds will kill you if you walk on them. - You'll be asked to give your status report to the communication device, it will be flashing blue. Speak to it and select any option.
- You'll be asked again after another cutscene, and select any option again.
- After the strike, talk to the device to get the navi for the next location (1@os_a 52, 177).
- Talk to the other device and let the small cutscene happen.
- Follow the navi lines by moving north. You'll have to kill some mobs.
- Once the mobs are killed, walk near the blue light at (1@os_a 84, 256).
- Repeat the same thing, and then go to (1@os_a 163, 266).
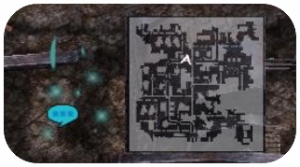
- And... again, then go to (1@os_a 138, 174).
- Kill Miguel on the right side.
- Speak with Erst.


You will get 1 Broken Weapon (25668), 5 Cor Core (25723) and some experiencce.
You have now unlocked the OS Mission instance daily quest.
Illusion Daily
To view the Illusion Daily click here.
Illusion Equipment and OS Weapons
To view the Illusion Equipment click here.
To view the OS Weapons click here.
To view the OS Headgears click here.