16.2 Terra Gloria/ko: Difference between revisions
Machine translation (deepseek-flash) |
Machine translation (deepseek-flash) |
||
| (14 intermediate revisions by the same user not shown) | |||
| Line 88: | Line 88: | ||
통로를 따라 올라가 Rebellion leader {{#navi:rebel_in|122|71}}에게 말을 거세요. 그는 Gonie를 언급하기 전까지 Young Rebellions에게 당신을 아래층으로 안내하게 하려 합니다. 협력에 대해 이야기하면 그는 그 제안을 비웃습니다. | 통로를 따라 올라가 Rebellion leader {{#navi:rebel_in|122|71}}에게 말을 거세요. 그는 Gonie를 언급하기 전까지 Young Rebellions에게 당신을 아래층으로 안내하게 하려 합니다. 협력에 대해 이야기하면 그는 그 제안을 비웃습니다. | ||
[[File:RebellionLeader-Rebel-Inn.png|frameless]] | [[File:RebellionLeader-Rebel-Inn.png|frameless]] | ||
Rebellion leader에게서 남쪽으로 가서 문 포탈 입구에 있는 Rebellion guard와 대화하세요. Rookie가 보냈다는 말에도 그들은 들여보내 주지 않습니다. Larcis가 당신의 목소리를 들을 때까지 Rebellion Guard leader에게 계속 물어보고 계속 소리치세요. 그러면 안으로 들어갈 수 있습니다. | |||
[[File:RebellionGuard-Rebel-Inn.png|frameless]] | [[File:RebellionGuard-Rebel-Inn.png|frameless]] | ||
안쪽으로 앞으로 걸어가면 Dien {{#navi:rebel_in|164|88}}이 당신에게 말을 걸기 시작합니다. 대화는 Gonie로 흘러갑니다. 그런 다음 협력에 대해 묻자 Ridsh는 격분하고 Dien은 침착하게 당신의 말을 끝까지 들어줍니다. Ridsh는 Schwartz가 무너져도 신경 쓰지 않을 것입니다. | |||
Dien은 다른 이들을 설득해 협력하게 돕기로 선택합니다. | |||
[[File:Dien-Rebel-Inn.png|frameless]] | [[File:Dien-Rebel-Inn.png|frameless]] | ||
Special Force commander {{#navi:rebel_in|210|89}}에게 Dien이 쓴 편지를 건네세요. 그녀가 쓴 내용에 놀라고 못마땅해하면서도, Dien의 마지막 소원일 수 있으므로 동의할 것입니다. | |||
[[File:SpecialForceCommanderErst-Rebel-Inn.png|frameless]] | [[File:SpecialForceCommanderErst-Rebel-Inn.png|frameless]] | ||
복도 구석에 있는 Rebellion leader Rupert {{#navi:rebel_in|122|71}}에게 돌아가 Dien의 편지를 전하세요. | |||
그 옆에 나타난 Rebellion Guard leader와 대화하세요. (필수 단계인가요? 제 생각에는 그런 것 같습니다. 제 퀘스트 로그 일부가 사라졌어요.) | |||
[[File:RebellionGuardLeader-Rebel-Inn.png|frameless]] | [[File:RebellionGuardLeader-Rebel-Inn.png|frameless]] | ||
뒤돌아서 Rebellion leader Rupert에게 다시 말을 거세요. 그는 소란을 피우며 Dien을 보러 가려 하지만, 그녀가 그의 옆에 나타납니다. | |||
Dien이 Secret Wings를 돕는 데 동의하겠다고 말하는 것을 들으세요. Ernst와 Dien이 둘 대 하나로 나서도, Rupert는 그들이 견뎌온 모든 것을 내려놓고 돕는 것을 여전히 받아들이지 않습니다. | |||
[[File:DienOutside-Rebel-Inn.png|frameless]] | [[File:DienOutside-Rebel-Inn.png|frameless]] | ||
Rebellion leader Rupert는 Dien을 그녀의 방으로 안내해 돌려보내려 하지만, Dien이 그의 수염을 붙잡습니다. 복수심을 놓지 않으면 아무것도 이룰 수 없다는 진실을 말하자, Rupert는 마침내 돕기로 동의합니다. 하지만 아주 조금만! | |||
Rebellion leader | |||
* Schwartz's Honor Token 10개를 받습니다. | |||
* | * Preparing for the Party 반복 퀘스트 이용 가능 | ||
* | |||
아래층으로 돌아가 Lazy에게 Rebellion이 도와줄 것이라고 알리세요. 그런 다음 Rookie의 어린 시절 이야기를 들으세요. 그는 작았고 가족이 그를 쓸모없다고 생각해서 집을 나왔고, Gonie를 만나 Rebel이 되었습니다. 원로들이 나타나 원로들이 가장 잘하는 일, 즉 불평을 합니다. Rookie는 젊은 구성원 중 누구도 그 시절에 무슨 일이 있었는지 모른다고 지적합니다. 그들은 그것에 대해 이야기하기를(혹은 변하기를) 거부하기 때문입니다. 그러면 당신이 진실의 차를 꺼내서 위층의 Rupert와 다른 아가씨들이 이미 돕기로 동의했다고 말합니다. | |||
* Lazy는 남기로 결정하고, 그러면 EXP와 Schwartz's Honor Token 10개를 받습니다. | |||
* | * Giving Charity to Charity 반복 퀘스트 이용 가능. | ||
* | * Tea Time Snacks 반복 퀘스트 이용 가능. | ||
* | * Tracking Down Missing Guns for Master 반복 퀘스트 이용 가능. | ||
* | * Twinkle Twinkle Shooting Star 반복 퀘스트 이용 가능. | ||
* | * Ericsson Adler 반복 퀘스트 이용 가능. | ||
* | * Pamphlet Promotion 반복 퀘스트 이용 가능. | ||
* | * Side Quests 이용 가능. | ||
* | |||
==== Heart Hunter War Base ==== | ==== Heart Hunter War Base ==== | ||
Rebellion Squadder {{#navi:rebel_in|65|46}} | Rebellion Squadder {{#navi:rebel_in|65|46}}가 Tess가 왔다고 알려줍니다. Yes를 선택하면 Einbech 기차 승강장으로 이동할 수 있고, 걸어가도 됩니다. | ||
[[File:RebellionSquadder-Rebel-Inn.png|frameless]] | [[File:RebellionSquadder-Rebel-Inn.png|frameless]] | ||
Einbroch에 도착하면 호텔 {{#navi:ein_in01|198|224}}로 가세요. 2층, 계단 바로 북쪽에 있는 방으로 가세요 {{#navi:ein_in01|273|276}}. Tess가 당신을 안으로 초대할 것입니다. | |||
Einbroch 호텔 방에서 Nihil과 대화하세요. 실제로 뭔가 하고 싶었는지 그가 직접 왔습니다. Skia도 연회에서 빠져나오는 데 성공했습니다. 이제 시설에 대한 공격 계획이 시작됩니다. 탈출 경로는 없지만 그들은 텔레포트 게이트가 있을 것으로 의심합니다. | |||
Einbroch 도시에서 북쪽으로 한 맵 이동해 작전 지점으로 가서 Julian {{#navi:ein_fild04|281|337}}와 대화하세요. | |||
몬스터 테이밍은 퀘스트의 다음 부분에 방해가 됩니다. 그러니 하지 마세요. (하지만 테이밍에 어떤 아이템을 써야 하는지는 잘 모르겠네요...) | |||
인스턴스를 예약하려면 Julian에게 말을 걸고, 입장하려면 Striker Unit Commander에게 말을 거세요. | |||
Heart Hunter War Base 1 Instance | Heart Hunter War Base 1 Instance | ||
<u>딜러가 아닌 캐릭터(예: Adoramus나 Judex가 없는 Arch Bishop)에게는 추천하지 않습니다.</u> | |||
<u> | |||
인스턴스를 시작하려면 지휘부 선두에 있는 Julian 근처로 걸어가세요. | |||
Heart Hunter Guards가 생성됩니다. 이들은 Fury (?), Increase Agi, Bowling Bash, Endure(추격 시?)를 사용하며, 아마 더 많은 스킬을 쓸 수 있습니다... | |||
Heart Hunter | |||
북쪽 끝 {{#navi:1@swat|58|89}}에 화약 더미가 있습니다. 이는 바닥에 Antique Gunpowder를 떨어뜨리고 경보를 울려 더 많은 적이 생성되게 합니다. | |||
동쪽에 있는 Julian에게 주면 모든 몬스터를 파괴하고 길을 열어줍니다. | |||
계속 동쪽으로 걸어가서 Julian에게 다가가 다시 말을 거세요. 그는 다음 폭발을 준비하는 데 시간이 조금 필요합니다. | |||
북쪽으로 올라가면 Suspicious instrument {{#navi:1@swat|147|119}}를 발견하게 됩니다. 버튼을 누르세요. 규칙을 따르지 않으면 규칙이 당신을 따르니까요! | |||
Heart Hunter Guards가 더 생성됩니다. Upgraded Heart Hunters도 일부 생성됩니다. 진행하려면 모두 처치하세요. 일반 Heart Hunter guards는 킬 0.5로 계산되고, Upgraded Heart Hunter는 킬 1로 계산됩니다. 계속하려면 15 킬 포인트가 필요합니다. | |||
버튼 누르는 사람을 싫어하는 사냥꾼들을 모두 처치한 뒤 Julian에게 걸어가고, 그다음 동쪽으로 계속 가세요. | |||
Julian이 화약이 떨어져서 당신이 더 찾아오길 원합니다. 이전에 폭파한 방어벽으로 돌아가면 Heart Hunter guards가 지키고 있는 Pile of gunpowder ({{#navi:@swat|165|56}})를 발견하게 됩니다. | |||
[[File:PileOfGunPowder.png|frameless]] | [[File:PileOfGunPowder.png|frameless]] | ||
Julian에게 화약을 주고 동쪽으로 진행하세요. Julian에게 다가가면 Heart Hunter 통신실을 점령했다는 안내가 나옵니다. | |||
이제 Ebel이 생성됩니다. 환풍구가 있는 구역을 지나갈 수 없으며, 지나가려 하면 뒤로 텔레포트됩니다. | |||
전투 후 Julian이 Ebel을 마비시키고, 경비병들에게 연구를 위해 그녀를 붙잡으라고 말합니다. | |||
Schwartz's Honor Token 10개를 받고 Einbroch Field 04로 워프됩니다. | |||
==== 메인 퀘스트 계속 ==== | |||
= | 인스턴스에서 나온 후 Rookie에게 말을 걸어 잘 부탁한다고 하세요. 아직 Terra Gloria를 찾지 못했기 때문에 Rookie가 당신을 Heart Hunter War base로 워프시켜 줍니다. | ||
Rookie 옆의 포탈로 들어가면 Werner Laboratory에 입장합니다. | |||
원한다면 Rebellion squadder가 당신을 다시 밖으로 데려다줍니다. | |||
Rebellion | |||
Yuslan이 Chimeras를 처치하는 것을 도와달라고 요청합니다. Material Chimera 10마리와 Human Chimera 10마리입니다. | |||
==== Werner Laboratory Central Room Instance ==== | ==== Werner Laboratory Central Room Instance ==== | ||
인스턴스를 시작하려면 Rookie {{#navi:slabw01|236|91}}에게 말을 거세요. (실제로 MVP와 싸우는 퀘스트를 받으려면 그에게 다시 말을 걸어야 한다고 합니다. 저는 이 부분을 서둘러 지나가느라 맵에서 Chimeras에게 공격받고 있었습니다) | |||
Rookie가 Central Room에 가고 싶어 합니다. | |||
장치를 클릭하면 인스턴스에 입장합니다. | |||
Eisen Werner의 말을 듣고, 위쪽 끝까지 걸어 올라가서 그들에게 다시 말을 거세요. | |||
양쪽 방의 북쪽 끝에 Security Device가 있습니다. 대괄호 안에 단어가 표시됩니다. 대화 선택지에서 해당 단어에 맞는 색상 버전을 고르세요. | |||
{|class="wikitable" style="width: 100%;text-align:center;" | {|class="wikitable" style="width: 100%;text-align:center;" | ||
|- style="background-color:#CD5C5C;" | |- style="background-color:#CD5C5C;" | ||
|colspan="5"| | |colspan="5"| 빨간색 선택 = 1번 선택지 | ||
|- | |- | ||
|Way Back Home | |Way Back Home | ||
| Line 312: | Line 213: | ||
|colspan="2"|Girl | |colspan="2"|Girl | ||
|- style="background-color:#87CEFA;text-align:center;" | |- style="background-color:#87CEFA;text-align:center;" | ||
|colspan="5"| | |colspan="5"|파란색 선택 = 2번 선택지 | ||
|- | |- | ||
|Purity | |Purity | ||
| Line 319: | Line 220: | ||
|colspan="2"|Dream | |colspan="2"|Dream | ||
|} | |} | ||
중앙으로 돌아가서 포탈에 들어가세요. | |||
Eisen Werner가 반대편 북쪽에 서 있습니다. 이 사악한 악당은 당신이 이 실험실에서 죽을 것이라고 생각하기 때문에 자신의 계획을 밝히고 있습니다. 방 양쪽 끝에도 Security Device가 있습니다. | |||
Eisen | |||
Security Device를 모두 해제했다면, Eisen이 서 있던 앞의 포탈로 들어가세요. | |||
Eisen Werner에게 말을 걸면 Heart of Ymir가 활용되지 않고 있어서 그것을 가져갔다고 설명합니다. 그가 서 있는 옆 문에 포탈이 열립니다. | |||
문 포탈을 지나가서 Eisen Werner에게 다시 말을 거세요. Heart of Ymir의 에너지가 바닥의 마법진으로 흘러 들어가 실험체들에게 들어가며, 그중 일부는 죽었습니다. | |||
그런 다음 Heart Hunter War Base로 워프됩니다. | |||
==== 메인 퀘스트 다시 계속 ==== | |||
= | Rookie {{#navi:que_swat|150|58}}에게 말을 걸면 호텔로 돌아가고 싶어 합니다. 그러면 당신을 Einbroch Field 04로 워프시켜 줍니다. | ||
[[File:IRO Wiki Swat Rookie.png|frameless]] | [[File:IRO Wiki Swat Rookie.png|frameless]] | ||
Einbroch Hotel로 돌아가 Philopontess에게 말을 거세요. Blessing Star를 Nihil에게 돌려주고, 그들은 곧바로 Prontera Castle로 돌아가고 싶어 합니다. | |||
Skia Nerius는 성 안의 당신 방에 있습니다. | |||
Skia | |||
* 항상 느끼나요?: 호텔에서 위 단계에서 Scroll of Movement를 사용해 달라고 요청했을 때라고 그녀가 말합니다 | |||
* | * 사랑: Spica가 나타납니다 | ||
* | * 언제 가장 심각해지나요? | ||
* | |||
Kronecker가 들어오고, 그들은 가족 문제에 대해 이야기합니다. | |||
Schwartz가 아닌 Honor Token 10개와 250만 Base 및 Job EXP(VIP)를 받습니다 | |||
Spica가 Philopontess가 Werner Laboratory에서 당신을 기다리고 있다고 말합니다. | |||
Werner Laboratory로 가서 Philopontess {{#navi:que_swat|145|57}}에게 말을 거세요. 그러면 10 Schwartz's Honor Token과 2x {{#item:12610}} + 2x {{#item:12871}}을 보상으로 받습니다. | |||
* People in the Lab 반복 퀘스트가 해금됩니다. | |||
* | * Heart Hunter War Base 2 반복 퀘스트가 해금됩니다. | ||
* | * Cutie Chimera C(K)illing 반복 퀘스트가 해금됩니다. | ||
* | |||
'''이것으로 Episode 16.2: Terra Gloria 메인 퀘스트가 끝납니다.''' | |||
''' | |||
< | <span id="Side_Quests"></span> | ||
=== | === 사이드 퀘스트 === | ||
==== Returning the Relics ==== | ==== Returning the Relics ==== | ||
# Small Leather Bag을 한 번 사용하면 캐릭터 귀속 아이템 6개를 받습니다. 아래는 해당 아이템을 제출할 위치입니다: | |||
# | # Old Rings - 남동쪽 inner ring에 있는 Prontera pub의 Knight Windsor {{#navi:prt_in|177|26}}. 그는 Seyren의 Pecopeco를 발견했을 때 뭔가 잘못됐다는 것을 알았습니다. | ||
# Old Rings - Knight Windsor | # Locket Pendant - (위의) Knight Windsor는 자신의 아이들이 죽게 된 것에 화가 나 있습니다. 이제 아내도 아이도 없으니, 그는 아마 자신이 있는 pub에서 슬픔을 달랠 것입니다. | ||
# Locket Pendant - | # Wood Rosary - 수도승들의 집인 St. Capitolina Abbey {{#navi:prt_monk|93|254}}의 Sister Margaret. Margaret은 Margaretha Sorin이 어렸을 때 얼마나 말괄량이였는지 기억합니다. 그녀에게 다시 말을 걸면 Prontera로 바로 워프될 기회를 얻습니다. | ||
# Wood Rosary - | # Portable Sewing Box - Hunter Sherine은 Payon의 North Kafra 오른쪽에 있는 집 안 {{#navi:payon|187|233}}, 복도 끝에 있습니다. Cecil은 옷에 단추를 달아 더 여성스러워 보이려고 언니에게 바느질하는 법을 물었습니다. | ||
# Portable Sewing Box - Hunter | # Decorated Archer's Thimble - Blacksmith Cleaver는 Juno 무기 상점 지하 {{#navi:yuno_in01|163|31}}에 있으며 Howard에게 무슨 일이 있었는지 궁금해합니다. 그것은 그가 만드는 데 애를 먹은 선물이었습니다. Howard에게는 Cleaver가 이 thimble을 건네줄 형이 있습니다. | ||
# Decorated Archer's Thimble - Blacksmith | # Assassin's Mark Dagger - Morroc Bar {{#navi:morocc|45|107}}로 가세요. Guile Marovitz는 Morroc pub {{#navi:que_job01|89|91}}에 있습니다. Eremes는 항상 실패한 임무를 싫어했고 보통 꽤 운이 좋았습니다. 이번만 빼고요. | ||
# Assassin's Mark Dagger - | |||
==== Rachel's Repair Work ==== | ==== Rachel's Repair Work ==== | ||
* Rachel Smith는 사람들이 무기를 그냥 부러뜨려 놓고 "잃어버렸다"고 거짓말하는 것에 질려 버렸습니다. 그 무기들은 결함률이 높습니다. 그녀는 Rachel's Revolver를 Blacksmith Guild로 가져가 검사해 달라고 요청합니다. | |||
* Rachel | |||
* [[File:RachelSmith-Rebel-Inn.png|frameless]] | * [[File:RachelSmith-Rebel-Inn.png|frameless]] | ||
* | * Einbroch의 Blacksmith Guild로 가서 Blacksmith Jack에게 말을 걸면 그녀의 작업을 자세히 살펴봅니다. 그는 그녀가 사용하는 재료의 불순물이 문제의 원인이라고 결론 내립니다. | ||
* | * Rebellion base 안의 Rachel Smith에게 돌아가면, 그녀는 재료가 원인일 거라고 의심했다고 말합니다. 그녀의 부탁을 들어주고 더 좋은 재료를 가지고 매일 돌아오겠다고 말하세요. | ||
'''Schwartz's Honor Token 7개를 받습니다. | |||
''' | 이제 Rachel Smith에게서 일일 퀘스트를 할 수 있습니다.''' | ||
==== Schwartz에서 텔레포트 활성화! ==== | |||
= | 벽난로 옆에 있는 Arinoa Yurhik에게 말을 걸어주세요 {{#navi:rebel_in|82|68}}. 근처에 어떤 남자가 나타나 당신이 Clana Nemieri에서 소란을 피운 사람이냐고 묻습니다. | ||
Arivero Yurhik {{#navi:rebel_in|78|66}}은 스스로를 "hot"한 남자라고 칭하며, 보기에는 그냥 거슬리는 "bro"일 뿐입니다. 두 남매 사이에 말없는 교감이 오간 뒤, Vero는 당신에게 네 곳에 가서 물건들을 파괴해 달라고 말합니다. | |||
Arivero | |||
네 가지 선택지가 주어집니다. 하나를 고르면 그는 사라집니다. | |||
기다린 후 (얼마간의 시간), Arinoa Yurhik에게 돌아가세요 (서버 시간 오전 4시일 수 있으며, 이전 단계의 대화 선택지에 따라 달라질 수 있습니다. | |||
Arivero Yuhrik이 나타나 준비가 완료되었다고 말합니다. Schwaltzvalt은 마법 남용 가능성 때문에 도시 내 텔레포트를 금지하고 있습니다. Arivero는 사건의 시간순과 Slums에서 사람들이 사라진 점을 근거로, Schwaltzvalt 정부가 비밀 Rekenber 연구를 보호하기 위해 장비를 설치했다고 믿습니다. | |||
Arivero | |||
그는 경비복을 입은 "H"가 순찰 중 이상한 장치를 발견했고, 그날 매우 강한 바람이 불었으며 H가 무언가를 보았지만 금세 사라졌다고 설명합니다. | |||
Guard Clothes: H는 딸에게 자신의 옷을 빨고 다림질하게 합니다. 아무래도 그 자신은 할 수 없기 때문인 모양입니다... | |||
Guard Clothes: | |||
Club: 표준 돌발 상황 대비 | |||
Club: | |||
H가 순찰한 방식: H는 매뉴얼을 따르며 매일 같은 경로를 순찰합니다 | |||
화물 열차: 밤에 멈춘 석탄 열차로, 광산의 몬스터 때문에 자주 운행하지 않습니다 | |||
강한 바람: 산악 지역에서는 때때로 강한 바람이 불 수 있습니다 | |||
꺼진 횃불: 횃불이 꺼진 것이 이번이 처음이라는 점이 이상했습니다 | |||
몇 번 반복합니다 (횃불에 대해 생각합니다). Vero의 이론은 불이 꺼지기 직전에 가장 강하다는 것입니다. 그는 자신의 이론을 시험하기 위해 불 속성 아이템 몇 개를 기차로 가져오라고 합니다. | |||
화물 열차 끝 근처로 걸어가면 {{#navi:einbech|212|212}} Arivero Yurhik이 나타납니다. | |||
* 여기서 효과가 있다고 알려진 것들: | |||
* | |||
* Flame Heart | * Flame Heart | ||
* ? | * ? | ||
텔레포트 금지 장비는 멀쩡해서 Vero는 물 속성 아이템을 가져오자고 제안합니다. | |||
* 여기서 효과가 있다고 알려진 것들: | |||
* | |||
* Mystic Frozen | * Mystic Frozen | ||
물 속성 아이템을 사용한 후 장비가 파괴됩니다. Rebellion Base로 돌아가 Arinoa Yurhik에게 말을 걸면 그녀의 남동생 Vero가 나타납니다. | |||
Arivero Yurhik은 한 요원이 Lighthalzen 저택에서 또 다른 텔레포트 금지 장비 (Water)를 발견했다고 말합니다. 그에게 Rough Wind가 물에 강한 속성석이라고 말해주세요. | |||
Arivero | |||
Lighthalzen {{#navi:lighthalzen|135|233}}에서 Arivero Yurhik은 장비를 드러내고 파괴하기 위해 Mystic Frozen 1개와 Rough Wind 3개를 필요로 합니다. | |||
기지로 돌아가 Arinoa Yurhik에게 말을 걸면 Arivero Yurhik이 나타납니다. 당신은 그의 누나가 사실 기뻐하는 건지 궁금해지고, 그는 그녀가 그저 부끄러운 것뿐이라고 말합니다. 그때 금지 장비가 사라지는 것을 막는 장치가 고장 납니다. 그는 그것을 고치기 위해 Star Crumb가 필요합니다. | |||
* 그냥 웃어넘깁니다 | |||
* | * 그에게 물어봅니다: 그는 방어적으로 나오고 당신은 어쨌든 그냥 웃어넘깁니다. | ||
* | |||
Juno {{#navi:yuno|204|226}}로 이동해 Great Natures 4개와 Rough Wind 1개를 가지고 Arivero Yuhrik에게 건네주세요. Rekenber와 정부가 눈치챈 것 같습니다. 그는 Einbroch의 마지막 위치를 알려주고 쫓기는 것처럼 달아납니다. | |||
Einbroch 남동쪽 {{#navi:einbroch|262|42}}에 당황한 Arivero Yurhik이 있습니다. 그는 당신에게 이것을 파괴해 달라고 부탁하고, 당신이 그렇게 하자마자 Vero는 수상하게 순간이동으로 사라집니다. | |||
기지 안에서 Arinoa Yurhik과 대화하면 Rebellion leader가 나타나고, 자신이 알고 있는 큰 임무가 없다며 혼란스러워합니다. 당신이 임무를 설명하지만 Rebellion leader는 Arivero Yurhik을 전혀 모릅니다... 그는 Arinoa의 남동생이 얼마 전 사고로 죽었다고 말합니다. | |||
Schwartz's Honor Token 10개, Base EXP와 Job EXP, 그리고 많은 미해결 질문을 받습니다. | |||
Arinoa에게 다시 말을 걸면 인사를 할 기회가 주어지며 텍스트 입력 상자가 나타납니다. 이것이 퀘스트의 연장인지는 확실하지 않습니다. | |||
==== Elena 돕기 ==== | |||
== | Elena Volkova와 대화할 때 두 번째 선택지인 '오늘은 바쁘지 않아요, 들렀어요.'를 선택하세요. 그녀는 USU가 "Under Seal Unit"을 의미하며, 일종의 수어사이드 스쿼드 같은 거라고 말합니다. 그들은 나쁜 짓을 했지만, 탐험할 수 있도록 목줄이 주어진다(?). Elena는 쫓겨날 수도 있는 두 명의 미성년 고아에 대해 말하고, 그들의 문제를 해결해 달라고 요청합니다. | ||
[[File:ElenaBolkova-Rebel Inn.png|frameless]] | [[File:ElenaBolkova-Rebel Inn.png|frameless]] | ||
아래층으로 내려가서 Jana Levedeva {{#navi:rebel_in|109|54}}와 대화하세요. | |||
위층으로 돌아가 Elena Volkova에게 Lebedev 쌍둥이에 대해 말하세요. | |||
그녀는 당신에게 Milo와 Mason에게 그들에 대해 물어보라고 합니다: | |||
반대편 계단에서 Milo Rivers와 대화하면, 그는 그들이 사격에 뛰어났다고 말합니다. Jana가 민간인 구역에 수류탄을 던졌다고 합니다. USU 부대로 옮겨진 후, 그들은 선배들에게 반항하기 시작했습니다. | |||
[[File:MiloRivera-Rebel-Inn.png|frameless]] | [[File:MiloRivera-Rebel-Inn.png|frameless]] | ||
기지 입구에 있는 Mason Bender는 두 사람에 대해 좋게 생각하지 않습니다. Ilya가 빗나간 총알로 Mason을 쐈다고 합니다. | |||
Mason | |||
* 그들에게 직접 물어본다: | |||
* | * 빙빙 돌려 말한다: | ||
* | |||
성과가 없으면 위층으로 돌아가 Elena Volkova에게 가세요. 그녀는 당신을 그들의 이전 지휘관에게 보냅니다. | |||
아래층 벽난로 옆에서 Ericsson Adler를 만나면, 그가 당신에게 Delicious Handmade Cookie를 주며 그것을 먹고 그들과 이야기를 나누라고 합니다. | |||
Jana Levedava에게 걸어가서 그들에게 쿠키를 주세요. Commander Adler, 당신, 그리고 Elena가 두 사람을 걱정하고 있다고 말하세요. Jana는 상태가 좋지 않아서 무너지기 시작하고, Ilya는 고의로 수류탄을 던진 게 아니라고 말합니다. 그들은 전출된 후 겁을 먹었고, 문제 행동을 하기 시작했으며 더욱 겁을 먹게 되었습니다. 그들은 Elena에게 자신들의 감정을 말해도 된다고 허락합니다. | |||
Elena Volkova에게 쌍둥이들이 자신들을 짐이라고 느꼈다고 말하세요. Elena는 실수로 그들을 어른처럼 대했고, 그건 도움이 되지 않았습니다. | |||
Jana Levedava에게 돌아가서 그들을 Elena에게 데려가고, 당신이 쌍둥이를 변호하겠다고 말하세요. | |||
Elena Volkova와 대화하고 'Lebedev 자매를 데려왔습니다. 남녀 쌍둥이인 줄 알았어요.'라고 말하세요. Elena는 도망쳤다며 그들에게 소리칩니다. 그리고 나서 두 사람에게 사과합니다. 그런 다음 그녀는 그들에게 친구를 사귀거나 훈련할 수 있도록 실제 전투 임무에 투입하지 않겠다고 말합니다. | |||
이 모든 후에 Schwartz's Honor Token 10개, Base EXP와 Job EXP를 받습니다. | |||
'''이제 Cookie Delivery (Name not final) 일일 퀘스트에 접근할 수 있습니다.''' | |||
''' | |||
== 일일 퀘스트== | |||
== | '''<u>[[Terra_Gloria_Dailies|일일 퀘스트는 여기에서 확인할 수 있습니다]].</u>''' | ||
'''<u>[[Terra_Gloria_Dailies| | |||
< | <span id="Schwartz's_Honor_Token_Exchange_and_Enchantment"></span> | ||
== Schwartz's Honor Token | == Schwartz's Honor Token 교환 및 인챈트== | ||
'''<u>[[Schwartz's_Honor_Token|여기에서 확인할 수 있습니다.]]</u>''' | |||
'''<u>[[Schwartz's_Honor_Token| | |||
== Imperial Set 및 인챈트 == | |||
== Imperial Set | '''[[Imperial Set|여기에서 확인할 수 있습니다.]]''' | ||
'''[[Imperial Set| | |||
Latest revision as of 12:22, 15 October 2026
어떤 퀘스트를 시작하기 전에, New World Quest!를 진행하세요.
Temporal Tina is an NPC who sells Episode Clear Tickets. She is located in Prontera (prontera 140, 174) and the Main Office (main_office 94, 59).

|

|
| (prontera 140, 174) | (main_office 94, 59) |
Episode Clear Tickets
An Episode Clear Ticket is a consumable item that allows you to skip the main quest of an episode. By using it, you will gain instant access to all NPCs, dungeons, and equipment shops that would normally require you to complete the episode or fulfill certain quests to unlock.
Please note that by using an Episode Clear Ticket, you will miss out on quest rewards such as EXP, Zeny, reputation, and items.
Some Episode Clear Tickets have prerequisites. If it's your first character on the server, you will still have to progress from Episode 17.2 to the last episode normally.
Check the table below to see the requirements and prices for each ticket.
| Episode Clear Tickets | |||
|---|---|---|---|
| Episode Ticket | Level | Zeny Costs | Prerequisites |
 Episode 14 Clear Ticket (1000284) Episode 14 Clear Ticket (1000284)
|
160 | 1,000,000 | None |
 Episode 15 Clear Ticket (1000286) Episode 15 Clear Ticket (1000286)
|
140 | 1,000,000 | None |
 Episode 16 Clear Ticket (1000282) Episode 16 Clear Ticket (1000282)
|
100 | 1,000,000 | None |
 Episode 17.1 Clear Ticket (1000285) Episode 17.1 Clear Ticket (1000285)
|
110 | 2,000,000 | None |
 Episode 17.2 Clear Ticket (1000287) Episode 17.2 Clear Ticket (1000287)
|
130 | 4,000,000 | The current character has cleared Episode 17.1 |
 Episode 18 Clear Ticket (1000288) Episode 18 Clear Ticket (1000288)
|
170 | 9,000,000 | The current character has cleared Episode 17.2 |
 Episode 19 Clear Ticket (1000988) Episode 19 Clear Ticket (1000988)
|
200 | 12,000,000 | The current character has cleared Episode 18 AND one character in the master account has cleared Episode 19 and the side quests "Purification Saint" and "Frozen Sea" |
 Episode 20 Clear Ticket (1001214) Episode 20 Clear Ticket (1001214)
|
215 | 16,000,000 | The current character has cleared Episode 19 AND one character in the master account has cleared Episode 20 |
 Episode 21 Clear Ticket (1001215) Episode 21 Clear Ticket (1001215)
|
230 | 32,000,000 | The current character has cleared Episode 20 AND one character in the master account has cleared Episode 21 |
 Chapter 1 Clear Ticket (50098) Chapter 1 Clear Ticket (50098)
|
265 | 64,000,000 | One character in the master account has cleared Chapter 1 and complete Zero Cell Sector |
How to check which episode I have unlocked?
Right now, we don't have a feature which simply tells you which episode you are.
So here's some things you can do to check it by yourself:
| Episode Quest | ||
|---|---|---|
| Episode | Steps | Description |
| Episode 15 | Click on Warper > Instances > Central Laboratory. | If you can go, you have completed the Episode 15 quest. |
| Episode 16 | Click on Warper > Instances > Heart Hunter War Base. | If you can go, you have completed the Episode 16 quest. |
| Episode 17.1 | Use @go 46. (Cor) | If you can go, you have completed the Episode 17.1 quest. |
| Episode 17.2 | Use @go 47. (Varmundt's Mansion) | If you can go, you have completed the Episode 17.2 quest. |
| Episode 18 | Use @go 51. (Gray Wolf Village) | If you can go, you have completed the Episode 18 quest. |
| Episode 19 | Use @go 53. (Ice Castle) | If you can go, you have completed the Episode 19 quest. |
| Episode 20 | Click on Warper > Instances > The Immortal. | If you can go, you have completed the Episode 20 quest. |
| Episode 21 | Click on Warper > Instances > Final Battle. | If you can go, you have completed the Episode 21 quest. |
메인 퀘스트
- Ritual of Blessing이 필요합니다.
성 안의 개인 방에서 Nihil M. Heine과 Spica의 대역이 당신을 기다리고 있습니다. Nihil에게 말을 걸어보세요 (prt_cas_q 21, 39).
- 진짜 Spica는 무언가를 조사하러 갔으며 잠시 후에 나타날 것입니다.

Spica Nerius가 나타나면, 그녀에게 말을 걸어 (prt_cas_q 23, 36) Crux가 왕실 구성원의 muka juice에 약물을 탄 하녀를 찾아냈다는 사실을 알게 됩니다. 그 하녀는 그것을 계획한 자가 시종장 중 한 명이라고 밝혔습니다. Crux의 조사로 그 시종장이 Republic of Schwartzvald 출신이라는 사실도 밝혀졌습니다. Crux는 배신한 시종장을 계속 추격하여 Lighthalzen까지 따라갔습니다.

Crux는 유능하지만, 그도 결국 혼자입니다. Nihil M. Heine은 걱정하며, 왕족이 아닌 당신의 "자유로움" 때문에 당신이 Crux의 조사를 도우러 가주기를 요청합니다. Skia도 조사를 돕기 위해 Lighthalzen으로 갈 것입니다. 두 사람은 Lighthalzen 공항에서 당신을 만날 것입니다.
공항 오른쪽에서 Crux (lhz_airport 189, 39)를 찾으세요. Skia는 도망 중인 시종장이 Einbroch의 산업 오염 문제 때문에 Einbroch가 아닌 Lighthalzen에 나타날 것이라고 추측합니다. 그들은 그의 이름이 Bruno라는 것을 알고 있습니다. 당신은 Banquet에서 동쪽 계단 꼭대기에서 Bruno를 만났던 것이 기억날지도 모릅니다. 수사팀은 나뉘어서, Crux는 Lighthalzen 남부를, Skia는 상업 지구를, 당신은 북부와 북동부를 확인합니다. 집결 지점은 중앙 백화점 근처입니다.

마을에서 가장 북쪽에 있는 집의 북쪽 뒤쪽 구석으로 걸어가세요 (lighthalzen 184, 292). Man과 Scientist를 보게 됩니다. Man은 더 많은 돈을 받기 위해 Scientist를 위협합니다. 그는 더 이상 Rune Midgard나 Republic of Schwartzvald에서 살 수 없기 때문입니다. 두 사람은 남의 눈을 피해 다음에 슬럼가에서 만나기로 합의합니다. Man이 떠난 후, Scientist는 다른 누군가에게 Man을 죽여야 한다고 중얼거립니다. 돈을 너무 많이 요구하는 것도 너무 적게 요구하는 것만큼 나쁘기 때문입니다.
선택 사항: 백화점 밖 집결 지점으로 가세요 (lighthalzen 202, 167). 그곳에서 Skia를 만나 당신이 엿들었던 것을 말해줍니다. 그녀는 당신에게 먼저 슬럼가로 가라고 하고, 자신은 Crux에게 알린 뒤 그들이 따라잡을 것이라고 합니다.
Man은 슬럼가에 있습니다 (lighthalzen 309, 263) 그리고 당신이 "Bruno"라고 부르자 그는 놀랍니다. 갑자기 Heart Hunter가 Man 근처에 나타나 그를 놀라게 합니다. 이때 Man은 돈을 받지 못하게 된 것을 보고 Scientist에게 사기를 당했다는 것을 깨닫습니다. Crux와 Skia가 나타나고, 그 Heart Hunter가 이전에 붙잡혀 심문당했던 것과 같은 유형의 용병임을 알아봅니다. Crux는 이 새로운 녀석을 잡아 허심탄회하게 심문하고 싶어 합니다. Heart Hunter는 Crux, Skia, 그리고 당신이 있는 이상 할 수 있는 일이 거의 없다는 것을 깨닫고 자폭합니다. Skia는 Bruno에게 협력하는 게 최선이라고 말합니다. 그 Heart Hunter들이 평생 그를 쫓을 것이고, 적어도 Rune Midgard는 협력하면 그를 죽이지 않을 것이기 때문입니다. Crux는 Bruno를 궁전으로 데려갑니다.

성 안의 당신 방으로 돌아가면 Nihil M. Heine과 Spica Nerius가 당신을 기다리고 있는 것을 보게 됩니다. Nihil에게 말을 걸어보세요. Crux는 Bruno를 심문하여 쉽게 자백을 받아냈습니다. 문제의 근원 뒤에는 "enterprise"가 있는 것으로 보입니다. Bruno는 Republic of Schwartzvald의 시설을 조사할 허가를 받는 거래의 일부로 Schwartz 정부에 넘겨졌습니다. 두 가지 선택지 중에서 고를 수 있습니다. 둘 다 같은 대화로 이어집니다.
- Skia는 Spica가 보낸 임무를 수행 중이라, Lighthalzen에서 자신도 궁전으로 돌아간다고 말했는데도 방에 없습니다. 게다가 Nerius 가문의 중요한 물건이 Schwartzvald의 수상한 시설로 옮겨진 것 같아, 조사하려면 Schwartzvald 정부의 허가가 필요합니다. Schwartzvald 정부는 이미 문제 중 일부를 알고 있었던 것 같습니다. Crux가 조사로 너무 바빠서 더 많은 일손이 필요합니다. 당신의 임무는 Spica를 호위하는 것이며, 그러면 Crux가 자유롭게 움직일 수 있습니다.
이번에는 Juno 공항으로 가서 Crux (y_airport 168, 41)를 만나세요. 그와 Skia는 Yuno에서 회의를 하고 싶어 했지만, Spica는 자신의 왕족 신분이 사람들을 모을 것 같아 대신 Lighthalzen 호텔에서 만나고 싶어 합니다. 그는 "당신에게 기대하겠습니다"라고 말하며 당신을 Lighthalzen 공항으로 워프시킬 것입니다.
호텔의 마지막 방에서 Spica Nerius를 만날 수 있습니다. 그녀는 당신에게 Schwartz 정부 대표를 소개해 줍니다.
Philopontess (lhz_in02 239, 148)에게 말을 걸어보세요. 그는 "Tess"라고 불립니다.
- 들어봅시다.: Tess는 Secret Wing이 완전히 파괴된 것은 아니지만 Nerius 가문이 그들을 지원할 것이라고 말합니다. 목표는 Enterprise를 무력화하는 것입니다. Rebellion은 그들의 병력을 사용해 시설을 조사함으로써 당신을 도울 것입니다. 하지만 도움은 왕실이 아닌 당신을 통해야 합니다.

Einbroch 기차 승강장에 Unusual person (einbroch 239, 269)이 있습니다. 그는 당신이 들어본 적 없는 비밀 암호로 말합니다. 그러고는 자신이 당신이 찾던 사람인 Lazy라고 밝힙니다. 그는 만남 장소가 Einbech였어야 한다고 말합니다.

아주 긴 대화 끝에, Lazy (einbroch 270, 268)가 당신을 위해 기차 승강장에서 조금 동쪽으로 /navi를 자동 생성해 줄 것입니다. "무임승차"를 하기 위해서입니다. 추적을 피하기 위해 Lazy는 기차 대신 터널을 통해 당신을 데려가려고 합니다.

Very small hole을 클릭하면 Einbech로 이동합니다.

Einbech 기차 승강장에서 Lazy (einbech 46, 208)와 대화하세요. 그가 은퇴에 대해 지껄이는 것을 다 들은 후, 가야 할 곳을 지도에 표시해 주고 /navi도 함께 알려줍니다.
Lazy (einbech 76, 131)는 쓰러진 사람을 덮고 있는 모래더미 옆에 서 있습니다. 그래서 Lazy는 신의 힘을 가진 셈인데, 보기에는 Arch Bishop조차 치유로 지친 Rebel을 살릴 수 없었던 모양입니다.

Lazy (einbech 217, 82)를 찾은 후, 업고 온 Rebel 남자를 바닥에 내려놓습니다. Lazy는 누군가 이미 자신의 도착을 감지했다고 말하며, Gonie는 입구에 그냥 두라고 합니다.

안으로 들어가면 Lazy (rebel_in 21, 45)와 대화하세요. 그러면 그는 Shopkeeper들을 우리를 쫓아내고 싶어 할 만큼 화나게 합니다. Lazy는 밖에 바닥에 있는 Gonie에 대해 그들에게 말합니다. Shopkeeper는 Gonie를 안으로 데려온 뒤 Lucky를 부릅니다. Lazy는 안으로 들어가 버린 Shopkeeper를 소리쳐 부르고, 쫓겨날 위기에 처합니다. 결국 그들은 당신을 안으로 들여보내 줍니다.

안은 초보자와 노인들을 위한 곳입니다. 소파 옆에서 Lazy (rebel_in 86, 61)를 만날 수 있습니다. 그는 다른 이들에게 자신이 Secret Wings 요원이라고 밝힙니다. Lucky는 자신의 진짜 이름이 "Rookie"이고 "Lucky"는 별명이라고 밝힙니다. 차를 두고 이런저런 말다툼이 많이 벌어집니다. Lazy는 원로 Rebel들에게 President가 원하는 바를 말합니다. 그들은 다시 배신당할 것 같다며 돕기를 원하지 않습니다. 원로는 떠나고, Lazy는 Lucky/Rookie에게 자신에게 원로들을 설득할 수 있는 힘 있는 목소리가 있다고 설득하려 합니다.

왼쪽 계단을 올라가 Elena Volkova (rebel_in 70, 78)와 대화하세요. 그녀는 당신을 통과시키려 하지 않고 싸우려고 합니다.

Elena와 싸우세요:
- 당신이 Priest (어쩌면 Acolyte?) 계열이라면, Elena는 "clerics"와 싸우지 않을 만큼 명예가 높으므로 이 부분을 건너뛸 수 있습니다.
- 쓰러뜨리면 Schwartz's Honor Token 10개를 받습니다.
- Fighting Elena 반복 퀘스트 이용 가능
통로를 따라 올라가 Rebellion leader (rebel_in 122, 71)에게 말을 거세요. 그는 Gonie를 언급하기 전까지 Young Rebellions에게 당신을 아래층으로 안내하게 하려 합니다. 협력에 대해 이야기하면 그는 그 제안을 비웃습니다.

Rebellion leader에게서 남쪽으로 가서 문 포탈 입구에 있는 Rebellion guard와 대화하세요. Rookie가 보냈다는 말에도 그들은 들여보내 주지 않습니다. Larcis가 당신의 목소리를 들을 때까지 Rebellion Guard leader에게 계속 물어보고 계속 소리치세요. 그러면 안으로 들어갈 수 있습니다.

안쪽으로 앞으로 걸어가면 Dien (rebel_in 164, 88)이 당신에게 말을 걸기 시작합니다. 대화는 Gonie로 흘러갑니다. 그런 다음 협력에 대해 묻자 Ridsh는 격분하고 Dien은 침착하게 당신의 말을 끝까지 들어줍니다. Ridsh는 Schwartz가 무너져도 신경 쓰지 않을 것입니다.
Dien은 다른 이들을 설득해 협력하게 돕기로 선택합니다.

Special Force commander (rebel_in 210, 89)에게 Dien이 쓴 편지를 건네세요. 그녀가 쓴 내용에 놀라고 못마땅해하면서도, Dien의 마지막 소원일 수 있으므로 동의할 것입니다.

복도 구석에 있는 Rebellion leader Rupert (rebel_in 122, 71)에게 돌아가 Dien의 편지를 전하세요.
그 옆에 나타난 Rebellion Guard leader와 대화하세요. (필수 단계인가요? 제 생각에는 그런 것 같습니다. 제 퀘스트 로그 일부가 사라졌어요.)

뒤돌아서 Rebellion leader Rupert에게 다시 말을 거세요. 그는 소란을 피우며 Dien을 보러 가려 하지만, 그녀가 그의 옆에 나타납니다.
Dien이 Secret Wings를 돕는 데 동의하겠다고 말하는 것을 들으세요. Ernst와 Dien이 둘 대 하나로 나서도, Rupert는 그들이 견뎌온 모든 것을 내려놓고 돕는 것을 여전히 받아들이지 않습니다.

Rebellion leader Rupert는 Dien을 그녀의 방으로 안내해 돌려보내려 하지만, Dien이 그의 수염을 붙잡습니다. 복수심을 놓지 않으면 아무것도 이룰 수 없다는 진실을 말하자, Rupert는 마침내 돕기로 동의합니다. 하지만 아주 조금만!
- Schwartz's Honor Token 10개를 받습니다.
- Preparing for the Party 반복 퀘스트 이용 가능
아래층으로 돌아가 Lazy에게 Rebellion이 도와줄 것이라고 알리세요. 그런 다음 Rookie의 어린 시절 이야기를 들으세요. 그는 작았고 가족이 그를 쓸모없다고 생각해서 집을 나왔고, Gonie를 만나 Rebel이 되었습니다. 원로들이 나타나 원로들이 가장 잘하는 일, 즉 불평을 합니다. Rookie는 젊은 구성원 중 누구도 그 시절에 무슨 일이 있었는지 모른다고 지적합니다. 그들은 그것에 대해 이야기하기를(혹은 변하기를) 거부하기 때문입니다. 그러면 당신이 진실의 차를 꺼내서 위층의 Rupert와 다른 아가씨들이 이미 돕기로 동의했다고 말합니다.
- Lazy는 남기로 결정하고, 그러면 EXP와 Schwartz's Honor Token 10개를 받습니다.
- Giving Charity to Charity 반복 퀘스트 이용 가능.
- Tea Time Snacks 반복 퀘스트 이용 가능.
- Tracking Down Missing Guns for Master 반복 퀘스트 이용 가능.
- Twinkle Twinkle Shooting Star 반복 퀘스트 이용 가능.
- Ericsson Adler 반복 퀘스트 이용 가능.
- Pamphlet Promotion 반복 퀘스트 이용 가능.
- Side Quests 이용 가능.
Heart Hunter War Base
Rebellion Squadder (rebel_in 65, 46)가 Tess가 왔다고 알려줍니다. Yes를 선택하면 Einbech 기차 승강장으로 이동할 수 있고, 걸어가도 됩니다.

Einbroch에 도착하면 호텔 (ein_in01 198, 224)로 가세요. 2층, 계단 바로 북쪽에 있는 방으로 가세요 (ein_in01 273, 276). Tess가 당신을 안으로 초대할 것입니다.
Einbroch 호텔 방에서 Nihil과 대화하세요. 실제로 뭔가 하고 싶었는지 그가 직접 왔습니다. Skia도 연회에서 빠져나오는 데 성공했습니다. 이제 시설에 대한 공격 계획이 시작됩니다. 탈출 경로는 없지만 그들은 텔레포트 게이트가 있을 것으로 의심합니다.
Einbroch 도시에서 북쪽으로 한 맵 이동해 작전 지점으로 가서 Julian (ein_fild04 281, 337)와 대화하세요.
몬스터 테이밍은 퀘스트의 다음 부분에 방해가 됩니다. 그러니 하지 마세요. (하지만 테이밍에 어떤 아이템을 써야 하는지는 잘 모르겠네요...)
인스턴스를 예약하려면 Julian에게 말을 걸고, 입장하려면 Striker Unit Commander에게 말을 거세요. Heart Hunter War Base 1 Instance
딜러가 아닌 캐릭터(예: Adoramus나 Judex가 없는 Arch Bishop)에게는 추천하지 않습니다.
인스턴스를 시작하려면 지휘부 선두에 있는 Julian 근처로 걸어가세요.
Heart Hunter Guards가 생성됩니다. 이들은 Fury (?), Increase Agi, Bowling Bash, Endure(추격 시?)를 사용하며, 아마 더 많은 스킬을 쓸 수 있습니다...
북쪽 끝 (1@swat 58, 89)에 화약 더미가 있습니다. 이는 바닥에 Antique Gunpowder를 떨어뜨리고 경보를 울려 더 많은 적이 생성되게 합니다.
동쪽에 있는 Julian에게 주면 모든 몬스터를 파괴하고 길을 열어줍니다.
계속 동쪽으로 걸어가서 Julian에게 다가가 다시 말을 거세요. 그는 다음 폭발을 준비하는 데 시간이 조금 필요합니다.
북쪽으로 올라가면 Suspicious instrument (1@swat 147, 119)를 발견하게 됩니다. 버튼을 누르세요. 규칙을 따르지 않으면 규칙이 당신을 따르니까요!
Heart Hunter Guards가 더 생성됩니다. Upgraded Heart Hunters도 일부 생성됩니다. 진행하려면 모두 처치하세요. 일반 Heart Hunter guards는 킬 0.5로 계산되고, Upgraded Heart Hunter는 킬 1로 계산됩니다. 계속하려면 15 킬 포인트가 필요합니다.
버튼 누르는 사람을 싫어하는 사냥꾼들을 모두 처치한 뒤 Julian에게 걸어가고, 그다음 동쪽으로 계속 가세요.
Julian이 화약이 떨어져서 당신이 더 찾아오길 원합니다. 이전에 폭파한 방어벽으로 돌아가면 Heart Hunter guards가 지키고 있는 Pile of gunpowder ((@swat 165, 56))를 발견하게 됩니다.

Julian에게 화약을 주고 동쪽으로 진행하세요. Julian에게 다가가면 Heart Hunter 통신실을 점령했다는 안내가 나옵니다.
이제 Ebel이 생성됩니다. 환풍구가 있는 구역을 지나갈 수 없으며, 지나가려 하면 뒤로 텔레포트됩니다.
전투 후 Julian이 Ebel을 마비시키고, 경비병들에게 연구를 위해 그녀를 붙잡으라고 말합니다.
Schwartz's Honor Token 10개를 받고 Einbroch Field 04로 워프됩니다.
메인 퀘스트 계속
인스턴스에서 나온 후 Rookie에게 말을 걸어 잘 부탁한다고 하세요. 아직 Terra Gloria를 찾지 못했기 때문에 Rookie가 당신을 Heart Hunter War base로 워프시켜 줍니다.
Rookie 옆의 포탈로 들어가면 Werner Laboratory에 입장합니다.
원한다면 Rebellion squadder가 당신을 다시 밖으로 데려다줍니다.
Yuslan이 Chimeras를 처치하는 것을 도와달라고 요청합니다. Material Chimera 10마리와 Human Chimera 10마리입니다.
Werner Laboratory Central Room Instance
인스턴스를 시작하려면 Rookie (slabw01 236, 91)에게 말을 거세요. (실제로 MVP와 싸우는 퀘스트를 받으려면 그에게 다시 말을 걸어야 한다고 합니다. 저는 이 부분을 서둘러 지나가느라 맵에서 Chimeras에게 공격받고 있었습니다)
Rookie가 Central Room에 가고 싶어 합니다.
장치를 클릭하면 인스턴스에 입장합니다.
Eisen Werner의 말을 듣고, 위쪽 끝까지 걸어 올라가서 그들에게 다시 말을 거세요.
양쪽 방의 북쪽 끝에 Security Device가 있습니다. 대괄호 안에 단어가 표시됩니다. 대화 선택지에서 해당 단어에 맞는 색상 버전을 고르세요.
| 빨간색 선택 = 1번 선택지 | ||||
| Way Back Home | Loneliness | Contradiction | Rose | Sea |
| Joy | Twilight | Glow | Girl | |
| 파란색 선택 = 2번 선택지 | ||||
| Purity | Eternity | Dawn | Dream | |
중앙으로 돌아가서 포탈에 들어가세요.
Eisen Werner가 반대편 북쪽에 서 있습니다. 이 사악한 악당은 당신이 이 실험실에서 죽을 것이라고 생각하기 때문에 자신의 계획을 밝히고 있습니다. 방 양쪽 끝에도 Security Device가 있습니다.
Security Device를 모두 해제했다면, Eisen이 서 있던 앞의 포탈로 들어가세요.
Eisen Werner에게 말을 걸면 Heart of Ymir가 활용되지 않고 있어서 그것을 가져갔다고 설명합니다. 그가 서 있는 옆 문에 포탈이 열립니다.
문 포탈을 지나가서 Eisen Werner에게 다시 말을 거세요. Heart of Ymir의 에너지가 바닥의 마법진으로 흘러 들어가 실험체들에게 들어가며, 그중 일부는 죽었습니다.
그런 다음 Heart Hunter War Base로 워프됩니다.
메인 퀘스트 다시 계속
Rookie (que_swat 150, 58)에게 말을 걸면 호텔로 돌아가고 싶어 합니다. 그러면 당신을 Einbroch Field 04로 워프시켜 줍니다.

Einbroch Hotel로 돌아가 Philopontess에게 말을 거세요. Blessing Star를 Nihil에게 돌려주고, 그들은 곧바로 Prontera Castle로 돌아가고 싶어 합니다.
Skia Nerius는 성 안의 당신 방에 있습니다.
- 항상 느끼나요?: 호텔에서 위 단계에서 Scroll of Movement를 사용해 달라고 요청했을 때라고 그녀가 말합니다
- 사랑: Spica가 나타납니다
- 언제 가장 심각해지나요?
Kronecker가 들어오고, 그들은 가족 문제에 대해 이야기합니다.
Schwartz가 아닌 Honor Token 10개와 250만 Base 및 Job EXP(VIP)를 받습니다
Spica가 Philopontess가 Werner Laboratory에서 당신을 기다리고 있다고 말합니다.
Werner Laboratory로 가서 Philopontess (que_swat 145, 57)에게 말을 거세요. 그러면 10 Schwartz's Honor Token과 2x  Mysterious Egg (12610) + 2x
  Mysterious Egg II (12871)을 보상으로 받습니다.
- People in the Lab 반복 퀘스트가 해금됩니다.
- Heart Hunter War Base 2 반복 퀘스트가 해금됩니다.
- Cutie Chimera C(K)illing 반복 퀘스트가 해금됩니다.
이것으로 Episode 16.2: Terra Gloria 메인 퀘스트가 끝납니다.
사이드 퀘스트
Returning the Relics
- Small Leather Bag을 한 번 사용하면 캐릭터 귀속 아이템 6개를 받습니다. 아래는 해당 아이템을 제출할 위치입니다:
- Old Rings - 남동쪽 inner ring에 있는 Prontera pub의 Knight Windsor (prt_in 177, 26). 그는 Seyren의 Pecopeco를 발견했을 때 뭔가 잘못됐다는 것을 알았습니다.
- Locket Pendant - (위의) Knight Windsor는 자신의 아이들이 죽게 된 것에 화가 나 있습니다. 이제 아내도 아이도 없으니, 그는 아마 자신이 있는 pub에서 슬픔을 달랠 것입니다.
- Wood Rosary - 수도승들의 집인 St. Capitolina Abbey (prt_monk 93, 254)의 Sister Margaret. Margaret은 Margaretha Sorin이 어렸을 때 얼마나 말괄량이였는지 기억합니다. 그녀에게 다시 말을 걸면 Prontera로 바로 워프될 기회를 얻습니다.
- Portable Sewing Box - Hunter Sherine은 Payon의 North Kafra 오른쪽에 있는 집 안 (payon 187, 233), 복도 끝에 있습니다. Cecil은 옷에 단추를 달아 더 여성스러워 보이려고 언니에게 바느질하는 법을 물었습니다.
- Decorated Archer's Thimble - Blacksmith Cleaver는 Juno 무기 상점 지하 (yuno_in01 163, 31)에 있으며 Howard에게 무슨 일이 있었는지 궁금해합니다. 그것은 그가 만드는 데 애를 먹은 선물이었습니다. Howard에게는 Cleaver가 이 thimble을 건네줄 형이 있습니다.
- Assassin's Mark Dagger - Morroc Bar (morocc 45, 107)로 가세요. Guile Marovitz는 Morroc pub (que_job01 89, 91)에 있습니다. Eremes는 항상 실패한 임무를 싫어했고 보통 꽤 운이 좋았습니다. 이번만 빼고요.
Rachel's Repair Work
- Rachel Smith는 사람들이 무기를 그냥 부러뜨려 놓고 "잃어버렸다"고 거짓말하는 것에 질려 버렸습니다. 그 무기들은 결함률이 높습니다. 그녀는 Rachel's Revolver를 Blacksmith Guild로 가져가 검사해 달라고 요청합니다.
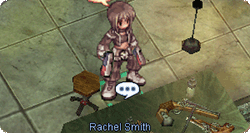
- Einbroch의 Blacksmith Guild로 가서 Blacksmith Jack에게 말을 걸면 그녀의 작업을 자세히 살펴봅니다. 그는 그녀가 사용하는 재료의 불순물이 문제의 원인이라고 결론 내립니다.
- Rebellion base 안의 Rachel Smith에게 돌아가면, 그녀는 재료가 원인일 거라고 의심했다고 말합니다. 그녀의 부탁을 들어주고 더 좋은 재료를 가지고 매일 돌아오겠다고 말하세요.

Schwartz's Honor Token 7개를 받습니다. 이제 Rachel Smith에게서 일일 퀘스트를 할 수 있습니다.
Schwartz에서 텔레포트 활성화!
벽난로 옆에 있는 Arinoa Yurhik에게 말을 걸어주세요 (rebel_in 82, 68). 근처에 어떤 남자가 나타나 당신이 Clana Nemieri에서 소란을 피운 사람이냐고 묻습니다.
Arivero Yurhik (rebel_in 78, 66)은 스스로를 "hot"한 남자라고 칭하며, 보기에는 그냥 거슬리는 "bro"일 뿐입니다. 두 남매 사이에 말없는 교감이 오간 뒤, Vero는 당신에게 네 곳에 가서 물건들을 파괴해 달라고 말합니다.
네 가지 선택지가 주어집니다. 하나를 고르면 그는 사라집니다.
기다린 후 (얼마간의 시간), Arinoa Yurhik에게 돌아가세요 (서버 시간 오전 4시일 수 있으며, 이전 단계의 대화 선택지에 따라 달라질 수 있습니다.
Arivero Yuhrik이 나타나 준비가 완료되었다고 말합니다. Schwaltzvalt은 마법 남용 가능성 때문에 도시 내 텔레포트를 금지하고 있습니다. Arivero는 사건의 시간순과 Slums에서 사람들이 사라진 점을 근거로, Schwaltzvalt 정부가 비밀 Rekenber 연구를 보호하기 위해 장비를 설치했다고 믿습니다.
그는 경비복을 입은 "H"가 순찰 중 이상한 장치를 발견했고, 그날 매우 강한 바람이 불었으며 H가 무언가를 보았지만 금세 사라졌다고 설명합니다.
Guard Clothes: H는 딸에게 자신의 옷을 빨고 다림질하게 합니다. 아무래도 그 자신은 할 수 없기 때문인 모양입니다...
Club: 표준 돌발 상황 대비
H가 순찰한 방식: H는 매뉴얼을 따르며 매일 같은 경로를 순찰합니다 화물 열차: 밤에 멈춘 석탄 열차로, 광산의 몬스터 때문에 자주 운행하지 않습니다
강한 바람: 산악 지역에서는 때때로 강한 바람이 불 수 있습니다
꺼진 횃불: 횃불이 꺼진 것이 이번이 처음이라는 점이 이상했습니다
몇 번 반복합니다 (횃불에 대해 생각합니다). Vero의 이론은 불이 꺼지기 직전에 가장 강하다는 것입니다. 그는 자신의 이론을 시험하기 위해 불 속성 아이템 몇 개를 기차로 가져오라고 합니다.
화물 열차 끝 근처로 걸어가면 (einbech 212, 212) Arivero Yurhik이 나타납니다.
- 여기서 효과가 있다고 알려진 것들:
- Flame Heart
- ?
텔레포트 금지 장비는 멀쩡해서 Vero는 물 속성 아이템을 가져오자고 제안합니다.
- 여기서 효과가 있다고 알려진 것들:
- Mystic Frozen
물 속성 아이템을 사용한 후 장비가 파괴됩니다. Rebellion Base로 돌아가 Arinoa Yurhik에게 말을 걸면 그녀의 남동생 Vero가 나타납니다.
Arivero Yurhik은 한 요원이 Lighthalzen 저택에서 또 다른 텔레포트 금지 장비 (Water)를 발견했다고 말합니다. 그에게 Rough Wind가 물에 강한 속성석이라고 말해주세요.
Lighthalzen (lighthalzen 135, 233)에서 Arivero Yurhik은 장비를 드러내고 파괴하기 위해 Mystic Frozen 1개와 Rough Wind 3개를 필요로 합니다.
기지로 돌아가 Arinoa Yurhik에게 말을 걸면 Arivero Yurhik이 나타납니다. 당신은 그의 누나가 사실 기뻐하는 건지 궁금해지고, 그는 그녀가 그저 부끄러운 것뿐이라고 말합니다. 그때 금지 장비가 사라지는 것을 막는 장치가 고장 납니다. 그는 그것을 고치기 위해 Star Crumb가 필요합니다.
- 그냥 웃어넘깁니다
- 그에게 물어봅니다: 그는 방어적으로 나오고 당신은 어쨌든 그냥 웃어넘깁니다.
Juno (yuno 204, 226)로 이동해 Great Natures 4개와 Rough Wind 1개를 가지고 Arivero Yuhrik에게 건네주세요. Rekenber와 정부가 눈치챈 것 같습니다. 그는 Einbroch의 마지막 위치를 알려주고 쫓기는 것처럼 달아납니다.
Einbroch 남동쪽 (einbroch 262, 42)에 당황한 Arivero Yurhik이 있습니다. 그는 당신에게 이것을 파괴해 달라고 부탁하고, 당신이 그렇게 하자마자 Vero는 수상하게 순간이동으로 사라집니다. 기지 안에서 Arinoa Yurhik과 대화하면 Rebellion leader가 나타나고, 자신이 알고 있는 큰 임무가 없다며 혼란스러워합니다. 당신이 임무를 설명하지만 Rebellion leader는 Arivero Yurhik을 전혀 모릅니다... 그는 Arinoa의 남동생이 얼마 전 사고로 죽었다고 말합니다. Schwartz's Honor Token 10개, Base EXP와 Job EXP, 그리고 많은 미해결 질문을 받습니다.
Arinoa에게 다시 말을 걸면 인사를 할 기회가 주어지며 텍스트 입력 상자가 나타납니다. 이것이 퀘스트의 연장인지는 확실하지 않습니다.
Elena 돕기
Elena Volkova와 대화할 때 두 번째 선택지인 '오늘은 바쁘지 않아요, 들렀어요.'를 선택하세요. 그녀는 USU가 "Under Seal Unit"을 의미하며, 일종의 수어사이드 스쿼드 같은 거라고 말합니다. 그들은 나쁜 짓을 했지만, 탐험할 수 있도록 목줄이 주어진다(?). Elena는 쫓겨날 수도 있는 두 명의 미성년 고아에 대해 말하고, 그들의 문제를 해결해 달라고 요청합니다.
아래층으로 내려가서 Jana Levedeva (rebel_in 109, 54)와 대화하세요.
위층으로 돌아가 Elena Volkova에게 Lebedev 쌍둥이에 대해 말하세요.
그녀는 당신에게 Milo와 Mason에게 그들에 대해 물어보라고 합니다:
반대편 계단에서 Milo Rivers와 대화하면, 그는 그들이 사격에 뛰어났다고 말합니다. Jana가 민간인 구역에 수류탄을 던졌다고 합니다. USU 부대로 옮겨진 후, 그들은 선배들에게 반항하기 시작했습니다.

기지 입구에 있는 Mason Bender는 두 사람에 대해 좋게 생각하지 않습니다. Ilya가 빗나간 총알로 Mason을 쐈다고 합니다.
- 그들에게 직접 물어본다:
- 빙빙 돌려 말한다:
성과가 없으면 위층으로 돌아가 Elena Volkova에게 가세요. 그녀는 당신을 그들의 이전 지휘관에게 보냅니다.
아래층 벽난로 옆에서 Ericsson Adler를 만나면, 그가 당신에게 Delicious Handmade Cookie를 주며 그것을 먹고 그들과 이야기를 나누라고 합니다.
Jana Levedava에게 걸어가서 그들에게 쿠키를 주세요. Commander Adler, 당신, 그리고 Elena가 두 사람을 걱정하고 있다고 말하세요. Jana는 상태가 좋지 않아서 무너지기 시작하고, Ilya는 고의로 수류탄을 던진 게 아니라고 말합니다. 그들은 전출된 후 겁을 먹었고, 문제 행동을 하기 시작했으며 더욱 겁을 먹게 되었습니다. 그들은 Elena에게 자신들의 감정을 말해도 된다고 허락합니다.
Elena Volkova에게 쌍둥이들이 자신들을 짐이라고 느꼈다고 말하세요. Elena는 실수로 그들을 어른처럼 대했고, 그건 도움이 되지 않았습니다.
Jana Levedava에게 돌아가서 그들을 Elena에게 데려가고, 당신이 쌍둥이를 변호하겠다고 말하세요.
Elena Volkova와 대화하고 'Lebedev 자매를 데려왔습니다. 남녀 쌍둥이인 줄 알았어요.'라고 말하세요. Elena는 도망쳤다며 그들에게 소리칩니다. 그리고 나서 두 사람에게 사과합니다. 그런 다음 그녀는 그들에게 친구를 사귀거나 훈련할 수 있도록 실제 전투 임무에 투입하지 않겠다고 말합니다. 이 모든 후에 Schwartz's Honor Token 10개, Base EXP와 Job EXP를 받습니다.
이제 Cookie Delivery (Name not final) 일일 퀘스트에 접근할 수 있습니다.
일일 퀘스트