Temple God: Difference between revisions
No edit summary |
|||
| (140 intermediate revisions by 4 users not shown) | |||
| Line 1: | Line 1: | ||
===Prequest=== | <languages/> | ||
<translate> | |||
<!--T:1--> | |||
[[Category:Instances]] | |||
You can skip doing the the Prequest by using {{#item:1000284}}, available at Temporal Tina in Main Office or Prontera near Main Office building. | |||
===<span style="color: #FFA07A;">Prequest (Base Level 160+)</span>=== | |||
This quest introduces you to Tamarin, an adventurer which stumbled upon the entrance to the Fire Basin area. Completing this quest gives you access to the Fire Cave, which is the entry point for Bios Island, Morse's Cave, and Temple of the Demon God. | This quest introduces you to Tamarin, an adventurer which stumbled upon the entrance to the Fire Basin area. Completing this quest gives you access to the Fire Cave, which is the entry point for Bios Island, Morse's Cave, and Temple of the Demon God. | ||
# Go to Pile of Rags | <!--T:2--> | ||
* Requierement 1 {{#item:528|Monster's Feed}} | |||
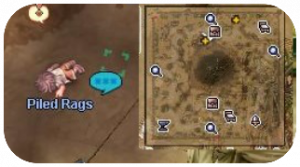
# Go to Pile of Rags {{#navi:morocc|137|238}} and choose '''Remove it'''. You will find that there is a person under there. | |||
#; [[File:DemonGod-033.png|frameless]] | |||
# Choose to '''Shake the rags''', to wake him up. He will ask for something to eat. | # Choose to '''Shake the rags''', to wake him up. He will ask for something to eat. | ||
# Give him 1 Monster Feed, and he will wake up to introduce himself as Tamarin. | # Give him 1 {{#item:528|Monster's Feed}}, and he will wake up to introduce himself as Tamarin. | ||
# Choose to '''Introduce yourself'''. He will appreciate your friendliness. | # Choose to '''Introduce yourself'''. He will appreciate your friendliness. | ||
# He will ask about a place to wash up. '''Tell him the place''', and finally '''Accompany him''' there. | # He will ask about a place to wash up. '''Tell him the place''', and finally '''Accompany him''' there. | ||
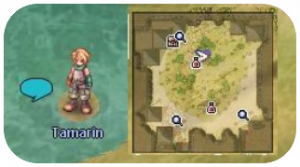
# Go to the northwestern portal (or use the Warper > Dungeons > Pyramids and exit the dungeon), and head to Tamarin at moc_ruins | # Go to the northwestern portal (or use the Warper > Dungeons > Pyramids and exit the dungeon), and head to Tamarin at {{#navi:moc_ruins|107|139}} | ||
#; [[File:DemonGod-034.png|frameless]] | |||
# He will tell his story, choose '''I'm listening''', and then '''Tell him you want to tag along'''. | # He will tell his story, choose '''I'm listening''', and then '''Tell him you want to tag along'''. | ||
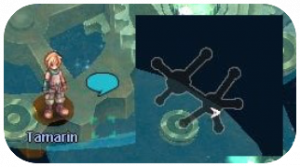
# Use the Warper > Special Areas > Dimensional | # Use the Warper > Special Areas > Dimensional Rift. Tamarin is just south of where you spawn. {{#navi:dali|112|69}} | ||
# Go northwest and take the warp to access the second area (or use the Warper > | #; [[File:DemonGod-035.png|frameless]] | ||
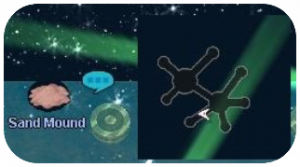
# Go northwest and take the warp to access the second area, then go to the south-east (or use the Warper > Instances > Geffen Night Arena). On the second island, turn to the south-west and talk to the '''Sand Mound''' {{#navi:dali02|90|62}} Tamarin will appear to talk to you. Choose '''Enter'''. | |||
#; [[File:DemonGod-036.png|frameless]] | |||
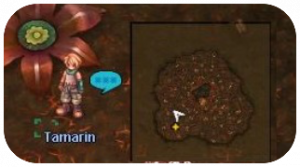
# You will arrive at the Fire Basin. Talk to Tamarin. Your conversation will be interrupted midway. | # You will arrive at the Fire Basin. Talk to Tamarin. Your conversation will be interrupted midway. | ||
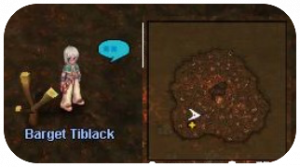
# Talk to '''Bargat Tiblack''' standing near you and accept her hunting quest. You have to help her kill 20 Fire Pits and collect 50 Burning Bug Skins. When you kill a Fire Pit, | # Talk to '''Bargat Tiblack''' standing near you and accept her hunting quest. You have to help her kill 20 Fire Pits and collect 50 Burning Bug Skins. '''When you kill a Fire Pit, Fire Bug appear and they drop the skins at a 40% rate.''' | ||
# Return to Bargat Tiblack and she will ask you to kill 50 Sonia and gather 50 Yummy Stems. Tamarin will call you before you finish the conversation. | #; [[File:DemonGod-038.png|frameless]] | ||
# Talk to Tamarin and he will offer his help killing the Sonias. You will now only need to kill ''25'' of them and gather ''25'' of the stems. | # Return to Bargat Tiblack and she will ask you to kill 50 Sonia and gather 50 Yummy Stems. '''<u>Tamarin will call you before you finish the conversation.</u>''' | ||
# Meet Tamarin at the center of the map when you're done. | # '''<u>Talk to Tamarin and he will offer his help killing the Sonias. You will now only need to kill ''25'' of them and gather ''25'' of the stems.</u>''' | ||
#; [[File:DemonGod-037.png|frameless]] | |||
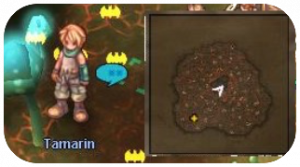
# Meet Tamarin at the center of the map when you're done. {{#navi:moro_vol|198|179}}He will offer you some of the stems to taste. | |||
#; [[File:DemonGod-027.png|frameless]] | |||
# Return to Bargat Tiblack. He will mention something about a cave, and tells you to meet Instructor Rugen. | # Return to Bargat Tiblack. He will mention something about a cave, and tells you to meet Instructor Rugen. | ||
# Find Instructor Rugen at the southwestern corner of the map | #; [[File:DemonGod-038.png|frameless]] | ||
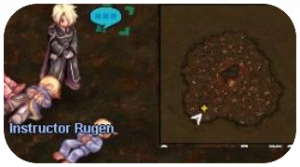
# Find Instructor Rugen at the southwestern corner of the map {{#navi:moro_vol|105|71}} and choose '''Talk to him'''. | |||
#; [[File:DemonGod-028.png|frameless]] | |||
# Talk to '''Intoxicated Patient''' below Rugen to feed him the Sonia stems, and return to Instructor Rugen. | # Talk to '''Intoxicated Patient''' below Rugen to feed him the Sonia stems, and return to Instructor Rugen. | ||
# Go back to Bargat Tiblack, and you will be rewarded with EXP, as well as access to the Fire Cave. | # Go back to Bargat Tiblack, and you will be rewarded with EXP, as well as access to the Fire Cave. | ||
#; [[File:DemonGod-038.png|frameless]] | |||
====<span style="color: #FFA07A;">Fire Basin Cards </span>==== <!--T:3--> | |||
<!--T:4--> | |||
{| class="wikitable mw-collapsible mw-collapsed" style="width: 60%;text-align: center;" | |||
|- style="background-color:#FFDAB9; font-weight: bold;" | |||
| style="width: 20%;" |Card | |||
| style="width: 40%;" |Description | |||
|- | |||
| {{#item:27026| Fire Condor Card}} | |||
|{{#itemDesc:27026}} | |||
|- | |||
| {{#item:27027| Fire Sandman Card}} | |||
|{{#itemDesc:27027}} | |||
|- | |||
| {{#item:27028| Fire Frilldora Card}} | |||
|{{#itemDesc:27028}} | |||
|- | |||
| {{#item:27029| Fire Golem Card}} | |||
|{{#itemDesc:27029}} | |||
|- | |||
| {{#item:27030| Firebug Card}} | |||
|{{#itemDesc:27030}} | |||
|} | |||
<!--T:5--> | |||
{{:Bios_Island}} | |||
<!--T:6--> | |||
{{:Morses_Cave}} | |||
===<span style="color: #87CEFA;">Temple of the Demon God</span>=== <!--T:7--> | |||
====<span style="color: #87CEFA;">Requirements and Rewards</span>==== <!--T:8--> | |||
<!--T:9--> | |||
* Base Lvl 160 | |||
* Completed Bios Island and Morse Cave | |||
* You have 1 hour to complete this instance | |||
* 1 day cooldown | |||
* Reward: {{#item:22567|Expedition Award Box (Essences of Evil)}} | |||
<!--T:10--> | |||
====<span style="color: #87CEFA;">Instance</span>==== | |||
Talk to '''Commander Hibba Agip''' {{#navi:moro_vol|108|88}} and '''Abidal''' to take the two quests which are necessary to start the instance. | |||
<!--T:11--> | |||
[[File:DemonGod-032.png|frameless]] | |||
<!--T:12--> | |||
Use the warper > Instances Bios Island > Talk to the Yggdrasil Lookalike - Tree to reserve and enter the instance. | |||
<!--T:13--> | |||
Walk to the north part of the room close to Ahat where he will notice you. He will now teleport the party to a new room. | |||
<!--T:14--> | |||
'''Ahat & Shnaim''' | |||
<!--T:15--> | |||
Defeat Ahat & Shnaim. You will get Soul of Ahat and Soul of Shnaim. | |||
<!--T:16--> | |||
At top center of the room, put each soul into the orbs to open the door to central room. Enter to proceed with the instance. | |||
<!--T:17--> | |||
Be aware that some monsters have the element Ghost Lv 3 and that means that your damage needs to be from a different element besides neutral to cause them damage. | |||
<!--T:18--> | |||
Morroc in his kid version will greet you to reach him. Loki and Nidhogg will appear and a brief conversation will roll. After a while a new portal will appear in the left side of the room. | |||
<!--T:19--> | |||
'''Brinaranea''' | |||
<!--T:20--> | |||
In this room you will face Brinaranea and Frost Spiders. | |||
<!--T:21--> | |||
Most of the skill being used here either water or wind based, and can also freeze you, so having a way to not freeze and some reduction based on those elements is advised to be used when facing. | |||
<!--T:22--> | |||
OPTIONAL: After killing the MVP, if you're not yet maxed, you can talk with Nidhogg before entering the room and proceed with the rest of the instance. She will give you a reward of 37.5M base exp and 12.5M job exp. | |||
<!--T:23--> | |||
Morroc will once again show his face and after a brief talk a new portal will appear but this time on the right side of the room. | |||
<!--T:24--> | |||
'''Muspelskoll''' | |||
<!--T:25--> | |||
In this room you will face Muspelskoll along with Frenzied Kasas and Salamanders. | |||
<!--T:26--> | |||
Almost every skill here is fire based so fire reductions are a must. MDEF based gear may help but be careful with the Fire Pillars since they ignore it at 100%. | |||
<!--T:27--> | |||
To melee damage users: Be careful when you attack since everything besides the MVP can cast Reflect Shield and kill you. | |||
<!--T:28--> | |||
This room is mostly a gear check. If your damage isn't high enough, you won't be able to out damage the heal spam from the MVP. | |||
<!--T:29--> | |||
OPTIONAL: After killing the MVP, if you're not yet maxed, you can talk with Nidhogg before entering the room and proceed with the rest of the instance. She will give you a reward of base exp and job exp. | |||
<!--T:30--> | |||
Morroc will salute your achievement in his glorious adult form but the game hasn't ended. A new portal will appear at the north side of the room where the final fight will start. | |||
<!--T:31--> | |||
'''Morroc''' | |||
<!--T:32--> | |||
The final fight has three stages: | |||
<!--T:33--> | |||
Morroc in his kid form a.k.a. Demigod until you reach 50% of HP | |||
<!--T:34--> | |||
Morroc summons Morroc of the Sabbath & Morroc of the Genesis and killing them reduces Demigod's HP to 20% | |||
<!--T:35--> | |||
Morroc in his adult form a.k.a. Despair God Morroc | |||
<!--T:36--> | |||
Besides Earthquake, that both Demigod and Despair God Morroc have, the rest doesn't hurt much. Both phases of Morroc are mostly HP sponges. | |||
<!--T:37--> | |||
Demigod is Holy so physical damage dealers are advised to bring Cursed Waters or ammunition of the same element. | |||
<!--T:38--> | |||
Despair God Morroc is Shadow so physical damage dealers are advised to bring Holy Elemental Converters, asking for Aspersio, or ammunition of the same element. | |||
<!--T:39--> | |||
If you succeed to kill Despair God Morroc, Nidhogg will appear and give a Squad Prize when you talk to her as a reward for completing the instance. | |||
==== | ====<span style="color: #87CEFA;">Monsters</span>==== <!--T:40--> | ||
{| class="wikitable" style="text-align: center; | <!--T:41--> | ||
! style="background-color:# | {| class="wikitable mw-collapsible mw-collapsed" style="width: 60%;text-align:center;" data-mce-style="width: 100%;" | ||
! style="background-color:# | ! style="background-color:#87CEFA;" |Monster | ||
! style="background-color:# | ! style="background-color:#87CEFA;" | Level | ||
! style="background-color:#87CEFA;" |HP | |||
! style="background-color:#87CEFA;" |Size / Race / Element | |||
|- | |- | ||
| | |{{#mob:3105| Gatekeeper Ahat}} | ||
| | |149 | ||
| | |5,000,000 | ||
|Large / Angel / Fire 2 | |||
|- | |- | ||
| | |{{#mob:3106 |Gatekeeper Shnaim}} | ||
| | |149 | ||
| | |5,000,000 | ||
|Medium / Demon / Ghost 3 | |||
|- | |- | ||
| | |{{#mob:3088| Frost Spider}} | ||
| | |155 | ||
| | |155,600 | ||
|Medium / Plant / Water 1 | |||
|- | |||
|{{#mob:3091| Brinaranea}} | |||
|165 | |||
|81,650,000 | |||
|Large / Demon / Water 3 | |||
|- | |||
|{{#mob:3089| Frenzied Kasa}} | |||
|155 | |||
|185,000 | |||
|Large / Demon / Dark 2 | |||
|- | |||
|{{#mob:3090 |Frenzied Salamander}} | |||
|155 | |||
|217,650 | |||
|Medium / Demon / Dark 2 | |||
|- | |||
|{{#mob:3092| Muspelskoll}} | |||
|165 | |||
|55,620,000 | |||
|Large / Demon / Fire 3 | |||
|- | |||
|{{#mob:3098| Morroc of the Genesis}} | |||
|160 | |||
|1,450,000 | |||
|Large / Demon Dark 4 | |||
|- | |||
|{{#mob:3098 |Morroc of the Genesis}} | |||
|160 | |||
|3,258,000 | |||
|Large / Demon / Dark 4 | |||
|- | |||
|{{#mob:3096 |Demigod}} | |||
|175 | |||
|80,000,000 | |||
|Small / Demon / Holy 3 | |||
|- | |||
|{{#mob:3097| Despair God Morroc}} | |||
|175 | |||
|120,000,000 | |||
|Medium / Demon / Dark 2 | |||
|} | |||
<!--T:42--> | |||
====<span style="color: #87CEFA;text-align: center;">Cards</span>==== | |||
{| class="wikitable mw-collapsible mw-collapsed" style="width: 60%;text-align: center;" data-mce-style="width: 100%;" | |||
! style="background-color:#87CEFA; font-weight: bold;" |Card | |||
! style="background-color:#87CEFA; font-weight: bold;" |Description | |||
|- | |- | ||
| | | {{#item:27322|Demon God's Apostle Ahat Card}} | ||
| | | {{#itemDesc:27322}} | ||
|- | |- | ||
| | | {{#item:27323|Demon God's Apostle Shnaim Card}} | ||
| | | {{#itemDesc:27323}} | ||
| | |- | ||
| {{#item:27324|Brinaranea Card}} | |||
| {{#itemDesc:27324}} | |||
|- | |||
| {{#item:27325|Muspellskoll Card}} | |||
| {{#itemDesc:27325}} | |||
|- | |||
| {{#item:27321|Despair God Morocc Card}} | |||
| {{#itemDesc:27321}} | |||
|} | |} | ||
=== | <!--T:43--> | ||
====<span style="color: #87CEFA;text-align:center;">Essences of Evil </span>==== | |||
Essences of Evil work similarly to cards, meaning they can be put in a piece of equipment that has a slot for a card. | |||
<!--T:44--> | |||
The Wise Old Woman (Decarder NPC) in Main Office will also treat Essences of Evil like any other cards. | |||
<!--T:45--> | |||
Unlike normal cards, Essences of Evil can be put in any piece of equipment. | |||
<!--T:46--> | |||
# | {| class="wikitable mw-collapsible mw-collapsed" style="width: 60%;text-align:center;" data-mce-style="width: 100%;" | ||
|- style="background-color:#87CEFA;text-align:center;" | |||
# | | style="width: 20%" |'''Item''' | ||
# | | style="width: 40%" |'''Description''' | ||
# | |- | ||
# | |{{#item:4908 |DLE STR.png}} | ||
# | | {{#itemDesc:4908}} | ||
|- | |||
|{{#item:4910 |DLE STR.png}} | |||
| {{#itemDesc:4910}} | |||
|- | |||
|{{#item:4912 |DLE INT.png}} | |||
| {{#itemDesc:4912}} | |||
|- | |||
|{{#item:4913 |DLE INT.png}} | |||
| {{#itemDesc:4913}} | |||
|- | |||
|{{#item:4915 |DLE AGI.png}} | |||
| {{#itemDesc:4915}} | |||
|- | |||
|{{#item:4916 |DLE AGI.png}} | |||
| {{#itemDesc:4916}} | |||
|- | |||
|{{#item:4918 |DLE VIT.png}} | |||
| {{#itemDesc:4918}} | |||
|- | |||
|{{#item:4919 |DLE VIT.png}} | |||
| {{#itemDesc:4919}} | |||
|- | |||
|{{#item:4921 |DLE DEX.png}} | |||
| {{#itemDesc:4921 }} | |||
|- | |||
|{{#item:4922 |DLE DEX.png}} | |||
| {{#itemDesc:4922}} | |||
|- | |||
|{{#item:4924 |DLE LUK.png}} | |||
| {{#itemDesc:4924}} | |||
|- | |||
|{{#item:4925 |DLE LUK.png}} | |||
| {{#itemDesc:4925}} | |||
|} | |||
=== | <!--T:47--> | ||
===<span style="color: #C71585;text-align:center;">Prize of Hero</span>=== | |||
{{:Heroic_Equipment}} | |||
<!--T:48--> | |||
{{:Hero_Ring}} | |||
</translate> | |||
Latest revision as of 06:17, 27 November 2025
You can skip doing the the Prequest by using ![]() Episode 14 Clear Ticket (1000284) , available at Temporal Tina in Main Office or Prontera near Main Office building.
Episode 14 Clear Ticket (1000284) , available at Temporal Tina in Main Office or Prontera near Main Office building.
Prequest (Base Level 160+)
This quest introduces you to Tamarin, an adventurer which stumbled upon the entrance to the Fire Basin area. Completing this quest gives you access to the Fire Cave, which is the entry point for Bios Island, Morse's Cave, and Temple of the Demon God.
- Requierement 1
 Monster's Feed (528)
- Go to Pile of Rags (morocc 137, 238) and choose Remove it. You will find that there is a person under there.
- Choose to Shake the rags, to wake him up. He will ask for something to eat.
- Give him 1
 Monster's Feed (528) , and he will wake up to introduce himself as Tamarin.
 - Choose to Introduce yourself. He will appreciate your friendliness.
- He will ask about a place to wash up. Tell him the place, and finally Accompany him there.
- Go to the northwestern portal (or use the Warper > Dungeons > Pyramids and exit the dungeon), and head to Tamarin at (moc_ruins 107, 139)
- He will tell his story, choose I'm listening, and then Tell him you want to tag along.
- Use the Warper > Special Areas > Dimensional Rift. Tamarin is just south of where you spawn. (dali 112, 69)
- Go northwest and take the warp to access the second area, then go to the south-east (or use the Warper > Instances > Geffen Night Arena). On the second island, turn to the south-west and talk to the Sand Mound (dali02 90, 62) Tamarin will appear to talk to you. Choose Enter.
- You will arrive at the Fire Basin. Talk to Tamarin. Your conversation will be interrupted midway.
- Talk to Bargat Tiblack standing near you and accept her hunting quest. You have to help her kill 20 Fire Pits and collect 50 Burning Bug Skins. When you kill a Fire Pit, Fire Bug appear and they drop the skins at a 40% rate.
- Return to Bargat Tiblack and she will ask you to kill 50 Sonia and gather 50 Yummy Stems. Tamarin will call you before you finish the conversation.
- Talk to Tamarin and he will offer his help killing the Sonias. You will now only need to kill 25 of them and gather 25 of the stems.
- Meet Tamarin at the center of the map when you're done. (moro_vol 198, 179)He will offer you some of the stems to taste.
- Return to Bargat Tiblack. He will mention something about a cave, and tells you to meet Instructor Rugen.
- Find Instructor Rugen at the southwestern corner of the map (moro_vol 105, 71) and choose Talk to him.
- Talk to Intoxicated Patient below Rugen to feed him the Sonia stems, and return to Instructor Rugen.
- Go back to Bargat Tiblack, and you will be rewarded with EXP, as well as access to the Fire Cave.
Fire Basin Cards
| Card | Description |
| Decreases Variable Casting Time of Fire Ball by 50%. Increases damage of Fire Ball by 100%. _______________________ Type: Card Compound on: Accessory Weight: 1 | |
| DEF +50 Decreases Damage taken from Fire elemental attacks by 10%. _______________________ Type: Card Compound on: Armor Weight: 1 | |
| Increases Magical Damage against Earth elemental enemies by 3%. _______________________ Refine Level +7: Increases Magical Damage against Earth elemental enemies by 5%. _______________________ Refine Level +9: Increases Magical Damage against Earth elemental enemies by 7%. _______________________ Type: Card Compound on: Right Hand Weight: 1 | |
| Decreases Damage taken from Fire elemental attacks by 20%. Increases Physical Damage against Fire elemental enemies by 5%. _______________________ Type: Card Compound on: Left Hand Weight: 1 | |
| Random chance to inflict Burning status on the target when dealing physical or magical attack. _______________________ Type: Card Compound on: Head Top Weight: 1 |
Bios Island
Requirements and Rewards
- Use the Warper > Instances > Bios Island
- Base Level 160
- 1 hour to complete this instance
- 1 day cooldown
- Reward is 1
 Token Of Hero (6684) and 1
  Prize Of Hero (22537)
Instance
The instance is divided in 3 parts.
In parts 1 and 2, your objective is to kill every single mob on the map in order to get the warp, on the far right side, to open up.
- Enter the Fire Cave by talking to the Warper > Instances > Bios Island.
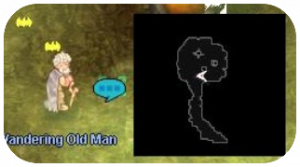
- Talk to the Wandering Old Man (moro_cav 45, 60) to begin the Bios Island quest.
- Click on the Yellow Seed (moro_cav 45, 60) which is right to the Wandering Old Man. You can generate and enter the instance from this NPC.
- Once you've entered, walk a bit on the east to get a dialogue scene between Vrid and Zeith.
- You will be asked to eliminate all the monsters in the first and second floor to proceed. They do a lot of damage so be careful!
- Once you reach the final room, you will meet Vrid and Zeith again. After the dialogue, 3 series of mobs will spawn. Kill them all to proceed.
- The Reaper Yanku will then spawn. He is relatively easy, just make sure to avoid the Comet attack (you can use spellbreak on this one).
- The MVP will drop a Prize of Hero (regular drop) after dying. You can then talk to Vrid to exit the area and be rewarded with a Token of Hero.
Monsters
| Monster | Level | HP | Size/Race/Element |
| First Floor | |||
 Corrupt Orc Baby (3010) |
158 | 250,000 | Small / Demi-Human / Earth 2 |
 Corrupt Baby Desert Wol (3011) |
158 | 232,890 | Small / Brute / Fire 2 |
 Corrupt Familiar (3012) |
158 | 222,550 | Small / Fish / Water 2 |
| Second Floor | |||
 Corrupt Orc Warrior (3013) |
158 | 300,000 | Medium / Demi-Human / Earth 2 |
 Corrupt Desert Wolf (3014) |
158 | 292,450 | Medium / Brute / Fire 2 |
 Corrupt Phen (3015) |
158 | 284,110 | Medium / Fish / Water 2 |
| Third Floor | |||
 Corrupt Orc Zombie (3016) |
158 | 375,000 | Medium / Demi-Human / Undead 2 |
 Corrupt Verit (3017) |
158 | 352,715 | Medium / Brute / Undead 2 |
 Corrupt Megalodon (3018) |
158 | 347,413 | Medium / Fish / Undead 2 |
 Reaper Yanku (3029) (MVP) |
159 | 50,000,000 | Large / Undead / Undead 4 |
Cards
| Card | Description |
| MaxHP +500 MaxSP +50 Increases damage taken from Angel race by 50%. _______________________ When equipped with Orb Baby Card: FLEE +5 Decreases damage taken from Neutral elemental attacks by 5%. _______________________ When equipped with Baby Desert Wolf Card: INT +3 MaxSP +100 MATK +5% _______________________ When equipped with Familiar Card: ATK +15 Increases Physical Damage against Shadow elemental enemies by 20%. _______________________ When equipped with Orc Warrior Card: Increases damage taken from Demi-Human race by 15%. _______________________ When equipped with Baby Desert Wolf Card: Increases damage taken from Medium and Large size by 15%. _______________________ When equipped with Phen Card: Decreases Variable Casting Time by 25%. _______________________ When equipped with Orc Zombie Card: HIT +15 FLEE +15 Increases Critical Damage by 15%. _______________________ When equipped with Verit Card: MaxHP +4% MaxSP +4% _______________________ When equipped with Megalodon Card: DEF +100 _______________________ Type: Card Compound on: Head Top Weight: 1 | |
| Receiving physical or magical damage has a chance to curse all enemies in 17x17 cells around the caster and increase ATK by 25% and MATK by 25% for 10 seconds. The chance increases with the Refine Level. Transforms into Grim Reaper Ankou for 5 seconds, when using the First Aid skill. _______________________ Type: Card Compound on: Head Top Weight: 1 |
Morses Cave
Requirements and Rewards
- Base Lvl 160
- 1 day cooldown
- Reward is 1
 Token Of Hero (6684) and 2
  Prize Of Hero (22537)
- You will be able to access this instance if you've completed Bios Island. It is recommended to bring minimal support classes and the maximum number of damage dealer as it will reduce the chances of having no damage dealer during the split in phase 3.
Instance
To enter this instance, warp to Bios Island in the instance tab.
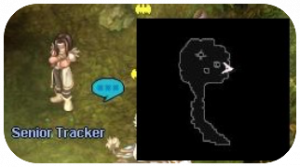
Talk to Senior Tracker (moro_cav 61, 69) to generate the instance.
Talk to the Red Flower (moro_cav 57, 65) to enter.
The instance is divided into five phases.
- You fight 9 Morroc's Ghoul, kill them all to proceed.
- Weakened Morroc will spawn. Kill him and move on.
- Your party will be randomly split into 2 groups and be rooted in place. If the split is bad, you can have members re-enter the dungeon and get warped randomly again. Both parties must be alive and have killed all the mobs otherwise the instance will end.
- All party members will be teleported back into the same ice room and you'll get new waves of monsters to kill.
- Your party will face Morroc Necromancer (ghost form). It is fairly weak and easy to kill.
- Once killed, he will morph into his FINAL FORM (necromancer form). The MVP itself isn't too hard to deal with, he only spams Frost Joke and Meteor Storm. The hard part is the amount of slaves spawned every 20 seconds which can easily overcome your party if you're not careful. It is recommended to group your party alongside the walls and stick together for this phase.
- Morroc Necromancer will drop 2 Prize of Hero upon death.
- Talk to the teleportation device to exit the map and speak to Senior Tracker (moro_cav 61, 69) in order to receive your Token of Hero.
Monsters
| Monster | HP | Race | Element |
|---|---|---|---|
 Morroc's Ghoul (3001) |
295,240 | Demon | Neutral 3 |
 Morroc's Archer Skeleton (3003) |
295,240 | Demon | Neutral 3 |
 Morroc's Wraith (3004) |
100,000 | Demon | Neutral 3 |
 Morroc's Verit (3005) |
442,860 | Demon | Neutral 3 |
 Morroc's Osiris (3002) |
442,860 | Demon | Neutral 3 |
 Morroc Hidden (3008) |
295,240 | Demon | Neutral 3 |
 Morroc Necromancer (2999) (MVP) |
4,000,000 | Human | Neutral 3 |
 Morroc Necromancer (3000) (MVP) |
80,000,000 | Human | Earth 4 |
Cards
| Card | Description |
|---|---|
| ATK +100 Increases Attack Speed greatly (Decreases After Attack Delay by 25%). MaxHP -20% _______________________ When equipped with Despair God Morocc Card: MaxHP +50% _______________________ Type: Card Compound on: Armor Weight: 1 |
Temple of the Demon God
Requirements and Rewards
- Base Lvl 160
- Completed Bios Island and Morse Cave
- You have 1 hour to complete this instance
- 1 day cooldown
- Reward:
 Expedition Prize Box (22567)
Instance
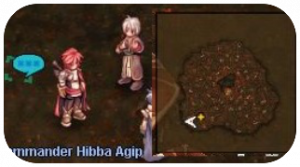
Talk to Commander Hibba Agip (moro_vol 108, 88) and Abidal to take the two quests which are necessary to start the instance.
Use the warper > Instances Bios Island > Talk to the Yggdrasil Lookalike - Tree to reserve and enter the instance.
Walk to the north part of the room close to Ahat where he will notice you. He will now teleport the party to a new room.
Ahat & Shnaim
Defeat Ahat & Shnaim. You will get Soul of Ahat and Soul of Shnaim.
At top center of the room, put each soul into the orbs to open the door to central room. Enter to proceed with the instance.
Be aware that some monsters have the element Ghost Lv 3 and that means that your damage needs to be from a different element besides neutral to cause them damage.
Morroc in his kid version will greet you to reach him. Loki and Nidhogg will appear and a brief conversation will roll. After a while a new portal will appear in the left side of the room.
Brinaranea
In this room you will face Brinaranea and Frost Spiders.
Most of the skill being used here either water or wind based, and can also freeze you, so having a way to not freeze and some reduction based on those elements is advised to be used when facing.
OPTIONAL: After killing the MVP, if you're not yet maxed, you can talk with Nidhogg before entering the room and proceed with the rest of the instance. She will give you a reward of 37.5M base exp and 12.5M job exp.
Morroc will once again show his face and after a brief talk a new portal will appear but this time on the right side of the room.
Muspelskoll
In this room you will face Muspelskoll along with Frenzied Kasas and Salamanders.
Almost every skill here is fire based so fire reductions are a must. MDEF based gear may help but be careful with the Fire Pillars since they ignore it at 100%.
To melee damage users: Be careful when you attack since everything besides the MVP can cast Reflect Shield and kill you.
This room is mostly a gear check. If your damage isn't high enough, you won't be able to out damage the heal spam from the MVP.
OPTIONAL: After killing the MVP, if you're not yet maxed, you can talk with Nidhogg before entering the room and proceed with the rest of the instance. She will give you a reward of base exp and job exp.
Morroc will salute your achievement in his glorious adult form but the game hasn't ended. A new portal will appear at the north side of the room where the final fight will start.
Morroc
The final fight has three stages:
Morroc in his kid form a.k.a. Demigod until you reach 50% of HP
Morroc summons Morroc of the Sabbath & Morroc of the Genesis and killing them reduces Demigod's HP to 20%
Morroc in his adult form a.k.a. Despair God Morroc
Besides Earthquake, that both Demigod and Despair God Morroc have, the rest doesn't hurt much. Both phases of Morroc are mostly HP sponges.
Demigod is Holy so physical damage dealers are advised to bring Cursed Waters or ammunition of the same element.
Despair God Morroc is Shadow so physical damage dealers are advised to bring Holy Elemental Converters, asking for Aspersio, or ammunition of the same element.
If you succeed to kill Despair God Morroc, Nidhogg will appear and give a Squad Prize when you talk to her as a reward for completing the instance.
Monsters
| Monster | Level | HP | Size / Race / Element |
|---|---|---|---|
 Demon God's Apostle Aha (3105) |
149 | 5,000,000 | Large / Angel / Fire 2 |
 Demon God's Apostle Shn (3106) |
149 | 5,000,000 | Medium / Demon / Ghost 3 |
 Frost Spider (3088) |
155 | 155,600 | Medium / Plant / Water 1 |
 Brinaranea (3091) |
165 | 81,650,000 | Large / Demon / Water 3 |
 Frenzied Kasa (3089) |
155 | 185,000 | Large / Demon / Dark 2 |
 Mad Salamander (3090) |
155 | 217,650 | Medium / Demon / Dark 2 |
 Muspellskoll (3092) |
165 | 55,620,000 | Large / Demon / Fire 3 |
 Morroc of the Genesis (3098) |
160 | 1,450,000 | Large / Demon Dark 4 |
 Morroc of the Genesis (3098) |
160 | 3,258,000 | Large / Demon / Dark 4 |
 Demigod (3096) |
175 | 80,000,000 | Small / Demon / Holy 3 |
 Despair God Morroc (3097) |
175 | 120,000,000 | Medium / Demon / Dark 2 |
Cards
| Card | Description |
|---|---|
| MaxSP +5% _______________________ When equipped with Apostle of Morocc Shinaim Card: MaxSP +5% _______________________ Type: Card Compound on: Accessory Weight: 1 | |
| MaxHP +5% _______________________ When equipped with Demon God's Apostle Ahat Card: MaxHP +5% _______________________ Type: Card Compound on: Accessory Weight: 1 | |
| Increases Magical Damage with Water element by 15%. _______________________ When equipped with Muspellskoll Card: Increases Magical Damage with Water element by aditional 10%. _______________________ Type: Card Compound on: Right Hand Weight: 1 | |
| Decreases Damage taken from Fire elemental attacks by 30%. _______________________ When equipped with Brinaranea Card: Increases Damage against Fire elemental enemies by 10%. _______________________ Type: Card Compound on: Left Hand Weight: 1 | |
| Transforms into Despair God Morocc for 5 seconds, when using the First Aid skill. ATK +10% MaxHP -50% Increases Physical Damage against Demi-Human and Angel race by 30%. _______________________ Type: Card Compound on: Shoes Weight: 1 |
Essences of Evil
Essences of Evil work similarly to cards, meaning they can be put in a piece of equipment that has a slot for a card.
The Wise Old Woman (Decarder NPC) in Main Office will also treat Essences of Evil like any other cards.
Unlike normal cards, Essences of Evil can be put in any piece of equipment.
| Item | Description |
| An essence of Satan Morocc. Contains part of demon's power. _______________________ STR +1 ATK +3 INT -1 _______________________ Note: This is a special enchant items and therefore not within the card's slot. _______________________ Type: Enchant Position: Head Top Weight: 1 | |
| An essence of Satan Morocc. Contains part of demon's power. _______________________ STR +4 ATK +12 INT -4 _______________________ Note: This is a special enchant items and therefore not within the card's slot. _______________________ Type: Enchant Position: Head Top Weight: 1 | |
| An essence of Satan Morocc. Contains part of demon's power. _______________________ INT +2 MATK +6 STR -2 _______________________ Note: This is a special enchant items and therefore not within the card's slot. _______________________ Type: Enchant Position: Head Top Weight: 1 | |
| An essence of Satan Morocc. Contains part of demon's power. _______________________ INT +4 MATK +12 STR -4 _______________________ Note: This is a special enchant items and therefore not within the card's slot. _______________________ Type: Enchant Position: Head Top Weight: 1 | |
| An essence of Satan Morocc. Contains part of demon's power. _______________________ AGI +2 FLEE +4 VIT -2 _______________________ Note: This is a special enchant items and therefore not within the card's slot. _______________________ Type: Enchant Position: Head Top Weight: 1 | |
| An essence of Satan Morocc. Contains part of demon's power. _______________________ AGI +4 FLEE +8 VIT -4 _______________________ Note: This is a special enchant items and therefore not within the card's slot. _______________________ Type: Enchant Position: Head Top Weight: 1 | |
| An essence of Satan Morocc. Contains part of demon's power. _______________________ VIT +2 DEF +6 MDEF +4 AGI -2 _______________________ Note: This is a special enchant items and therefore not within the card's slot. _______________________ Type: Enchant Position: Head Top Weight: 1 | |
| An essence of Satan Morocc. Contains part of demon's power. _______________________ VIT +4 DEF +12 MDEF +8 AGI -4 _______________________ Note: This is a special enchant items and therefore not within the card's slot. _______________________ Type: Enchant Position: Head Top Weight: 1 | |
| An essence of Satan Morocc. Contains part of demon's power. _______________________ DEX +2 HIT +4 LUK -2 _______________________ Note: This is a special enchant items and therefore not within the card's slot. _______________________ Type: Enchant Position: Head Top Weight: 1 | |
| An essence of Satan Morocc. Contains part of demon's power. _______________________ DEX +4 HIT +8 LUK -4 _______________________ Note: This is a special enchant items and therefore not within the card's slot. _______________________ Type: Enchant Position: Head Top Weight: 1 | |
| An essence of Satan Morocc. Contains part of demon's power. _______________________ LUK +2 CRI +2 DEX -2 _______________________ Note: This is a special enchant items and therefore not within the card's slot. _______________________ Type: Enchant Position: Head Top Weight: 1 | |
| An essence of Satan Morocc. Contains part of demon's power. _______________________ LUK +4 CRI +4 DEX -4 _______________________ Note: This is a special enchant items and therefore not within the card's slot. _______________________ Type: Enchant Position: Head Top Weight: 1 |
Prize of Hero
The equipment listed below are attainable only through opening Prizes of Hero. They all require Base Level 160 to be worn, and each of the armor pieces are exclusive to their respective classes. The footgear items are wearable by all classes.
| Item | Description |
|---|---|
| Honorable plate given to those who fought Satan Morocc. There is strong power that protects this plate. _______________________ MaxHP +5% MaxSP +5% ATK +10 MATK +10 HIT +10 FLEE +10 MDEF +5 _______________________ Increases damage of Banishing Point by 10%. _______________________ Increases damage of Storm Blast by 10%. _______________________ Random chance to auto-cast Level 10 Heal or Level 10 Stormgust when dealing physical damage. chance is increased with a higher Refine Level. _______________________ Class Restrictions: Rune Knight and Royal Guard _______________________ Type: Armor Position: Armor Defense: 120 Armor Level: 1 Refinable Weight: 400 Required Level: 160 | |
| Honorable robe given to those who fought Satan Morocc. The robe is enhanced with powers to increase concentration and spirit, occasionally it will release unpredictable attacks. _______________________ MaxHP +5% MaxSP +5% ATK +10 MATK +10 HIT +10 FLEE +10 _______________________ Increases damage of Dragon Combo, Sky Net Blow and Earth Shaker by 10%. _______________________ Increases damage of Judex and Adoramus by 10%. _______________________ Random chance to auto-cast Level 1 Lex Aeterna when performing magical attacks. chance is increased with a higher Refine Level. _______________________ Random chance to auto-cast Level 10 Kyrie Eleison when performing physical attacks. chance is increased with a higher Refine Level. _______________________ Class Restrictions: Archbishop and Sura _______________________ Type: Armor Position: Armor Defense: 77 Armor Level: 1 Refinable Weight: 50 Required Level: 160 | |
| Honorable magic coat given to those who fought Satan Morocc. The power of this robe changes based on Refine Level. _______________________ MaxHP +5% MaxSP +5% MATK +10 FLEE +10 _______________________ Increases damage of Crimson Rock and Psychic Wave by 10%. _______________________ If the Refine Level is an odd number, protects from skill cast interruption and the Variable Casting Time is increased by 20%. If the Refine Level is an even number, MDEF +1 and the Variable Casting Time is reduced by 1% for every 2 Refine Level. _______________________ Class Restrictions: Warlock and Sorcerer _______________________ Type: Armor Position: Armor Defense: 50 Armor Level: 1 Refinable Weight: 80 Required Level: 160 | |
| Honorable suit given to those who fought Satan Morocc. This clothes makes its wearer to attack faster. _______________________ All Basic Stats +1 ASPD +1 MaxHP +5% MaxSP +5% _______________________ Increases Ranged Physical Damage by 3%. _______________________ Random chance to auto-cast Level 10 Improve Concentration or Level 10 Double Strafe when dealing physical damage. auto-cast rate is increased depend on Refine Level. _______________________ Class Restrictions: Ranger, Minstrel and Wanderer _______________________ Type: Armor Position: Armor Defense: 60 Armor Level: 1 Refinable Weight: 20 Required Level: 160 | |
| Honorable clothes given to those who fought Satan Morocc. This clothes exerts the power of wearer. _______________________ MaxHP +5% MaxSP +5% _______________________ Increases damage of Fatal Manace, Triangle Shot by 10%. _______________________ Increases damage of Cross Impact and Cross Ripper Slasher by 10%. _______________________ Random chance to increase Critical by 20, FLEE by 20, physical damage against all classes by 10% and MATK by 10% for 10 seconds when dealing physical damage. chance is increased depend on Refine Level. _______________________ Class Restrictions: Guillotine Cross and Shadow Chaser _______________________ Type: Armor Position: Armor Defense: 70 Armor Level: 1 Refinable Weight: 20 Required Level: 160 | |
| Honorable trade mail given to those who fought Satan Morocc. This mail enhances wearer abilities. _______________________ MaxHP +5% MaxSP +5% ATK +10 MATK +10 MDEF +5 _______________________ Random chance to inflict Stun, Poison, Silence, Curse status on the target when dealing physical damage. chance is increased depend on Refine Level. _______________________ Base STR at least 90: For each 2 Refine Levels: STR +1 _______________________ Base INT at least 90: For each 2 Refine Levels: INT +1 _______________________ Base VIT at least 90: For each 2 Refine Levels: VIT +1 _______________________ Base AGI at least 90: For each 2 Refine Levels: AGI +1 _______________________ Base DEX at least 90: For each 2 Refine Levels: DEX +1 _______________________ Base LUK at least 90: For each 2 Refine Levels: LUK +1 _______________________ Class Restrictions: Mechanic and Genetic _______________________ Type: Armor Position: Armor Defense: 100 Armor Level: 1 Refinable Weight: 50 Required Level: 160 | |
| This technology will help you to be faster. Made with nepenthes leaves, known for their effect to alleviate muscle tension. _______________________ Decreases Variable Casting Time by 10%. _______________________ Refine Level +8: Decreases Variable Casting Time by additional 5%. For each Refine Level above +8: Decreases Variable Casting Time by additional 1%. (Upt to +10) _______________________ Refine Level +11: Decreases Variable Casting Time by additional 3%. For each Refine Level above +11: Decreases Variable Casting Time by additional 3%. (Up to +13) _______________________ Type: Armor Position: Shoes Defense: 10 Armor Level: 1 Refinable Weight: 30 Required Level: 160 | |
| A boots made of silver fox fur that able to increase wearer's traction. _______________________ Increases Ranged Physical Damage by 5%. _______________________ For each Refine Level equal or above +8: Increases Ranged Physical Damage by additional 1%. (Up to +13) _______________________ Type: Armor Position: Shoes Defense: 15 Armor Level: 1 Refinable Weight: 30 Required Level: 160 | |
| Boots stained with body fluids Ungoliant extract that may improve the capacity to Reduces concentration. _______________________ Decreases SP Consumption by 5%. _______________________ For each Refine Level equal or above +8: Decreases SP Consumption by additional 1%. (Up to +13) _______________________ Type: Armor Position: Shoes Defense: 10 Armor Level: 1 Refinable Weight: 30 Required Level: 160 |
Heroic Ring
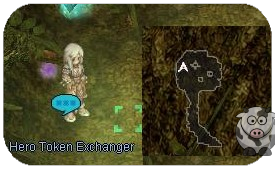
The ![]() Heroic Ring (2981) can be purchased with 30
Heroic Ring (2981) can be purchased with 30 ![]() Token Of Hero (6684) by the NPC Hero Token Exchanger.
Token Of Hero (6684) by the NPC Hero Token Exchanger.
(moro_cav 32, 73)
The ![]() Heroic Ring (2981) can be enchanted and reset enchantments with
Heroic Ring (2981) can be enchanted and reset enchantments with ![]() Token Of Hero (6684) by the NPC Expert Enchanter Byrnes.
Token Of Hero (6684) by the NPC Expert Enchanter Byrnes.
(moro_cav 34, 65)
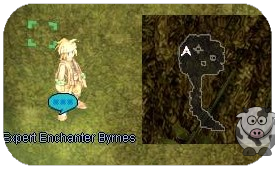
Heroic Ring Enchantment
There are 4 slots available to enchant, Byrnes will ask you what kind of enchant category you want for each slot.
Once chosen, Byrnes will give a random enchant from the desired category.
To reset the enchant, you need to give him 3 ![]() Token Of Hero (6684) .
Token Of Hero (6684) .
Be careful since resetting means wiping ALL ENCHANT SLOTS.
Below is the enchant category available for each slot and each respective enchants:
| Slot 1 | Slot 2 | Slot 3 | Slot 4 | ||||||||||||
| Stats | Random Enchant | Stats | Random Enchant | Stats | Random Enchant | Stats | Random Enchant | ||||||||
| STR | +1~+5 | ATK | +1%~+5% | MAX HP | +1%~+5% | DEF | +3 | +6 | +9 | +12 | +15 | ||||
| INT | +1~+5 | MATK | +1%~+5% | MAX SP | +25 | +50 | +75 | +100 | +150 | MDEF | +1 | +2 | +3 | +4 | +5 |
| AGI | +1~+5 | ||||||||||||||
| VIT | +1~+5 | ||||||||||||||
| DEX | +1~+5 | ||||||||||||||
| LUK | +1~+5 | ||||||||||||||
