17.1 Illusion/ko: Difference between revisions
Machine translation (deepseek-flash) Tags: Mobile edit Mobile web edit |
Machine translation (deepseek-flash) |
||
| (One intermediate revision by the same user not shown) | |||
| Line 188: | Line 188: | ||
===Helping the Workers=== | ===Helping the Workers=== | ||
* Base Level 110 | * Base Level 110 | ||
* | * 시작 지점 {{#navi:sp_cor|168|81}} | ||
# Cor 입구 근처에 있는 '''Advanced Team'''과 대화하세요 {{#navi:sp_cor|168|81}} . 일꾼들은 당신이 이 지역을 침입했다고 생각하며 당신이 여기에 있는 것을 원하지 않습니다. | |||
# | |||
#; [[File:000h.png|frameless]] | #; [[File:000h.png|frameless]] | ||
# | # Kaya에게 말을 걸어 그가 연설을 하게 하세요. 일꾼들은 그가 정말 Rekenber의 부사장인지 믿지 않습니다. | ||
#; [[File:001h.png|frameless]] | #; [[File:001h.png|frameless]] | ||
# | # Tess와 대화하여 그가 일꾼들을 설득할 수 있을지 알아보세요. Elyumina가 나타나 일꾼들을 공격합니다. 일부는 부상을 입어 도움이 필요합니다. | ||
#; [[File:003h.png|frameless]] | #; [[File:003h.png|frameless]] | ||
# | # 안전한 장소에 있는 Tess와 대화하세요 {{#navi:sp_cor|122|141}} . | ||
# | # 근처에 있는 Ashley와 대화하세요. 그녀는 많은 일꾼이 매우 아프다고 말합니다. 경험치를 보상으로 받습니다. | ||
#; [[File:004h.png|frameless]]<br>'' | #; [[File:004h.png|frameless]]<br>''[[Illusion#Finding Patrick|Finding Patrick]] 퀘스트를 해금했습니다.<br>Capturing Elyumina 퀘스트로 계속할 수 있습니다.'' | ||
<br clear="all"> | <br clear="all"> | ||
===Capturing Elyumina=== | ===Capturing Elyumina=== | ||
* 기본 레벨 110 | |||
* | * 시작 지점 {{#navi:sp_cor|108|130}} | ||
* | * 보상 1 {{#item:25668|Broken Weapon}}<br>5 {{#item:25723|Cor Cores}} | ||
* | |||
# {{#navi:sp_cor|108|130}}에 있는 '''Rebellion'''과 대화하세요. Elena Volkova가 당신 옆에 나타납니다. | |||
# | |||
#; [[File:000E.png|frameless]] | #; [[File:000E.png|frameless]] | ||
# | # '''Elena Volkova'''와 대화하세요. Elyumina가 더 큰 문제를 일으키고 있습니다. | ||
#; [[File:001E.png|frameless]] | #; [[File:001E.png|frameless]] | ||
# | # 작전 준비를 위해 다음 지역, {{#navi:sp_cor|180|169}} 근처에서 Elena Volkova와 만나세요. | ||
#; [[File:007E.png|frameless]] | #; [[File:007E.png|frameless]] | ||
# | # 파티 상태에서 Elena Volkova와 대화하고 '''Create Cor Operation'''을 선택하여 인스턴스를 생성하세요. 그녀와 다시 대화하여 입장하세요. | ||
## | ## 입구에서 Elena Volkova와 대화하세요. | ||
##; [[File:003E.png|frameless]] | ##; [[File:003E.png|frameless]] | ||
## | ## 당신 북쪽에 있는 Box 장치를 조사하세요 {{#navi:1@cor|222|236}} 그리고 위쪽 {{#navi:1@cor|220|170}}. | ||
##; [[File:004E.png|frameless]] | ##; [[File:004E.png|frameless]] | ||
## | ## 생성된 몬스터들을 처치한 뒤 Box 옆에 있는 Rebellion과 대화하세요. | ||
## | ## 다음 지역이 미니맵에 표시됩니다 {{#navi:1@cor|172|223}}. | ||
##; [[File:005E.png|frameless]] | ##; [[File:005E.png|frameless]] | ||
## | ## Elena Volkova와 대화하고 '''Give signal'''을 선택하세요. | ||
## | ## 왼쪽 포털로 들어가 전투를 시작하세요. | ||
## | ## EL1-A17T를 처치하세요. 스토리 버전에서는 몬스터가 매우 약하고 HP가 낮습니다. | ||
## | ## Elena가 나타나면 그녀와 대화하고 작전을 종료하세요. | ||
##; [[File:006E.png|frameless]] | ##; [[File:006E.png|frameless]] | ||
# | # 인스턴스 밖에서 그녀와 다시 대화하세요. 그녀는 1 {{#item:25668|Broken Weapon}}, 5 {{#item:25723|Cor Cores}}와 약간의 경험치를 보상으로 줍니다. | ||
# | # Barrack {{#navi:sp_cor|136|210}}에 있는 '''Gonie'''와 대화하세요. Rookie가 심문을 하겠다고 했습니다. | ||
#;[[File:008E.png|frameless]] | #;[[File:008E.png|frameless]] | ||
# | # '''Rookie'''와 대화하세요. Varmundt's Mansion에 들어가는 방법을 알게 됩니다. | ||
#; [[File:009E.png|frameless]] | #; [[File:009E.png|frameless]] | ||
# | # 지정된 좌표 {{#navi:sp_cor|255|285}}로 이동하여 Rookie와 대화하세요. 약간의 경험치를 보상으로 받습니다. | ||
#;[[File:010E.png|frameless]]<br>'' | #;[[File:010E.png|frameless]]<br>''Illusion 에피소드 퀘스트를 완료했습니다.''<br>''[[Cor Mission]] 인스턴스 일일 퀘스트를 해금했습니다.''<br>''[[Illusion#Helping Farm Worker|Helping Farm Worker]] 일일 퀘스트를 해금했습니다.''<br>''Sage's Legacy 퀘스트(17.2 에피소드 퀘스트)를 해금했습니다.'' | ||
===OS Mission=== | ===OS Mission=== | ||
* 기본 레벨 110 | |||
* | * 시작 지점 {{#navi:sp_cor|163|56}} | ||
* | * 보상 1 {{#item:25668| Broken Weapon}}<br>5 {{#item:25723| Cor Cores}} | ||
* | # {{#navi:sp_cor|163|56}}에 있는 Erst와 대화하세요. 그녀가 보이지 않으면 그녀의 위치 근처로 걸어가 나타나게 하세요. | ||
# | |||
#; [[File:000o.png|frameless]] | #; [[File:000o.png|frameless]] | ||
# | # 파티 상태에서 그녀와 다시 대화하고 '''Generate OS Mission'''을 선택하세요. 그런 다음 한 번 더 대화하여 인스턴스에 입장하세요. | ||
# | # 안에 들어가면 브리핑이 시작됩니다. 컷신을 잠시 기다리세요.<br>''독구름 위를 걸으면 죽으니 지역을 떠나지 마세요.'' | ||
#; [[File:001o.png|frameless]] | #; [[File:001o.png|frameless]] | ||
# | # 통신 장치에 상태 보고를 하라는 요청을 받게 됩니다. 장치는 파란색으로 깜빡입니다. 장치와 대화하고 아무 옵션이나 선택하세요. | ||
# | # 또 다른 컷신 후 다시 요청을 받게 되며, 아무 옵션이나 다시 선택하세요. | ||
# | # 공격 후 장치와 대화하여 다음 위치 내비를 받으세요 {{#navi:1@os_a|52|177}}. | ||
#; [[File:002o.png|frameless]] | #; [[File:002o.png|frameless]] | ||
# | # 다른 장치와 대화하고 짧은 컷신이 재생되게 하세요. | ||
# | # 내비 선을 따라 북쪽으로 이동하세요. 몬스터 몇 마리를 처치해야 합니다. | ||
# | # 몬스터를 처치한 후 {{#navi:1@os_a|84|256}}에 있는 파란 불빛 근처로 걸어가세요. | ||
#; [[File:003o.png|frameless]] | #; [[File:003o.png|frameless]] | ||
# | # 같은 일을 반복한 다음 {{#navi:1@os_a|163|266}}로 가세요. | ||
# [[File:Imageasdfasdf.png|frameless]] | # [[File:Imageasdfasdf.png|frameless]] | ||
# | # 그리고... 다시, 그다음 {{#navi:1@os_a|138|174}}로 가세요. | ||
#; [[File:004o.png|frameless]] | #; [[File:004o.png|frameless]] | ||
# | # 오른쪽에 있는 Miguel을 처치하세요. | ||
# | # Erst와 대화하세요. | ||
#; [[File:005o.png|frameless]] | #; [[File:005o.png|frameless]] | ||
1 {{#item:25668| Broken Weapon}}, 5 {{#item:25723| Cor Cores}}와 약간의 경험치를 받습니다.<br>''[[OS Mission]] 인스턴스 일일 퀘스트를 해금했습니다. | |||
<br clear="all"> | <br clear="all"> | ||
= Illusion 일일 퀘스트 = | |||
= Illusion | Illusion 일일 퀘스트를 보려면 [[Illusion Dailys|여기를 클릭하세요.]] | ||
= Illusion 장비와 OS 무기 = | |||
= Illusion | Illusion 장비를 보려면 [[Illusion_Armors_(17.1)|여기를 클릭하세요.]] | ||
OS 무기를 보려면 [[OS_Weapons|여기를 클릭하세요.]] | |||
OS 헤드기어를 보려면 [[OS_/_OS-LT_Headgears|여기를 클릭하세요.]] | |||
= Grace Set = | = Grace Set = | ||
Grace Set을 보려면 [[Grace Set|여기를 클릭하세요.]] | |||
= | = 카드 = | ||
카드를 보려면 [[17.1 Cards|여기를 클릭하세요.]] | |||
Latest revision as of 12:22, 15 October 2026
어떤 퀘스트를 시작하기 전에, New World Quest!를 완료하세요.
Temporal Tina is an NPC who sells Episode Clear Tickets. She is located in Prontera (prontera 140, 174) and the Main Office (main_office 94, 59).

|

|
| (prontera 140, 174) | (main_office 94, 59) |
Episode Clear Tickets
An Episode Clear Ticket is a consumable item that allows you to skip the main quest of an episode. By using it, you will gain instant access to all NPCs, dungeons, and equipment shops that would normally require you to complete the episode or fulfill certain quests to unlock.
Please note that by using an Episode Clear Ticket, you will miss out on quest rewards such as EXP, Zeny, reputation, and items.
Some Episode Clear Tickets have prerequisites. If it's your first character on the server, you will still have to progress from Episode 17.2 to the last episode normally.
Check the table below to see the requirements and prices for each ticket.
| Episode Clear Tickets | |||
|---|---|---|---|
| Episode Ticket | Level | Zeny Costs | Prerequisites |
 Episode 14 Clear Ticket (1000284) Episode 14 Clear Ticket (1000284)
|
160 | 1,000,000 | None |
 Episode 15 Clear Ticket (1000286) Episode 15 Clear Ticket (1000286)
|
140 | 1,000,000 | None |
 Episode 16 Clear Ticket (1000282) Episode 16 Clear Ticket (1000282)
|
100 | 1,000,000 | None |
 Episode 17.1 Clear Ticket (1000285) Episode 17.1 Clear Ticket (1000285)
|
110 | 2,000,000 | None |
 Episode 17.2 Clear Ticket (1000287) Episode 17.2 Clear Ticket (1000287)
|
130 | 4,000,000 | The current character has cleared Episode 17.1 |
 Episode 18 Clear Ticket (1000288) Episode 18 Clear Ticket (1000288)
|
170 | 9,000,000 | The current character has cleared Episode 17.2 |
 Episode 19 Clear Ticket (1000988) Episode 19 Clear Ticket (1000988)
|
200 | 12,000,000 | The current character has cleared Episode 18 AND one character in the master account has cleared Episode 19 and the side quests "Purification Saint" and "Frozen Sea" |
 Episode 20 Clear Ticket (1001214) Episode 20 Clear Ticket (1001214)
|
215 | 16,000,000 | The current character has cleared Episode 19 AND one character in the master account has cleared Episode 20 |
 Episode 21 Clear Ticket (1001215) Episode 21 Clear Ticket (1001215)
|
230 | 32,000,000 | The current character has cleared Episode 20 AND one character in the master account has cleared Episode 21 |
 Chapter 1 Clear Ticket (50098) Chapter 1 Clear Ticket (50098)
|
265 | 64,000,000 | One character in the master account has cleared Chapter 1 and complete Zero Cell Sector |
How to check which episode I have unlocked?
Right now, we don't have a feature which simply tells you which episode you are.
So here's some things you can do to check it by yourself:
| Episode Quest | ||
|---|---|---|
| Episode | Steps | Description |
| Episode 15 | Click on Warper > Instances > Central Laboratory. | If you can go, you have completed the Episode 15 quest. |
| Episode 16 | Click on Warper > Instances > Heart Hunter War Base. | If you can go, you have completed the Episode 16 quest. |
| Episode 17.1 | Use @go 46. (Cor) | If you can go, you have completed the Episode 17.1 quest. |
| Episode 17.2 | Use @go 47. (Varmundt's Mansion) | If you can go, you have completed the Episode 17.2 quest. |
| Episode 18 | Use @go 51. (Gray Wolf Village) | If you can go, you have completed the Episode 18 quest. |
| Episode 19 | Use @go 53. (Ice Castle) | If you can go, you have completed the Episode 19 quest. |
| Episode 20 | Click on Warper > Instances > The Immortal. | If you can go, you have completed the Episode 20 quest. |
| Episode 21 | Click on Warper > Instances > Final Battle. | If you can go, you have completed the Episode 21 quest. |
퀘스트 시리즈 Illusion 17.1
Rudus 조사
- 참고: Episode 17 퀘스트라인을 시작하기 위해 Episode 16 선행 퀘스트를 완료할 필요는 없습니다.
- Base Level 110
- 시작: (prontera 156, 354)
- Learning About the Families의 Step 1
방 안에서 Nyhill이 보이지 않는다면, 이미 그와 대화한 것입니다. 이 가이드의 3단계로 넘어가세요. - 보상: 15
 Cor Core (25723)
Episode 17.1의 퀘스트라인을 진행하기 위해 Episode 16의 퀘스트라인을 완료할 필요는 없습니다. 하지만 Nyhill과 대화하려면 Prontera Castle 안의 자신의 방에 접근해야 하며, 이를 위해서는 Learning About the Families의 Step 1을 완료해야 합니다. 방 안에서 Nyhill이 보이지 않는다면 이미 그와 대화한 것입니다. 이 가이드의 3단계로 넘어가세요.
- Prontera Castle 안의 자신의 방으로 가세요 (@go woe 입력 후 북쪽으로 이동). 당신의 방은 왼쪽 날개의 맨 아래 방입니다 (prt_cas_q 30, 28).
- 방 안에서 Nyhill M. Heine과 대화하세요. 그는 Peter가 상태가 좋지 않으며 이제 왕위 계승 서열 다음이라고 말합니다.
- Einbech의 Clana Nemieri 입구 근처로 가면 (einbech 215, 79), Rebellion Crew 단원이 나타납니다. 그와 대화하여 새 작전 기지에 대한 정보를 수집하세요.
- Einbroch의 선술집 Cat on Bullet으로 향하세요 (einbroch 302, 326).
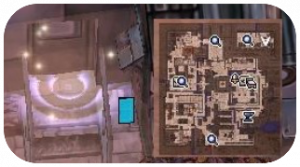
- 안으로 들어가서 Philofontes와 대화하세요 (pub_cat 94, 104). 그는 버려진 Rudus 황무지로 통하는 입구를 찾았다고 말합니다.
- Rudus의 입구는 (ein_fild05 156, 288)에 있습니다. 그곳에 있는 Rebellion Crew와 대화하면 들어갈 수 있습니다.
이제 Morning 일일 퀘스트를 이용할 수 있습니다. - 입구 근처에서 Elena Volkova와 대화하세요. 그녀는 길을 막는 결계가 있다고 말합니다.
- 남쪽으로 걸어가 결계 앞에서 Rookie와 대화하세요.
- 미니맵에 표시된, 정보를 수집해야 할 3개의 장소가 있습니다:
- (sp_rudus 303, 266)에 있는 Rebellion Crew 단원.
- (sp_rudus 121, 286)에 있는 Rebellion Crew 단원.
- (sp_rudus 27, 300)에 있는 Small Hole.
- (sp_rudus 303, 266)에 있는 Rebellion Crew 단원.
- 이 모든 장소를 확인한 뒤 Rookie에게 돌아가세요. 그가 문을 열었으므로, 이제 Firmly Closed Door와 대화해 반대편으로 갈 수 있습니다.
- 결계 너머에서 이상한 소리가 들리며, 그는 그 근원을 찾아달라고 합니다. 다음 몬스터들을 사냥해야 합니다:
- Dolors 10마리.
- Venenums 10마리.
- Twin Caputs 10마리.
- 완료한 뒤 입구 근처에서 Elena Volkova와 대화하세요. 15 Cor Core (25723)와 약간의 경험치를 보상으로 받습니다.
- Securing Regenschirm으로 퀘스트를 계속할 수 있습니다.


Securing Regenschirm
- Base Level 110
- 시작 지점 (pub_cat 93, 105)
- 보상 25
 Unknown Parts (25669)
- Cat on Bullet 안에 있는 Philofontes에게 결과를 보고하세요. 다른 방에 새 손님이 도착했습니다.
- 오른쪽에 있는 Retired Rebellion와 대화하여 방에 들어가세요.
- 방 안에 있는 Philofontes와 대화하세요. Regenschirm 실험실이 Heart Hunters에게 점령당했다는 것을 알게 됩니다.
- Philofontes 옆에 있는 Middle-Aged Gentleman와 대화하세요. 그는 자신을 소개하고 싶어하며, Kaya Toss로 알려진 Rekenber의 부사장이라고 말합니다.
- Lighthalzen에 있는 Rekenber 본사 옆, Regenschirm 입구 (lighthalzen 53, 269)로 가세요.
- Republic Guard와 대화하세요. 실험실 탈환 준비가 끝나면 Oscar가 들어오게 해줄 것입니다.
- 파티 상태에서 포털 옆에 있는 Rekenber Guard Oscar와 대화하고 Generate Regenschirm을 선택하여 인스턴스를 시작하세요. 다시 그와 대화하면 입장할 수 있습니다.
- 조금 위로 이동하여 Ashley와 대화하세요. 메인 홀 방으로 워프됩니다.
- 주변 지역의 모든 적을 처치하세요. 왼쪽 아래에 있는 공용 방을 잊지 마세요. 계속하려면 모든 Special Guard를 하나도 빠짐없이 처치해야 합니다.
- (왼쪽에 있는) 레스토랑 방으로 이동한 다음, 문 근처의 Access Controller를 클릭하세요.
- 바로 옆에 있는 Researcher와 대화하여 문을 열게 하세요. 복도로 워프됩니다.
- 북쪽으로 걸어가며 왼쪽 편의 모든 Deadly Poisonous Gas를 제거하세요. 그 후 포털이 잠금 해제되었다는 안내가 나옵니다.
- 왼쪽의 회의실로 들어가 Erst와 대화하세요. 그녀가 코드 0315를 알려줍니다.
- 왼쪽에 있는 Access Controller에 코드를 사용하고 컷신이 끝날 때까지 기다리세요.
- 회의실에서 나와 오른쪽 아래 부분으로 가세요. 제거해야 할 Deadly Poisonous Gas가 더 있습니다.
- 모든 가스를 제거하면 주변 방에 접근할 수 있습니다.
- (1@rgsr 211, 136)에 있는 첫 번째 방부터 시작하여 Detained Researcher와 대화하세요.
- 아래쪽 방으로 이동하여 다른 Detained Researcher와 대화하세요.
- 다음 방에서도 위와 같은 단계를 진행하세요.
세 번째 사람은 대화 후에도 사라지지 않습니다. - 맨 아래의 마지막 방으로 가면 Ashley가 기다리고 있습니다. 그녀와 대화하세요. 책상 위의 Scattered Documents를 클릭하여 챙기는 것을 잊지 마세요.
- 방을 나와 (1@rgsr 125, 153)에 있는 Central Room으로 가세요. Central Room을 클릭하면 Ashley와 다른 사람들이 나타납니다.
- Ashley와 대화하고 컷신을 시청하세요. 끝나면 그녀와 다시 대화하고 Enter를 선택하세요.
- 다음 단계를 진행하려면 Restrained Specimen 근처로 올라가세요.
- 이 방에는 4개의 제어 장치가 있습니다. 올바른 순서는 다음과 같습니다 (실수해도 같은 단계를 다시 하면 되며 처음부터 시작하지 않아도 됩니다):
- 오른쪽 위 제어 장치 > Blue Button.
- 왼쪽 아래 제어 장치 > Red button.
- 왼쪽 위 제어 장치 > White Button.
- 오른쪽 아래 제어 장치 (Restrained Specimen 근처, 벽에 있음) > Yellow Button.
- Restrained Specimen이 풀려나면 처치하여 진행하세요.
- Ashley가 방 남쪽에 다시 나타납니다. 그녀와 대화하고 Move to Einbroch를 선택하세요.
- Cat on Bullet 안에 있는 Philofontes와 대화하세요. 그는 25 Unknown Parts (25669)와 약간의 경험치를 보상으로 줍니다.
앞서 Scattered Documents를 챙겼다면 Philofontes와 다시 대화하여 경험치를 더 받을 수 있습니다.
Investigating Rekenber 퀘스트로 계속 진행할 수 있습니다.


Investigating Rekenber
- Base Level 110
- 시작 지점 (pub_cat 106, 69)
- 보상 20 Cor Core (25723)
- (pub_cat 106, 69)에 있는 펍 안에서 Lazy와 대화하세요. 그는 제공된 문서에 대해 Kaya Toss와 다투고 있고, 서로를 믿으려 하지 않습니다.
- 아래층에서 그와 다시 대화하여 무슨 일이 벌어지는지 알아보세요.
- Kaya와 대화하고 그에게 제안하세요. Lazy, Kaya, 그리고 당신이 함께 문제를 조사하자고 제안하는 것입니다.
- Lazy와 대화하세요. Kaya가 대화에 합류하여 제안을 받아들입니다. 약간의 경험치를 보상으로 받습니다.
- (einbroch 42, 208)에 있는 Einbroch Airport로 이동한 후 Lazy와 대화하세요. Kaya는 Patrick Kaufman의 행방을 조사하기로 결정했습니다.
- (lighthalzen 259, 215)에 있는 Lighthalzen에서 Lazy를 찾으세요.
- (lighthalzen 336, 266)에 있는 Patrick's House로 가서 Lazy와 대화하세요.
- (lighthalzen 108, 163) 근처 Rekenber's Headquarters로 가서 Lazy와 대화하세요.
- 북쪽에 있는 Headquarters 안으로 들어가세요. 들어간 후 Staff 멤버와 대화하세요.
- 동쪽 2층으로 올라가 (lhz_in01 162, 258)로 가세요. 또 다른 Staff 멤버와 대화하세요.
- Headquarters 왼쪽 건물인 Regenschirm으로 가세요 (lighthalzen 53, 277).
- 오른쪽에 있는 Laboratory Staff와 대화하세요.
- 왼쪽 아래 공용실로 가서 Staff 멤버와 대화하세요. 그는 Patrick이 어디로 전출되었는지 모르기 때문에 당신을 Office로 돌려보냅니다.
- Headquarters로 돌아가 (lhz_in01 80, 210)에 있는 Secretary와 대화하세요. 그는 정보를 찾기 위해 문서 보관실을 확인해보라고 합니다.
- 왼쪽 위 방으로 가서 (lhz_in01 32, 264)에 있는 Staff와 대화하세요. 당신은 수색을 나누기로 하고, Kaya와 함께 Patrick이 전출되었다고 추정되는 새 실험실, Einbroch Mountains의 District 01, Section 95-146으로 가기로 합니다.
- 위치는 (ein_fild01 95, 146)입니다. 그곳에서 Kaya가 당신을 기다리고 있습니다.
- Kaya와 대화하면 그곳에는 아무것도 없다는 것이 밝혀집니다. 20 Cor Core (25723)와 약간의 경험치를 보상으로 받습니다.


Old Memories 퀘스트를 계속할 수 있습니다.
Old Memories
- Base Level 110
- 시작 지점 (pub_cat 93, 105)
- 보상 Unknown Parts (25669)
- Cat on Bullet 안에 있는 Philofontes와 대화하세요. 그는 Einbroch 북서쪽 지역에서 Rebellion Crew 멤버를 만나보라고 합니다. Rebellion 원로들은 당신을 돕기로 결정했습니다.
- (ein_fild03 278, 269) 에 있는 Rebellion Crew 멤버와 대화하세요. 그곳에 또 다른 수상한 폐광이 있고, 그는 먼저 주변을 살펴보라고 합니다.
- (ein_fild03 347, 219) 근처로 걸어가세요.
- (ein_fild03 268, 207) 근처로 걸어가세요.
- (ein_fild03 218, 266) 근처로 걸어가세요.
- Rebellion Crew와 다시 대화하세요. 약간의 경험치를 보상으로 받습니다.
- 파티 상태에서 Rebellion Crew와 대화하고 Create instance를 선택하여 인스턴스를 시작하세요. 다시 그와 대화하면 입장합니다.
- 입구에 있는 Ridsh와 대화하세요.
- 오른쪽으로 조금 이동하여 생성된 2마리의 몬스터를 처치하세요.
- 오른쪽 아래에 Suspicious Device가 나타납니다. 그것을 클릭하고 진행하려면 Crush it을 선택하세요.
- 캠프 입구가 보일 때까지 철도를 따라가세요.
- 3개의 Thick Wires를 클릭하여 모두 제거하세요.
- 계속 철도를 따라가세요.
- 다음 포털 위를 걸어 짧은 대화를 발생시키세요. Dien이 문을 부수지 않고 철도로 돌아가려면 오른쪽으로 걸어가라고 말합니다.
- 오른쪽 위 구역으로 계속 이동하면 Ridsh를 만납니다. 그녀와 대화하세요. 그녀의 대화가 끝나면 포털이 사라지고 계속 진행할 수 있습니다.
- 오른쪽 위의 다음 구역으로 걸어가세요. Dien을 다시 만날 때까지 철도를 따라가세요.
- 그녀와 대화하면 25 Unknown Parts (25669)와 약간의 경험치를 보상으로 받습니다.
- 입구에 있는 Ridsh와 대화하세요.
- Einbech (einbech 215, 79) 에 있는 Clana Nemieri로 돌아간 후, 내부 (rebel_in 68, 41) 에 있는 Rebellion Crew와 대화하세요.
- Dien의 방에 들어가 책상 위의 Ornament Box를 여세요. Just take it을 선택하세요.
 Dien's Precious Envelope (25665)를 얻습니다. 편지를 받지 못하더라도 다음 단계를 계속 진행하세요.
- OS로 돌아가 Dien과 대화하세요 (ein_fild03 278, 269)> 그런 다음 포털에 들어가세요 > (sp_os 253, 359). 그림을 건네주면 약간의 경험치를 보상으로 받습니다.
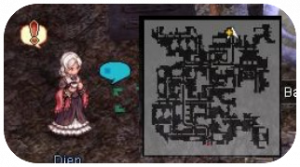
이제 Cor 지역에 접근할 수 있습니다.
Mercenary vs Mercenary 일일 퀘스트를 해금했습니다.
OS Mission 퀘스트를 해금했습니다.
Helping the Workers 퀘스트를 계속할 수 있습니다.


Helping the Workers
- Base Level 110
- 시작 지점 (sp_cor 168, 81)
- Cor 입구 근처에 있는 Advanced Team과 대화하세요 (sp_cor 168, 81) . 일꾼들은 당신이 이 지역을 침입했다고 생각하며 당신이 여기에 있는 것을 원하지 않습니다.
- Kaya에게 말을 걸어 그가 연설을 하게 하세요. 일꾼들은 그가 정말 Rekenber의 부사장인지 믿지 않습니다.
- Tess와 대화하여 그가 일꾼들을 설득할 수 있을지 알아보세요. Elyumina가 나타나 일꾼들을 공격합니다. 일부는 부상을 입어 도움이 필요합니다.
- 안전한 장소에 있는 Tess와 대화하세요 (sp_cor 122, 141) .
- 근처에 있는 Ashley와 대화하세요. 그녀는 많은 일꾼이 매우 아프다고 말합니다. 경험치를 보상으로 받습니다.
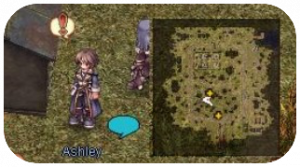
Finding Patrick 퀘스트를 해금했습니다.
Capturing Elyumina 퀘스트로 계속할 수 있습니다.


Capturing Elyumina
- 기본 레벨 110
- 시작 지점 (sp_cor 108, 130)
- 보상 1
 Broken Weapon (25668)
5 Cor Core (25723)
- (sp_cor 108, 130)에 있는 Rebellion과 대화하세요. Elena Volkova가 당신 옆에 나타납니다.
- Elena Volkova와 대화하세요. Elyumina가 더 큰 문제를 일으키고 있습니다.
- 작전 준비를 위해 다음 지역, (sp_cor 180, 169) 근처에서 Elena Volkova와 만나세요.
- 파티 상태에서 Elena Volkova와 대화하고 Create Cor Operation을 선택하여 인스턴스를 생성하세요. 그녀와 다시 대화하여 입장하세요.
- 입구에서 Elena Volkova와 대화하세요.
- 당신 북쪽에 있는 Box 장치를 조사하세요 (1@cor 222, 236) 그리고 위쪽 (1@cor 220, 170).
- 생성된 몬스터들을 처치한 뒤 Box 옆에 있는 Rebellion과 대화하세요.
- 다음 지역이 미니맵에 표시됩니다 (1@cor 172, 223).
- Elena Volkova와 대화하고 Give signal을 선택하세요.
- 왼쪽 포털로 들어가 전투를 시작하세요.
- EL1-A17T를 처치하세요. 스토리 버전에서는 몬스터가 매우 약하고 HP가 낮습니다.
- Elena가 나타나면 그녀와 대화하고 작전을 종료하세요.
- 입구에서 Elena Volkova와 대화하세요.
- 인스턴스 밖에서 그녀와 다시 대화하세요. 그녀는 1 Broken Weapon (25668), 5 Cor Core (25723)와 약간의 경험치를 보상으로 줍니다.
- Barrack (sp_cor 136, 210)에 있는 Gonie와 대화하세요. Rookie가 심문을 하겠다고 했습니다.
- Rookie와 대화하세요. Varmundt's Mansion에 들어가는 방법을 알게 됩니다.
- 지정된 좌표 (sp_cor 255, 285)로 이동하여 Rookie와 대화하세요. 약간의 경험치를 보상으로 받습니다.
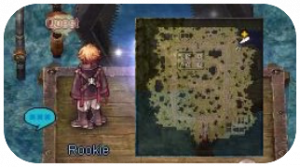
Illusion 에피소드 퀘스트를 완료했습니다.
Cor Mission 인스턴스 일일 퀘스트를 해금했습니다.
Helping Farm Worker 일일 퀘스트를 해금했습니다.
Sage's Legacy 퀘스트(17.2 에피소드 퀘스트)를 해금했습니다.


OS Mission
- 기본 레벨 110
- 시작 지점 (sp_cor 163, 56)
- 보상 1 Broken Weapon (25668)
5 Cor Core (25723)
- (sp_cor 163, 56)에 있는 Erst와 대화하세요. 그녀가 보이지 않으면 그녀의 위치 근처로 걸어가 나타나게 하세요.
- 파티 상태에서 그녀와 다시 대화하고 Generate OS Mission을 선택하세요. 그런 다음 한 번 더 대화하여 인스턴스에 입장하세요.
- 안에 들어가면 브리핑이 시작됩니다. 컷신을 잠시 기다리세요.
독구름 위를 걸으면 죽으니 지역을 떠나지 마세요. - 통신 장치에 상태 보고를 하라는 요청을 받게 됩니다. 장치는 파란색으로 깜빡입니다. 장치와 대화하고 아무 옵션이나 선택하세요.
- 또 다른 컷신 후 다시 요청을 받게 되며, 아무 옵션이나 다시 선택하세요.
- 공격 후 장치와 대화하여 다음 위치 내비를 받으세요 (1@os_a 52, 177).
- 다른 장치와 대화하고 짧은 컷신이 재생되게 하세요.
- 내비 선을 따라 북쪽으로 이동하세요. 몬스터 몇 마리를 처치해야 합니다.
- 몬스터를 처치한 후 (1@os_a 84, 256)에 있는 파란 불빛 근처로 걸어가세요.
- 같은 일을 반복한 다음 (1@os_a 163, 266)로 가세요.
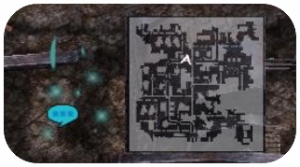
- 그리고... 다시, 그다음 (1@os_a 138, 174)로 가세요.
- 오른쪽에 있는 Miguel을 처치하세요.
- Erst와 대화하세요.


1 Broken Weapon (25668), 5 Cor Core (25723)와 약간의 경험치를 받습니다.
OS Mission 인스턴스 일일 퀘스트를 해금했습니다.
Illusion 일일 퀘스트
Illusion 일일 퀘스트를 보려면 여기를 클릭하세요.
Illusion 장비와 OS 무기
Illusion 장비를 보려면 여기를 클릭하세요.
OS 무기를 보려면 여기를 클릭하세요.
OS 헤드기어를 보려면 여기를 클릭하세요.
Grace Set
Grace Set을 보려면 여기를 클릭하세요.
카드
카드를 보려면 여기를 클릭하세요.