A Start to Levelling Alts
Introduction
This is mostly a guide aimed at levelling alts that I would do Multi-Clienting but also there should be no problems for a newer player to follow along until 3rd Jobs.
This should apply to most/any classes but for this guide, I will be using an Archer to demonstrate and will not be Multi-Clienting as I normally would and manually levelling to 250 on it.
They will need to branch off later, as the guide focuses mostly on leeching the most of the levels to make the experience easier and makes use of the abundantly available ![]() [Bound] Battle Manual (12263)from Eden but is also optional, it will just take a bit longer and need to repeat quests.
[Bound] Battle Manual (12263)from Eden but is also optional, it will just take a bit longer and need to repeat quests.
This isn't really a guide specifically on how to level a class but more of a way to mass produce alts for whatever purpose you may have, maybe you'll have better luck with this Guide to Levelling Various Characters as I'm not really interested in the gearing process, only getting them to 250 as fast as I can.
I will not go in to what I farm or what's good to farm as there's another guide out there such as Multi Client Farming but maybe in the future.
Another really good guide to follow starting up is - The Road to a Billion Zeny - Newbie Leveling/Farming Guide.
Another page that will go more in-depth about Eden Gear is on here.
Setting Up & Notes
Before making the character you want to level, it is highly recommended to make a Merchant for ![]() Discount &
Discount & ![]() Overcharge.
Overcharge.
This will save up on costs and help you in the early game.
The process to quickly setting one up is:
- Decline tutorial
- Job change to Merchant
- Go to
@go paramkto buy 1-2 Meteor Storm Scroll (14512)or
  Lord of Vermilion Scroll (14514) from Madoha ( More details below).
 - Add 10 Dex & rest to Int, and warp to Anthell.
- Cast Meteor Storm on Ant Eggs
I'd also recommend on stocking up on ![]() Fly Wing (601)available from any Tool Dealer as they're very helpful early on if you're not Multi-Clienting.
Fly Wing (601)available from any Tool Dealer as they're very helpful early on if you're not Multi-Clienting.
The way it usually goes is: Kill -> Fly Wing and repeat until you're done with whatever you're doing.
Once done, buy 6x ![]() Holy Water (523)& 6x
Holy Water (523)& 6x ![]() Blue Gemstone (717)from any Tool Dealer(This will be used later for Cautious Village quest), and then send the rest of remaining Zeny to your bank to use on the character you want to level.
Blue Gemstone (717)from any Tool Dealer(This will be used later for Cautious Village quest), and then send the rest of remaining Zeny to your bank to use on the character you want to level.
Make sure you have autoloot set to 100% as you'll want to be selling everything you find.
Put items you want to keep in your inventory in your Favourites Tab.
Other notable items to prepare but can be gathered later
- x80
 Unknown Parts (25669) - Grace Set
 - x60
 Cor Core (25723)- Grace Refine Tickets
  Eden Coin (25223) - For consumables and/or skipping gathering materials for Advanced Eden Equipment
- x15
 Old Pick (7318) - Advanced Eden Gear Exchange
 - x3
 Blue Hair (1034) - Advanced Eden Gear Exchange
 - x15
 Elastic Band (7200) - Advanced Eden Gear Exchange
 - Any other equipment that may help you past Level 200 on classes that need a bit more gear to function.
Useful @commands
@lastwarp@storeall@getall@go eden@go main
Make sure you're always throwing your loot in to your storage using @storeall. This is so you can earn more Zeny by selling them on your Merchant to the NPC's.
More player commands found here
While you're under the effects of
![]() [Bound] Battle Manual (12263)or
[Bound] Battle Manual (12263)or ![]() Novice Battle Manual (7803)or even
Novice Battle Manual (7803)or even ![]() [Bound] Bubble Gum (12264), the timer will be paused while you are in any town EXCEPT IF YOU'RE IN EDEN OR MAIN OFFICE (as of 16/07/25).
[Bound] Bubble Gum (12264), the timer will be paused while you are in any town EXCEPT IF YOU'RE IN EDEN OR MAIN OFFICE (as of 16/07/25).
So keep note where you are afking or alt-tabbed!
No longer the case! - https://forum.muhro.eu/d/4359-patch-notes-189-14-november-2025 (as of 14/11/25)
Feel free to afk in Eden or Main.
A quick note that I won't go indepth about.
This change allows you to passively level alts through item turn-ins in the Eden Boards, albeit slower than just slogging it out.
Starting - Primary Classes Route
| Classes | |||||
|---|---|---|---|---|---|
| Swordsman | Magician | Archer | Acolyte | Merchant | Thief |

|

|

|

|

|

|

First Job
Spawning initially will bring you to Lunos which will prompt you whether to start the tutorial or not.
I highly recommend to follow the initial tutorial to receive ![]() Novice Battle Manual (7803).
Novice Battle Manual (7803).
Just make sure you skip the tutorial for Main Office by choosing you already know the way - this is after you're teleported to Prontera.
It's also possible to skip the tutorial but will be a bit slower as the Novice Battle Manual is a 200% EXP Boost.
Most notable rewards are ![]() Novice Battle Manual (7803)&
Novice Battle Manual (7803)& ![]() C. Beginner Cap (20307).
C. Beginner Cap (20307).
Do note that the Novice Battle Manual is only usable between levels 1~40.
Enter Main Office and change to a job to your liking!
Once done, go to @go paramk and find Madoha at (paramk 96, 199) and purchase 2x ![]() Meteor Storm Scroll (14512) or
Meteor Storm Scroll (14512) or ![]() Lord of Vermilion Scroll (14514).
Lord of Vermilion Scroll (14514).

Afterwards, go to @go eden and join the Eden Group.
Now it's time to begin the process, begin with adding 10 Dex and the rest to Int then warp to Anthell Dungeon.
Cast Meteor Storm/Lord of Vermilion on the Ant Eggs, this should get you enough levels (Level 10 minimum) to get Armor from the Eden Group.

Go to @go edenand go to (moc_para01 106, 92).
Talk to the two NPC's; Lucy & Lothaire. Grab the Shadow Gears from Lucy, grab a suitable Weapon & Armour from Lothaire.
Afterwards, go back to buy more Meteor Storm or Lord of Vermilion Scrolls and use on Ant Eggs in Anthell until you're level 40+ unless you have access to AoE skills as the Eden Gears you obtained earlier will let you easily kill them now.
Once reaching at least 40, you can return to Eden and take all the quest from Eden Board 40-69.
Afterwards, we now go to Orc Dungeon to the next step of the process.
-
 Lucy
Lucy -
 Lothaire
 -
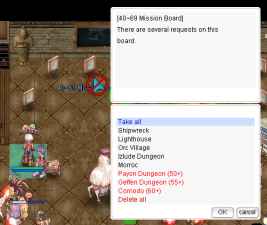 Eden Board 40-69


Afterwards, we now go to Orc Dungeon to the next step of the process.
Finish the kill quest in here by killing Orc Zombies in Floor 1 then proceed to Floor 2 for Orc Skeletons & Zenorcs
| Mob | Amount |
|---|---|
| Orc Zombie (1153) | 20 |
| Orc Skeleton (1152) | 20 |
| Zenorc (1177) | 20 |
Second Job
By the time you finish this, you will have hit Job Level 50. Now it's time to Job Change before handing in the quest.
When you're done changing jobs, return to Eden and hand in the Board Quest.
Your next step is to take the quests from the 70-99 Mission Board to take on Glast Heim!
How to get there:
- Warper > Glast Heim > Monastery
| Mob | Amount |
|---|---|
| Evil Druid (1117) | 15 |
| Wraith (1192) | 15 |
| (Optional lvl 90+) Dark Priest (2283) | 10 |
| (Optional lvl 90+) Furious Dark Priest (2861) | 1 |
Rinse & repeat the quest until you have reached 99/50.
In some cases that you are close to 99/50 and would overlevel by handing in the quest, you can finish off you're levelling by grouping the mobs in Orc Dungeon to finish it off.
Pre-Rebirth & Rebirth
Just before Rebirth, now would be the perfect time to make use of the 6x ![]() Holy Water (523)& 6x
Holy Water (523)& 6x ![]() Blue Gemstone (717) that was bought earlier before starting and grab it from your storage or from your Merchant alt.
Blue Gemstone (717) that was bought earlier before starting and grab it from your storage or from your Merchant alt.
Go to @go 34 and start Cautious Village . The quest guide is a little terrible so I'll be covering it here briefly to show the way to do it faster.
YOU NEED THE HOLY WATER & BLUE GEMSTONES IN YOUR INVENTORY
Cautious Village Steps
- Go to (malaya 185, 354) and talk to Leader Phong to start the quest.
- Talk to Old Man Nardo close to Leader Phong.
- Go to (malaya 221, 265) and talk to the Father & Daughter pair; Romel & Talah (You must talk to both separately!).
- Go to (malaya 123, 216) and talk to Blacksmith Pandoi.
- Go to
@go 34to return to the middle of Port Malaya. - Go to (malaya 292, 171) and talk to Collection Dealer Woeon.
- Go to (malaya 325, 74) and talk to Pedro the Sailor (Option 2 > Option 1).
- Go to
@go 34and return to Leader Phong (Spam spacebar). - He will ask you to give everyone Holy Waters & Blue Gemstones.
- Talk to Old Man Nardo to give him a Holy Water & a Blue Gemstone.
- Romel & Talah are next.
- Blacksmith Pandoi
- Collection Dealer Woeon
- Pedro the Sailor
- STOP THE QUEST AFTER HERE
-
 Leader Phong & Old Man Nardo
 -
 Talah & Romel
 -
 Blacksmith Pandoi
 -
 Collection Dealer Woeon
 -
 Pedro the Sailor


You will hand in the quest later on after reaching 2nd Job again.
Before rebirthing you can also make more preparations such as finishing Orc Dungeon and/or Glast Heim Board Quest but this is optional but recommended while you're still able to easily kill them.
Buying 1 or 2 ![]() Meteor Storm Scroll (14512) depending on if you have completed the extra board quests prior.
Meteor Storm Scroll (14512) depending on if you have completed the extra board quests prior.
You might also want to farm the items below for later on to make the most out of your ![]() Novice Battle Manual (7803).
Novice Battle Manual (7803).
- 15x Elastic Band (7200)from Wootan Shooter (1498) .
- 3x Blue Hair (1034)from Kobold (1135) .
- 15x Old Pick (7318)from Pitman (1616) .
Once you're all ready and prepared, it's now time to Rebirth.
High Novice to Third Job
Now it's all the same steps that was mentioned above, putting in points in to Int & Dex, using ![]() Meteor Storm Scroll (14512)on Ant Eggs in Anthell to get your first job.
Meteor Storm Scroll (14512)on Ant Eggs in Anthell to get your first job.
But this time we will be on a 30-minutes timer using the ![]() Novice Battle Manual (7803) from the tutorial, pop it just before you kill the Ant Eggs.
Novice Battle Manual (7803) from the tutorial, pop it just before you kill the Ant Eggs.
After Job Level 10
- Return to the Job Change in
@go mainand grab your 1st Transcendent Class. - Hand in Orc Dungeon Board
- If you didn't prepare it then.
- Go back to Anthell to kill more Ant Eggs until you reach Job Level 50
- Grab 2nd Transcendent Class.
- Return to
@go 34to finish off Cautious Village. - Go to (malaya 185, 354) and talk to Leader Phong to finish the quest.
This will give you enough exp to reach 99/70 with the ![]() Novice Battle Manual (7803)active and no EXP Event.
Novice Battle Manual (7803)active and no EXP Event.
With the ![]() [Bound] Battle Manual (12263), you will need to finish off the rest of the exp from anywhere like Orc Dungeon by killing Orc Zombies as they're easy to group.
[Bound] Battle Manual (12263), you will need to finish off the rest of the exp from anywhere like Orc Dungeon by killing Orc Zombies as they're easy to group.
UNLESS there is an EXP Event on-going then the normal ![]() [Bound] Battle Manual (12263)from Eden will be enough to let you hit 99/70.
[Bound] Battle Manual (12263)from Eden will be enough to let you hit 99/70.
Now you're able to Job Change to your 3rd Job.
Hand in the Glast Heim quest if you still had one saved up from earlier to get some quick Job Levels to start off.

Expanded Classes Route
As Expanded Job Classes do not typically follow the same path with the conventional primary classes due to the lack of the Rebirth option available to them, you should be able to make it through your Expanded Third Class fairly easily but has a tighter time constraint than Primary Classes as you can't prepare your level as easily which makes it a bit harder to take advantage of the ![]() Novice Battle Manual (7803) provided as it has 30 minutes timer.
Novice Battle Manual (7803) provided as it has 30 minutes timer.
| Classes | |||||
|---|---|---|---|---|---|
| TaeKwon Kid | Ninja | Gunslinger | Super Novice | Summoner | Druid |

|

|

|

|

|
|
First Job - Preparation
As soon as you have finished the tutorial, and have changed to your chosen Expanded Job Class.
- You should procure 6x
 Holy Water (523) & 6x
  Blue Gemstone (717).
 - Sign up as an Eden Member and grab the Eden Gear (Level 10 minimum).
- Purchase 1 ~ 3 Meteor Storm Scroll (14512) or Lord of Vermilion Scroll (14514).
- Sort out any consumables you will require such as Ammo / Charms that's relevant to your class & skills.
This part will just give be a quick short list of what your route will be to save time but you can read the Primary Class Route for more of a detailed look
Begginings: First Job to Second Job
We will start off by doing the Cautious Village quest, follow along the steps above here. Return after Step 15.
Once that has been prepared, it's now time to begin and where we will be in a tight time constraint but if you really need some time. Return to a Town so that the ![]() Novice Battle Manual (7803) timer is paused.
Novice Battle Manual (7803) timer is paused.
- Warp to Anthell
- Pop your
 Novice Battle Manual (7803)
 - Cast Meteor Storm Scroll (14512) or Lord of Vermilion Scroll (14514) on Ant Eggs until Level 40+.
- For the following steps below -
You can skip the HAND-IN if you have enough EXP and can choose to hand it later if you prefer. The EXP from ![]() Novice Battle Manual (7803) will let you glide through the levels.
Novice Battle Manual (7803) will let you glide through the levels.
- Take Orc Dungeon Eden Board Quest & Repeat until 70+.
- Hit Level 70+ but have/haven't finished the quest?
- Yes?
- Finish the quest but DO NOT hand in.
- No?
- Carry on with quest & hand in.
- Yes?
- Hit Level 70+ but have/haven't finished the quest?
- Take Glast Heim Wraiths & Evil Druid Kill Quests until 99/70.
- Finished the quest but close to 99/70?
- Yes?
- Hand in Orc Dungeon ONLY
- No?
- Hand in both.
- Yes?
- Finished the quest but close to 99/70?
- Job Change -> Hand in Cautious Village quest & any remaining board quests you have.
Journey: Second Job to Third Job
After Job Changing to 2nd Job, you can simply follow the same route under the Leeching & Manual Levelling Path.
Below are images of mainly sticking with Grace Set, Advanced Eden Gears, and a rented Advanced Class Shadow Gear clearing all necessary dungeons to get to Level 250.
-
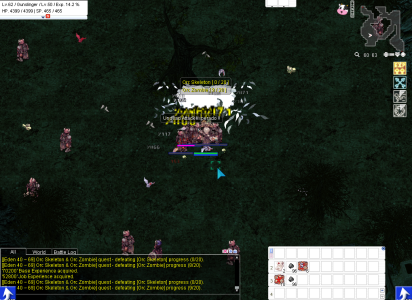 Orc Dungeon
 -
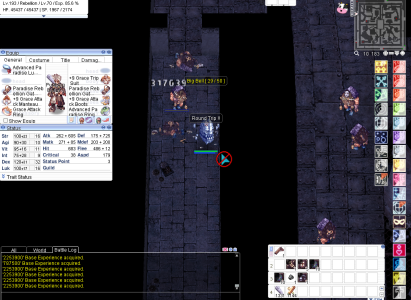
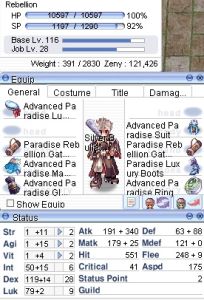 Rebellion - Stat Update
 -
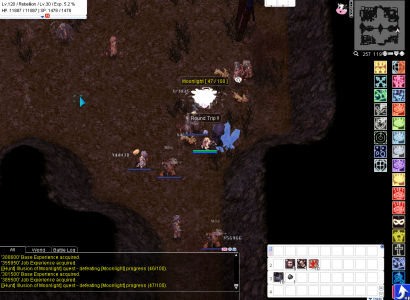 Illusion of Moonlight
 -
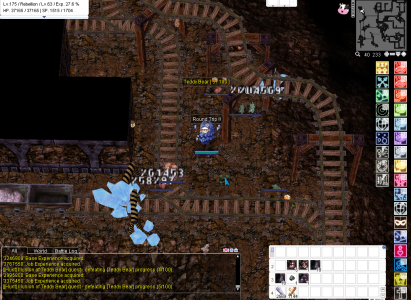 Illusion of Teddy
 -
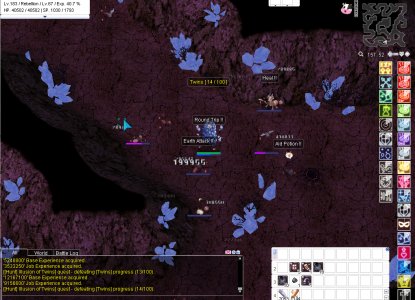 Illusion of Twins
 -
 Nightmare Clocktower
 -
 Night Watch - Stats Update
 -
 Einbech Dungeon 3
 -
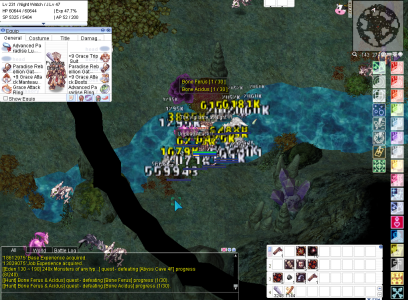 Abyss Lake 4


Leeching & Manual Levelling: Path to 250
The ultimate goal is to reach Level 250, which is the highest level required for you to be able to wear any type of gear.
But this is where I'd consider the path splitting off between Alts & New Characters, as leeching yourself will be the fastest way.
From this point on, you will want to be under the permanent effect of a ![]() [Bound] Battle Manual (12263)which costs 20x
[Bound] Battle Manual (12263)which costs 20x ![]() Eden Coin (25223)but only if you can afford it.
Eden Coin (25223)but only if you can afford it.
Eden Machine Location - (moc_para01 49, 31)
Leeching: 100 - 180
A somewhat general guide for levelling through this method would be to make use of the Daily Hunt NPC and do Iillusion Dungeon bounties.
I would go through the Illusion Dungeons in order until you're around Level 180~.
Your party composition if you're Multi-Clienting should at least have the Carry + Arch Bishop/Cardinal.
The Carry should preferrably be able to one-shot normal mobs up to Abyss Lake 4 for this.
The Cardinal will be providing you the best utility for streamlining the levelling, and keeping your levelling Alts healthy.
Throughout all this, your Cardinal will be the one doing the real carrying through ![]() Teleport &
Teleport & ![]() Convenio.
Convenio.
| Notable Skill | Effect |
|---|---|
| Teleporting around | |
| Unlocking locked dungeons for your Alts | |
| Holy Weapon endow. | |
| Revive dead alts | |
| AoE | |
| AoE | |
| AoE | |
| Cleanse Frozen status | |
| Speeds up casting (important if your Cardinal is not geared) | |
| Essentially a | |
| Improved & better |
Other items might be useful in these dungeons like materials for crafting but I really don't pay attention to them much and throw them all in storage.
Fastest way to Illusion Dungeons (auto completed and only have a level requirement to enter):
- Warper > Illusion Dungeons
Part 1: Illusion of Moonlight
Nothing important to note about Illusion of Moonlight.
| Mob | HP | Size | Race | Element |
|---|---|---|---|---|
| Bitter Munak (3760) | 17,728 | Medium | Undead | Undead 1 |
| Bitter Bongun (3761) | 19,077 | Medium | Undead | Undead 1 |
| Bitter Sohee (3762) | 22,414 | Medium | Demon | Water 2 |
| Resentful Soldier (3763) | 20,843 | Medium | Undead | Undead 1 |
| Angry Nine Tail (3759) | 21,875 | Medium | Brute | Fire 3 |
| Fury Hero (3765) | 24,078 | Medium | Undead | Undead 3 |
| Wizard of Veritas (3764) | 121,847 | Medium | Undead | Shadow 1 |
| Anger Moonlight (3758) | 4,287,803 | Medium | Demon | Fire 3 |
For Illusion of Moonlight, you will need to kill 100 Mobs inside the Dungeon. I would just repeat this quest 3x but you can do it as much as you'd like really but try not to go over the x15 daily limit for ![]() Forgotten Heirloom (50001).
Forgotten Heirloom (50001).
Notable items:
 Illusion Stone (25271)
 Moonlight Refinement Box (100391)
 Illusion Moonlight Box (41081)
 Salty Rice Cake (12197)
 Hearty Rice Cake (12196)
 Carnium (6223)
 Bradium (6224)
Part 2: Illusion of Frozen (Optional)
Be wary of Anger Gazeti as this will be your most dangerous mob due to it being ranged and uses ![]() Cold Bolt and can use
Cold Bolt and can use ![]() Auto Guard.
Auto Guard.
You may be prone to being frozen often as the other mobs use ![]() Frost Nova.
Frost Nova.
This is where an Archbishop/Cardinal alt can help you with using ![]() Lauda Agnus to cleanse the Freeze.
Lauda Agnus to cleanse the Freeze.
| Mob | HP | Size | Race | Element |
|---|---|---|---|---|
| Anger Gazeti (3792) | 57,541 | Medium | Demon | Water 1 |
| Anger Snowier (3793) | 66,540 | Large | Formless | Water 2 |
| Anger Ice Titan (3794) | 72,045 | Large | Formless | Water 3 |
| Solid Icicle (3795) | 1,012 | Small | Formless | Water 2 |
| Awaken Ktullanux (3796) | 13,521,443 | Large | Brute | Water 4 |
Once again, the usual kill 100 Mobs inside the Dungeon. Also the usual repeat as many as you feel like.
Notable items:
- Illusion Stone (25271)
 Frozen Refine Box (9785)
 Illusion Frozen Box (41082)
- Bradium (6224)
Part 3: Illusion of Vampire
Not much to note about this dungeon, it's arguably easier to do than Illusion of Frozen but have a higher HP pool but won't die as much as there isn't a Gazeti around.
| Mob | HP | Size | Race | Element |
|---|---|---|---|---|
| Starving Living Dead (3752) | 290,984 | Medium | Undead | Undead 1 |
| Living Dead (3751) | 253,926 | Medium | Undead | Undead 1 |
| Living Dead (3753) | 267,379 | Medium | Undead | Undead 2 |
| Matt Drainliar (3750) | 242,246 | Small | Brute | Shadow 2 |
| Sweet Nightmare (3754) | 261,334 | Large | Demon | Ghost 2 |
| Black Mushroom (3755) | 150,000 | Small | Plant | Earth 1 |
| Bomi (3756) | 408,510 | Medium | Demi-Human | Undead 2 |
| Dracula of Rage (3757) | 7,509,690 | Large | Demon | Shadow 4 |
Repeat the usual steps of killing 100 Mobs until you feel like it or EXP has slowed down.
Notable items:
- Illusion Stone (25271)
 Vampire Refinement Box (100414)
 Illusion Vampire Box (41083)
- Bradium (6224)
- Carnium (6223)
 Alcohol (970)
 Yggdrasil Berry (607)
Part 4: Illusion of Teddy Bear (optional)
Only annoying thing about this dungeon are mobs using ![]() Hiding.
Hiding.
A good source of Elunium & Oridecon
| Mob | HP | Size | Race | Element |
|---|---|---|---|---|
| Red Teddy Bear (20255) | 328,072 | Small | Formless | Fire 1 |
| Yellow Teddy Bear (20256) | 294,044 | Small | Formless | Wind 1 |
| Green Teddy Bear (20257) | 331,960 | Small | Formless | Poison 1 |
| White Teddy Bear (20258) | 311,841 | Small | Formless | Neutral 1 |
| Blue Teddy Bear (20259) | 280,567 | Small | Formless | Water 1 |
| Pitman Worker (20261) | 335,605 | Large | Demon | Earth 2 |
| Fragment of Soul (20262) | 320,324 | Small | Formless | Neutral 2 |
| Sinister Obsidian (20263) | 348,593 | Small | Formless | Earth 2 |
| Shining Teddy Bear (20260) | 10,724,874 | Large | Formless | Holy 4 |
Follows the usual of doing it until you feel like EXP has slowed or you have capped from x15 daily limit.
Notable items:
- Illusion Stone (25271)
 Teddy Bear Refinement Box (100419)
 Illusion Teddy Bear Box (41085)
 Oridecon (984)
 Elunium (985)
Part 5: Illusion of Twins
Not really many notable drops here from mobs.
Only annoying thing is Diligent Soldier Andre (21387) casting ![]() Decrease Agility , so don't forget to recast
Decrease Agility , so don't forget to recast ![]() Cantocandidus.
Cantocandidus.
| Mob | HP | Size | Race | Element |
|---|---|---|---|---|
| Diligent Andre (21386) | 839,882 | Small | Insect | Earth 3 |
| Diligent Soldier Andre (21387) | 943,547 | Medium | Insect | Earth 4 |
| Diligend Andre Larva (21388) | 819,978 | Small | Insect | Earth 2 |
| Diligent Deniro (21389) | 819,978 | Small | Insect | Earth 3 |
| Diligent Piere (21390) | 825,541 | Small | Insect | Earth 3 |
| Mushy Ant Egg (21391) | 659,810 | Small | Formless | Neutral 2 |
| Intrepid Giearth (21392) | 864,988 | Small | Demon | Dark 3 |
| Intrepid Familiar (21393) | 761,002 | Small | Brute | Dark 2 |
| Diligent Vitata (21394) | 879,511 | Small | Insect | Poison 4 |
| Silent Maya (21395) | 24,512,365 | Large | Insect | Neutral 4 |
Usually the last Illusion Dungeon before transitioning in to regular dungeon farming.
Notable items:
- Illusion Stone (25271)
 Twins Refinement Box (100699)
 Illusion Twins Box (41087)
Part 6: Illusion of Labyrinth (Optional)
Would not really recommend for Multi-Clienting but it's an option you have.
| Mob | HP | Size | Race | Element |
|---|---|---|---|---|
| Acolyte of Chaos (20521) | 1,057,547 | Medium | Demi-Human | Neutral 3 |
| Acolyte of Chaos (20522) | 1,057,444 | Medium | Demi-Human | Neutral 3 |
| Acolyte of Chaos (20523) | 1,057,650 | Medium | Demi-Human | Neutral 3 |
| Acolyte of Chaos (20524) | 1,056,411 | Medium | Demi-Human | Neutral 3 |
| Baphomet Jr. of Chaos (20525) | 1,057,444 | Small | Demon | Shadow 1 |
| Side Winder of Chaos (20526) | 1,051,983 | Medium | Brute | Poison 1 |
| Hunter Fly of Chaos (20527) | 1,045,087 | Small | Formless | Wind 2 |
| Mantis of Chaos (20528) | 1,039,216 | Medium | Insect | Earth 1 |
| Ghostring of Chaos (20529) | 1,033,446 | Medium | Demon | Ghost 2 |
| Killer Mantis of Chaos (20530) | 1,058,167 | Medium | Insect | Earth 1 |
| Poporing of Chaos (20531) | 1,032,638 | Medium | Plant | Poison 3 |
| Stem Worm Chaos (20532) | 1,027,071 | Medium | Plant | Wind 1 |
| Baphomet of Chaos (20520) | 21,278,744 | Large | Demon | Shadow 3 |
Notable items:
- Illusion Stone (25271)
 Labyrinth Refinement Box (100423)
 Illusion Labyrinth Box (41088)
- Yggdrasil Berry (607)
 Yggdrasil Seed (608)
- Oridecon (984)
Leeching: 180 - 250+
Once you've reached 180+, It's now time to start getting better EXP again.
This section will cover two Dungeons; Einbroch Dungeon 3, and Abyss Lake 4.
I will highly recommend unlocking these on your Cardinal, and memo-ing these locations.
Part 1: Einbroch Dungeon 3 (Level 180)
This is the dungeon that will help you boost your alts reall quickly to their 4th Jobs. A few rounds of turns ins from the Daily Hunt NPC & Eden Boards will take you to 200/70.
Ignore Jewels, actual waste of time.
I recommend using ![]() Aspersio on your Carry just to deal with the Poisonous (20592) .
Aspersio on your Carry just to deal with the Poisonous (20592) .
| Mob | HP | Size | Race | Element |
|---|---|---|---|---|
| Poisonous (20592) | 2,407,086 | Medium | Formless | Ghost 4 |
| Toxious (20593) | 2,407,556 | Medium | Formless | Poison 4 |
| Green Mineral (20594) | 2,435,702 | Large | Formless | Neutral 4 |
| Red Mineral (20595) | 2,435,702 | Large | Formless | Neutral 4 |
| White Mineral (20596) | 2,436,177 | Large | Formless | Neutral 4 |
| Purple Mineral (20597) | 2,435,543 | Large | Formless | Neutral 4 |
| Jewel (20600) | 100 | Large | Formless | Neutral 4 |
| White Porcellio (20602) | 2,403,326 | Small | Insect | Earth 4 |
| Abyssman (20603) | 2,428,577 | Large | Brute | Neutral 4 |
| Jewelry Ant (20598) | 2,445,656 | Medium | Insect | Neutral 4 |
| Jewgoliant (20601) | 37,847,096 | Large | Insect | Neutral 4 |
I recommend staying here until 220~ before moving on to the next dungeon.
Notable items:
 Shadowdecon Ore (25728)
 Zelunium Ore (25730)
 Gold (969)
- Oridecon (984)
 Rindium (25810)
 Redium (25809)
 Whidium (25813)
 Purdium (25812)
 Odium (25811)
 Untouched Gemstone (9517)
 Dynite (25814)
Part 2: Abyss Lake 4 (Level 190)
Although you can start here at 190. I'd just recommend doing Einbech Dungeon 3 until 220.
Mobs here do a lot of damage, and a lot of them cast fireballs, so make sure there is no downtime on ![]() Mediale Votum.
Mediale Votum.
I recommend using ![]() Aspersio here as it's very effective.
Aspersio here as it's very effective.
| Mob | HP | Size | Race | Element |
|---|---|---|---|---|
| Purple Ferus (20612) | 3,404,262 | Large | Dragon | Poison 4 |
| Treasure Mimic (20613) | 3,436,608 | Large | Formless | Neutral 4 |
| Black Acidus (20614) | 3,455,504 | Large | Dragon | Dark 4 |
| Silver Acidus (20615) | 3,456,051 | Large | Dragon | Ghost 4 |
| Bone Ferus (20616) | 3,474,420 | Large | Undead | Undead 4 |
| Bone Acidus (20617) | 3,491,700 | Large | Undead | Undead 4 |
| Bone Detale (20618) | 88,466,828 | Large | Undead | Undead 4 |
This is your home until level 250.
Notable items:
 Shadowdecon (25729)
 Zelunium (25731)
 Treasure Box (7444)
 Dragon Treasure (23985)
 Gold Dragon Orb (25762)
 Purple Dragon Orb (25763)
 Green Dragon Orb (25759)
 Silver Dragon Orb (25764)
 Blue Dragon Orb (25760)
 Red Dragon Orb (25761)
 Small Dragon Bone (25766)
 Large Dragon Bone (25765)

Manual Levelling - Prelude
It's always a bit painful to get started to get your first character to 250 and will be a tough grind unless you have access to enough Zeny to somewhat gear yourself up a bit and take on tougher mobs but it's definitely possible.
After reaching 100, I would highly recommend farming or buying these items:
- 15x Elastic Band (7200)from Wootan Shooter (1498) .
- 3x Blue Hair (1034)from Kobold (1135) .
- 15x Old Pick (7318)from Pitman (1616) .
- 20x Eden Coin (25223)from Eden Board Quests.
These items will be required to exchange for Advanced Eden Gears & Advanced Shadow Gears in (moc_para01 106, 92) from the NPC's: Lucy, Louis, and Labraham.
-
 Lucy
Lucy -
 Louis
Louis -
 Labraham


These 3 will offer you Advanced Shadow Gears, Advanced Eden Armour, and Advanced Eden Weapon for your chosen class respectively.
This is almost mandatory to do as a newer player as they will provide a good amount of damage early on for you.
You can find more information on - Beginner's Guide.
These are good until you reach Level 150, then it's best to move towards the Grace Set for your class.
This will require completion of Episode 17.1: Illusion - which can be bought from Temporal Tina for 2m Zeny through a skip ticket.
| Item | Cost | Amount Required |
|---|---|---|
| 20 | ||
| 20 | ||
| 20 | ||
| 20 | ||
| 20 | ||
| 20 | ||
| 20 | ||
| 20 |
Also consider investing in ![]() The One Potion (50035)from the Eden Machine to make levelling manually a bit easier.
The One Potion (50035)from the Eden Machine to make levelling manually a bit easier.
Manual Levelling: 100 - 200
It's perfectly possible to follow the recommended Illusions Dungeons & Normal Dungeons above if your character is able to handle them but if not. It might be wiser to swap to doing Eden Board Quests after Illusion of Moonlight & Illusion of Frozen if you choose to do it.
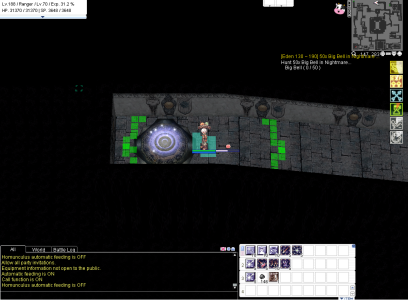
So first off, we'll be starting in Illusion of Moonlight.
As a Ranger, we will be using a combination of Arrow Storm & Sharp Shooting to kill the mobs! Make sure to always keep your 3 staple buffs in Wind Walk, Improved Concentration, True
You should be able to one shot the mobs in here still, so it will be a breeze. If you're still under Novice Battle Manual then just hand in once and move on to Frozen if you're able to one shot those.

Once, EXP slows down it's time to move on to Vampire if you're able to but generally it's a bit harder to move up in Illusion Dungeon tier as their HP scales a bit higher than your Eden Gear is able to manage and might require you to swap over to the Grace Set.
In order to obtain this item, you're best bet might be to farm in Geffenia until you have enough around 15m~ Zeny and should be able to afford it from other players.
But as this wastes time for my ![]() Novice Battle Manual (7803), I will be skipping it as I like to prioritise the massive exp boost from the
Novice Battle Manual (7803), I will be skipping it as I like to prioritise the massive exp boost from the ![]() Novice Battle Manual (7803).
Novice Battle Manual (7803).
However, if you've prepared it beforehand or have spare Zeny or Instance Coins laying around, I would highly recommend switching as soon as possible.
Generally, the exp will feel like slowing down around the 160~170 range and it might make you want to move on to higher Illusion Dungeon tier but cannot due to gearing issue unless you're under the effect of the ![]() Novice Battle Manual (7803)as this will allow you to farm these lower Illusion Dungeons a bit more up to maybe around 180~185 or if you really want, you can go until it expires but I will be moving on after reaching Level 188 for this character.
Novice Battle Manual (7803)as this will allow you to farm these lower Illusion Dungeons a bit more up to maybe around 180~185 or if you really want, you can go until it expires but I will be moving on after reaching Level 188 for this character.

This time I'll be moving on to something I prefer after the EXP from the first 3 Illusion Dungeons slow down and after reaching 170 at least; Eden Board 130 - 190.
I would just take all but we will be focusin on only one kill quest for this until we reach Level 200 and able to Job Change to 4th Job.
The target this time will be Big Bell (2917) in Nightmare Clock Tower which is located in (c_tower3_ , ), the floor after entering Nightmare Clock Tower so prepare ![]() Fly Wing (601) .
Fly Wing (601) .
- Warper -> Nightmare Clock Tower -> Pay NPC 10k -> North Warp
| Mob | Amount |
|---|---|
| Big Bell (2917) | 50 |
We'll be repeating this Kill Quest to 200, so good luck.
Quick note if your character has enough damage to be quick, you can take the route below.
- Illusion of Moonlight until around 150~ to switch to Grace Set.
- Illusion of Vampire for a round or two around 160-170.
- Illusion of Teddy until 200.
Do note to buy a ![]() [Bound] Battle Manual (12263) once yours runs out and use it.
[Bound] Battle Manual (12263) once yours runs out and use it.
-
 Floor Entrance for Big Bell
 -
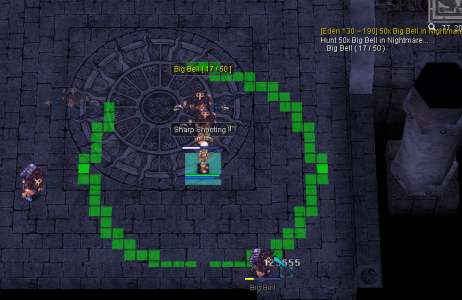 Big Bells
 -
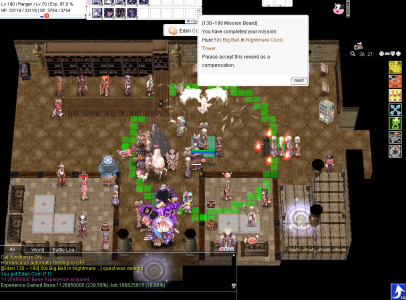 Big Bell Kill Quest Hand In EXP


Manual Levelling: 200 - 250+

Now that you've reached 4th Jobs. I'd recommend now trying to get the Grace Set for yourself if you haven't gotten it yet, but I would wait on upgrading any weapons as you want to aim for Glacier Weapon or Dimensional Weapons.
But most importantly, I would take a look at class specific in Player Guides that's relevant to you to get an idea on what you're building and what skills you'll be using.
Feel free to grind any where you like to earn some initial Job Skill Points to put in to your new main skills as they will propel your damage by a lot than before.
For Windhawk, we will be focusing on Calamity & Gale Storm ability.
Calamity is Unlimit on crack with no cooldown meanwhile Gale Storm is Arrow Storm on crack with no cooldown but you can try to boost your ability a bit by using the consumables from the Eden Machine for things such as The One Potion if you're lazy and a Ranged Transformation Scroll. You may also want to invest in to an Incubus Pet as Gale Storm is very intense mana draining skill.
From now on, you should be able to follow along the levelling order from the Leeching section but this may heavily depend on your class and their tool-kit.
Most classes from my experience are able to do enough damage to be levelling in Einbech 3 & Abyss Lake 4 after switching 4th Jobs as it's a massive power spike but some classes do require a bit of gear to function a bit more from my experience levelling normal job classes to expanded job classes from things such as needing more Crit maybe, or some FCT/VCT reductions.
Windhawk has to be one of the more easier classes to level towards as you have good options with dealing with different types of elements through elemental arrows and such, along with good options early on with Sharp Shooting, Arrow Storm, and even Unlimit. Which is raised even more once you reach Windhawk with the Calamity & Gale Storm combo which has allowed me to clear the mobs in Einbech Dungeon 3 & Abyss Lake 4 with a mixture of Grace & Advanced Eden Set.
-
 The One Potion & Ranged Transformation Scroll
 -
 Abyss Glast Heim
 -
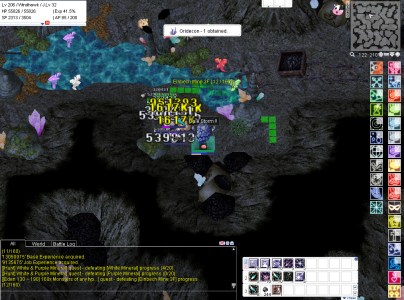 Einbech Dungeon 3
 -
 Abyss Lake 4


If you happen to want to want to upgrade your weapon beforehand, I'd recommend waiting for Level 210 so you're able to equip the Glacier Weapon of your class or Level 230 for your Dim Glacier Weapon instead.
For Windhawk, we will be going with the ![]() Glacier Bow (700052) or
Glacier Bow (700052) or ![]() Dim Glacier Bow [1] (700059) and aiming for the following enchants below.
Dim Glacier Bow [1] (700059) and aiming for the following enchants below.
These weapons are temporary as you will be switching to your next tier of weapons at Level 250 so try look for something cheap, and at least +9 as these items should be fairly abundant.
I'd recommend to just forgo the Glacier/Dim Glacier Weapons and work on the next tier of weapons such as ![]() Dimensions Wind Crossbow [2] (700093).
Dimensions Wind Crossbow [2] (700093).
| Weapon | Enchant Slot 1 | Enchant Slot 2 | Enchant Slot 3 | Enchant Slot 4 |
|---|---|---|---|---|
| +9 |
||||
| +9 |
N/A (Card Slot) |
You can find more information about these equipments here and what might be relevant to your specific class or playstyle - Issgard Equipment .
Conclusion
The leeching method will allow you to make as many alts as you want in just a few hours if done optimally, and you can even start leeching as early as killing Glast Heim mobs.
If you take advantage of the EXP Event and a Novice Battle Manual - You can print out Level 250 alts (Normal Job Classes so far) in about 1~ hour.
The order of levelling is very arbitary and you can choose different paths that's not noted here. You CAN even do all of them if you really want to such as switching between Ein3 & Abyss4.
As a new player, the grind will be a lot slower as it will involve the gearing process and the need to farm Zeny for those.
Maybe we'll cover different classes in the future to manually level but unlikely as it's time consuming.