Cannon Meat's Class Tierlist: Difference between revisions
Jump to navigation
Jump to search
Cannon Meat (talk | contribs) No edit summary |
m Protected "Cannon Meat's Class Tierlist" ([Edit=Allow only autoconfirmed users] (indefinite) [Move=Allow only autoconfirmed users] (indefinite)) |
||
| (24 intermediate revisions by 2 users not shown) | |||
| Line 1: | Line 1: | ||
=Overview= | |||
= | |||
Last Updated: " | *Last Updated: "27.07.2023" by Cannon Meat | ||
*Latest Episode: EP 19 | |||
* <span style="color:red">(Disclaimer: If your favorite class is lower than you think please consider the decisions made, all classes can be played, some are just stronger/more versitale than others. Also this should NOT be seen as which class is the best to start with!)</span> | |||
* Detailed player Guides can be found [[:Category:Class_Guides|here.]] | |||
= Details = | |||
*Tier: Current Meta (S-F) | |||
*Solo Playability: How strong the class is during solo play | |||
*Party Playability: How strong the class is during party play | |||
*Tanking Ability: (Physical): How well the class can tank, reduce, or ignore physical damage | |||
*Tanking Ability: (Magical): How well the class can tank, reduce, or ignore magical damage | |||
*Physical DPS: How strong the physical damage per second is for the class | |||
*Magical DPS: How strong the magical damage per second is for the class | |||
*Utility: How much and how useful the class utility is (Teleport, Full Chemical Protection, Striking, mostly buffs) | |||
*Farming Ability: How well this class can farm in endgame dungeons (Clock Tower Basement, Thana12, etc) (Maybe include overcharge too) | |||
*Movement: How well the class can move around maps (Cart Booster, Body Relocation, Mount) | |||
*Limits: The overall limits of the class (access to damage elements and stuff) | |||
*Ranged / Melee / Magic: Types of damage the class has reasonable access to (basically only consider skills that you would actually build/use) | |||
*Difficulty: The difficulty level to play the class | |||
*Synergy: How many skills does the class have that help others in terms of dmg/survivability. | |||
= Classes = | |||
{| class="mw-collapsible mv-collapsed" style="width: 100%;" data-mce-style="width: 100%;" | |||
= Classes | |||
{| class="mw-collapsible" style="width: 100%;" data-mce-style="width: 100%;" | |||
|- style="background-color:#FFFACD; text-align: Center; font-size: 100%;" data-mce-style="background-color: #FFFACD; text-align: center;" | |- style="background-color:#FFFACD; text-align: Center; font-size: 100%;" data-mce-style="background-color: #FFFACD; text-align: center;" | ||
| [[File:Meister.png|frameless|294x294px|link=Meister]] | | [[File:Meister.png|frameless|294x294px|link=Meister]] | ||
'''[[Meister|MEISTER]]''' <span style="color:#FFFACD;> | '''[[Meister|MEISTER]]''' <span style="color:#FFFACD;> <span> | ||
|- | |- | ||
| Line 27: | Line 37: | ||
|- style="background-color:#FFFACD; text-align: center; font-size: 100%;" data-mce-style="background-color: #FFFACD;" | |- style="background-color:#FFFACD; text-align: center; font-size: 100%;" data-mce-style="background-color: #FFFACD;" | ||
|- | |- | ||
| Tier || | | Tier ||A | ||
|- | |||
|Solo Playability ||A || Very tanky good dps only vurnable to magic but needs gear to really get going | |||
|- | |- | ||
| | |Party Playability ||S || Due to the high Synergy/DPS/Versatility a meister is welcome in any party | ||
|- | |- | ||
| | |Tanking Ability (Physical) ||B || meiser has high defense thanks to mado gear and defensive skills such as skin tmepering(for 100% neutral builds)/neutral barrier = mobile pneuma/and defense machine for additional res and def | ||
|- | |- | ||
|Tanking Ability ( | |Tanking Ability (Magical) ||D || meister is very vurnable to magic the only defensive skill he has is shape shift to change the armor element but still get a lot of dmg | ||
|- | |- | ||
| | |Physical DPS ||A || High Single target DPS but no longer in S tier | ||
|- | |- | ||
| | |Magical DPS ||F || the only reason he even is in f tier is bcs of faw silver sniper which technically is a magic attack :D | ||
|- | |- | ||
| | |Utility ||A || Neutral barrier/rush quake for dps/bots that help with hp and dps | ||
|- | |- | ||
| | |Farming Ability ||A || with a decent Spark blaster build you can kill most content mobs you can farm mvp s/instances | ||
|- | |- | ||
| | |Movement ||A || With accelerate you have perma agi up mount speed that can t be dispelled or reduced and with front/backslide you can move even faster if you have enough acd^^ | ||
|- | |- | ||
| | |Limits ||A || All Elements exept ghost melee and range dmg but no magic | ||
|- | |- | ||
| | |Ranged / Melee / Magic || A / B / F || Triple laser Spark Blaster / mighty smash | ||
|- | |- | ||
| | |Difficulty ||B || meister needs a lot of gear to get going and positioning is key for some situations so he s a bit harder to play but still relatively easy. | ||
|- | |- | ||
| | |Synergy ||S || rush quake to boost dps/defensive and offensive maschine/ ABR's to help with hp/sp / Neutral barrier = mobile pneuma | ||
|} | |} | ||
|} | |} | ||
| Line 58: | Line 70: | ||
|- style="background-color:#FFFACD; text-align: center; font-size: 100%;" data-mce-style="background-color: #daa520; text-align: center;" | |- style="background-color:#FFFACD; text-align: center; font-size: 100%;" data-mce-style="background-color: #daa520; text-align: center;" | ||
| [[File:Biolo.png|frameless|294x294px|link=Biolo]] | | [[File:Biolo.png|frameless|294x294px|link=Biolo]] | ||
'''[[Biolo|BIOLO]]''' <span style="color:#FFFACD;> | '''[[Biolo|BIOLO]]''' <span style="color:#FFFACD;> <span> | ||
|- | |- | ||
| | | | ||
| Line 64: | Line 76: | ||
|- style="width: 100%;" data-mce-style="width: 100%;" | |- style="width: 100%;" data-mce-style="width: 100%;" | ||
|- style="background-color:#FFFACD; text-align: center; font-size: 100%;" data-mce-style="background-color: #daa520;" | |- style="background-color:#FFFACD; text-align: center; font-size: 100%;" data-mce-style="background-color: #daa520;" | ||
|- | |- | ||
|Solo Playability || | == Biolo == | ||
| Tier || A | |||
|- | |||
|Solo Playability || A | |||
|- | |- | ||
|Party Playability || | |Party Playability || B | ||
|- | |- | ||
|Tanking Ability (Physical) || | |Tanking Ability (Physical) || B | ||
|- | |- | ||
|Tanking Ability (Magical) || | |Tanking Ability (Magical) || B | ||
|- | |- | ||
|Physical DPS || | |Physical DPS ||A | ||
|- | |- | ||
|Magical DPS || | |Magical DPS || D | ||
|- | |- | ||
|Utility || | |Utility || A | ||
|- | |- | ||
|Farming Ability || | |Farming Ability || A | ||
|- | |- | ||
|Movement || | |Movement || S | ||
|- | |- | ||
|Limits || | |Limits || A | ||
|- | |- | ||
|Ranged / Melee / Magic || | |Ranged / Melee / Magic || | ||
|- | |- | ||
|Difficulty || | |Difficulty || | ||
|- | |||
|Synergy || C | |||
|} | |} | ||
|} | |} | ||
| Line 94: | Line 110: | ||
|- style="background-color:#FFFACD; text-align: center; font-size: 100%;" data-mce-style="background-color: #daa520; text-align: center;" | |- style="background-color:#FFFACD; text-align: center; font-size: 100%;" data-mce-style="background-color: #daa520; text-align: center;" | ||
| [[File:DragonKnight.png|alt=|frameless|294x294px|link=Dragon Knight]] | | [[File:DragonKnight.png|alt=|frameless|294x294px|link=Dragon Knight]] | ||
'''DRAGON KNIGHT''' <span style="color:#FFFACD;> | '''[[Dragon Knight|DRAGON KNIGHT]]''' <span style="color:#FFFACD;> <span> | ||
|- | |- | ||
| | | | ||
| Line 100: | Line 116: | ||
|- style="width: 100%;" data-mce-style="width: 100%;" | |- style="width: 100%;" data-mce-style="width: 100%;" | ||
|- style="background-color:#FFFACD; text-align: center; font-size: 100%;" data-mce-style="background-color: #daa520;" | |- style="background-color:#FFFACD; text-align: center; font-size: 100%;" data-mce-style="background-color: #daa520;" | ||
|- | |- | ||
|Solo Playability || | == Dragon Knight == | ||
| Tier || S | |||
|- | |||
|Solo Playability || S | |||
|- | |||
|Party Playability || S | |||
|- | |- | ||
| | |Tanking Ability (Physical) || A | ||
|- | |- | ||
|Tanking Ability ( | |Tanking Ability (Magical) || A | ||
|- | |- | ||
| | |Physical DPS || S | ||
|- | |- | ||
| | |Magical DPS || D | ||
|- | |- | ||
| | |Utility || S | ||
|- | |- | ||
| | |Farming Ability || S | ||
|- | |- | ||
| | |Movement || C | ||
|- | |- | ||
| | |Limits || A | ||
|- | |- | ||
| | |Ranged / Melee / Magic || S / A / D | ||
|- | |- | ||
| | |Difficulty || S | ||
|- | |- | ||
| | |Synergy || F | ||
|} | |} | ||
|} | |} | ||
| Line 130: | Line 150: | ||
|- style="background-color:#FFFACD; text-align: center; font-size: 100%;" data-mce-style="background-color: #daa520; text-align: center;" | |- style="background-color:#FFFACD; text-align: center; font-size: 100%;" data-mce-style="background-color: #daa520; text-align: center;" | ||
| [[File:ShadowCross.png|frameless|294x294px|link=Shadow Cross]] | | [[File:ShadowCross.png|frameless|294x294px|link=Shadow Cross]] | ||
'''[[Shadow Cross|SHADOW CROSS]]''' <span style="color:#FFFACD;> | '''[[Shadow Cross|SHADOW CROSS]]''' <span style="color:#FFFACD;> <span> | ||
|- | |- | ||
| | | | ||
| Line 136: | Line 156: | ||
|- style="width: 100%;" data-mce-style="width: 100%;" | |- style="width: 100%;" data-mce-style="width: 100%;" | ||
|- style="background-color:#FFFACD; text-align: center; font-size: 100%;" data-mce-style="background-color: #daa520;" | |- style="background-color:#FFFACD; text-align: center; font-size: 100%;" data-mce-style="background-color: #daa520;" | ||
|- | |||
== Shadow Cross == | |||
| Tier || | | Tier || | ||
|- | |- | ||
| Line 161: | Line 183: | ||
|- | |- | ||
|Difficulty || | |Difficulty || | ||
|- | |||
|Synergy || | |||
|} | |} | ||
|} | |} | ||
| Line 166: | Line 190: | ||
|- style="background-color:#FFFACD; text-align: center; font-size: 100%;" data-mce-style="background-color: #daa520; text-align: center;" | |- style="background-color:#FFFACD; text-align: center; font-size: 100%;" data-mce-style="background-color: #daa520; text-align: center;" | ||
| [[File:Inquisitor.png|frameless|293x293px|link=Inquisitor]] | | [[File:Inquisitor.png|frameless|293x293px|link=Inquisitor]] | ||
'''[[Inquisitor|INQUISITOR]]''' <span style="color:#FFFACD;> | '''[[Inquisitor|INQUISITOR]]''' <span style="color:#FFFACD;> <span> | ||
|- | |- | ||
| | | | ||
| Line 172: | Line 196: | ||
|- style="width: 100%;" data-mce-style="width: 100%;" | |- style="width: 100%;" data-mce-style="width: 100%;" | ||
|- style="background-color:#FFFACD; text-align: center; font-size: 100%;" data-mce-style="background-color: #daa520;" | |- style="background-color:#FFFACD; text-align: center; font-size: 100%;" data-mce-style="background-color: #daa520;" | ||
|- | |||
== Inquisitor == | |||
| Tier || | | Tier || | ||
|- | |- | ||
| Line 197: | Line 223: | ||
|- | |- | ||
|Difficulty || | |Difficulty || | ||
|- | |||
|Synergy || | |||
|} | |} | ||
|} | |} | ||
| Line 202: | Line 230: | ||
|- style="background-color:#FFFACD; text-align: center; font-size: 100%;" data-mce-style="background-color: #daa520; text-align: center;" | |- style="background-color:#FFFACD; text-align: center; font-size: 100%;" data-mce-style="background-color: #daa520; text-align: center;" | ||
| [[File:Spirit_Handler.png|frameless|243x243px|link=Spirit Handler]] | | [[File:Spirit_Handler.png|frameless|243x243px|link=Spirit Handler]] | ||
'''[[Spirit Handler|SPIRIT HANDLER]]''' <span style="color:#FFFACD;> | '''[[Spirit Handler|SPIRIT HANDLER]]''' <span style="color:#FFFACD;> <span> | ||
|- | |- | ||
| | | | ||
| Line 208: | Line 236: | ||
|- style="width: 100%;" data-mce-style="width: 100%;" | |- style="width: 100%;" data-mce-style="width: 100%;" | ||
|- style="background-color:#FFFACD; text-align: center; font-size: 100%;" data-mce-style="background-color: #daa520;" | |- style="background-color:#FFFACD; text-align: center; font-size: 100%;" data-mce-style="background-color: #daa520;" | ||
|- | |||
== Spirit Handler == | |||
| Tier || | | Tier || | ||
|- | |- | ||
| Line 233: | Line 263: | ||
|- | |- | ||
|Difficulty || | |Difficulty || | ||
|- | |||
|Synergy || | |||
|} | |} | ||
|} | |} | ||
| Line 238: | Line 270: | ||
|- style="background-color:#FFFACD; text-align: center; font-size: 100%;" data-mce-style="background-color: #daa520; text-align: center;" | |- style="background-color:#FFFACD; text-align: center; font-size: 100%;" data-mce-style="background-color: #daa520; text-align: center;" | ||
| [[File:ImperialGuard.png|frameless|293x293px|link=Imperial Guard]] | | [[File:ImperialGuard.png|frameless|293x293px|link=Imperial Guard]] | ||
[[Imperial Guard|'''IMPERIAL GUARD''']] <span style="color:#FFFACD;> | [[Imperial Guard|'''IMPERIAL GUARD''']] <span style="color:#FFFACD;> <span> | ||
|- | |- | ||
| | | | ||
| Line 244: | Line 276: | ||
|- style="width: 100%;" data-mce-style="width: 100%;" | |- style="width: 100%;" data-mce-style="width: 100%;" | ||
|- style="background-color:#FFFACD; text-align: center; font-size: 100%;" data-mce-style="background-color: #daa520;" | |- style="background-color:#FFFACD; text-align: center; font-size: 100%;" data-mce-style="background-color: #daa520;" | ||
|- | |||
== Imperial Guard == | |||
| Tier || | | Tier || | ||
|- | |- | ||
| Line 269: | Line 303: | ||
|- | |- | ||
|Difficulty || | |Difficulty || | ||
|- | |||
|Synergy || | |||
|} | |} | ||
|} | |} | ||
| Line 274: | Line 310: | ||
|- style="background-color:#FFFACD; text-align: center; font-size: 100%;" data-mce-style="background-color: #daa520; text-align: center;" | |- style="background-color:#FFFACD; text-align: center; font-size: 100%;" data-mce-style="background-color: #daa520; text-align: center;" | ||
| [[File:WindHawk.png|frameless|293x293px|link=Wind Hawk]] | | [[File:WindHawk.png|frameless|293x293px|link=Wind Hawk]] | ||
'''[[Wind Hawk|WIND HAWK]]''' <span style="color:#FFFACD;> | '''[[Wind Hawk|WIND HAWK]]''' <span style="color:#FFFACD;> <span> | ||
|- | |- | ||
| | | | ||
| Line 280: | Line 316: | ||
|- style="width: 100%;" data-mce-style="width: 100%;" | |- style="width: 100%;" data-mce-style="width: 100%;" | ||
|- style="background-color:#FFFACD; text-align: center; font-size: 100%;" data-mce-style="background-color: #daa520;" | |- style="background-color:#FFFACD; text-align: center; font-size: 100%;" data-mce-style="background-color: #daa520;" | ||
|- | |||
== Wind Hawk == | |||
| Tier || | | Tier || | ||
|- | |- | ||
| Line 305: | Line 343: | ||
|- | |- | ||
|Difficulty || | |Difficulty || | ||
|- | |||
|Synergy || | |||
|} | |} | ||
|} | |} | ||
| Line 310: | Line 350: | ||
|- style="background-color:#FFFACD; text-align: center; font-size: 100%;" data-mce-style="background-color: #daa520; text-align: center;" | |- style="background-color:#FFFACD; text-align: center; font-size: 100%;" data-mce-style="background-color: #daa520; text-align: center;" | ||
| [[File:Sky_Emperor.png|frameless|293x293px|link=Sky Emperor]] | | [[File:Sky_Emperor.png|frameless|293x293px|link=Sky Emperor]] | ||
'''[[Sky Emperor|SKY EMPEROR]]''' <span style="color:#FFFACD;> | '''[[Sky Emperor|SKY EMPEROR]]''' <span style="color:#FFFACD;> <span> | ||
|- | |- | ||
| | | | ||
| Line 316: | Line 356: | ||
|- style="width: 100%;" data-mce-style="width: 100%;" | |- style="width: 100%;" data-mce-style="width: 100%;" | ||
|- style="background-color:#FFFACD; text-align: center; font-size: 100%;" data-mce-style="background-color: #daa520;" | |- style="background-color:#FFFACD; text-align: center; font-size: 100%;" data-mce-style="background-color: #daa520;" | ||
|- | |||
== Sky Emperor == | |||
| Tier || | | Tier || | ||
|- | |- | ||
| Line 341: | Line 383: | ||
|- | |- | ||
|Difficulty || | |Difficulty || | ||
|- | |||
|Synergy || | |||
|} | |} | ||
|} | |} | ||
| Line 346: | Line 390: | ||
|- style="background-color:#FFFACD; text-align: center; font-size: 100%;" data-mce-style="background-color: #daa520; text-align: center;" | |- style="background-color:#FFFACD; text-align: center; font-size: 100%;" data-mce-style="background-color: #daa520; text-align: center;" | ||
| [[File:Nightwatch.png|frameless|294x294px|link=Night Watch]] | | [[File:Nightwatch.png|frameless|294x294px|link=Night Watch]] | ||
'''[[Night Watch|NIGHT WATCH]]''' <span style="color:#FFFACD;> | '''[[Night Watch|NIGHT WATCH]]''' <span style="color:#FFFACD;> <span> | ||
|- | |- | ||
| | | | ||
| Line 352: | Line 396: | ||
|- style="width: 100%;" data-mce-style="width: 100%;" | |- style="width: 100%;" data-mce-style="width: 100%;" | ||
|- style="background-color:#FFFACD; text-align: center; font-size: 100%;" data-mce-style="background-color: #daa520;" | |- style="background-color:#FFFACD; text-align: center; font-size: 100%;" data-mce-style="background-color: #daa520;" | ||
|- | |||
== Night Watch == | |||
| Tier || | | Tier || | ||
|- | |- | ||
| Line 377: | Line 423: | ||
|- | |- | ||
|Difficulty || | |Difficulty || | ||
|- | |||
|Synergy || | |||
|} | |} | ||
|} | |} | ||
| Line 382: | Line 430: | ||
|- style="background-color:#FFFACD; text-align: center; font-size: 100%;" data-mce-style="background-color: #daa520; text-align: center;" | |- style="background-color:#FFFACD; text-align: center; font-size: 100%;" data-mce-style="background-color: #daa520; text-align: center;" | ||
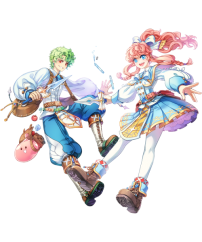
| [[File:Troubadussen.png|frameless|293x293px|link=Troubadour]] | | [[File:Troubadussen.png|frameless|293x293px|link=Troubadour]] | ||
'''[[Troubadour|TROUBADOUR]] & [[Trouvere|TROUVERE]]''' <span style="color:#FFFACD;> | '''[[Troubadour|TROUBADOUR]] & [[Trouvere|TROUVERE]]''' <span style="color:#FFFACD;> <span> | ||
|- | |- | ||
| | | | ||
| Line 388: | Line 436: | ||
|- style="width: 100%;" data-mce-style="width: 100%;" | |- style="width: 100%;" data-mce-style="width: 100%;" | ||
|- style="background-color:#FFFACD; text-align: center; font-size: 100%;" data-mce-style="background-color: #daa520;" | |- style="background-color:#FFFACD; text-align: center; font-size: 100%;" data-mce-style="background-color: #daa520;" | ||
|- | |||
== Troubadure & Trouvere == | |||
| Tier || | | Tier || | ||
|- | |- | ||
| Line 413: | Line 463: | ||
|- | |- | ||
|Difficulty || | |Difficulty || | ||
|- | |||
|Synergy || | |||
|} | |} | ||
|} | |} | ||
| Line 418: | Line 470: | ||
|- style="background-color:#FFFACD; text-align: center; font-size: 100%;" data-mce-style="background-color: #daa520; text-align: center;" | |- style="background-color:#FFFACD; text-align: center; font-size: 100%;" data-mce-style="background-color: #daa520; text-align: center;" | ||
| [[File:ArchMage.png|frameless|294x294px|link=Arch Mage]] | | [[File:ArchMage.png|frameless|294x294px|link=Arch Mage]] | ||
[[Arch Mage|'''ARCH MAGE''']] <span style="color:#FFFACD;> | [[Arch Mage|'''ARCH MAGE''']] <span style="color:#FFFACD;> <span> | ||
|- | |- | ||
| | | | ||
| Line 424: | Line 476: | ||
|- style="width: 100%;" data-mce-style="width: 100%;" | |- style="width: 100%;" data-mce-style="width: 100%;" | ||
|- style="background-color:#FFFACD; text-align: center; font-size: 100%;" data-mce-style="background-color: #daa520;" | |- style="background-color:#FFFACD; text-align: center; font-size: 100%;" data-mce-style="background-color: #daa520;" | ||
|- | |||
== Arch Mage == | |||
| Tier || | | Tier || | ||
|- | |- | ||
| Line 449: | Line 503: | ||
|- | |- | ||
|Difficulty || | |Difficulty || | ||
|- | |||
|Synergy || | |||
|} | |} | ||
|} | |} | ||
| Line 454: | Line 510: | ||
|- style="background-color:#FFFACD; text-align: center; font-size: 100%;" data-mce-style="background-color: #daa520; text-align: center;" | |- style="background-color:#FFFACD; text-align: center; font-size: 100%;" data-mce-style="background-color: #daa520; text-align: center;" | ||
| [[File:ElementalMaster.png|frameless|293x293px|link=Elemental Master]] | | [[File:ElementalMaster.png|frameless|293x293px|link=Elemental Master]] | ||
'''[[Elemental Master|ELEMENTAL MASTER]]''' <span style="color:#FFFACD;> | '''[[Elemental Master|ELEMENTAL MASTER]]''' <span style="color:#FFFACD;> <span> | ||
|- | |- | ||
| | | | ||
| Line 460: | Line 516: | ||
|- style="width: 100%;" data-mce-style="width: 100%;" | |- style="width: 100%;" data-mce-style="width: 100%;" | ||
|- style="background-color:#FFFACD; text-align: center; font-size: 100%;" data-mce-style="background-color: #daa520;" | |- style="background-color:#FFFACD; text-align: center; font-size: 100%;" data-mce-style="background-color: #daa520;" | ||
|- | |||
== Elemental Master == | |||
| Tier || | | Tier || | ||
|- | |- | ||
| Line 485: | Line 543: | ||
|- | |- | ||
|Difficulty || | |Difficulty || | ||
|- | |||
|Synergy || | |||
|} | |} | ||
|} | |} | ||
| Line 490: | Line 550: | ||
|- style="background-color:#FFFACD; text-align: center; font-size: 100%;" data-mce-style="background-color: #daa520; text-align: center;" | |- style="background-color:#FFFACD; text-align: center; font-size: 100%;" data-mce-style="background-color: #daa520; text-align: center;" | ||
| [[File:Cardinal.png|frameless|295x295px|link=Cardinal]] | | [[File:Cardinal.png|frameless|295x295px|link=Cardinal]] | ||
'''[[Cardinal|CARDINAL]]''' <span style="color:#FFFACD;> | '''[[Cardinal|CARDINAL]]''' <span style="color:#FFFACD;> <span> | ||
|- | |- | ||
| | | | ||
| Line 496: | Line 556: | ||
|- style="width: 100%;" data-mce-style="width: 100%;" | |- style="width: 100%;" data-mce-style="width: 100%;" | ||
|- style="background-color:#FFFACD; text-align: center; font-size: 100%;" data-mce-style="background-color: #daa520;" | |- style="background-color:#FFFACD; text-align: center; font-size: 100%;" data-mce-style="background-color: #daa520;" | ||
|- | |||
== Cardinal == | |||
| Tier || | | Tier || | ||
|- | |- | ||
| Line 521: | Line 583: | ||
|- | |- | ||
|Difficulty || | |Difficulty || | ||
|- | |||
|Synergy || | |||
|} | |} | ||
|} | |} | ||
| Line 526: | Line 590: | ||
|- style="background-color:#FFFACD; text-align: center; font-size: 100%;" data-mce-style="background-color: #daa520; text-align: center;" | |- style="background-color:#FFFACD; text-align: center; font-size: 100%;" data-mce-style="background-color: #daa520; text-align: center;" | ||
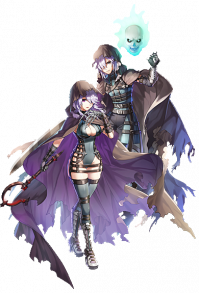
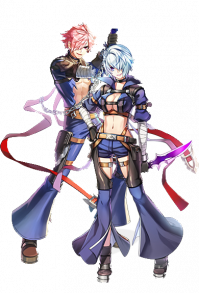
| [[File:Schinken.png|frameless|295x295px|link=SHIRANUI]] | | [[File:Schinken.png|frameless|295x295px|link=SHIRANUI]] | ||
'''[[Shinkiro|SHINKIRO & SHIRANUI]]''' <span style="color:#FFFACD;> | '''[[Shinkiro|SHINKIRO & SHIRANUI]]''' <span style="color:#FFFACD;> <span> | ||
|- | |- | ||
| | | | ||
| Line 532: | Line 596: | ||
|- style="width: 100%;" data-mce-style="width: 100%;" | |- style="width: 100%;" data-mce-style="width: 100%;" | ||
|- style="background-color:#FFFACD; text-align: center; font-size: 100%;" data-mce-style="background-color: #daa520;" | |- style="background-color:#FFFACD; text-align: center; font-size: 100%;" data-mce-style="background-color: #daa520;" | ||
|- | |- | ||
|Solo Playability || | == Shinkiro & Shiranui == | ||
| Tier ||B | |||
|- | |||
|Solo Playability ||S || especially as your first character or your farmer since it requires almost no gear to be able to farm in many places | |||
|- | |||
|Party Playability ||C || You provide mediocre damage and have no party utility | |||
|- | |- | ||
| | |Tanking Ability (Physical) ||B || Cicada and Mirror Image are nice utility | ||
|- | |- | ||
|Tanking Ability ( | |Tanking Ability (Magical) ||F || Extremely vulnerable to magic | ||
|- | |- | ||
| | |Physical DPS || B || | ||
|- | |- | ||
| | |Magical DPS || C || | ||
|- | |- | ||
| | |Utility ||D || You have distorted crescent which you can use to buff | ||
|- | |- | ||
| | |Farming Ability ||S || "Huuma Shuriken - Grasp" is a big ground target aoe that stays on the ground and does damage over time. Every single one of the other core skills is also aoe. You can pick any element through kunai. Most skills are multi-hit and trigger leeching effects easily. | ||
|- | |- | ||
| | |Movement || F || no movement bonus | ||
|- | |- | ||
| | |Limits || A || Kunai skills have all elements available but the other skills don t have access to ghost and only limited magic | ||
|- | |- | ||
| | |Ranged / Melee / Magic || B / C / C | ||
|- | |- | ||
| | |Difficulty || B || very easy to get into | ||
|- | |- | ||
| | |Synergy || D || with disorted crescent you can increase/decrease? :D your partys atk/matk | ||
|} | |} | ||
|} | |} | ||
| Line 562: | Line 630: | ||
|- style="background-color:#FFFACD; text-align: center; font-size: 100%;" data-mce-style="background-color: #daa520; text-align: center;" | |- style="background-color:#FFFACD; text-align: center; font-size: 100%;" data-mce-style="background-color: #daa520; text-align: center;" | ||
| [[File:Hyper_Novice.png|center|frameless|243x243px|link=Hyper Novice]] | | [[File:Hyper_Novice.png|center|frameless|243x243px|link=Hyper Novice]] | ||
'''[[Hyper Novice|HYPER NOVICE]]''' <span style="color:#FFFACD;> | '''[[Hyper Novice|HYPER NOVICE]]''' <span style="color:#FFFACD;> <span> | ||
|- | |- | ||
| | | | ||
| Line 568: | Line 636: | ||
|- style="width: 100%;" data-mce-style="width: 100%;" | |- style="width: 100%;" data-mce-style="width: 100%;" | ||
|- style="background-color:#FFFACD; text-align: center; font-size: 100%;" data-mce-style="background-color: #daa520;" | |- style="background-color:#FFFACD; text-align: center; font-size: 100%;" data-mce-style="background-color: #daa520;" | ||
|- | |||
== Hyper Novice == | |||
| Tier || | | Tier || | ||
|- | |- | ||
| Line 593: | Line 664: | ||
|- | |- | ||
|Difficulty || | |Difficulty || | ||
|- | |||
|Synergy || | |||
|} | |} | ||
|} | |} | ||
| Line 598: | Line 671: | ||
|- style="background-color:#FFFACD; text-align: center; font-size: 100%;" data-mce-style="background-color: #daa520; text-align: center;" | |- style="background-color:#FFFACD; text-align: center; font-size: 100%;" data-mce-style="background-color: #daa520; text-align: center;" | ||
| [[File:AbyssChaser.png|frameless|293x293px|link=Shadow Chaser]] | | [[File:AbyssChaser.png|frameless|293x293px|link=Shadow Chaser]] | ||
'''[[Abyss Chaser|ABYSS CHASER]]''' <span style="color:#FFFACD;> | '''[[Abyss Chaser|ABYSS CHASER]]''' <span style="color:#FFFACD;> <span> | ||
|- | |- | ||
| | | | ||
| Line 604: | Line 677: | ||
|- style="width: 100%;" data-mce-style="width: 100%;" | |- style="width: 100%;" data-mce-style="width: 100%;" | ||
|- style="background-color:#FFFACD; text-align: center; font-size: 100%;" data-mce-style="background-color: #daa520;" | |- style="background-color:#FFFACD; text-align: center; font-size: 100%;" data-mce-style="background-color: #daa520;" | ||
|- | |||
== Abyss Chaser == | |||
| Tier || | | Tier || | ||
|- | |- | ||
| Line 629: | Line 704: | ||
|- | |- | ||
|Difficulty || | |Difficulty || | ||
|- | |||
|Synergy || | |||
|} | |} | ||
|} | |} | ||
| Line 634: | Line 711: | ||
|- style="background-color:#FFFACD; text-align: center; font-size: 100%;" data-mce-style="background-color: #daa520; text-align: center;" | |- style="background-color:#FFFACD; text-align: center; font-size: 100%;" data-mce-style="background-color: #daa520; text-align: center;" | ||
| [[File:SoulAscetic.png|frameless|293x293px|link=Soul Ascetic]] | | [[File:SoulAscetic.png|frameless|293x293px|link=Soul Ascetic]] | ||
'''[[Soul Ascetic|SOUL ASCETIC]]''' <span style="color:#FFFACD;> | '''[[Soul Ascetic|SOUL ASCETIC]]''' <span style="color:#FFFACD;> <span> | ||
|- | |- | ||
| | | | ||
| Line 640: | Line 717: | ||
|- style="width: 100%;" data-mce-style="width: 100%;" | |- style="width: 100%;" data-mce-style="width: 100%;" | ||
|- style="background-color:#FFFACD; text-align: center; font-size: 100%;" data-mce-style="background-color: #daa520;" | |- style="background-color:#FFFACD; text-align: center; font-size: 100%;" data-mce-style="background-color: #daa520;" | ||
|- | |||
== Soul Ascetic == | |||
| Tier || | | Tier || | ||
|- | |- | ||
| Line 665: | Line 744: | ||
|- | |- | ||
|Difficulty || | |Difficulty || | ||
|- | |||
|Synergy || | |||
|} | |} | ||
|} | |} | ||
=Changelog= | =Changelog= | ||
* Changed DPS into Physical & Magical DPS | * added Shinkiro/Shiranui | ||
* added synergy and Meister descriptions | |||
* 4.1.2023 Completly changed the List | |||
* 4.1.2023 Changed DPS into Physical & Magical DPS | |||
* 11,11,2022 upgraded Arch Mage to B Tier | DPS from 6->8 | Vers 5--->6 | * 11,11,2022 upgraded Arch Mage to B Tier | DPS from 6->8 | Vers 5--->6 | ||
* 2,10,22: added scala to the classes | * 2,10,22: added scala to the classes | ||
Latest revision as of 10:21, 24 September 2024
Overview
- Last Updated: "27.07.2023" by Cannon Meat
- Latest Episode: EP 19
- (Disclaimer: If your favorite class is lower than you think please consider the decisions made, all classes can be played, some are just stronger/more versitale than others. Also this should NOT be seen as which class is the best to start with!)
- Detailed player Guides can be found here.
Details
- Tier: Current Meta (S-F)
- Solo Playability: How strong the class is during solo play
- Party Playability: How strong the class is during party play
- Tanking Ability: (Physical): How well the class can tank, reduce, or ignore physical damage
- Tanking Ability: (Magical): How well the class can tank, reduce, or ignore magical damage
- Physical DPS: How strong the physical damage per second is for the class
- Magical DPS: How strong the magical damage per second is for the class
- Utility: How much and how useful the class utility is (Teleport, Full Chemical Protection, Striking, mostly buffs)
- Farming Ability: How well this class can farm in endgame dungeons (Clock Tower Basement, Thana12, etc) (Maybe include overcharge too)
- Movement: How well the class can move around maps (Cart Booster, Body Relocation, Mount)
- Limits: The overall limits of the class (access to damage elements and stuff)
- Ranged / Melee / Magic: Types of damage the class has reasonable access to (basically only consider skills that you would actually build/use)
- Difficulty: The difficulty level to play the class
- Synergy: How many skills does the class have that help others in terms of dmg/survivability.
Classes

| |||||||||||||||||||||||||||||||||||||||||
|

| ||||||||||||||||||||||||||||
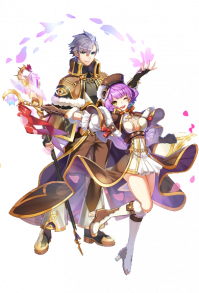
Biolo
|

| ||||||||||||||||||||||||||||
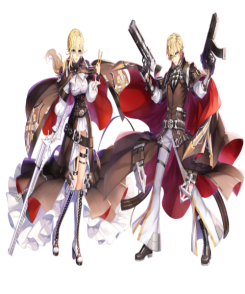
Dragon Knight
|
| ||||||||||||||||||||||||||||
Shadow Cross
|

| ||||||||||||||||||||||||||||
Inquisitor
|
| ||||||||||||||||||||||||||||
Spirit Handler
|

| ||||||||||||||||||||||||||||
Imperial Guard
|
| ||||||||||||||||||||||||||||
Wind Hawk
|
| ||||||||||||||||||||||||||||
Sky Emperor
|
| ||||||||||||||||||||||||||||
Night Watch
|

| ||||||||||||||||||||||||||||
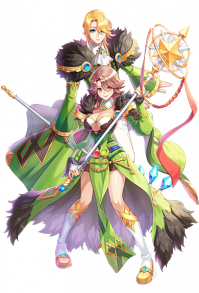
Troubadure & Trouvere
|
| ||||||||||||||||||||||||||||
Arch Mage
|
| ||||||||||||||||||||||||||||
Elemental Master
|

| ||||||||||||||||||||||||||||
Cardinal
|
| ||||||||||||||||||||||||||||||||||||||||
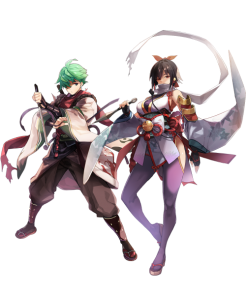
Shinkiro & Shiranui
|
 | ||||||||||||||||||||||||||||
Hyper Novice
|
| ||||||||||||||||||||||||||||
Abyss Chaser
|

| ||||||||||||||||||||||||||||
Soul Ascetic
|
Changelog
- added Shinkiro/Shiranui
- added synergy and Meister descriptions
- 4.1.2023 Completly changed the List
- 4.1.2023 Changed DPS into Physical & Magical DPS
- 11,11,2022 upgraded Arch Mage to B Tier | DPS from 6->8 | Vers 5--->6
- 2,10,22: added scala to the classes