|
|
| (35 intermediate revisions by the same user not shown) |
| Line 1: |
Line 1: |
| | [[Category:Instances]] |
| ===<span style="color: #B0C4DE;">Requirements and Rewards</span> === | | ===<span style="color: #B0C4DE;">Requirements and Rewards</span> === |
|
| |
|
| * Base Level 130+ | | * Base Level 130+ |
| * Go in Verus and find Charleston {{#navi:verus04|75|114}}. She needs replacement parts from the factory. | | * 1 day cooldown |
| | * Go in Verus and find Charleston {{#navi:verus04|75|114}}. She needs replacement parts from the factory. <br> |
| | [[File:CharlestonEnt.jpg]] |
| * After gaining her permission, you will be able to use the Machine next to her. | | * After gaining her permission, you will be able to use the Machine next to her. |
| | [[File:EntMA.jpg]] |
| * The party leader has to create the instance and the other members can join afterwards. | | * The party leader has to create the instance and the other members can join afterwards. |
|
| |
|
| Line 20: |
Line 24: |
|
| |
|
| * Inside the lab, go near Dr. Vee to trigger the next scene (you must be really close to him). Accept to help him. | | * Inside the lab, go near Dr. Vee to trigger the next scene (you must be really close to him). Accept to help him. |
| * The party leader has to speak with Charleston 1 {{#navi:2@mcd|121|217}} and she'll ask you to kill 3 Locksteps. | | * The party leader has to speak with Charleston 1 {{#navi:2@mcd|121|217}} and she'll ask you to kill 3 Rock Steps. |
| * You can see their locations on the minimap. | | * You can see their locations on the minimap. |
| * Return to Charleston 1 after killing 3 Locksteps. She tells you there's a problem with the generators, you have to investigate them. | | * Return to Charleston 1 after killing 3 Rock Steps. She tells you there's a problem with the generators, you have to investigate them. |
| * You only have to go near the generators, you don't have to kill the Kickstep. | | * You only have to go near the generators, you don't have to kill the Kick Step. |
|
| |
|
| * {{#navi:2@mcd|175|195}} | | * {{#navi:2@mcd|175|195}} |
| Line 39: |
Line 43: |
| * Walk out of the lab and go all the way south below the middle /navi {{#navi:2@mcd|130|127}}. Charleston 1 and 2 will be waiting for you. | | * Walk out of the lab and go all the way south below the middle /navi {{#navi:2@mcd|130|127}}. Charleston 1 and 2 will be waiting for you. |
| * Move near Charleston 2 to trigger the next dialogues. | | * Move near Charleston 2 to trigger the next dialogues. |
| * Charleston 1 wants you to gather 1 Explosive Powder . These drop from the Step found in the instance. | | * Charleston 1 wants you to gather 1 {{#item:6213|Explosive Powder}} . These drop from the Step found in the instance. |
| * Return to her and she will warp you inside the Core. | | * Return to her and she will warp you inside the Core. |
| * Walk near the NPCs to trigger the next scene. You have to defeat Charleston 3. | | * Walk near the NPCs to trigger the next scene. You have to defeat Charleston 3. |
| Line 47: |
Line 51: |
| * Once the scene between 1 and 2 is over, move downward and go back to Dr. Vee in the lab. A dialogue will trigger once you get close. | | * Once the scene between 1 and 2 is over, move downward and go back to Dr. Vee in the lab. A dialogue will trigger once you get close. |
| * Talk to Shalosh {{#navi:2@mcd|77|167}} and select I want to go back. | | * Talk to Shalosh {{#navi:2@mcd|77|167}} and select I want to go back. |
| * You will be rewarded with 3 Charleston Component. | | * You will be rewarded with 3 {{#item:6752|Charleston Component}}. |
|
| |
|
| ===<span style="color: #B0C4DE;">Monsters</span>=== | | ===<span style="color: #B0C4DE;">Monsters</span>=== |
|
| |
|
| {| class="wikitable mw-collapsible" style="width: 100%;text-align: center;" data-mce-style="width: 100%;" | | {| class="wikitable mw-collapsible mw-collapsed" style="width: 60%;text-align: center;" data-mce-style="width: 100%;" |
| |- style="background-color:#B0C4DE;text-align:center;" data-mce-style="background-color: #aef;" | | |- style="background-color:#B0C4DE;text-align:center;" data-mce-style="background-color: #aef;" |
| | style="width: 15%" data-mce-style="width: 15%;"|Image | | | style="width: 20%"|Monster |
| | style="width: 15%" data-mce-style="width: 15%;"|Name
| | | style="width: 10%"|Level |
| | style="width: 10%" data-mce-style="width: 10%;"|Level | | | style="width: 10%"|HP |
| | style="width: 15%" data-mce-style="width: 15%;"|HP | | | style="width: 20%"|Size/Race/Element |
| | style="width: 45%" data-mce-style="width: 45%;"|Size/Race/Element | |
| |- | | |- |
| || [[File:Step.png]] | | ||{{#mob:3125|Step}} |
| ||Step
| |
| ||130 | | ||130 |
| ||55,403 | | ||55,403 |
| ||Small / Demon / Neutral 1 | | ||Small / Demon / Neutral 1 |
| |- | | |- |
| || [[File:Lockstep.png]] | | ||{{#mob:3126|Rock step}} |
| ||Lockstep | |
| ||131 | | ||131 |
| ||71,056 | | ||71,056 |
| ||Medium / Demon / Neutral 2 | | ||Medium / Demon / Neutral 2 |
| |- | | |- |
| || [[File:Kickstep.png]] | | ||{{#mob:3127|Kick Step}} |
| ||Kickstep | |
| ||132 | | ||132 |
| ||73,644 | | ||73,644 |
| ||Medium / Demon / Neutral 1 | | ||Medium / Demon / Neutral 1 |
| |- | | |- |
| || [[File:KickAndKick.png]] | | ||{{#mob:3128|Kick And Kick}} |
| ||Kick And Kick
| |
| ||133 | | ||133 |
| ||68,018 | | ||68,018 |
| ||Medium / Demon / Neutral 2 | | ||Medium / Demon / Neutral 2 |
| |- | | |- |
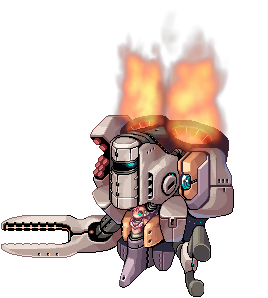
| || [[File:Charleston3.png]] | | ||{{#mob:3124|Charleston 3}} |
| ||Charleston 3
| |
| '''(MVP)'''
| |
| ||145 | | ||145 |
| ||23,671,401 | | ||23,671,401 |
| Line 95: |
Line 92: |
| ===<span style="color: #B0C4DE;">Cards</span>=== | | ===<span style="color: #B0C4DE;">Cards</span>=== |
|
| |
|
| {| class="wikitable mw-collapsible" style="width: 100%;" data-mce-style="width: 100%;" | | {| class="wikitable mw-collapsible mw-collapsed" style="width: 60%;" data-mce-style="width: 100%;" |
| |- style="background-color:#B0C4DE;text-align:center;" | | |- style="background-color:#B0C4DE;text-align:center;" |
| | style="width: 15%"|Card | | | style="width: 20%"|Card |
| | style="width: 15%"|Type | | | style="width: 40%"|Description |
| | style="width: 70%"|Effect
| |
| |- | | |- |
| | style="text-align: center;" | Step Card | | | {{#item:4698|Step Card}} |
| | style="text-align: center;" | Weapon | | | {{#itemDesc:4698}} |
| | style="text-align: center;" | Axe Boomerang damage +30%.
| |
| If refined to +10 or higher, additional Axe Boomerang damage +30%.
| |
| |- | | |- |
| | style="text-align: center;" | Lockstep Card | | | {{#item:4699|Rock Step Card}} |
| | style="text-align: center;" | Weapon
| | | {{#itemDesc:4699}} |
| | style="text-align: center;" | Arms Cannon damage +20%.
| |
| If refined to +10 or higher, additional Arms Cannon damage +20%.
| |
| | |
| If equipped with Kickstep Card, Mado does not consume Fuel.
| |
| |-
| |
| | style="text-align: center;" | Kickstep Card
| |
| | style="text-align: center;" | Armor
| |
| | style="text-align: center;" | MaxHP +8%.
| |
| If equipped by Mechanic class, reduce long ranged physical damage received by 30%.
| |
| |-
| |
| | style="text-align: center;" | Kick and Kick Card
| |
| | style="text-align: center;" | Weapon
| |
| | style="text-align: center;" | Vulcan Arm damage +10%.
| |
| If refined to +10 or higher, additional Vulcan Arm damage +20%.
| |
| | |
| If equipped with Kickstep Card, Mado does not consume Fuel.
| |
| |-
| |
| | style="text-align: center;" | Charleston 3 Card
| |
| | style="text-align: center;" | Weapon
| |
| | style="text-align: center;" | MaxSP -300.
| |
| High chance of breaking the enemy's armor when using melee attacks.
| |
| | |
| If equipped with Kickstep Card, Mado does not consume Fuel.
| |
| |}
| |
| | |
| ===<span style="color: #B0C4DE;">Equipment</span>===
| |
| | |
| {| class="wikitable mw-collapsible" style="width: 100%;" data-mce-style="width: 100%;" | |
| |- style="background-color:#B0C4DE; text-align:center;" data-mce-style="background-color: #daa520; text-align:center;"
| |
| |-
| |
| | style="background-color:#B0C4DE; text-align:center;" colspan="4"|Supplement Equipment
| |
| |-
| |
| | style="width: 5%; text-align: center;" data-mce-style="width: 9.69957%; text-align: center;"|<span style="color: rgb(0, 0, 0);" data-mce-style="color: #000000;">Image</span>
| |
| | style="width: 15%; text-align: center;" data-mce-style="width: 10%; text-align: center;"|<span style="color: rgb(0, 0, 0);" data-mce-style="color: #000000;">Name</span>
| |
| | style="width: 10%; text-align: center;" data-mce-style="width: 58.3262%; text-align: center;"|<span style="color: rgb(0, 0, 0);" data-mce-style="color: #000000;">Slot</span>
| |
| | style="width: 75%;" data-mce-style="width: 17.5107%; text-align: center;"|<span style="color: rgb(0, 0, 0);" data-mce-style="color: #000000;">Effect</span>
| |
| |-
| |
| | style="text-align: center;" | [[File:15110 supp part STR.png]]
| |
| | style="text-align: center;" | STR Supplement Equipment
| |
| | style="text-align: center;" | Armor
| |
| |DEF + 80, ATK + 5%.
| |
| ATK + 1% every 4 upgrade levels of the item.
| |
| | |
| Set Bonus: AGI Supplement Equipment & STR Supplement Equipment; ATK + 30.
| |
| | |
| Set Bonus: VIT Supplement Equipment & STR Supplement Equipment; Axe Tornado damage +25%.
| |
| | |
| Set Bonus: DEX Supplement Equipment & STR Supplement Equipment; Axe Boomerang damage + 100%.
| |
| | |
| Mechanic only.
| |
| |- | |
| | style="text-align: center;" | [[File:20732 supp part VIT.png]] | |
| | style="text-align: center;" | VIT Supplement Equipment[1]
| |
| | style="text-align: center;" | Garment
| |
| |DEF + 20, Max HP + 6%.
| |
|
| |
| Max HP + 1% every 2 upgrade levels of the item.
| |
| | |
| If upgrade level is +9 or higher, HP Recovery + 50%
| |
| | |
| Set Bonus: VIT Supplement Equipment & STR Supplement Equipment; Axe Tornado damage +25%.
| |
| | |
| Mechanic only.
| |
| |-
| |
| | style="text-align: center;" | [[File:22043 supp part AGI.png]]
| |
| | style="text-align: center;" | AGI Supplement Equipment [1]
| |
| | style="text-align: center;" | Footgear
| |
| |DEF + 25, ASPD + 6%.
| |
| Max HP + 1% every 2 upgrade levels of the item.
| |
| | |
| If upgrade level is +4 or higher, ASPD + 1%.
| |
| | |
| Set Bonus: AGI Supplement Equipment & STR Supplement Equipment; ATK +30.
| |
| | |
| Mechanic only.
| |
| |-
| |
| | style="text-align: center;" | [[File:2995 supp part DEX.png]]
| |
| | style="text-align: center;" | DEX Supplement Equipment [1]
| |
| | style="text-align: center;" | Accessory
| |
| |Cast Delay - 10%.
| |
| Variable Casting Time - 10%.
| |
|
| |
| Reduces the SP cost of skills by 10%.
| |
| | |
| Set Bonus: DEX Supplement Equipment & STR Supplement Equipment:
| |
| | |
| Axe Boomerang damage +100%. Reduces the cooldown of Axe Boomerang by 2 seconds.
| |
| | |
| Mechanic only.
| |
| |-
| |
| |}
| |
| | |
| | |
| {| class="wikitable mw-collapsible" style="width: 100%;" data-mce-style="width: 100%;" | |
| |- style="background-color:#B0C4DE; text-align:center;" data-mce-style="background-color: #daa520; text-align:center;"
| |
| |-
| |
| | style="background-color:#B0C4DE; text-align:center;" colspan="4"|Reinforced Parts
| |
| |-
| |
| | style="width: 5%; text-align: center;" data-mce-style="width: 9.69957%; text-align: center;"|<span style="color: rgb(0, 0, 0);" data-mce-style="color: #000000;">Image</span>
| |
| | style="width: 15%; text-align: center;" data-mce-style="width: 10%; text-align: center;"|<span style="color: rgb(0, 0, 0);" data-mce-style="color: #000000;">Name</span>
| |
| | style="width: 10%; text-align: center;" data-mce-style="width: 58.3262%; text-align: center;"|<span style="color: rgb(0, 0, 0);" data-mce-style="color: #000000;">Slot</span>
| |
| | style="width: 75%; text-align: center;" data-mce-style="width: 17.5107%; text-align: center;"|<span style="color: rgb(0, 0, 0);" data-mce-style="color: #000000;">Effect</span>
| |
| |-
| |
| | style="text-align: center;" | [[File:15111 reinforced plate.png]]
| |
| | style="text-align: center;" | Reinforced Parts - Plate
| |
| | style="text-align: center;" | Armor
| |
| |DEF + 110, Reduces damage received from Small and Medium size enemies by 10%.
| |
| | |
| Indestructible.
| |
|
| |
| If upgrade level is +7 or higher, reduces damage received from Large size enemies by 10%.
| |
|
| |
| If upgrade level is +9 or higher, reduces damage received from Small and Medium size enemies by 5%.
| |
| | |
| Set Bonus: Reinforced Parts - Plate, Reinforced Parts - Engine, Reinforced Parts - Booster, Reinforced Parts - Gun Barrel; Arm Cannon damage + 50%.
| |
| | |
| Mechanic only.
| |
| |-
| |
| | style="text-align: center;" | [[File:20733 reinforced engine.png]]
| |
| | style="text-align: center;" | Reinforced Parts - Engine [1]
| |
| | style="text-align: center;" | Garment
| |
| |DEF + 25, Cast Delay - 10%
| |
| | |
| If upgrade level is +7 or higher, reduces damage received from Neutral property attacks by 10%.
| |
| | |
| If upgrade level is +9 or higher, Cast Delay - 10%
| |
| | |
| Set Bonus: Reinforced Parts - Plate, Reinforced Parts - Engine, Reinforced Parts - Booster, Reinforced Parts - Gun Barrel; Arm Cannon damage + 50%.
| |
| | |
| Mechanic only.
| |
| |-
| |
| | style="text-align: center;" | [[File:22044 reinforced booster.png]]
| |
| | style="text-align: center;" | Reinforced Parts - Booster [1]
| |
| | style="text-align: center;" | Footgear
| |
| |DEF + 23, Reduces the SP cost of Hover by 15.
| |
| | |
| If upgrade level is +7 or higher, reduces the SP cost of Acceleration by 20.
| |
| | |
| Set Bonus: Reinforced Parts - Plate, Reinforced Parts - Engine, Reinforced Parts - Booster, Reinforced Parts - Gun Barrel; Arm Cannon damage + 50%.
| |
| | |
| Mechanic only.
| |
| |-
| |
| | style="text-align: center;" | [[File:2996 reinforced gun barrel.png]]
| |
| | style="text-align: center;" | Reinforced Parts - Gun Barrel [1]
| |
| | style="text-align: center;" | Accessory
| |
| |ATK + 4%
| |
| | |
| HIT + 10
| |
| | |
| Knuckle Boost damage +25%.
| |
| | |
| Set Bonus: Reinforced Parts - Plate, Reinforced Parts - Engine, Reinforced Parts - Booster, Reinforced Parts - Gun Barrel; Arm Cannon damage + 50%.
| |
| | |
| Mechanic only.
| |
| |-
| |
| |}
| |
| | |
| | |
| {| class="wikitable mw-collapsible" style="width: 100%;" data-mce-style="width: 100%;"
| |
| |- style="background-color:#B0C4DE; text-align:center;" data-mce-style="background-color: #daa520; text-align:center;"
| |
| |-
| |
| | style="background-color:#B0C4DE;text-align:center;" colspan="4"|Excellion Gear
| |
| |-
| |
| | style="width:5%; text-align: center;" data-mce-style="width: 9.69957%; text-align: center;"|<span style="color: rgb(0, 0, 0);" data-mce-style="color: #000000;">Image</span>
| |
| | style="width:15%; text-align: center;" data-mce-style="width: 10%; text-align: center;"|<span style="color: rgb(0, 0, 0);" data-mce-style="color: #000000;">Name</span>
| |
| | style="width:10%; text-align: center;" data-mce-style="width: 58.3262%; text-align: center;"|<span style="color: rgb(0, 0, 0);" data-mce-style="color: #000000;">Slot</span>
| |
| | style="width:75%; text-align: center;" data-mce-style="width: 17.5107%; text-align: center;"|<span style="color: rgb(0, 0, 0);" data-mce-style="color: #000000;">Effect</span>
| |
| |-
| |
| | style="text-align: center;" | [[File:20773.png|center|frameless]]
| |
| | style="text-align: center;" | Excellion Wing
| |
| | style="text-align: center;" | Garment
| |
| |A power wing made from the lost technology of a ruined laboratory.
| |
| Perfect Dodge + 8.
| |
| If level 130 or above, additional Perfect Dodge + 2.
| |
| Increase Flee by 2 for every refine upgrade.
| |
| | |
| [[Excellion#Enchantments_2| Can be enchanted with various unique reactors]]
| |
| | |
| [+ Excellion Suit]
| |
| Reduce skill delay by 10%.
| |
| If level 130 or above, additional skill delay reduction by 10%.
| |
| Perfect Dodge + 6.
| |
| |-
| |
| | style="text-align: center;" |[[File:15128.png|center|frameless]]
| |
| | style="text-align: center;" | Excellion Suit
| |
| | style="text-align: center;" | Armor
| |
| |A power suit made from the lost technology of a ruined laboratory.
| |
| VIT + 6.
| |
| If level 130 or above, additional VIT + 4.
| |
| Increase Max HP by 4% for every 3 refine upgrades.
| |
| This item is indestructible in battle.
| |
| | |
| [[Excellion#Enchantments_2| Can be enchanted with various unique reactors]]
| |
| | |
| [+ Excellion Wing]
| |
| Reduce skill delay by 10%.
| |
| If level 130 or above, additional skill delay reduction by 10%.
| |
| Perfect Dodge + 6.
| |
| |}
| |
| | |
| | |
| {| class="wikitable mw-collapsible" style="width: 100%;" data-mce-style="width: 100%;"
| |
| |- style="background-color:#B0C4DE; text-align: center;" data-mce-style="background-color: #daa520; text-align: center;"
| |
| |-
| |
| | style="background-color:#B0C4DE;text-align:center;" colspan="4"|Weapons
| |
| |-
| |
| | style="width: 5%; text-align: center;" data-mce-style="width: 9.69957%; text-align: center;"|<span style="color: rgb(0, 0, 0);" data-mce-style="color: #000000;">Image</span>
| |
| | style="width: 15%; text-align: center;" data-mce-style="width: 10%; text-align: center;"|<span style="color: rgb(0, 0, 0);" data-mce-style="color: #000000;">Name</span>
| |
| | style="width: 10%; text-align: center;" data-mce-style="width: 58.3262%; text-align: center;"|<span style="color: rgb(0, 0, 0);" data-mce-style="color: #000000;">Slot</span>
| |
| | style="width: 75%; text-align: center;" data-mce-style="width: 17.5107%; text-align: center;"|<span style="color: rgb(0, 0, 0);" data-mce-style="color: #000000;">Effect</span>
| |
| |-
| |
| | style="text-align: center;" | [[File:16031 pile bunker p.png]]
| |
| | style="text-align: center;" | Pile Bunker P
| |
| | style="text-align: center;" | Mace
| |
| |ATK + 450
| |
| | |
| ATK + 5 every upgrade level of the item. Mechanic only.
| |
| |-
| |
| | style="text-align: center;" | [[File:16030 pile bunker s.png]]
| |
| | style="text-align: center;" | Pile Bunker S [1]
| |
| | style="text-align: center;" | Mace
| |
| |ATK + 400
| |
| | |
| Attack Speed +1% per 2 upgrade levels of the item. Mechanic only.
| |
| |-
| |
| | style="text-align: center;" | [[File:16032 pile bunker t.png]]
| |
| | style="text-align: center;" | Pile Bunker T [1]
| |
| | style="text-align: center;" | Mace
| |
| |ATK + 400
| |
| | |
| Reduces the SP cost of skills by 1% every upgrade level of the item. Mechanic only.
| |
| |- | | |- |
| | style="text-align: center;" | [[File:28101 tornado axe.png]] | | | {{#item:27012|Kick Step Card}} |
| | style="text-align: center;" | Tornado Axe [1]
| | | {{#itemDesc:27012}} |
| | style="text-align: center;" | Two Handed Axe | |
| |ATK + 350
| |
| | |
| Reduces the cooldown of Axe Tornado by 1 second.
| |
| |- | | |- |
| | style="text-align: center;" | [[File:21011 gigantic blade.png]] | | | {{#item:27013|Kick and Kick Card}} |
| | style="text-align: center;" | Gigantic Blade [1]
| | | {{#itemDesc:27013}} |
| | style="text-align: center;" | Two Handed Sword
| |
| |ATK + 300, ASPD - 15%.
| |
| | |
| Increases critical damage on targets by 1% per upgrade level of the item.
| |
| | |
| Indestructible.
| |
| | |
| If base STR is 110 or lower, ATK - 250
| |
| |-
| |
| | style="text-align: center;" | [[File:16033 robots mechanical arm.png]]
| |
| | style="text-align: center;" | Robot's Mechanical Arm [2]
| |
| | style="text-align: center;" | Mace | |
| |ATK + 195, CRIT + 20.
| |
| | |
| Indestructible.
| |
| |- | | |- |
| | | {{#item:4697|Charleston 3 Card}} |
| | | {{#itemDesc:4697}} |
| |} | | |} |
| <br clear="both">
| |
|
| |
|
| ===<span style="color: #B0C4DE;">Enchants</span>=== | | ===<span style="color: #B0C4DE;">Equipment and Enchantments</span>=== |
| It's possible to enchant the Mechanic Items by talking with Mass Charleston {{#navi:verus04|71|106}}.
| | For more informations [[Verus Gear|click here.]] |
| | |
| Enchanting requires {{#item:6752|1 Charleston Component}} and 100,000 zeny.
| |
| | |
| Enchants can be reset by paying {{#item:6752|1 Charleston Component}} and 100,000 zeny.
| |
| | |
| Enchantment can be done in 3 slots and items refined to +9 and above have wider options.
| |
| | |
| 4th slot has 100% success chance, 3rd slot has chance of failure (resetting all enchant when failed), 2nd slot has chance of failure (either resetting all enchant or breaking the gear).
| |
| | |
| {| class="wikitable mw-collapsible" style="width: 100%;" data-mce-style="width: 100%;"
| |
| |- style="background-color:#B0C4DE;text-align:center;"
| |
| |rowspan="2" |Items
| |
| |rowspan="2" | Enchants Possible
| |
| |rowspan="2" | +8 below Enchantment list option
| |
| |colspan="2" | +9 Enchantment list options
| |
| |-
| |
| |style="background-color:#B0C4DE;"| Regular Upgrade
| |
| |style="background-color:#B0C4DE;"| Superior Upgrade
| |
| |-
| |
| | {{#item:22044|Reinforced Parts - Booster [1]}}
| |
| | rowspan="6" style="text-align:center;" | 3
| |
| |{{#item:4700|STR +1}} or {{#linkitem:4701|STR +2}} <br>
| |
| {{#item:4730|AGI +1}} or {{#linkitem:4731|AGI +2}} <br>
| |
| {{#item:4740|VIT +1}} or {{#linkitem:4741|VIT +2}}<br>
| |
| {{#item:4720|DEX +1}} or {{#linkitem:4721|DEX +2}}<br>
| |
| {{#item:4815|Spell 1}}<br>
| |
| {{#item:4869|ASPD Lv.1}}
| |
| | colspan="2" |
| |
| {{#item:4701|STR +2}} or {{#linkitem:4702|STR +3}} <br>
| |
| {{#item:4731|AGI +2}} or {{#linkitem:4732|AGI +3}} <br>
| |
| {{#item:4741|VIT +2}} or {{#linkitem:4742|VIT +3}}<br>
| |
| {{#item:4721|DEX +2}} or {{#linkitem:4722|DEX +3}}<br>
| |
| {{#item:4815|Spell 1}} or {{#linkitem:4816|Spell 2}}<br>
| |
| {{#item:4869|ASPD Lv.1}} or {{#linkitem:4872|ASPD Lv.2}}
| |
| |-
| |
| |{{#item: 22043|AGI Supplement Equipment[1]}}
| |
| |{{#item:4700|STR +1}} or {{#linkitem:4701|STR +2}} <br>
| |
| {{#item:4730|AGI +1}} or {{#linkitem:4731|AGI +2}} <br>
| |
| {{#item:4740|VIT +1}} or {{#linkitem:4741|VIT +2}}<br>
| |
| {{#item:4720|DEX +1}} or {{#linkitem:4721|DEX +2}}<br>
| |
| {{#item:4869|ASPD Lv.1}}
| |
| | colspan="2" |
| |
| {{#item:4701|STR +2}} or {{#linkitem:4702|STR +3}} <br>
| |
| {{#item:4731|AGI +2}} or {{#linkitem:4732|AGI +3}} <br>
| |
| {{#item:4741|VIT +2}} or {{#linkitem:4742|VIT +3}}<br>
| |
| {{#item:4721|DEX +2}} or {{#linkitem:4722|DEX +3}}<br>
| |
| {{#item:4869|ASPD Lv.1}} or {{#linkitem:4872|ASPD Lv.2}}
| |
| |-
| |
| | {{#item:20733|Reinforced Parts - Engine[1]}}
| |
| |{{#item:4700|STR +1}} or {{#linkitem:4701|STR +2}} <br>
| |
| {{#item:4730|AGI +1}} or {{#linkitem:4731|AGI +2}} <br>
| |
| {{#item:4740|VIT +1}} or {{#linkitem:4741|VIT +2}}<br>
| |
| {{#item:4720|DEX +1}} or {{#linkitem:4721|DEX +2}}<br>
| |
| {{#item:4750|LUK +1}} or {{#linkitem:4751|LUK +2}}<br>
| |
| {{#item:4832|Expert Archer 1}}
| |
| | colspan="2" |
| |
| {{#item:4701|STR +2}} or {{#linkitem:4702|STR +3}} <br>
| |
| {{#item:4731|AGI +2}} or {{#linkitem:4732|AGI +3}} <br>
| |
| {{#item:4741|VIT +2}} or {{#linkitem:4742|VIT +3}}<br>
| |
| {{#item:4721|DEX +2}} or {{#linkitem:4722|DEX +3}}<br>
| |
| {{#item:4711|INT +2}} or {{#linkitem:4712|INT +3}}<br>
| |
| {{#item:4751|LUK +2}} or {{#linkitem:4752|LUK +3}}<br>
| |
| {{#item:4832|Expert Archer 1}}, {{#linkitem:4833|Expert Archer 2}} or {{#linkitem:4834|Expert Archer 3}}
| |
| |-
| |
| |{{#item:20732|Supplement Part Con[1]
| |
| |{{#item:4700|STR +1}} or {{#linkitem:4701|STR +2}}
| |
| {{#item:4730|AGI +1}} or {{#linkitem:4731|AGI +2}} <br>
| |
| {{#item:4740|VIT +1}} or {{#linkitem:4741|VIT +2}}<br>
| |
| {{#item:4720|DEX +1}} or {{#linkitem:4721|DEX +2}}<br>
| |
| {{#item:4710|INT +1}} or {{#linkitem:4711|INT +2}}<br>
| |
| {{#item:4750|LUK +1}} or {{#linkitem:4751|LUK +2}}<br>
| |
| {{#item:4832|Expert Archer 1}}
| |
| | colspan="2" |
| |
| {{#item:4701|STR +2}} or {{#linkitem:4702|STR +3}} <br>
| |
| {{#item:4731|AGI +2}} or {{#linkitem:4732|AGI +3}} <br>
| |
| {{#item:4741|VIT +2}} or {{#linkitem:4742|VIT +3}}<br>
| |
| {{#item:4721|DEX +2}} or {{#linkitem:4722|DEX +3}}<br>
| |
| {{#item:4711|INT +2}} or {{#linkitem:4712|INT +3}}<br>
| |
| {{#item:4751|LUK +2}} or {{#linkitem:4752|LUK +3}}<br>
| |
| {{#item:4832|Expert Archer 1}}, {{#linkitem:4833|Expert Archer 2}} or {{#linkitem:4834|Expert Archer 3}}
| |
| |-
| |
| |{{#item:15111|Reinforced Parts - Gloves}}
| |
| |{{#item:4730|AGI +1}} or {{#linkitem:4731|AGI +2}}<br>
| |
| {{#item:4750|LUK +1}} or {{#linkitem:4751|LUK +2}}<br>
| |
| {{#item:4869|ASPD Lv.1}} or {{#linkitem:4872|ASPD Lv.2}}<br>
| |
| {{#item:4762|FLEE +6}} or {{#linkitem:4763|FLEE +12}}
| |
| | '''Speed''':<br>
| |
| {{#item:4731|AGI +2}} or {{#linkitem:4732|AGI +3}} <br>
| |
| {{#item:4751|LUK +2}} or {{#linkitem:4752|LUK +3}}<br>
| |
| {{#item:4869|ASPD Lv.1}} or {{#linkitem:4870|ASPD Lv.2}}<br>
| |
| {{#item:4762|FLEE +6}} or {{#linkitem:4763|FLEE +12}}
| |
| | '''Attack''':<br>
| |
| {{#item:4701|STR +2}} or {{#linkitem:4702|STR +3}} <br>
| |
| {{#item:4721|DEX +2}} or {{#linkitem:4722|DEX +3}}<br>
| |
| {{#item:4811|Fighting Spirit 1}} or {{#linkitem:4810|Fighting Spirit 2}}<br>
| |
| {{#item:4832|Expert Archer 1}}, {{#linkitem:4833|Expert Archer 2}} or {{#linkitem:4834|Expert Archer 3}}
| |
| |-
| |
| |{{#item:15110|STR Supplement Equipment}}
| |
| | {{#item:4730|AGI +1}}, {{#linkitem:4731|AGI +2}} or {{#linkitem:4732|AGI +3}}<br>
| |
| {{#item:4750|LUK +1}}, {{#linkitem:4751|LUK +2}} or {{#linkitem:4752|LUK +3}}<br>
| |
| {{#item:4869|ASPD Lv.1}} or {{#linkitem:4872|ASPD Lv.2}}<br>
| |
| {{#item:4762|FLEE +6}} or {{#linkitem:4763|FLEE +12}}
| |
| | '''Speed''':<br>
| |
| {{#item:4731|AGI +2}} or {{#linkitem:4732|AGI +3}} <br>
| |
| {{#item:4751|Luk +2}} or {{#linkitem:4752|Luk +3}}<br>
| |
| {{#item:4869|ASPD Lv.1}} or {{#linkitem:4872|ASPD Lv.2}}<br>
| |
| {{#item:4762|FLEE +6}} or {{#linkitem:4763|FLEE +12}}
| |
| | '''Defense''':<br>
| |
| {{#item:4741|VIT +2}} or {{#linkitem:4742|VIT +3}}<br>
| |
| {{#item:4861|MHP 1%}}, {{#linkitem:4862|MHP 2%}} or {{#linkitem:4863|MHP 3%}}<br>
| |
| {{#item:4933|Neutral Resistance 1}} or {{#item:4934|Neutral Resistance 2}}<br>
| |
| {{#item:4792|DEF +6}} or {{#linkitem:4793|DEF +9}}
| |
| |-
| |
| |{{#item:2996|Reinforced Parts - Gun Barrel[1]}}
| |
| | rowspan="2" style="text-align:center;" | 2
| |
| |{{#item:4700|STR +1}} or {{#linkitem:4701|STR +2}} <br>
| |
| {{#item:4730|AGI +1}} or {{#linkitem:4731|AGI +2}} <br>
| |
| {{#item:4740|VIT +1}} or {{#linkitem:4741|VIT +2}}<br>
| |
| {{#item:4720|DEX +1}} or {{#linkitem:4721|DEX +2}}<br>
| |
| {{#item:4710|INT +1}} or {{#linkitem:4711|INT +2}}<br>
| |
| {{#item:4815|Spell 1}} or {{#linkitem:4816|Spell 2}}<br><br>
| |
| {{#item:4869|ASPD Lv.1}}
| |
| | colspan="2" | n/a
| |
| |-
| |
| |{{#item:2995|DEX Supplement Equipment[1]}}
| |
| | {{#item:4700|STR +1}} or {{#linkitem:4701|STR +2}} <br>
| |
| {{#item:4730|AGI +1}} or {{#linkitem:4731|AGI +2}} <br>
| |
| {{#item:4740|VIT +1}} or {{#linkitem:4741|VIT +2}}<br>
| |
| {{#item:4720|DEX +1}} or {{#linkitem:4721|DEX +2}}<br>
| |
| {{#item:4710|INT +1}} or {{#linkitem:4711|INT +2}}<br>
| |
| {{#item:4815|Spell 1}} or {{#linkitem:4816|Spell 2}}<br>
| |
| {{#item:4869|ASPD Lv.1}}
| |
| | colspan="2" | n/a
| |
| |}
| |
| | |
| <br clear="both">
| |


 Explosive Powder (6213) . These drop from the Step found in the instance.
 Charleston Component (6752) .