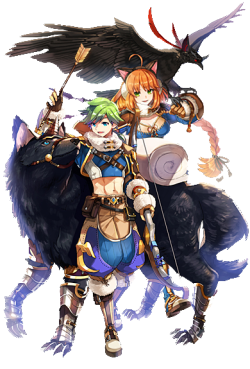
Wind Hawk Guide by Hurt Locker: Difference between revisions
Hurt Locker (talk | contribs) No edit summary |
Hurt Locker (talk | contribs) No edit summary |
||
| Line 63: | Line 63: | ||
| style="background:#E0FFFF;"| | | style="background:#E0FFFF;"| | ||
{{#item:4084|Marine Sphere Card}} | {{#item:4084|Marine Sphere Card}} | ||
| style="background:#EBEBFF;"| It doesn't have much mystery, more damage for a few seconds (if the PC allows it; if not, skip) | |||
|- | |- | ||
| style="background:#E0FFFF;"| | | style="background:#E0FFFF;"| | ||
{{#item:300241|Brutal Murderer Card}} | {{#item:300519|Yormi Card}}+ {{#item:300506|Scalleg Card}} All size enemies (The Best) | ||
{{#item:300457|Grey Icewind Card }}+ {{#item:300455|Copo Card}} Small/Large enemies (Alternative to the Yormi Combo) | |||
{{#item:27361|Polluted Wander Man Card}} All size enemies (It works for everything, cheap) | |||
{{#item:300240|Gan Ceann Card}} Large enemies (Good for CT example) | |||
{{#item:300241|Brutal Murderer Card}} Mid enemies (Good for farming dun) | |||
| style="background:#EBEBFF;"| We have alternatives to choose from before having at least one {{#item:300595|Epesto Walther Megas Card}} in our pocket (I'll explain later). So choose wisely what to use in your weapon. | |||
| style="background:#EBEBFF;"| | |||
<br> | <br> | ||
'''Note: It is better to use x2 the same card, than to use the combo that amplifies its damage; you gain more % and flat Atk. ''' | '''Note: It is better to use x2 the same card, than to use the combo that amplifies its damage; you gain more % and flat Atk. ''' | ||
Revision as of 23:43, 3 August 2025
Wind Hawk Guide by Hurt Locker
| This guide is still in development | |
|---|---|
| Check it out on the #archer channel and good luck with your build. |
 | |||||||||
Job Base:
|
Ranger
|
Hurt Locker | |||||||
4th Job Bonus
| |||||||||
POW
|
STA
|
WIS
|
SPL
|
CON
|
CRT
|
||||
| 7 | 4 | 5 | 4 | 9 | 4 | ||||
Introduction
Hello! Some of you may already know me (from previous servers), but if not, you will. My name is Hurt Locker, I'm a WH main, been in MuhRO for a long time. I designed this guide not only to update previous guides, but also to offer a fresh perspective on the job based on my experience and acquired knowledge. I hope you find it useful and... enjoy it!
Note:Always check the market (prices may vary) and the final damage depends on your build and equipment (progress is different and everyone goes at their own pace, you have to support each other).
Tips to Increase Damage
There are several ways to increase your damage, be it by having the race bypass set or elemental advantage using arrow. But what I am going to say is something that perhaps few know or was even out of their knowledge (Don't worry, I'll show you). Next, the list of consumables and equipment that could give you that "push" of damage:
| Gears/Consumables | Note |
|---|---|
|
|
It is achieved through Template:Item List2. Provides slightly buffs for all builds (For SS it stands out more for that extra critical). Good buff to use all the time, and cheap by the way. |
|
|
It doesn't have much mystery, more damage for a few seconds (if the PC allows it; if not, skip) |
|
|
We have alternatives to choose from before having at least one
Note: It is better to use x2 the same card, than to use the combo that amplifies its damage; you gain more % and flat Atk. |
|
|
Another expensive consumable, but it increases your range damage by 15% for 500 seconds (approx 8min) good in the long run, but you are forced not to die because it is lost if you die or get hit Template:Skill Info |
|
Long term consumable (and free via Template:Item List2) all stats +8 and lasts 30min, doesn't drop on death and doesn't drop with Template:Skill Info. | |
|
|
Doesn't drop on death and doesn't drop with Template:Skill Info. |