Chapter 1/es: Difference between revisions
Created page with "=Call the World Tree= Call the World Tree marca el comienzo de una nueva era. A medida que las perturbaciones se propagan por los reinos, el Árbol del Mundo, "fuente de vida y equilibrio", comienza a agitarse. Los aventureros son convocados para investigar su llamada, descubriendo verdades antiguas y enfrentándose a amenazas que ponen en peligro los propios cimientos del mundo. Este capítulo introduce una nueva línea argumental, personajes y regiones, preparando el e..." |
Updating to match new version of source page |
||
| (30 intermediate revisions by one other user not shown) | |||
| Line 1: | Line 1: | ||
<languages/> | <languages/> | ||
<div class="mw-translate-fuzzy"> | |||
=Call the World Tree= | =Call the World Tree= | ||
La llamada del Árbol del Mundo marca el comienzo de una nueva era. A medida que las perturbaciones se propagan por los reinos, el Árbol del Mundo, "fuente de vida y equilibrio", comienza a agitarse. Los aventureros son convocados para investigar su llamada, descubriendo verdades antiguas y enfrentándose a amenazas que ponen en peligro los propios cimientos del mundo. Este capítulo introduce una nueva línea argumental, personajes y regiones, preparando el escenario para las pruebas y revelaciones que están por venir. | |||
==Requisitos== | ==Requisitos== | ||
* Nivel 200+ | * Nivel 200+ | ||
* Punto de inicio: Pequeño Árbol de Ceniza <br> {{#navi:prt_fild05|353|252}} <br> | * Punto de inicio: Pequeño Árbol de Ceniza <br> {{#navi:prt_fild05|353|252}} <br> | ||
[[File:Small_Ash.png]] | [[File:Small_Ash.png]] | ||
</div> | |||
<div | <div class="mw-translate-fuzzy"> | ||
== | ==Misión Principal== | ||
=== | ===La Llamada del Árbol del Mundo=== | ||
# | # Pequeño Árbol de Ceniza <br> {{#navi:prt_fild05|353|252}} | ||
#; [[File:Small_Ash.png]] | #; [[File:Small_Ash.png]] | ||
# | # Habla con la Mensajera Laphine {{#navi:ygg_edge|254|243}} | ||
#; [[File:LaphineMess.png]] | #; [[File:LaphineMess.png]] | ||
# | # Encuentra a Laphine Shasha {{#navi:ygg_edge|168|139}} | ||
#; [[File:LaphineSasha.png]] | #; [[File:LaphineSasha.png]] | ||
# | # Habla con Maysel junto a Shasha, recibirás como recompensa 10x {{#item:1001972}}. | ||
#; [[File:Maysel.png]] | #; [[File:Maysel.png]] | ||
</div> | </div> | ||
<div | <div class="mw-translate-fuzzy"> | ||
=== | ===Tierra Retorcida de la Oscuridad=== | ||
# | # Entra al portal en {{#navi:ygg_edge|36|117}} | ||
#; [[File:PortalDarkness.png]] | #; [[File:PortalDarkness.png]] | ||
# | # Necesitas encontrar 3 Puntos de Investigación (acércate para activarlos) en: | ||
#; {{#navi:ygg_roots|334|138}} <br> [[File:InvPoint1.png]] | #; {{#navi:ygg_roots|334|138}} <br> [[File:InvPoint1.png]] | ||
#; {{#navi:ygg_roots|299|59}} <br> [[File:InvPoint2.png]] | #; {{#navi:ygg_roots|299|59}} <br> [[File:InvPoint2.png]] | ||
| Line 30: | Line 32: | ||
</div> | </div> | ||
<div | <div class="mw-translate-fuzzy"> | ||
=== | ===Regeneración=== | ||
# | # Mientras investigas la Tierra Retorcida de la Oscuridad, escuchas un Grito. Habla con la fuente del sonido en {{#navi:ygg_roots|164|131}}. | ||
#; [[File:SourceSound.png]] | #; [[File:SourceSound.png]] | ||
# | # Parece que Yvain necesita tu ayuda, habla con Yvain para levantar las raíces. | ||
#; [[File:Yvain.png]] | #; [[File:Yvain.png]] | ||
# | # En {{#navi:ygg_roots|151|198}} encontrarás a Maggi. | ||
#; [[File:MaggiCh1.png]] | #; [[File:MaggiCh1.png]] | ||
# Maggi | # Maggi te dice que se separó de su grupo debido a un terremoto. | ||
#; [[File:Maggi2Ch1.png]] | #; [[File:Maggi2Ch1.png]] | ||
# | # Entra a la encrucijada a través del portal rojo para investigar {{#navi:ygg_roots|157|242}}. | ||
#; [[File:CrossroadPortal.png]] | #; [[File:CrossroadPortal.png]] | ||
# | # Dentro de la encrucijada encontrarás al Investigador, obtendrás información de la primera encrucijada. | ||
#; [[File:Investigator.png]] | #; [[File:Investigator.png]] | ||
# | # Regresa con Maggi. | ||
#; [[File:Maggi2Ch1.png]] | #; [[File:Maggi2Ch1.png]] | ||
# | # En {{#navi:ygg_roots|116|246}} encontrarás a otro Investigador, te proporciona información sobre otro compañero desaparecido. | ||
#; [[File:Investigator2.png]] | #; [[File:Investigator2.png]] | ||
# | # Encuentra a Mark en {{#navi:ygg_roots|39|268}}. Descubres lo que parecen ser rastros dejados por Tamarin. | ||
#; [[File:MarkCh1.png]] | #; [[File:MarkCh1.png]] | ||
# Tamarin | # Tamarin está en {{#navi:ygg_roots|95|157}}. Tamarin y Alf encontraron una nueva intersección. | ||
#; [[File:TamarinCH1.png]] | #; [[File:TamarinCH1.png]] | ||
# | # Muévete a la nueva intersección y revísala. Habla con Tamarin nuevamente antes de entrar {{#navi:ygg_roots|42|126}}. | ||
#; [[File:TamarinCross.png]] | #; [[File:TamarinCross.png]] | ||
#; [[File:TamaPortal.png]] | #; [[File:TamaPortal.png]] | ||
# Alf, | # Alf, que estaba esperando en la Tierra Retorcida de la Oscuridad, parece haber entrado primero en la intersección. | ||
#; [[File:AlphCH1.png]] | #; [[File:AlphCH1.png]] | ||
# | # La situación dentro no parece buena. Entra al Portal azul {{#navi:uknw_ruin|266|241}}. | ||
#; [[File:Portaluknw.png]] | #; [[File:Portaluknw.png]] | ||
# | # Habla con Tamarin nuevamente, necesitas regresar a la aldea de Mulpure para informar todo lo que has aprendido hasta ahora. Dew sigue desaparecido. | ||
#; [[File:TamarinCross.png]] | #; [[File:TamarinCross.png]] | ||
# | # Habla con otro Investigador en {{#navi:ygg_roots|204|178}} y pregunta por Dew. Él te dirá que Dew se dirigió hacia la aldea. | ||
#; [[File:Investigator3.png]] | #; [[File:Investigator3.png]] | ||
# | # En tu camino encontrarás a otro Investigador en {{#navi:ygg_roots|290|199}}. Él te dirá que vieron a Dew dirigiéndose hacia el este. Dirígete al este para encontrarlo. | ||
#; [[File:Investigator4.png]] | #; [[File:Investigator4.png]] | ||
# | # Volverás a encontrar a Mark junto con Chez y Dew {{#navi:ygg_roots|338|243}}. Recibirás como recompensa 10x {{#item:1001972}}. | ||
#; [[File:MarkCh2.png]] | #; [[File:MarkCh2.png]] | ||
</div> | </div> | ||
<div | <div class="mw-translate-fuzzy"> | ||
=== | ===De regreso a la Aldea del Árbol de Ceniza=== | ||
# | # Regresa a la aldea (@go 61) para visitar a Laphine Shasha {{#navi:ygg_edge|168|139}} y hablar sobre qué hacer a continuación. | ||
#; [[File:LaphineSasha.png]] | #; [[File:LaphineSasha.png]] | ||
# Devries | # Devries te pide que entregues 5x {{#item:1036}} a su laboratorio en {{#navi:ygg_edge|150|127}}. Recibirás como recompensa 10x {{#item:1001972}}. | ||
#; [[File:Devries.png]] | #; [[File:Devries.png]] | ||
</div> | </div> | ||
<div lang="en" dir="ltr" class="mw-content-ltr"> | <div lang="en" dir="ltr" class="mw-content-ltr"> | ||
=== | ===Back to Ash Tree Village=== | ||
# | | Head back to the village (@go 61) to visit Laphine Shasha {{#navi:ygg_edge|168|139}} and discuss what to do next. He will ask you how the Land of Darkness was and that they received some information about the Distorted Spaces, they currently analyzing it. | ||
<br> [[File:LaphineSasha.png]] | |||
|- | |||
| Devries asks you to deliver 5x {{#item:1036}} to his lab at {{#navi:ygg_edge|150|127}}. You will get rewarded with 10x {{#item:1001972}}. | |||
<br> [[File:Devries.png]] | |||
|} | |||
</div> | |||
<div class="mw-translate-fuzzy"> | |||
===Hacia Geffen en Ruinas=== | |||
# Para investigar Geffen en Ruinas del Segundo Mundo, entra al portal en {{#navi:ygg_edge|36|117}}. | |||
#; [[File:PortalDarkness.png]] | #; [[File:PortalDarkness.png]] | ||
# | # Allí te encontrarás con el Taoísta Jeon en {{#navi:ygg_roots|164|231}}. | ||
#; [[File:Jeoncheosa.png]] | #; [[File:Jeoncheosa.png]] | ||
# | # El Taoísta Jeon percibe una presencia ominosa proveniente de Geffen, por lo que decides dirigirte al Campo de Geffen de la dimensión en ruinas. Entra al portal rojo en {{#navi:ygg_roots|161|241}}. | ||
#; [[File:CrossroadPortalNew.png]] | #; [[File:CrossroadPortalNew.png]] | ||
# | # Entra al lugar oculto en {{#navi:hem_fild|98|153}}. Allí conocerás a Reno y a algunos otros. | ||
#; [[File:HiddenSP.png]] | #; [[File:HiddenSP.png]] | ||
# | # Habla con Reno, el grupo decide ir a Geffen en Ruinas, donde se necesita ayuda. Recibirás como recompensa 3x {{#item:1001972}} | ||
#; [[File:Reno.png]] | #; [[File:Reno.png]] | ||
</div> | </div> | ||
<div lang="en" dir="ltr" class="mw-content-ltr"> | <div lang="en" dir="ltr" class="mw-content-ltr"> | ||
===Geffen | ===To Ruined Geffen=== | ||
# | | To investigate the Second World's Ruined Geffen, enter the portal at {{#navi:ygg_edge|36|117}}. | ||
<br> [[File:PortalDarkness.png]] | |||
|- | |||
| Among the crosspoints that appeared in the Twisted Land of Darkness, you decided to first investigate the Second World's Ruined Geffen are. There you will meet Taoist Jeon at {{#navi:ygg_roots|164|231}}. | |||
<br> [[File:Jeoncheosa.png]] | |||
|- | |||
| Taoist Jeon sense an ominous presence from Geffen, so you decide to head to the ruined dimension's Geffen Field. Enter the red portal at {{#navi:ygg_roots|161|241}}. | |||
<br> [[File:CrossroadPortalNew.png]] | |||
|- | |||
| Enter the hidden spot at {{#navi:hem_fild|98|153}}. There you will meet Reno and some others. | |||
<br> [[File:HiddenSP.png]] | |||
|- | |||
| Talk to Reno, the group decides to go to Ruined Geffen, where help is needed. You will get rewarded with 3x {{#item:1001972}} | |||
<br> [[File:Reno.png]] | |||
|} | |||
</div> | |||
<div class="mw-translate-fuzzy"> | |||
===Geffen de un Mundo Paralelo=== | |||
# Para llegar a Geffen en Ruinas, sal del mapa por el portal oeste {{#navi:hem_fild|35|194}}. | |||
#; [[File:hem_fild.png]] | #; [[File:hem_fild.png]] | ||
# | # Allí te encontrarás con un Geffen Resident, habla con él dos veces. <br> Escucharás que la gente está preocupada por una enfermedad. Encuentra a más residentes para obtener más detalles. | ||
#; [[File:GeffenResi.png]] | #; [[File:GeffenResi.png]] | ||
# | # Otro Geffen Resident está en {{#navi:ch1_geffen|154|59}}. Te dirá que la causa de la enfermedad podría ser un mago en la Torre de Geffen. | ||
#; [[File:geffenResi2.png]] | #; [[File:geffenResi2.png]] | ||
# | # Dirígete a la torre en {{#navi:ch1_geffen|121|111}}, allí conocerás a Charles. | ||
#; [[File:CharlesGef.png]] | #; [[File:CharlesGef.png]] | ||
# | # Una persona misteriosa está bloqueando tu camino en la Torre de Geffen. Pregunta qué ocurrió. | ||
#; [[File:CharlesGef.png]] | #; [[File:CharlesGef.png]] | ||
# | # Aparecerá la Maga Clover, diciéndote que el camino hacia el sótano de la Torre de Geffen está sellado por una barrera. | ||
#; [[File:MageClover.png]] | #; [[File:MageClover.png]] | ||
# | # Habla con el Taoísta Jeon para ver si existe una forma segura de eliminarla. Recibirás como recompensa 7x {{#item:1001972}}. | ||
#; [[File:Taoist_jeon.png]] | #; [[File:Taoist_jeon.png]] | ||
# | # Mientras el Taoísta Jeon, Charles y Clover piensan en una manera de eliminar la barrera de la Torre de Geffen, decides investigar la plaga yendo a la clínica en Geffen en Ruinas. | ||
</div> | </div> | ||
<div lang="en" dir="ltr" class="mw-content-ltr"> | <div lang="en" dir="ltr" class="mw-content-ltr"> | ||
===Geffen | ===Geffen of a Parallel World=== | ||
# The | | To reach Ruined Geffen, leave the map through the west portal {{#navi:hem_fild|35|194}}. <br> [[File:hem_fild.png]] | ||
|- | |||
| You will meet a Geffen Resident. Talk to him twice. <br>You will hear, that people are worried about an illness. Find more residents for more details. <br> [[File:GeffenResi.png]] | |||
|- | |||
| Another Geffen Resident is at {{#navi:ch1_geffen|154|59}}. They will tell you that the cause of the illness might be a mage in Geffen Tower. <br> [[File:geffenResi2.png]] | |||
|- | |||
| Head to the tower at {{#navi:ch1_geffen|121|111}} where you meet Charles. <br> [[File:CharlesGef.png]] | |||
|- | |||
| A mysterious person is blocking your way at Geffen Tower. Ask what happened. <br> [[File:CharlesGef.png]] | |||
|- | |||
| Mage Clover will appear, telling you that the path down to the basement of Geffen Tower is sealed by a barrier. The problem with the barrier is, if we remove it now, a horde of monsters will come out.<br> [[File:MageClover.png]] | |||
|- | |||
| Ask Taoist Jeon if there's a safe way to remove it. You will get rewarded with 7x {{#item:1001972}}. <br> [[File:Taoist_jeon.png]] | |||
|- | |||
| While Taoist Jeon, Charles and Clover think of a way to remove Geffen Tower's barrier, you decide to investigate the plague by going to the clinic in Ruined Geffen. | |||
|} | |||
</div> | |||
<div class="mw-translate-fuzzy"> | |||
===Clínica de Geffen=== | |||
# La clínica es el edificio en {{#navi:ch1_geffen|169|172}}. Entra por el Portal. | |||
#; [[File:WayClinic.png]] | #; [[File:WayClinic.png]] | ||
# | # Dentro de la clínica encontrarás al Doctor Neumann. Él quiere que visites a 5 Pacientes de la Clínica. | ||
#; [[File:DocNeumann.png]] | #; [[File:DocNeumann.png]] | ||
#* {{#navi:ch1_gef_in|110|30}} Bath Craved | #* {{#navi:ch1_gef_in|110|30}} Paciente que necesita un baño (Bath Craved) y Paciente con tos (Cough Patient). | ||
#; [[File:BathCraved.png]] [[File:CoughingPatient.png]] | #; [[File:BathCraved.png]] [[File:CoughingPatient.png]] | ||
# | # Aparecerá un Voluntario de la Clínica, puedes pedirle allí la toalla que necesitas para el Paciente que necesita un baño. | ||
#; [[File:Clinic_Vol.png]] | #; [[File:Clinic_Vol.png]] | ||
# | # Habla nuevamente con el Paciente que necesita un baño. | ||
#; [[File:BathCraved.png]] | #; [[File:BathCraved.png]] | ||
# | # Habla con el Paciente Delgado (Skinny Patient) en {{#navi:ch1_gef_in|69|112}}, quiere algo de comida de otro Voluntario de la Clínica. | ||
#; [[File:Skinny_P.png]] | #; [[File:Skinny_P.png]] | ||
# | # Otro Voluntario de la Clínica está en {{#navi:ch1_gef_in|107|109}}. Pide una comida. | ||
#; [[File:Clinic_Vol2.png]] | #; [[File:Clinic_Vol2.png]] | ||
# | # Regresa con el Paciente Delgado y entrégale la comida. | ||
# | # Regresa al Voluntario de la Clínica, allí verás a otro Paciente Joven. | ||
#* Young Patient | #* Paciente Joven (Young Patient) que pide algunos dulces, habla con el Voluntario de la Clínica para obtenerlos. | ||
#; [[File:Young_P.png]] | #; [[File:Young_P.png]] | ||
# | # Entrega las Batatas Dulces al Paciente Joven. | ||
#* | #* Habla con el último paciente, el Paciente Anciano (Elderly Patient). | ||
#; [[File:ELder_P.png]] | #; [[File:ELder_P.png]] | ||
# | # Después de ayudar a todos los pacientes, regresa con el Doctor Neumann en {{#navi:ch1_gef_in|78|74}}. | ||
# | # Has reunido algo de información sobre los pacientes, habla con Einhar para compartir opiniones sobre el síndrome de Soren. | ||
#; [[File:EinharCH.png]] | #; [[File:EinharCH.png]] | ||
# | # Sal del edificio y dirígete a {{#navi:ch1_geffen|101|138}}, entra al edificio y habla con Gregor. | ||
#; [[File:Build1CH.png]] [[File:GregorCh.png]] | #; [[File:Build1CH.png]] [[File:GregorCh.png]] | ||
# | # Sal del edificio y entra al siguiente edificio en {{#navi:ch1_geffen|76|191}}, habla con Einhar. | ||
#; [[File:Build2CH.png]] [[File:EinharCh2.png]] | #; [[File:Build2CH.png]] [[File:EinharCh2.png]] | ||
# | # Después de reunir información, regresas al ayuntamiento de Geffen en Ruinas {{#navi:ch1_geffen|102|194}}. | ||
#; [[File:TownHall.png]] | #; [[File:TownHall.png]] | ||
# Gregor | # Gregor te dice que ahora puede usar sus habilidades profesionales, elige: "I'll go.". Recibirás como recompensa 5x {{#item:1001972}}. | ||
#; [[File:GregorTown.png]] | #; [[File:GregorTown.png]] | ||
<br> | <br> | ||
| Line 149: | Line 200: | ||
|- | |- | ||
|Healthy Person's Blood | |Healthy Person's Blood | ||
| | |Survivor's Blood | ||
|Patient Blood | |Patient Blood | ||
|- | |- | ||
|{{#navi:ch1_geffen|181|149}} | |{{#navi:ch1_geffen|181|149}} | ||
|{{#navi:ch1_geffen|46|88}} | |{{#navi:ch1_geffen|46|88}} | ||
|{{#navi:ch1_geffen|170|171}} | |{{#navi:ch1_geffen|170|171}} entra a la clínica, obtén permiso del Doctor Neumann. | ||
|- | |- | ||
|[[File:Aire_Gef.png]] | |[[File:Aire_Gef.png]] | ||
| Line 160: | Line 211: | ||
|[[File:curseP.png]] | |[[File:curseP.png]] | ||
|} | |} | ||
<li> | <li> Regresa con Gregor en {{#navi:ch1_geffen|101|138}} después de completar las tareas. Habla con él hasta que desaparezca.</li><br> | ||
<li> | <li> Reúnete con Einhar y Gregor en Geffen en Ruinas en {{#navi:ch1_geffen|175|67}} y entra a la casa del Doctor Neumann.</li> <br> [[File:Einhar3Ch.png]] | ||
<li> | <li> Parece que el Doctor Neumann está ocultando algo, junto con Gregor intentas averiguar qué es. Habla con Gregor.</li> <br> [[File:GregorHouse.png]] | ||
<li> | <li> Después de hablar con Gregor sube las escaleras, Einhar también encontró algo interesante. Recibirás como recompensa 5x {{#item:1001972}}.</li> <br> [[File:EinharHouse.png]] | ||
<li> | <li> Regresa a la clínica en Geffen en Ruinas. Te encontrarás con el Taoísta Jeon frente a la clínica {{#navi:ch1_geffen|165|168}}. Te dice que han encontrado una forma de entrar a través de la barrera que sella el subsuelo de Geffen en Ruinas. Dirígete a la Torre de Geffen.</li> <br> [[File:Taoist_Clinic.png]] | ||
<li> Clover | <li> Clover elimina la barrera y puedes entrar al sótano. Recibirás como recompensa 3x {{#item:1001972}}.</li> <br> [[File:Clover_tower.png]] | ||
</ol> | </ol> | ||
</div> | </div> | ||
<div lang="en" dir="ltr" class="mw-content-ltr"> | <div lang="en" dir="ltr" class="mw-content-ltr"> | ||
=== | ===Geffen Clinic=== | ||
| The clinic is the building at {{#navi:ch1_geffen|169|172}}. Enter the Portal. Your goal is to ask about the disease that Dr. Neumann is treating at the clinic.<br> [[File:WayClinic.png]] | |||
|- | |||
| Inside the clinic you will find Doctor Neumann. He wants you to visit 5 Clinic Patients and grants you access to those information.<br> [[File:DocNeumann.png]] | |||
# | |- | ||
# | | {{#navi:ch1_gef_in|110|30}} Talk to both the Bath Craved and the Coughing Patient. <br> [[File:BathCraved.png]] [[File:CoughingPatient.png]] | ||
# | |- | ||
# | | A Clinic Volunteer will appear, you can ask her for the towel you need for the Bath Craved Patient. <br> [[File:Clinic_Vol.png]] | ||
# You | |- | ||
| Talk to the Bath Craved Patient again. <br> [[File:BathCraved.png]] | |||
|- | |||
| Talk to the Skinny Patient at {{#navi:ch1_gef_in|69|112}}, he wants some food from another Clinic Volunteer. <br> [[File:Skinny_P.png]] | |||
|- | |||
| The Clinic Volunteer is at {{#navi:ch1_gef_in|107|109}}. Ask them for a meal. <br> [[File:Clinic_Vol2.png]] | |||
|- | |||
| Head back to the Skinny Patient and hand out the meal. | |||
|- | |||
| Go back to the Clinic Volunteer where you will see another Young Patient. | |||
|- | |||
| The Young Patient asks for some sweets, talk to the Clinic Volunteer to get them. <br> [[File:Young_P.png]] | |||
|- | |||
| Give the sweet potatoes to the Young Patient. | |||
|- | |||
| Talk to the last patient, Elderly Patient. <br> [[File:ELder_P.png]] | |||
|- | |||
| After helping all patients, head back to Doctor Neumann at {{#navi:ch1_gef_in|78|74}}. <br> [[File:Neumann2.png]] | |||
|- | |||
| You've gathered some information about the patients, talk to Einhar to share opinions about Soren's syndrome. <br> [[File:EinharCH.png]] | |||
|- | |||
| Leave the building and go to {{#navi:ch1_geffen|101|138}}. Enter the building and talk to Gregor. <br> [[File:Build1CH.png]] [[File:GregorCh.png]] | |||
|- | |||
| Leave the building and enter the next building at {{#navi:ch1_geffen|76|191}}, talk to Einhar. <br> [[File:Build2CH.png]] [[File:EinharCh2.png]] | |||
|} | |||
{| class="mw-collapsible mw-collapsed" | |||
|+ style="text-align:left; font-weight:700; font-size:1.15em; padding:0; background:transparent;width: 100%" | | |||
===A Lead for Research=== | |||
| After gathering information, you return to the town hall of Ruined Geffen {{#navi:ch1_geffen|102|194}}. <br> [[File:TownHall.png]] | |||
|- | |||
| Gregor tells you that he can now use his professional skills, choose: "I'll go.". You will get rewarded with 5x {{#item:1001972}}. <br> [[File:GregorTown.png]] | |||
|- | |||
| | |||
* Healthy Person's Blood {{#navi:ch1_geffen|181|149}} <br> [[File:Aire_Gef.png]] | |||
* Survivor's Blood {{#navi:ch1_geffen|46|88}} <br> [[File:Dapan_gef.png]] | |||
* Patient Blood {{#navi:ch1_geffen|170|171}} Enter clinic, get permission from Doctor Neumann. <br> [[File:curseP.png]] | |||
|- | |||
| Return to Gregor at {{#navi:ch1_geffen|102|194}} after finishing the tasks. Talk to Einhar and Gregor till they disappear. <br> [[File:GreEinhar.png]] | |||
|- | |||
| Meet Einhar and Gregor in Ruined Geffen at {{#navi:ch1_geffen|175|67}} and enter Doctor Neumann's house. You should inform Doctor Neumann of the research results as soon as possible. Einhar is warning you, that they hear something from inside the house. You can hear someone shouting: "How long do we have to keep doing this dam thing! Is there even really a cure?". Seems a another man feeling bad about whatever Doctor Neumann is hiding and want to tell the truth to everyone. <br> [[File:Einhar3Ch.png]] | |||
|- | |||
| It seems like Doctor Neumann is hiding something, together with Gregor you try to find out what. Talk to Gregor. <br> [[File:GregorHouse.png]] | |||
|- | |||
| After talking to Gregor, go upstairs. Einhar found something interesting too. You will get rewarded with 5x {{#item:1001972}}. <br> [[File:EinharHouse.png]] | |||
|- | |||
| Head back to the clinic in Ruined Geffen. You will meet Taoist Jeon in front of the clinic {{#navi:ch1_geffen|165|168}}. You have to tell him, that you and Gregor found a the source of infection. He tells you that they found a way to enter through the barrier sealing Ruined Geffen's underground. Go to the Geffen Tower. <br> [[File:Taoist_Clinic.png]] | |||
|- | |||
| Clover removes the barrier and you can enter the basement. You will get rewarded with 3x {{#item:1001972}}. <br> [[File:Clover_tower.png]] | |||
|} | |||
</div> | </div> | ||
<div lang="en" dir="ltr" class="mw-content-ltr"> | <div lang="en" dir="ltr" class="mw-content-ltr"> | ||
== | {| class="mw-collapsible mw-collapsed" | ||
|+ style="text-align:left; font-weight:700; font-size:1.15em; padding:0; background:transparent;width: 100%" | | |||
</div> | </div> | ||
<div lang="en" dir="ltr" class="mw-content-ltr"> | <div lang="en" dir="ltr" class="mw-content-ltr"> | ||
{| | ===Between Civilization and Savagery=== | ||
| Entering the basement you meet Charles at {{#navi:hem_dun01|26|109}} in the parallel world's ruined Verus. Why is it connected to the underground of Geffen? Taoist is warning you, to be more cautious and assume that it's not the same. Things are different here. | |||
<br> [[File:CharlesHem.png]] | |||
|- | |||
| While exploring, you will find Clover's mentor in a hidden spot at {{#navi:hem_dun01|77|140}}. Talk to Clover, Sua and Parsifal. You will get rewarded with 5x {{#item:1001972}}. Clover is asking what this place was used for? Where are the people built this place? | |||
<br> [[File:CloverIns.png]] [[File:SuaIns.png]] [[File:ParsifalIns.png]] | |||
|- | |- | ||
| Parsifal says he'll show you a new world and leads you to another hidden spot at {{#navi:hem_dun01|174|198}}. Talk to Charles, Clover, Parsifal and Taoist Jeon. You will see a dead person, while believers trust in the blessing of rebirth, Charles believes into a disease. | |||
<br> [[File:HideSpot2.png]] [[File:CharlesH2.png]] [[File:CloverH2.png]] [[File:ParsifalH2.png]] [[File:TaoistH2.png]] | |||
|- | |- | ||
| | | After seeing a person who died from the plague and become part of an Immortal Legion, you decide to follow the Immortal Legion. | ||
|- | |- | ||
| | | You leave the hidden spot and find Charles outside at {{#navi:hem_dun01|218|208}}. You will get rewarded with 5x {{#item:1001972}} and teleported to another map. | ||
<br> [[File:CharlesFollow.png]] | |||
|} | |} | ||
</div> | |||
<div class="mw-translate-fuzzy"> | |||
===Fortaleza Aérea: Susurro Oscuro=== | |||
# Te encontrarás con el Taoísta que sigue a una Legión Inmortal, te unirás a él y seguirás también a la criatura. | |||
#; [[File:TaoistAir.png]] | |||
# Al final de las escaleras encontrarás una pequeña habitación. Habla con Clover. | |||
#; [[File:CloverRoom.png]] | |||
# Explora las habitaciones laterales y recoge 2x {{#item:1001974}}. | |||
</div> | </div> | ||
<div lang="en" dir="ltr" class="mw-content-ltr"> | <div lang="en" dir="ltr" class="mw-content-ltr"> | ||
< | === Air Fortress: Dark Whisper=== | ||
< | | You will meet Taoist Jeon who is following an Immortal Legion. Join him and follow the creature. | ||
<br> [[File:TaoistAir.png]] | |||
|- | |||
| At the end of the stairs you will find a small room. Talk to Clover. | |||
<br> [[File:CloverRoom.png]] | |||
|- | |||
| Search the side rooms and collect 2x {{#item:1001974}}. | |||
|- | |||
| Go first into the Right Room: You will find 3x Immortal Monsters in cubes, click on the tubes and kill them, to collect 1x {{#item:1001974}}. <br> [[File:ImmoCubes.png]] | |||
|- | |||
| Then head back and enter the Left Room: You will find 4x Mechanical Device, click on them and collect 1x {{#item:1001974}}. <br>[[File:MechaDevice.png]] | |||
|- | |||
| As soon as you have collected 2x {{#item:1001974}}, go back to the middle room and talk to Taoist Jeon. The Group decides to meet in Ruined Verus again to discuss the new information they got. <br> You will get rewarded with 12x {{#item:1001972}}</li> <br> [[File:TaoistSample.png]] | |||
|- | |||
| The new hiding spot is at {{#navi:hem_dun01|184|195}}. Talk to Clover. The group decides to avoid the swarming followers and escape to Ruined Geffen. The Believer want to know, if you meet new humans at the temple. <br> [[File:HideSpot5.png]] | |||
|- | |||
| Head back to Ruined Geffen with @go 62 and meet up with Clover at the destroyed Geffen Tower {{#navi:ch1_geffen|122|118}}.</li> <br> [[File:ClovRG.png]] | |||
|- | |||
| As information about the plague is collected, the group goes ahead to the town hall in Ruined Geffen to discuss things further, follow up {{#navi:ch1_geffen|102|194}}.</li> <br> [[File:TownHall.png]] | |||
|- | |||
| At the town hall in Ruined Geffen, the group discusses the plague based on the information brought back from Dark Whisper. | |||
Talk to Einhar first and then to Taoist Jeon. You will get rewarded with 5x {{#item:1001972}}. <br> [[File:EinharTH.png]] [[File:TaoistTH.png]] | |||
|} | |||
</div> | </div> | ||
<div | <div class="mw-translate-fuzzy"> | ||
=== | ===Identidad de la Plaga=== | ||
# | # Después de discutir, el grupo decidió compartir lo que has aprendido con el Doctor Neumann en {{#navi:ch1_geffen|169|172}}. Entra por el Portal. | ||
#; [[File:WayClinic.png]] | #; [[File:WayClinic.png]] | ||
# | # Allí conocerás al Paciente Errante (Wandering Patient). Después de hablar con él, se abrirá el portal a la habitación izquierda. | ||
#; [[File:WandPat.png]] [[File:PortLeftRoom.png]] | #; [[File:WandPat.png]] [[File:PortLeftRoom.png]] | ||
# | # En el camino hacia el siguiente Portal se activará un diálogo. Después de entrar al Portal encontrarás un punto brillante "Doorway". | ||
#; [[File:Doorway.png]] | #; [[File:Doorway.png]] | ||
# | # Síguelos hacia la siguiente habitación por el portal sur. | ||
#; [[File:southP.png]] | #; [[File:southP.png]] | ||
# Einhar | # Aparecerá Einhar y generará un warp oscuro para ti, te aconseja calmarte y continuar con los aliados. Entra al portal oscuro. | ||
#; [[File:darkwarp.png]] | #; [[File:darkwarp.png]] | ||
# | # El Taoísta Jeon te espera en {{#navi:ygg_fruit|40|72}}. Recibirás como recompensa 10x {{#item:1001972}}. | ||
# | # Regresa a Geffen en Ruinas (go 62) y dirígete a la clínica en {{#navi:ch1_geffen|169|172}}. Entra por el Portal y vuelve a entrar a la habitación izquierda. Sigue caminando hasta llegar al Subsuelo de Geffen en Ruinas. | ||
#; [[File:WayClinic.png]] | #; [[File:WayClinic.png]] | ||
# | # Te espera una visión inesperada en el sótano de la clínica del Doctor Neumann. Gregor parece haber encontrado rastros que Einhar dejó atrás. Habla con Gregor. | ||
#; [[File:GregorUnde.png]] | #; [[File:GregorUnde.png]] | ||
# | # Todos vagan por el sótano de la clínica del Doctor Neumann. El Taoísta Jeon logró encontrar el rastro de Einhar. | ||
#; [[File:TaoistUnde2.png]] | #; [[File:TaoistUnde2.png]] | ||
# | # Finalmente encuentras a Einhar en el sótano, pero parece aturdido. Habla con Einhar. | ||
#; [[File:EinharUnde.png]] | #; [[File:EinharUnde.png]] | ||
# | # Regresa al sótano del Doctor Neumann en {{#navi:ch1_gef_in|68|33}}. Te encontrarás con Maxim, quien te recompensará con 10x {{#item:1001972}}. | ||
#; [[File:WayClinic.png]] [[File:MaximBase.png]] | #; [[File:WayClinic.png]] [[File:MaximBase.png]] | ||
</div> | </div> | ||
<div lang="en" dir="ltr" class="mw-content-ltr"> | <div lang="en" dir="ltr" class="mw-content-ltr"> | ||
=== | ===Identity of the Plague=== | ||
# You | | After discussing, the group decides to share what they've learned with Doctor Neumann at {{#navi:ch1_geffen|169|172}}. Enter the Portal. | ||
<br> [[File:WayClinic.png]] | |||
|- | |||
| You will meet a Wandering Patient there. After talking with him, he will tell you, that the door at 9 o*clock is usually locked, but now it seems to be slightly open. Enter the portal. | |||
<br> [[File:WandPat.png]] [[File:PortLeftRoom.png]] | |||
|- | |||
| On the way to the next Portal, a dialogue will appear. After entering the Portal you will find a shining spot "Doorway". You will hear the same man like earlier, begging to save his daughter, even if that means he has to do even more horrible things than anything he had ever done before. | |||
<br> [[File:Doorway.png]] | |||
|- | |||
| Follow them into the next room through the south portal. | |||
<br> [[File:southP.png]] | |||
|- | |||
| Einhar will appear and spawn a dark warp for you. He advices you to calm down and get help. Enter the dark portal. | |||
<br> [[File:darkwarp.png]] | |||
|- | |||
| Taoist Jeon is waiting for you at {{#navi:ygg_fruit|40|72}}. You will get rewarded with 10x {{#item:1001972}}. <br> [[File:TaoEntr.png]] | |||
|- | |||
| Go back to Ruined Geffen (go 62) and head to the clinic at {{#navi:ch1_geffen|169|172}}. Enter the Portal and move to the room on the left again. Keep walking down until you reach the Ruined Geffen Underground. | |||
<br> [[File:WayClinic.png]] | |||
|- | |||
| An unexpected sight awaits in the basement of Doctor Neumann's clinic. Gregor seems to have found traces Einhar left behind. Talk to Gregor. | |||
<br> [[File:GregorUnde.png]] | |||
|- | |||
| After wandering the basement of Doctor Neumann's clinic. Taoist Jeon manages to find Einhar's trail {{#navi:ch1_que01|125|57}}. | |||
<br> [[File:TaoistUnde2.png]] | |||
|- | |||
| Follow the trail to Einhar's next mark {{#navi:ch1_que01|51|46}}. | |||
|- | |||
| You finally find Einhar in the basement {{#navi:ch1_que01|67|128}}, but he looks stunned. Talk to Einhar. | |||
<br> [[File:EinharUnde.png]] | |||
|- | |||
| Walk back to the basement of the clinic (@go 62) at {{#navi:ch1_gef_in|68|33}}. You will meet Maxim, who will reward you with 10x {{#item:1001972}}. | |||
<br> [[File:WayClinic.png]] [[File:MaximBase.png]] | |||
|} | |||
</div> | |||
<div class="mw-translate-fuzzy"> | |||
===Exploración del Tomo de Ilusiones=== | |||
# Puede que hayas encontrado una pista en el diario, regresa al Profesor Telcos (@go 61) en la Aldea del Árbol de Ceniza {{#navi:ygg_edge|212|206}}. | |||
#; [[File:ProfTelco.png]] | #; [[File:ProfTelco.png]] | ||
# | # Hablando con el Profesor Telcos, él te mostrará el diario que creó. Entra en el libro. | ||
#; [[File:IlluBook.png]] | #; [[File:IlluBook.png]] | ||
# | # Después de entrar al diario, dirígete a Ziegler que se encuentra en {{#navi:ch1_vrgef2|139|195}}. | ||
#; [[File:Ziegler1.png]] | #; [[File:Ziegler1.png]] | ||
# Ziegler | # Ziegler parece ocupado, se encuentra en {{#navi:ch1_vrgef2|190|137}}. Lo volverás a encontrar. | ||
#; [[File:Ziegler2.png]] | #; [[File:Ziegler2.png]] | ||
# | # Encuentra nuevamente a Ziegler en {{#navi:ch1_vrgef2|50|93}}, él te pide ayuda, así que síguelo a la casa de adelante. | ||
#; [[File:Ziegler3.png]] | #; [[File:Ziegler3.png]] | ||
# | # Entra en la casa junto a Ziegler en {{#navi:ch1_vrgef1|66|137}}, él te pide encontrar algo sospechoso en la habitación. | ||
#; [[File:Ziegler4.png]] | #; [[File:Ziegler4.png]] | ||
# | # En la misma habitación encontrarás objetos sobre los que puedes hacer clic, revisa todos hasta que Ziegler te dé un nuevo icono de Misión para continuar. | ||
# | # Habla con Ziegler y sal del edificio. | ||
# | # Habla con él nuevamente frente a la casa. | ||
# | # Después de hablar con Ziegler, dirígete a la casa de Neumann en {{#navi:ch1_vrgef2|173|64}} y entra en la casa. | ||
# | # Habrá varios diálogos, sigue subiendo las escaleras. | ||
# | # Con el último diálogo, sal nuevamente de la casa, donde Ziegler te estará esperando. | ||
#; [[File:Ziegler5.png]] | #; [[File:Ziegler5.png]] | ||
# | # Has completado la Exploración del Tomo de Ilusiones, regresa al Profesor Telcos (@go 61). Recibirás como recompensa 10x {{#item:1001972}}. | ||
=== | |||
# Neumann | ===La Verdad del Doctor=== | ||
# Neumann era un doctor falso, regresa a Geffen en Ruinas (go 62) y discútelo con Maxim {{#navi:ch1_geffen|102|194}}. Recibirás 3 pequeñas misiones de visita. | |||
#; [[File:TownHall.png]] [[File:MaximTH.png]] | #; [[File:TownHall.png]] [[File:MaximTH.png]] | ||
#* | #* ¿Qué tipo de persona es el Doctor? Parte 1 {{#navi:ch1_geffen|179|161}}. <br> [[File:DocP1.png]] | ||
#* | #* ¿Qué tipo de persona es el Doctor? Parte 2 {{#navi:ch1_geffen|56|90}}. <br> [[File:DocP2.png]] | ||
#* | #* ¿Qué tipo de persona es el Doctor? Parte 3 {{#navi:ch1_geffen|119|195}}. <br> [[File:DocP3.png]] | ||
# | # Habla con todos ellos. Notarás que tampoco sabían mucho sobre qué tipo de persona era Neumann. Regresa con Maxim {{#navi:ch1_geffen|102|194}}. | ||
# Maxim | # Maxim dice que Margot, esposa de Neumann, probablemente sepa más sobre él. Visítala en {{#navi:ch1_geffen|178|63}}. Sube las escaleras. | ||
#; [[File:MagoW.png]] | #; [[File:MagoW.png]] | ||
# | # Habla varias veces con ella, te pedirá un vaso de agua antes de continuar con la información sobre su esposo Neumann. | ||
# | # Regresa a la entrada y encontrarás un punto brillante para conseguir agua para Margot. | ||
#; [[File:WaterK.png]] | #; [[File:WaterK.png]] | ||
# | # Regresa con ella y dale el agua, te dirá que Neumann tenía un registro sobre sus experimentos, necesitas encontrarlo. | ||
# | # Vuelve nuevamente al sótano, encontrarás el registro de Neumann debajo de la cama. "Lift the mattress." | ||
#; [[File:Crecord.png]] | #; [[File:Crecord.png]] | ||
# | # Tómalo y regresa con Margot. Recibirás como recompensa 10x {{#item:1001972}}. | ||
# | # Regresa a la aldea vía @go 61 y habla con la Asistente Baily {{#navi:ygg_edge|73|151}} y entra al portal. Ella te dirá que la sangre de la enfermera podría ser útil, ella irá contigo a Geffen para extraerle algo de sangre. | ||
#; [[File:PortalBaily.png]] [[File:Baily.png]] | #; [[File:PortalBaily.png]] [[File:Baily.png]] | ||
# | # Regresa con Margot a la parte superior de su casa. (@go 62 y {{#navi:ch1_geffen|178|63}}). | ||
#; [[File:MagoW.png]] | #; [[File:MagoW.png]] | ||
# | # Habla con Baily, te dirá que se quedará y monitorizará el progreso de Margot y proporcionará ayuda antes de regresar a la aldea. | ||
#; [[File:BailyBl.png]] | #; [[File:BailyBl.png]] | ||
# | # Regresas con @go 61 y visitas el Estante de Baily {{#navi:ygg_edge|73|151}} y entras al portal. Recibirás como recompensa 10x {{#item:1001972}}. | ||
#; [[File:BailyShelf.png]] | #; [[File:BailyShelf.png]] | ||
</div> | </div> | ||
<div lang="en" dir="ltr" class="mw-content-ltr"> | <div lang="en" dir="ltr" class="mw-content-ltr"> | ||
=== | ===Illusion Tome Exploration=== | ||
# | | You may have found a clue in the diary, return to Professor Telcos (@go 61) in Ash Tree Village {{#navi:ygg_edge|212|206}}. | ||
<br> [[File:ProfTelco.png]] | |||
|- | |||
| By talking to Professor Telcos, he will show you the journal he created. Enter the book. | |||
<br> [[File:IlluBook.png]] | |||
|- | |||
| After entering the journal, head to Ziegler who is located at {{#navi:ch1_vrgef2|139|195}}. | |||
<br> [[File:Ziegler1.png]] | |||
|- | |||
| Ziegler seems to be busy and leaves. Move to {{#navi:ch1_vrgef2|190|137}}, where you will meet him again. | |||
<br> [[File:Ziegler2.png]] | |||
|- | |||
| Find Ziegler, who is located at {{#navi:ch1_vrgef2|50|93}}, again. He asks you for some help, so follow him into the house ahead. | |||
<br> [[File:Ziegler3.png]] | |||
|- | |||
| Enter the house next to Ziegler who is located at {{#navi:ch1_vrgef1|66|137}}. He asks you to find something suspicious in the room. | |||
<br> [[File:Ziegler4.1.png]] | |||
|- | |||
| In the same room, you will find items you can click on. Check them all until Ziegler gives you a new Quest icon to continue. <br> [[File:ziegel_in.png]] | |||
|- | |||
| Talk to Ziegler and then leave the building. | |||
|- | |||
| Talk to him once again in front of the house. | |||
|- | |||
| After talking with Ziegler move to Neumann's house at {{#navi:ch1_vrgef2|173|64}} and enter it. <br> [[File:Ziegler4.png]] | |||
|- | |||
| There will be several dialogues, keep moving upstairs. | |||
|- | |||
| With the last dialogue, move back out of the house, where Ziegler is waiting for you. | |||
<br> [[File:Ziegler5.png]] | |||
|- | |||
| You completed the Illusion Tome Exploration. Head back to Professor Telcos (@go 61). You will get rewarded with 10x {{#item:1001972}}. | |||
|} | |||
</div> | |||
<div lang="en" dir="ltr" class="mw-content-ltr"> | |||
{| class="mw-collapsible mw-collapsed" | |||
|+ style="text-align:left; font-weight:700; font-size:1.15em; padding:0; background:transparent;width: 100%" | | |||
</div> | |||
<div lang="en" dir="ltr" class="mw-content-ltr"> | |||
===The Doctor's Truth=== | |||
| Neumann was a fake doctor. Return to Ruined Geffen (go 62) and discuss this with Maxim {{#navi:ch1_geffen|102|194}}. You will receive 3 small visit-quests. | |||
<br> [[File:TownHall.png]] [[File:MaximTH.png]] | |||
|- | |||
| What Kind of Person is the Doctor? Part 1 {{#navi:ch1_geffen|179|161}}. <br> [[File:DocP1.png]] | |||
|- | |||
| What Kind of Person is the Doctor? Part 2 {{#navi:ch1_geffen|56|90}}. <br> [[File:DocP2.png]] | |||
|- | |||
| What Kind of Person is the Doctor? Part 3 {{#navi:ch1_geffen|119|195}}. <br> [[File:DocP3.png]] | |||
|- | |||
| Talk to all of them. You will notice that they also don't know much about what kind of person Neumann was. Return to Maxim {{#navi:ch1_geffen|102|194}}. <br> [[File:MaximTH.png]] | |||
|- | |||
| Maxim says Margot, Neumann's wife, would probably know more about him. Let's visit her at {{#navi:ch1_geffen|178|63}}. Walk up the stairs. | |||
<br> [[File:MagoW.png]] | |||
|- | |||
| Talk several times to her, she will ask you for a cup of water before continuing with her story about her husband Neumann. | |||
|- | |||
| Walk back to the entrance, where you will find a shining spot to get some water for Margot. <br> [[File:WaterK.png]] | |||
|- | |||
| Return to her and give her the water. She will tell you that Neumann had a record about his experiments, you need to find it. <br> [[File:MagoW.png]] | |||
|- | |||
| Walk back to the basement again, where you will find Neumann's record under the bed. Choose "Lift the mattress." | |||
<br> [[File:Crecord.png]] | |||
|- | |||
| Take it and go back to Margot. You will get rewarded with 10x {{#item:1001972}}. | |||
|- | |||
| Return to the village via @go 61 and talk to Assistant Baily {{#navi:ygg_edge|73|151}} and enter the portal. She will tell you that the nurse's blood could be helpful. She will go with you to Geffen to draw some blood from Margot. | |||
<br> [[File:PortalBaily.png]] [[File:Baily.png]] | |||
|- | |||
| Head back to Margot on the top floor of her house. (@go 62 and {{#navi:ch1_geffen|178|63}}). | |||
<br> [[File:MagoW.png]] | |||
|- | |||
| Talk to Baily, she will tell you that she will stay and monitor Margot's progress and provide relief there before returning back to the village. | |||
<br> [[File:BailyBl.png]] | |||
|- | |||
| You head back with @go 61 and visit Baily's Shelf {{#navi:ygg_edge|73|151}}. Enter the portal. You will get rewarded with 10x {{#item:1001972}}. | |||
<br> [[File:BailyShelf.png]] | |||
|} | |||
</div> | |||
<div class="mw-translate-fuzzy"> | |||
===Hacia Brimir=== | |||
# Un equipo ya ha partido para la exploración. Usa el portal warp en {{#navi:ygg_edge|36|117}}. | |||
#; [[File:PortalDarkness.png]] | #; [[File:PortalDarkness.png]] | ||
# | # Muévete a {{#navi:ygg_roots|37|123}} y entra al portal rojo. Te encontrarás con ellos en {{#navi:uknw_ruin|256|238}}. Habla con uno de ellos, te teleportarán a un lugar seguro. | ||
#; [[File:Elisha_Isha.png]] | #; [[File:Elisha_Isha.png]] | ||
# | # Dentro del lugar seguro habla nuevamente con ellos. Aparecerán One y Zero, habla también con ellos. | ||
#; [[File:Elisha_safe.png]] [[File:One_safe.png]] [[File:Zero_safe.png]] | #; [[File:Elisha_safe.png]] [[File:One_safe.png]] [[File:Zero_safe.png]] | ||
# | # Después de que todos desaparezcan, sal de la habitación y busca a los 3 Residentes de Brimir en: | ||
#; {{#navi:uknw_ruin|253|63}} <br> [[File:Brimir1.png]] | #; {{#navi:uknw_ruin|253|63}} <br> [[File:Brimir1.png]] | ||
#; {{#navi:uknw_ruin|91|173}} <br> [[File:Brimir2.png]] | #; {{#navi:uknw_ruin|91|173}} <br> [[File:Brimir2.png]] | ||
#; {{#navi:uknw_ruin|153|150}} <br> [[File:Brimir3.png]] | #; {{#navi:uknw_ruin|153|150}} <br> [[File:Brimir3.png]] | ||
# | # Después de visitar a todos los Residentes de Brimir, Zero aparecerá en {{#navi:uknw_ruin|158|158}}, diciéndote que uno de los Residentes podría saber cómo romper las cadenas atadas a sus tobillos. Te teleportará a otro lugar seguro. Habla con él nuevamente. | ||
# | # Debes cazar 10x Shadow Jailer y regresar con One en {{#navi:uknw_ruin|158|158}}. | ||
# | # Después de entregar la misión, ahora tienes la solución para liberar a las prisioneras Valquiria de sus cadenas. Sal del lugar seguro y habla afuera con Dry Branch. Entra al lugar seguro y habla con él nuevamente. Aparecerá Two, habla también con él. Quiere que encuentres a Broken Branch en Brimir. | ||
#; [[File:DryBranch.png]] | #; [[File:DryBranch.png]] | ||
# Broken Branch | # Broken Branch se encuentra en {{#navi:uknw_ruin|255|59}}. Hablando con él aparecerá Three. Entra al portal junto a él. | ||
#; [[File:Brokenbranch.png]] [[File:Three.png]] [[File:BRportal.png]] | #; [[File:Brokenbranch.png]] [[File:Three.png]] [[File:BRportal.png]] | ||
# Rotten Branch | # Rotten Branch está en {{#navi:uknw_ruin|93|173}}, te teleportará a una zona segura donde aparecerá Four, habla con ellos. | ||
# | #; [[File:RottenBranch.png]] [[File:Four_safe.png]] | ||
# | # Regresa con One en {{#navi:uknw_ruin|158|158}}, entra a la zona segura y habla nuevamente con él. Recibirás como recompensa 10x {{#item:1001972}}. | ||
# | # Desbloqueas las misiones diarias: "Una Tumba Formal", "Los Gatos siguen siendo Gatos" y "De Hecho. Ellos también.". | ||
</div> | </div> | ||
<div lang="en" dir="ltr" class="mw-content-ltr"> | <div lang="en" dir="ltr" class="mw-content-ltr"> | ||
=== | ===To Brimir=== | ||
# | | A team has already departed for exploration. Use the warp portal at {{#navi:ygg_edge|36|117}}. | ||
<br> [[File:PortalDarkness.png]] | |||
|- | |||
| Move to {{#navi:ygg_roots|37|123}} and enter the red portal. <br> [[File:brimir_portal.png]] | |||
|- | |||
| You will meet them at {{#navi:uknw_ruin|256|238}}. Talk to one of them, they will warp you to a safe place. | |||
<br> [[File:Elisha_Isha.png]] | |||
|- | |||
| Talk to them again inside the safe place . One and Zero will appear, talk to them too. | |||
<br> [[File:Elisha_safe.png]] [[File:One_safe.png]] [[File:Zero_safe.png]] | |||
|- | |||
| After they all disappear, leave the room and search for the 3 Brimir Residents at: | |||
* {{#navi:uknw_ruin|253|63}} <br> [[File:Brimir1.png]] | |||
* {{#navi:uknw_ruin|91|173}} <br> [[File:Brimir2.png]] | |||
* {{#navi:uknw_ruin|153|150}} <br> [[File:Brimir3.png]] | |||
|- | |||
| After visiting all Brimir Residents, One will appear at {{#navi:uknw_ruin|158|158}} telling you that one of the Residents may know how to break the chains tied to their ankles. He will warp you into another safe place. Talk to him again. <br> [[File:One_3.png]] | |||
|- | |||
| You have to hunt 10x {{#linkmob:22464}} and collect 5x {{#item:1001976}} from them. Then return to One at {{#navi:uknw_ruin|158|158}}. | |||
|- | |||
| After you turn in the quest, you now have the solution to free the Valkyrie prisoners from their chains. Leave the safe place and talk to Dry Branch outside. Enter the safe place and talk to him again. Two will appear, talk to him too. He wants you to find Broken Branch in Brimir. | |||
<br> [[File:DryBranch.png]] [[File:Two_insid.png]] | |||
|- | |||
| Broken Branch is located at {{#navi:uknw_ruin|255|59}}. Talking to him will summon Three. Enter the portal next to him. | |||
<br> [[File:Brokenbranch.png]] [[File:Three.png]] [[File:BRportal.png]] | |||
|- | |||
| Rotten Branch is at {{#navi:uknw_ruin|93|173}}, he warps you into a safe zone where Four spawns. Talk to them. <br> [[File:RottenBranch.png]] [[File:Four_safe.png]] | |||
|- | |||
| Return to One at {{#navi:uknw_ruin|158|158}}, enter the safe zone and talk to him again. You will get rewarded with 10x {{#item:1001972}}. | |||
|- | |||
| You unlock the daily quest: "A Formal Grave", "Cats are still Cats" and "In Fact. They too.". | |||
|} | |||
</div> | |||
<div class="mw-translate-fuzzy"> | |||
===La Tierra del Calor=== | |||
# Regresa con @go 61 a la aldea y habla con Laphine Shasha en {{#navi:ygg_fruit|80|122}}. Habla con ella dos veces. | |||
#; [[File:LaphSha.png]] | #; [[File:LaphSha.png]] | ||
# | # Parece que la pista final para la cura se encuentra en Muspelheim. Visita a Devries en {{#navi:ygg_fruit|71|78}}. Recibirás como recompensa 10x {{#item:1001972}}. | ||
#; [[File:DevMus.png]] | #; [[File:DevMus.png]] | ||
# | # Los preparativos para viajar al Valle Volund en Muspelheim están completos, encuentra al grupo en el Valle Volund. | ||
# | # Entra al portal en {{#navi:ygg_edge|36|117}} | ||
#; [[File:PortalDarkness.png]] | #; [[File:PortalDarkness.png]] | ||
# | # Para entrar a la Tierra del Calor, muévete a la parte superior este del mapa {{#navi:ygg_roots|342|248}}. | ||
#; [[File:HeatLandPortal.png]] | #; [[File:HeatLandPortal.png]] | ||
# | # Al entrar al mapa encontrarás un Punto de Medición (Survey Point), haz clic en él para entrar al lugar seguro. | ||
#; [[File:SurveyPoint.png]] | #; [[File:SurveyPoint.png]] | ||
# | # Dentro del lugar seguro encontrarás a Chez y a los demás esperándote. Gracias al dispositivo de control de temperatura, ahora son posibles las operaciones en Muspelheim. | ||
#; [[File:Chez_Safe1.png]] | #; [[File:Chez_Safe1.png]] | ||
# | # Dirígete más adentro para encontrar a Harban en {{#navi:mu_fild01|158|217}}. Has obtenido información sobre Hal, continúa más adentro de Muspelheim para encontrarlo. | ||
#; [[File:Harban_Land.png]] | #; [[File:Harban_Land.png]] | ||
# | # Más adentro en Muspelheim encontrarás a Tamarin en {{#navi:mu_fild01|224|245}}. | ||
#; [[File:Mus_Tama.png]] | #; [[File:Mus_Tama.png]] | ||
# | # Aprendiste sobre el equipo de Tamarin, ahora busca a Yupilus {{#navi:mu_fild01|196|184}}. Te pedirán que recolectes Hal para su experimento. | ||
#; [[File:Mus_Yup.png]] | #; [[File:Mus_Yup.png]] | ||
# | # Dirígete a los 8 Trabajadores en: | ||
#;{{#navi:mu_fild01|236|293}} <br> [[File:Mu_Worker.png]] | #;{{#navi:mu_fild01|236|293}} <br> [[File:Mu_Worker.png]] | ||
#;{{#navi:mu_fild01|218|308}} <br> [[File:Mu_Worker1.png]] | #;{{#navi:mu_fild01|218|308}} <br> [[File:Mu_Worker1.png]] | ||
| Line 342: | Line 624: | ||
#;{{#navi:mu_fild01|90|195}} <br> [[File:Mu_Worker5.png]] | #;{{#navi:mu_fild01|90|195}} <br> [[File:Mu_Worker5.png]] | ||
#;{{#navi:mu_fild01|120|235}} <br> [[File:Mu_Worker6.png]] | #;{{#navi:mu_fild01|120|235}} <br> [[File:Mu_Worker6.png]] | ||
# | # Has reunido la cantidad requerida de Hal. Regresa con Yupilus en {{#navi:mu_fild01|199|185}}. Dentro del lugar seguro también habla con Harban. <br> Habla con Yupilus y recibirás como recompensa 10x {{#item:1001972}}. | ||
#; [[File:mu_f_Yup.png]] [[File:ins_harban.png]] | #; [[File:mu_f_Yup.png]] [[File:ins_harban.png]] | ||
</div> | </div> | ||
<div lang="en" dir="ltr" class="mw-content-ltr"> | <div lang="en" dir="ltr" class="mw-content-ltr"> | ||
=== | ===The Land of Heat=== | ||
# You | | Head back to the Village with @go 61 and talk to Laphine Shasha at {{#navi:ygg_fruit|80|122}}. Talk to her twice. | ||
<br> [[File:LaphSha.png]] | |||
|- | |||
| It seems the final clue for the cure can be found in Muspelheim. Visit Devries in {{#navi:ygg_fruit|71|78}}. You will get rewarded with 10x {{#item:1001972}}. | |||
<br> [[File:DevMus.png]] | |||
|- | |||
| Preparations to travel to Volund Valley in Muspelheim are complete, find the group in Volund Valley. | |||
|- | |||
| Enter the portal at {{#navi:ygg_edge|36|117}} | |||
<br> [[File:PortalDarkness.png]] | |||
|- | |||
| To enter the Land of Heat move to the east upper part of the map {{#navi:ygg_roots|342|248}}. | |||
<br> [[File:HeatLandPortal.png]] | |||
|- | |||
| By entering the map you will find a Survey Point, move close to it to enter the safe place. | |||
<br> [[File:SurveyPoint.png]] | |||
|- | |||
| Inside the safe place you will find Chez and the others waiting for you. Thanks to the temperature control device, operations in Muspelheim are now possible. | |||
<br> [[File:Chez_Safe1.png]] | |||
|- | |||
| Head deeper inside to find Harban at {{#navi:mu_fild01|158|217}}. You obtain some information about Hal, go deeper into Muspelheim to find out more. | |||
<br> [[File:Harban_Land.png]] | |||
|- | |||
| Deeper in Muspelheim you will find Tamarin at {{#navi:mu_fild01|224|245}}. | |||
<br> [[File:Mus_Tama.png]] | |||
|- | |||
| You learn about the team from Tamarin, now you search for Yupilus {{#navi:mu_fild01|196|184}}. You will be asked to collect Hal for his experiment. | |||
<br> [[File:Mus_Yup.png]] | |||
|- | |||
| Head to the 8 Workers at: | |||
* {{#navi:mu_fild01|236|293}} <br> [[File:Mu_Worker.png]] | |||
* {{#navi:mu_fild01|218|308}} <br> [[File:Mu_Worker1.png]] | |||
* {{#navi:mu_fild01|166|369}} <br> [[File:Mu_Worker7.png]] | |||
* {{#navi:mu_fild01|134|308}} <br> [[File:Mu_Worker2.png]] | |||
* {{#navi:mu_fild01|125|303}} <br> [[File:Mu_Worker3.png]] | |||
* {{#navi:mu_fild01|35|192}} <br> [[File:Mu_Worker4.png]] | |||
* {{#navi:mu_fild01|90|195}} <br> [[File:Mu_Worker5.png]] | |||
* {{#navi:mu_fild01|120|235}} <br> [[File:Mu_Worker6.png]] | |||
|- | |||
| After you've gathered the required amount of Hal, return to Yupilus at {{#navi:mu_fild01|199|185}}. Inside the safe place also talk to Harban. <br> Talk to Yupilus again and you will get rewarded with 10x {{#item:1001972}}. | |||
<br> [[File:mu_f_Yup.png]] [[File:ins_harban.png]] | |||
|} | |||
</div> | |||
<div class="mw-translate-fuzzy"> | |||
===Cura Creada con Éxito=== | |||
# Has obtenido una bilis especial. Regresa a la aldea y entrégala a la Asistente Baily. Regresa a la aldea con @go 61 y sigue el navi hasta {{#navi:ygg_edge|73|151}}, entra al portal. | |||
#; [[File:PortalBaily.png]] | #; [[File:PortalBaily.png]] | ||
# | # La Asistente Baily completó la cura usando la bilis especial y te pidió entregarla a Maxim en Geffen en Ruinas, usa @go 62 y {{#navi:ch1_geffen|102|194}}. | ||
#; [[File:TownHall.png]] | #; [[File:TownHall.png]] | ||
#Maxim | # Maxim sugiere que sería mejor realizar el ensayo clínico en lugar de usar la cura de inmediato. | ||
#;[[File:MaximTH.png]] | #;[[File:MaximTH.png]] | ||
# | # Administra la cura primero a Margot {{#navi:ch1_geffen|178|63}}. | ||
#; [[File:MagoW.png]] | #; [[File:MagoW.png]] | ||
# | # Has usado la cura en la enfermera. Habla con Maxim junto a ella. Maxim dice que se encargará de Margot mientras la medicina hace efecto. Para una observación más precisa, entrégale el diario de la condición de Margot que ha estado guardando. | ||
#; [[File:MaximNurse.png]] | #; [[File:MaximNurse.png]] | ||
# | # Regresa al Ayuntamiento {{#navi:ch1_geffen|102|193}}, donde verás un punto brillante que contiene el Diario. Elige "Small Journal". | ||
#;[[File:JournalTH.png]] | #;[[File:JournalTH.png]] | ||
# | # Regresa con Maxim, que todavía está con Margot {{#navi:ch1_geffen|178|63}}. | ||
#; [[File:MagoW.png]] [[File:MaximNurse.png]] | #; [[File:MagoW.png]] [[File:MaximNurse.png]] | ||
#Maxim | # Maxim te dice que la condición de Margot ha mejorado, la cura parece ser efectiva. Distribuye la cura a los otros pacientes en la clínica de Geffen {{#navi:ch1_geffen|169|172}}. Entra al portal. | ||
#; [[File:WayClinic.png]] | #; [[File:WayClinic.png]] | ||
# | # Cura a los 3 pacientes: | ||
#; | #; Primera habitación <br> [[File:CureWeak.png]] | ||
#; {{#navi:ch1_gef_in|112|31}} <br> [[File:CureSkinny.png]] | #; {{#navi:ch1_gef_in|112|31}} <br> [[File:CureSkinny.png]] | ||
#; {{#navi:ch1_gef_in|112|108}} <br> [[File:CureDrowsy.png]] | #; {{#navi:ch1_gef_in|112|108}} <br> [[File:CureDrowsy.png]] | ||
# | # Has distribuido la cura a las personas en la clínica. Regresa con Maxim al Ayuntamiento y reporta los resultados {{#navi:ch1_geffen|102|194}}. Habla con él dos veces. Recibirás como recompensa 10x {{#item:1001972}}. | ||
#; [[File:TownHall.png]] [[File:MaximTH.png]] | #; [[File:TownHall.png]] [[File:MaximTH.png]] | ||
</div> | </div> | ||
<div lang="en" dir="ltr" class="mw-content-ltr"> | <div lang="en" dir="ltr" class="mw-content-ltr"> | ||
=== | ===Cure Created Successfully=== | ||
# | | You obtain a special Hal. Return to the Village and deliver it to Assistant Baily. Return to the village with @go 61 and follow the navi to {{#navi:ygg_edge|73|151}}, enter the portal. | ||
<br> [[File:PortalBaily.png]] | |||
|- | |||
| Assistant Baily completes the cure using the special Hal and asks you to deliver it to Maxim in Ruined Geffen, use @go 62 and {{#navi:ch1_geffen|102|194}}. | |||
<br> [[File:TownHall.png]] | |||
|- | |||
| Maxim suggest that it would be best to conduct a clinical trial rather than use the cure immediately. | |||
<br> [[File:MaximTH.png]] | |||
|- | |||
| Administer the cure to Margot first {{#navi:ch1_geffen|178|63}}. | |||
<br> [[File:MagoW.png]] | |||
|- | |||
| You use the cure on the nurse. Talk to Maxim next to her. Maxim says he will take care of Margot, while the medicine takes effect. For a more accurate observation, bring him the journal of Margot's condition that he has been keeping. | |||
<br> [[File:MaximNurse.png]] | |||
|- | |||
| Return to the Town Hall {{#navi:ch1_geffen|102|193}}, where you will see a shining spot containing the Journal. Choose "Small Journal". | |||
<br> [[File:JournalTH.png]] | |||
|- | |||
| Return to Maxim who is still with Margot {{#navi:ch1_geffen|178|63}}. | |||
<br> [[File:MagoW.png]] [[File:MaximNurse.png]] | |||
|- | |||
| Maxim tells you that Margot's condition improved, the cure seems to be effective. Distribute the cure to the other patients at Geffen's clinic {{#navi:ch1_geffen|169|172}}. Enter the Portal. | |||
<br> [[File:WayClinic.png]] | |||
|- | |||
| | |||
* Cure all 3 patients: | |||
** First room <br> [[File:CureWeak.png]] | |||
** {{#navi:ch1_gef_in|112|31}} <br> [[File:CureSkinny.png]] | |||
** {{#navi:ch1_gef_in|112|108}} <br> [[File:CureDrowsy.png]] | |||
|- | |||
| After you have distributed the cure to the people at the clinic, return to Maxim at the Town Hall and report the results {{#navi:ch1_geffen|102|194}}. Talk to him twice. You will get rewarded with 10x {{#item:1001972}}. | |||
<br> [[File:TownHall.png]] [[File:MaximTH.png]] | |||
|} | |||
</div> | |||
<div class="mw-translate-fuzzy"> | |||
===Derribar la Fortaleza Aérea=== | |||
# Nuestro objetivo es derribar a Dark Whisper, la fuente de la plaga. Regresa a Geffen en Ruinas con @go 62 y entra al portal en la Torre de Geffen en Ruinas {{#navi:ch1_geffen|120|118}}. | |||
#; [[File:BasementP.png]] | #; [[File:BasementP.png]] | ||
# | # Habla con Est en {{#navi:hem_dun01|206|245}}. Crea un grupo para unirte a la instancia "Ominous Dark Whisper". | ||
#; [[File:Est_hem.png]] | #; [[File:Est_hem.png]] | ||
# | # Dentro de la instancia habla nuevamente con Est, elige "Let's move out" para iniciar la instancia. | ||
#; [[File:Est_in1.png]] | #; [[File:Est_in1.png]] | ||
# | # Sigue a Est, que está disfrazado de Succubus. Después de algunos monstruos malditos, serás teleportado afuera. | ||
#; [[File:Estubus.png]] | #; [[File:Estubus.png]] | ||
# | # Sigue las escaleras y mata a los monstruos en el camino. Si matas a todos los monstruos, se abrirá la sala hacia la cámara. | ||
# | # Conocerás al Monarca Inmortal (Immortal Monarch), mátalo y habla con Est. (Destruye el cristal en el borde para infligirle daño) | ||
#; [[File:ImmMonarch.png]] [[File:EstMon.png]] | #; [[File:ImmMonarch.png]] [[File:EstMon.png]] | ||
# | # Después de derrotar al Monarca Inmortal, regresa a la aldea vía @go 61, sigue el navi: {{#navi:ygg_edge|167|137}} y entra al portal. | ||
#; [[File:PortSha.png]] | #; [[File:PortSha.png]] | ||
# | # Dentro habla con Shasha, recibirás como recompensa 10x {{#item:1001972}}. | ||
#; [[File:ShaIns.png]] | #; [[File:ShaIns.png]] | ||
# | # Regresa a Geffen en Ruinas con @go 62 y entra al portal en la Torre de Geffen en Ruinas {{#navi:ch1_geffen|120|118}}. | ||
#; [[File:BasementP.png]] | #; [[File:BasementP.png]] | ||
# | # El profesor mago dice que hay algo que discutir sobre Dark Whisper {{#navi:hem_dun01|201|248}}. | ||
#; [[File:hemMage.png]] | #; [[File:hemMage.png]] | ||
# You have completed Main Quest of Chapter 1 and | # Has completado la Misión Principal del Chapter 1 y ahora tienes acceso a la instancia diaria Recreated Dark Whisper. | ||
</div> | |||
<div lang="en" dir="ltr" class="mw-content-ltr"> | |||
===Bring down the Air Fortress=== | |||
| Our goal is to bring down Dark Whisper, the source of the plague. Head back to Ruined Geffen with @go 62 and enter the Portal at the ruined Geffen Tower {{#navi:ch1_geffen|120|118}}. | |||
<br> [[File:BasementP.png]] | |||
|- | |||
| Talk to Est at {{#navi:hem_dun01|206|245}}. Create a party to join the instance "Ominous Dark Whisper". | |||
<br> [[File:Est_hem.png]] | |||
|- | |||
| Inside the instance talk to Est again, choose "Let's move out" to start the instance. | |||
<br> [[File:Est_in1.png]] | |||
|- | |||
| Follow Est who is disguised as Succubus. After some cursed monsters appear, you will get warped out. | |||
<br> [[File:Estubus.png]] | |||
|- | |||
| Follow the stairs and kill the monsters on the way. Once you killed all monsters the way to the chamber will open. | |||
|- | |||
| You will meet the Immortal Monarch, kill him and talk to Est. (Destroy the crystal at the edge to deal damage to him). You will get rewarded with 20x {{#item:1001972}}. | |||
<br> [[File:ImmMonarch.png]] [[File:EstMon.png]] | |||
|- | |||
| After defeating the Immortal Monarch head back to the village via @go 61 and follow the navi: {{#navi:ygg_edge|167|137}} and enter the portal. | |||
<br> [[File:PortSha.png]] | |||
|- | |||
| Talk to Shasha inside, you will get rewarded with 10x {{#item:1001972}}. | |||
<br> [[File:ShaIns.png]] | |||
|- | |||
| Head back to Ruined Geffen with @go 62 and enter the Portal at the ruined Geffen Tower {{#navi:ch1_geffen|120|118}}. | |||
<br> [[File:BasementP.png]] | |||
|- | |||
| The wizard professor says there's something to discuss about Dark Whisper {{#navi:hem_dun01|201|248}}. | |||
<br> [[File:hemMage.png]] | |||
|- | |||
| You have completed the Main Quest of Chapter 1 and now have access to the Recreated Dark Whisper daily instance. | |||
|} | |||
</div> | </div> | ||
<div lang="en" dir="ltr" class="mw-content-ltr"> | <div lang="en" dir="ltr" class="mw-content-ltr"> | ||
==Side Quests== | ==Side Quests== | ||
{| class="mw-collapsible mw-collapsed" | |||
|+ style="text-align:left; font-weight:700; font-size:1.15em; padding:0; background:transparent;width: 100%" | | |||
===Clover's Worry=== | ===Clover's Worry=== | ||
|To start the side quest talk to Clover at the Ruined Geffen {{#navi:ch1_geffen|120|114}}. <br> [[File:ClovBPortal.png]] | |||
|- | |||
|Head into the portal and talk to the people who are left behind in Ruined Verus {{#navi:hem_dun01|78|142}}. <br> [[File:hidVerus.png]] | |||
|- | |||
|Sua and the others will tell you that the maddened people are the problem, you decide to go to Taoist Jeon in Ruined geffen to discuss solutions. <br> [[File:hidSua.png]] | |||
|- | |||
|Return with @go 62 to Ruined Geffen and find Taoist Jeon at {{#navi:ch1_geffen|171|167}}, he will tell you that he'll take time to look around in Ruined verus and find a solution. <br> [[File:Taoist_gef_S.png]] | |||
|- | |||
|Return to the safe place in Ruined Verus {{#navi:ch1_geffen|120|114}}. <br> [[File:ClovBPortal.png]] | |||
|- | |||
|Head into the portal and enter the safe place in Ruined Verus {{#navi:hem_dun01|78|142}} again. <br> [[File:hidVerus.png]] | |||
|- | |||
|Talk again to Sua. <br> [[File:hidSua.png]] | |||
|- | |||
|Return back to Clover (@go 62) {{#navi:ch1_geffen|120|114}}. You will get rewarded with 10x {{#item:1001972}}. <br> [[File:ClovBPortal.png]] | |||
|- | |||
|You unlocked the daily quests: "This is a sacred remedy" and "Save them first". | |||
|} | |||
</div> | </div> | ||
<div | <div class="mw-translate-fuzzy"> | ||
===Schrödinger | ===La Tierra Oscura de Schrödinger=== | ||
# | # De regreso a la Aldea Ash Tree (go 61) te encontrarás con Yvain en {{#navi:ygg_edge|180|182}}. Yvain parece muy preocupado por los investigadores en la Tierra Oscura. | ||
#; [[File:Yvain_Ash.png]] | #; [[File:Yvain_Ash.png]] | ||
# | # Entra al portal en {{#navi:ygg_edge|36|117}} para encontrar al Investigador. | ||
#; [[File:PortalDarkness.png]] | #; [[File:PortalDarkness.png]] | ||
# | # El Investigador en {{#navi:ygg_roots|280|99}} te dirá que la investigación va supuestamente bien. Necesitas encontrar a otro Investigador. | ||
#; [[File:Inve1.png]] | #; [[File:Inve1.png]] | ||
# | # Investigador en {{#navi:ygg_roots|208|95}}. | ||
#; [[File:Inve2.png]] | #; [[File:Inve2.png]] | ||
# | # Investigador en {{#navi:ygg_roots|120|170}}, te dirá que se lesionó el tobillo durante el temblor en la Tierra Oscura. | ||
#; [[File:Reserch1.png]] | #; [[File:Reserch1.png]] | ||
# | # Regresa con Yvain en {{#navi:ygg_edge|180|182}} (@go 61). Recibirás como recompensa 10x {{#item:1001972}}. | ||
#; [[File:Yvain_Ash.png]] | #; [[File:Yvain_Ash.png]] | ||
# | # Has desbloqueado la misión diaria: "¡Ayúdanos, doctor!" | ||
=== | |||
# | ===Una Puerta Brumosa=== | ||
# De regreso a la Aldea Ash Tree (go 61) te encontrarás con Rubiel en {{#navi:ygg_edge|180|182}}. Rubiel te pide que vayas al Campo de Geffen del Segundo Mundo. | |||
#; [[File:Rubiel_Ash.png]] | #; [[File:Rubiel_Ash.png]] | ||
# | # Primero necesitas salir del mapa en {{#navi:ygg_edge|36|117}} y entrar al portal azul. | ||
#; [[File:PortalDarkness.png]] | #; [[File:PortalDarkness.png]] | ||
# | # Luego necesitas entrar al portal rojo en {{#navi:ygg_roots|161|241}}. | ||
#; [[File:CrossroadPortalNew.png]] | #; [[File:CrossroadPortalNew.png]] | ||
# | # Entra al espacio seguro haciendo clic en el "Recon Point" en {{#navi:hem_fild|180|263}}. | ||
#; [[File:Recon Point.png]] | #; [[File:Recon Point.png]] | ||
# | # Con Rubiel desbloqueas mejoras especiales que cuestan 45x {{#item:1001996}}. | ||
#; [[File:Rubiel_in.png]] | #; [[File:Rubiel_in.png]] | ||
# | # Aquí obtienes una mejora por una hora para entrar a West y East Encroched Geffenia. | ||
# | # El portal oeste te lleva a West Encroched Geffenia. | ||
# | # El portal este/superior te lleva a East Encroched Geffenia. | ||
# | # Sal de esta sala con el Punto de Reconocimiento y dirígete a Minuel en {{#navi:hem_fild|329|191}}. | ||
# | # Con Minuel desbloqueas mejoras especiales que cuestan 20x {{#item:1001996}}. Aquí obtienes una mejora por una hora para entrar a Encroched Valkyrie Realm. | ||
#; [[File:Rubiel_in.png]] | #; [[File:Rubiel_in.png]] | ||
# | # El portal rojo junto a él te teleportará a Encroched Valkyrie Realm. | ||
=== | |||
# | ===Dame algo que hacer=== | ||
# Entra al portal en {{#navi:ygg_edge|36|117}} | |||
#; [[File:PortalDarkness.png]] | #; [[File:PortalDarkness.png]] | ||
# | # Para entrar a la Tierra del Calor, muévete a la parte superior este del mapa {{#navi:ygg_roots|342|248}}. | ||
#; [[File:HeatLandPortal.png]] | #; [[File:HeatLandPortal.png]] | ||
# | # Habla con Yupilus {{#navi:mu_fild01|196|184}}. Ella te teleportará a un espacio seguro. Habla nuevamente con ella y con Harban. | ||
#; [[File:Mus_Yup.png]] | #; [[File:Mus_Yup.png]] | ||
# | # Habla nuevamente con Yupilus, recibirás como recompensa 10x {{#item:1001972}}. Has desbloqueado la diaria: "Muchas cosas por hacer". | ||
</div> | |||
<div lang="en" dir="ltr" class="mw-content-ltr"> | |||
{| class="mw-collapsible mw-collapsed" | |||
|+ style="text-align:left; font-weight:700; font-size:1.15em; padding:0; background:transparent;width: 100%" | | |||
===A Hazy Gate=== | |||
|Back to Ash Tree Village (go 61) you will meet Rubiel at {{#navi:ygg_edge|180|182}}. Rubiel asks you to come to the Geffen Field of the Second World. <br> [[File:Rubiel_Ash.png]] | |||
|- | |||
|First you need to leave the map at {{#navi:ygg_edge|36|117}} and enter the blue portal. <br> [[File:PortalDarkness.png]] | |||
|- | |||
|Then you need to enter the red portal at {{#navi:ygg_roots|161|241}}. <br> [[File:CrossroadPortalNew.png]] | |||
|- | |||
|Enter the safe space by clicking on the "Recon Point" at {{#navi:hem_fild|180|263}}. <br> [[File:Recon Point.png]] | |||
|- | |||
|At Rubiel you unlock special buffs which cost you 45x {{#item:1001996}}. <br> [[File:Rubiel_in.png]] | |||
|- | |||
|Here you get a buff for one hour to enter West and East Encroched Geffenia. | |||
|- | |||
|West portal leads you to West Encroched Geffenia. | |||
|- | |||
|East/Upper portal leads you to East Encroched Geffenia. | |||
|- | |||
|Leave this room with the Recon Point and head to Minuel at {{#navi:hem_fild|329|191}}. | |||
|- | |||
|At Minuel you unlock special buffs which cost you 20x {{#item:1001996}}. Here you get a buff for one hour to enter Encroched Valkyrie Realm. <br> [[File:Rubiel_in.png]] | |||
|- | |||
|The red portal next to him will warp you to Encroched Valkyrie Realm. | |||
|} | |||
</div> | </div> | ||
<div lang="en" dir="ltr" class="mw-content-ltr"> | <div lang="en" dir="ltr" class="mw-content-ltr"> | ||
== | {| class="mw-collapsible mw-collapsed" | ||
=== | |+ style="text-align:left; font-weight:700; font-size:1.15em; padding:0; background:transparent;width: 100%" | | ||
Talk to | ===Give me something todo=== | ||
|Enter the portal at {{#navi:ygg_edge|36|117}} <br> [[File:PortalDarkness.png]] | |||
|- | |||
|To enter the Land of Heat move to the east upper part of the map {{#navi:ygg_roots|342|248}}. <br> [[File:HeatLandPortal.png]] | |||
|- | |||
|Talk to Yupilus {{#navi:mu_fild01|196|184}}. She will warp you into a safe space. Talk again to her and to Harban. <br> [[File:Mus_Yup.png]] | |||
|- | |||
|Talk again to Yupilus, you will get rewarded with 10x {{#item:1001972}}. You unlock the daily: "Many things todo". | |||
|} | |||
</div> | |||
<div class="mw-translate-fuzzy"> | |||
==Misiones Diarias== | |||
===Sálvalos primero=== | |||
Habla con Clover para obtener la misión diaria "Sálvalos primero". Necesitas cazar 300x monstruos en Ruined Verus. <br> | |||
[[File:ClovBPortal.png]] <br> | [[File:ClovBPortal.png]] <br> | ||
Recompensa: 10x {{#item:1001972}} | |||
</div> | </div> | ||
<div | <div class="mw-translate-fuzzy"> | ||
=== | ===Este es un remedio sagrado=== | ||
Habla con Taoist Jeon para recibir 5x {{#item:1001973}}. Úsalo para purificar a 5x creyentes de Verus en Ruined Verus. <br> | |||
[[File:TaoistDaily.png]] <br> | [[File:TaoistDaily.png]] <br> | ||
Recompensa: 5x {{#item:1001972}} | |||
</div> | </div> | ||
<div | <div class="mw-translate-fuzzy"> | ||
=== | ===¡Ayúdanos, doctor!=== | ||
Para iniciar la misión diaria, habla con Yvain en {{#navi:ygg_edge|180|182}} (@go 61). <br> | |||
[[File:Yvain_Ash.png]] <br> | [[File:Yvain_Ash.png]] <br> | ||
Entra al portal en {{#navi:ygg_edge|36|117}} para encontrar al Investigador. <br> | |||
[[File:PortalDarkness.png]] <br> | [[File:PortalDarkness.png]] <br> | ||
Encontrarás muchos Investigadores, habla con todos hasta encontrar al que está herido. <br> | |||
Regresa con Yvain (@go 61). <br> | |||
Recompensa: 5x {{#item:1001972}} | |||
=== | |||
# | ===Muchas cosas por hacer=== | ||
# Entra al portal en {{#navi:ygg_edge|36|117}} | |||
#; [[File:PortalDarkness.png]] | #; [[File:PortalDarkness.png]] | ||
# | # Para entrar a la Tierra del Calor, muévete a la parte superior este del mapa {{#navi:ygg_roots|342|248}}. | ||
#; [[File:HeatLandPortal.png]] | #; [[File:HeatLandPortal.png]] | ||
# | # Habla con Yupilus {{#navi:mu_fild01|196|184}}. Aquí puedes obtener las 4 misiones diarias. | ||
#; [[File:Mus_Yup.png]] | #; [[File:Mus_Yup.png]] | ||
#;* | #;* Abuelo: Recolecta 10x {{#item:1001977}}. | ||
#;* Can we grill it?: Hunt 20x Volcano Clams. | #;* ¿Podemos asarlo?: Caza 20x Almejas Volcánicas. | ||
#;* ¿Alguien parecía querer esto?: Caza 20x Firafflesias. | |||
#;* ¡Nos han engañado!: Caza 20x Anillos de Fuego. | |||
# Puedes aceptar todas las misiones a la vez y regresar; cada misión será recompensada con 5x {{#item:1001972}}. | |||
===Misiones de Brimir=== | |||
# Para iniciar las misiones diarias, dirígete al árbol (@go 61) y usa el portal en {{#navi:ygg_edge|36|117}}. | |||
#; [[File:PortalDarkness.png]] | |||
# La misión "De hecho, ellos también." está con el NPC Four {{#navi:uknw_ruin|93|174}}. Debes matar 10x Guardianes Sombríos. <br> [[File:FourDaily.png]] <br> Recompensa: 5x {{#item:1001972}} | |||
# La misión "Los gatos siguen siendo gatos." está con el NPC Three {{#navi:uknw_ruin|252|59}}. Habla con Broken Branch para entrar a la sala. Debes matar 10x Guardianes Sombríos. <br> [[File:ThreeDaily.png]] <br> Recompensa: 5x {{#item:1001972}} | |||
# La misión "Una Tumba Formal." está con el NPC Two {{#navi:uknw_ruin|149|150}}. Habla con Broken Branch para entrar a la sala. Debes matar 50x Tulipanes y 50x Caléndulas y recolectar 20x {{#item:1001975}}. <br> [[File:TwoDaily.png]] <br> Recompensa: 5x {{#item:1001972}} | |||
</div> | |||
<div lang="en" dir="ltr" class="mw-content-ltr"> | |||
===Help us, doctor!=== | |||
| To start the daily quest talk to Yvain at {{#navi:ygg_edge|180|182}} (@go 61). <br> [[File:Yvain_Ash.png]] | |||
|- | |||
|Enter the portal at {{#navi:ygg_edge|36|117}} to find the Investigator. <br> [[File:PortalDarkness.png]] | |||
|- | |||
|You will find many Investigators, talk to all of them till you find the injured one. | |||
|- | |||
|Head back to Yvain (@go 61). <br> Reward:5x {{#item:1001972}}. | |||
|} | |||
</div> | |||
<div lang="en" dir="ltr" class="mw-content-ltr"> | |||
{| class="mw-collapsible mw-collapsed" | |||
|+ style="text-align:left; font-weight:700; font-size:1.15em; padding:0; background:transparent;width: 100%" | | |||
===Many Things to do=== | |||
| *Enter the portal at {{#navi:ygg_edge|36|117}} <br> [[File:PortalDarkness.png]] | |||
|- | |||
| *To enter the Land of Heat move to the east upper part of the map {{#navi:ygg_roots|342|248}}. <br> [[File:HeatLandPortal.png]] | |||
|- | |||
| Talk to Yupilus {{#navi:mu_fild01|196|184}}. Here you can get all 4x daily quests. <br> [[File:Mus_Yup.png]] | |||
|- | |||
| Grandfather: Collect 10x {{#item:1001977}}. | |||
|- | |||
| Can we grill it?: Hunt 20x Volcano Clams. | |||
|- | |||
| Someone seemed to want this?: Hunt 20x Firafflesias. | |||
|- | |||
| We've been tricked!!!: Hunt 20x Fire Rings. | |||
|- | |||
| *You can take all quests at once and return in, every quest will be rewarded with 5x {{#item:1001972}}. | |||
|} | |||
</div> | |||
<div lang="en" dir="ltr" class="mw-content-ltr"> | |||
{| class="mw-collapsible mw-collapsed" | |||
|+ style="text-align:left; font-weight:700; font-size:1.15em; padding:0; background:transparent;width: 100%" | | |||
===Brimir quests=== | ===Brimir quests=== | ||
| To start the daily quests head to the tree (@go 61) and use the portal at {{#navi:ygg_edge|36|117}}. <br> [[File:PortalDarkness.png]] | |||
|- | |||
| The quest "In Fact, they too." is at NPC Four {{#navi:uknw_ruin|93|174}}. You have to kill 10x Shadow Jailers. <br> [[File:FourDaily.png]] <br> Reward: 5x {{#item:1001972}} | |||
|- | |||
| The quest "Cats are still cats." is at NPC Three {{#navi:uknw_ruin|252|59}}. Talk to the Broken Branch to enter the room. You have to kill 10x Shadow Jailers. <br> [[File:ThreeDaily.png]] <br> Reward: 5x {{#item:1001972}} | |||
|- | |||
| The quest "A formal Grave." is at NPC Two {{#navi:uknw_ruin|149|150}}. Talk to the Broken Branch to enter the room. You have to kill 50x Tulip and 50x Calendulas also to collect 20x {{#item:1001975}}. <br> [[File:TwoDaily.png]] <br> Reward: 5x {{#item:1001972}} | |||
|} | |||
</div> | |||
<div class="mw-translate-fuzzy"> | |||
==Monstruos== | |||
==Instancia== | |||
El Profesor Mago (Mage Professor) te abrirá la instancia: "Prepare recreated Dark Whisper" en {{#navi:hem_dun01|201|248}}. <br> | |||
[[File:hemMage.png]] | |||
</div> | |||
<div lang="en" dir="ltr" class="mw-content-ltr"> | |||
{| class="wikitable mw-collapsible mw-collapsed" style="text-align: center;width: 100%" | |||
|- style="background: #B2C6D7;" | |||
| Map || colspan="4" | Monster | |||
| | |||
|- style="background: #BFEFFF;" | |||
| rowspan="1" | Twisted Dark Land <br> ygg_roots <br> [[File:Twisted Dark Land (ygg_roots).png|150px]] || colspan="2"| {{#mob:22443}} | |||
| colspan="2"| {{#mob:22444}} | |||
| | |||
|- style="background: #B0E2FF;" | |||
| rowspan="2" | Outside the Bolund Valley <br> mu_fild01 <br> [[File:Outside the Bolund Valley (mu fild01).png|150px]]|| {{#mob:22445}} | |||
|{{#mob:22446}} | |||
|{{#mob:22447}} | |||
| colspan="2" rowspan="2" |'''MVP''' <br> {{#mob:22494}} | |||
|- style="background: #B0E2FF;" | |||
|{{#mob:22448}} | |||
|{{#mob:22449}} | |||
|{{#mob:22450}} | |||
|- style="background: #BFEFFF;" | |||
| rowspan="2" | Twisted Brimir 1F <br> uknw_ruin <br> [[File:Twisted Brimir 1F (uknw ruin).png|150px]] | |||
||{{#mob:22463}} | |||
|{{#mob:22464}} | |||
| colspan="2" rowspan="2" |{{#mob:22465}} | |||
| | |||
|- style="background: #BFEFFF;" | |||
|{{#mob:22466}} | |||
|{{#mob:22467}} | |||
| | |||
|- style="background: #B0E2FF;" | |||
| rowspan="2" | Twisted Brimir 2F <br> uknw_ruin2 <br> [[File:Twisted Brimir 2F (uknw ruin2).png|150px]] | |||
|| {{#mob:22463}} | |||
|{{#mob:22464}} | |||
| colspan="2"|{{#mob:22468}} | |||
| | |||
|- style="background: #B0E2FF;" | |||
|{{#mob:22469}} | |||
|{{#mob:22470}} | |||
| colspan="2"|'''MVP''' <br> {{#mob:22495}} | |||
| | |||
|- style="background: #BFEFFF;" | |||
| rowspan="2" | Ruined Geffen Field <br> hem_fild <br> [[File:Ruined Geffen Field (hem fild).png|150px]] | |||
||{{#mob:22451}} | |||
|{{#mob:22452}} | |||
| colspan="2"|{{#mob:22453}} | |||
| | |||
|- style="background: #BFEFFF;" | |||
|{{#mob:22460}} | |||
|{{#mob:22461}} | |||
| colspan="2"|{{#mob:22462}} | |||
| | |||
|- style="background: #B0E2FF;" | |||
| rowspan="3" | Ruined Verus <br> hem_dun01 <br> [[File:Ruined Verus (hem dun01).png|150px]] || {{#mob:22454}} | |||
|{{#mob:22455}} | |||
| colspan="2"|{{#mob:22456}} | |||
| | |||
|- style="background: #B0E2FF;" | |||
|{{#mob:22457}} | |||
|{{#mob:22458}} | |||
| colspan="2"|{{#mob:22459}} | |||
| | |||
|- style="background: #B0E2FF;" | |||
|{{#mob:22460}} | |||
|{{#mob:22461}} | |||
| colspan="2"|{{#mob:22462}} | |||
| | |||
|- style="background: #BFEFFF;" | |||
| rowspan="2" | Ruined Valkyrie Realm <br> hem_dun02 <br> [[File:Ruined Valkyrie Realm (hem dun02).png|150px]] || {{#mob:22471}} | |||
|{{#mob:22472}} | |||
| colspan="2" rowspan="2" |{{#mob:22473}} | |||
| | |||
|- style="background: #BFEFFF;" | |||
|{{#mob:22474}} | |||
|{{#mob:22475}} | |||
| | |||
|- style="background: #B0E2FF;" | |||
| rowspan="2" | East of Eroded Geffenia <br> ch1_gfn01 <br> [[File:East of Eroded Geffenia (ch1 gfn01).png|150px]]|| {{#mob:22476}} | |||
|{{#mob:22478}} | |||
|{{#mob:22480}} | |||
| colspan="2" rowspan="2" |{{#mob:22482}} | |||
|- style="background: #B0E2FF;" | |||
|{{#mob:22484}} | |||
|{{#mob:22486}} | |||
|{{#mob:22488}} | |||
|- style="background: #BFEFFF;" | |||
| rowspan="2" | West of Eroded Geffenia <br> ch1_gfn03 <br> [[File:West of Eroded Geffenia (ch1 gfn03).png|150px]]|| {{#mob:22476}} | |||
|{{#mob:22478}} | |||
|{{#mob:22480}} | |||
| colspan="2" rowspan="2" |{{#mob:22482}} | |||
|- style="background: #BFEFFF;" | |||
|{{#mob:22484}} | |||
|{{#mob:22486}} | |||
|{{#mob:22488}} | |||
|} | |||
</div> | |||
<div lang="en" dir="ltr" class="mw-content-ltr"> | |||
All new maps have Map Drops, which means that all monsters in that specifc map can drop: | |||
{| class="wikitable mw-collapsible mw-collapsed" style="text-align: center;width: 100%" | |||
|- style="background: #B2C6D7;" | |||
| Map || Map Drops || Drop rate | |||
|- style="background: #BFEFFF;" | |||
|rowspan="6" | Outside the Bolund Valley <br> mu_fild01 <br> [[File:Outside the Bolund Valley (mu fild01).png|150px]] | |||
|{{#item:25728}} || 2,19% | |||
|- style="background: #BFEFFF;" | |||
|{{#item:25729}} || 0,44% | |||
|- style="background: #BFEFFF;" | |||
|{{#item:25730}} || 2,19% | |||
|- style="background: #BFEFFF;" | |||
|{{#item:25731}} || 0,44% | |||
|- style="background: #BFEFFF;" | |||
|{{#item:1000322}} || 1,43% | |||
|- style="background: #BFEFFF;" | |||
|{{#item:1001977}} || 7,32% | |||
|- | |||
|- style="background: #B0E2FF;" | |||
|rowspan="5" | Twisted Brimir 1F <br> uknw_ruin <br> [[File:Twisted Brimir 1F (uknw ruin).png|150px]] | |||
|{{#item:25728}} || 2,19% | |||
|- style="background: #B0E2FF;" | |||
|{{#item:25729}} || 0,44% | |||
|- style="background: #B0E2FF;" | |||
|{{#item:25730}} || 2,19% | |||
|- style="background: #B0E2FF;" | |||
|{{#item:25731}} || 0,44% | |||
|- style="background: #B0E2FF;" | |||
|{{#item:1000322}} || 1,43% | |||
|- | |||
|- style="background: #BFEFFF;" | |||
|rowspan="5" | Twisted Brimir 2F <br> uknw_ruin2 <br> [[File:Twisted Brimir 2F (uknw ruin2).png|150px]] | |||
|{{#item:25728}} || 2,19% | |||
|- style="background: #BFEFFF;" | |||
|{{#item:25729}} || 0,44% | |||
|- style="background: #BFEFFF;" | |||
|{{#item:25730}} || 2,19% | |||
|- style="background: #BFEFFF;" | |||
|{{#item:25731}} || 0,44% | |||
|- style="background: #BFEFFF;" | |||
|{{#item:1000322}} || 1,43% | |||
|- | |||
|- style="background: #B0E2FF;" | |||
|rowspan="5" | Ruined Geffen Field <br> hem_fild <br> [[File:Ruined Geffen Field (hem fild).png|150px]] | |||
|{{#item:25728}} || 2,19% | |||
|- style="background: #B0E2FF;" | |||
|{{#item:25729}} || 0,44% | |||
|- style="background: #B0E2FF;" | |||
|{{#item:25730}} || 2,19% | |||
|- style="background: #B0E2FF;" | |||
|{{#item:25731}} || 0,44% | |||
|- style="background: #B0E2FF;" | |||
|{{#item:1000322}} || 1,43% | |||
|- | |||
|- style="background: #BFEFFF;" | |||
|rowspan="5" | Ruined Verus <br> hem_dun01 <br> [[File:Ruined Verus (hem dun01).png|150px]] | |||
|{{#item:25728}} || 2,19% | |||
|- style="background: #BFEFFF;" | |||
|{{#item:25729}} || 0,44% | |||
|- style="background: #BFEFFF;" | |||
|{{#item:25730}} || 2,19% | |||
|- style="background: #BFEFFF;" | |||
|{{#item:25731}} || 0,44% | |||
|- style="background: #BFEFFF;" | |||
|{{#item:1000322}} || 1,43% | |||
|- | |||
|- style="background: #B0E2FF;" | |||
|rowspan="10" | Ruined Valkyrie Realm <br> hem_dun02 <br> [[File:Ruined Valkyrie Realm (hem dun02).png|150px]] | |||
|{{#item:25729}} || 0,44% | |||
|- style="background: #B0E2FF;" | |||
|{{#item:25731}} || 0,44% | |||
|- style="background: #B0E2FF;" | |||
|{{#item:1000322}} || 1,28% | |||
|- style="background: #B0E2FF;" | |||
|{{#item:1001997}} || 6,23% | |||
|- style="background: #B0E2FF;" | |||
|{{#item:1001999}} || 4,18% | |||
|- style="background: #B0E2FF;" | |||
|{{#item:1002000}} || 4,18% | |||
|- style="background: #B0E2FF;" | |||
|{{#item:1002034}} || 3,24% | |||
|- style="background: #B0E2FF;" | |||
|{{#item:1002035}} || 3,24% | |||
|- style="background: #B0E2FF;" | |||
|{{#item:1002011}} || 0,92% | |||
|- style="background: #B0E2FF;" | |||
|{{#item:1002012}} || 0,44% | |||
|- | |||
|- style="background: #BFEFFF;" | |||
|rowspan="13" | East of Eroded Geffenia <br> ch1_gfn01 <br> [[File:East of Eroded Geffenia (ch1 gfn01).png|150px]] | |||
|{{#item:25729}} || 0,61% | |||
|- style="background: #BFEFFF;" | |||
|{{#item:25731}} || 0,61% | |||
|- style="background: #BFEFFF;" | |||
|{{#item:1000322}} || 1,6% | |||
|- style="background: #BFEFFF;" | |||
|{{#item:1001997}} || 6,23% | |||
|- style="background: #BFEFFF;" | |||
|{{#item:1002001}} || 4,18% | |||
|- style="background: #BFEFFF;" | |||
|{{#item:1002002}} || 4,18% | |||
|- style="background: #BFEFFF;" | |||
|{{#item:1002036}} || 3,24% | |||
|- style="background: #BFEFFF;" | |||
|{{#item:1002037}} || 3,24% | |||
|- style="background: #BFEFFF;" | |||
|{{#item:1002014}} || 4,18% | |||
|- style="background: #BFEFFF;" | |||
|{{#item:1002015}} || 2,74% | |||
|- style="background: #BFEFFF;" | |||
|{{#item:1002016}} || 0,92% | |||
|- style="background: #BFEFFF;" | |||
|{{#item:1002013}} || 0,92% | |||
|- style="background: #BFEFFF;" | |||
|{{#item:1001998}} || 0,92% | |||
|- | |||
|- style="background: #B0E2FF;" | |||
|rowspan="13" | West of Eroded Geffenia <br> ch1_gfn03 <br> [[File:West of Eroded Geffenia (ch1 gfn03).png|150px]] | |||
|{{#item:25729}} || 0,61% | |||
|- style="background: #B0E2FF;" | |||
|{{#item:25731}} || 0,61% | |||
|- style="background: #B0E2FF;" | |||
|{{#item:1000322}} || 1,6% | |||
|- style="background: #B0E2FF;" | |||
|{{#item:1001997}} || 6,23% | |||
|- style="background: #B0E2FF;" | |||
|{{#item:1002001}} || 4,18% | |||
|- style="background: #B0E2FF;" | |||
|{{#item:1002002}} || 4,18% | |||
|- style="background: #B0E2FF;" | |||
|{{#item:1002036}} || 3,24% | |||
|- style="background: #B0E2FF;" | |||
|{{#item:1002037}} || 3,24% | |||
|- style="background: #B0E2FF;" | |||
|{{#item:1002014}} || 4,18% | |||
|- style="background: #B0E2FF;" | |||
|{{#item:1002015}} || 2,74% | |||
|- style="background: #B0E2FF;" | |||
|{{#item:1002016}} || 0,92% | |||
|- style="background: #B0E2FF;" | |||
|{{#item:1002013}} || 0,92% | |||
|- style="background: #B0E2FF;" | |||
|{{#item:1001998}} || 0,92% | |||
|} | |||
</div> | </div> | ||
<div lang="en" dir="ltr" class="mw-content-ltr"> | <div lang="en" dir="ltr" class="mw-content-ltr"> | ||
==Instance== | ==Instance== | ||
Mage Professor will open you the instance: "Prepare recreated Dark Whisper" at {{#navi:hem_dun01|201|248}}. <br> | Mage Professor will open you the instance: "Prepare recreated Dark Whisper" at {{#navi:hem_dun01|201|248}}. <br> | ||
| Line 512: | Line 1,258: | ||
</div> | </div> | ||
<div | <div class="mw-translate-fuzzy"> | ||
== | ==NPC de Intercambio== | ||
{{#navi:ygg_fruit|168|124}} | {{#navi:ygg_fruit|168|124}} | ||
<br> | <br> | ||
| Line 532: | Line 1,278: | ||
| | | | ||
|} | |} | ||
</div> | |||
<div class="mw-translate-fuzzy"> | |||
==Equipo== | |||
{{:Placeholder Entwined Equipment/es}} | |||
{{:Placeholder Dimensional Equipment/es}} | |||
</div> | </div> | ||
<div lang="en" dir="ltr" class="mw-content-ltr"> | <div lang="en" dir="ltr" class="mw-content-ltr"> | ||
== | ==Dimension Shoes & Enchants== | ||
{{: | {{:Dimension Shoes Enchants}} | ||
</div> | </div> | ||
| Line 586: | Line 1,337: | ||
|{{#item:300667}} <br> {{#itemDesc:300667}} | |{{#item:300667}} <br> {{#itemDesc:300667}} | ||
|} | |} | ||
{{:Zero Cell Sector}} | |||
</div> | </div> | ||
Latest revision as of 18:11, 15 January 2026
Call the World Tree
La llamada del Árbol del Mundo marca el comienzo de una nueva era. A medida que las perturbaciones se propagan por los reinos, el Árbol del Mundo, "fuente de vida y equilibrio", comienza a agitarse. Los aventureros son convocados para investigar su llamada, descubriendo verdades antiguas y enfrentándose a amenazas que ponen en peligro los propios cimientos del mundo. Este capítulo introduce una nueva línea argumental, personajes y regiones, preparando el escenario para las pruebas y revelaciones que están por venir.
Requisitos
- Nivel 200+
- Punto de inicio: Pequeño Árbol de Ceniza
(prt_fild05 353, 252)

Misión Principal
La Llamada del Árbol del Mundo
- Pequeño Árbol de Ceniza
(prt_fild05 353, 252) - Habla con la Mensajera Laphine (ygg_edge 254, 243)
- Encuentra a Laphine Shasha (ygg_edge 168, 139)
- Habla con Maysel junto a Shasha, recibirás como recompensa 10x
 Root Gold Coin (1001972).


Tierra Retorcida de la Oscuridad
- Entra al portal en (ygg_edge 36, 117)
- Necesitas encontrar 3 Puntos de Investigación (acércate para activarlos) en:
- (ygg_roots 334, 138)
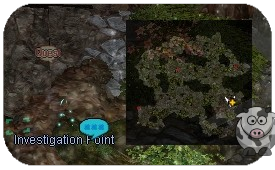
- (ygg_roots 299, 59)
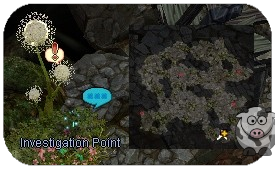
- (ygg_roots 186, 117)
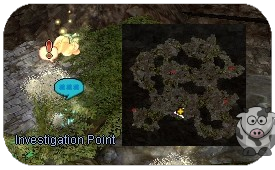
- (ygg_roots 334, 138)


Regeneración
- Mientras investigas la Tierra Retorcida de la Oscuridad, escuchas un Grito. Habla con la fuente del sonido en (ygg_roots 164, 131).
- Parece que Yvain necesita tu ayuda, habla con Yvain para levantar las raíces.
- En (ygg_roots 151, 198) encontrarás a Maggi.
- Maggi te dice que se separó de su grupo debido a un terremoto.
- Entra a la encrucijada a través del portal rojo para investigar (ygg_roots 157, 242).
- Dentro de la encrucijada encontrarás al Investigador, obtendrás información de la primera encrucijada.
- Regresa con Maggi.
- En (ygg_roots 116, 246) encontrarás a otro Investigador, te proporciona información sobre otro compañero desaparecido.
- Encuentra a Mark en (ygg_roots 39, 268). Descubres lo que parecen ser rastros dejados por Tamarin.
- Tamarin está en (ygg_roots 95, 157). Tamarin y Alf encontraron una nueva intersección.
- Muévete a la nueva intersección y revísala. Habla con Tamarin nuevamente antes de entrar (ygg_roots 42, 126).
- Alf, que estaba esperando en la Tierra Retorcida de la Oscuridad, parece haber entrado primero en la intersección.
- La situación dentro no parece buena. Entra al Portal azul (uknw_ruin 266, 241).
- Habla con Tamarin nuevamente, necesitas regresar a la aldea de Mulpure para informar todo lo que has aprendido hasta ahora. Dew sigue desaparecido.
- Habla con otro Investigador en (ygg_roots 204, 178) y pregunta por Dew. Él te dirá que Dew se dirigió hacia la aldea.
- En tu camino encontrarás a otro Investigador en (ygg_roots 290, 199). Él te dirá que vieron a Dew dirigiéndose hacia el este. Dirígete al este para encontrarlo.
- Volverás a encontrar a Mark junto con Chez y Dew (ygg_roots 338, 243). Recibirás como recompensa 10x Root Gold Coin (1001972).


De regreso a la Aldea del Árbol de Ceniza
- Regresa a la aldea (@go 61) para visitar a Laphine Shasha (ygg_edge 168, 139) y hablar sobre qué hacer a continuación.
- Devries te pide que entregues 5x
 Dragon Scale (1036) a su laboratorio en (ygg_edge 150, 127). Recibirás como recompensa 10x Root Gold Coin (1001972).
Back to Ash Tree Village
| Head back to the village (@go 61) to visit Laphine Shasha (ygg_edge 168, 139) and discuss what to do next. He will ask you how the Land of Darkness was and that they received some information about the Distorted Spaces, they currently analyzing it.
 |-
| Devries asks you to deliver 5x
|-
| Devries asks you to deliver 5x ![]() Dragon Scale (1036) to his lab at (ygg_edge 150, 127). You will get rewarded with 10x
Dragon Scale (1036) to his lab at (ygg_edge 150, 127). You will get rewarded with 10x ![]() Root Gold Coin (1001972).
Root Gold Coin (1001972).
 |}
|}
Hacia Geffen en Ruinas
- Para investigar Geffen en Ruinas del Segundo Mundo, entra al portal en (ygg_edge 36, 117).
- Allí te encontrarás con el Taoísta Jeon en (ygg_roots 164, 231).
- El Taoísta Jeon percibe una presencia ominosa proveniente de Geffen, por lo que decides dirigirte al Campo de Geffen de la dimensión en ruinas. Entra al portal rojo en (ygg_roots 161, 241).
- Entra al lugar oculto en (hem_fild 98, 153). Allí conocerás a Reno y a algunos otros.
- Habla con Reno, el grupo decide ir a Geffen en Ruinas, donde se necesita ayuda. Recibirás como recompensa 3x Root Gold Coin (1001972)
To Ruined Geffen
| To investigate the Second World's Ruined Geffen, enter the portal at (ygg_edge 36, 117).
 |-
| Among the crosspoints that appeared in the Twisted Land of Darkness, you decided to first investigate the Second World's Ruined Geffen are. There you will meet Taoist Jeon at (ygg_roots 164, 231).
|-
| Among the crosspoints that appeared in the Twisted Land of Darkness, you decided to first investigate the Second World's Ruined Geffen are. There you will meet Taoist Jeon at (ygg_roots 164, 231).
 |-
| Taoist Jeon sense an ominous presence from Geffen, so you decide to head to the ruined dimension's Geffen Field. Enter the red portal at (ygg_roots 161, 241).
|-
| Taoist Jeon sense an ominous presence from Geffen, so you decide to head to the ruined dimension's Geffen Field. Enter the red portal at (ygg_roots 161, 241).
 |-
| Enter the hidden spot at (hem_fild 98, 153). There you will meet Reno and some others.
|-
| Enter the hidden spot at (hem_fild 98, 153). There you will meet Reno and some others.
 |-
| Talk to Reno, the group decides to go to Ruined Geffen, where help is needed. You will get rewarded with 3x
|-
| Talk to Reno, the group decides to go to Ruined Geffen, where help is needed. You will get rewarded with 3x ![]() Root Gold Coin (1001972)
Root Gold Coin (1001972)
 |}
|}
Geffen de un Mundo Paralelo
- Para llegar a Geffen en Ruinas, sal del mapa por el portal oeste (hem_fild 35, 194).
- Allí te encontrarás con un Geffen Resident, habla con él dos veces.
Escucharás que la gente está preocupada por una enfermedad. Encuentra a más residentes para obtener más detalles. - Otro Geffen Resident está en (ch1_geffen 154, 59). Te dirá que la causa de la enfermedad podría ser un mago en la Torre de Geffen.
- Dirígete a la torre en (ch1_geffen 121, 111), allí conocerás a Charles.
- Una persona misteriosa está bloqueando tu camino en la Torre de Geffen. Pregunta qué ocurrió.
- Aparecerá la Maga Clover, diciéndote que el camino hacia el sótano de la Torre de Geffen está sellado por una barrera.
- Habla con el Taoísta Jeon para ver si existe una forma segura de eliminarla. Recibirás como recompensa 7x Root Gold Coin (1001972).
- Mientras el Taoísta Jeon, Charles y Clover piensan en una manera de eliminar la barrera de la Torre de Geffen, decides investigar la plaga yendo a la clínica en Geffen en Ruinas.
Geffen of a Parallel World
| To reach Ruined Geffen, leave the map through the west portal (hem_fild 35, 194).
 |-
| You will meet a Geffen Resident. Talk to him twice.
|-
| You will meet a Geffen Resident. Talk to him twice.
You will hear, that people are worried about an illness. Find more residents for more details.
 |-
| Another Geffen Resident is at (ch1_geffen 154, 59). They will tell you that the cause of the illness might be a mage in Geffen Tower.
|-
| Another Geffen Resident is at (ch1_geffen 154, 59). They will tell you that the cause of the illness might be a mage in Geffen Tower.
 |-
| Head to the tower at (ch1_geffen 121, 111) where you meet Charles.
|-
| Head to the tower at (ch1_geffen 121, 111) where you meet Charles.
 |-
| A mysterious person is blocking your way at Geffen Tower. Ask what happened.
|-
| A mysterious person is blocking your way at Geffen Tower. Ask what happened.
|-
| Mage Clover will appear, telling you that the path down to the basement of Geffen Tower is sealed by a barrier. The problem with the barrier is, if we remove it now, a horde of monsters will come out.
 |-
| Ask Taoist Jeon if there's a safe way to remove it. You will get rewarded with 7x
|-
| Ask Taoist Jeon if there's a safe way to remove it. You will get rewarded with 7x ![]() Root Gold Coin (1001972).
Root Gold Coin (1001972).
 |-
| While Taoist Jeon, Charles and Clover think of a way to remove Geffen Tower's barrier, you decide to investigate the plague by going to the clinic in Ruined Geffen.
|}
|-
| While Taoist Jeon, Charles and Clover think of a way to remove Geffen Tower's barrier, you decide to investigate the plague by going to the clinic in Ruined Geffen.
|}
Clínica de Geffen
- La clínica es el edificio en (ch1_geffen 169, 172). Entra por el Portal.
- Dentro de la clínica encontrarás al Doctor Neumann. Él quiere que visites a 5 Pacientes de la Clínica.
- (ch1_gef_in 110, 30) Paciente que necesita un baño (Bath Craved) y Paciente con tos (Cough Patient).
- Aparecerá un Voluntario de la Clínica, puedes pedirle allí la toalla que necesitas para el Paciente que necesita un baño.
- Habla nuevamente con el Paciente que necesita un baño.
- Habla con el Paciente Delgado (Skinny Patient) en (ch1_gef_in 69, 112), quiere algo de comida de otro Voluntario de la Clínica.
- Otro Voluntario de la Clínica está en (ch1_gef_in 107, 109). Pide una comida.
- Regresa con el Paciente Delgado y entrégale la comida.
- Regresa al Voluntario de la Clínica, allí verás a otro Paciente Joven.
- Paciente Joven (Young Patient) que pide algunos dulces, habla con el Voluntario de la Clínica para obtenerlos.
- Entrega las Batatas Dulces al Paciente Joven.
- Habla con el último paciente, el Paciente Anciano (Elderly Patient).
- Después de ayudar a todos los pacientes, regresa con el Doctor Neumann en (ch1_gef_in 78, 74).
- Has reunido algo de información sobre los pacientes, habla con Einhar para compartir opiniones sobre el síndrome de Soren.
- Sal del edificio y dirígete a (ch1_geffen 101, 138), entra al edificio y habla con Gregor.
- Sal del edificio y entra al siguiente edificio en (ch1_geffen 76, 191), habla con Einhar.
- Después de reunir información, regresas al ayuntamiento de Geffen en Ruinas (ch1_geffen 102, 194).
- Gregor te dice que ahora puede usar sus habilidades profesionales, elige: "I'll go.". Recibirás como recompensa 5x Root Gold Coin (1001972).
- Regresa con Gregor en (ch1_geffen 101, 138) después de completar las tareas. Habla con él hasta que desaparezca.
- Reúnete con Einhar y Gregor en Geffen en Ruinas en (ch1_geffen 175, 67) y entra a la casa del Doctor Neumann.
- Parece que el Doctor Neumann está ocultando algo, junto con Gregor intentas averiguar qué es. Habla con Gregor.
- Después de hablar con Gregor sube las escaleras, Einhar también encontró algo interesante. Recibirás como recompensa 5x Root Gold Coin (1001972).
- Regresa a la clínica en Geffen en Ruinas. Te encontrarás con el Taoísta Jeon frente a la clínica (ch1_geffen 165, 168). Te dice que han encontrado una forma de entrar a través de la barrera que sella el subsuelo de Geffen en Ruinas. Dirígete a la Torre de Geffen.
- Clover elimina la barrera y puedes entrar al sótano. Recibirás como recompensa 3x Root Gold Coin (1001972).
| Healthy Person's Blood | Survivor's Blood | Patient Blood |
| (ch1_geffen 181, 149) | (ch1_geffen 46, 88) | (ch1_geffen 170, 171) entra a la clínica, obtén permiso del Doctor Neumann. |

|

|

|


Geffen Clinic
| The clinic is the building at (ch1_geffen 169, 172). Enter the Portal. Your goal is to ask about the disease that Dr. Neumann is treating at the clinic.
 |-
| Inside the clinic you will find Doctor Neumann. He wants you to visit 5 Clinic Patients and grants you access to those information.
|-
| Inside the clinic you will find Doctor Neumann. He wants you to visit 5 Clinic Patients and grants you access to those information.
 |-
| (ch1_gef_in 110, 30) Talk to both the Bath Craved and the Coughing Patient.
|-
| (ch1_gef_in 110, 30) Talk to both the Bath Craved and the Coughing Patient.

 |-
| A Clinic Volunteer will appear, you can ask her for the towel you need for the Bath Craved Patient.
|-
| A Clinic Volunteer will appear, you can ask her for the towel you need for the Bath Craved Patient.
 |-
| Talk to the Bath Craved Patient again.
|-
| Talk to the Bath Craved Patient again.
|-
| Talk to the Skinny Patient at (ch1_gef_in 69, 112), he wants some food from another Clinic Volunteer.
 |-
| The Clinic Volunteer is at (ch1_gef_in 107, 109). Ask them for a meal.
|-
| The Clinic Volunteer is at (ch1_gef_in 107, 109). Ask them for a meal.
 |-
| Head back to the Skinny Patient and hand out the meal.
|-
| Go back to the Clinic Volunteer where you will see another Young Patient.
|-
| The Young Patient asks for some sweets, talk to the Clinic Volunteer to get them.
|-
| Head back to the Skinny Patient and hand out the meal.
|-
| Go back to the Clinic Volunteer where you will see another Young Patient.
|-
| The Young Patient asks for some sweets, talk to the Clinic Volunteer to get them.
 |-
| Give the sweet potatoes to the Young Patient.
|-
| Talk to the last patient, Elderly Patient.
|-
| Give the sweet potatoes to the Young Patient.
|-
| Talk to the last patient, Elderly Patient.
 |-
| After helping all patients, head back to Doctor Neumann at (ch1_gef_in 78, 74).
|-
| After helping all patients, head back to Doctor Neumann at (ch1_gef_in 78, 74).
 |-
| You've gathered some information about the patients, talk to Einhar to share opinions about Soren's syndrome.
|-
| You've gathered some information about the patients, talk to Einhar to share opinions about Soren's syndrome.
 |-
| Leave the building and go to (ch1_geffen 101, 138). Enter the building and talk to Gregor.
|-
| Leave the building and go to (ch1_geffen 101, 138). Enter the building and talk to Gregor.

 |-
| Leave the building and enter the next building at (ch1_geffen 76, 191), talk to Einhar.
|-
| Leave the building and enter the next building at (ch1_geffen 76, 191), talk to Einhar.

 |}
|}
After gathering information, you return to the town hall of Ruined Geffen (ch1_geffen 102, 194). 
|
Gregor tells you that he can now use his professional skills, choose: "I'll go.". You will get rewarded with 5x 
|
|
Return to Gregor at (ch1_geffen 102, 194) after finishing the tasks. Talk to Einhar and Gregor till they disappear. 
|
| Meet Einhar and Gregor in Ruined Geffen at (ch1_geffen 175, 67) and enter Doctor Neumann's house. You should inform Doctor Neumann of the research results as soon as possible. Einhar is warning you, that they hear something from inside the house. You can hear someone shouting: "How long do we have to keep doing this dam thing! Is there even really a cure?". Seems a another man feeling bad about whatever Doctor Neumann is hiding and want to tell the truth to everyone.
|
| It seems like Doctor Neumann is hiding something, together with Gregor you try to find out what. Talk to Gregor.
|
| After talking to Gregor, go upstairs. Einhar found something interesting too. You will get rewarded with 5x
|
| Head back to the clinic in Ruined Geffen. You will meet Taoist Jeon in front of the clinic (ch1_geffen 165, 168). You have to tell him, that you and Gregor found a the source of infection. He tells you that they found a way to enter through the barrier sealing Ruined Geffen's underground. Go to the Geffen Tower.
|
| Clover removes the barrier and you can enter the basement. You will get rewarded with 3x
|
| Entering the basement you meet Charles at (hem_dun01 26, 109) in the parallel world's ruined Verus. Why is it connected to the underground of Geffen? Taoist is warning you, to be more cautious and assume that it's not the same. Things are different here.
|
| While exploring, you will find Clover's mentor in a hidden spot at (hem_dun01 77, 140). Talk to Clover, Sua and Parsifal. You will get rewarded with 5x
|
| Parsifal says he'll show you a new world and leads you to another hidden spot at (hem_dun01 174, 198). Talk to Charles, Clover, Parsifal and Taoist Jeon. You will see a dead person, while believers trust in the blessing of rebirth, Charles believes into a disease.
|
| After seeing a person who died from the plague and become part of an Immortal Legion, you decide to follow the Immortal Legion. |
| You leave the hidden spot and find Charles outside at (hem_dun01 218, 208). You will get rewarded with 5x
|


Fortaleza Aérea: Susurro Oscuro
- Te encontrarás con el Taoísta que sigue a una Legión Inmortal, te unirás a él y seguirás también a la criatura.
- Al final de las escaleras encontrarás una pequeña habitación. Habla con Clover.
- Explora las habitaciones laterales y recoge 2x
 Collected Sample (1001974).
Air Fortress: Dark Whisper
| You will meet Taoist Jeon who is following an Immortal Legion. Join him and follow the creature.
 |-
| At the end of the stairs you will find a small room. Talk to Clover.
|-
| At the end of the stairs you will find a small room. Talk to Clover.
 |-
| Search the side rooms and collect 2x
|-
| Search the side rooms and collect 2x ![]() Collected Sample (1001974).
|-
| Go first into the Right Room: You will find 3x Immortal Monsters in cubes, click on the tubes and kill them, to collect 1x
Collected Sample (1001974).
|-
| Go first into the Right Room: You will find 3x Immortal Monsters in cubes, click on the tubes and kill them, to collect 1x ![]() Collected Sample (1001974).
Collected Sample (1001974).
 |-
| Then head back and enter the Left Room: You will find 4x Mechanical Device, click on them and collect 1x
|-
| Then head back and enter the Left Room: You will find 4x Mechanical Device, click on them and collect 1x ![]() Collected Sample (1001974).
Collected Sample (1001974).  |-
|-
You will get rewarded with 12x
 |-
| The new hiding spot is at (hem_dun01 184, 195). Talk to Clover. The group decides to avoid the swarming followers and escape to Ruined Geffen. The Believer want to know, if you meet new humans at the temple.
|-
| The new hiding spot is at (hem_dun01 184, 195). Talk to Clover. The group decides to avoid the swarming followers and escape to Ruined Geffen. The Believer want to know, if you meet new humans at the temple.  |-
| Head back to Ruined Geffen with @go 62 and meet up with Clover at the destroyed Geffen Tower (ch1_geffen 122, 118).
|-
| Head back to Ruined Geffen with @go 62 and meet up with Clover at the destroyed Geffen Tower (ch1_geffen 122, 118).  |-
| As information about the plague is collected, the group goes ahead to the town hall in Ruined Geffen to discuss things further, follow up (ch1_geffen 102, 194).
|-
| At the town hall in Ruined Geffen, the group discusses the plague based on the information brought back from Dark Whisper.
Talk to Einhar first and then to Taoist Jeon. You will get rewarded with 5x
|-
| As information about the plague is collected, the group goes ahead to the town hall in Ruined Geffen to discuss things further, follow up (ch1_geffen 102, 194).
|-
| At the town hall in Ruined Geffen, the group discusses the plague based on the information brought back from Dark Whisper.
Talk to Einhar first and then to Taoist Jeon. You will get rewarded with 5x 
 |}
|}
Identidad de la Plaga
- Después de discutir, el grupo decidió compartir lo que has aprendido con el Doctor Neumann en (ch1_geffen 169, 172). Entra por el Portal.
- Allí conocerás al Paciente Errante (Wandering Patient). Después de hablar con él, se abrirá el portal a la habitación izquierda.
- En el camino hacia el siguiente Portal se activará un diálogo. Después de entrar al Portal encontrarás un punto brillante "Doorway".
- Síguelos hacia la siguiente habitación por el portal sur.
- Aparecerá Einhar y generará un warp oscuro para ti, te aconseja calmarte y continuar con los aliados. Entra al portal oscuro.
- El Taoísta Jeon te espera en (ygg_fruit 40, 72). Recibirás como recompensa 10x Root Gold Coin (1001972).
- Regresa a Geffen en Ruinas (go 62) y dirígete a la clínica en (ch1_geffen 169, 172). Entra por el Portal y vuelve a entrar a la habitación izquierda. Sigue caminando hasta llegar al Subsuelo de Geffen en Ruinas.
- Te espera una visión inesperada en el sótano de la clínica del Doctor Neumann. Gregor parece haber encontrado rastros que Einhar dejó atrás. Habla con Gregor.
- Todos vagan por el sótano de la clínica del Doctor Neumann. El Taoísta Jeon logró encontrar el rastro de Einhar.
- Finalmente encuentras a Einhar en el sótano, pero parece aturdido. Habla con Einhar.
- Regresa al sótano del Doctor Neumann en (ch1_gef_in 68, 33). Te encontrarás con Maxim, quien te recompensará con 10x Root Gold Coin (1001972).
Identity of the Plague
| After discussing, the group decides to share what they've learned with Doctor Neumann at (ch1_geffen 169, 172). Enter the Portal.
|-
| You will meet a Wandering Patient there. After talking with him, he will tell you, that the door at 9 o*clock is usually locked, but now it seems to be slightly open. Enter the portal.

 |-
| On the way to the next Portal, a dialogue will appear. After entering the Portal you will find a shining spot "Doorway". You will hear the same man like earlier, begging to save his daughter, even if that means he has to do even more horrible things than anything he had ever done before.
|-
| On the way to the next Portal, a dialogue will appear. After entering the Portal you will find a shining spot "Doorway". You will hear the same man like earlier, begging to save his daughter, even if that means he has to do even more horrible things than anything he had ever done before.
 |-
| Follow them into the next room through the south portal.
|-
| Follow them into the next room through the south portal.
 |-
| Einhar will appear and spawn a dark warp for you. He advices you to calm down and get help. Enter the dark portal.
|-
| Einhar will appear and spawn a dark warp for you. He advices you to calm down and get help. Enter the dark portal.
 |-
| Taoist Jeon is waiting for you at (ygg_fruit 40, 72). You will get rewarded with 10x
|-
| Taoist Jeon is waiting for you at (ygg_fruit 40, 72). You will get rewarded with 10x ![]() Root Gold Coin (1001972).
Root Gold Coin (1001972).
 |-
| Go back to Ruined Geffen (go 62) and head to the clinic at (ch1_geffen 169, 172). Enter the Portal and move to the room on the left again. Keep walking down until you reach the Ruined Geffen Underground.
|-
| Go back to Ruined Geffen (go 62) and head to the clinic at (ch1_geffen 169, 172). Enter the Portal and move to the room on the left again. Keep walking down until you reach the Ruined Geffen Underground.
|-
| An unexpected sight awaits in the basement of Doctor Neumann's clinic. Gregor seems to have found traces Einhar left behind. Talk to Gregor.
 |-
| After wandering the basement of Doctor Neumann's clinic. Taoist Jeon manages to find Einhar's trail (ch1_que01 125, 57).
|-
| After wandering the basement of Doctor Neumann's clinic. Taoist Jeon manages to find Einhar's trail (ch1_que01 125, 57).
 |-
| Follow the trail to Einhar's next mark (ch1_que01 51, 46).
|-
| You finally find Einhar in the basement (ch1_que01 67, 128), but he looks stunned. Talk to Einhar.
|-
| Follow the trail to Einhar's next mark (ch1_que01 51, 46).
|-
| You finally find Einhar in the basement (ch1_que01 67, 128), but he looks stunned. Talk to Einhar.
 |-
| Walk back to the basement of the clinic (@go 62) at (ch1_gef_in 68, 33). You will meet Maxim, who will reward you with 10x
|-
| Walk back to the basement of the clinic (@go 62) at (ch1_gef_in 68, 33). You will meet Maxim, who will reward you with 10x ![]() Root Gold Coin (1001972).
Root Gold Coin (1001972).
 |}
|}
Exploración del Tomo de Ilusiones
- Puede que hayas encontrado una pista en el diario, regresa al Profesor Telcos (@go 61) en la Aldea del Árbol de Ceniza (ygg_edge 212, 206).
- Hablando con el Profesor Telcos, él te mostrará el diario que creó. Entra en el libro.
- Después de entrar al diario, dirígete a Ziegler que se encuentra en (ch1_vrgef2 139, 195).
- Ziegler parece ocupado, se encuentra en (ch1_vrgef2 190, 137). Lo volverás a encontrar.
- Encuentra nuevamente a Ziegler en (ch1_vrgef2 50, 93), él te pide ayuda, así que síguelo a la casa de adelante.
- Entra en la casa junto a Ziegler en (ch1_vrgef1 66, 137), él te pide encontrar algo sospechoso en la habitación.
- En la misma habitación encontrarás objetos sobre los que puedes hacer clic, revisa todos hasta que Ziegler te dé un nuevo icono de Misión para continuar.
- Habla con Ziegler y sal del edificio.
- Habla con él nuevamente frente a la casa.
- Después de hablar con Ziegler, dirígete a la casa de Neumann en (ch1_vrgef2 173, 64) y entra en la casa.
- Habrá varios diálogos, sigue subiendo las escaleras.
- Con el último diálogo, sal nuevamente de la casa, donde Ziegler te estará esperando.
- Has completado la Exploración del Tomo de Ilusiones, regresa al Profesor Telcos (@go 61). Recibirás como recompensa 10x Root Gold Coin (1001972).
La Verdad del Doctor
- Neumann era un doctor falso, regresa a Geffen en Ruinas (go 62) y discútelo con Maxim (ch1_geffen 102, 194). Recibirás 3 pequeñas misiones de visita.
- ¿Qué tipo de persona es el Doctor? Parte 1 (ch1_geffen 179, 161).
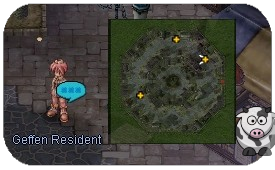
- ¿Qué tipo de persona es el Doctor? Parte 2 (ch1_geffen 56, 90).
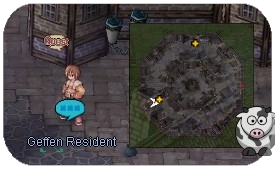
- ¿Qué tipo de persona es el Doctor? Parte 3 (ch1_geffen 119, 195).
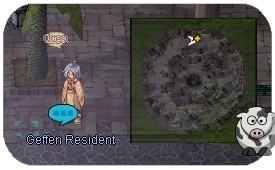
- Habla con todos ellos. Notarás que tampoco sabían mucho sobre qué tipo de persona era Neumann. Regresa con Maxim (ch1_geffen 102, 194).
- Maxim dice que Margot, esposa de Neumann, probablemente sepa más sobre él. Visítala en (ch1_geffen 178, 63). Sube las escaleras.
- Habla varias veces con ella, te pedirá un vaso de agua antes de continuar con la información sobre su esposo Neumann.
- Regresa a la entrada y encontrarás un punto brillante para conseguir agua para Margot.
- Regresa con ella y dale el agua, te dirá que Neumann tenía un registro sobre sus experimentos, necesitas encontrarlo.
- Vuelve nuevamente al sótano, encontrarás el registro de Neumann debajo de la cama. "Lift the mattress."
- Tómalo y regresa con Margot. Recibirás como recompensa 10x Root Gold Coin (1001972).
- Regresa a la aldea vía @go 61 y habla con la Asistente Baily (ygg_edge 73, 151) y entra al portal. Ella te dirá que la sangre de la enfermera podría ser útil, ella irá contigo a Geffen para extraerle algo de sangre.
- Regresa con Margot a la parte superior de su casa. (@go 62 y (ch1_geffen 178, 63)).
- Habla con Baily, te dirá que se quedará y monitorizará el progreso de Margot y proporcionará ayuda antes de regresar a la aldea.
- Regresas con @go 61 y visitas el Estante de Baily (ygg_edge 73, 151) y entras al portal. Recibirás como recompensa 10x Root Gold Coin (1001972).


Illusion Tome Exploration
| You may have found a clue in the diary, return to Professor Telcos (@go 61) in Ash Tree Village (ygg_edge 212, 206).
 |-
| By talking to Professor Telcos, he will show you the journal he created. Enter the book.
|-
| By talking to Professor Telcos, he will show you the journal he created. Enter the book.
 |-
| After entering the journal, head to Ziegler who is located at (ch1_vrgef2 139, 195).
|-
| After entering the journal, head to Ziegler who is located at (ch1_vrgef2 139, 195).
 |-
| Ziegler seems to be busy and leaves. Move to (ch1_vrgef2 190, 137), where you will meet him again.
|-
| Ziegler seems to be busy and leaves. Move to (ch1_vrgef2 190, 137), where you will meet him again.
 |-
| Find Ziegler, who is located at (ch1_vrgef2 50, 93), again. He asks you for some help, so follow him into the house ahead.
|-
| Find Ziegler, who is located at (ch1_vrgef2 50, 93), again. He asks you for some help, so follow him into the house ahead.
 |-
| Enter the house next to Ziegler who is located at (ch1_vrgef1 66, 137). He asks you to find something suspicious in the room.
|-
| Enter the house next to Ziegler who is located at (ch1_vrgef1 66, 137). He asks you to find something suspicious in the room.
 |-
| In the same room, you will find items you can click on. Check them all until Ziegler gives you a new Quest icon to continue.
|-
| In the same room, you will find items you can click on. Check them all until Ziegler gives you a new Quest icon to continue.
 |-
| Talk to Ziegler and then leave the building.
|-
| Talk to him once again in front of the house.
|-
| After talking with Ziegler move to Neumann's house at (ch1_vrgef2 173, 64) and enter it.
|-
| Talk to Ziegler and then leave the building.
|-
| Talk to him once again in front of the house.
|-
| After talking with Ziegler move to Neumann's house at (ch1_vrgef2 173, 64) and enter it.
 |-
| There will be several dialogues, keep moving upstairs.
|-
| With the last dialogue, move back out of the house, where Ziegler is waiting for you.
|-
| There will be several dialogues, keep moving upstairs.
|-
| With the last dialogue, move back out of the house, where Ziegler is waiting for you.
 |-
| You completed the Illusion Tome Exploration. Head back to Professor Telcos (@go 61). You will get rewarded with 10x
|-
| You completed the Illusion Tome Exploration. Head back to Professor Telcos (@go 61). You will get rewarded with 10x ![]() Root Gold Coin (1001972).
|}
Root Gold Coin (1001972).
|}
| Neumann was a fake doctor. Return to Ruined Geffen (go 62) and discuss this with Maxim (ch1_geffen 102, 194). You will receive 3 small visit-quests.
|
What Kind of Person is the Doctor? Part 1 (ch1_geffen 179, 161). 
|
What Kind of Person is the Doctor? Part 2 (ch1_geffen 56, 90). 
|
What Kind of Person is the Doctor? Part 3 (ch1_geffen 119, 195). 
|
Talk to all of them. You will notice that they also don't know much about what kind of person Neumann was. Return to Maxim (ch1_geffen 102, 194). 
|
| Maxim says Margot, Neumann's wife, would probably know more about him. Let's visit her at (ch1_geffen 178, 63). Walk up the stairs.
|
| Talk several times to her, she will ask you for a cup of water before continuing with her story about her husband Neumann. |
Walk back to the entrance, where you will find a shining spot to get some water for Margot. 
|
Return to her and give her the water. She will tell you that Neumann had a record about his experiments, you need to find it. 
|
| Walk back to the basement again, where you will find Neumann's record under the bed. Choose "Lift the mattress."
|
| Take it and go back to Margot. You will get rewarded with 10x |
| Return to the village via @go 61 and talk to Assistant Baily (ygg_edge 73, 151) and enter the portal. She will tell you that the nurse's blood could be helpful. She will go with you to Geffen to draw some blood from Margot.
|
| Head back to Margot on the top floor of her house. (@go 62 and (ch1_geffen 178, 63)).
|
| Talk to Baily, she will tell you that she will stay and monitor Margot's progress and provide relief there before returning back to the village.
|
| You head back with @go 61 and visit Baily's Shelf (ygg_edge 73, 151). Enter the portal. You will get rewarded with 10x
|
Hacia Brimir
- Un equipo ya ha partido para la exploración. Usa el portal warp en (ygg_edge 36, 117).
- Muévete a (ygg_roots 37, 123) y entra al portal rojo. Te encontrarás con ellos en (uknw_ruin 256, 238). Habla con uno de ellos, te teleportarán a un lugar seguro.
- Dentro del lugar seguro habla nuevamente con ellos. Aparecerán One y Zero, habla también con ellos.
- Después de que todos desaparezcan, sal de la habitación y busca a los 3 Residentes de Brimir en:
- (uknw_ruin 253, 63)

- (uknw_ruin 91, 173)

- (uknw_ruin 153, 150)
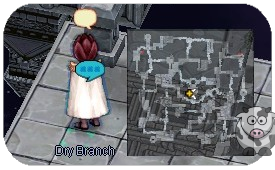
- (uknw_ruin 253, 63)
- Después de visitar a todos los Residentes de Brimir, Zero aparecerá en (uknw_ruin 158, 158), diciéndote que uno de los Residentes podría saber cómo romper las cadenas atadas a sus tobillos. Te teleportará a otro lugar seguro. Habla con él nuevamente.
- Debes cazar 10x Shadow Jailer y regresar con One en (uknw_ruin 158, 158).
- Después de entregar la misión, ahora tienes la solución para liberar a las prisioneras Valquiria de sus cadenas. Sal del lugar seguro y habla afuera con Dry Branch. Entra al lugar seguro y habla con él nuevamente. Aparecerá Two, habla también con él. Quiere que encuentres a Broken Branch en Brimir.
- Broken Branch se encuentra en (uknw_ruin 255, 59). Hablando con él aparecerá Three. Entra al portal junto a él.
- Rotten Branch está en (uknw_ruin 93, 173), te teleportará a una zona segura donde aparecerá Four, habla con ellos.
- Regresa con One en (uknw_ruin 158, 158), entra a la zona segura y habla nuevamente con él. Recibirás como recompensa 10x Root Gold Coin (1001972).
- Desbloqueas las misiones diarias: "Una Tumba Formal", "Los Gatos siguen siendo Gatos" y "De Hecho. Ellos también.".


To Brimir
| A team has already departed for exploration. Use the warp portal at (ygg_edge 36, 117).
|-
| Move to (ygg_roots 37, 123) and enter the red portal.
 |-
| You will meet them at (uknw_ruin 256, 238). Talk to one of them, they will warp you to a safe place.
|-
| You will meet them at (uknw_ruin 256, 238). Talk to one of them, they will warp you to a safe place.
 |-
| Talk to them again inside the safe place . One and Zero will appear, talk to them too.
|-
| Talk to them again inside the safe place . One and Zero will appear, talk to them too.


 |-
| After they all disappear, leave the room and search for the 3 Brimir Residents at:
|-
| After they all disappear, leave the room and search for the 3 Brimir Residents at:
- (uknw_ruin 253, 63)
- (uknw_ruin 91, 173)
- (uknw_ruin 153, 150)
|-
| After visiting all Brimir Residents, One will appear at (uknw_ruin 158, 158) telling you that one of the Residents may know how to break the chains tied to their ankles. He will warp you into another safe place. Talk to him again.
 |-
| You have to hunt 10x Shadow Jailer (22464) and collect 5x
|-
| You have to hunt 10x Shadow Jailer (22464) and collect 5x ![]() Broken Petal (1001976) from them. Then return to One at (uknw_ruin 158, 158).
|-
| After you turn in the quest, you now have the solution to free the Valkyrie prisoners from their chains. Leave the safe place and talk to Dry Branch outside. Enter the safe place and talk to him again. Two will appear, talk to him too. He wants you to find Broken Branch in Brimir.
Broken Petal (1001976) from them. Then return to One at (uknw_ruin 158, 158).
|-
| After you turn in the quest, you now have the solution to free the Valkyrie prisoners from their chains. Leave the safe place and talk to Dry Branch outside. Enter the safe place and talk to him again. Two will appear, talk to him too. He wants you to find Broken Branch in Brimir.

 |-
| Broken Branch is located at (uknw_ruin 255, 59). Talking to him will summon Three. Enter the portal next to him.
|-
| Broken Branch is located at (uknw_ruin 255, 59). Talking to him will summon Three. Enter the portal next to him.


 |-
| Rotten Branch is at (uknw_ruin 93, 173), he warps you into a safe zone where Four spawns. Talk to them.
|-
| Rotten Branch is at (uknw_ruin 93, 173), he warps you into a safe zone where Four spawns. Talk to them.

 |-
| Return to One at (uknw_ruin 158, 158), enter the safe zone and talk to him again. You will get rewarded with 10x
|-
| Return to One at (uknw_ruin 158, 158), enter the safe zone and talk to him again. You will get rewarded with 10x ![]() Root Gold Coin (1001972).
|-
| You unlock the daily quest: "A Formal Grave", "Cats are still Cats" and "In Fact. They too.".
|}
Root Gold Coin (1001972).
|-
| You unlock the daily quest: "A Formal Grave", "Cats are still Cats" and "In Fact. They too.".
|}
La Tierra del Calor
- Regresa con @go 61 a la aldea y habla con Laphine Shasha en (ygg_fruit 80, 122). Habla con ella dos veces.
- Parece que la pista final para la cura se encuentra en Muspelheim. Visita a Devries en (ygg_fruit 71, 78). Recibirás como recompensa 10x Root Gold Coin (1001972).
- Los preparativos para viajar al Valle Volund en Muspelheim están completos, encuentra al grupo en el Valle Volund.
- Entra al portal en (ygg_edge 36, 117)
- Para entrar a la Tierra del Calor, muévete a la parte superior este del mapa (ygg_roots 342, 248).
- Al entrar al mapa encontrarás un Punto de Medición (Survey Point), haz clic en él para entrar al lugar seguro.
- Dentro del lugar seguro encontrarás a Chez y a los demás esperándote. Gracias al dispositivo de control de temperatura, ahora son posibles las operaciones en Muspelheim.
- Dirígete más adentro para encontrar a Harban en (mu_fild01 158, 217). Has obtenido información sobre Hal, continúa más adentro de Muspelheim para encontrarlo.
- Más adentro en Muspelheim encontrarás a Tamarin en (mu_fild01 224, 245).
- Aprendiste sobre el equipo de Tamarin, ahora busca a Yupilus (mu_fild01 196, 184). Te pedirán que recolectes Hal para su experimento.
- Dirígete a los 8 Trabajadores en:
- (mu_fild01 236, 293)

- (mu_fild01 218, 308)
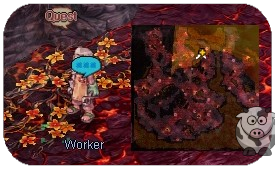
- (mu_fild01 166, 369)
- (mu_fild01 134, 308)

- (mu_fild01 125, 303)
- (mu_fild01 35, 192)

- (mu_fild01 90, 195)

- (mu_fild01 120, 235)
- (mu_fild01 236, 293)
- Has reunido la cantidad requerida de Hal. Regresa con Yupilus en (mu_fild01 199, 185). Dentro del lugar seguro también habla con Harban.
Habla con Yupilus y recibirás como recompensa 10x Root Gold Coin (1001972).


The Land of Heat
| Head back to the Village with @go 61 and talk to Laphine Shasha at (ygg_fruit 80, 122). Talk to her twice.
 |-
| It seems the final clue for the cure can be found in Muspelheim. Visit Devries in (ygg_fruit 71, 78). You will get rewarded with 10x
|-
| It seems the final clue for the cure can be found in Muspelheim. Visit Devries in (ygg_fruit 71, 78). You will get rewarded with 10x ![]() Root Gold Coin (1001972).
Root Gold Coin (1001972).
 |-
| Preparations to travel to Volund Valley in Muspelheim are complete, find the group in Volund Valley.
|-
| Enter the portal at (ygg_edge 36, 117)
|-
| Preparations to travel to Volund Valley in Muspelheim are complete, find the group in Volund Valley.
|-
| Enter the portal at (ygg_edge 36, 117)
|-
| To enter the Land of Heat move to the east upper part of the map (ygg_roots 342, 248).
 |-
| By entering the map you will find a Survey Point, move close to it to enter the safe place.
|-
| By entering the map you will find a Survey Point, move close to it to enter the safe place.
 |-
| Inside the safe place you will find Chez and the others waiting for you. Thanks to the temperature control device, operations in Muspelheim are now possible.
|-
| Inside the safe place you will find Chez and the others waiting for you. Thanks to the temperature control device, operations in Muspelheim are now possible.
 |-
| Head deeper inside to find Harban at (mu_fild01 158, 217). You obtain some information about Hal, go deeper into Muspelheim to find out more.
|-
| Head deeper inside to find Harban at (mu_fild01 158, 217). You obtain some information about Hal, go deeper into Muspelheim to find out more.
 |-
| Deeper in Muspelheim you will find Tamarin at (mu_fild01 224, 245).
|-
| Deeper in Muspelheim you will find Tamarin at (mu_fild01 224, 245).
 |-
| You learn about the team from Tamarin, now you search for Yupilus (mu_fild01 196, 184). You will be asked to collect Hal for his experiment.
|-
| You learn about the team from Tamarin, now you search for Yupilus (mu_fild01 196, 184). You will be asked to collect Hal for his experiment.
 |-
| Head to the 8 Workers at:
|-
| Head to the 8 Workers at:
- (mu_fild01 236, 293)
- (mu_fild01 218, 308)
- (mu_fild01 166, 369)
- (mu_fild01 134, 308)
- (mu_fild01 125, 303)
- (mu_fild01 35, 192)
- (mu_fild01 90, 195)
- (mu_fild01 120, 235)
|-
| After you've gathered the required amount of Hal, return to Yupilus at (mu_fild01 199, 185). Inside the safe place also talk to Harban.
Talk to Yupilus again and you will get rewarded with 10x ![]() Root Gold Coin (1001972).
Root Gold Coin (1001972).

 |}
|}
Cura Creada con Éxito
- Has obtenido una bilis especial. Regresa a la aldea y entrégala a la Asistente Baily. Regresa a la aldea con @go 61 y sigue el navi hasta (ygg_edge 73, 151), entra al portal.
- La Asistente Baily completó la cura usando la bilis especial y te pidió entregarla a Maxim en Geffen en Ruinas, usa @go 62 y (ch1_geffen 102, 194).
- Maxim sugiere que sería mejor realizar el ensayo clínico en lugar de usar la cura de inmediato.
- Administra la cura primero a Margot (ch1_geffen 178, 63).
- Has usado la cura en la enfermera. Habla con Maxim junto a ella. Maxim dice que se encargará de Margot mientras la medicina hace efecto. Para una observación más precisa, entrégale el diario de la condición de Margot que ha estado guardando.
- Regresa al Ayuntamiento (ch1_geffen 102, 193), donde verás un punto brillante que contiene el Diario. Elige "Small Journal".
- Regresa con Maxim, que todavía está con Margot (ch1_geffen 178, 63).
- Maxim te dice que la condición de Margot ha mejorado, la cura parece ser efectiva. Distribuye la cura a los otros pacientes en la clínica de Geffen (ch1_geffen 169, 172). Entra al portal.
- Cura a los 3 pacientes:
- Primera habitación

- (ch1_gef_in 112, 31)

- (ch1_gef_in 112, 108)

- Primera habitación
- Has distribuido la cura a las personas en la clínica. Regresa con Maxim al Ayuntamiento y reporta los resultados (ch1_geffen 102, 194). Habla con él dos veces. Recibirás como recompensa 10x Root Gold Coin (1001972).


Cure Created Successfully
| You obtain a special Hal. Return to the Village and deliver it to Assistant Baily. Return to the village with @go 61 and follow the navi to (ygg_edge 73, 151), enter the portal.
 |-
| Assistant Baily completes the cure using the special Hal and asks you to deliver it to Maxim in Ruined Geffen, use @go 62 and (ch1_geffen 102, 194).
|-
| Assistant Baily completes the cure using the special Hal and asks you to deliver it to Maxim in Ruined Geffen, use @go 62 and (ch1_geffen 102, 194).
|-
| Maxim suggest that it would be best to conduct a clinical trial rather than use the cure immediately.
|-
| Administer the cure to Margot first (ch1_geffen 178, 63).
|-
| You use the cure on the nurse. Talk to Maxim next to her. Maxim says he will take care of Margot, while the medicine takes effect. For a more accurate observation, bring him the journal of Margot's condition that he has been keeping.
 |-
| Return to the Town Hall (ch1_geffen 102, 193), where you will see a shining spot containing the Journal. Choose "Small Journal".
|-
| Return to the Town Hall (ch1_geffen 102, 193), where you will see a shining spot containing the Journal. Choose "Small Journal".
 |-
| Return to Maxim who is still with Margot (ch1_geffen 178, 63).
|-
| Return to Maxim who is still with Margot (ch1_geffen 178, 63).
|-
| Maxim tells you that Margot's condition improved, the cure seems to be effective. Distribute the cure to the other patients at Geffen's clinic (ch1_geffen 169, 172). Enter the Portal.
|-
|
- Cure all 3 patients:
- First room
- (ch1_gef_in 112, 31)
- (ch1_gef_in 112, 108)
- First room
|-
| After you have distributed the cure to the people at the clinic, return to Maxim at the Town Hall and report the results (ch1_geffen 102, 194). Talk to him twice. You will get rewarded with 10x ![]() Root Gold Coin (1001972).
Root Gold Coin (1001972).
|}
Derribar la Fortaleza Aérea
- Nuestro objetivo es derribar a Dark Whisper, la fuente de la plaga. Regresa a Geffen en Ruinas con @go 62 y entra al portal en la Torre de Geffen en Ruinas (ch1_geffen 120, 118).
- Habla con Est en (hem_dun01 206, 245). Crea un grupo para unirte a la instancia "Ominous Dark Whisper".
- Dentro de la instancia habla nuevamente con Est, elige "Let's move out" para iniciar la instancia.
- Sigue a Est, que está disfrazado de Succubus. Después de algunos monstruos malditos, serás teleportado afuera.
- Sigue las escaleras y mata a los monstruos en el camino. Si matas a todos los monstruos, se abrirá la sala hacia la cámara.
- Conocerás al Monarca Inmortal (Immortal Monarch), mátalo y habla con Est. (Destruye el cristal en el borde para infligirle daño)
- Después de derrotar al Monarca Inmortal, regresa a la aldea vía @go 61, sigue el navi: (ygg_edge 167, 137) y entra al portal.
- Dentro habla con Shasha, recibirás como recompensa 10x Root Gold Coin (1001972).
- Regresa a Geffen en Ruinas con @go 62 y entra al portal en la Torre de Geffen en Ruinas (ch1_geffen 120, 118).
- El profesor mago dice que hay algo que discutir sobre Dark Whisper (hem_dun01 201, 248).
- Has completado la Misión Principal del Chapter 1 y ahora tienes acceso a la instancia diaria Recreated Dark Whisper.
Bring down the Air Fortress
| Our goal is to bring down Dark Whisper, the source of the plague. Head back to Ruined Geffen with @go 62 and enter the Portal at the ruined Geffen Tower (ch1_geffen 120, 118).
 |-
| Talk to Est at (hem_dun01 206, 245). Create a party to join the instance "Ominous Dark Whisper".
|-
| Talk to Est at (hem_dun01 206, 245). Create a party to join the instance "Ominous Dark Whisper".
 |-
| Inside the instance talk to Est again, choose "Let's move out" to start the instance.
|-
| Inside the instance talk to Est again, choose "Let's move out" to start the instance.
 |-
| Follow Est who is disguised as Succubus. After some cursed monsters appear, you will get warped out.
|-
| Follow Est who is disguised as Succubus. After some cursed monsters appear, you will get warped out.
 |-
| Follow the stairs and kill the monsters on the way. Once you killed all monsters the way to the chamber will open.
|-
| You will meet the Immortal Monarch, kill him and talk to Est. (Destroy the crystal at the edge to deal damage to him). You will get rewarded with 20x
|-
| Follow the stairs and kill the monsters on the way. Once you killed all monsters the way to the chamber will open.
|-
| You will meet the Immortal Monarch, kill him and talk to Est. (Destroy the crystal at the edge to deal damage to him). You will get rewarded with 20x ![]() Root Gold Coin (1001972).
Root Gold Coin (1001972).

 |-
| After defeating the Immortal Monarch head back to the village via @go 61 and follow the navi: (ygg_edge 167, 137) and enter the portal.
|-
| After defeating the Immortal Monarch head back to the village via @go 61 and follow the navi: (ygg_edge 167, 137) and enter the portal.
 |-
| Talk to Shasha inside, you will get rewarded with 10x
|-
| Talk to Shasha inside, you will get rewarded with 10x ![]() Root Gold Coin (1001972).
Root Gold Coin (1001972).
 |-
| Head back to Ruined Geffen with @go 62 and enter the Portal at the ruined Geffen Tower (ch1_geffen 120, 118).
|-
| Head back to Ruined Geffen with @go 62 and enter the Portal at the ruined Geffen Tower (ch1_geffen 120, 118).
|-
| The wizard professor says there's something to discuss about Dark Whisper (hem_dun01 201, 248).
 |-
| You have completed the Main Quest of Chapter 1 and now have access to the Recreated Dark Whisper daily instance.
|}
|-
| You have completed the Main Quest of Chapter 1 and now have access to the Recreated Dark Whisper daily instance.
|}
Side Quests
To start the side quest talk to Clover at the Ruined Geffen (ch1_geffen 120, 114). 
|
Head into the portal and talk to the people who are left behind in Ruined Verus (hem_dun01 78, 142). 
|
Sua and the others will tell you that the maddened people are the problem, you decide to go to Taoist Jeon in Ruined geffen to discuss solutions. 
|
Return with @go 62 to Ruined Geffen and find Taoist Jeon at (ch1_geffen 171, 167), he will tell you that he'll take time to look around in Ruined verus and find a solution. 
|
| Return to the safe place in Ruined Verus (ch1_geffen 120, 114).
|
| Head into the portal and enter the safe place in Ruined Verus (hem_dun01 78, 142) again.
|
| Talk again to Sua.
|
| Return back to Clover (@go 62) (ch1_geffen 120, 114). You will get rewarded with 10x
|
| You unlocked the daily quests: "This is a sacred remedy" and "Save them first". |
La Tierra Oscura de Schrödinger
- De regreso a la Aldea Ash Tree (go 61) te encontrarás con Yvain en (ygg_edge 180, 182). Yvain parece muy preocupado por los investigadores en la Tierra Oscura.
- Entra al portal en (ygg_edge 36, 117) para encontrar al Investigador.
- El Investigador en (ygg_roots 280, 99) te dirá que la investigación va supuestamente bien. Necesitas encontrar a otro Investigador.
- Investigador en (ygg_roots 208, 95).
- Investigador en (ygg_roots 120, 170), te dirá que se lesionó el tobillo durante el temblor en la Tierra Oscura.
- Regresa con Yvain en (ygg_edge 180, 182) (@go 61). Recibirás como recompensa 10x Root Gold Coin (1001972).
- Has desbloqueado la misión diaria: "¡Ayúdanos, doctor!"


Una Puerta Brumosa
- De regreso a la Aldea Ash Tree (go 61) te encontrarás con Rubiel en (ygg_edge 180, 182). Rubiel te pide que vayas al Campo de Geffen del Segundo Mundo.
- Primero necesitas salir del mapa en (ygg_edge 36, 117) y entrar al portal azul.
- Luego necesitas entrar al portal rojo en (ygg_roots 161, 241).
- Entra al espacio seguro haciendo clic en el "Recon Point" en (hem_fild 180, 263).
- Con Rubiel desbloqueas mejoras especiales que cuestan 45x
 Mana Ring (1001996).
- Aquí obtienes una mejora por una hora para entrar a West y East Encroched Geffenia.
- El portal oeste te lleva a West Encroched Geffenia.
- El portal este/superior te lleva a East Encroched Geffenia.
- Sal de esta sala con el Punto de Reconocimiento y dirígete a Minuel en (hem_fild 329, 191).
- Con Minuel desbloqueas mejoras especiales que cuestan 20x Mana Ring (1001996). Aquí obtienes una mejora por una hora para entrar a Encroched Valkyrie Realm.
- El portal rojo junto a él te teleportará a Encroched Valkyrie Realm.
Dame algo que hacer
- Entra al portal en (ygg_edge 36, 117)
- Para entrar a la Tierra del Calor, muévete a la parte superior este del mapa (ygg_roots 342, 248).
- Habla con Yupilus (mu_fild01 196, 184). Ella te teleportará a un espacio seguro. Habla nuevamente con ella y con Harban.
- Habla nuevamente con Yupilus, recibirás como recompensa 10x Root Gold Coin (1001972). Has desbloqueado la diaria: "Muchas cosas por hacer".
Back to Ash Tree Village (go 61) you will meet Rubiel at (ygg_edge 180, 182). Rubiel asks you to come to the Geffen Field of the Second World. 
|
| First you need to leave the map at (ygg_edge 36, 117) and enter the blue portal.
|
| Then you need to enter the red portal at (ygg_roots 161, 241).
|
Enter the safe space by clicking on the "Recon Point" at (hem_fild 180, 263). 
|
At Rubiel you unlock special buffs which cost you 45x 
|
| Here you get a buff for one hour to enter West and East Encroched Geffenia. |
| West portal leads you to West Encroched Geffenia. |
| East/Upper portal leads you to East Encroched Geffenia. |
| Leave this room with the Recon Point and head to Minuel at (hem_fild 329, 191). |
| At Minuel you unlock special buffs which cost you 20x
|
| The red portal next to him will warp you to Encroched Valkyrie Realm. |
| Enter the portal at (ygg_edge 36, 117)
|
| To enter the Land of Heat move to the east upper part of the map (ygg_roots 342, 248).
|
| Talk to Yupilus (mu_fild01 196, 184). She will warp you into a safe space. Talk again to her and to Harban.
|
| Talk again to Yupilus, you will get rewarded with 10x |
Misiones Diarias
Sálvalos primero
Habla con Clover para obtener la misión diaria "Sálvalos primero". Necesitas cazar 300x monstruos en Ruined Verus.
Recompensa: 10x ![]() Root Gold Coin (1001972)
Root Gold Coin (1001972)
Este es un remedio sagrado
Habla con Taoist Jeon para recibir 5x ![]() Purification Amulet (1001973). Úsalo para purificar a 5x creyentes de Verus en Ruined Verus.
Purification Amulet (1001973). Úsalo para purificar a 5x creyentes de Verus en Ruined Verus.

Recompensa: 5x ![]() Root Gold Coin (1001972)
Root Gold Coin (1001972)
¡Ayúdanos, doctor!
Para iniciar la misión diaria, habla con Yvain en (ygg_edge 180, 182) (@go 61).

Entra al portal en (ygg_edge 36, 117) para encontrar al Investigador.
Encontrarás muchos Investigadores, habla con todos hasta encontrar al que está herido.
Regresa con Yvain (@go 61).
Recompensa: 5x ![]() Root Gold Coin (1001972)
Root Gold Coin (1001972)
Muchas cosas por hacer
- Entra al portal en (ygg_edge 36, 117)
- Para entrar a la Tierra del Calor, muévete a la parte superior este del mapa (ygg_roots 342, 248).
- Habla con Yupilus (mu_fild01 196, 184). Aquí puedes obtener las 4 misiones diarias.
- Abuelo
- Recolecta 10x
 Hal (1001977).
 - ¿Podemos asarlo?: Caza 20x Almejas Volcánicas.
- ¿Alguien parecía querer esto?: Caza 20x Firafflesias.
- ¡Nos han engañado!: Caza 20x Anillos de Fuego.
- Recolecta 10x
- Puedes aceptar todas las misiones a la vez y regresar; cada misión será recompensada con 5x Root Gold Coin (1001972).
Misiones de Brimir
- Para iniciar las misiones diarias, dirígete al árbol (@go 61) y usa el portal en (ygg_edge 36, 117).
- La misión "De hecho, ellos también." está con el NPC Four (uknw_ruin 93, 174). Debes matar 10x Guardianes Sombríos.

Recompensa: 5x Root Gold Coin (1001972) - La misión "Los gatos siguen siendo gatos." está con el NPC Three (uknw_ruin 252, 59). Habla con Broken Branch para entrar a la sala. Debes matar 10x Guardianes Sombríos.

Recompensa: 5x Root Gold Coin (1001972) - La misión "Una Tumba Formal." está con el NPC Two (uknw_ruin 149, 150). Habla con Broken Branch para entrar a la sala. Debes matar 50x Tulipanes y 50x Caléndulas y recolectar 20x
 Grey Petal (1001975).

Recompensa: 5x Root Gold Coin (1001972)
Help us, doctor!
| To start the daily quest talk to Yvain at (ygg_edge 180, 182) (@go 61).
|-
|Enter the portal at (ygg_edge 36, 117) to find the Investigator.
|-
|You will find many Investigators, talk to all of them till you find the injured one.
|-
|Head back to Yvain (@go 61).
Reward:5x ![]() Root Gold Coin (1001972).
|}
Root Gold Coin (1001972).
|}
| *Enter the portal at (ygg_edge 36, 117)
|
| *To enter the Land of Heat move to the east upper part of the map (ygg_roots 342, 248).
|
| Talk to Yupilus (mu_fild01 196, 184). Here you can get all 4x daily quests.
|
| Grandfather: Collect 10x |
| Can we grill it?: Hunt 20x Volcano Clams. |
| Someone seemed to want this?: Hunt 20x Firafflesias. |
| We've been tricked!!!: Hunt 20x Fire Rings. |
| *You can take all quests at once and return in, every quest will be rewarded with 5x |
| To start the daily quests head to the tree (@go 61) and use the portal at (ygg_edge 36, 117).
|
The quest "In Fact, they too." is at NPC Four (uknw_ruin 93, 174). You have to kill 10x Shadow Jailers.  Reward: 5x |
The quest "Cats are still cats." is at NPC Three (uknw_ruin 252, 59). Talk to the Broken Branch to enter the room. You have to kill 10x Shadow Jailers.  Reward: 5x |
The quest "A formal Grave." is at NPC Two (uknw_ruin 149, 150). Talk to the Broken Branch to enter the room. You have to kill 50x Tulip and 50x Calendulas also to collect 20x  Reward: 5x |
Monstruos
Instancia
El Profesor Mago (Mage Professor) te abrirá la instancia: "Prepare recreated Dark Whisper" en (hem_dun01 201, 248).
| Map | Monster | ||||
| Twisted Dark Land ygg_roots .png) |
Yggring (22443) |
Leafeing (22444) |
|||
| Outside the Bolund Valley mu_fild01 .png) |
Charcoaring (22445) |
Vulring (22446) |
Fireloop (22447) |
MVP Bulgasari (22494) | |
Firafflesia (22448) |
Volimpet (22449) |
Fire Flower (22450) | |||
| Twisted Brimir 1F uknw_ruin .png)
|
Nyaise (22463) |
Shadow Jailer (22464) |
Tulip (22465) |
||
Calendula (22466) |
Scabiosa (22467) |
||||
| Twisted Brimir 2F uknw_ruin2 .png)
|
Nyaise (22463) |
Shadow Jailer (22464) |
Lobelia (22468) |
||
Myosotis (22469) |
Anemone (22470) |
MVP Glutto (22495) |
|||
| Ruined Geffen Field hem_fild .png)
|
Peeping (22451) |
Polluted Silk Frog (22452) |
Polluted Silk Snail (22453) |
||
Immortal Officer (22460) |
Immortal Officer (22461) |
Immortal Officer (22462) |
|||
| Ruined Verus hem_dun01 .png) |
Encroached Ex-Rover (22454) |
Encroached Re-Rover (22455) |
Encroached Dimik (22456) |
||
Encroached Dimik (22457) |
Encroached Dimik (22458) |
Encroached Dimik (22459) |
|||
Immortal Officer (22460) |
Immortal Officer (22461) |
Immortal Officer (22462) |
|||
| Ruined Valkyrie Realm hem_dun02 .png) |
Uncanny Skogul (22471) |
Uncanny Frus (22472) |
Listener (22473) |
||
Immortal Officer (22474) |
Immortal Officer (22475) |
||||
| East of Eroded Geffenia ch1_gfn01 .png) |
Toxit (22476) |
Lunarina (22478) |
Bloody Slasher (22480) |
Shadiest (22482) | |
High Succubus (22484) |
High Incubus (22486) |
Chief Knight of Abyss (22488) | |||
| West of Eroded Geffenia ch1_gfn03 .png) |
Toxit (22476) |
Lunarina (22478) |
Bloody Slasher (22480) |
Shadiest (22482) | |
High Succubus (22484) |
High Incubus (22486) |
Chief Knight of Abyss (22488) | |||
All new maps have Map Drops, which means that all monsters in that specifc map can drop:
| Map | Map Drops | Drop rate |
| Outside the Bolund Valley mu_fild01
|
2,19% | |
| 0,44% | ||
| 2,19% | ||
| 0,44% | ||
| 1,43% | ||
| 7,32% | ||
| Twisted Brimir 1F uknw_ruin
|
2,19% | |
| 0,44% | ||
| 2,19% | ||
| 0,44% | ||
| 1,43% | ||
| Twisted Brimir 2F uknw_ruin2
|
2,19% | |
| 0,44% | ||
| 2,19% | ||
| 0,44% | ||
| 1,43% | ||
| Ruined Geffen Field hem_fild
|
2,19% | |
| 0,44% | ||
| 2,19% | ||
| 0,44% | ||
| 1,43% | ||
| Ruined Verus hem_dun01
|
2,19% | |
| 0,44% | ||
| 2,19% | ||
| 0,44% | ||
| 1,43% | ||
| Ruined Valkyrie Realm hem_dun02
|
0,44% | |
| 0,44% | ||
| 1,28% | ||
| 6,23% | ||
| 4,18% | ||
| 4,18% | ||
| 3,24% | ||
| 3,24% | ||
| 0,92% | ||
| 0,44% | ||
| East of Eroded Geffenia ch1_gfn01
|
0,61% | |
| 0,61% | ||
| 1,6% | ||
| 6,23% | ||
| 4,18% | ||
| 4,18% | ||
| 3,24% | ||
| 3,24% | ||
| 4,18% | ||
| 2,74% | ||
| 0,92% | ||
| 0,92% | ||
| 0,92% | ||
| West of Eroded Geffenia ch1_gfn03
|
0,61% | |
| 0,61% | ||
| 1,6% | ||
| 6,23% | ||
| 4,18% | ||
| 4,18% | ||
| 3,24% | ||
| 3,24% | ||
| 4,18% | ||
| 2,74% | ||
| 0,92% | ||
| 0,92% | ||
| 0,92% |
Instance
Mage Professor will open you the instance: "Prepare recreated Dark Whisper" at (hem_dun01 201, 248).
NPC de Intercambio
(ygg_fruit 168, 124)

| Item | Cost |
|---|---|
| 104000 | 1001972
5k zeny |
Dimension Shoes & Enchants
Overview
| Items | Enchant order | Reset |
|---|---|---|
| 4th > 3rd > 2nd Slot | 100% Success Rate 25x Note: Enchants do NOT downgrade on fail. | |
4th Slot Perfect Enchant
| Costs: | 4th Slot Perfect Enchant | ||||
| 30x 20x |
Physical damage to Brute-type monsters +3% Magic damage to Brute-type monsters +3% Physical damage to Plant-type monsters +3% Magic damage to Plant-type monsters +3% _______________________ Grade >= D: Physical damage to Brute-type monsters +1% Magic damage to Brute-type monsters +1% Physical damage to Plant-type monsters +1% Magic damage to Plant-type monsters +1% _______________________ Type: Enchant Position: Unknown |
Physical damage to Fish-type monsters +3% Magic damage to Fish-type monsters +3% Physical damage to Demi-Human monsters +3% Magic damage to Demi-Human monsters +3% _______________________ Grade >= D: Physical damage to Fish-type monsters +1% Magic damage to Fish-type monsters +1% Physical damage to Demi-Human monsters +1% Magic damage to Demi-Human monsters +1% _______________________ Type: Enchant Position: Unknown |
Physical damage to Angel-type monsters +3% Magic damage to Angel-type monsters +3% Physical damage to Demon-type monsters +3% Magic damage to Demon-type monsters +3% _______________________ Grade >= D: Physical damage to Angel-type monsters +1% Magic damage to Angel-type monsters +1% Physical damage to Demon-type monsters +1% Magic damage to Demon-type monsters +1% _______________________ Type: Enchant Position: Unknown |
Physical damage to Undead monsters +3% Magic damage to Undead monsters +3% Physical damage to Dragon-type monsters +3% Magic damage to Dragon-type monsters +3% _______________________ Grade >= D: Physical damage to Undead monsters +1% Magic damage to Undead monsters +1% Physical damage to Dragon-type monsters +1% Magic damage to Dragon-type monsters +1% _______________________ Type: Enchant Position: Unknown |
Physical damage to Insect-type monsters +3% Magic damage to Insect-type monsters +3% Physical damage to Formless monsters +3% Magic damage to Formless monsters +3% _______________________ Grade >= D: Physical damage to Insect-type monsters +1% Magic damage to Insect-type monsters +1% Physical damage to Formless monsters +1% Magic damage to Formless monsters +1% _______________________ Type: Enchant Position: Unknown |
Enchant Upgrade Slot 4
| All possible Enchants: | ||||||||||
| LVL 1 | LVL 2 | LVL 3 | LVL 4 | LVL 5 | Special | |||||
Physical damage to Insect-type monsters +12% Magic damage to Insect-type monsters +12% Physical damage to Formless monsters +12% Magic damage to Formless monsters +12% _______________________ Grade >= D: Physical damage to Insect-type monsters +2% Magic damage to Insect-type monsters +2% Physical damage to Formless monsters +2% Magic damage to Formless monsters +2% _______________________ Grade >= C: Physical damage to Insect-type monsters +2% Magic damage to Insect-type monsters +2% Physical damage to Formless monsters +2% Magic damage to Formless monsters +2% _______________________ Grade >= B: Physical damage to Insect-type monsters +4% Magic damage to Insect-type monsters +4% Physical damage to Formless monsters +4% Magic damage to Formless monsters +4% _______________________ Grade >= A: Physical damage to Insect-type monsters +5% Magic damage to Insect-type monsters +5% Physical damage to Formless monsters +5% Magic damage to Formless monsters +5% _______________________ Type: Enchant Position: Unknown |
→ | Physical damage to Brute-type monsters +4% Magic damage to Brute-type monsters +4% Physical damage to Plant-type monsters +4% Magic damage to Plant-type monsters +4% _______________________ Grade >= D: Physical damage to Brute-type monsters +1% Magic damage to Brute-type monsters +1% Physical damage to Plant-type monsters +1% Magic damage to Plant-type monsters +1% _______________________ Grade >= C: Physical damage to Brute-type monsters +1% Magic damage to Brute-type monsters +1% Physical damage to Plant-type monsters +1% Magic damage to Plant-type monsters +1% _______________________ Type: Enchant Position: Unknown |
→ | Physical damage to Brute-type monsters +5% Magic damage to Brute-type monsters +5% Physical damage to Plant-type monsters +5% Magic damage to Plant-type monsters +5% _______________________ Grade >= D: Physical damage to Brute-type monsters +1% Magic damage to Brute-type monsters +1% Physical damage to Plant-type monsters +1% Magic damage to Plant-type monsters +1% _______________________ Grade >= C: Physical damage to Brute-type monsters +1% Magic damage to Brute-type monsters +1% Physical damage to Plant-type monsters +1% Magic damage to Plant-type monsters +1% _______________________ Grade >= B: Physical damage to Brute-type monsters +2% Magic damage to Brute-type monsters +2% Physical damage to Plant-type monsters +2% Magic damage to Plant-type monsters +2% _______________________ Type: Enchant Position: Unknown |
→ | Physical damage to Brute-type monsters +7% Magic damage to Brute-type monsters +7% Physical damage to Plant-type monsters +7% Magic damage to Plant-type monsters +7% _______________________ Grade >= D: Physical damage to Brute-type monsters +1% Magic damage to Brute-type monsters +1% Physical damage to Plant-type monsters +1% Magic damage to Plant-type monsters +1% _______________________ Grade >= C: Physical damage to Brute-type monsters +1% Magic damage to Brute-type monsters +1% Physical damage to Plant-type monsters +1% Magic damage to Plant-type monsters +1% _______________________ Grade >= B: Physical damage to Brute-type monsters +2% Magic damage to Brute-type monsters +2% Physical damage to Plant-type monsters +2% Magic damage to Plant-type monsters +2% _______________________ Grade >= A: Physical damage to Brute-type monsters +2% Magic damage to Brute-type monsters +2% Physical damage to Plant-type monsters +2% Magic damage to Plant-type monsters +2% _______________________ Type: Enchant Position: Unknown |
→ | Physical damage to Brute-type monsters +10% Magic damage to Brute-type monsters +10% Physical damage to Plant-type monsters +10% Magic damage to Plant-type monsters +10% _______________________ Grade >= D: Physical damage to Brute-type monsters +1% Magic damage to Brute-type monsters +1% Physical damage to Plant-type monsters +1% Magic damage to Plant-type monsters +1% _______________________ Grade >= C: Physical damage to Brute-type monsters +1% Magic damage to Brute-type monsters +1% Physical damage to Plant-type monsters +1% Magic damage to Plant-type monsters +1% _______________________ Grade >= B: Physical damage to Brute-type monsters +2% Magic damage to Brute-type monsters +2% Physical damage to Plant-type monsters +2% Magic damage to Plant-type monsters +2% _______________________ Grade >= A: Physical damage to Brute-type monsters +4% Magic damage to Brute-type monsters +4% Physical damage to Plant-type monsters +4% Magic damage to Plant-type monsters +4% _______________________ Type: Enchant Position: Unknown |
→ | Physical damage to Brute-type monsters +12% Magic damage to Brute-type monsters +12% Physical damage to Plant-type monsters +12% Magic damage to Plant-type monsters +12% _______________________ Grade >= D: Physical damage to Brute-type monsters +2% Magic damage to Brute-type monsters +2% Physical damage to Plant-type monsters +2% Magic damage to Plant-type monsters +2% _______________________ Grade >= C: Physical damage to Brute-type monsters +2% Magic damage to Brute-type monsters +2% Physical damage to Plant-type monsters +2% Magic damage to Plant-type monsters +2% _______________________ Grade >= B: Physical damage to Brute-type monsters +4% Magic damage to Brute-type monsters +4% Physical damage to Plant-type monsters +4% Magic damage to Plant-type monsters +4% _______________________ Grade >= A: Physical damage to Brute-type monsters +5% Magic damage to Brute-type monsters +5% Physical damage to Plant-type monsters +5% Magic damage to Plant-type monsters +5% _______________________ Type: Enchant Position: Unknown |
Physical damage to Fish-type monsters +3% Magic damage to Fish-type monsters +3% Physical damage to Demi-Human monsters +3% Magic damage to Demi-Human monsters +3% _______________________ Grade >= D: Physical damage to Fish-type monsters +1% Magic damage to Fish-type monsters +1% Physical damage to Demi-Human monsters +1% Magic damage to Demi-Human monsters +1% _______________________ Type: Enchant Position: Unknown |
→ | Physical damage to Fish-type monsters +4% Magic damage to Fish-type monsters +4% Physical damage to Demi-Human monsters +4% Magic damage to Demi-Human monsters +4% _______________________ Grade >= D: Physical damage to Fish-type monsters +1% Magic damage to Fish-type monsters +1% Physical damage to Demi-Human monsters +1% Magic damage to Demi-Human monsters +1% _______________________ Grade >= C: Physical damage to Fish-type monsters +1% Magic damage to Fish-type monsters +1% Physical damage to Demi-Human monsters +1% Magic damage to Demi-Human monsters +1% _______________________ Type: Enchant Position: Unknown |
→ | Physical damage to Fish-type monsters +5% Magic damage to Fish-type monsters +5% Physical damage to Demi-Human monsters +5% Magic damage to Demi-Human monsters +5% _______________________ Grade >= D: Physical damage to Fish-type monsters +1% Magic damage to Fish-type monsters +1% Physical damage to Demi-Human monsters +1% Magic damage to Demi-Human monsters +1% _______________________ Grade >= C: Physical damage to Fish-type monsters +1% Magic damage to Fish-type monsters +1% Physical damage to Demi-Human monsters +1% Magic damage to Demi-Human monsters +1% _______________________ Grade >= B: Physical damage to Fish-type monsters +2% Magic damage to Fish-type monsters +2% Physical damage to Demi-Human monsters +2% Magic damage to Demi-Human monsters +2% _______________________ Type: Enchant Position: Unknown |
→ | Physical damage to Fish-type monsters +7% Magic damage to Fish-type monsters +7% Physical damage to Demi-Human monsters +7% Magic damage to Demi-Human monsters +7% _______________________ Grade >= D: Physical damage to Fish-type monsters +1% Magic damage to Fish-type monsters +1% Physical damage to Demi-Human monsters +1% Magic damage to Demi-Human monsters +1% _______________________ Grade >= C: Physical damage to Fish-type monsters +1% Magic damage to Fish-type monsters +1% Physical damage to Demi-Human monsters +1% Magic damage to Demi-Human monsters +1% _______________________ Grade >= B: Physical damage to Fish-type monsters +2% Magic damage to Fish-type monsters +2% Physical damage to Demi-Human monsters +2% Magic damage to Demi-Human monsters +2% _______________________ Grade >= A: Physical damage to Fish-type monsters +2% Magic damage to Fish-type monsters +2% Physical damage to Demi-Human monsters +2% Magic damage to Demi-Human monsters +2% _______________________ Type: Enchant Position: Unknown |
→ | Physical damage to Fish-type monsters +10% Magic damage to Fish-type monsters +10% Physical damage to Demi-Human monsters +10% Magic damage to Demi-Human monsters +10% _______________________ Grade >= D: Physical damage to Fish-type monsters +1% Magic damage to Fish-type monsters +1% Physical damage to Demi-Human monsters +1% Magic damage to Demi-Human monsters +1% _______________________ Grade >= C: Physical damage to Fish-type monsters +1% Magic damage to Fish-type monsters +1% Physical damage to Demi-Human monsters +1% Magic damage to Demi-Human monsters +1% _______________________ Grade >= B: Physical damage to Fish-type monsters +2% Magic damage to Fish-type monsters +2% Physical damage to Demi-Human monsters +2% Magic damage to Demi-Human monsters +2% _______________________ Grade >= A: Physical damage to Fish-type monsters +4% Magic damage to Fish-type monsters +4% Physical damage to Demi-Human monsters +4% Magic damage to Demi-Human monsters +4% _______________________ Type: Enchant Position: Unknown |
→ | Physical damage to Fish-type monsters +12% Magic damage to Fish-type monsters +12% Physical damage to Demi-Human monsters +12% Magic damage to Demi-Human monsters +12% _______________________ Grade >= D: Physical damage to Fish-type monsters +2% Magic damage to Fish-type monsters +2% Physical damage to Demi-Human monsters +2% Magic damage to Demi-Human monsters +2% _______________________ Grade >= C: Physical damage to Fish-type monsters +2% Magic damage to Fish-type monsters +2% Physical damage to Demi-Human monsters +2% Magic damage to Demi-Human monsters +2% _______________________ Grade >= B: Physical damage to Fish-type monsters +4% Magic damage to Fish-type monsters +4% Physical damage to Demi-Human monsters +4% Magic damage to Demi-Human monsters +4% _______________________ Grade >= A: Physical damage to Fish-type monsters +5% Magic damage to Fish-type monsters +5% Physical damage to Demi-Human monsters +5% Magic damage to Demi-Human monsters +5% _______________________ Type: Enchant Position: Unknown |
Physical damage to Angel-type monsters +3% Magic damage to Angel-type monsters +3% Physical damage to Demon-type monsters +3% Magic damage to Demon-type monsters +3% _______________________ Grade >= D: Physical damage to Angel-type monsters +1% Magic damage to Angel-type monsters +1% Physical damage to Demon-type monsters +1% Magic damage to Demon-type monsters +1% _______________________ Type: Enchant Position: Unknown |
→ | Physical damage to Angel-type monsters +4% Magic damage to Angel-type monsters +4% Physical damage to Demon-type monsters +4% Magic damage to Demon-type monsters +4% _______________________ Grade >= D: Physical damage to Angel-type monsters +1% Magic damage to Angel-type monsters +1% Physical damage to Demon-type monsters +1% Magic damage to Demon-type monsters +1% _______________________ Grade >= C: Physical damage to Angel-type monsters +1% Magic damage to Angel-type monsters +1% Physical damage to Demon-type monsters +1% Magic damage to Demon-type monsters +1% _______________________ Type: Enchant Position: Unknown |
→ | Physical damage to Angel-type monsters +5% Magic damage to Angel-type monsters +5% Physical damage to Demon-type monsters +5% Magic damage to Demon-type monsters +5% _______________________ Grade >= D: Physical damage to Angel-type monsters +1% Magic damage to Angel-type monsters +1% Physical damage to Demon-type monsters +1% Magic damage to Demon-type monsters +1% _______________________ Grade >= C: Physical damage to Angel-type monsters +1% Magic damage to Angel-type monsters +1% Physical damage to Demon-type monsters +1% Magic damage to Demon-type monsters +1% _______________________ Grade >= B: Physical damage to Angel-type monsters +2% Magic damage to Angel-type monsters +2% Physical damage to Demon-type monsters +2% Magic damage to Demon-type monsters +2% _______________________ Type: Enchant Position: Unknown |
→ | Physical damage to Angel-type monsters +7% Magic damage to Angel-type monsters +7% Physical damage to Demon-type monsters +7% Magic damage to Demon-type monsters +7% _______________________ Grade >= D: Physical damage to Angel-type monsters +1% Magic damage to Angel-type monsters +1% Physical damage to Demon-type monsters +1% Magic damage to Demon-type monsters +1% _______________________ Grade >= C: Physical damage to Angel-type monsters +1% Magic damage to Angel-type monsters +1% Physical damage to Demon-type monsters +1% Magic damage to Demon-type monsters +1% _______________________ Grade >= B: Physical damage to Angel-type monsters +2% Magic damage to Angel-type monsters +2% Physical damage to Demon-type monsters +2% Magic damage to Demon-type monsters +2% _______________________ Grade >= A: Physical damage to Angel-type monsters +2% Magic damage to Angel-type monsters +2% Physical damage to Demon-type monsters +2% Magic damage to Demon-type monsters +2% _______________________ Type: Enchant Position: Unknown |
→ | Physical damage to Angel-type monsters +10% Magic damage to Angel-type monsters +10% Physical damage to Demon-type monsters +10% Magic damage to Demon-type monsters +10% _______________________ Grade >= D: Physical damage to Angel-type monsters +1% Magic damage to Angel-type monsters +1% Physical damage to Demon-type monsters +1% Magic damage to Demon-type monsters +1% _______________________ Grade >= C: Physical damage to Angel-type monsters +1% Magic damage to Angel-type monsters +1% Physical damage to Demon-type monsters +1% Magic damage to Demon-type monsters +1% _______________________ Grade >= B: Physical damage to Angel-type monsters +2% Magic damage to Angel-type monsters +2% Physical damage to Demon-type monsters +2% Magic damage to Demon-type monsters +2% _______________________ Grade >= A: Physical damage to Angel-type monsters +4% Magic damage to Angel-type monsters +4% Physical damage to Demon-type monsters +4% Magic damage to Demon-type monsters +4% _______________________ Type: Enchant Position: Unknown |
→ | Physical damage to Angel-type monsters +12% Magic damage to Angel-type monsters +12% Physical damage to Demon-type monsters +12% Magic damage to Demon-type monsters +12% _______________________ Grade >= D: Physical damage to Angel-type monsters +2% Magic damage to Angel-type monsters +2% Physical damage to Demon-type monsters +2% Magic damage to Demon-type monsters +2% _______________________ Grade >= C: Physical damage to Angel-type monsters +2% Magic damage to Angel-type monsters +2% Physical damage to Demon-type monsters +2% Magic damage to Demon-type monsters +2% _______________________ Grade >= B: Physical damage to Angel-type monsters +4% Magic damage to Angel-type monsters +4% Physical damage to Demon-type monsters +4% Magic damage to Demon-type monsters +4% _______________________ Grade >= A: Physical damage to Angel-type monsters +5% Magic damage to Angel-type monsters +5% Physical damage to Demon-type monsters +5% Magic damage to Demon-type monsters +5% _______________________ Type: Enchant Position: Unknown |
Physical damage to Undead monsters +3% Magic damage to Undead monsters +3% Physical damage to Dragon-type monsters +3% Magic damage to Dragon-type monsters +3% _______________________ Grade >= D: Physical damage to Undead monsters +1% Magic damage to Undead monsters +1% Physical damage to Dragon-type monsters +1% Magic damage to Dragon-type monsters +1% _______________________ Type: Enchant Position: Unknown |
→ | Physical damage to Undead monsters +4% Magic damage to Undead monsters +4% Physical damage to Dragon-type monsters +4% Magic damage to Dragon-type monsters +4% _______________________ Grade >= D: Physical damage to Undead monsters +1% Magic damage to Undead monsters +1% Physical damage to Dragon-type monsters +1% Magic damage to Dragon-type monsters +1% _______________________ Grade >= C: Physical damage to Undead monsters +1% Magic damage to Undead monsters +1% Physical damage to Dragon-type monsters +1% Magic damage to Dragon-type monsters +1% _______________________ Type: Enchant Position: Unknown |
→ | Physical damage to Undead monsters +5% Magic damage to Undead monsters +5% Physical damage to Dragon-type monsters +5% Magic damage to Dragon-type monsters +5% _______________________ Grade >= D: Physical damage to Undead monsters +1% Magic damage to Undead monsters +1% Physical damage to Dragon-type monsters +1% Magic damage to Dragon-type monsters +1% _______________________ Grade >= C: Physical damage to Undead monsters +1% Magic damage to Undead monsters +1% Physical damage to Dragon-type monsters +1% Magic damage to Dragon-type monsters +1% _______________________ Grade >= B: Physical damage to Undead monsters +2% Magic damage to Undead monsters +2% Physical damage to Dragon-type monsters +2% Magic damage to Dragon-type monsters +2% _______________________ Type: Enchant Position: Unknown |
→ | Physical damage to Undead monsters +7% Magic damage to Undead monsters +7% Physical damage to Dragon-type monsters +7% Magic damage to Dragon-type monsters +7% _______________________ Grade >= D: Physical damage to Undead monsters +1% Magic damage to Undead monsters +1% Physical damage to Dragon-type monsters +1% Magic damage to Dragon-type monsters +1% _______________________ Grade >= C: Physical damage to Undead monsters +1% Magic damage to Undead monsters +1% Physical damage to Dragon-type monsters +1% Magic damage to Dragon-type monsters +1% _______________________ Grade >= B: Physical damage to Undead monsters +2% Magic damage to Undead monsters +2% Physical damage to Dragon-type monsters +2% Magic damage to Dragon-type monsters +2% _______________________ Grade >= A: Physical damage to Undead monsters +2% Magic damage to Undead monsters +2% Physical damage to Dragon-type monsters +2% Magic damage to Dragon-type monsters +2% _______________________ Type: Enchant Position: Unknown |
→ | Physical damage to Undead monsters +10% Magic damage to Undead monsters +10% Physical damage to Dragon-type monsters +10% Magic damage to Dragon-type monsters +10% _______________________ Grade >= D: Physical damage to Undead monsters +1% Magic damage to Undead monsters +1% Physical damage to Dragon-type monsters +1% Magic damage to Dragon-type monsters +1% _______________________ Grade >= C: Physical damage to Undead monsters +1% Magic damage to Undead monsters +1% Physical damage to Dragon-type monsters +1% Magic damage to Dragon-type monsters +1% _______________________ Grade >= B: Physical damage to Undead monsters +2% Magic damage to Undead monsters +2% Physical damage to Dragon-type monsters +2% Magic damage to Dragon-type monsters +2% _______________________ Grade >= A: Physical damage to Undead monsters +4% Magic damage to Undead monsters +4% Physical damage to Dragon-type monsters +4% Magic damage to Dragon-type monsters +4% _______________________ Type: Enchant Position: Unknown |
→ | Physical damage to Undead monsters +12% Magic damage to Undead monsters +12% Physical damage to Dragon-type monsters +12% Magic damage to Dragon-type monsters +12% _______________________ Grade >= D: Physical damage to Undead monsters +2% Magic damage to Undead monsters +2% Physical damage to Dragon-type monsters +2% Magic damage to Dragon-type monsters +2% _______________________ Grade >= C: Physical damage to Undead monsters +2% Magic damage to Undead monsters +2% Physical damage to Dragon-type monsters +2% Magic damage to Dragon-type monsters +2% _______________________ Grade >= B: Physical damage to Undead monsters +4% Magic damage to Undead monsters +4% Physical damage to Dragon-type monsters +4% Magic damage to Dragon-type monsters +4% _______________________ Grade >= A: Physical damage to Undead monsters +5% Magic damage to Undead monsters +5% Physical damage to Dragon-type monsters +5% Magic damage to Dragon-type monsters +5% _______________________ Type: Enchant Position: Unknown |
Physical damage to Insect-type monsters +3% Magic damage to Insect-type monsters +3% Physical damage to Formless monsters +3% Magic damage to Formless monsters +3% _______________________ Grade >= D: Physical damage to Insect-type monsters +1% Magic damage to Insect-type monsters +1% Physical damage to Formless monsters +1% Magic damage to Formless monsters +1% _______________________ Type: Enchant Position: Unknown |
→ | Physical damage to Insect-type monsters +4% Magic damage to Insect-type monsters +4% Physical damage to Formless monsters +4% Magic damage to Formless monsters +4% _______________________ Grade >= D: Physical damage to Insect-type monsters +1% Magic damage to Insect-type monsters +1% Physical damage to Formless monsters +1% Magic damage to Formless monsters +1% _______________________ Grade >= C: Physical damage to Insect-type monsters +1% Magic damage to Insect-type monsters +1% Physical damage to Formless monsters +1% Magic damage to Formless monsters +1% _______________________ Type: Enchant Position: Unknown |
→ | Physical damage to Insect-type monsters +5% Magic damage to Insect-type monsters +5% Physical damage to Formless monsters +5% Magic damage to Formless monsters +5% _______________________ Grade >= D: Physical damage to Insect-type monsters +1% Magic damage to Insect-type monsters +1% Physical damage to Formless monsters +1% Magic damage to Formless monsters +1% _______________________ Grade >= C: Physical damage to Insect-type monsters +1% Magic damage to Insect-type monsters +1% Physical damage to Formless monsters +1% Magic damage to Formless monsters +1% _______________________ Grade >= B: Physical damage to Insect-type monsters +2% Magic damage to Insect-type monsters +2% Physical damage to Formless monsters +2% Magic damage to Formless monsters +2% _______________________ Type: Enchant Position: Unknown |
→ | Physical damage to Insect-type monsters +7% Magic damage to Insect-type monsters +7% Physical damage to Formless monsters +7% Magic damage to Formless monsters +7% _______________________ Grade >= D: Physical damage to Insect-type monsters +1% Magic damage to Insect-type monsters +1% Physical damage to Formless monsters +1% Magic damage to Formless monsters +1% _______________________ Grade >= C: Physical damage to Insect-type monsters +1% Magic damage to Insect-type monsters +1% Physical damage to Formless monsters +1% Magic damage to Formless monsters +1% _______________________ Grade >= B: Physical damage to Insect-type monsters +2% Magic damage to Insect-type monsters +2% Physical damage to Formless monsters +2% Magic damage to Formless monsters +2% _______________________ Grade >= A: Physical damage to Insect-type monsters +2% Magic damage to Insect-type monsters +2% Physical damage to Formless monsters +2% Magic damage to Formless monsters +2% _______________________ Type: Enchant Position: Unknown |
→ | Physical damage to Insect-type monsters +10% Magic damage to Insect-type monsters +10% Physical damage to Formless monsters +10% Magic damage to Formless monsters +10% _______________________ Grade >= D: Physical damage to Insect-type monsters +1% Magic damage to Insect-type monsters +1% Physical damage to Formless monsters +1% Magic damage to Formless monsters +1% _______________________ Grade >= C: Physical damage to Insect-type monsters +1% Magic damage to Insect-type monsters +1% Physical damage to Formless monsters +1% Magic damage to Formless monsters +1% _______________________ Grade >= B: Physical damage to Insect-type monsters +2% Magic damage to Insect-type monsters +2% Physical damage to Formless monsters +2% Magic damage to Formless monsters +2% _______________________ Grade >= A: Physical damage to Insect-type monsters +4% Magic damage to Insect-type monsters +4% Physical damage to Formless monsters +4% Magic damage to Formless monsters +4% _______________________ Type: Enchant Position: Unknown |
→ | Physical damage to Insect-type monsters +12% Magic damage to Insect-type monsters +12% Physical damage to Formless monsters +12% Magic damage to Formless monsters +12% _______________________ Grade >= D: Physical damage to Insect-type monsters +2% Magic damage to Insect-type monsters +2% Physical damage to Formless monsters +2% Magic damage to Formless monsters +2% _______________________ Grade >= C: Physical damage to Insect-type monsters +2% Magic damage to Insect-type monsters +2% Physical damage to Formless monsters +2% Magic damage to Formless monsters +2% _______________________ Grade >= B: Physical damage to Insect-type monsters +4% Magic damage to Insect-type monsters +4% Physical damage to Formless monsters +4% Magic damage to Formless monsters +4% _______________________ Grade >= A: Physical damage to Insect-type monsters +5% Magic damage to Insect-type monsters +5% Physical damage to Formless monsters +5% Magic damage to Formless monsters +5% _______________________ Type: Enchant Position: Unknown |
3rd Slot Perfect Enchant
| Costs: | 3rd Slot Perfect Enchant | ||||
| 50x 30x |
Magic damage to Dark property +3% Physical damage to Dark property +3% Magic damage to Fire property +3% Physical damage to Fire property +3% _______________________ Grade >= D: Magic damage to Dark property +1% Physical damage to Dark property +1% Magic damage to Fire property +1% Physical damage to Fire property +1% _______________________ Type: Enchant Position: Unknown |
Magic damage to Holy property +3% Physical damage to Holy property +3% Magic damage to Water property +3% Physical damage to Water property +3% _______________________ Grade >= D: Magic damage to Holy property +1% Physical damage to Holy property +1% Magic damage to Water property +1% Physical damage to Water property +1% _______________________ Type: Enchant Position: Unknown |
Magic damage to Earth property +3% Physical damage to Earth property +3% Magic damage to Wind property +3% Physical damage to Wind property +3% _______________________ Grade >= D: Magic damage to Earth property +1% Physical damage to Earth property +1% Magic damage to Wind property +1% Physical damage to Wind property +1% _______________________ Type: Enchant Position: Unknown |
Physical damage to Ghost property +3% Magic damage to Ghost property +3% Physical damage to Undead property +3% Magic damage to Undead property +3% _______________________ Grade >= D: Physical damage to Ghost property +1% Magic damage to Ghost property +1% Physical damage to Undead property +1% Magic damage to Undead property +1% _______________________ Type: Enchant Position: Unknown |
Magic damage to Poison property +3% Physical damage to Poison property +3% Magic damage to Neutral property +3% Physical damage to Neutral property +3% _______________________ Grade >= D: Magic damage to Poison property +1% Physical damage to Poison property +1% Magic damage to Neutral property +1% Physical damage to Neutral property +1% _______________________ Type: Enchant Position: Unknown |
Enchant Upgrade Slot 3
| Enchant | Chance | Materials | Zeny | ||
Magic damage to Dark property +3% Physical damage to Dark property +3% Magic damage to Fire property +3% Physical damage to Fire property +3% _______________________ Grade >= D: Magic damage to Dark property +1% Physical damage to Dark property +1% Magic damage to Fire property +1% Physical damage to Fire property +1% _______________________ Type: Enchant Position: Unknown |
→ | Magic damage to Dark property +4% Physical damage to Dark property +4% Magic damage to Fire property +4% Physical damage to Fire property +4% _______________________ Grade >= D: Magic damage to Dark property +1% Physical damage to Dark property +1% Magic damage to Fire property +1% Physical damage to Fire property +1% _______________________ Grade >= C: Magic damage to Dark property +1% Physical damage to Dark property +1% Magic damage to Fire property +1% Physical damage to Fire property +1% _______________________ Type: Enchant Position: Unknown |
90% |
12x |
5,000,000 |
Magic damage to Dark property +5% Physical damage to Dark property +5% Magic damage to Fire property +5% Physical damage to Fire property +5% _______________________ Grade >= D: Magic damage to Dark property +1% Physical damage to Dark property +1% Magic damage to Fire property +1% Physical damage to Fire property +1% _______________________ Grade >= C: Magic damage to Dark property +1% Physical damage to Dark property +1% Magic damage to Fire property +1% Physical damage to Fire property +1% _______________________ Grade >= B: Magic damage to Dark property +2% Physical damage to Dark property +2% Magic damage to Fire property +2% Physical damage to Fire property +2% _______________________ Type: Enchant Position: Unknown |
10% | ||||
Magic damage to Dark property +4% Physical damage to Dark property +4% Magic damage to Fire property +4% Physical damage to Fire property +4% _______________________ Grade >= D: Magic damage to Dark property +1% Physical damage to Dark property +1% Magic damage to Fire property +1% Physical damage to Fire property +1% _______________________ Grade >= C: Magic damage to Dark property +1% Physical damage to Dark property +1% Magic damage to Fire property +1% Physical damage to Fire property +1% _______________________ Type: Enchant Position: Unknown |
→ | Magic damage to Dark property +5% Physical damage to Dark property +5% Magic damage to Fire property +5% Physical damage to Fire property +5% _______________________ Grade >= D: Magic damage to Dark property +1% Physical damage to Dark property +1% Magic damage to Fire property +1% Physical damage to Fire property +1% _______________________ Grade >= C: Magic damage to Dark property +1% Physical damage to Dark property +1% Magic damage to Fire property +1% Physical damage to Fire property +1% _______________________ Grade >= B: Magic damage to Dark property +2% Physical damage to Dark property +2% Magic damage to Fire property +2% Physical damage to Fire property +2% _______________________ Type: Enchant Position: Unknown |
90% |
14x |
10,000,000 |
Magic damage to Dark property +7% Physical damage to Dark property +7% Magic damage to Fire property +7% Physical damage to Fire property +7% _______________________ Grade >= D: Magic damage to Dark property +1% Physical damage to Dark property +1% Magic damage to Fire property +1% Physical damage to Fire property +1% _______________________ Grade >= C: Magic damage to Dark property +1% Physical damage to Dark property +1% Magic damage to Fire property +1% Physical damage to Fire property +1% _______________________ Grade >= B: Magic damage to Dark property +2% Physical damage to Dark property +2% Magic damage to Fire property +2% Physical damage to Fire property +2% _______________________ Grade >= A: Magic damage to Dark property +2% Physical damage to Dark property +2% Magic damage to Fire property +2% Physical damage to Fire property +2% _______________________ Type: Enchant Position: Unknown |
10% | ||||
Magic damage to Dark property +5% Physical damage to Dark property +5% Magic damage to Fire property +5% Physical damage to Fire property +5% _______________________ Grade >= D: Magic damage to Dark property +1% Physical damage to Dark property +1% Magic damage to Fire property +1% Physical damage to Fire property +1% _______________________ Grade >= C: Magic damage to Dark property +1% Physical damage to Dark property +1% Magic damage to Fire property +1% Physical damage to Fire property +1% _______________________ Grade >= B: Magic damage to Dark property +2% Physical damage to Dark property +2% Magic damage to Fire property +2% Physical damage to Fire property +2% _______________________ Type: Enchant Position: Unknown |
→ | Magic damage to Dark property +7% Physical damage to Dark property +7% Magic damage to Fire property +7% Physical damage to Fire property +7% _______________________ Grade >= D: Magic damage to Dark property +1% Physical damage to Dark property +1% Magic damage to Fire property +1% Physical damage to Fire property +1% _______________________ Grade >= C: Magic damage to Dark property +1% Physical damage to Dark property +1% Magic damage to Fire property +1% Physical damage to Fire property +1% _______________________ Grade >= B: Magic damage to Dark property +2% Physical damage to Dark property +2% Magic damage to Fire property +2% Physical damage to Fire property +2% _______________________ Grade >= A: Magic damage to Dark property +2% Physical damage to Dark property +2% Magic damage to Fire property +2% Physical damage to Fire property +2% _______________________ Type: Enchant Position: Unknown |
90% |
16x |
17,500,000 |
Magic damage to Dark property +10% Physical damage to Dark property +10% Magic damage to Fire property +10% Physical damage to Fire property +10% _______________________ Grade >= D: Magic damage to Dark property +1% Physical damage to Dark property +1% Magic damage to Fire property +1% Physical damage to Fire property +1% _______________________ Grade >= C: Magic damage to Dark property +1% Physical damage to Dark property +1% Magic damage to Fire property +1% Physical damage to Fire property +1% _______________________ Grade >= B: Magic damage to Dark property +2% Physical damage to Dark property +2% Magic damage to Fire property +2% Physical damage to Fire property +2% _______________________ Grade >= A: Magic damage to Dark property +4% Physical damage to Dark property +4% Magic damage to Fire property +4% Physical damage to Fire property +4% _______________________ Type: Enchant Position: Unknown |
10% | ||||
Magic damage to Dark property +7% Physical damage to Dark property +7% Magic damage to Fire property +7% Physical damage to Fire property +7% _______________________ Grade >= D: Magic damage to Dark property +1% Physical damage to Dark property +1% Magic damage to Fire property +1% Physical damage to Fire property +1% _______________________ Grade >= C: Magic damage to Dark property +1% Physical damage to Dark property +1% Magic damage to Fire property +1% Physical damage to Fire property +1% _______________________ Grade >= B: Magic damage to Dark property +2% Physical damage to Dark property +2% Magic damage to Fire property +2% Physical damage to Fire property +2% _______________________ Grade >= A: Magic damage to Dark property +2% Physical damage to Dark property +2% Magic damage to Fire property +2% Physical damage to Fire property +2% _______________________ Type: Enchant Position: Unknown |
→ | Magic damage to Dark property +10% Physical damage to Dark property +10% Magic damage to Fire property +10% Physical damage to Fire property +10% _______________________ Grade >= D: Magic damage to Dark property +1% Physical damage to Dark property +1% Magic damage to Fire property +1% Physical damage to Fire property +1% _______________________ Grade >= C: Magic damage to Dark property +1% Physical damage to Dark property +1% Magic damage to Fire property +1% Physical damage to Fire property +1% _______________________ Grade >= B: Magic damage to Dark property +2% Physical damage to Dark property +2% Magic damage to Fire property +2% Physical damage to Fire property +2% _______________________ Grade >= A: Magic damage to Dark property +4% Physical damage to Dark property +4% Magic damage to Fire property +4% Physical damage to Fire property +4% _______________________ Type: Enchant Position: Unknown |
90% |
18x |
27,500,000 |
Magic damage to Dark property +12% Physical damage to Dark property +12% Magic damage to Fire property +12% Physical damage to Fire property +12% _______________________ Grade >= D: Magic damage to Dark property +2% Physical damage to Dark property +2% Magic damage to Fire property +2% Physical damage to Fire property +2% _______________________ Grade >= C: Magic damage to Dark property +2% Physical damage to Dark property +2% Magic damage to Fire property +2% Physical damage to Fire property +2% _______________________ Grade >= B: Magic damage to Dark property +4% Physical damage to Dark property +4% Magic damage to Fire property +4% Physical damage to Fire property +4% _______________________ Grade >= A: Magic damage to Dark property +5% Physical damage to Dark property +5% Magic damage to Fire property +5% Physical damage to Fire property +5% _______________________ Type: Enchant Position: Unknown |
10% | ||||
Magic damage to Dark property +10% Physical damage to Dark property +10% Magic damage to Fire property +10% Physical damage to Fire property +10% _______________________ Grade >= D: Magic damage to Dark property +1% Physical damage to Dark property +1% Magic damage to Fire property +1% Physical damage to Fire property +1% _______________________ Grade >= C: Magic damage to Dark property +1% Physical damage to Dark property +1% Magic damage to Fire property +1% Physical damage to Fire property +1% _______________________ Grade >= B: Magic damage to Dark property +2% Physical damage to Dark property +2% Magic damage to Fire property +2% Physical damage to Fire property +2% _______________________ Grade >= A: Magic damage to Dark property +4% Physical damage to Dark property +4% Magic damage to Fire property +4% Physical damage to Fire property +4% _______________________ Type: Enchant Position: Unknown |
→ | Magic damage to Dark property +12% Physical damage to Dark property +12% Magic damage to Fire property +12% Physical damage to Fire property +12% _______________________ Grade >= D: Magic damage to Dark property +2% Physical damage to Dark property +2% Magic damage to Fire property +2% Physical damage to Fire property +2% _______________________ Grade >= C: Magic damage to Dark property +2% Physical damage to Dark property +2% Magic damage to Fire property +2% Physical damage to Fire property +2% _______________________ Grade >= B: Magic damage to Dark property +4% Physical damage to Dark property +4% Magic damage to Fire property +4% Physical damage to Fire property +4% _______________________ Grade >= A: Magic damage to Dark property +5% Physical damage to Dark property +5% Magic damage to Fire property +5% Physical damage to Fire property +5% _______________________ Type: Enchant Position: Unknown |
100% |
150x |
100,000,00 |
| All possible Enchants: | ||||||||||
| LVL 1 | LVL 2 | LVL 3 | LVL 4 | LVL 5 | Special | |||||
Magic damage to Dark property +3% Physical damage to Dark property +3% Magic damage to Fire property +3% Physical damage to Fire property +3% _______________________ Grade >= D: Magic damage to Dark property +1% Physical damage to Dark property +1% Magic damage to Fire property +1% Physical damage to Fire property +1% _______________________ Type: Enchant Position: Unknown |
→ | Magic damage to Dark property +4% Physical damage to Dark property +4% Magic damage to Fire property +4% Physical damage to Fire property +4% _______________________ Grade >= D: Magic damage to Dark property +1% Physical damage to Dark property +1% Magic damage to Fire property +1% Physical damage to Fire property +1% _______________________ Grade >= C: Magic damage to Dark property +1% Physical damage to Dark property +1% Magic damage to Fire property +1% Physical damage to Fire property +1% _______________________ Type: Enchant Position: Unknown |
→ | Magic damage to Dark property +5% Physical damage to Dark property +5% Magic damage to Fire property +5% Physical damage to Fire property +5% _______________________ Grade >= D: Magic damage to Dark property +1% Physical damage to Dark property +1% Magic damage to Fire property +1% Physical damage to Fire property +1% _______________________ Grade >= C: Magic damage to Dark property +1% Physical damage to Dark property +1% Magic damage to Fire property +1% Physical damage to Fire property +1% _______________________ Grade >= B: Magic damage to Dark property +2% Physical damage to Dark property +2% Magic damage to Fire property +2% Physical damage to Fire property +2% _______________________ Type: Enchant Position: Unknown |
→ | Magic damage to Dark property +7% Physical damage to Dark property +7% Magic damage to Fire property +7% Physical damage to Fire property +7% _______________________ Grade >= D: Magic damage to Dark property +1% Physical damage to Dark property +1% Magic damage to Fire property +1% Physical damage to Fire property +1% _______________________ Grade >= C: Magic damage to Dark property +1% Physical damage to Dark property +1% Magic damage to Fire property +1% Physical damage to Fire property +1% _______________________ Grade >= B: Magic damage to Dark property +2% Physical damage to Dark property +2% Magic damage to Fire property +2% Physical damage to Fire property +2% _______________________ Grade >= A: Magic damage to Dark property +2% Physical damage to Dark property +2% Magic damage to Fire property +2% Physical damage to Fire property +2% _______________________ Type: Enchant Position: Unknown |
→ | Magic damage to Dark property +10% Physical damage to Dark property +10% Magic damage to Fire property +10% Physical damage to Fire property +10% _______________________ Grade >= D: Magic damage to Dark property +1% Physical damage to Dark property +1% Magic damage to Fire property +1% Physical damage to Fire property +1% _______________________ Grade >= C: Magic damage to Dark property +1% Physical damage to Dark property +1% Magic damage to Fire property +1% Physical damage to Fire property +1% _______________________ Grade >= B: Magic damage to Dark property +2% Physical damage to Dark property +2% Magic damage to Fire property +2% Physical damage to Fire property +2% _______________________ Grade >= A: Magic damage to Dark property +4% Physical damage to Dark property +4% Magic damage to Fire property +4% Physical damage to Fire property +4% _______________________ Type: Enchant Position: Unknown |
→ | Magic damage to Dark property +12% Physical damage to Dark property +12% Magic damage to Fire property +12% Physical damage to Fire property +12% _______________________ Grade >= D: Magic damage to Dark property +2% Physical damage to Dark property +2% Magic damage to Fire property +2% Physical damage to Fire property +2% _______________________ Grade >= C: Magic damage to Dark property +2% Physical damage to Dark property +2% Magic damage to Fire property +2% Physical damage to Fire property +2% _______________________ Grade >= B: Magic damage to Dark property +4% Physical damage to Dark property +4% Magic damage to Fire property +4% Physical damage to Fire property +4% _______________________ Grade >= A: Magic damage to Dark property +5% Physical damage to Dark property +5% Magic damage to Fire property +5% Physical damage to Fire property +5% _______________________ Type: Enchant Position: Unknown |
Magic damage to Holy property +3% Physical damage to Holy property +3% Magic damage to Water property +3% Physical damage to Water property +3% _______________________ Grade >= D: Magic damage to Holy property +1% Physical damage to Holy property +1% Magic damage to Water property +1% Physical damage to Water property +1% _______________________ Type: Enchant Position: Unknown |
→ | Magic damage to Holy property +4% Physical damage to Holy property +4% Magic damage to Water property +4% Physical damage to Water property +4% _______________________ Grade >= D: Magic damage to Holy property +1% Physical damage to Holy property +1% Magic damage to Water property +1% Physical damage to Water property +1% _______________________ Grade >= C: Magic damage to Holy property +1% Physical damage to Holy property +1% Magic damage to Water property +1% Physical damage to Water property +1% _______________________ Type: Enchant Position: Unknown |
→ | Magic damage to Holy property +5% Physical damage to Holy property +5% Magic damage to Water property +5% Physical damage to Water property +5% _______________________ Grade >= D: Magic damage to Holy property +1% Physical damage to Holy property +1% Magic damage to Water property +1% Physical damage to Water property +1% _______________________ Grade >= C: Magic damage to Holy property +1% Physical damage to Holy property +1% Magic damage to Water property +1% Physical damage to Water property +1% _______________________ Grade >= B: Magic damage to Holy property +2% Physical damage to Holy property +2% Magic damage to Water property +2% Physical damage to Water property +2% _______________________ Type: Enchant Position: Unknown |
→ | Magic damage to Holy property +7% Physical damage to Holy property +7% Magic damage to Water property +7% Physical damage to Water property +7% _______________________ Grade >= D: Magic damage to Holy property +1% Physical damage to Holy property +1% Magic damage to Water property +1% Physical damage to Water property +1% _______________________ Grade >= C: Magic damage to Holy property +1% Physical damage to Holy property +1% Magic damage to Water property +1% Physical damage to Water property +1% _______________________ Grade >= B: Magic damage to Holy property +2% Physical damage to Holy property +2% Magic damage to Water property +2% Physical damage to Water property +2% _______________________ Grade >= A: Magic damage to Holy property +2% Physical damage to Holy property +2% Magic damage to Water property +2% Physical damage to Water property +2% _______________________ Type: Enchant Position: Unknown |
→ | Magic damage to Holy property +10% Physical damage to Holy property +10% Magic damage to Water property +10% Physical damage to Water property +10% _______________________ Grade >= D: Magic damage to Holy property +1% Physical damage to Holy property +1% Magic damage to Water property +1% Physical damage to Water property +1% _______________________ Grade >= C: Magic damage to Holy property +1% Physical damage to Holy property +1% Magic damage to Water property +1% Physical damage to Water property +1% _______________________ Grade >= B: Magic damage to Holy property +2% Physical damage to Holy property +2% Magic damage to Water property +2% Physical damage to Water property +2% _______________________ Grade >= A: Magic damage to Holy property +4% Physical damage to Holy property +4% Magic damage to Water property +4% Physical damage to Water property +4% _______________________ Type: Enchant Position: Unknown |
→ | Magic damage to Holy property +12% Physical damage to Holy property +12% Magic damage to Water property +12% Physical damage to Water property +12% _______________________ Grade >= D: Magic damage to Holy property +2% Physical damage to Holy property +2% Magic damage to Water property +2% Physical damage to Water property +2% _______________________ Grade >= C: Magic damage to Holy property +2% Physical damage to Holy property +2% Magic damage to Water property +2% Physical damage to Water property +2% _______________________ Grade >= B: Magic damage to Holy property +4% Physical damage to Holy property +4% Magic damage to Water property +4% Physical damage to Water property +4% _______________________ Grade >= A: Magic damage to Holy property +5% Physical damage to Holy property +5% Magic damage to Water property +5% Physical damage to Water property +5% _______________________ Type: Enchant Position: Unknown |
Magic damage to Earth property +3% Physical damage to Earth property +3% Magic damage to Wind property +3% Physical damage to Wind property +3% _______________________ Grade >= D: Magic damage to Earth property +1% Physical damage to Earth property +1% Magic damage to Wind property +1% Physical damage to Wind property +1% _______________________ Type: Enchant Position: Unknown |
→ | Magic damage to Earth property +4% Physical damage to Earth property +4% Magic damage to Wind property +4% Physical damage to Wind property +4% _______________________ Grade >= D: Magic damage to Earth property +1% Physical damage to Earth property +1% Magic damage to Wind property +1% Physical damage to Wind property +1% _______________________ Grade >= C: Magic damage to Earth property +1% Physical damage to Earth property +1% Magic damage to Wind property +1% Physical damage to Wind property +1% _______________________ Type: Enchant Position: Unknown |
→ | Magic damage to Earth property +5% Physical damage to Earth property +5% Magic damage to Wind property +5% Physical damage to Wind property +5% _______________________ Grade >= D: Magic damage to Earth property +1% Physical damage to Earth property +1% Magic damage to Wind property +1% Physical damage to Wind property +1% _______________________ Grade >= C: Magic damage to Earth property +1% Physical damage to Earth property +1% Magic damage to Wind property +1% Physical damage to Wind property +1% _______________________ Grade >= B: Magic damage to Earth property +2% Physical damage to Earth property +2% Magic damage to Wind property +2% Physical damage to Wind property +2% _______________________ Type: Enchant Position: Unknown |
→ | Magic damage to Earth property +7% Physical damage to Earth property +7% Magic damage to Wind property +7% Physical damage to Wind property +7% _______________________ Grade >= D: Magic damage to Earth property +1% Physical damage to Earth property +1% Magic damage to Wind property +1% Physical damage to Wind property +1% _______________________ Grade >= C: Magic damage to Earth property +1% Physical damage to Earth property +1% Magic damage to Wind property +1% Physical damage to Wind property +1% _______________________ Grade >= B: Magic damage to Earth property +2% Physical damage to Earth property +2% Magic damage to Wind property +2% Physical damage to Wind property +2% _______________________ Grade >= A: Magic damage to Earth property +2% Physical damage to Earth property +2% Magic damage to Wind property +2% Physical damage to Wind property +2% _______________________ Type: Enchant Position: Unknown |
→ | Magic damage to Earth property +10% Physical damage to Earth property +10% Magic damage to Wind property +10% Physical damage to Wind property +10% _______________________ Grade >= D: Magic damage to Earth property +1% Physical damage to Earth property +1% Magic damage to Wind property +1% Physical damage to Wind property +1% _______________________ Grade >= C: Magic damage to Earth property +1% Physical damage to Earth property +1% Magic damage to Wind property +1% Physical damage to Wind property +1% _______________________ Grade >= B: Magic damage to Earth property +2% Physical damage to Earth property +2% Magic damage to Wind property +2% Physical damage to Wind property +2% _______________________ Grade >= A: Magic damage to Earth property +4% Physical damage to Earth property +4% Magic damage to Wind property +4% Physical damage to Wind property +4% _______________________ Type: Enchant Position: Unknown |
→ | Magic damage to Earth property +12% Physical damage to Earth property +12% Magic damage to Wind property +12% Physical damage to Wind property +12% _______________________ Grade >= D: Magic damage to Earth property +2% Physical damage to Earth property +2% Magic damage to Wind property +2% Physical damage to Wind property +2% _______________________ Grade >= C: Magic damage to Earth property +2% Physical damage to Earth property +2% Magic damage to Wind property +2% Physical damage to Wind property +2% _______________________ Grade >= B: Magic damage to Earth property +4% Physical damage to Earth property +4% Magic damage to Wind property +4% Physical damage to Wind property +4% _______________________ Grade >= A: Magic damage to Earth property +5% Physical damage to Earth property +5% Magic damage to Wind property +5% Physical damage to Wind property +5% _______________________ Type: Enchant Position: Unknown |
Physical damage to Ghost property +3% Magic damage to Ghost property +3% Physical damage to Undead property +3% Magic damage to Undead property +3% _______________________ Grade >= D: Physical damage to Ghost property +1% Magic damage to Ghost property +1% Physical damage to Undead property +1% Magic damage to Undead property +1% _______________________ Type: Enchant Position: Unknown |
→ | Physical damage to Ghost property +4% Magic damage to Ghost property +4% Physical damage to Undead property +4% Magic damage to Undead property +4% _______________________ Grade >= D: Physical damage to Ghost property +1% Magic damage to Ghost property +1% Physical damage to Undead property +1% Magic damage to Undead property +1% _______________________ Grade >= C: Physical damage to Ghost property +1% Magic damage to Ghost property +1% Physical damage to Undead property +1% Magic damage to Undead property +1% _______________________ Type: Enchant Position: Unknown |
→ | Physical damage to Ghost property +5% Magic damage to Ghost property +5% Physical damage to Undead property +5% Magic damage to Undead property +5% _______________________ Grade >= D: Physical damage to Ghost property +1% Magic damage to Ghost property +1% Physical damage to Undead property +1% Magic damage to Undead property +1% _______________________ Grade >= C: Physical damage to Ghost property +1% Magic damage to Ghost property +1% Physical damage to Undead property +1% Magic damage to Undead property +1% _______________________ Grade >= B: Physical damage to Ghost property +2% Magic damage to Ghost property +2% Physical damage to Undead property +2% Magic damage to Undead property +2% _______________________ Type: Enchant Position: Unknown |
→ | Physical damage to Ghost property +7% Magic damage to Ghost property +7% Physical damage to Undead property +7% Magic damage to Undead property +7% _______________________ Grade >= D: Physical damage to Ghost property +1% Magic damage to Ghost property +1% Physical damage to Undead property +1% Magic damage to Undead property +1% _______________________ Grade >= C: Physical damage to Ghost property +1% Magic damage to Ghost property +1% Physical damage to Undead property +1% Magic damage to Undead property +1% _______________________ Grade >= B: Physical damage to Ghost property +2% Magic damage to Ghost property +2% Physical damage to Undead property +2% Magic damage to Undead property +2% _______________________ Grade >= A: Physical damage to Ghost property +2% Magic damage to Ghost property +2% Physical damage to Undead property +2% Magic damage to Undead property +2% _______________________ Type: Enchant Position: Unknown |
→ | Physical damage to Ghost property +10% Magic damage to Ghost property +10% Physical damage to Undead property +10% Magic damage to Undead property +10% _______________________ Grade >= D: Physical damage to Ghost property +1% Magic damage to Ghost property +1% Physical damage to Undead property +1% Magic damage to Undead property +1% _______________________ Grade >= C: Physical damage to Ghost property +1% Magic damage to Ghost property +1% Physical damage to Undead property +1% Magic damage to Undead property +1% _______________________ Grade >= B: Physical damage to Ghost property +2% Magic damage to Ghost property +2% Physical damage to Undead property +2% Magic damage to Undead property +2% _______________________ Grade >= A: Physical damage to Ghost property +4% Magic damage to Ghost property +4% Physical damage to Undead property +4% Magic damage to Undead property +4% _______________________ Type: Enchant Position: Unknown |
→ | Physical damage to Ghost property +12% Magic damage to Ghost property +12% Physical damage to Undead property +12% Magic damage to Undead property +12% _______________________ Grade >= D: Physical damage to Ghost property +2% Magic damage to Ghost property +2% Physical damage to Undead property +2% Magic damage to Undead property +2% _______________________ Grade >= C: Physical damage to Ghost property +2% Magic damage to Ghost property +2% Physical damage to Undead property +2% Magic damage to Undead property +2% _______________________ Grade >= B: Physical damage to Ghost property +4% Magic damage to Ghost property +4% Physical damage to Undead property +4% Magic damage to Undead property +4% _______________________ Grade >= A: Physical damage to Ghost property +5% Magic damage to Ghost property +5% Physical damage to Undead property +5% Magic damage to Undead property +5% _______________________ Type: Enchant Position: Unknown |
Magic damage to Poison property +3% Physical damage to Poison property +3% Magic damage to Neutral property +3% Physical damage to Neutral property +3% _______________________ Grade >= D: Magic damage to Poison property +1% Physical damage to Poison property +1% Magic damage to Neutral property +1% Physical damage to Neutral property +1% _______________________ Type: Enchant Position: Unknown |
→ | Magic damage to Poison property +4% Physical damage to Poison property +4% Magic damage to Neutral property +4% Physical damage to Neutral property +4% _______________________ Grade >= D: Magic damage to Poison property +1% Physical damage to Poison property +1% Magic damage to Neutral property +1% Physical damage to Neutral property +1% _______________________ Grade >= C: Magic damage to Poison property +1% Physical damage to Poison property +1% Magic damage to Neutral property +1% Physical damage to Neutral property +1% _______________________ Type: Enchant Position: Unknown |
→ | Magic damage to Poison property +5% Physical damage to Poison property +5% Magic damage to Neutral property +5% Physical damage to Neutral property +5% _______________________ Grade >= D: Magic damage to Poison property +1% Physical damage to Poison property +1% Magic damage to Neutral property +1% Physical damage to Neutral property +1% _______________________ Grade >= C: Magic damage to Poison property +1% Physical damage to Poison property +1% Magic damage to Neutral property +1% Physical damage to Neutral property +1% _______________________ Grade >= B: Magic damage to Poison property +2% Physical damage to Poison property +2% Magic damage to Neutral property +2% Physical damage to Neutral property +2% _______________________ Type: Enchant Position: Unknown |
→ | Magic damage to Poison property +7% Physical damage to Poison property +7% Magic damage to Neutral property +7% Physical damage to Neutral property +7% _______________________ Grade >= D: Magic damage to Poison property +1% Physical damage to Poison property +1% Magic damage to Neutral property +1% Physical damage to Neutral property +1% _______________________ Grade >= C: Magic damage to Poison property +1% Physical damage to Poison property +1% Magic damage to Neutral property +1% Physical damage to Neutral property +1% _______________________ Grade >= B: Magic damage to Poison property +2% Physical damage to Poison property +2% Magic damage to Neutral property +2% Physical damage to Neutral property +2% _______________________ Grade >= A: Magic damage to Poison property +2% Physical damage to Poison property +2% Magic damage to Neutral property +2% Physical damage to Neutral property +2% _______________________ Type: Enchant Position: Unknown |
→ | Magic damage to Poison property +10% Physical damage to Poison property +10% Magic damage to Neutral property +10% Physical damage to Neutral property +10% _______________________ Grade >= D: Magic damage to Poison property +1% Physical damage to Poison property +1% Magic damage to Neutral property +1% Physical damage to Neutral property +1% _______________________ Grade >= C: Magic damage to Poison property +1% Physical damage to Poison property +1% Magic damage to Neutral property +1% Physical damage to Neutral property +1% _______________________ Grade >= B: Magic damage to Poison property +2% Physical damage to Poison property +2% Magic damage to Neutral property +2% Physical damage to Neutral property +2% _______________________ Grade >= A: Magic damage to Poison property +4% Physical damage to Poison property +4% Magic damage to Neutral property +4% Physical damage to Neutral property +4% _______________________ Type: Enchant Position: Unknown |
→ | Magic damage to Poison property +12% Physical damage to Poison property +12% Magic damage to Neutral property +12% Physical damage to Neutral property +12% _______________________ Grade >= D: Magic damage to Poison property +2% Physical damage to Poison property +2% Magic damage to Neutral property +2% Physical damage to Neutral property +2% _______________________ Grade >= C: Magic damage to Poison property +2% Physical damage to Poison property +2% Magic damage to Neutral property +2% Physical damage to Neutral property +2% _______________________ Grade >= B: Magic damage to Poison property +4% Physical damage to Poison property +4% Magic damage to Neutral property +4% Physical damage to Neutral property +4% _______________________ Grade >= A: Magic damage to Poison property +5% Physical damage to Poison property +5% Magic damage to Neutral property +5% Physical damage to Neutral property +5% _______________________ Type: Enchant Position: Unknown |
2nd Slot Perfect Enchant
| Costs: | 2nd Slot Perfect Enchant | |||||
| 70x 40x |
Grade >= D: P.ATK +3 POW +1 _______________________ Type: Enchant Position: Unknown |
Grade >= D: P.ATK +3 CON +3 _______________________ Type: Enchant Position: Unknown |
Grade >= D: S.MATK +3 SPL +1 _______________________ Type: Enchant Position: Unknown |
Grade >= D: S.MATK +3 SPL +1 _______________________ Type: Enchant Position: Unknown |
Grade >= D: CRate +1 P.ATK +2 POW +1 _______________________ Type: Enchant Position: Unknown |
Grade >= D: CRate +1 P.ATK +2 CON +3 _______________________ Type: Enchant Position: Unknown |
Enchant Upgrade Slot 2
| Enchant | Chance | Materials | Zeny | ||
Grade >= D: P.ATK +3 POW +1 _______________________ Type: Enchant Position: Unknown |
→ | Grade >= D: P.ATK +4 POW +2 _______________________ Grade >= C: Ranged Physical Damage +2% Melee Physical Damage +2% _______________________ Type: Enchant Position: Unknown |
90% |
14x |
7,500,000 |
Grade >= D: P.ATK +5 POW +3 _______________________ Grade >= C: Ranged Physical Damage +4% Melee Physical Damage +4% _______________________ Grade >= B: POW +3 For each 5 Refine Levels: Base ATK +3 _______________________ Type: Enchant Position: Unknown |
10% | ||||
Grade >= D: P.ATK +4 POW +2 _______________________ Grade >= C: Ranged Physical Damage +2% Melee Physical Damage +2% _______________________ Type: Enchant Position: Unknown |
→ | Grade >= D: P.ATK +5 POW +3 _______________________ Grade >= C: Ranged Physical Damage +4% Melee Physical Damage +4% _______________________ Grade >= B: POW +3 For each 5 Refine Levels: Base ATK +3 _______________________ Type: Enchant Position: Unknown |
90% |
16x |
12,500,000 |
Grade >= D: P.ATK +6 POW +4 _______________________ Grade >= C: Ranged Physical Damage +6% Melee Physical Damage +6% _______________________ Grade >= B: POW +4 For each 4 Refine Levels: Base ATK +5 _______________________ Grade >= A: For each 3 Refine Levels: POW +5 _______________________ Type: Enchant Position: Unknown |
10% | ||||
Grade >= D: P.ATK +5 POW +3 _______________________ Grade >= C: Ranged Physical Damage +4% Melee Physical Damage +4% _______________________ Grade >= B: POW +3 For each 5 Refine Levels: Base ATK +3 _______________________ Type: Enchant Position: Unknown |
→ | Grade >= D: P.ATK +6 POW +4 _______________________ Grade >= C: Ranged Physical Damage +6% Melee Physical Damage +6% _______________________ Grade >= B: POW +4 For each 4 Refine Levels: Base ATK +5 _______________________ Grade >= A: For each 3 Refine Levels: POW +5 _______________________ Type: Enchant Position: Unknown |
90% |
18x |
20,000,000 |
Grade >= D: P.ATK +7 POW +5 _______________________ Grade >= C: Ranged Physical Damage +8% Melee Physical Damage +8% _______________________ Grade >= B: POW +5 For each 3 Refine Levels: Base ATK +7 _______________________ Grade >= A: For each 2 Refine Levels: POW +6 _______________________ Type: Enchant Position: Unknown |
10% | ||||
Grade >= D: P.ATK +6 POW +4 _______________________ Grade >= C: Ranged Physical Damage +6% Melee Physical Damage +6% _______________________ Grade >= B: POW +4 For each 4 Refine Levels: Base ATK +5 _______________________ Grade >= A: For each 3 Refine Levels: POW +5 _______________________ Type: Enchant Position: Unknown |
→ | Grade >= D: P.ATK +7 POW +5 _______________________ Grade >= C: Ranged Physical Damage +8% Melee Physical Damage +8% _______________________ Grade >= B: POW +5 For each 3 Refine Levels: Base ATK +7 _______________________ Grade >= A: For each 2 Refine Levels: POW +6 _______________________ Type: Enchant Position: Unknown |
90% |
20x |
30,000,000 |
Physical damage to Boss monsters +5% Physical damage to All sizes +15% _______________________ Grade >= D: P.ATK +7 POW +5 _______________________ Grade >= C: Ranged Physical Damage +12% Melee Physical Damage +12% _______________________ Grade >= B: POW +5 For each 3 Refine Levels: Base ATK +9 _______________________ Grade >= A: For each 2 Refine Levels: POW +6 _______________________ Type: Enchant Position: Unknown |
10% | ||||
Grade >= D: P.ATK +7 POW +5 _______________________ Grade >= C: Ranged Physical Damage +8% Melee Physical Damage +8% _______________________ Grade >= B: POW +5 For each 3 Refine Levels: Base ATK +7 _______________________ Grade >= A: For each 2 Refine Levels: POW +6 _______________________ Type: Enchant Position: Unknown |
→ | Physical damage to Boss monsters +5% Physical damage to All sizes +15% _______________________ Grade >= D: P.ATK +7 POW +5 _______________________ Grade >= C: Ranged Physical Damage +12% Melee Physical Damage +12% _______________________ Grade >= B: POW +5 For each 3 Refine Levels: Base ATK +9 _______________________ Grade >= A: For each 2 Refine Levels: POW +6 _______________________ Type: Enchant Position: Unknown |
100% |
250x |
100,000,00 |
| All possible Enchants: | ||||||||||
| LVL 1 | LVL 2 | LVL 3 | LVL 4 | LVL 5 | Special | |||||
Grade >= D: P.ATK +3 POW +1 _______________________ Type: Enchant Position: Unknown |
→ | Grade >= D: P.ATK +4 POW +2 _______________________ Grade >= C: Ranged Physical Damage +2% Melee Physical Damage +2% _______________________ Type: Enchant Position: Unknown |
→ | Grade >= D: P.ATK +5 POW +3 _______________________ Grade >= C: Ranged Physical Damage +4% Melee Physical Damage +4% _______________________ Grade >= B: POW +3 For each 5 Refine Levels: Base ATK +3 _______________________ Type: Enchant Position: Unknown |
→ | Grade >= D: P.ATK +6 POW +4 _______________________ Grade >= C: Ranged Physical Damage +6% Melee Physical Damage +6% _______________________ Grade >= B: POW +4 For each 4 Refine Levels: Base ATK +5 _______________________ Grade >= A: For each 3 Refine Levels: POW +5 _______________________ Type: Enchant Position: Unknown |
→ | Grade >= D: P.ATK +7 POW +5 _______________________ Grade >= C: Ranged Physical Damage +8% Melee Physical Damage +8% _______________________ Grade >= B: POW +5 For each 3 Refine Levels: Base ATK +7 _______________________ Grade >= A: For each 2 Refine Levels: POW +6 _______________________ Type: Enchant Position: Unknown |
→ | Physical damage to Boss monsters +5% Physical damage to All sizes +15% _______________________ Grade >= D: P.ATK +7 POW +5 _______________________ Grade >= C: Ranged Physical Damage +12% Melee Physical Damage +12% _______________________ Grade >= B: POW +5 For each 3 Refine Levels: Base ATK +9 _______________________ Grade >= A: For each 2 Refine Levels: POW +6 _______________________ Type: Enchant Position: Unknown |
Grade >= D: P.ATK +3 CON +3 _______________________ Type: Enchant Position: Unknown |
→ | Grade >= D: P.ATK +4 CON +4 _______________________ Grade >= C: Ranged Physical Damage +4% Melee Physical Damage +4% _______________________ Type: Enchant Position: Unknown |
→ | Grade >= D: P.ATK +5 CON +5 _______________________ Grade >= C: Ranged Physical Damage +6% Melee Physical Damage +6% _______________________ Grade >= B: CON +5 For each 5 Refine Levels: Base ATK +4 _______________________ Type: Enchant Position: Unknown |
→ | Grade >= D: P.ATK +6 CON +6 _______________________ Grade >= C: Ranged Physical Damage +8% Melee Physical Damage +8% _______________________ Grade >= B: CON +6 For each 4 Refine Levels: Base ATK +6 _______________________ Grade >= A: For each 3 Refine Levels: CON +6 _______________________ Type: Enchant Position: Unknown |
→ | Grade >= D: P.ATK +7 CON +7 _______________________ Grade >= C: Ranged Physical Damage +10% Melee Physical Damage +10% _______________________ Grade >= B: CON +7 For each 3 Refine Levels: Base ATK +8 _______________________ Grade >= A: For each 2 Refine Levels: CON +7 _______________________ Type: Enchant Position: Unknown |
→ | Physical damage to Boss monsters +5% Physical damage to All sizes +15% _______________________ Grade >= D: P.ATK +7 CON +7 _______________________ Grade >= C: Ranged Physical Damage +15% Melee Physical Damage +15% _______________________ Grade >= B: CON +7 For each 3 Refine Levels: Base ATK +10 _______________________ Grade >= A: For each 2 Refine Levels: CON +7 _______________________ Type: Enchant Position: Unknown |
Grade >= D: S.MATK +3 SPL +1 _______________________ Type: Enchant Position: Unknown |
→ | Grade >= D: S.MATK +4 SPL +2 _______________________ Grade >= C: Magic damage with Neutral property +2% Magic damage with Fire property +2% Magic damage with Earth property +2% Magic damage with Water property +2% Magic damage with Wind property +2% Magic damage with Poison property +2% Magic damage with Dark property +2% _______________________ Type: Enchant Position: Unknown |
→ | Grade >= D: S.MATK +5 SPL +3 _______________________ Grade >= C: Magic damage with Neutral property +4% Magic damage with Fire property +4% Magic damage with Earth property +4% Magic damage with Water property +4% Magic damage with Wind property +4% Magic damage with Poison property +4% Magic damage with Dark property +4% _______________________ Grade >= B: SPL +3 For each 5 Refine Levels: MATK +3 _______________________ Type: Enchant Position: Unknown |
→ | Grade >= D: S.MATK +6 SPL +4 _______________________ Grade >= C: Magic damage with Neutral property +6% Magic damage with Fire property +6% Magic damage with Earth property +6% Magic damage with Water property +6% Magic damage with Wind property +6% Magic damage with Poison property +6% Magic damage with Dark property +6% _______________________ Grade >= B: SPL +4 For each 4 Refine Levels: MATK +5 _______________________ Grade >= A: For each 3 Refine Levels: SPL +5 _______________________ Type: Enchant Position: Unknown |
→ | Grade >= D: S.MATK +7 SPL +5 _______________________ Grade >= C: Magic damage with Neutral property +8% Magic damage with Fire property +8% Magic damage with Earth property +8% Magic damage with Water property +8% Magic damage with Wind property +8% Magic damage with Poison property +8% Magic damage with Dark property +8% _______________________ Grade >= B: SPL +5 For each 3 Refine Levels: MATK +7 _______________________ Grade >= A: For each 2 Refine Levels: SPL +6 _______________________ Type: Enchant Position: Unknown |
→ | Magic damage to Boss monsters +5% Magic damage to All sizes +15% _______________________ Grade >= D: S.MATK +7 SPL +5 _______________________ Grade >= C: Magic damage with Neutral property +12% Magic damage with Fire property +12% Magic damage with Earth property +12% Magic damage with Water property +12% Magic damage with Wind property +12% Magic damage with Poison property +12% Magic damage with Dark property +12% _______________________ Grade >= B: SPL +5 For each 3 Refine Levels: MATK +9 _______________________ Grade >= A: For each 2 Refine Levels: SPL +6 _______________________ Type: Enchant Position: Unknown |
Grade >= D: S.MATK +3 SPL +1 _______________________ Type: Enchant Position: Unknown |
→ | Grade >= D: S.MATK +4 SPL +2 _______________________ Grade >= C: Magic damage with Undead property +2% Magic damage with Fire property +2% Magic damage with Neutral property +2% Magic damage with Wind property +2% Magic damage with Ghost property +2% Magic damage with Holy property +2% Magic damage with Dark property +2% _______________________ Type: Enchant Position: Unknown |
→ | Grade >= D: S.MATK +5 SPL +3 _______________________ Grade >= C: Magic damage with Undead property +4% Magic damage with Fire property +4% Magic damage with Neutral property +4% Magic damage with Wind property +4% Magic damage with Ghost property +4% Magic damage with Holy property +4% Magic damage with Dark property +4% _______________________ Grade >= B: SPL +3 For each 5 Refine Levels: MATK +3 _______________________ Type: Enchant Position: Unknown |
→ | Grade >= D: S.MATK +6 SPL +4 _______________________ Grade >= C: Magic damage with Undead property +6% Magic damage with Fire property +6% Magic damage with Neutral property +6% Magic damage with Wind property +6% Magic damage with Ghost property +6% Magic damage with Holy property +6% Magic damage with Dark property +6% _______________________ Grade >= B: SPL +4 For each 4 Refine Levels: MATK +5 _______________________ Grade >= A: For each 3 Refine Levels: SPL +5 _______________________ Type: Enchant Position: Unknown |
→ | Grade >= D: S.MATK +7 SPL +5 _______________________ Grade >= C: Magic damage with Undead property +8% Magic damage with Fire property +8% Magic damage with Neutral property +8% Magic damage with Wind property +8% Magic damage with Ghost property +8% Magic damage with Holy property +8% Magic damage with Dark property +8% _______________________ Grade >= B: SPL +5 For each 3 Refine Levels: MATK +7 _______________________ Grade >= A: For each 2 Refine Levels: SPL +6 _______________________ Type: Enchant Position: Unknown |
→ | Magic damage to Boss monsters +5% Magic damage to All sizes +15% _______________________ Grade >= D: S.MATK +7 SPL +5 _______________________ Grade >= C: Magic damage with Undead property +12% Magic damage with Fire property +12% Magic damage with Neutral property +12% Magic damage with Wind property +12% Magic damage with Ghost property +12% Magic damage with Holy property +12% Magic damage with Dark property +12% _______________________ Grade >= B: SPL +5 For each 3 Refine Levels: MATK +9 _______________________ Grade >= A: For each 2 Refine Levels: SPL +6 _______________________ Type: Enchant Position: Unknown |
Grade >= D: CRate +1 P.ATK +2 POW +1 _______________________ Type: Enchant Position: Unknown |
→ | Grade >= D: CRate +2 P.ATK +2 POW +2 _______________________ Grade >= C: Critical Damage +1% Ranged Physical Damage +1% Melee Physical Damage +1% _______________________ Type: Enchant Position: Unknown |
→ | Grade >= D: CRate +2 P.ATK +3 POW +3 _______________________ Grade >= C: Critical Damage +1% Ranged Physical Damage +3% Melee Physical Damage +3% _______________________ Grade >= B: CRT +3 For each 5 Refine Levels: Critical +1 Base ATK +2 _______________________ Type: Enchant Position: Unknown |
→ | Grade >= D: CRate +2 P.ATK +4 POW +4 _______________________ Grade >= C: Critical Damage +3% Ranged Physical Damage +3% Melee Physical Damage +3% _______________________ Grade >= B: CRT +4 For each 4 Refine Levels: Critical +2 Base ATK +3 _______________________ Grade >= A: For each 3 Refine Levels: POW +4 CRT +1 _______________________ Type: Enchant Position: Unknown |
→ | Grade >= D: CRate +3 P.ATK +4 POW +5 _______________________ Grade >= C: Critical Damage +5% Ranged Physical Damage +5% Melee Physical Damage +5% _______________________ Grade >= B: CRT +5 For each 3 Refine Levels: Critical +2 Base ATK +5 _______________________ Grade >= A: For each 2 Refine Levels: POW +4 CRT +2 _______________________ Type: Enchant Position: Unknown |
→ | Physical damage to Boss monsters +5% Physical damage to All sizes +15% _______________________ Grade >= D: CRate +3 P.ATK +4 POW +5 _______________________ Grade >= C: Critical Damage +7% Ranged Physical Damage +7% Melee Physical Damage +7% _______________________ Grade >= B: CRT +5 For each 3 Refine Levels: Critical +4 Base ATK +5 _______________________ Grade >= A: For each 2 Refine Levels: POW +4 CRT +2 _______________________ Type: Enchant Position: Unknown |
Grade >= D: CRate +1 P.ATK +2 CON +3 _______________________ Type: Enchant Position: Unknown |
→ | Grade >= D: CRate +2 P.ATK +2 CON +4 _______________________ Grade >= C: Critical Damage +1% Ranged Physical Damage +3% Melee Physical Damage +3% _______________________ Type: Enchant Position: Unknown |
→ | Grade >= D: CRate +2 P.ATK +3 CON +5 _______________________ Grade >= C: Critical Damage +1% Ranged Physical Damage +5% Melee Physical Damage +5% _______________________ Grade >= B: CRT +3 For each 5 Refine Levels: Critical +1 Base ATK +3 _______________________ Type: Enchant Position: Unknown |
→ | Grade >= D: CRate +2 P.ATK +4 CON +6 _______________________ Grade >= C: Critical Damage +3% Ranged Physical Damage +5% Melee Physical Damage +5% _______________________ Grade >= B: CRT +4 For each 4 Refine Levels: Critical +2 Base ATK +3 _______________________ Grade >= A: For each 3 Refine Levels: CON +3 CRT +2 _______________________ Type: Enchant Position: Unknown |
→ | Grade >= D: CRate +3 P.ATK +4 CON +7 _______________________ Grade >= C: Critical Damage +5% Ranged Physical Damage +7% Melee Physical Damage +7% _______________________ Grade >= B: CRT +5 For each 3 Refine Levels: Critical +2 Base ATK +6 _______________________ Grade >= A: For each 2 Refine Levels: CON +4 CRT +3 _______________________ Type: Enchant Position: Unknown |
→ | Physical damage to Boss monsters +5% Physical damage to All sizes +15% _______________________ Grade >= D: CRate +3 P.ATK +4 CON +7 _______________________ Grade >= C: Critical Damage +8% Ranged Physical Damage +10% Melee Physical Damage +10% _______________________ Grade >= B: CRT +5 For each 3 Refine Levels: Critical +4 Base ATK +6 _______________________ Grade >= A: For each 2 Refine Levels: CON +4 CRT +3 _______________________ Type: Enchant Position: Unknown |
Cards
CRT +7 _______________________ Type: Card Compound on: Left Hand Weight: 1 |
CRT +3 _______________________ Type: Card Compound on: Right Hand Weight: 1 |
DEF +80 RES +40 _______________________ For each 3 Refine Levels: DEF +15 RES +8 _______________________ Type: Card Compound on: Armor Weight: 1 |
P.ATK +7 Physical damage to Wind property +12% _______________________ Refine >= 10: Physical damage to Wind property +8% _______________________ Type: Card Compound on: Head Top Weight: 1 |
Resistance to Neutral property +15% Ranged Physical Damage +20% _______________________ For each 3 Refine Levels: Ranged Physical Damage +4% _______________________ [Set Bonus] <ITEM>[Encroached Dimik Card]<INFO>300646</INFO></ITEM> <ITEM>[Fireloop Card]<INFO>300637</INFO></ITEM> Ranged Physical Damage +8% _______________________ Type: Card Compound on: Garment Weight: 1 |
ATK +8% _______________________ Refine >= 7: Physical damage to Demi-Human monsters +12% _______________________ Refine >= 9: Physical damage to Demi-Human monsters +8% _______________________ Type: Card Compound on: Shoes Weight: 1 |
S.MATK +5 Magic damage to Earth property +7% _______________________ Refine >= 10: Magic damage to Earth property +8% _______________________ Type: Card Compound on: Head Top Weight: 1 |
ATK +8% _______________________ Refine >= 7: Physical damage to Plant-type monsters +12% _______________________ Refine >= 9: Physical damage to Plant-type monsters +8% _______________________ Type: Card Compound on: Shoes Weight: 1 |
Variable Cast Time -5% _______________________ For each 3 Refine Levels: Magic damage with Fire property +4% Magic damage with Neutral property +4% Magic damage with Holy property +4% Magic damage with Dark property +4% Magic damage with Ghost property +4% Magic damage with Wind property +4% Magic damage with Undead property +4% _______________________ Refine < 11: Magic damage with Fire property +20% Magic damage with Neutral property +20% Magic damage with Holy property +20% Magic damage with Dark property +20% Magic damage with Ghost property +20% Magic damage with Wind property +20% Magic damage with Undead property +20% _______________________ [Set Bonus] <ITEM>[Encroached Re-Rover Card]<INFO>300645</INFO></ITEM> <ITEM>[Peeping Card]<INFO>300641</INFO></ITEM> Magic damage with Undead property +8% Magic damage with Fire property +8% Magic damage with Neutral property +8% Magic damage with Wind property +8% Magic damage with Ghost property +8% Magic damage with Holy property +8% Magic damage with Dark property +8% _______________________ Type: Card Compound on: Garment Weight: 1 |
P.ATK +7 Physical damage to Fire property +12% _______________________ Refine >= 10: Physical damage to Fire property +8% _______________________ Type: Card Compound on: Head Top Weight: 1 |
Variable Cast Time -5% _______________________ For each 3 Refine Levels: Magic damage with Fire property +4% Magic damage with Water property +4% Magic damage with Earth property +4% Magic damage with Dark property +4% Magic damage with Neutral property +4% Magic damage with Wind property +4% Magic damage with Poison property +4% _______________________ Refine < 11: Magic damage with Fire property +20% Magic damage with Water property +20% Magic damage with Earth property +20% Magic damage with Dark property +20% Magic damage with Neutral property +20% Magic damage with Wind property +20% Magic damage with Poison property +20% _______________________ [Set Bonus] <ITEM>[Encroached Re-Rover Card]<INFO>300645</INFO></ITEM> <ITEM>[Polluted Silk Snail Card]<INFO>300643</INFO></ITEM> Magic damage with Neutral property +8% Magic damage with Fire property +8% Magic damage with Earth property +8% Magic damage with Water property +8% Magic damage with Wind property +8% Magic damage with Poison property +8% Magic damage with Dark property +8% _______________________ Type: Card Compound on: Garment Weight: 1 |
Resistance to Neutral property +20% Melee Physical Damage +20% _______________________ For each 3 Refine Levels: Melee Physical Damage +4% _______________________ [Set Bonus] <ITEM>[Encroached Dimik Card]<INFO>300646</INFO></ITEM> <ITEM>[Encroached Ex-Rover Card]<INFO>300644</INFO></ITEM> Melee Physical Damage +8% _______________________ Type: Card Compound on: Garment Weight: 1 |
Variable Cast Time -5% _______________________ For each 2 Refine Levels: Magic damage with All elements property +3% _______________________ [Set Bonus] <ITEM>[Encroached Re-Rover Card]<INFO>300645</INFO></ITEM> <ITEM>[Peeping Card]<INFO>300641</INFO></ITEM> Magic damage with Undead property +8% Magic damage with Fire property +8% Magic damage with Neutral property +8% Magic damage with Wind property +8% Magic damage with Ghost property +8% Magic damage with Holy property +8% Magic damage with Dark property +8% _______________________ [Set Bonus] <ITEM>[Encroached Re-Rover Card]<INFO>300645</INFO></ITEM> <ITEM>[Polluted Silk Snail Card]<INFO>300643</INFO></ITEM> Magic damage with Neutral property +8% Magic damage with Fire property +8% Magic damage with Earth property +8% Magic damage with Water property +8% Magic damage with Wind property +8% Magic damage with Poison property +8% Magic damage with Dark property +8% _______________________ Type: Card Compound on: Armor Weight: 1 |
Critical +7 Flee +30 _______________________ For each 2 Refine Levels: Ranged Physical Damage +3% Melee Physical Damage +3% _______________________ [Set Bonus] <ITEM>[Encroached Dimik Card]<INFO>300646</INFO></ITEM> <ITEM>[Encroached Ex-Rover Card]<INFO>300644</INFO></ITEM> Melee Physical Damage +8% _______________________ [Set Bonus] <ITEM>[Encroached Dimik Card]<INFO>300646</INFO></ITEM> <ITEM>[Fireloop Card]<INFO>300637</INFO></ITEM> Ranged Physical Damage +8% _______________________ Type: Card Compound on: Armor Weight: 1 |
S.MATK +5 Magic damage to Dark property +7% _______________________ Refine >= 10: Magic damage to Dark property +8% _______________________ Type: Card Compound on: Head Top Weight: 1 |
P.ATK +7 Physical damage to Ghost property +12% _______________________ Refine >= 10: Physical damage to Ghost property +8% _______________________ Type: Card Compound on: Head Top Weight: 1 |
Variable Cast Time -5% Max SP -5% _______________________ [Set Bonus] <ITEM>[Tulip Card]<INFO>300649</INFO></ITEM> <ITEM>[Lobelia Card]<INFO>300652</INFO></ITEM> After Cast Delay -5% Variable Cast Time -10% _______________________ Type: Card Compound on: Left Accessory Weight: 1 |
Melee Physical Damage +7% Critical +2 _______________________ [Set Bonus] <ITEM>[Calendula Card]<INFO>300650</INFO></ITEM> <ITEM>[Myosotis Card]<INFO>300653</INFO></ITEM> Critical Damage +10% CRate +2 _______________________ Type: Card Compound on: Left Accessory Weight: 1 |
Ranged Physical Damage +7% Variable Cast Time -5% _______________________ [Set Bonus] <ITEM>[Scabiosa Card]<INFO>300651</INFO></ITEM> <ITEM>[Anemone Card]<INFO>300654</INFO></ITEM> Critical Damage +10% CRate +2 _______________________ Type: Card Compound on: Left Accessory Weight: 1 |
After Cast Delay -3% Variable Cast Time +5% _______________________ [Set Bonus] <ITEM>[Tulip Card]<INFO>300649</INFO></ITEM> <ITEM>[Lobelia Card]<INFO>300652</INFO></ITEM> After Cast Delay -5% Variable Cast Time -10% _______________________ Type: Card Compound on: Right Accessory Weight: 1 |
CRate +1 Critical +5 Melee Physical Damage +5% _______________________ [Set Bonus] <ITEM>[Calendula Card]<INFO>300650</INFO></ITEM> <ITEM>[Myosotis Card]<INFO>300653</INFO></ITEM> Critical Damage +10% CRate +2 _______________________ Type: Card Compound on: Right Accessory Weight: 1 |
Variable Cast Time -3% Critical +5 Ranged Physical Damage +7% _______________________ [Set Bonus] <ITEM>[Scabiosa Card]<INFO>300651</INFO></ITEM> <ITEM>[Anemone Card]<INFO>300654</INFO></ITEM> Critical Damage +10% CRate +2 _______________________ Type: Card Compound on: Right Accessory Weight: 1 |
MATK +5% _______________________ Refine >= 7: Magic damage to Angel-type monsters +10% _______________________ Refine >= 9: Magic damage to Angel-type monsters +7% _______________________ Type: Card Compound on: Shoes Weight: 1 |
P.ATK +7 Physical damage to Holy property +12% _______________________ Refine >= 10: Physical damage to Holy property +8% _______________________ Type: Card Compound on: Head Top Weight: 1 |
S.MATK +5 Magic damage to Water property +7% _______________________ Refine >= 10: Magic damage to Water property +8% _______________________ Type: Card Compound on: Head Top Weight: 1 |
S.MATK +5 Magic damage to Holy property +7% _______________________ Refine >= 10: Magic damage to Holy property +8% _______________________ Type: Card Compound on: Head Top Weight: 1 |
P.ATK +7 _______________________ When Weapon Level of compounded equipment is 5: For each 3 Refine Levels: Physical damage to Boss monsters +2% _______________________ Grade >= A: Physical damage to All elements property +10% _______________________ [Set Bonus] <ITEM>[Toxit Card]<INFO>300659</INFO></ITEM> <ITEM>[Bloody Slasher Card]<INFO>300661</INFO></ITEM> Physical damage to Boss monsters +7% Physical damage to Normal monsters +7% _______________________ [Set Bonus] <ITEM>[The Chief Knight of Abyss Card]<INFO>300665</INFO></ITEM> <ITEM>[Toxit Card]<INFO>300659</INFO></ITEM> Physical damage to All sizes +8% _______________________ Type: Card Compound on: Right Hand Weight: 1 |
S.MATK +5 _______________________ When Weapon Level of compounded equipment is 5: For each 3 Refine Levels: Magic damage to Normal monsters +2% _______________________ Grade >= A: Magic damage to All sizes +12% _______________________ [Set Bonus] <ITEM>[Lunarina Card]<INFO>300660</INFO></ITEM> <ITEM>[Shadiest Card]<INFO>300662</INFO></ITEM> Magic damage to Normal monsters +4% Magic damage to Boss monsters +4% _______________________ [Set Bonus] <ITEM>[The Chief Knight of Abyss Card]<INFO>300665</INFO></ITEM> <ITEM>[Lunarina Card]<INFO>300660</INFO></ITEM> Magic damage to All elements property +5% _______________________ Type: Card Compound on: Right Hand Weight: 1 |
P.ATK +7 _______________________ When Weapon Level of compounded equipment is 5: For each 3 Refine Levels: Physical damage to Normal monsters +2% _______________________ Grade >= A: Physical damage to All sizes +12% _______________________ [Set Bonus] <ITEM>[The Chief Knight of Abyss Card]<INFO>300665</INFO></ITEM> <ITEM>[Bloody Slasher Card]<INFO>300661</INFO></ITEM> Physical damage to All elements property +5% _______________________ [Set Bonus] <ITEM>[Toxit Card]<INFO>300659</INFO></ITEM> <ITEM>[Bloody Slasher Card]<INFO>300661</INFO></ITEM> Physical damage to Boss monsters +7% Physical damage to Normal monsters +7% _______________________ Type: Card Compound on: Right Hand Weight: 1 |
S.MATK +5 _______________________ When Weapon Level of compounded equipment is 5: For each 3 Refine Levels: Magic damage to Boss monsters +2% _______________________ Grade >= A: Magic damage to All elements property +10% _______________________ [Set Bonus] <ITEM>[Lunarina Card]<INFO>300660</INFO></ITEM> <ITEM>[Shadiest Card]<INFO>300662</INFO></ITEM> Magic damage to Normal monsters +4% Magic damage to Boss monsters +4% _______________________ [Set Bonus] <ITEM>[The Chief Knight of Abyss Card]<INFO>300665</INFO></ITEM> <ITEM>[Shadiest Card]<INFO>300662</INFO></ITEM> Magic damage to All sizes +8% _______________________ Type: Card Compound on: Right Hand Weight: 1 |
S.MATK +5 Magic damage to Neutral property +7% _______________________ Refine >= 10: Magic damage to Neutral property +8% _______________________ Type: Card Compound on: Head Top Weight: 1 |
P.ATK +7 Physical damage to Neutral property +12% _______________________ Refine >= 10: Physical damage to Neutral property +8% _______________________ Type: Card Compound on: Head Top Weight: 1 |
Max HP -25% _______________________ Armor Level = 2: For each 3 Refine Levels: Magic damage to Boss monsters +2% Physical damage to Boss monsters +2% _______________________ Grade >= A: Magic damage to Boss monsters +10% Physical damage to Boss monsters +10% _______________________ Refine > 11: Magic damage to Boss monsters +4% Physical damage to Boss monsters +7% _______________________ [Set Bonus] <ITEM>[The Chief Knight of Abyss Card]<INFO>300665</INFO></ITEM> <ITEM>[Bloody Slasher Card]<INFO>300661</INFO></ITEM> Physical damage to All elements property +5% _______________________ [Set Bonus] <ITEM>[The Chief Knight of Abyss Card]<INFO>300665</INFO></ITEM> <ITEM>[Toxit Card]<INFO>300659</INFO></ITEM> Physical damage to All sizes +8% _______________________ [Set Bonus] <ITEM>[The Chief Knight of Abyss Card]<INFO>300665</INFO></ITEM> <ITEM>[Lunarina Card]<INFO>300660</INFO></ITEM> Magic damage to All elements property +5% _______________________ [Set Bonus] <ITEM>[The Chief Knight of Abyss Card]<INFO>300665</INFO></ITEM> <ITEM>[Shadiest Card]<INFO>300662</INFO></ITEM> Magic damage to All sizes +8% _______________________ Type: Card Compound on: Armor Weight: 1 |
S.MATK +15 ASPD +3 10% chance to autocast Rock Down Level 5 on melee normal attack 7% chance to autocast Abyss Flame Level 5 on melee normal attack _______________________ Type: Card Compound on: Left Accessory Weight: 1 |
Max HP +25% Max SP -25% Meat healing +150% _______________________ Type: Card Compound on: Shoes Weight: 1 |
Zero Cell Sector
Prerequisite
- Complete Chapter 1 Main Story Quest
- Complete Hazy Gate
Access Quest
- Talk to Robin in Ash Tree Village (ygg_edge 173, 185).

- Move through the Portal to next area (ygg_edge 32, 117).
- Enter the Portal to Erosion Zone 1 (ygg_roots 151, 345).

- Talk to Newt (ch1fild1 168, 38).

- Talk to Robin (ch1fild1 101, 84).

- Talk to Robin again (ch1fild1 25, 132).

- Talk to Robin once more (ch1fild1 101, 84).

- Talk to Newt (ch1fild1 106, 84).

Daily Quest
Daily Quest for Zero Cell can be accepted and turned in at Robin (ch1fild1 101, 84).
| Name | Objective | Reward |
| Clean Up Zero Cell Lux | Defeat 300 monsters in Zero Cell Lux | 1x 15x |
| Clean Up Zero Cell Nox | Defeat 300 monsters in Zero Cell Nox | |
| Clean Up Zero Cell Vita | Defeat 100 monsters in Zero Cell Vita | 1x 20x |
| Clean Up Zero Cell Ark | Defeat 100 monsters in Zero Cell Ark |
Maps
To enter the Zero Cell dungeon, you need a special buff. Once the buff ends, you will be warped out of the dungeon.
Talk to Newt (ch1fild1 106, 84) to get a buff for 1 hour and enter Zero Cell. Each buff lasts 1 hour.
| Area | Cost | Level Requirement |
| Lux & Nox | 50x |
260 |
| Vita & Ark | 70x |
270 |
Twisted Land of Darkness - Erosion Zone 1
| Map | Monster | ||
Erosion Zone 1  ch1fild1 |
M.RK-ERROR (22669) |
M.GC-ERROR (22670) |
M.GC.D-ERROR (22671) |
Zero Cell Sector - Lux
| Map | Monster | |||
Zero Cell Sector - Lux  ch1zero1 |
M.RK-4480 (22507) |
M.MC.M-5407 (22508) |
M.SC-3941 (22509) |
M.RA-4152 (22510) |
M.SO-4206 (22511) |
M.AB-4084 (22512) |
M.MI.D-5794 (22513) |
M.GC.D-4402 (22514) | |
Zero Cell Sector - Nox
| Map | Monster | |||
Zero Cell Sector - Nox  ch1zero2 |
M.RG-5520 (22516) |
M.MC-4593 (22517) |
M.GN-6059 (22518) |
M.GC-5848 (22519) |
M.MI-4419 (22520) |
M.SR-5916 (22521) |
M.WL-5581 (22522) |
M.WA-5598 (22523) | |
Zero Cell Sector - Vita
| Map | Monster | |||
Zero Cell Sector - Vita  ch1zero3 |
M.RK-0001 (22525) |
M.MC.M-0001 (22526) |
M.SC-0001 (22527) |
M.RA-0001 (22528) |
M.SO-0001 (22529) |
M.AB-0001 (22530) |
M.MI.D-0001 (22531) |
M.GC.D-0001 (22532) | |
Zero Cell Sector - Ark
| Map | Monster | |||
Zero Cell Sector - Ark  ch1zero4 |
M.RG-0001 (22542) |
M.MC-0001 (22543) |
M.GN-0001 (22544) |
M.GC-0001 (22545) |
M.MI-0001 (22546) |
M.SR-0001 (22547) |
M.WL-0001 (22548) |
M.WA-0001 (22549) | |
Gear
Frontier Rune Crown
Frontier Rune Crows are part of Zero Cell Sector content. The crowns are available at NPC Vitoli (ygg_fruit 162, 122).

For crafting you need:
- 300x Mana Ring (1001996)
- 15x
 Teal Frontier Stone (1002009)
 - 15x
 Pitch Black Frontier Stone (1002010)
 - 40x
 Otherworldly Rune (1002015)
 - 25.000.000 zeny
| Crowns | ||
For each 3 Refine Levels: ATK +4% For each 4 Refine Levels: Hack And Slasher damage +5% Servant Weapon damage +5% _______________________ Refine >= 7: Melee Physical Damage +10% _______________________ Refine >= 9: Physical damage to All races +15% Physical damage to Human players -15% Physical damage to Doram players -15% P.ATK +7 _______________________ Refine >= 12: Critical Damage +15% Critical +15 _______________________ Grade >= D: P.ATK +5 _______________________ Grade >= C: Max HP +5% Max SP +5% _______________________ Grade >= B: Melee Physical Damage +10% _______________________ Grade >= A: Physical damage to All sizes +15% _______________________ [Set Bonus] <ITEM>[Frontier Rune Crown (Dragon Knight)]<INFO>400975</INFO></ITEM> <ITEM>[Frontier Dragon Sword]<INFO>600071</INFO></ITEM> Hack And Slasher damage +45% Critical Damage +15% Upper Headgear refine+Right hand refine >= 24 and Upper Headgear grade >= A and Right hand grade >= A: Hack And Slasher cooldown -0.2s Upper Headgear refine+Right hand refine >= 24 and Upper Headgear grade >= A and Right hand grade >= A / Servant Weapon Level >= 4: 100% chance to autocast Servant Weapon Attack Level 4 when using Hack And Slasher 100% chance to autocast Servant Weapon Attack Level 4 when using Servant Weapon Phantom _______________________ Class Restrictions: Knight _______________________ Type: Armor Position: Head Top Defense: 60 Armor Level: 2 Refinable / Gradable Weight: 100 Required Level: 265 |
For each 3 Refine Levels: ATK +4% For each 4 Refine Levels: Imperial Cross damage +7% Overslash damage +7% _______________________ Refine >= 7: Melee Physical Damage +10% _______________________ Refine >= 9: Physical damage to All races +15% Physical damage to Human players -15% Physical damage to Doram players -15% P.ATK +7 _______________________ Refine >= 12: Fixed Cast Time -0.5s Non-critical Physical Damage +15% Base ATK +50 _______________________ Grade >= D: P.ATK +5 _______________________ Grade >= C: Max HP +5% Max SP +5% _______________________ Grade >= B: Melee Physical Damage +10% _______________________ Grade >= A: Physical damage to All sizes +15% _______________________ [Set Bonus] <ITEM>[Frontier Rune Crown (Imperial Guard)]<INFO>400976</INFO></ITEM> <ITEM>[Frontier Imperial Spear]<INFO>530072</INFO></ITEM> Overslash damage +25% Non-critical Physical Damage +15% Upper Headgear refine+Right hand refine >= 24 and Upper Headgear grade >= A and Right hand grade >= A / Overslash Level >= 10: 100% chance to autocast Overslash Level 10 when using Imperial Cross _______________________ Class Restrictions: Crusader _______________________ Type: Armor Position: Head Top Defense: 60 Armor Level: 2 Refinable / Gradable Weight: 100 Required Level: 265 |
For each 3 Refine Levels: ATK +4% For each 4 Refine Levels: Rush Strike damage +7% Powerful Swing damage +7% _______________________ Refine >= 7: Melee Physical Damage +10% _______________________ Refine >= 9: Physical damage to All races +15% Physical damage to Human players -15% Physical damage to Doram players -15% P.ATK +7 _______________________ Refine >= 12: Non-critical Physical Damage +15% After Cast Delay -5% Base ATK +50 _______________________ Grade >= D: P.ATK +5 _______________________ Grade >= C: Max HP +5% Max SP +5% _______________________ Grade >= B: Melee Physical Damage +10% _______________________ Grade >= A: Physical damage to All sizes +15% _______________________ [Set Bonus] <ITEM>[Frontier Rune Crown (Meister)]<INFO>400977</INFO></ITEM> <ITEM>[Frontier Mechanical Axe]<INFO>620058</INFO></ITEM> Rush Strike damage +25% Non-critical Physical Damage +15% Upper Headgear refine+Right hand refine >= 24 and Upper Headgear grade >= A and Right hand grade >= A: Rush Strike cooldown -0.15s Upper Headgear refine+Right hand refine >= 24 and Upper Headgear grade >= A and Right hand grade >= A / Powerful Swing Level >= 5: 100% chance to autocast Powerful Swing Level 5 when using Rush Strike _______________________ Class Restrictions: Blacksmith _______________________ Type: Armor Position: Head Top Defense: 60 Armor Level: 2 Refinable / Gradable Weight: 100 Required Level: 265 |
For each 3 Refine Levels: ATK +4% For each 4 Refine Levels: Explosive Powder damage +7% Dust Explosion damage +7% _______________________ Refine >= 7: Melee Physical Damage +10% _______________________ Refine >= 9: Physical damage to All races +15% Physical damage to Human players -15% Physical damage to Doram players -15% P.ATK +7 _______________________ Refine >= 12: Non-critical Physical Damage +15% Base ATK +75 _______________________ Grade >= D: P.ATK +5 _______________________ Grade >= C: Max HP +5% Max SP +5% _______________________ Grade >= B: Melee Physical Damage +10% _______________________ Grade >= A: Physical damage to All sizes +15% _______________________ [Set Bonus] <ITEM>[Frontier Rune Crown (Biolo)]<INFO>400978</INFO></ITEM> <ITEM>[Frontier Biological Scepter]<INFO>590107</INFO></ITEM> Explosive Powder damage +25% Non-critical Physical Damage +15% Upper Headgear refine+Right hand refine >= 24 and Upper Headgear grade >= A and Right hand grade >= A / Explosive Powder Level >= 5: 100% chance on using Research Report to trigger for 150s: 100% chance to autocast Explosive Powder Level 5 when using Dust Explosion For each Right hand Refine Level: Non-critical Physical Damage +2% Melee Physical Damage +8% _______________________ Class Restrictions: Alchemist _______________________ Type: Armor Position: Head Top Defense: 60 Armor Level: 2 Refinable / Gradable Weight: 100 Required Level: 265 |
For each 3 Refine Levels: ATK +4% For each 4 Refine Levels: Savage Impact damage +5% Cross Slash damage +5% _______________________ Refine >= 7: Melee Physical Damage +10% _______________________ Refine >= 9: Physical damage to All races +15% Physical damage to Human players -15% Physical damage to Doram players -15% P.ATK +7 _______________________ Refine >= 12: Critical Damage +15% Critical +15 _______________________ Grade >= D: P.ATK +5 _______________________ Grade >= C: Max HP +5% Max SP +5% _______________________ Grade >= B: Melee Physical Damage +10% _______________________ Grade >= A: Physical damage to All sizes +15% _______________________ [Set Bonus] <ITEM>[Frontier Rune Crown (Shadow Cross)]<INFO>400979</INFO></ITEM> <ITEM>[Frontier Shadow Katar]<INFO>610085</INFO></ITEM> Eternal Slash damage +45% Critical Damage +15% Upper Headgear refine+Right hand refine >= 24 and Upper Headgear grade >= A and Right hand grade >= A: Savage Impact cooldown -0.2s Upper Headgear refine+Right hand refine >= 24 and Upper Headgear grade >= A and Right hand grade >= A / Cross Slash Level >= 4: 100% chance to autocast Cross Slash Level 4 when using Savage Impact _______________________ Class Restrictions: Assassin _______________________ Type: Armor Position: Head Top Defense: 60 Armor Level: 2 Refinable / Gradable Weight: 100 Required Level: 265 |
For each 3 Refine Levels: MATK +4% For each 4 Refine Levels: From The Abyss damage +5% Abyss Flame damage +5% _______________________ Refine >= 7: Magic damage with Fire property +10% Magic damage with Neutral property +10% _______________________ Refine >= 9: Magic damage to All races +15% Magic damage to Human players -15% Magic damage to Doram players -15% S.MATK +7 _______________________ Refine >= 12: Magic damage with Fire property +15% Magic damage with Neutral property +15% MATK +50 ASPD +2 _______________________ Grade >= D: S.MATK +5 _______________________ Grade >= C: Max HP +5% Max SP +5% _______________________ Grade >= B: Magic damage with Fire property +10% Magic damage with Neutral property +10% _______________________ Grade >= A: Magic damage to All sizes +15% _______________________ [Set Bonus] <ITEM>[Frontier Rune Crown (Abyss Chaser)]<INFO>400980</INFO></ITEM> <ITEM>[Frontier Abyss Dagger]<INFO>510192</INFO></ITEM> Abyss Square damage +35% Abyss Flame damage +35% Upper Headgear refine+Right hand refine >= 24 and Upper Headgear grade >= A and Right hand grade >= A / Abyss Flame Level >= 5: 100% chance on using Abyss Slayer to trigger for 150s: 8% chance to autocast Abyss Flame Level 5 when attacking For each Right hand Refine Level: Abyss Square damage +3% Abyss Flame damage +3% _______________________ Class Restrictions: Rogue _______________________ Type: Armor Position: Head Top Defense: 60 Armor Level: 2 Refinable / Gradable Weight: 100 Required Level: 265 |
For each 3 Refine Levels: MATK +4% For each 4 Refine Levels: Crimson Arrow damage +5% Rock Down damage +5% _______________________ Refine >= 7: Magic damage with Fire property +10% Magic damage with Earth property +10% _______________________ Refine >= 9: Magic damage to All races +15% Magic damage to Human players -15% Magic damage to Doram players -15% S.MATK +7 _______________________ Refine >= 12: Fixed Cast Time -0.5s Magic damage with Fire property +15% Magic damage with Earth property +15% MATK +50 _______________________ Grade >= D: S.MATK +5 _______________________ Grade >= C: Max HP +5% Max SP +5% _______________________ Grade >= B: Magic damage with Fire property +10% Magic damage with Earth property +10% _______________________ Grade >= A: Magic damage to All sizes +15% _______________________ [Set Bonus] <ITEM>[Frontier Rune Crown (Arch Mage)]<INFO>400981</INFO></ITEM> <ITEM>[Frontier Arc Staff]<INFO>640064</INFO></ITEM> Violent Quake damage +35% All Bloom damage +35% Upper Headgear refine+Right hand refine >= 24 and Upper Headgear grade >= A and Right hand grade >= A: 5% chance on magic attack to trigger for 10s: Magic damage with Fire property +15% Magic damage with Earth property +15% Magic damage to Water property +15% Magic damage to Wind property +15% Ignore 15% M.RES of All races except players _______________________ Class Restrictions: Wizard _______________________ Type: Armor Position: Head Top Defense: 60 Armor Level: 2 Refinable / Gradable Weight: 100 Required Level: 265 |
For each 3 Refine Levels: MATK +4% For each 4 Refine Levels: Lightning Bolt damage +35% Fire Bolt damage +35% Cold Bolt damage +35% Soul Strike damage +50% _______________________ Refine >= 7: Magic damage with Ghost property +10% Magic damage with Fire property +10% Magic damage with Water property +10% Magic damage with Wind property +10% _______________________ Refine >= 9: Magic damage to All races +15% Magic damage to Human players -15% Magic damage to Doram players -15% S.MATK +7 _______________________ Refine >= 12: Magic damage with Ghost property +15% Magic damage with Fire property +15% Magic damage with Water property +15% Magic damage with Wind property +15% MATK +50 ASPD +2 _______________________ Grade >= D: S.MATK +5 _______________________ Grade >= C: Max HP +5% Max SP +5% _______________________ Grade >= B: Magic damage with Ghost property +10% Magic damage with Fire property +10% Magic damage with Water property +10% Magic damage with Wind property +10% _______________________ Grade >= A: Magic damage to All sizes +15% _______________________ [Set Bonus] <ITEM>[Frontier Rune Crown (Elemental Master)]<INFO>400982</INFO></ITEM> <ITEM>[Frontier Elemental Book]<INFO>540110</INFO></ITEM> Soul Strike damage +45% Magic damage with Ghost property +15% Magic damage with Fire property +15% Magic damage with Water property +15% Magic damage with Wind property +15% Upper Headgear refine+Right hand refine >= 24 and Upper Headgear grade >= A and Right hand grade >= A / Soul Strike Level >= 10: 100% chance on using Spell Fist to trigger for 150s: Soul Strike cooldown +2s 60% chance to autocast Soul Vulcan Strike Level 5 when using Soul Strike For each Right hand Refine Level: Soul Strike damage +75% Soul Vulcan Strike damage +7% _______________________ Class Restrictions: Sage _______________________ Type: Armor Position: Head Top Defense: 60 Armor Level: 2 Refinable / Gradable Weight: 100 Required Level: 265 |
For each 3 Refine Levels: MATK +4% For each 4 Refine Levels: Divinus Flos damage +5% _______________________ Refine >= 7: Magic damage with Holy property +10% Magic damage with Neutral property +10% _______________________ Refine >= 9: Magic damage to All races +15% Magic damage to Human players -15% Magic damage to Doram players -15% S.MATK +7 _______________________ Refine >= 12: Fixed Cast Time -0.5s Magic damage with Holy property +15% Magic damage with Neutral property +15% MATK +50 _______________________ Grade >= D: S.MATK +5 _______________________ Grade >= C: Max HP +5% Max SP +5% _______________________ Grade >= B: Magic damage with Holy property +10% Magic damage with Neutral property +10% _______________________ Grade >= A: Magic damage to All sizes +15% _______________________ [Set Bonus] <ITEM>[Frontier Rune Crown (Cardinal)]<INFO>400983</INFO></ITEM> <ITEM>[Frontier Saint Lord]<INFO>550176</INFO></ITEM> Pneumaticus Procella damage +25% Magic damage with Holy property +15% Magic damage with Neutral property +15% Upper Headgear refine+Right hand refine >= 24 and Upper Headgear grade >= A and Right hand grade >= A / Adoramus Level >= 10: 100% chance on using Reparatio to trigger for 1 min: 100% chance to autocast Adoramus Level 10 when using Divinus Flos For each Right hand Refine Level: Adoramus damage +35% _______________________ Class Restrictions: Priest _______________________ Type: Armor Position: Head Top Defense: 60 Armor Level: 2 Refinable / Gradable Weight: 100 Required Level: 265 |
For each 3 Refine Levels: ATK +4% For each 4 Refine Levels: Explosion Blaster damage +5% Blazing Flame Blast damage +5% _______________________ Refine >= 7: Ranged Physical Damage +10% _______________________ Refine >= 9: Physical damage to All races +15% Physical damage to Human players -15% Physical damage to Doram players -15% P.ATK +7 _______________________ Refine >= 12: Fixed Cast Time -0.5s Critical Damage +15% Critical +10 _______________________ Grade >= D: P.ATK +5 _______________________ Grade >= C: Max HP +5% Max SP +5% _______________________ Grade >= B: Ranged Physical Damage +10% _______________________ Grade >= A: Physical damage to All sizes +15% _______________________ [Set Bonus] <ITEM>[Frontier Rune Crown (Inquisitor)]<INFO>400984</INFO></ITEM> <ITEM>[Frontier Judgment Claw]<INFO>560081</INFO></ITEM> Explosion Blaster damage +25% Critical Damage +15% Upper Headgear refine+ Right hand refine >= 24 and Upper Headgear grade >= A and Right hand grade >= A: 100% chance on using Massive Flame Blaster to trigger for 15s: Blazing Flame Blast cooldown -0.3s Explosion Blaster cooldown -0.2s For each Right hand Refine Level: Ranged Physical Damage +5% CRate +1 Critical +2 _______________________ Class Restrictions: Monk _______________________ Type: Armor Position: Head Top Defense: 60 Armor Level: 2 Refinable / Gradable Weight: 100 Required Level: 265 |
For each 3 Refine Levels: ATK +4% For each 4 Refine Levels: Crescive Bolt damage +5% Gale Storm damage +5% _______________________ Refine >= 7: Ranged Physical Damage +10% _______________________ Refine >= 9: Physical damage to All races +15% Physical damage to Human players -15% Physical damage to Doram players -15% P.ATK +7 _______________________ Refine >= 12: Fixed Cast Time -0.5s Critical Damage +15% Critical +10 _______________________ Grade >= D: P.ATK +5 _______________________ Grade >= C: Max HP +5% Max SP +5% _______________________ Grade >= B: Ranged Physical Damage +10% _______________________ Grade >= A: Physical damage to All sizes +15% _______________________ [Set Bonus] <ITEM>[Frontier Rune Crown (Windhawk)]<INFO>400985</INFO></ITEM> <ITEM>[Frontier Wind Bow]<INFO>700119</INFO></ITEM> Crescive Bolt damage +25% Critical Damage +15% Upper Headgear refine+ Right hand refine >= 24 and Upper Headgear grade >= A and Right hand grade >= A: 100% chance on using Wild Walk to trigger for 30s: Gale Storm cooldown -0.15s For each Right hand Refine Level: Critical Damage +4% CRate +1 Critical +3 _______________________ Class Restrictions: Hunter _______________________ Type: Armor Position: Head Top Defense: 60 Armor Level: 2 Refinable / Gradable Weight: 100 Required Level: 265 |
For each 3 Refine Levels: ATK +4% For each 4 Refine Levels: Rose Blossom damage +7% Rhythm Shooting damage +7% _______________________ Refine >= 7: Ranged Physical Damage +10% _______________________ Refine >= 9: Physical damage to All races +15% Physical damage to Human players -15% Physical damage to Doram players -15% P.ATK +7 _______________________ Refine >= 12: Non-critical Physical Damage +15% Variable Cast Time -10% Base ATK +50 _______________________ Grade >= D: P.ATK +5 _______________________ Grade >= C: Max HP +5% Max SP +5% _______________________ Grade >= B: Ranged Physical Damage +10% _______________________ Grade >= A: Physical damage to All sizes +15% _______________________ [Set Bonus] <ITEM>[Frontier Rune Crown (Troubadour & Trouvere)]<INFO>400986</INFO></ITEM> <ITEM>[Frontier Musical Violin]<INFO>570087</INFO></ITEM> Non-critical Physical Damage +15% Rose Blossom damage +25% Upper Headgear refine+ Right hand refine >= 24 and Upper Headgear grade >= A and Right hand grade >= A: 100% chance on using Mystic Symphony to trigger for 150s: Severe Rainstorm cooldown -1.5s Severe Rainstorm damage +150% Rose Blossom damage +20% Rose Blossom Attack damage +20% For each Right hand Refine Level: Severe Rainstorm damage +75% Non-critical Physical Damage +2% Ranged Physical Damage +8% _______________________ [Set Bonus] <ITEM>[Frontier Rune Crown (Troubadour & Trouvere)]<INFO>400986</INFO></ITEM> <ITEM>[Frontier Musical Rope]<INFO>580087</INFO></ITEM> Non-critical Physical Damage +15% Rose Blossom damage +25% Upper Headgear refine+ Right hand refine >= 24 and Upper Headgear grade >= A and Right hand grade >= A: 100% chance on using Mystic Symphony to trigger for 150s: Severe Rainstorm cooldown -1.5s Severe Rainstorm damage +150% Rose Blossom damage +20% Rose Blossom Attack damage +20% For each Right hand Refine Level: Severe Rainstorm damage +75% Non-critical Physical Damage +2% Ranged Physical Damage +8% _______________________ Class Restrictions: Bard/Dancer _______________________ Type: Armor Position: Head Top Defense: 60 Armor Level: 2 Refinable / Gradable Weight: 100 Required Level: 265 |
For each 3 Refine Levels: ATK +4% For each 4 Refine Levels: Huuma Shuriken - Construct damage +7% Kunai - Rotation damage +7% _______________________ Refine >= 7: Ranged Physical Damage +10% _______________________ Refine >= 9: Physical damage to All races +15% Physical damage to Human players -15% Physical damage to Doram players -15% P.ATK +7 _______________________ Refine >= 12: Non-critical Physical Damage +15% Base ATK +75 _______________________ Grade >= D: P.ATK +5 _______________________ Grade >= C: Max HP +5% Max SP +5% _______________________ Grade >= B: Ranged Physical Damage +10% _______________________ Grade >= A: Physical damage to All sizes +15% _______________________ [Set Bonus] <ITEM>[Frontier Rune Crown (Shinkiro & Shiranui)]<INFO>400987</INFO></ITEM> <ITEM>[Frontier Moonlight Fuuma Shuriken]<INFO>650058</INFO></ITEM> Non-critical Physical Damage +15% Kunai - Refraction damage +25% Upper Headgear refine+Right hand refine >= 24 and Upper Headgear grade >= A and Right hand grade >= A / Huuma Shuriken - Construct Level >= 10: 100% chance on using Kunai - Nightmare to trigger for 90s: Swirling Petal cooldown -2.5s Huuma Shuriken - Construct damage +25% Swirling Petal damage +125% 100% chance to autocast Huuma Shuriken - Construct Level 10 when using Swirling Petal For each Right hand Refine Level: Swirling Petal damage +85% Non-critical Physical Damage +2% Ranged Physical Damage +8% _______________________ Class Restrictions: Kagerou/Oboro _______________________ Type: Armor Position: Head Top Defense: 60 Armor Level: 2 Refinable / Gradable Weight: 100 Required Level: 265 |
For each 3 Refine Levels: ATK +4% For each 4 Refine Levels: Spiral Shooting damage +5% Wild Shot damage +5% _______________________ Refine >= 7: Ranged Physical Damage +10% _______________________ Refine >= 9: Physical damage to All races +15% Physical damage to Human players -15% Physical damage to Doram players -15% P.ATK +7 _______________________ Refine >= 12: Fixed Cast Time -0.5s Critical Damage +15% Critical +10 _______________________ Grade >= D: P.ATK +5 _______________________ Grade >= C: Max HP +5% Max SP +5% _______________________ Grade >= B: Ranged Physical Damage +10% _______________________ Grade >= A: Physical damage to All sizes +15% _______________________ [Set Bonus] <ITEM>[Frontier Rune Crown (Night Watch)]<INFO>400988</INFO></ITEM> <ITEM>[Frontier Knight Rifle]<INFO>810049</INFO></ITEM> Spiral Shooting damage +25% Critical Damage +15% Upper Headgear refine+Right hand refine >= 24 and Upper Headgear grade >= A and Right hand grade >= A / Wild Shot Level >= 4: 100% chance to autocast Wild Shot Level 4 when using Spiral Shooting 100% chance on using Hidden Card to trigger for 150s: CRate +15 Critical +25 Ignore 15% RES of All races except players _______________________ Class Restrictions: Rebellion _______________________ Type: Armor Position: Head Top Defense: 60 Armor Level: 2 Refinable / Gradable Weight: 100 Required Level: 265 |
For each 3 Refine Levels: ATK +4% For each 4 Refine Levels: Sky Sun damage +5% Sunset Blast damage +5% _______________________ Refine >= 7: Melee Physical Damage +10% _______________________ Refine >= 9: Physical damage to All races +15% Physical damage to Human players -15% Physical damage to Doram players -15% P.ATK +7 _______________________ Refine >= 12: Critical Damage +15% Critical +15 _______________________ Grade >= D: P.ATK +5 _______________________ Grade >= C: Max HP +5% Max SP +5% _______________________ Grade >= B: Melee Physical Damage +10% _______________________ Grade >= A: Physical damage to All sizes +15% _______________________ [Set Bonus] <ITEM>[Frontier Rune Crown (Sky Emperor)]<INFO>400989</INFO></ITEM> <ITEM>[Frontier Emperor Battle Book]<INFO>540111</INFO></ITEM> Sunset Blast damage +25% Critical Damage +15% Upper Headgear refine+Right hand refine >= 24 and Upper Headgear grade >= A and Right hand grade >= A / Sky Sun Level >= 5 and Sunset Blast Level >= 5: 100% chance on using Enchanting Sky to trigger for 150s: CRate +10 Critical +15 100% chance to autocast Sky Sun Level 5 when using Noon Blast 100% chance to autocast Sunset Blast Level 5 when using Noon Blast _______________________ Class Restrictions: Star Gladiator _______________________ Type: Armor Position: Head Top Defense: 60 Armor Level: 2 Refinable / Gradable Weight: 100 Required Level: 265 |
For each 3 Refine Levels: MATK +4% For each 4 Refine Levels: Talisman Of Blue Dragon damage +5% Talisman Of Red Phoenix damage +5% _______________________ Refine >= 7: Magic damage with Holy property +10% Magic damage with Fire property +10% Magic damage with Neutral property +10% Magic damage with Earth property +10% Magic damage with Water property +10% Magic damage with Wind property +10% Magic damage with Ghost property +10% Magic damage with Dark property +10% _______________________ Refine >= 9: Magic damage to All races +15% Magic damage to Human players -15% Magic damage to Doram players -15% S.MATK +7 _______________________ Refine >= 12: Fixed Cast Time -0.5s Magic damage with Holy property +15% Magic damage with Fire property +15% Magic damage with Neutral property +15% Magic damage with Earth property +15% Magic damage with Water property +15% Magic damage with Wind property +15% Magic damage with Ghost property +15% Magic damage with Dark property +15% MATK +50 _______________________ Grade >= D: S.MATK +5 _______________________ Grade >= C: Max HP +5% Max SP +5% _______________________ Grade >= B: Magic damage with Holy property +10% Magic damage with Fire property +10% Magic damage with Neutral property +10% Magic damage with Earth property +10% Magic damage with Water property +10% Magic damage with Wind property +10% Magic damage with Ghost property +10% Magic damage with Dark property +10% _______________________ Grade >= A: Magic damage to All sizes +15% _______________________ [Set Bonus] <ITEM>[Frontier Rune Crown (Soul Ascetic)]<INFO>400990</INFO></ITEM> <ITEM>[Frontier Soul Staff]<INFO>640065</INFO></ITEM> Talisman Of White Tiger damage +35% Talisman Of Black Tortoise damage +35% Upper Headgear refine+Right hand refine >= 24 and Upper Headgear grade >= A and Right hand grade >= A / Talisman Of White Tiger Level >= 5 and Talisman Of Black Tortoise Level >= 5: 100% chance on using Circle Of Directions And Elementals to trigger for 1 min: 100% chance to autocast Talisman Of White Tiger Level 5 when using Talisman Of Blue Dragon 100% chance to autocast Talisman Of Black Tortoise Level 5 when using Talisman Of Red Phoenix _______________________ Class Restrictions: Soul Linker _______________________ Type: Armor Position: Head Top Defense: 60 Armor Level: 2 Refinable / Gradable Weight: 100 Required Level: 265 |
For each 3 Refine Levels: MATK +4% For each 4 Refine Levels: Jupitel Thunderstorm damage +5% Jack Frost Nova damage +5% _______________________ Refine >= 7: Magic damage with Wind property +10% Magic damage with Water property +10% _______________________ Refine >= 9: Magic damage to All races +15% Magic damage to Human players -15% Magic damage to Doram players -15% S.MATK +7 _______________________ Refine >= 12: Fixed Cast Time -0.5s Magic damage with Wind property +15% Magic damage with Water property +15% MATK +50 _______________________ Grade >= D: S.MATK +5 _______________________ Grade >= C: Max HP +5% Max SP +5% _______________________ Grade >= B: Magic damage with Wind property +10% Magic damage with Water property +10% _______________________ Grade >= A: Magic damage to All sizes +15% _______________________ [Set Bonus] <ITEM>[Frontier Rune Crown (Hyper Novice)]<INFO>400991</INFO></ITEM> <ITEM>[Frontier Hyper Lord]<INFO>550177</INFO></ITEM> Jupitel Thunderstorm damage +25% Magic damage with Wind property +15% Magic damage with Water property +15% Upper Headgear refine+Right hand refine >= 24 and Upper Headgear grade >= A and Right hand grade >= A: 100% chance on using Rule Break to trigger for 150s: 100% chance to autocast Tornado Storm Level 5 when using Jupitel Thunderstorm 100% chance to autocast Rain Of Crystal Level 5 when using Jack Frost Nova For each Right hand Refine Level: Rain Of Crystal damage +7% Tornado Storm damage +7% _______________________ Class Restrictions: Super Novice _______________________ Type: Armor Position: Head Top Defense: 60 Armor Level: 2 Refinable / Gradable Weight: 100 Required Level: 265 |
For each 3 Refine Levels: MATK +4% For each 4 Refine Levels: Hyunrok Breeze damage +5% Hyunrok Spirit Power damage +5% _______________________ Refine >= 7: Magic damage with Holy property +10% Magic damage with Fire property +10% Magic damage with Neutral property +10% Magic damage with Earth property +10% Magic damage with Water property +10% Magic damage with Wind property +10% Magic damage with Dark property +10% _______________________ Refine >= 9: Magic damage to All races +15% Magic damage to Human players -15% Magic damage to Doram players -15% S.MATK +7 _______________________ Refine >= 12: Fixed Cast Time -0.5s Magic damage with Holy property +15% Magic damage with Fire property +15% Magic damage with Neutral property +15% Magic damage with Earth property +15% Magic damage with Water property +15% Magic damage with Wind property +15% Magic damage with Dark property +15% MATK +50 _______________________ Grade >= D: S.MATK +5 _______________________ Grade >= C: Max HP +5% Max SP +5% _______________________ Grade >= B: Magic damage with Holy property +10% Magic damage with Fire property +10% Magic damage with Neutral property +10% Magic damage with Earth property +10% Magic damage with Water property +10% Magic damage with Wind property +10% Magic damage with Dark property +10% _______________________ Grade >= A: Magic damage to All sizes +15% _______________________ [Set Bonus] <ITEM>[Frontier Rune Crown (Spirit Master)]<INFO>400992</INFO></ITEM> <ITEM>[Frontier Spirit Foxtail]<INFO>550178</INFO></ITEM> Hyunrok Breeze damage +25% Magic damage with Holy property +15% Magic damage with Fire property +15% Magic damage with Neutral property +15% Magic damage with Earth property +15% Magic damage with Water property +15% Magic damage with Wind property +15% Magic damage with Dark property +15% Upper Headgear refine+Right hand refine >= 24 and Upper Headgear grade >= A and Right hand grade >= A / Hyunrok Breeze Level >= 7: 100% chance on using Temporary Communion to trigger for 150s: Hyunrok Spirit Power cooldown -0.2s 40% chance to autocast Hyunrok Breeze Level 7 when using Hyunrok Spirit Power _______________________ Class Restrictions: Spirit Handler _______________________ Type: Armor Position: Head Top Defense: 60 Armor Level: 2 Refinable / Gradable Weight: 100 Required Level: 265 |
Frontier Rune Crown Enchants
| Items | Enchant order | Reset |
| All Frontier Rune Crowns | 4th > 3rd > 2nd Slot | 100% Success Rate 5x |
Normal Enchants
Perfect Enchants Slot 2
| 2nd Slot Enchant | Materials | Zeny |
| 100x 85x |
100,000,000 zeny | |
Reroll / Upgrade Slot 4
The slot 4 enchant can be rerolled for 180x ![]() Frontier Magic Powder (1001997)
Frontier Magic Powder (1001997)
| Upgrade | ||||||
|---|---|---|---|---|---|---|
| +1 | → | +2 | 2x | 10x | 10x | 10x |
| +2 | → | +3 | 5x | 20x | 20x | 20x |
| +3 | → | +4 | 10x | 40x | 40x | 40x |
| +4 | → | +5 | 30x | 125x | 125x | 125x |
Upgrade Enchant Slot 2
<translate>
Encroached Weapon Enchants
One table is shown for each Encroached random option group. Line Option 2 and Line Option 3 use identical pools, so they are combined as "Line Option 2 / 3" below.
Possible enchants on Encroached Ranged 2H Critical weapons:
| Line Option 1 |
| Ranged Physical Damage + 15% ~ 25% |
| Critical Damage + 25% ~ 45% |
| ATK + 20 ~ 50 |
| CRIT + 7 ~ 15 |
| Critical Rate + 5 ~ 12 |
| Line Option 2 / 3 |
| Ranged Physical Damage + 5% ~ 15% |
| Critical Damage + 8% ~ 18% |
| ATK + 7 ~ 20 |
| CRIT + 3 ~ 7 |
| Critical Rate + 1 ~ 4 |
| Physical Damage to Neutral Property Monsters + 4% ~ 12% |
| Physical Damage to Water Property Monsters + 4% ~ 12% |
| Physical Damage to Earth Property Monsters + 4% ~ 12% |
| Physical Damage to Wind Property Monsters + 4% ~ 12% |
| Physical Damage to Poison Property Monsters + 4% ~ 12% |
| Physical Damage to Holy Property Monsters + 4% ~ 12% |
| Physical Damage to Shadow Property Monsters + 4% ~ 12% |
| Physical Damage to Ghost Property Monsters + 4% ~ 12% |
| Physical Damage to Undead Property Monsters + 4% ~ 12% |
| Physical Damage to Formless Monsters + 4% ~ 12% |
| Physical Damage to Undead Monsters + 4% ~ 12% |
| Physical Damage to Brute Monsters + 4% ~ 12% |
| Physical Damage to Plant Monsters + 4% ~ 12% |
| Physical Damage to Insect Monsters + 4% ~ 12% |
| Physical Damage to Fish Monsters + 4% ~ 12% |
| Physical Damage to Demon Monsters + 4% ~ 12% |
| Physical Damage to Demi-Human Monsters + 4% ~ 12% |
| Physical Damage to Angel Monsters + 4% ~ 12% |
| Physical Damage to Dragon Monsters + 4% ~ 12% |
Possible enchants on Encroached Ranged 2H weapons:
| Line Option 1 |
| Ranged Physical Damage + 15% ~ 25% |
| Non-Critical Physical Damage + 25% ~ 45% |
| ATK + 20 ~ 50 |
| ATK + 5% ~ 12% |
| P.ATK + 5 ~ 12 |
| Line Option 2 / 3 |
| Ranged Physical Damage + 5% ~ 15% |
| Non-Critical Physical Damage + 8% ~ 18% |
| ATK + 7 ~ 20 |
| ATK + 1% ~ 4% |
| P.ATK + 1 ~ 4 |
| Physical Damage to Neutral Property Monsters + 4% ~ 12% |
| Physical Damage to Water Property Monsters + 4% ~ 12% |
| Physical Damage to Earth Property Monsters + 4% ~ 12% |
| Physical Damage to Wind Property Monsters + 4% ~ 12% |
| Physical Damage to Poison Property Monsters + 4% ~ 12% |
| Physical Damage to Holy Property Monsters + 4% ~ 12% |
| Physical Damage to Shadow Property Monsters + 4% ~ 12% |
| Physical Damage to Ghost Property Monsters + 4% ~ 12% |
| Physical Damage to Undead Property Monsters + 4% ~ 12% |
| Physical Damage to Formless Monsters + 4% ~ 12% |
| Physical Damage to Undead Monsters + 4% ~ 12% |
| Physical Damage to Brute Monsters + 4% ~ 12% |
| Physical Damage to Plant Monsters + 4% ~ 12% |
| Physical Damage to Insect Monsters + 4% ~ 12% |
| Physical Damage to Fish Monsters + 4% ~ 12% |
| Physical Damage to Demon Monsters + 4% ~ 12% |
| Physical Damage to Demi-Human Monsters + 4% ~ 12% |
| Physical Damage to Angel Monsters + 4% ~ 12% |
| Physical Damage to Dragon Monsters + 4% ~ 12% |
Possible enchants on Encroached Melee 2H Critical weapons:
| Line Option 1 |
| Melee Physical Damage + 15% ~ 25% |
| Critical Damage + 25% ~ 45% |
| ATK + 20 ~ 50 |
| CRIT + 7 ~ 15 |
| Critical Rate + 5 ~ 12 |
| Line Option 2 / 3 |
| Melee Physical Damage + 5% ~ 15% |
| Critical Damage + 8% ~ 18% |
| ATK + 7 ~ 20 |
| CRIT + 3 ~ 7 |
| Critical Rate + 1 ~ 4 |
| Physical Damage to Neutral Property Monsters + 4% ~ 12% |
| Physical Damage to Water Property Monsters + 4% ~ 12% |
| Physical Damage to Earth Property Monsters + 4% ~ 12% |
| Physical Damage to Wind Property Monsters + 4% ~ 12% |
| Physical Damage to Poison Property Monsters + 4% ~ 12% |
| Physical Damage to Holy Property Monsters + 4% ~ 12% |
| Physical Damage to Shadow Property Monsters + 4% ~ 12% |
| Physical Damage to Ghost Property Monsters + 4% ~ 12% |
| Physical Damage to Undead Property Monsters + 4% ~ 12% |
| Physical Damage to Formless Monsters + 4% ~ 12% |
| Physical Damage to Undead Monsters + 4% ~ 12% |
| Physical Damage to Brute Monsters + 4% ~ 12% |
| Physical Damage to Plant Monsters + 4% ~ 12% |
| Physical Damage to Insect Monsters + 4% ~ 12% |
| Physical Damage to Fish Monsters + 4% ~ 12% |
| Physical Damage to Demon Monsters + 4% ~ 12% |
| Physical Damage to Demi-Human Monsters + 4% ~ 12% |
| Physical Damage to Angel Monsters + 4% ~ 12% |
| Physical Damage to Dragon Monsters + 4% ~ 12% |
Possible enchants on Encroached Melee 2H weapons:
| Line Option 1 |
| Melee Physical Damage + 15% ~ 25% |
| Non-Critical Physical Damage + 25% ~ 45% |
| ATK + 20 ~ 50 |
| ATK + 5% ~ 12% |
| P.ATK + 5 ~ 12 |
| Line Option 2 / 3 |
| Melee Physical Damage + 5% ~ 15% |
| Non-Critical Physical Damage + 8% ~ 18% |
| ATK + 7 ~ 20 |
| ATK + 1% ~ 4% |
| P.ATK + 1 ~ 4 |
| Physical Damage to Neutral Property Monsters + 4% ~ 12% |
| Physical Damage to Water Property Monsters + 4% ~ 12% |
| Physical Damage to Earth Property Monsters + 4% ~ 12% |
| Physical Damage to Wind Property Monsters + 4% ~ 12% |
| Physical Damage to Poison Property Monsters + 4% ~ 12% |
| Physical Damage to Holy Property Monsters + 4% ~ 12% |
| Physical Damage to Shadow Property Monsters + 4% ~ 12% |
| Physical Damage to Ghost Property Monsters + 4% ~ 12% |
| Physical Damage to Undead Property Monsters + 4% ~ 12% |
| Physical Damage to Formless Monsters + 4% ~ 12% |
| Physical Damage to Undead Monsters + 4% ~ 12% |
| Physical Damage to Brute Monsters + 4% ~ 12% |
| Physical Damage to Plant Monsters + 4% ~ 12% |
| Physical Damage to Insect Monsters + 4% ~ 12% |
| Physical Damage to Fish Monsters + 4% ~ 12% |
| Physical Damage to Demon Monsters + 4% ~ 12% |
| Physical Damage to Demi-Human Monsters + 4% ~ 12% |
| Physical Damage to Angel Monsters + 4% ~ 12% |
| Physical Damage to Dragon Monsters + 4% ~ 12% |
Possible enchants on Encroached Ranged 1H Critical weapons:
| Line Option 1 |
| Ranged Physical Damage + 10% ~ 20% |
| Critical Damage + 15% ~ 35% |
| ATK + 15 ~ 45 |
| CRIT + 5 ~ 12 |
| Critical Rate + 3 ~ 10 |
| Line Option 2 / 3 |
| Ranged Physical Damage + 3% ~ 10% |
| Critical Damage + 5% ~ 15% |
| ATK + 5 ~ 15 |
| CRIT + 1 ~ 5 |
| Critical Rate + 1 ~ 3 |
| Physical Damage to Neutral Property Monsters + 3% ~ 10% |
| Physical Damage to Water Property Monsters + 3% ~ 10% |
| Physical Damage to Earth Property Monsters + 3% ~ 10% |
| Physical Damage to Wind Property Monsters + 3% ~ 10% |
| Physical Damage to Poison Property Monsters + 3% ~ 10% |
| Physical Damage to Holy Property Monsters + 3% ~ 10% |
| Physical Damage to Shadow Property Monsters + 3% ~ 10% |
| Physical Damage to Ghost Property Monsters + 3% ~ 10% |
| Physical Damage to Undead Property Monsters + 3% ~ 10% |
| Physical Damage to Formless Monsters + 3% ~ 10% |
| Physical Damage to Undead Monsters + 3% ~ 10% |
| Physical Damage to Brute Monsters + 3% ~ 10% |
| Physical Damage to Plant Monsters + 3% ~ 10% |
| Physical Damage to Insect Monsters + 3% ~ 10% |
| Physical Damage to Fish Monsters + 3% ~ 10% |
| Physical Damage to Demon Monsters + 3% ~ 10% |
| Physical Damage to Demi-Human Monsters + 3% ~ 10% |
| Physical Damage to Angel Monsters + 3% ~ 10% |
| Physical Damage to Dragon Monsters + 3% ~ 10% |
Possible enchants on Encroached Ranged 1H weapons:
| Line Option 1 |
| Ranged Physical Damage + 10% ~ 20% |
| Non-Critical Physical Damage + 15% ~ 35% |
| ATK + 15 ~ 45 |
| ATK + 3% ~ 10% |
| P.ATK + 3 ~ 10 |
| Line Option 2 / 3 |
| Ranged Physical Damage + 3% ~ 10% |
| Non-Critical Physical Damage + 5% ~ 15% |
| ATK + 5 ~ 15 |
| ATK + 1% ~ 3% |
| P.ATK + 1 ~ 3 |
| Physical Damage to Neutral Property Monsters + 3% ~ 10% |
| Physical Damage to Water Property Monsters + 3% ~ 10% |
| Physical Damage to Earth Property Monsters + 3% ~ 10% |
| Physical Damage to Wind Property Monsters + 3% ~ 10% |
| Physical Damage to Poison Property Monsters + 3% ~ 10% |
| Physical Damage to Holy Property Monsters + 3% ~ 10% |
| Physical Damage to Shadow Property Monsters + 3% ~ 10% |
| Physical Damage to Ghost Property Monsters + 3% ~ 10% |
| Physical Damage to Undead Property Monsters + 3% ~ 10% |
| Physical Damage to Formless Monsters + 3% ~ 10% |
| Physical Damage to Undead Monsters + 3% ~ 10% |
| Physical Damage to Brute Monsters + 3% ~ 10% |
| Physical Damage to Plant Monsters + 3% ~ 10% |
| Physical Damage to Insect Monsters + 3% ~ 10% |
| Physical Damage to Fish Monsters + 3% ~ 10% |
| Physical Damage to Demon Monsters + 3% ~ 10% |
| Physical Damage to Demi-Human Monsters + 3% ~ 10% |
| Physical Damage to Angel Monsters + 3% ~ 10% |
| Physical Damage to Dragon Monsters + 3% ~ 10% |
Possible enchants on Encroached Melee 1H Critical weapons:
| Line Option 1 |
| Melee Physical Damage + 10% ~ 20% |
| Critical Damage + 15% ~ 35% |
| ATK + 15 ~ 45 |
| CRIT + 5 ~ 12 |
| Critical Rate + 3 ~ 10 |
| Line Option 2 / 3 |
| Melee Physical Damage + 3% ~ 10% |
| Critical Damage + 5% ~ 15% |
| ATK + 5 ~ 15 |
| CRIT + 1 ~ 5 |
| Critical Rate + 1 ~ 3 |
| Physical Damage to Neutral Property Monsters + 3% ~ 10% |
| Physical Damage to Water Property Monsters + 3% ~ 10% |
| Physical Damage to Earth Property Monsters + 3% ~ 10% |
| Physical Damage to Wind Property Monsters + 3% ~ 10% |
| Physical Damage to Poison Property Monsters + 3% ~ 10% |
| Physical Damage to Holy Property Monsters + 3% ~ 10% |
| Physical Damage to Shadow Property Monsters + 3% ~ 10% |
| Physical Damage to Ghost Property Monsters + 3% ~ 10% |
| Physical Damage to Undead Property Monsters + 3% ~ 10% |
| Physical Damage to Formless Monsters + 3% ~ 10% |
| Physical Damage to Undead Monsters + 3% ~ 10% |
| Physical Damage to Brute Monsters + 3% ~ 10% |
| Physical Damage to Plant Monsters + 3% ~ 10% |
| Physical Damage to Insect Monsters + 3% ~ 10% |
| Physical Damage to Fish Monsters + 3% ~ 10% |
| Physical Damage to Demon Monsters + 3% ~ 10% |
| Physical Damage to Demi-Human Monsters + 3% ~ 10% |
| Physical Damage to Angel Monsters + 3% ~ 10% |
| Physical Damage to Dragon Monsters + 3% ~ 10% |
Possible enchants on Encroached Melee 1H weapons:
| Line Option 1 |
| Melee Physical Damage + 10% ~ 20% |
| Non-Critical Physical Damage + 15% ~ 35% |
| ATK + 15 ~ 45 |
| ATK + 3% ~ 10% |
| P.ATK + 3 ~ 10 |
| Line Option 2 / 3 |
| Melee Physical Damage + 3% ~ 10% |
| Non-Critical Physical Damage + 5% ~ 15% |
| ATK + 5 ~ 15 |
| ATK + 1% ~ 3% |
| P.ATK + 1 ~ 3 |
| Physical Damage to Neutral Property Monsters + 3% ~ 10% |
| Physical Damage to Water Property Monsters + 3% ~ 10% |
| Physical Damage to Earth Property Monsters + 3% ~ 10% |
| Physical Damage to Wind Property Monsters + 3% ~ 10% |
| Physical Damage to Poison Property Monsters + 3% ~ 10% |
| Physical Damage to Holy Property Monsters + 3% ~ 10% |
| Physical Damage to Shadow Property Monsters + 3% ~ 10% |
| Physical Damage to Ghost Property Monsters + 3% ~ 10% |
| Physical Damage to Undead Property Monsters + 3% ~ 10% |
| Physical Damage to Formless Monsters + 3% ~ 10% |
| Physical Damage to Undead Monsters + 3% ~ 10% |
| Physical Damage to Brute Monsters + 3% ~ 10% |
| Physical Damage to Plant Monsters + 3% ~ 10% |
| Physical Damage to Insect Monsters + 3% ~ 10% |
| Physical Damage to Fish Monsters + 3% ~ 10% |
| Physical Damage to Demon Monsters + 3% ~ 10% |
| Physical Damage to Demi-Human Monsters + 3% ~ 10% |
| Physical Damage to Angel Monsters + 3% ~ 10% |
| Physical Damage to Dragon Monsters + 3% ~ 10% |
Possible enchants on Encroached Magic 1H weapons:
| Line Option 1 |
| Magic Damage of Neutral Element Skills + 15% ~ 35% |
| Magic Damage of Water Element Skills + 15% ~ 35% |
| Magic Damage of Earth Element Skills + 15% ~ 35% |
| Magic Damage of Fire Element Skills + 15% ~ 35% |
| Magic Damage of Wind Element Skills + 15% ~ 35% |
| Magic Damage of Poison Element Skills + 15% ~ 35% |
| Magic Damage of Holy Element Skills + 15% ~ 35% |
| Magic Damage of Shadow Element Skills + 15% ~ 35% |
| Magic Damage of Ghost Element Skills + 15% ~ 35% |
| Magic Damage of Undead Element Skills + 15% ~ 35% |
| Magic Damage of All Element Skills + 5% ~ 15% |
| Variable Cast Time - 3% ~ 10% |
| MATK + 15 ~ 45 |
| MATK + 3% ~ 10% |
| S.MATK + 3 ~ 10 |
| Line Option 2 / 3 |
| Magic Damage of Neutral Element Skills + 5% ~ 15% |
| Magic Damage of Water Element Skills + 5% ~ 15% |
| Magic Damage of Earth Element Skills + 5% ~ 15% |
| Magic Damage of Fire Element Skills + 5% ~ 15% |
| Magic Damage of Wind Element Skills + 5% ~ 15% |
| Magic Damage of Poison Element Skills + 5% ~ 15% |
| Magic Damage of Holy Element Skills + 5% ~ 15% |
| Magic Damage of Shadow Element Skills + 5% ~ 15% |
| Magic Damage of Ghost Element Skills + 5% ~ 15% |
| Magic Damage of Undead Element Skills + 5% ~ 15% |
| Magic Damage of All Element Skills + 2% ~ 5% |
| Variable Cast Time - 2% ~ 5% |
| MATK + 5 ~ 15 |
| MATK + 1% ~ 3% |
| S.MATK + 1 ~ 3 |
| Magical Damage to Neutral Property Monsters + 3% ~ 10% |
| Magical Damage to Water Property Monsters + 3% ~ 10% |
| Magical Damage to Earth Property Monsters + 3% ~ 10% |
| Magical Damage to Fire Property Monsters + 3% ~ 10% |
| Magical Damage to Wind Property Monsters + 3% ~ 10% |
| Magical Damage to Poison Property Monsters + 3% ~ 10% |
| Magical Damage to Holy Property Monsters + 3% ~ 10% |
| Magical Damage to Shadow Property Monsters + 3% ~ 10% |
| Magical Damage to Ghost Property Monsters + 3% ~ 10% |
| Magical Damage to Undead Property Monsters + 3% ~ 10% |
| Magical Damage to Formless Monsters + 3% ~ 10% |
| Magical Damage to Undead Monsters + 3% ~ 10% |
| Magical Damage to Brute Monsters + 3% ~ 10% |
| Magical Damage to Plant Monsters + 3% ~ 10% |
| Magical Damage to Insect Monsters + 3% ~ 10% |
| Magical Damage to Fish Monsters + 3% ~ 10% |
| Magical Damage to Demon Monsters + 3% ~ 10% |
| Magical Damage to Demi-Human Monsters + 3% ~ 10% |
| Magical Damage to Angel Monsters + 3% ~ 10% |
| Magical Damage to Dragon Monsters + 3% ~ 10% |
Possible enchants on Encroached Magic 2H weapons:
| Line Option 1 |
| Magic Damage of Neutral Element Skills + 25% ~ 45% |
| Magic Damage of Water Element Skills + 25% ~ 45% |
| Magic Damage of Earth Element Skills + 25% ~ 45% |
| Magic Damage of Fire Element Skills + 25% ~ 45% |
| Magic Damage of Wind Element Skills + 25% ~ 45% |
| Magic Damage of Poison Element Skills + 25% ~ 45% |
| Magic Damage of Holy Element Skills + 25% ~ 45% |
| Magic Damage of Shadow Element Skills + 25% ~ 45% |
| Magic Damage of Ghost Element Skills + 25% ~ 45% |
| Magic Damage of Undead Element Skills + 25% ~ 45% |
| Magic Damage of All Element Skills + 10% ~ 20% |
| Variable Cast Time - 5% ~ 15% |
| MATK + 20 ~ 50 |
| MATK + 5% ~ 15% |
| S.MATK + 5 ~ 15 |
| Line Option 2 / 3 |
| Magic Damage of Neutral Element Skills + 7% ~ 20% |
| Magic Damage of Water Element Skills + 7% ~ 20% |
| Magic Damage of Earth Element Skills + 7% ~ 20% |
| Magic Damage of Fire Element Skills + 7% ~ 20% |
| Magic Damage of Wind Element Skills + 7% ~ 20% |
| Magic Damage of Poison Element Skills + 7% ~ 20% |
| Magic Damage of Holy Element Skills + 7% ~ 20% |
| Magic Damage of Shadow Element Skills + 7% ~ 20% |
| Magic Damage of Ghost Element Skills + 7% ~ 20% |
| Magic Damage of Undead Element Skills + 7% ~ 20% |
| Magic Damage of All Element Skills + 3% ~ 7% |
| Variable Cast Time - 3% ~ 7% |
| MATK + 7 ~ 20 |
| MATK + 1% ~ 5% |
| S.MATK + 1 ~ 5 |
| Magical Damage to Neutral Property Monsters + 4% ~ 12% |
| Magical Damage to Water Property Monsters + 4% ~ 12% |
| Magical Damage to Earth Property Monsters + 4% ~ 12% |
| Magical Damage to Fire Property Monsters + 4% ~ 12% |
| Magical Damage to Wind Property Monsters + 4% ~ 12% |
| Magical Damage to Poison Property Monsters + 4% ~ 12% |
| Magical Damage to Holy Property Monsters + 4% ~ 12% |
| Magical Damage to Shadow Property Monsters + 4% ~ 12% |
| Magical Damage to Ghost Property Monsters + 4% ~ 12% |
| Magical Damage to Undead Property Monsters + 4% ~ 12% |
| Magical Damage to Formless Monsters + 4% ~ 12% |
| Magical Damage to Undead Monsters + 4% ~ 12% |
| Magical Damage to Brute Monsters + 4% ~ 12% |
| Magical Damage to Plant Monsters + 4% ~ 12% |
| Magical Damage to Insect Monsters + 4% ~ 12% |
| Magical Damage to Fish Monsters + 4% ~ 12% |
| Magical Damage to Demon Monsters + 4% ~ 12% |
| Magical Damage to Demi-Human Monsters + 4% ~ 12% |
| Magical Damage to Angel Monsters + 4% ~ 12% |
| Magical Damage to Dragon Monsters + 4% ~ 12% |
</translate>
Another Dimension Weapon
Another Dimension Weapons are part of Zero Cell Sector content. The necessary scrolls for item reform are obtainable at NPC Vitoli (ygg_fruit 162, 122).
| Weapons | |
Mayhemic Thorns damage +15% _______________________ For each 2 Refine Levels: Mayhemic Thorns damage +4% ATK +1% Base ATK +20 _______________________ Refine >= 7: Critical +15 Mayhemic Thorns damage +15% _______________________ Refine >= 9: Variable Cast Time -10% CRate +7 _______________________ Refine >= 12: Critical Damage +15% Mayhemic Thorns damage +10% _______________________ Grade >= D: Critical Damage +10% Critical +5 _______________________ Grade >= C: Ranged Physical Damage +20% Variable Cast Time -5% _______________________ Grade >= B: Mayhemic Thorns damage +15% _______________________ Grade >= A: P.ATK +15 _______________________ Grade >= A / Refine >= 12: Mayhemic Thorns cooldown -0.2s Mayhemic Thorns damage +15% _______________________ Class Restrictions: Alchemist _______________________ Type: 1hSword Position: Right Hand Physical Attack: 260 Weapon Level: 5 Refinable / Gradable Weight: 270 Required Level: 265 |
Radiant Spear damage +20% _______________________ For each 3 Refine Levels: Radiant Spear damage +5% ATK +1% Base ATK +25 _______________________ Refine >= 7: Radiant Spear damage +25% _______________________ Refine >= 9: Critical Damage +15% Critical +15 _______________________ Refine >= 12: Radiant Spear damage +15% _______________________ Refine >= 12 / Cannon Spear Level >= 5: 100% chance on using Grand Judgement to trigger for 1 min: Ignore 15% RES of All races except players 100% chance to autocast Cannon Spear Level 5 when using Radiant Spear For each Refine Level: Ranged Physical Damage +3% STR +7 Cannon Spear damage +65% _______________________ Grade >= D: Variable Cast Time -10% Critical +5 _______________________ Grade >= C: Critical Damage +10% Ranged Physical Damage +15% _______________________ Grade >= B: CRate +5 Radiant Spear damage +10% _______________________ Grade >= A: P.ATK +15 _______________________ Grade >= A / Refine >= 12: Radiant Spear cooldown -0.3s _______________________ Class Restrictions: Crusader _______________________ Type: 1hSpear Position: Right Hand Physical Attack: 260 Weapon Level: 5 Refinable / Gradable Weight: 270 Required Level: 265 |
Sky Moon damage +20% _______________________ For each 3 Refine Levels: Sky Moon damage +5% ATK +1% Base ATK +25 _______________________ Refine >= 7: Non-critical Physical Damage +15% Variable Cast Time -10% _______________________ Refine >= 9: Sky Moon damage +20% _______________________ Refine >= 12: Melee Physical Damage +10% _______________________ Refine >= 12 / Midnight Kick Level >= 5 and Dawn Break Level >= 5: 100% chance on using Enchanting Sky to trigger for 150s: Non-critical Physical Damage +15% 100% chance to autocast Dawn Break Level 5 when using Sky Moon 100% chance to autocast Midnight Kick Level 5 when using Dawn Break For each Refine Level: Midnight Kick damage +4% Dawn Break damage +4% _______________________ Grade >= D: Non-critical Physical Damage +10% _______________________ Grade >= C: Sky Moon damage +15% _______________________ Grade >= B: Melee Physical Damage +15% Variable Cast Time -5% _______________________ Grade >= A: P.ATK +15 _______________________ Grade >= A / Refine >= 12: Sky Moon cooldown -0.3s _______________________ Class Restrictions: Star Gladiator _______________________ Type: Book Position: Right Hand Physical Attack: 260 Weapon Level: 5 Refinable / Gradable Weight: 240 Required Level: 265 |
Madness Crusher damage +15% _______________________ For each 2 Refine Levels: Madness Crusher damage +4% ATK +1% Base ATK +20 _______________________ Refine >= 7: Non-critical Physical Damage +15% Max HP +7% _______________________ Refine >= 9: Variable Cast Time -10% Madness Crusher damage +15% _______________________ Refine >= 12: Ranged Physical Damage +15% Madness Crusher damage +15% _______________________ Grade >= D: Ranged Physical Damage +15% Variable Cast Time -5% _______________________ Grade >= C: Madness Crusher damage +15% _______________________ Grade >= B: P.ATK +5 Max HP +5% _______________________ Grade >= A: P.ATK +15 _______________________ [Set Bonus] <ITEM>[Faceworm Queen's Horn]<INFO>630060</INFO></ITEM> <ITEM>[Gigant Snake Breath]<INFO>19268</INFO></ITEM> Max HP +5% Ranged Physical Damage +8% Dragonic Breath damage +20% _______________________ For each 2 Right hand Refine Levels: Dragonic Breath damage +8% Right hand refine >= 9: Dragonic Breath damage +20% Right hand refine >= 9 and Right hand grade >= A: Dragonic Breath cooldown -0.15s Max HP +3% Max SP +5% _______________________ Class Restrictions: Knight _______________________ Type: 2hSpear Position: Right Hand Physical Attack: 390 Weapon Level: 5 Refinable / Gradable Weight: 800 Required Level: 265 |
Chasing Shot damage +15% _______________________ For each 2 Refine Levels: Chasing Shot damage +4% ATK +1% Base ATK +20 _______________________ Refine >= 7: Critical +15 Chasing Shot damage +20% _______________________ Refine >= 9: Critical Damage +15% CRate +7 _______________________ Refine >= 12: Chasing Shot damage +15% 100% chance on using Hit And Sliding to trigger for 30s: Ignore 15% RES of All races except players CRate +12 For each Refine Level: Ranged Physical Damage +5% Critical +3 Frenzy Shot damage +3% _______________________ Grade >= D: Variable Cast Time -10% Chasing Shot damage +15% _______________________ Grade >= C: Ranged Physical Damage +15% Frenzy Shot damage +15% _______________________ Grade >= B: Frenzy Shot damage +20% _______________________ Grade >= A: P.ATK +15 _______________________ Grade >= A / Refine >= 12: Chasing Shot cooldown -0.3s Frenzy Shot damage +15% _______________________ Class Restrictions: Rogue _______________________ Type: Bow Position: Right Hand Physical Attack: 370 Weapon Level: 5 Refinable / Gradable Weight: 240 Required Level: 265 |
Midnight Fallen damage +20% _______________________ For each 3 Refine Levels: Midnight Fallen damage +5% ATK +1% Base ATK +25 _______________________ Refine >= 7: Midnight Fallen damage +15% _______________________ Refine >= 9: Non-critical Physical Damage +15% P.ATK +7 _______________________ Refine >= 12: Midnight Fallen damage +15% _______________________ Refine >= 12 / Grade >= A / Wild Fire Level >= 5: 100% chance on using Hidden Card to trigger for 150s: Non-critical Physical Damage +15% 100% chance to autocast Wild Fire Level 5 when using Spiral Shooting For each Refine Level: Spiral Shooting damage +5% Wild Fire damage +5% _______________________ Grade >= D: Variable Cast Time -10% _______________________ Grade >= C: Non-critical Physical Damage +10% Ranged Physical Damage +15% _______________________ Grade >= B: Variable Cast Time -5% Midnight Fallen damage +10% _______________________ Grade >= A: P.ATK +15 _______________________ Grade >= A / Refine >= 12: Midnight Fallen cooldown -0.2s _______________________ Class Restrictions: Rebellion _______________________ Type: Grenade Position: Right Hand Physical Attack: 420 Weapon Level: 5 Refinable / Gradable Weight: 320 Required Level: 265 |
Variable Cast Time -5% Rhythmical Wave damage +15% _______________________ For each 2 Refine Levels: Rhythmical Wave damage +4% MATK +1% MATK +20 _______________________ Refine >= 7: Magic damage with All elements property +15% Rhythmical Wave damage +10% _______________________ Refine >= 9: Variable Cast Time -5% S.MATK +7 _______________________ Refine >= 12: Rhythmical Wave damage +15% _______________________ Refine >= 12 / Grade >= A: 100% chance on using Sound Blend to trigger for 30s: Magic damage with All elements property +15% Metallic Fury damage +40% Ignore 15% M.RES of All races except players _______________________ Grade >= D: Magic damage with All elements property +10% S.MATK +7 _______________________ Grade >= C: Rhythmical Wave damage +15% _______________________ Grade >= B: Magic damage to All elements property +10% _______________________ Grade >= A: S.MATK +15 _______________________ Class Restrictions: Bard/Dancer _______________________ Type: Musical Position: Right Hand Physical Attack: 100 Magic Attack: 260 Weapon Level: 5 Refinable / Gradable Weight: 200 Required Level: 265 |
Variable Cast Time -5% Rhythmical Wave damage +15% _______________________ For each 2 Refine Levels: Rhythmical Wave damage +4% MATK +1% MATK +20 _______________________ Refine >= 7: Magic damage with All elements property +15% Rhythmical Wave damage +10% _______________________ Refine >= 9: Variable Cast Time -5% S.MATK +7 _______________________ Refine >= 12: Rhythmical Wave damage +15% _______________________ Refine >= 12 / Grade >= A: 100% chance on using Sound Blend to trigger for 30s: Magic damage with All elements property +15% Metallic Fury damage +40% Ignore 15% M.RES of All races except players _______________________ Grade >= D: Magic damage with All elements property +10% S.MATK +7 _______________________ Grade >= C: Rhythmical Wave damage +15% _______________________ Grade >= B: Magic damage to All elements property +10% _______________________ Grade >= A: S.MATK +15 _______________________ Class Restrictions: Bard/Dancer _______________________ Type: Whip Position: Right Hand Physical Attack: 100 Magic Attack: 260 Weapon Level: 5 Refinable / Gradable Weight: 200 Required Level: 265 |
Weapon cannot be broken Double Bowling Bash damage +20% _______________________ For each 3 Refine Levels: Double Bowling Bash damage +5% ATK +1% Base ATK +25 _______________________ Refine >= 7: Double Bowling Bash damage +15% _______________________ Refine >= 9: Non-critical Physical Damage +15% P.ATK +7 _______________________ Refine >= 12: Double Bowling Bash damage +20% _______________________ Refine >= 12 / Grade >= A: 100% chance on using Breaking Limit to trigger for 150s: Double Bowling Bash cooldown -0.2s Physical damage to All elements property +15% Non-critical Physical Damage +15% For each Refine Level: Chasing Break damage +7% _______________________ Grade >= D: Melee Physical Damage +10% P.ATK +7 _______________________ Grade >= C: Non-critical Physical Damage +15% _______________________ Grade >= B: Double Bowling Bash damage +15% _______________________ Grade >= A: Grants the skill Chasing Break Level 5 After Cast Delay -10% _______________________ Class Restrictions: Super Novice _______________________ Type: Mace Position: Right Hand Physical Attack: 280 Weapon Level: 5 Refinable / Gradable Weight: 220 Required Level: 265 |
Critical +5 Eternal Slash damage +15% _______________________ For each 3 Refine Levels: Eternal Slash damage +5% ATK +1% Base ATK +25 _______________________ Refine >= 7: Critical Damage +20% _______________________ Refine >= 9: CRate +10 Critical +10 _______________________ Grade >= A / Refine >= 12: Eternal Slash damage +15% _______________________ Refine >= 12 / Grade >= A: 100% chance on using Cross Slash to trigger for 20s: Eternal Slash damage +15% Eternal Slash cooldown -0.15s Melee Physical Damage +15% Critical +10 For each Refine Level: Cross Slash damage +3% _______________________ Grade >= D: Critical Damage +10% Critical +5 _______________________ Grade >= C: Melee Physical Damage +15% _______________________ Grade >= B: CRate +5 Eternal Slash damage +15% _______________________ Grade >= A: P.ATK +15 _______________________ Class Restrictions: Assassin _______________________ Type: Katar Position: Right Hand Physical Attack: 340 Weapon Level: 5 Refinable / Gradable Weight: 240 Required Level: 265 |
Diamond Storm damage +20% Terra Drive damage +20% _______________________ For each 3 Refine Levels: Diamond Storm damage +5% Terra Drive damage +5% MATK +1% MATK +25 _______________________ Refine >= 7: Magic damage with Water property +10% Magic damage with Earth property +10% Diamond Storm damage +20% _______________________ Refine >= 9: S.MATK +7 Terra Drive damage +20% _______________________ Refine >= 12: Diamond Storm damage +15% Terra Drive damage +15% _______________________ Grade >= D: Magic damage with Water property +10% Magic damage with Earth property +10% S.MATK +7 _______________________ Grade >= C: Diamond Storm damage +15% Terra Drive damage +15% _______________________ Grade >= B: Magic damage with Water property +10% Magic damage with Earth property +10% _______________________ Grade >= A: S.MATK +15 Elemental Buster damage +25% Elemental Buster Fire damage +25% Elemental Buster Water damage +25% Elemental Buster Wind damage +25% Elemental Buster Poison damage +25% Elemental Buster Ground damage +25% _______________________ Grade >= A / Refine >= 12 / Elemental Buster Level >= 10 and Greater Elemental active: 100% chance to autocast Elemental Buster Level 10 when using Terra Drive 100% chance to autocast Elemental Buster Level 10 when using Diamond Storm _______________________ Class Restrictions: Sage _______________________ Type: Book Position: Right Hand Physical Attack: 100 Magic Attack: 260 Weapon Level: 5 Refinable / Gradable Weight: 200 Required Level: 265 |
Critical +5 Petitio damage +15% _______________________ For each 2 Refine Levels: Petitio damage +4% ATK +1% Base ATK +20 _______________________ Refine >= 7: Critical Damage +20% _______________________ Refine >= 9: CRate +7 Critical +15 _______________________ Refine >= 12: Petitio damage +20% _______________________ Refine >= 12 / Grade >= A: 100% chance on using Effligo to trigger for 30s: Petitio cooldown -0.25s Melee Physical Damage +20% CRate +10 Critical +15 For each Refine Level: Duple Light Melee damage +85% Duple Light Magic damage +85% Effligo damage +7% _______________________ Grade >= D: Critical Damage +15% Critical +5 _______________________ Grade >= C / Petitio Level > 0: 50% chance to autocast Petitio when using Duple Light Melee 50% chance to autocast Petitio when using Duple Light Magic _______________________ Grade >= B: CRate +5 Petitio damage +15% _______________________ Grade >= A: Grants the skill Unlucky Rush Level 3 P.ATK +10 _______________________ Class Restrictions: Priest _______________________ Type: Book Position: Right Hand Physical Attack: 260 Magic Attack: 190 Weapon Level: 5 Refinable / Gradable Weight: 200 Required Level: 265 |
Weapon cannot be broken Soul Vulcan Strike damage +15% Mystery Illusion damage +15% _______________________ For each 2 Refine Levels: Soul Vulcan Strike damage +4% Mystery Illusion damage +4% MATK +1% MATK +20 _______________________ Refine >= 7: Magic damage with Ghost property +10% Magic damage with Dark property +10% Mystery Illusion damage +15% _______________________ Refine >= 9: S.MATK +7 Soul Vulcan Strike damage +15% _______________________ Refine >= 12: Soul Vulcan Strike damage +10% _______________________ Grade >= D: Magic damage with Ghost property +10% Magic damage with Dark property +10% S.MATK +7 _______________________ Grade >= C: SPL +7 Soul Vulcan Strike damage +15% _______________________ Grade >= B: Magic damage with Ghost property +10% Magic damage with Dark property +10% _______________________ Grade >= A: S.MATK +15 _______________________ Grade >= A / Refine >= 12: Soul Vulcan Strike cooldown -0.2s Mystery Illusion damage +15% Telekinesis Intense cooldown -30s _______________________ Class Restrictions: Wizard _______________________ Type: 2hStaff Position: Right Hand Physical Attack: 120 Magic Attack: 380 Weapon Level: 5 Refinable / Gradable Weight: 230 Required Level: 265 |
Weapon cannot be broken Variable Cast Time -5% Spark Blaster damage +15% _______________________ For each 3 Refine Levels: Spark Blaster damage +5% ATK +1% Base ATK +25 _______________________ Refine >= 7: Spark Blaster damage +15% _______________________ Refine >= 9: Non-critical Physical Damage +15% P.ATK +7 _______________________ Refine >= 12: Energy Cannonade damage +20% _______________________ Refine >= 12 / Grade >= A: 100% chance on using Energy Cannonade to trigger for 30s: Spark Blaster cooldown -0.15s Non-critical Physical Damage +20% Spark Blaster damage +15% For each Refine Level: Energy Cannonade damage +8% _______________________ Grade >= D: Variable Cast Time -10% _______________________ Grade >= C: Non-critical Physical Damage +10% Ranged Physical Damage +15% _______________________ Grade >= B: Variable Cast Time -5% Spark Blaster damage +15% _______________________ Grade >= A: P.ATK +15 _______________________ Class Restrictions: Blacksmith _______________________ Type: Mace Position: Right Hand Physical Attack: 350 Weapon Level: 5 Refinable / Gradable Weight: 300 Required Level: 265 |
Item Reform
You need to use Dimensional Tuning to reform the item. e.g  Dimensional Tuning (Was) (106254)
Reform change overview
| Before item reform | After item reform |
Class Restrictions: Swordsman classes _______________________ Type: 2hSword Position: Right Hand Physical Attack: 100 Weapon Level: 5 Refinable Weight: 380 Required Level: 260 |
Critical +5 Servant Weapon damage +5% _______________________ For each 3 Refine Levels: Servant Weapon damage +5% For each 2 Refine Levels: ATK +1% Base ATK +25 _______________________ Refine >= 9: CRate +5 Critical +15 _______________________ Refine >= 11: Servant Weapon damage +25% _______________________ Refine >= 12 and Servant Weapon Level >= 5: 8% chance to autocast Servant Weapon Attack Level 5 when attacking _______________________ Grade >= D: P.ATK +5 Critical +5 _______________________ Grade >= C: Servant Weapon damage +15% _______________________ Grade >= B: Melee Physical Damage +15% _______________________ Grade >= A: For each 2 Refine Levels: P.ATK +3 _______________________ [Set Bonus] <ITEM>[Frontier Rune Crown (Dragon Knight)]<INFO>400975</INFO></ITEM> <ITEM>[Frontier Dragon Sword]<INFO>600071</INFO></ITEM> Hack And Slasher damage +45% Critical Damage +15% Upper Headgear refine+Right hand refine >= 24 and Upper Headgear grade >= A and Right hand grade >= A: Hack And Slasher cooldown -0.2s Upper Headgear refine+Right hand refine >= 24 and Upper Headgear grade >= A and Right hand grade >= A / Servant Weapon Level >= 4: 100% chance to autocast Servant Weapon Attack Level 4 when using Hack And Slasher 100% chance to autocast Servant Weapon Attack Level 4 when using Servant Weapon Phantom _______________________ Class Restrictions: Knight _______________________ Type: 2hSword Position: Right Hand Physical Attack: 400 Weapon Level: 5 Refinable / Gradable Weight: 380 Required Level: 265 |
Class Restrictions: Swordsman classes _______________________ Type: 1hSpear Position: Right Hand Physical Attack: 50 Weapon Level: 5 Refinable Weight: 270 Required Level: 260 |
P.ATK +5 Imperial Cross damage +5% _______________________ For each 3 Refine Levels: Imperial Cross damage +5% For each 2 Refine Levels: ATK +1% Base ATK +25 _______________________ Refine >= 9: Melee Physical Damage +15% P.ATK +7 _______________________ Refine >= 11: Imperial Cross damage +15% _______________________ Refine >= 12: Imperial Cross damage +20% Overslash damage +25% _______________________ Grade >= D: Melee Physical Damage +10% P.ATK +7 _______________________ Grade >= C: Imperial Cross damage +10% _______________________ Grade >= B: Non-critical Physical Damage +15% _______________________ Grade >= A: For each 2 Refine Levels: P.ATK +3 _______________________ [Set Bonus] <ITEM>[Frontier Rune Crown (Imperial Guard)]<INFO>400976</INFO></ITEM> <ITEM>[Frontier Imperial Spear]<INFO>530072</INFO></ITEM> Overslash damage +25% Non-critical Physical Damage +15% Upper Headgear refine+Right hand refine >= 24 and Upper Headgear grade >= A and Right hand grade >= A / Overslash Level >= 10: 100% chance to autocast Overslash Level 10 when using Imperial Cross _______________________ Class Restrictions: Crusader _______________________ Type: 1hSpear Position: Right Hand Physical Attack: 260 Weapon Level: 5 Refinable / Gradable Weight: 270 Required Level: 265 |
Weapon cannot be broken _______________________ Class Restrictions: Swordsman classes, Merchant classes, Druid, and Karnos _______________________ Type: 2hAxe Position: Right Hand Physical Attack: 100 Weapon Level: 5 Refinable Weight: 480 Required Level: 260 |
P.ATK +5 Powerful Swing damage +5% _______________________ For each 3 Refine Levels: Powerful Swing damage +5% For each 2 Refine Levels: ATK +1% Base ATK +25 _______________________ Refine >= 9: Melee Physical Damage +15% P.ATK +7 _______________________ Refine >= 11: Powerful Swing damage +15% _______________________ Refine >= 12: Powerful Swing damage +20% Rush Strike damage +25% _______________________ Grade >= D: Melee Physical Damage +10% P.ATK +7 _______________________ Grade >= C: Powerful Swing damage +15% _______________________ Grade >= B: Non-critical Physical Damage +15% _______________________ Grade >= A: For each 2 Refine Levels: P.ATK +3 _______________________ [Set Bonus] <ITEM>[Frontier Rune Crown (Meister)]<INFO>400977</INFO></ITEM> <ITEM>[Frontier Mechanical Axe]<INFO>620058</INFO></ITEM> Rush Strike damage +25% Non-critical Physical Damage +15% Upper Headgear refine+Right hand refine >= 24 and Upper Headgear grade >= A and Right hand grade >= A: Rush Strike cooldown -0.15s Upper Headgear refine+Right hand refine >= 24 and Upper Headgear grade >= A and Right hand grade >= A / Powerful Swing Level >= 5: 100% chance to autocast Powerful Swing Level 5 when using Rush Strike _______________________ Class Restrictions: Blacksmith _______________________ Type: 2hAxe Position: Right Hand Physical Attack: 430 Weapon Level: 5 Refinable / Gradable Weight: 480 Required Level: 265 |
Weapon cannot be broken _______________________ Class Restrictions: Swordsman classes, Acolyte classes, Merchant classes, Druid, Karnos, Novice, and Super Novice _______________________ Type: Mace Position: Right Hand Physical Attack: 50 Weapon Level: 5 Refinable Weight: 270 Required Level: 260 |
P.ATK +5 Weapon cannot be broken Dust Explosion damage +5% _______________________ For each 3 Refine Levels: Dust Explosion damage +5% For each 2 Refine Levels: ATK +1% Base ATK +25 _______________________ Refine >= 9: Melee Physical Damage +15% P.ATK +7 _______________________ Refine >= 11: Dust Explosion damage +15% _______________________ Refine >= 12: Dust Explosion damage +20% Explosive Powder damage +25% _______________________ Grade >= D: Melee Physical Damage +10% P.ATK +7 _______________________ Grade >= C: Dust Explosion damage +10% _______________________ Grade >= B: Non-critical Physical Damage +15% _______________________ Grade >= A: For each 2 Refine Levels: P.ATK +3 _______________________ [Set Bonus] <ITEM>[Frontier Rune Crown (Biolo)]<INFO>400978</INFO></ITEM> <ITEM>[Frontier Biological Scepter]<INFO>590107</INFO></ITEM> Explosive Powder damage +25% Non-critical Physical Damage +15% Upper Headgear refine+Right hand refine >= 24 and Upper Headgear grade >= A and Right hand grade >= A / Explosive Powder Level >= 5: 100% chance on using Research Report to trigger for 150s: 100% chance to autocast Explosive Powder Level 5 when using Dust Explosion For each Right hand Refine Level: Non-critical Physical Damage +2% Melee Physical Damage +8% _______________________ Class Restrictions: Alchemist _______________________ Type: Mace Position: Right Hand Physical Attack: 260 Weapon Level: 5 Refinable / Gradable Weight: 270 Required Level: 265 |
Class Restrictions: Assassin _______________________ Type: Katar Position: Right Hand Physical Attack: 100 Weapon Level: 5 Refinable Weight: 250 Required Level: 260 |
Critical +5 Savage Impact damage +5% _______________________ For each 3 Refine Levels: Savage Impact damage +5% For each 2 Refine Levels: ATK +1% Base ATK +25 _______________________ Refine >= 9: CRate +5 Critical +15 _______________________ Refine >= 11: Savage Impact damage +15% _______________________ Refine >= 12: Savage Impact damage +20% Cross Slash damage +35% _______________________ Grade >= D: P.ATK +5 Critical +5 _______________________ Grade >= C: Savage Impact damage +15% _______________________ Grade >= B: Melee Physical Damage +15% _______________________ Grade >= A: For each 2 Refine Levels: P.ATK +3 _______________________ [Set Bonus] <ITEM>[Frontier Rune Crown (Shadow Cross)]<INFO>400979</INFO></ITEM> <ITEM>[Frontier Shadow Katar]<INFO>610085</INFO></ITEM> Eternal Slash damage +45% Critical Damage +15% Upper Headgear refine+Right hand refine >= 24 and Upper Headgear grade >= A and Right hand grade >= A: Savage Impact cooldown -0.2s Upper Headgear refine+Right hand refine >= 24 and Upper Headgear grade >= A and Right hand grade >= A / Cross Slash Level >= 4: 100% chance to autocast Cross Slash Level 4 when using Savage Impact _______________________ Class Restrictions: Assassin _______________________ Type: Katar Position: Right Hand Physical Attack: 370 Weapon Level: 5 Refinable / Gradable Weight: 250 Required Level: 265 |
Class Restrictions: Swordsman classes, Archer classes, Merchant classes, Thief classes, Ninja classes, Druid, Karnos, Novice, Rebellion, Soul Linker, Super Novice, and Wizard _______________________ Type: Dagger Position: Right Hand Physical Attack: 50 Weapon Level: 5 Refinable Weight: 200 Required Level: 260 |
S.MATK +5 From The Abyss damage +5% _______________________ For each 3 Refine Levels: From The Abyss damage +5% For each 2 Refine Levels: MATK +1% MATK +25 _______________________ Refine >= 9: Magic damage with Fire property +15% Magic damage with Neutral property +15% S.MATK +7 _______________________ Refine >= 11: From The Abyss damage +25% _______________________ Refine >= 12 / From The Abyss Level >= 5: 8% chance to autocast From The Abyss Attack Level 5 when attacking _______________________ Grade >= D: Magic damage with Fire property +10% Magic damage with Neutral property +10% S.MATK +7 _______________________ Grade >= C: From The Abyss damage +10% _______________________ Grade >= B: Magic damage with Fire property +10% Magic damage with Neutral property +10% _______________________ Grade >= A: For each 2 Refine Levels: S.MATK +3 _______________________ [Set Bonus] <ITEM>[Frontier Rune Crown (Abyss Chaser)]<INFO>400980</INFO></ITEM> <ITEM>[Frontier Abyss Dagger]<INFO>510192</INFO></ITEM> Abyss Square damage +35% Abyss Flame damage +35% Upper Headgear refine+Right hand refine >= 24 and Upper Headgear grade >= A and Right hand grade >= A / Abyss Flame Level >= 5: 100% chance on using Abyss Slayer to trigger for 150s: 8% chance to autocast Abyss Flame Level 5 when attacking For each Right hand Refine Level: Abyss Square damage +3% Abyss Flame damage +3% _______________________ Class Restrictions: Rogue _______________________ Type: Dagger Position: Right Hand Physical Attack: 150 Magic Attack: 250 Weapon Level: 5 Refinable / Gradable Weight: 220 Required Level: 265 |
Weapon cannot be broken _______________________ Class Restrictions: Mage classes, Acolyte classes, Novice, Soul Linker, and Super Novice _______________________ Type: 2hStaff Position: Right Hand Physical Attack: 100 Magic Attack: 100 Weapon Level: 5 Refinable Weight: 230 Required Level: 260 |
Weapon cannot be broken S.MATK +5 Crimson Arrow damage +5% Rock Down damage +5% _______________________ For each 3 Refine Levels: Crimson Arrow damage +5% Rock Down damage +5% For each 2 Refine Levels: MATK +1% MATK +25 _______________________ Refine >= 9: Magic damage with Fire property +15% Magic damage with Earth property +15% S.MATK +7 _______________________ Refine >= 11: Crimson Arrow damage +15% Rock Down damage +15% _______________________ Refine >= 12: Crimson Arrow damage +20% Rock Down damage +20% Violent Quake damage +25% All Bloom damage +25% _______________________ Grade >= D: Magic damage with Fire property +10% Magic damage with Earth property +10% S.MATK +7 _______________________ Grade >= C: Crimson Arrow damage +15% Rock Down damage +15% _______________________ Grade >= B: Magic damage with Fire property +10% Magic damage with Earth property +10% _______________________ Grade >= A: For each 2 Refine Levels: S.MATK +3 _______________________ [Set Bonus] <ITEM>[Frontier Rune Crown (Arch Mage)]<INFO>400981</INFO></ITEM> <ITEM>[Frontier Arc Staff]<INFO>640064</INFO></ITEM> Violent Quake damage +35% All Bloom damage +35% Upper Headgear refine+Right hand refine >= 24 and Upper Headgear grade >= A and Right hand grade >= A: 5% chance on magic attack to trigger for 10s: Magic damage with Fire property +15% Magic damage with Earth property +15% Magic damage to Water property +15% Magic damage to Wind property +15% Ignore 15% M.RES of All races except players _______________________ Class Restrictions: Wizard _______________________ Type: 2hStaff Position: Right Hand Physical Attack: 120 Magic Attack: 380 Weapon Level: 5 Refinable / Gradable Weight: 230 Required Level: 265 |
Class Restrictions: Priest, Sage, and Star Gladiator _______________________ Type: Book Position: Right Hand Physical Attack: 50 Magic Attack: 50 Weapon Level: 5 Refinable Weight: 200 Required Level: 260 |
S.MATK +5 Lightning Bolt damage +100% Fire Bolt damage +100% Cold Bolt damage +100% Lightning Bolt fixed cast time +2.5s Fire Bolt fixed cast time +2.5s Cold Bolt fixed cast time +2.5s _______________________ For each 3 Refine Levels: Lightning Bolt damage +35% Fire Bolt damage +35% Cold Bolt damage +35% For each 2 Refine Levels: MATK +1% MATK +25 _______________________ Refine >= 9: Magic damage with Ghost property +15% Magic damage with Fire property +15% Magic damage with Water property +15% Magic damage with Wind property +15% S.MATK +7 _______________________ Refine >= 11: Lightning Bolt damage +30% Fire Bolt damage +30% Cold Bolt damage +30% _______________________ Refine >= 12: Lightning Bolt damage +35% Fire Bolt damage +35% Cold Bolt damage +35% Soul Strike damage +45% _______________________ Grade >= D: Magic damage with Ghost property +15% Magic damage with Fire property +15% Magic damage with Water property +15% Magic damage with Wind property +15% S.MATK +7 _______________________ Grade >= C: Soul Strike damage +45% _______________________ Grade >= B: ASPD +10% ASPD +2 _______________________ Grade >= A: For each 2 Refine Levels: S.MATK +3 _______________________ [Set Bonus] <ITEM>[Frontier Rune Crown (Elemental Master)]<INFO>400982</INFO></ITEM> <ITEM>[Frontier Elemental Book]<INFO>540110</INFO></ITEM> Soul Strike damage +45% Magic damage with Ghost property +15% Magic damage with Fire property +15% Magic damage with Water property +15% Magic damage with Wind property +15% Upper Headgear refine+Right hand refine >= 24 and Upper Headgear grade >= A and Right hand grade >= A / Soul Strike Level >= 10: 100% chance on using Spell Fist to trigger for 150s: Soul Strike cooldown +2s 60% chance to autocast Soul Vulcan Strike Level 5 when using Soul Strike For each Right hand Refine Level: Soul Strike damage +75% Soul Vulcan Strike damage +7% _______________________ Class Restrictions: Sage _______________________ Type: Book Position: Right Hand Physical Attack: 100 Magic Attack: 260 Weapon Level: 5 Refinable / Gradable Weight: 200 Required Level: 265 |
Weapon cannot be broken _______________________ Class Restrictions: Mage classes, Acolyte classes, Novice, Soul Linker, and Super Novice _______________________ Type: Staff Position: Right Hand Physical Attack: 50 Magic Attack: 50 Weapon Level: 5 Refinable Weight: 220 Required Level: 260 |
Weapon cannot be broken S.MATK +5 Divinus Flos damage +5% _______________________ For each 3 Refine Levels: Divinus Flos damage +5% For each 2 Refine Levels: MATK +1% MATK +25 _______________________ Refine >= 9: Magic damage with Holy property +15% Magic damage with Neutral property +15% S.MATK +7 _______________________ Refine >= 11: Divinus Flos damage +15% _______________________ Refine >= 12: Divinus Flos damage +20% Pneumaticus Procella damage +25% _______________________ Grade >= D: Magic damage with Holy property +10% Magic damage with Neutral property +10% S.MATK +7 _______________________ Grade >= C: Divinus Flos damage +10% _______________________ Grade >= B: Magic damage with Holy property +10% Magic damage with Neutral property +10% _______________________ Grade >= A: For each 2 Refine Levels: S.MATK +3 _______________________ [Set Bonus] <ITEM>[Frontier Rune Crown (Cardinal)]<INFO>400983</INFO></ITEM> <ITEM>[Frontier Saint Lord]<INFO>550176</INFO></ITEM> Pneumaticus Procella damage +25% Magic damage with Holy property +15% Magic damage with Neutral property +15% Upper Headgear refine+Right hand refine >= 24 and Upper Headgear grade >= A and Right hand grade >= A / Adoramus Level >= 10: 100% chance on using Reparatio to trigger for 1 min: 100% chance to autocast Adoramus Level 10 when using Divinus Flos For each Right hand Refine Level: Adoramus damage +35% _______________________ Class Restrictions: Priest _______________________ Type: Staff Position: Right Hand Physical Attack: 100 Magic Attack: 260 Weapon Level: 5 Refinable / Gradable Weight: 220 Required Level: 265 |
Class Restrictions: Monk _______________________ Type: Knuckle Position: Right Hand Physical Attack: 50 Weapon Level: 5 Refinable Weight: 250 Required Level: 260 |
Critical +5 Blazing Flame Blast damage +5% _______________________ For each 3 Refine Levels: Blazing Flame Blast damage +5% For each 2 Refine Levels: ATK +1% Base ATK +25 _______________________ Refine >= 9: CRate +5 Critical +15 _______________________ Refine >= 11: Blazing Flame Blast damage +15% _______________________ Refine >= 12: Blazing Flame Blast damage +20% Explosion Blaster damage +25% _______________________ Grade >= D: P.ATK +5 Critical +5 _______________________ Grade >= C: Blazing Flame Blast damage +10% _______________________ Grade >= B: Ranged Physical Damage +15% _______________________ Grade >= A: For each 2 Refine Levels: P.ATK +3 _______________________ [Set Bonus] <ITEM>[Frontier Rune Crown (Inquisitor)]<INFO>400984</INFO></ITEM> <ITEM>[Frontier Judgment Claw]<INFO>560081</INFO></ITEM> Explosion Blaster damage +25% Critical Damage +15% Upper Headgear refine+ Right hand refine >= 24 and Upper Headgear grade >= A and Right hand grade >= A: 100% chance on using Massive Flame Blaster to trigger for 15s: Blazing Flame Blast cooldown -0.3s Explosion Blaster cooldown -0.2s For each Right hand Refine Level: Ranged Physical Damage +5% CRate +1 Critical +2 _______________________ Class Restrictions: Monk _______________________ Type: Knuckle Position: Right Hand Physical Attack: 260 Weapon Level: 5 Refinable / Gradable Weight: 270 Required Level: 265 |
Class Restrictions: Bard/Dancer, Hunter, and Rogue _______________________ Type: Bow Position: Right Hand Physical Attack: 100 Weapon Level: 5 Refinable Weight: 240 Required Level: 260 |
Critical +5 Gale Storm damage +5% _______________________ For each 3 Refine Levels: Gale Storm damage +5% For each 2 Refine Levels: ATK +1% Base ATK +25 _______________________ Refine >= 9: CRate +5 Critical +15 _______________________ Refine >= 11: Gale Storm damage +15% _______________________ Refine >= 12: Gale Storm damage +20% Crescive Bolt damage +25% _______________________ Grade >= D: P.ATK +5 Critical +5 _______________________ Grade >= C: Gale Storm damage +15% _______________________ Grade >= B: Ranged Physical Damage +15% _______________________ Grade >= A: For each 2 Refine Levels: P.ATK +3 _______________________ [Set Bonus] <ITEM>[Frontier Rune Crown (Windhawk)]<INFO>400985</INFO></ITEM> <ITEM>[Frontier Wind Bow]<INFO>700119</INFO></ITEM> Crescive Bolt damage +25% Critical Damage +15% Upper Headgear refine+ Right hand refine >= 24 and Upper Headgear grade >= A and Right hand grade >= A: 100% chance on using Wild Walk to trigger for 30s: Gale Storm cooldown -0.15s For each Right hand Refine Level: Critical Damage +4% CRate +1 Critical +3 _______________________ Class Restrictions: Hunter _______________________ Type: Bow Position: Right Hand Physical Attack: 370 Weapon Level: 5 Refinable / Gradable Weight: 240 Required Level: 265 |
Class Restrictions: Bard/Dancer _______________________ Type: Musical Position: Right Hand Physical Attack: 50 Weapon Level: 5 Refinable Weight: 200 Required Level: 260 |
P.ATK +5 Rhythm Shooting damage +5% _______________________ For each 3 Refine Levels: Rhythm Shooting damage +5% For each 2 Refine Levels: ATK +1% Base ATK +25 _______________________ Refine >= 9: Ranged Physical Damage +15% P.ATK +7 _______________________ Refine >= 11: Rhythm Shooting damage +15% _______________________ Refine >= 12: Rhythm Shooting damage +20% Rose Blossom damage +25% _______________________ Grade >= D: Ranged Physical Damage +10% P.ATK +7 _______________________ Grade >= C: Rhythm Shooting damage +10% _______________________ Grade >= B: Non-critical Physical Damage +15% _______________________ Grade >= A: For each 2 Refine Levels: P.ATK +3 _______________________ [Set Bonus] <ITEM>[Frontier Rune Crown (Troubadour & Trouvere)]<INFO>400986</INFO></ITEM> <ITEM>[Frontier Musical Violin]<INFO>570087</INFO></ITEM> Non-critical Physical Damage +15% Rose Blossom damage +25% Upper Headgear refine+ Right hand refine >= 24 and Upper Headgear grade >= A and Right hand grade >= A: 100% chance on using Mystic Symphony to trigger for 150s: Severe Rainstorm cooldown -1.5s Severe Rainstorm damage +150% Rose Blossom damage +20% Rose Blossom Attack damage +20% For each Right hand Refine Level: Severe Rainstorm damage +75% Non-critical Physical Damage +2% Ranged Physical Damage +8% _______________________ Class Restrictions: Bard/Dancer _______________________ Type: Musical Position: Right Hand Physical Attack: 250 Weapon Level: 5 Refinable / Gradable Weight: 200 Required Level: 265 |
Class Restrictions: Bard/Dancer _______________________ Type: Whip Position: Right Hand Physical Attack: 50 Weapon Level: 5 Refinable Weight: 200 Required Level: 260 |
P.ATK +5 Rhythm Shooting damage +5% _______________________ For each 3 Refine Levels: Rhythm Shooting damage +5% For each 2 Refine Levels: ATK +1% Base ATK +25 _______________________ Refine >= 9: Ranged Physical Damage +15% P.ATK +7 _______________________ Refine >= 11: Rhythm Shooting damage +15% _______________________ Refine >= 12: Rhythm Shooting damage +20% Rose Blossom damage +25% _______________________ Grade >= D: Ranged Physical Damage +10% P.ATK +7 _______________________ Grade >= C: Rhythm Shooting damage +10% _______________________ Grade >= B: Non-critical Physical Damage +15% _______________________ Grade >= A: For each 2 Refine Levels: P.ATK +3 _______________________ [Set Bonus] <ITEM>[Frontier Rune Crown (Troubadour & Trouvere)]<INFO>400986</INFO></ITEM> <ITEM>[Frontier Musical Rope]<INFO>580087</INFO></ITEM> Non-critical Physical Damage +15% Rose Blossom damage +25% Upper Headgear refine+ Right hand refine >= 24 and Upper Headgear grade >= A and Right hand grade >= A: 100% chance on using Mystic Symphony to trigger for 150s: Severe Rainstorm cooldown -1.5s Severe Rainstorm damage +150% Rose Blossom damage +20% Rose Blossom Attack damage +20% For each Right hand Refine Level: Severe Rainstorm damage +75% Non-critical Physical Damage +2% Ranged Physical Damage +8% _______________________ Class Restrictions: Bard/Dancer _______________________ Type: Whip Position: Right Hand Physical Attack: 250 Weapon Level: 5 Refinable / Gradable Weight: 200 Required Level: 265 |
Weapon cannot be broken _______________________ Class Restrictions: Kagerou/Oboro _______________________ Type: Huuma Position: Right Hand Physical Attack: 100 Weapon Level: 5 Refinable Weight: 310 Required Level: 260 |
Weapon cannot be broken P.ATK +5 Kunai - Rotation damage +5% _______________________ For each 3 Refine Levels: Kunai - Rotation damage +5% For each 2 Refine Levels: ATK +1% Base ATK +25 _______________________ Refine >= 9: Ranged Physical Damage +15% P.ATK +7 _______________________ Refine >= 11: Kunai - Rotation damage +30% _______________________ Refine >= 12 / Kunai - Rotation Level >= 5: 100% chance to autocast Kunai - Rotation Level 5 when using Infiltrate _______________________ Refine >= 12: Kunai - Refraction damage +25% _______________________ Grade >= D: Ranged Physical Damage +10% P.ATK +7 _______________________ Grade >= C: Kunai - Rotation damage +15% _______________________ Grade >= B: Non-critical Physical Damage +15% _______________________ Grade >= A: For each 2 Refine Levels: P.ATK +3 _______________________ [Set Bonus] <ITEM>[Frontier Rune Crown (Shinkiro & Shiranui)]<INFO>400987</INFO></ITEM> <ITEM>[Frontier Moonlight Fuuma Shuriken]<INFO>650058</INFO></ITEM> Non-critical Physical Damage +15% Kunai - Refraction damage +25% Upper Headgear refine+Right hand refine >= 24 and Upper Headgear grade >= A and Right hand grade >= A / Huuma Shuriken - Construct Level >= 10: 100% chance on using Kunai - Nightmare to trigger for 90s: Swirling Petal cooldown -2.5s Huuma Shuriken - Construct damage +25% Swirling Petal damage +125% 100% chance to autocast Huuma Shuriken - Construct Level 10 when using Swirling Petal For each Right hand Refine Level: Swirling Petal damage +85% Non-critical Physical Damage +2% Ranged Physical Damage +8% _______________________ Class Restrictions: Kagerou/Oboro _______________________ Type: Huuma Position: Right Hand Physical Attack: 420 Weapon Level: 5 Refinable / Gradable Weight: 350 Required Level: 265 |
Class Restrictions: Rebellion _______________________ Type: Rifle Position: Right Hand Physical Attack: 100 Weapon Level: 5 Refinable Weight: 260 Required Level: 260 |
Critical +5 Wild Shot damage +5% _______________________ For each 3 Refine Levels: Wild Shot damage +5% For each 2 Refine Levels: ATK +1% Base ATK +25 _______________________ Refine >= 9: CRate +5 Critical +15 _______________________ Refine >= 11: Wild Shot damage +15% _______________________ Refine >= 12: Wild Shot damage +20% Spiral Shooting damage +25% _______________________ Grade >= D: P.ATK +5 Critical +5 _______________________ Grade >= C: Wild Shot damage +15% _______________________ Grade >= B: Ranged Physical Damage +15% _______________________ Grade >= A: For each 2 Refine Levels: P.ATK +3 _______________________ [Set Bonus] <ITEM>[Frontier Rune Crown (Night Watch)]<INFO>400988</INFO></ITEM> <ITEM>[Frontier Knight Rifle]<INFO>810049</INFO></ITEM> Spiral Shooting damage +25% Critical Damage +15% Upper Headgear refine+Right hand refine >= 24 and Upper Headgear grade >= A and Right hand grade >= A / Wild Shot Level >= 4: 100% chance to autocast Wild Shot Level 4 when using Spiral Shooting 100% chance on using Hidden Card to trigger for 150s: CRate +15 Critical +25 Ignore 15% RES of All races except players _______________________ Class Restrictions: Rebellion _______________________ Type: Rifle Position: Right Hand Physical Attack: 370 Weapon Level: 5 Refinable / Gradable Weight: 260 Required Level: 265 |
Class Restrictions: Priest, Sage, and Star Gladiator _______________________ Type: Book Position: Right Hand Physical Attack: 50 Magic Attack: 50 Weapon Level: 5 Refinable Weight: 200 Required Level: 260 |
Critical +5 Sky Sun damage +5% _______________________ For each 3 Refine Levels: Sky Sun damage +5% For each 2 Refine Levels: ATK +1% Base ATK +25 _______________________ Refine >= 9: CRate +5 Critical +15 _______________________ Refine >= 11: Sky Sun damage +15% _______________________ Refine >= 12: Sky Sun damage +20% Sunset Blast damage +25% _______________________ Grade >= D: P.ATK +5 Critical +5 _______________________ Grade >= C: Sky Sun damage +10% _______________________ Grade >= B: Melee Physical Damage +15% _______________________ Grade >= A: For each 2 Refine Levels: P.ATK +3 _______________________ [Set Bonus] <ITEM>[Frontier Rune Crown (Sky Emperor)]<INFO>400989</INFO></ITEM> <ITEM>[Frontier Emperor Battle Book]<INFO>540111</INFO></ITEM> Sunset Blast damage +25% Critical Damage +15% Upper Headgear refine+Right hand refine >= 24 and Upper Headgear grade >= A and Right hand grade >= A / Sky Sun Level >= 5 and Sunset Blast Level >= 5: 100% chance on using Enchanting Sky to trigger for 150s: CRate +10 Critical +15 100% chance to autocast Sky Sun Level 5 when using Noon Blast 100% chance to autocast Sunset Blast Level 5 when using Noon Blast _______________________ Class Restrictions: Star Gladiator _______________________ Type: Book Position: Right Hand Physical Attack: 250 Weapon Level: 5 Refinable / Gradable Weight: 240 Required Level: 265 |
Weapon cannot be broken _______________________ Class Restrictions: Mage classes, Acolyte classes, Novice, Soul Linker, and Super Novice _______________________ Type: 2hStaff Position: Right Hand Physical Attack: 100 Magic Attack: 100 Weapon Level: 5 Refinable Weight: 230 Required Level: 260 |
Weapon cannot be broken S.MATK +5 Talisman Of Blue Dragon damage +5% Talisman Of Red Phoenix damage +5% _______________________ For each 3 Refine Levels: Talisman Of Blue Dragon damage +5% Talisman Of Red Phoenix damage +5% For each 2 Refine Levels: MATK +1% MATK +25 _______________________ Refine >= 9: Magic damage with Holy property +15% Magic damage with Fire property +15% Magic damage with Neutral property +15% Magic damage with Earth property +15% Magic damage with Water property +15% Magic damage with Wind property +15% Magic damage with Ghost property +15% Magic damage with Dark property +15% S.MATK +7 _______________________ Refine >= 11: Talisman Of Blue Dragon damage +15% Talisman Of Red Phoenix damage +15% _______________________ Refine >= 12: Talisman Of Blue Dragon damage +20% Talisman Of Red Phoenix damage +20% Talisman Of White Tiger damage +25% Talisman Of Black Tortoise damage +25% _______________________ Grade >= D: Magic damage with Holy property +10% Magic damage with Fire property +10% Magic damage with Neutral property +10% Magic damage with Earth property +10% Magic damage with Water property +10% Magic damage with Wind property +10% Magic damage with Ghost property +10% Magic damage with Dark property +10% S.MATK +7 _______________________ Grade >= C: Talisman Of Blue Dragon damage +15% Talisman Of Red Phoenix damage +15% _______________________ Grade >= B: Magic damage with Holy property +10% Magic damage with Fire property +10% Magic damage with Neutral property +10% Magic damage with Earth property +10% Magic damage with Water property +10% Magic damage with Wind property +10% Magic damage with Ghost property +10% Magic damage with Dark property +10% _______________________ Grade >= A: For each 2 Refine Levels: S.MATK +3 _______________________ [Set Bonus] <ITEM>[Frontier Rune Crown (Soul Ascetic)]<INFO>400990</INFO></ITEM> <ITEM>[Frontier Soul Staff]<INFO>640065</INFO></ITEM> Talisman Of White Tiger damage +35% Talisman Of Black Tortoise damage +35% Upper Headgear refine+Right hand refine >= 24 and Upper Headgear grade >= A and Right hand grade >= A / Talisman Of White Tiger Level >= 5 and Talisman Of Black Tortoise Level >= 5: 100% chance on using Circle Of Directions And Elementals to trigger for 1 min: 100% chance to autocast Talisman Of White Tiger Level 5 when using Talisman Of Blue Dragon 100% chance to autocast Talisman Of Black Tortoise Level 5 when using Talisman Of Red Phoenix _______________________ Class Restrictions: Soul Linker _______________________ Type: 2hStaff Position: Right Hand Physical Attack: 120 Magic Attack: 380 Weapon Level: 5 Refinable / Gradable Weight: 230 Required Level: 265 |
Weapon cannot be broken _______________________ Class Restrictions: Mage classes, Acolyte classes, Novice, Soul Linker, and Super Novice _______________________ Type: Staff Position: Right Hand Physical Attack: 50 Magic Attack: 50 Weapon Level: 5 Refinable Weight: 220 Required Level: 260 |
Weapon cannot be broken S.MATK +5 Jack Frost Nova damage +5% _______________________ For each 3 Refine Levels: Jack Frost Nova damage +5% For each 2 Refine Levels: MATK +1% MATK +25 _______________________ Refine >= 9: Magic damage with Wind property +15% Magic damage with Water property +15% S.MATK +7 _______________________ Refine >= 11: Jack Frost Nova damage +15% _______________________ Refine >= 12: Jack Frost Nova damage +20% Jupitel Thunderstorm damage +25% _______________________ Grade >= D: Magic damage with Wind property +10% Magic damage with Water property +10% S.MATK +7 _______________________ Grade >= C: Jack Frost Nova damage +10% _______________________ Grade >= B: Magic damage with Wind property +10% Magic damage with Water property +10% _______________________ Grade >= A: For each 2 Refine Levels: S.MATK +3 _______________________ [Set Bonus] <ITEM>[Frontier Rune Crown (Hyper Novice)]<INFO>400991</INFO></ITEM> <ITEM>[Frontier Hyper Lord]<INFO>550177</INFO></ITEM> Jupitel Thunderstorm damage +25% Magic damage with Wind property +15% Magic damage with Water property +15% Upper Headgear refine+Right hand refine >= 24 and Upper Headgear grade >= A and Right hand grade >= A: 100% chance on using Rule Break to trigger for 150s: 100% chance to autocast Tornado Storm Level 5 when using Jupitel Thunderstorm 100% chance to autocast Rain Of Crystal Level 5 when using Jack Frost Nova For each Right hand Refine Level: Rain Of Crystal damage +7% Tornado Storm damage +7% _______________________ Class Restrictions: Super Novice _______________________ Type: Staff Position: Right Hand Physical Attack: 100 Magic Attack: 250 Weapon Level: 5 Refinable / Gradable Weight: 200 Required Level: 265 |
Weapon cannot be broken _______________________ Class Restrictions: Spirit Handler _______________________ Type: Staff Position: Right Hand Physical Attack: 50 Magic Attack: 50 Weapon Level: 5 Refinable Weight: 200 Required Level: 260 |
Weapon cannot be broken S.MATK +5 Hyunrok Spirit Power damage +5% _______________________ For each 3 Refine Levels: Hyunrok Spirit Power damage +5% For each 2 Refine Levels: MATK +1% MATK +25 _______________________ Refine >= 9: Magic damage with Holy property +15% Magic damage with Fire property +15% Magic damage with Neutral property +15% Magic damage with Earth property +15% Magic damage with Water property +15% Magic damage with Wind property +15% Magic damage with Dark property +15% S.MATK +7 _______________________ Refine >= 11: Hyunrok Spirit Power damage +15% _______________________ Refine >= 12: Hyunrok Spirit Power damage +20% Hyunrok Breeze damage +25% _______________________ Grade >= D: Magic damage with Holy property +10% Magic damage with Fire property +10% Magic damage with Neutral property +10% Magic damage with Earth property +10% Magic damage with Water property +10% Magic damage with Wind property +10% Magic damage with Dark property +10% S.MATK +7 _______________________ Grade >= C: Hyunrok Spirit Power damage +10% _______________________ Grade >= B: Magic damage with Holy property +10% Magic damage with Fire property +10% Magic damage with Neutral property +10% Magic damage with Earth property +10% Magic damage with Water property +10% Magic damage with Wind property +10% Magic damage with Dark property +10% _______________________ Grade >= A: For each 2 Refine Levels: S.MATK +3 _______________________ [Set Bonus] <ITEM>[Frontier Rune Crown (Spirit Master)]<INFO>400992</INFO></ITEM> <ITEM>[Frontier Spirit Foxtail]<INFO>550178</INFO></ITEM> Hyunrok Breeze damage +25% Magic damage with Holy property +15% Magic damage with Fire property +15% Magic damage with Neutral property +15% Magic damage with Earth property +15% Magic damage with Water property +15% Magic damage with Wind property +15% Magic damage with Dark property +15% Upper Headgear refine+Right hand refine >= 24 and Upper Headgear grade >= A and Right hand grade >= A / Hyunrok Breeze Level >= 7: 100% chance on using Temporary Communion to trigger for 150s: Hyunrok Spirit Power cooldown -0.2s 40% chance to autocast Hyunrok Breeze Level 7 when using Hyunrok Spirit Power _______________________ Class Restrictions: Spirit Handler _______________________ Type: Staff Position: Right Hand Physical Attack: 100 Magic Attack: 450 Weapon Level: 5 Refinable / Gradable Weight: 200 Required Level: 265 |
Class Restrictions: Swordsman classes _______________________ Type: 2hSpear Position: Right Hand Physical Attack: 100 Weapon Level: 5 Refinable Weight: 650 Required Level: 260 |
Madness Crusher damage +15% _______________________ For each 2 Refine Levels: Madness Crusher damage +4% ATK +1% Base ATK +20 _______________________ Refine >= 7: Non-critical Physical Damage +15% Max HP +7% _______________________ Refine >= 9: Variable Cast Time -10% Madness Crusher damage +15% _______________________ Refine >= 12: Ranged Physical Damage +15% Madness Crusher damage +15% _______________________ Grade >= D: Ranged Physical Damage +15% Variable Cast Time -5% _______________________ Grade >= C: Madness Crusher damage +15% _______________________ Grade >= B: P.ATK +5 Max HP +5% _______________________ Grade >= A: P.ATK +15 _______________________ [Set Bonus] <ITEM>[Faceworm Queen's Horn]<INFO>630060</INFO></ITEM> <ITEM>[Gigant Snake Breath]<INFO>19268</INFO></ITEM> Max HP +5% Ranged Physical Damage +8% Dragonic Breath damage +20% _______________________ For each 2 Right hand Refine Levels: Dragonic Breath damage +8% Right hand refine >= 9: Dragonic Breath damage +20% Right hand refine >= 9 and Right hand grade >= A: Dragonic Breath cooldown -0.15s Max HP +3% Max SP +5% _______________________ Class Restrictions: Knight _______________________ Type: 2hSpear Position: Right Hand Physical Attack: 390 Weapon Level: 5 Refinable / Gradable Weight: 800 Required Level: 265 |
Class Restrictions: Swordsman classes _______________________ Type: 1hSpear Position: Right Hand Physical Attack: 50 Weapon Level: 5 Refinable Weight: 270 Required Level: 260 |
Radiant Spear damage +20% _______________________ For each 3 Refine Levels: Radiant Spear damage +5% ATK +1% Base ATK +25 _______________________ Refine >= 7: Radiant Spear damage +25% _______________________ Refine >= 9: Critical Damage +15% Critical +15 _______________________ Refine >= 12: Radiant Spear damage +15% _______________________ Refine >= 12 / Cannon Spear Level >= 5: 100% chance on using Grand Judgement to trigger for 1 min: Ignore 15% RES of All races except players 100% chance to autocast Cannon Spear Level 5 when using Radiant Spear For each Refine Level: Ranged Physical Damage +3% STR +7 Cannon Spear damage +65% _______________________ Grade >= D: Variable Cast Time -10% Critical +5 _______________________ Grade >= C: Critical Damage +10% Ranged Physical Damage +15% _______________________ Grade >= B: CRate +5 Radiant Spear damage +10% _______________________ Grade >= A: P.ATK +15 _______________________ Grade >= A / Refine >= 12: Radiant Spear cooldown -0.3s _______________________ Class Restrictions: Crusader _______________________ Type: 1hSpear Position: Right Hand Physical Attack: 260 Weapon Level: 5 Refinable / Gradable Weight: 270 Required Level: 265 |
Class Restrictions: Bard/Dancer, Hunter, and Rogue _______________________ Type: Bow Position: Right Hand Physical Attack: 100 Weapon Level: 5 Refinable Weight: 240 Required Level: 260 |
Chasing Shot damage +15% _______________________ For each 2 Refine Levels: Chasing Shot damage +4% ATK +1% Base ATK +20 _______________________ Refine >= 7: Critical +15 Chasing Shot damage +20% _______________________ Refine >= 9: Critical Damage +15% CRate +7 _______________________ Refine >= 12: Chasing Shot damage +15% 100% chance on using Hit And Sliding to trigger for 30s: Ignore 15% RES of All races except players CRate +12 For each Refine Level: Ranged Physical Damage +5% Critical +3 Frenzy Shot damage +3% _______________________ Grade >= D: Variable Cast Time -10% Chasing Shot damage +15% _______________________ Grade >= C: Ranged Physical Damage +15% Frenzy Shot damage +15% _______________________ Grade >= B: Frenzy Shot damage +20% _______________________ Grade >= A: P.ATK +15 _______________________ Grade >= A / Refine >= 12: Chasing Shot cooldown -0.3s Frenzy Shot damage +15% _______________________ Class Restrictions: Rogue _______________________ Type: Bow Position: Right Hand Physical Attack: 370 Weapon Level: 5 Refinable / Gradable Weight: 240 Required Level: 265 |
_______________________ Type: 1hSword Position: Right Hand Physical Attack: 50 Weapon Level: 5 Refinable Weight: 200 Required Level: 260 |
Mayhemic Thorns damage +15% _______________________ For each 2 Refine Levels: Mayhemic Thorns damage +4% ATK +1% Base ATK +20 _______________________ Refine >= 7: Critical +15 Mayhemic Thorns damage +15% _______________________ Refine >= 9: Variable Cast Time -10% CRate +7 _______________________ Refine >= 12: Critical Damage +15% Mayhemic Thorns damage +10% _______________________ Grade >= D: Critical Damage +10% Critical +5 _______________________ Grade >= C: Ranged Physical Damage +20% Variable Cast Time -5% _______________________ Grade >= B: Mayhemic Thorns damage +15% _______________________ Grade >= A: P.ATK +15 _______________________ Grade >= A / Refine >= 12: Mayhemic Thorns cooldown -0.2s Mayhemic Thorns damage +15% _______________________ Class Restrictions: Alchemist _______________________ Type: 1hSword Position: Right Hand Physical Attack: 260 Weapon Level: 5 Refinable / Gradable Weight: 270 Required Level: 265 |
Weapon cannot be broken _______________________ Class Restrictions: Mage classes, Acolyte classes, Novice, Soul Linker, and Super Novice _______________________ Type: 2hStaff Position: Right Hand Physical Attack: 100 Magic Attack: 100 Weapon Level: 5 Refinable Weight: 230 Required Level: 260 |
Weapon cannot be broken Soul Vulcan Strike damage +15% Mystery Illusion damage +15% _______________________ For each 2 Refine Levels: Soul Vulcan Strike damage +4% Mystery Illusion damage +4% MATK +1% MATK +20 _______________________ Refine >= 7: Magic damage with Ghost property +10% Magic damage with Dark property +10% Mystery Illusion damage +15% _______________________ Refine >= 9: S.MATK +7 Soul Vulcan Strike damage +15% _______________________ Refine >= 12: Soul Vulcan Strike damage +10% _______________________ Grade >= D: Magic damage with Ghost property +10% Magic damage with Dark property +10% S.MATK +7 _______________________ Grade >= C: SPL +7 Soul Vulcan Strike damage +15% _______________________ Grade >= B: Magic damage with Ghost property +10% Magic damage with Dark property +10% _______________________ Grade >= A: S.MATK +15 _______________________ Grade >= A / Refine >= 12: Soul Vulcan Strike cooldown -0.2s Mystery Illusion damage +15% Telekinesis Intense cooldown -30s _______________________ Class Restrictions: Wizard _______________________ Type: 2hStaff Position: Right Hand Physical Attack: 120 Magic Attack: 380 Weapon Level: 5 Refinable / Gradable Weight: 230 Required Level: 265 |
Class Restrictions: Priest, Sage, and Star Gladiator _______________________ Type: Book Position: Right Hand Physical Attack: 50 Magic Attack: 50 Weapon Level: 5 Refinable Weight: 200 Required Level: 260 |
Diamond Storm damage +20% Terra Drive damage +20% _______________________ For each 3 Refine Levels: Diamond Storm damage +5% Terra Drive damage +5% MATK +1% MATK +25 _______________________ Refine >= 7: Magic damage with Water property +10% Magic damage with Earth property +10% Diamond Storm damage +20% _______________________ Refine >= 9: S.MATK +7 Terra Drive damage +20% _______________________ Refine >= 12: Diamond Storm damage +15% Terra Drive damage +15% _______________________ Grade >= D: Magic damage with Water property +10% Magic damage with Earth property +10% S.MATK +7 _______________________ Grade >= C: Diamond Storm damage +15% Terra Drive damage +15% _______________________ Grade >= B: Magic damage with Water property +10% Magic damage with Earth property +10% _______________________ Grade >= A: S.MATK +15 Elemental Buster damage +25% Elemental Buster Fire damage +25% Elemental Buster Water damage +25% Elemental Buster Wind damage +25% Elemental Buster Poison damage +25% Elemental Buster Ground damage +25% _______________________ Grade >= A / Refine >= 12 / Elemental Buster Level >= 10 and Greater Elemental active: 100% chance to autocast Elemental Buster Level 10 when using Terra Drive 100% chance to autocast Elemental Buster Level 10 when using Diamond Storm _______________________ Class Restrictions: Sage _______________________ Type: Book Position: Right Hand Physical Attack: 100 Magic Attack: 260 Weapon Level: 5 Refinable / Gradable Weight: 200 Required Level: 265 |
Class Restrictions: Rebellion _______________________ Type: Rifle Position: Right Hand Physical Attack: 100 Weapon Level: 5 Refinable Weight: 260 Required Level: 260 |
Midnight Fallen damage +20% _______________________ For each 3 Refine Levels: Midnight Fallen damage +5% ATK +1% Base ATK +25 _______________________ Refine >= 7: Midnight Fallen damage +15% _______________________ Refine >= 9: Non-critical Physical Damage +15% P.ATK +7 _______________________ Refine >= 12: Midnight Fallen damage +15% _______________________ Refine >= 12 / Grade >= A / Wild Fire Level >= 5: 100% chance on using Hidden Card to trigger for 150s: Non-critical Physical Damage +15% 100% chance to autocast Wild Fire Level 5 when using Spiral Shooting For each Refine Level: Spiral Shooting damage +5% Wild Fire damage +5% _______________________ Grade >= D: Variable Cast Time -10% _______________________ Grade >= C: Non-critical Physical Damage +10% Ranged Physical Damage +15% _______________________ Grade >= B: Variable Cast Time -5% Midnight Fallen damage +10% _______________________ Grade >= A: P.ATK +15 _______________________ Grade >= A / Refine >= 12: Midnight Fallen cooldown -0.2s _______________________ Class Restrictions: Rebellion _______________________ Type: Grenade Position: Right Hand Physical Attack: 420 Weapon Level: 5 Refinable / Gradable Weight: 320 Required Level: 265 |
Class Restrictions: Priest, Sage, and Star Gladiator _______________________ Type: Book Position: Right Hand Physical Attack: 50 Magic Attack: 50 Weapon Level: 5 Refinable Weight: 200 Required Level: 260 |
Sky Moon damage +20% _______________________ For each 3 Refine Levels: Sky Moon damage +5% ATK +1% Base ATK +25 _______________________ Refine >= 7: Non-critical Physical Damage +15% Variable Cast Time -10% _______________________ Refine >= 9: Sky Moon damage +20% _______________________ Refine >= 12: Melee Physical Damage +10% _______________________ Refine >= 12 / Midnight Kick Level >= 5 and Dawn Break Level >= 5: 100% chance on using Enchanting Sky to trigger for 150s: Non-critical Physical Damage +15% 100% chance to autocast Dawn Break Level 5 when using Sky Moon 100% chance to autocast Midnight Kick Level 5 when using Dawn Break For each Refine Level: Midnight Kick damage +4% Dawn Break damage +4% _______________________ Grade >= D: Non-critical Physical Damage +10% _______________________ Grade >= C: Sky Moon damage +15% _______________________ Grade >= B: Melee Physical Damage +15% Variable Cast Time -5% _______________________ Grade >= A: P.ATK +15 _______________________ Grade >= A / Refine >= 12: Sky Moon cooldown -0.3s _______________________ Class Restrictions: Star Gladiator _______________________ Type: Book Position: Right Hand Physical Attack: 260 Weapon Level: 5 Refinable / Gradable Weight: 240 Required Level: 265 |
Weapon cannot be broken _______________________ Class Restrictions: Swordsman classes, Acolyte classes, Merchant classes, Druid, Karnos, Novice, and Super Novice _______________________ Type: Mace Position: Right Hand Physical Attack: 50 Weapon Level: 5 Refinable Weight: 270 Required Level: 260 |
Weapon cannot be broken Variable Cast Time -5% Spark Blaster damage +15% _______________________ For each 3 Refine Levels: Spark Blaster damage +5% ATK +1% Base ATK +25 _______________________ Refine >= 7: Spark Blaster damage +15% _______________________ Refine >= 9: Non-critical Physical Damage +15% P.ATK +7 _______________________ Refine >= 12: Energy Cannonade damage +20% _______________________ Refine >= 12 / Grade >= A: 100% chance on using Energy Cannonade to trigger for 30s: Spark Blaster cooldown -0.15s Non-critical Physical Damage +20% Spark Blaster damage +15% For each Refine Level: Energy Cannonade damage +8% _______________________ Grade >= D: Variable Cast Time -10% _______________________ Grade >= C: Non-critical Physical Damage +10% Ranged Physical Damage +15% _______________________ Grade >= B: Variable Cast Time -5% Spark Blaster damage +15% _______________________ Grade >= A: P.ATK +15 _______________________ Class Restrictions: Blacksmith _______________________ Type: Mace Position: Right Hand Physical Attack: 350 Weapon Level: 5 Refinable / Gradable Weight: 300 Required Level: 265 |
Class Restrictions: Assassin _______________________ Type: Katar Position: Right Hand Physical Attack: 100 Weapon Level: 5 Refinable Weight: 250 Required Level: 260 |
Critical +5 Eternal Slash damage +15% _______________________ For each 3 Refine Levels: Eternal Slash damage +5% ATK +1% Base ATK +25 _______________________ Refine >= 7: Critical Damage +20% _______________________ Refine >= 9: CRate +10 Critical +10 _______________________ Grade >= A / Refine >= 12: Eternal Slash damage +15% _______________________ Refine >= 12 / Grade >= A: 100% chance on using Cross Slash to trigger for 20s: Eternal Slash damage +15% Eternal Slash cooldown -0.15s Melee Physical Damage +15% Critical +10 For each Refine Level: Cross Slash damage +3% _______________________ Grade >= D: Critical Damage +10% Critical +5 _______________________ Grade >= C: Melee Physical Damage +15% _______________________ Grade >= B: CRate +5 Eternal Slash damage +15% _______________________ Grade >= A: P.ATK +15 _______________________ Class Restrictions: Assassin _______________________ Type: Katar Position: Right Hand Physical Attack: 340 Weapon Level: 5 Refinable / Gradable Weight: 240 Required Level: 265 |
Class Restrictions: Priest, Sage, and Star Gladiator _______________________ Type: Book Position: Right Hand Physical Attack: 50 Magic Attack: 50 Weapon Level: 5 Refinable Weight: 200 Required Level: 260 |
Critical +5 Petitio damage +15% _______________________ For each 2 Refine Levels: Petitio damage +4% ATK +1% Base ATK +20 _______________________ Refine >= 7: Critical Damage +20% _______________________ Refine >= 9: CRate +7 Critical +15 _______________________ Refine >= 12: Petitio damage +20% _______________________ Refine >= 12 / Grade >= A: 100% chance on using Effligo to trigger for 30s: Petitio cooldown -0.25s Melee Physical Damage +20% CRate +10 Critical +15 For each Refine Level: Duple Light Melee damage +85% Duple Light Magic damage +85% Effligo damage +7% _______________________ Grade >= D: Critical Damage +15% Critical +5 _______________________ Grade >= C / Petitio Level > 0: 50% chance to autocast Petitio when using Duple Light Melee 50% chance to autocast Petitio when using Duple Light Magic _______________________ Grade >= B: CRate +5 Petitio damage +15% _______________________ Grade >= A: Grants the skill Unlucky Rush Level 3 P.ATK +10 _______________________ Class Restrictions: Priest _______________________ Type: Book Position: Right Hand Physical Attack: 260 Magic Attack: 190 Weapon Level: 5 Refinable / Gradable Weight: 200 Required Level: 265 |
Class Restrictions: Bard/Dancer _______________________ Type: Musical Position: Right Hand Physical Attack: 50 Weapon Level: 5 Refinable Weight: 200 Required Level: 260 |
Variable Cast Time -5% Rhythmical Wave damage +15% _______________________ For each 2 Refine Levels: Rhythmical Wave damage +4% MATK +1% MATK +20 _______________________ Refine >= 7: Magic damage with All elements property +15% Rhythmical Wave damage +10% _______________________ Refine >= 9: Variable Cast Time -5% S.MATK +7 _______________________ Refine >= 12: Rhythmical Wave damage +15% _______________________ Refine >= 12 / Grade >= A: 100% chance on using Sound Blend to trigger for 30s: Magic damage with All elements property +15% Metallic Fury damage +40% Ignore 15% M.RES of All races except players _______________________ Grade >= D: Magic damage with All elements property +10% S.MATK +7 _______________________ Grade >= C: Rhythmical Wave damage +15% _______________________ Grade >= B: Magic damage to All elements property +10% _______________________ Grade >= A: S.MATK +15 _______________________ Class Restrictions: Bard/Dancer _______________________ Type: Musical Position: Right Hand Physical Attack: 100 Magic Attack: 260 Weapon Level: 5 Refinable / Gradable Weight: 200 Required Level: 265 |
Class Restrictions: Bard/Dancer _______________________ Type: Whip Position: Right Hand Physical Attack: 50 Weapon Level: 5 Refinable Weight: 200 Required Level: 260 |
Variable Cast Time -5% Rhythmical Wave damage +15% _______________________ For each 2 Refine Levels: Rhythmical Wave damage +4% MATK +1% MATK +20 _______________________ Refine >= 7: Magic damage with All elements property +15% Rhythmical Wave damage +10% _______________________ Refine >= 9: Variable Cast Time -5% S.MATK +7 _______________________ Refine >= 12: Rhythmical Wave damage +15% _______________________ Refine >= 12 / Grade >= A: 100% chance on using Sound Blend to trigger for 30s: Magic damage with All elements property +15% Metallic Fury damage +40% Ignore 15% M.RES of All races except players _______________________ Grade >= D: Magic damage with All elements property +10% S.MATK +7 _______________________ Grade >= C: Rhythmical Wave damage +15% _______________________ Grade >= B: Magic damage to All elements property +10% _______________________ Grade >= A: S.MATK +15 _______________________ Class Restrictions: Bard/Dancer _______________________ Type: Whip Position: Right Hand Physical Attack: 100 Magic Attack: 260 Weapon Level: 5 Refinable / Gradable Weight: 200 Required Level: 265 |
Weapon cannot be broken _______________________ Class Restrictions: Swordsman classes, Acolyte classes, Merchant classes, Druid, Karnos, Novice, and Super Novice _______________________ Type: Mace Position: Right Hand Physical Attack: 50 Weapon Level: 5 Refinable Weight: 270 Required Level: 260 |
Weapon cannot be broken Double Bowling Bash damage +20% _______________________ For each 3 Refine Levels: Double Bowling Bash damage +5% ATK +1% Base ATK +25 _______________________ Refine >= 7: Double Bowling Bash damage +15% _______________________ Refine >= 9: Non-critical Physical Damage +15% P.ATK +7 _______________________ Refine >= 12: Double Bowling Bash damage +20% _______________________ Refine >= 12 / Grade >= A: 100% chance on using Breaking Limit to trigger for 150s: Double Bowling Bash cooldown -0.2s Physical damage to All elements property +15% Non-critical Physical Damage +15% For each Refine Level: Chasing Break damage +7% _______________________ Grade >= D: Melee Physical Damage +10% P.ATK +7 _______________________ Grade >= C: Non-critical Physical Damage +15% _______________________ Grade >= B: Double Bowling Bash damage +15% _______________________ Grade >= A: Grants the skill Chasing Break Level 5 After Cast Delay -10% _______________________ Class Restrictions: Super Novice _______________________ Type: Mace Position: Right Hand Physical Attack: 280 Weapon Level: 5 Refinable / Gradable Weight: 220 Required Level: 265 |
Class Restrictions: Monk _______________________ Type: Knuckle Position: Right Hand Physical Attack: 50 Weapon Level: 5 Refinable Weight: 250 Required Level: 260 |
Second Flame damage +25% _______________________ For each 2 Refine Levels: Base ATK +20 ATK +1% Third Flame Bomb damage +4% _______________________ Refine >= 7: Max HP +7% Melee Physical Damage +15% _______________________ Refine >= 9: Third Flame Bomb damage +20% _______________________ Refine >= 12: Third Flame Bomb damage +20% _______________________ Refine >= 12 / Grade >= A: Melee Physical Damage +20% _______________________ Refine >= 12 / Grade >= A / Third Flame Bomb Level >= 5: 100% chance to autocast Third Flame Bomb Level 5 when using Second Flame _______________________ Grade >= D: P.ATK +5 Melee Physical Damage +10% _______________________ Grade >= C: Third Flame Bomb damage +15% _______________________ Grade >= B: Max HP +7% ATK +8% _______________________ Grade >= A: P.ATK +15 _______________________ Class Restrictions: Monk _______________________ Type: Knuckle Position: Right Hand Physical Attack: 260 Weapon Level: 5 Refinable / Gradable Weight: 27 Required Level: 265 |
Class Restrictions: Bard/Dancer, Hunter, and Rogue _______________________ Type: Bow Position: Right Hand Physical Attack: 100 Weapon Level: 5 Refinable Weight: 240 Required Level: 260 |
Critical +5 Crescive Bolt damage +15% _______________________ For each 3 Refine Levels: Base ATK +25 ATK +1% Crescive Bolt damage +5% _______________________ Refine >= 7: Critical Damage +20% _______________________ Refine >= 9: CRate +5 Variable Cast Time -5% _______________________ Refine >= 12: Crescive Bolt damage +15% _______________________ Refine >= 12 / Grade >= A: 100% chance on using Wild Walk to trigger for 30s: CRate +5 Ranged Physical Damage +15% Ignore 15% RES of All races except players For each Refine Level: Critical +2 _______________________ Grade >= D: Critical +5 Critical Damage +10% _______________________ Grade >= C: Variable Cast Time -10% After Cast Delay -5% _______________________ Grade >= B: CRate +5 Crescive Bolt damage +15% _______________________ Grade >= A: P.ATK +10 After Cast Delay -5% _______________________ Class Restrictions: Hunter _______________________ Type: Bow Position: Right Hand Physical Attack: 380 Weapon Level: 5 Refinable / Gradable Weight: 25 Required Level: 265 |
Weapon cannot be broken _______________________ Class Restrictions: Kagerou/Oboro _______________________ Type: Huuma Position: Right Hand Physical Attack: 100 Weapon Level: 5 Refinable Weight: 310 Required Level: 260 |
Weapon cannot be broken Red Flame Cannon damage +20% Cold Blooded Cannon damage +20% _______________________ For each 2 Refine Levels: MATK +20 MATK +1% Red Flame Cannon damage +4% Cold Blooded Cannon damage +4% _______________________ Refine >= 7: Darkening Cannon damage +20% Magic damage with Fire property +15% Magic damage with Water property +15% Magic damage with Dark property +15% _______________________ Refine >= 9: S.MATK +7 Red Flame Cannon damage +25% Cold Blooded Cannon damage +25% _______________________ Refine >= 12: Red Flame Cannon damage +25% Cold Blooded Cannon damage +25% Darkening Cannon damage +25% _______________________ Refine >= 12 / Grade >= A: 100% chance on using Melt Away to trigger for 30s: Ignore 15% M.RES of All races except players Thundering Cannon damage +30% Golden Dragon Cannon damage +30% For each Refine Level: Thundering Cannon damage +4% Golden Dragon Cannon damage +4% Magic damage with Wind property +2% Magic damage with Earth property +2% _______________________ Grade >= D: S.MATK +7 Magic damage with Fire property +10% Magic damage with Water property +10% Magic damage with Dark property +10% _______________________ Grade >= C: Red Flame Cannon damage +15% Cold Blooded Cannon damage +15% _______________________ Grade >= B: Darkening Cannon damage +10% _______________________ Grade >= A: S.MATK +10 Melt Away cooldown -1s _______________________ Class Restrictions: Kagerou/Oboro _______________________ Type: Huuma Position: Right Hand Physical Attack: 200 Magic Attack: 380 Weapon Level: 5 Refinable / Gradable Weight: 30 Required Level: 265 |
Weapon cannot be broken _______________________ Class Restrictions: Mage classes, Acolyte classes, Novice, Soul Linker, and Super Novice _______________________ Type: Staff Position: Right Hand Physical Attack: 50 Magic Attack: 50 Weapon Level: 5 Refinable Weight: 220 Required Level: 260 |
Weapon cannot be broken Talisman Of White Tiger damage +15% Talisman Of Black Tortoise damage +15% _______________________ For each 2 Refine Levels: MATK +20 MATK +1% Talisman Of White Tiger damage +4% Talisman Of Black Tortoise damage +4% _______________________ Refine >= 7: Magic damage with Water property +25% Magic damage with Wind property +25% Magic damage with Earth property +25% Magic damage with Fire property +25% Talisman Of Four Bearing God damage +25% _______________________ Refine >= 9: S.MATK +7 Variable Cast Time -10% _______________________ Refine >= 12: Talisman Of White Tiger damage +20% Talisman Of Black Tortoise damage +20% _______________________ Refine >= 12 / Grade >= A: Talisman Of White Tiger damage +25% Talisman Of Black Tortoise damage +25% Talisman Of Four Bearing God damage +25% Magic damage with Holy property +20% Magic damage with Fire property +20% Magic damage with Neutral property +20% Magic damage with Earth property +20% Magic damage with Water property +20% Magic damage with Wind property +20% Magic damage with Ghost property +20% Magic damage with Dark property +20% _______________________ Refine >= 12 / Grade >= A / Talisman Of White Tiger Level >= 5: 100% chance to autocast Talisman Of Black Tortoise Level 5 when using Talisman Of White Tiger _______________________ Grade >= D: S.MATK +7 Magic damage with Neutral property +25% Magic damage with Dark property +25% Magic damage with Ghost property +25% Magic damage with Holy property +25% _______________________ Grade >= C: Talisman Of White Tiger damage +15% Talisman Of Black Tortoise damage +15% _______________________ Grade >= B: MATK +7% S.MATK +5 _______________________ Grade >= A: S.MATK +15 _______________________ Class Restrictions: Soul Linker _______________________ Type: Staff Position: Right Hand Physical Attack: 100 Magic Attack: 270 Weapon Level: 5 Refinable / Gradable Weight: 22 Required Level: 265 |
Weapon cannot be broken _______________________ Class Restrictions: Spirit Handler _______________________ Type: Staff Position: Right Hand Physical Attack: 50 Magic Attack: 50 Weapon Level: 5 Refinable Weight: 200 Required Level: 260 |
Weapon cannot be broken Critical +5 Chulho Battering damage +15% _______________________ For each 2 Refine Levels: Base ATK +20 ATK +1% Chulho Battering damage +4% _______________________ Refine >= 7: Critical Damage +15% Chulho Battering damage +15% _______________________ Refine >= 9: Critical +10 CRate +5 _______________________ Refine >= 12: Chulho Battering damage +15% _______________________ Refine >= 12 / Grade >= A: After Cast Delay -10% Chulho Battering cooldown -0.3s 100% chance on using Howling of Chulho to trigger for 30s: CRate +5 Critical Damage +15% Ignore 15% RES of All races except players For each Refine Level: Critical +2 Ranged Physical Damage +2% _______________________ Grade >= D: Critical +5 Critical Damage +15% _______________________ Grade >= C: Chulho Battering damage +15% _______________________ Grade >= B: Ranged Physical Damage +10% _______________________ Grade >= A: P.ATK +15 _______________________ Class Restrictions: Spirit Handler _______________________ Type: Staff Position: Right Hand Physical Attack: 450 Weapon Level: 5 Refinable / Gradable Weight: 22 Required Level: 265 |
Class Restrictions: Swordsman classes, Archer classes, Merchant classes, Thief classes, Ninja classes, Druid, Karnos, Novice, Rebellion, Soul Linker, Super Novice, and Wizard _______________________ Type: Dagger Position: Right Hand Physical Attack: 50 Weapon Level: 5 Refinable Weight: 200 Required Level: 260 |
Critical +5 Pinion Shot damage +15% _______________________ For each 2 Refine Levels: Base ATK +20 ATK +1% Quill Spear damage +4% _______________________ Refine >= 7: Critical Damage +15% Quill Spear damage +15% _______________________ Refine >= 9: Critical +10 Pinion Shot damage +15% _______________________ Refine >= 12: Pinion Shot damage +15% Quill Spear damage +15% _______________________ Refine >= 12 / Grade >= A: 100% chance on using Tempest Flap to trigger for 30s: CRate +5 Ignore 15% RES of All races except players Pinion Shot damage +30% For each Refine Level: Critical +2 Ranged Physical Damage +1% _______________________ Grade >= D: Critical +5 Critical Damage +15% _______________________ Grade >= C: Quill Spear damage +15% _______________________ Grade >= B: CRate +5 After Cast Delay -10% _______________________ Grade >= A: P.ATK +15 _______________________ Class Restrictions: Alitea _______________________ Type: Dagger Position: Right Hand Physical Attack: 260 Weapon Level: 5 Refinable / Gradable Weight: 20 Required Level: 265 |