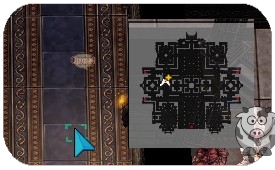
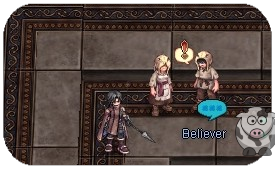
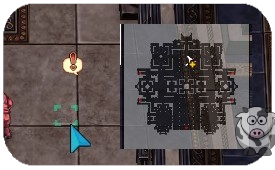
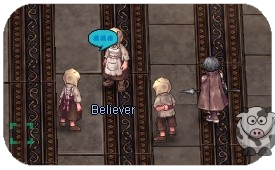
21 Age of Heroes/es: Difference between revisions
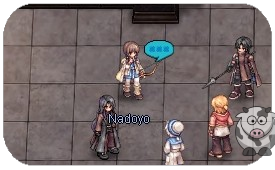
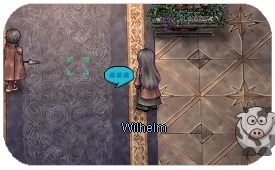
(Created page with "==Lugenburg Brothers== # Habla con Reinhardt dentro de los Barracones Centrales en {{#navi:mbase_in|118|186}}. Únete al portal directamente. # Visita a Wilhelm en {{#navi:jor_mbase|140|201}}. # Regresa a hablar con Reinhardt dentro de los Barracones Centrales. # Fuera de los barracones, Tris te está esperando en {{#navi:jor_mbase|197|277}}. # Habla con Reinhardt junto a él. # Habla con Wilhelm. # Habla una vez más con Tris. Serás recompensado con 10x {{#item:1001618...") |
(Updating to match new version of source page) |
||
| (38 intermediate revisions by 2 users not shown) | |||
| Line 1: | Line 1: | ||
<languages/> | <languages/> | ||
=Quest | =Quest Principal= | ||
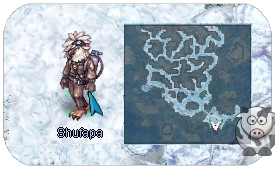
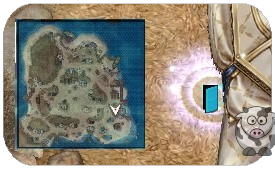
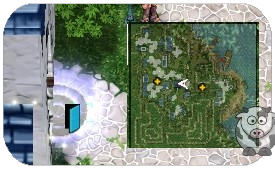
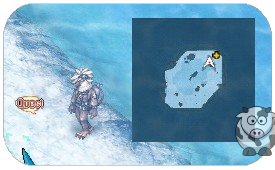
# En {{#navi:jor_tail|233|41}} encuentras a Shufapa. Él explica que planeaban investigar el Scale y te pide que los acompañes. La razón es una inusual longitud de onda de maná en esa isla. | # En {{#navi:jor_tail|233|41}} encuentras a Shufapa. Él explica que planeaban investigar el Scale y te pide que los acompañes. La razón es una inusual longitud de onda de maná en esa isla. | ||
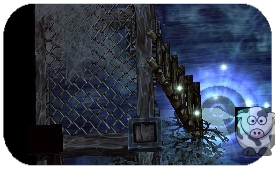
#; [[File:EP21_1.png]] | #; [[File:EP21_1.png]] | ||
| Line 20: | Line 20: | ||
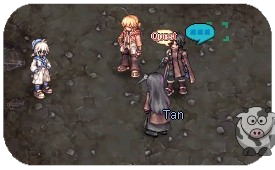
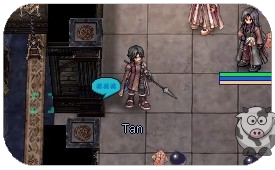
# Habla con Tan, quien fue ordenado para llevarte al Richard Mercenary Group. Está claramente en contra de que seamos parte de la resistencia. Dile que "Iremos de inmediato." | # Habla con Tan, quien fue ordenado para llevarte al Richard Mercenary Group. Está claramente en contra de que seamos parte de la resistencia. Dile que "Iremos de inmediato." | ||
#; [[File:EP_21_7.png]] | #; [[File:EP_21_7.png]] | ||
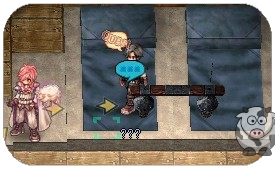
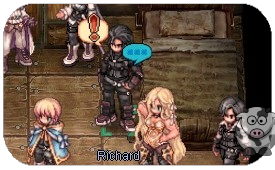
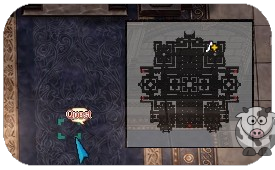
# Sigue el navi hasta {{#navi:jor_mbase|305|102}}. Hasta que aparezcan todos. Tan nos muestra dónde está la oficina del grupo de mercenarios y que necesitamos encontrar a Richard allí. | | # Sigue el navi hasta {{#navi:jor_mbase|305|102}}. Hasta que aparezcan todos. Tan nos muestra dónde está la oficina del grupo de mercenarios y que necesitamos encontrar a Richard allí. | HAZ SCREENSHOT ANTES DE ENTRAR!! | ||
#; [[File:EP_21_MISSING.png]] | #; [[File:EP_21_MISSING.png]] | ||
# Debes ir a la oficina del grupo de mercenarios, donde no hay nadie. De repente encuentras a un hombre misterioso. Lehar te envía a hablar con él. | # Debes ir a la oficina del grupo de mercenarios, donde no hay nadie. De repente encuentras a un hombre misterioso. Lehar te envía a hablar con él. | ||
| Line 67: | Line 67: | ||
#; [[File:EP_21_23.png]] | #; [[File:EP_21_23.png]] | ||
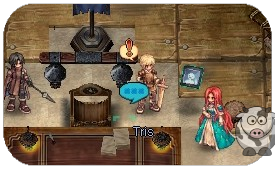
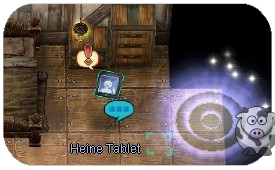
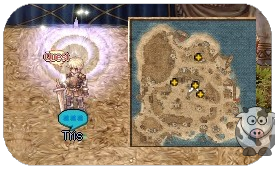
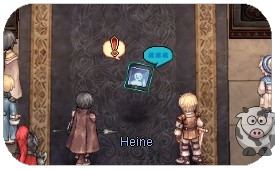
# Habla con Tris. Nos pregunta cómo nos fue. Después de explicar, nos dice que Alberta necesita un mago y que Nillem debería unirse a ellos. A Lehar lo enviarán al Grupo Mercante Wigner, que está ayudando a los refugiados que escaparon del culto. En nuestro caso, primero debemos conocer a alguien. Conocemos a Heine a través de una Tablet mágica (inserte broma sobre Handy aquí). Al conocer a Heine, nuestra tarea será ir a Alberta y recibir mercancías que Heine envió a la resistencia. Además, Heine quiere obtener de nosotros un Ojo Brillante especial. Debe ser uno fresco, recolectado por nosotros, no uno sacado del almacén. Hay 4 diálogos en total y debes seleccionar opciones específicas: | # Habla con Tris. Nos pregunta cómo nos fue. Después de explicar, nos dice que Alberta necesita un mago y que Nillem debería unirse a ellos. A Lehar lo enviarán al Grupo Mercante Wigner, que está ayudando a los refugiados que escaparon del culto. En nuestro caso, primero debemos conocer a alguien. Conocemos a Heine a través de una Tablet mágica (inserte broma sobre Handy aquí). Al conocer a Heine, nuestra tarea será ir a Alberta y recibir mercancías que Heine envió a la resistencia. Además, Heine quiere obtener de nosotros un Ojo Brillante especial. Debe ser uno fresco, recolectado por nosotros, no uno sacado del almacén. Hay 4 diálogos en total y debes seleccionar opciones específicas: | ||
#;* Primer diálogo: | #;* Primer diálogo: "Bearable." | ||
#;* Segundo diálogo: " | #;* Segundo diálogo: "Is that person you, Tris?" | ||
#;* Tercer diálogo: | #;* Tercer diálogo: "Enjoy the text." | ||
#;* Cuarto diálogo: Se activa misión de matar 10x Skipskipper y recolectar 1x {{#item:1001641}}. | #;* Cuarto diálogo: Se activa misión de matar 10x Skipskipper y recolectar 1x {{#item:1001641}}. | ||
#; [[File:EP_21_24.png]] | #; [[File:EP_21_24.png]] | ||
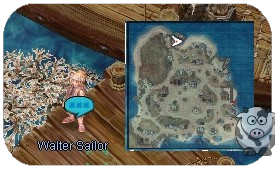
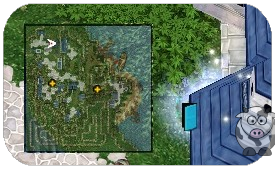
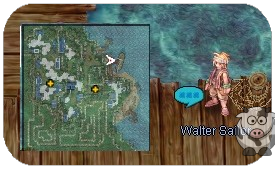
# Ve con el | # Ve con el Walter Sailor en {{#navi:jor_mbase|161|341}} y dirígete a Raised Land. Ahí puedes realizar la misión de matar. | ||
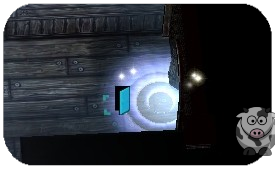
#; [[File:EP_21_25.png]] | #; [[File:EP_21_25.png]] | ||
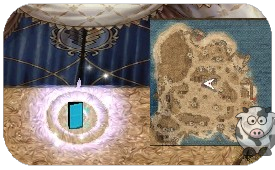
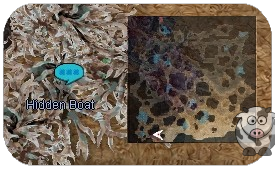
# Para volver, puedes hablar con | # Para volver, puedes hablar con 'Hidden Boat' en la esquina inferior izquierda del mapa. | ||
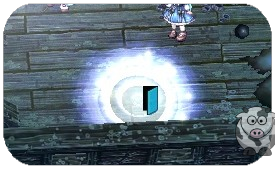
#; [[File:EP_21_25A.png]] | #; [[File:EP_21_25A.png]] | ||
# Regresa con Tris y recibirás como recompensa 30x {{#item:1001618}} + 35 de reputación. | # Regresa con Tris y recibirás como recompensa 30x {{#item:1001618}} + 35 de reputación. | ||
#; Desbloqueas las misiones diarias de Volunteer Vallen Wok y de Counselor Wool. | #; Desbloqueas las misiones diarias de Volunteer Vallen Wok y de Counselor Wool. | ||
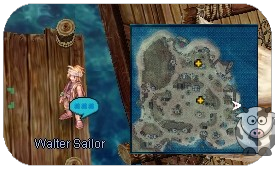
# Ve al otro | # Ve al otro Walter Sailor en {{#navi:jor_mbase|333|148}}, él te llevará a Alberta. | ||
#; [[File:EP_21_26.png]] | #; [[File:EP_21_26.png]] | ||
# Camina un poco hacia arriba y habla con Nillem. Verás cómo Nillem es sobrecargado de trabajo por el marinero. Luego de intervenir en la conversación, el marinero se presenta como Megas. Nos obliga a buscar trabajo en la playa, ignorando nuestras peticiones. | # Camina un poco hacia arriba y habla con Nillem. Verás cómo Nillem es sobrecargado de trabajo por el marinero. Luego de intervenir en la conversación, el marinero se presenta como Megas. Nos obliga a buscar trabajo en la playa, ignorando nuestras peticiones. | ||
| Line 84: | Line 84: | ||
# {{#navi:jor_albe|227|117}} Entra en el símbolo de misión, aparecerá Yohan. Él te asignará mover cargas a lugares específicos marcados en el mapa. | # {{#navi:jor_albe|227|117}} Entra en el símbolo de misión, aparecerá Yohan. Él te asignará mover cargas a lugares específicos marcados en el mapa. | ||
#; [[File:EP_21_28.png]] [[File:EP_21_29.png]] | #; [[File:EP_21_28.png]] [[File:EP_21_29.png]] | ||
# Visita al | # Visita al Walter Sailor en {{#navi:jor_albe|146|224}}. Él te explica que todos deben hacer estos trabajos, como un sistema de jerarquía donde todos empiezan igual. | ||
#; [[File:EP_21_30.png]] | #; [[File:EP_21_30.png]] | ||
# Hay otro | # Hay otro Walter Sailor esperando dentro de un edificio en {{#navi:jor_albe|120|145}}. | ||
#; [[File:EP_21_31.png]] | #; [[File:EP_21_31.png]] | ||
# Entra en el edificio, sube, y habla con el | # Entra en el edificio, sube, y habla con el Walter Sailor. | ||
#; [[File:EP_21_32.png]] | #; [[File:EP_21_32.png]] | ||
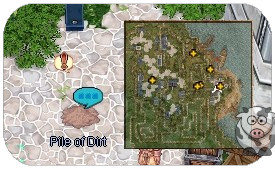
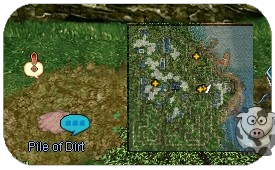
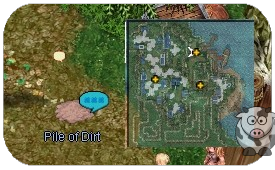
# Regresa con Yohan {{#navi:jor_albe|227|117}}. Con tanto movimiento de mercancías, la ciudad se ha ensuciado. Debes limpiar 4 montones de suciedad. | # Regresa con Yohan {{#navi:jor_albe|227|117}}. Con tanto movimiento de mercancías, la ciudad se ha ensuciado. Debes limpiar 4 montones de suciedad. | ||
| Line 117: | Line 117: | ||
#; [[File:EP_21_31.png]] [[File:EP_21_31A.png]] | #; [[File:EP_21_31.png]] [[File:EP_21_31A.png]] | ||
# Recompensa: 40x {{#item:1001618}} + 40 de reputación. | # Recompensa: 40x {{#item:1001618}} + 40 de reputación. | ||
# Regresa a | # Regresa a Lunaphoma y habla con el Walter Sailor en {{#navi:jor_albe|194|200}}. | ||
#; [[File:EP_21_42.png]] | #; [[File:EP_21_42.png]] | ||
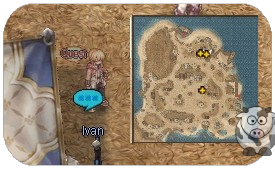
# Habla con Ivan en {{#navi:jor_mbase|240|277}}. Pregunta sobre el barco fantasma, pero en lugar de información, te asignan ayudar con la comida. | # Habla con Ivan en {{#navi:jor_mbase|240|277}}. Pregunta sobre el barco fantasma, pero en lugar de información, te asignan ayudar con la comida. | ||
| Line 129: | Line 129: | ||
# Habla con Ivan en {{#navi:jor_mbase|237|281}}. Él menciona que quiere unirse a la misión del barco fantasma, pero primero debes entregar un paquete a su hermana en Alberta. | # Habla con Ivan en {{#navi:jor_mbase|237|281}}. Él menciona que quiere unirse a la misión del barco fantasma, pero primero debes entregar un paquete a su hermana en Alberta. | ||
#; [[File:EP_21_47.png]] | #; [[File:EP_21_47.png]] | ||
# Ve con el | # Ve con el Walter Sailor {{#navi:jor_mbase|333|148}} para viajar de nuevo a Alberta. | ||
#; [[File:EP_21_26.png]] | #; [[File:EP_21_26.png]] | ||
# Entra en el edificio en {{#navi:jor_albe|100|238}}. | # Entra en el edificio en {{#navi:jor_albe|100|238}}. | ||
| Line 141: | Line 141: | ||
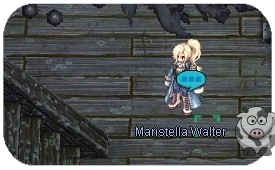
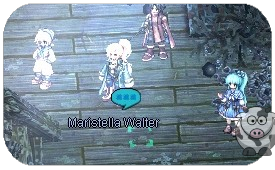
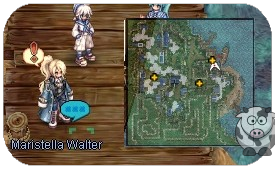
# Habla con Maristella Walter y entrégale la carta. Ella solo sonríe. Recompensa: 10x {{#item:1001618}} + 5 de reputación. | # Habla con Maristella Walter y entrégale la carta. Ella solo sonríe. Recompensa: 10x {{#item:1001618}} + 5 de reputación. | ||
#; [[File:EP_21_52.png]] | #; [[File:EP_21_52.png]] | ||
# Regresa a | # Regresa a Lunaphoma y habla con el Walter Sailor en {{#navi:jor_albe|194|200}}. | ||
#; [[File:EP_21_42.png]] | #; [[File:EP_21_42.png]] | ||
# Habla con Ivan en {{#navi:jor_mbase|237|281}}. Él sugiere infiltrarse por el norte de Raised Land y encontrarse allí. Recompensa: 40x {{#item:1001618}} + 40 de reputación. | # Habla con Ivan en {{#navi:jor_mbase|237|281}}. Él sugiere infiltrarse por el norte de Raised Land y encontrarse allí. Recompensa: 40x {{#item:1001618}} + 40 de reputación. | ||
#; [[File:EP_21_47.png]] | #; [[File:EP_21_47.png]] | ||
# Ve al | # Ve al Walter Sailor {{#navi:jor_mbase|161|341}} para ir a Raised Land. | ||
#; [[File:EP_21_25.png]] | #; [[File:EP_21_25.png]] | ||
# Sal del mapa por el portal superior. | # Sal del mapa por el portal superior. | ||
| Line 177: | Line 177: | ||
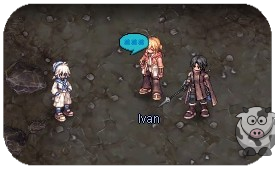
# Habla con Ivan. Ivan y Yohan llegaron a la misma conclusión: sin información no podemos avanzar. Se dice que primero necesitamos más información sobre el lugar. | # Habla con Ivan. Ivan y Yohan llegaron a la misma conclusión: sin información no podemos avanzar. Se dice que primero necesitamos más información sobre el lugar. | ||
#; [[File:EP_21_58.png]] | #; [[File:EP_21_58.png]] | ||
# Regresa a | # Regresa a Lunaphoma (posiblemente usando @go). | ||
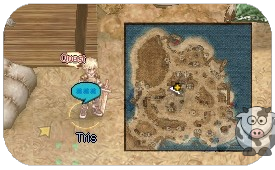
# Habla con Tris en {{#navi:jor_mbase|142|264}}. Tris está un poco frustrado porque no encontramos humanos que quisieran escapar ni información sobre el barco fantasma. Pero pronto llegará alguien con información interna, así que nos reuniremos con él. Recompensa: 15x {{#item:1001618}} + 15 reputación. | # Habla con Tris en {{#navi:jor_mbase|142|264}}. Tris está un poco frustrado porque no encontramos humanos que quisieran escapar ni información sobre el barco fantasma. Pero pronto llegará alguien con información interna, así que nos reuniremos con él. Recompensa: 15x {{#item:1001618}} + 15 reputación. | ||
#; [[File:EP_21_65.png]] | #; [[File:EP_21_65.png]] | ||
| Line 186: | Line 186: | ||
# Habla con Ivan, quien tiene una idea de qué persona encaja perfectamente con las condiciones, pero le preocupa ese pensamiento. | # Habla con Ivan, quien tiene una idea de qué persona encaja perfectamente con las condiciones, pero le preocupa ese pensamiento. | ||
#; [[File:EP_21_68.png]] | #; [[File:EP_21_68.png]] | ||
# Regresa a | # Regresa a Lunaphoma, hablando con el bote pequeño. | ||
#; [[File:EP_21_69.png]] | #; [[File:EP_21_69.png]] | ||
# Habla con Ivan en {{#navi:jor_mbase|163|295}}. Nos reunimos con Wilhelm, quien no quiere unirse a la misión. Después de que Tan menciona la razón por la que Wilhelm trabaja allí y con algo de persuasión, acepta infiltrarse en el templo para conseguir información sobre el barco fantasma y encontrar personas que quieran escapar. | # Habla con Ivan en {{#navi:jor_mbase|163|295}}. Nos reunimos con Wilhelm, quien no quiere unirse a la misión. Después de que Tan menciona la razón por la que Wilhelm trabaja allí y con algo de persuasión, acepta infiltrarse en el templo para conseguir información sobre el barco fantasma y encontrar personas que quieran escapar. | ||
#; [[File:EP_21_70.png]] | #; [[File:EP_21_70.png]] | ||
# Ve con el | # Ve con el Walter Sailor en {{#navi:jor_mbase|161|341}} y viaja a Raised Land. | ||
#; [[File:EP_21_25.png]] | #; [[File:EP_21_25.png]] | ||
# Sal del mapa por el portal superior. | # Sal del mapa por el portal superior. | ||
| Line 210: | Line 210: | ||
# Habla con Tan, quien te teletransportará a una nueva sala. | # Habla con Tan, quien te teletransportará a una nueva sala. | ||
#; [[File:EP_21_75.png]] | #; [[File:EP_21_75.png]] | ||
# Habla con Wilhelm, quien pregunta a los | # Habla con Wilhelm, quien pregunta a los Believers por Charmigand. No saben dónde está, pero dan pistas para buscar en la sala interior de oración. Wilhelm aprovecha para preguntar por alguien llamado Reinhard, la persona que está buscando. Después del diálogo, serás transportado afuera. | ||
#; [[File:EP_21_76.png]] | #; [[File:EP_21_76.png]] | ||
# Habla con Tan en la nueva ubicación. | # Habla con Tan en la nueva ubicación. | ||
| Line 216: | Line 216: | ||
# Habla con Tan para ser transportado a otra sala de oración. | # Habla con Tan para ser transportado a otra sala de oración. | ||
#; [[File:EP_21_78.png]] | #; [[File:EP_21_78.png]] | ||
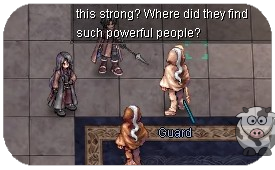
# Habla con los | # Habla con los Believers que se quejan de su tiempo en el templo. Quieren escapar y Wilhelm les ofrece una salida. Pero aparecen guardias sospechando del ruido y prohibiendo reuniones de más de dos personas. Te atacarán. | ||
#; [[File:EP_21_79.png]] | #; [[File:EP_21_79.png]] | ||
# Mata a los guardianes. | # Mata a los guardianes. | ||
| Line 237: | Line 237: | ||
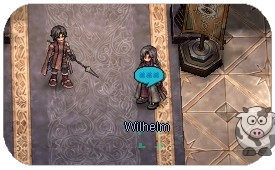
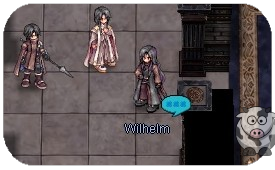
# Serás transportado nuevamente a una sala de predicadores, habla con Wilhelm (¿o camina un poco hacia arriba?). Charmigand aparecerá y aprenderás que Charmigand es en realidad Reinhardt, el chico que Wilhelm está buscando. Ambos son hermanos, sus padres murieron, y Wilhelm está feliz de encontrarlo finalmente, pero también decepcionado de que se haya convertido en un alto sacerdote de este templo. Charmigand explica que en esa sala hay un pasaje secreto que nadie de la iglesia conoce y necesitamos encontrarlo para escapar. | # Serás transportado nuevamente a una sala de predicadores, habla con Wilhelm (¿o camina un poco hacia arriba?). Charmigand aparecerá y aprenderás que Charmigand es en realidad Reinhardt, el chico que Wilhelm está buscando. Ambos son hermanos, sus padres murieron, y Wilhelm está feliz de encontrarlo finalmente, pero también decepcionado de que se haya convertido en un alto sacerdote de este templo. Charmigand explica que en esa sala hay un pasaje secreto que nadie de la iglesia conoce y necesitamos encontrarlo para escapar. | ||
#; [[File:EP_21_87.png]] | #; [[File:EP_21_87.png]] | ||
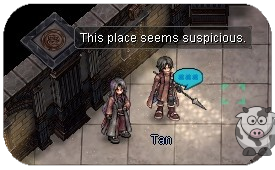
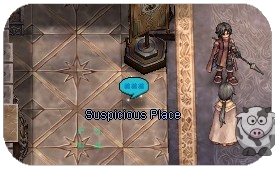
# Aparecerán | # Aparecerán 'Suspicious Place'. Haz clic en todos ellos hasta dar con el correcto y ser transportado fuera. | ||
#; [[File:EP_21_88.png]] | #; [[File:EP_21_88.png]] | ||
# Habla con Wilhelm, quien está confundido sobre por qué el pasaje es como una maza. Charmigand explica que cada sala de oración está conectada y necesitamos encontrar la correcta para escapar. | # Habla con Wilhelm, quien está confundido sobre por qué el pasaje es como una maza. Charmigand explica que cada sala de oración está conectada y necesitamos encontrar la correcta para escapar. | ||
| Line 249: | Line 249: | ||
#; [[File:EP_21_91.png]] | #; [[File:EP_21_91.png]] | ||
# Mata a los 3 guardianes que Hyasagand manda para capturar a Charmigand. | # Mata a los 3 guardianes que Hyasagand manda para capturar a Charmigand. | ||
# Habla con Wilhelm. Los | # Habla con Wilhelm. Los Believers son testigos de lo que sucede, y Hyasagand distorsiona las palabras para que Charmigand parezca el villano. Mata a los 9 guardianes para progresar. | ||
# Habla con Tan. Ivan y los demás aparecen con los | # Habla con Tan. Ivan y los demás aparecen con los Believers para escapar. Hyasagand se retira por ahora. Charmigand da un discurso a su gente para que lo sigan, aunque haya causado mucho dolor. Aparecerá un portal, entra en él para salir de la instancia. | ||
#; [[File:EP_21_92.png]] | #; [[File:EP_21_92.png]] | ||
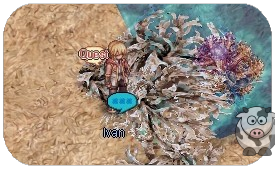
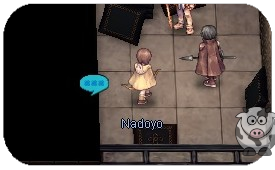
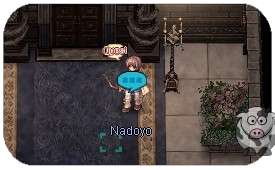
# Serás transportado de vuelta al punto seguro, entra en el arbusto y encontrarás a Nayado y los demás dentro. Ivan explica lo que sucedió dentro y Nadoyo no está sorprendida de cómo resultó todo. Charmigand le prometió que no cometería los mismos errores dos veces. Obtendrás 20x {{#item:1001618}} + 20 reputación. | # Serás transportado de vuelta al punto seguro, entra en el arbusto y encontrarás a Nayado y los demás dentro. Ivan explica lo que sucedió dentro y Nadoyo no está sorprendida de cómo resultó todo. Charmigand le prometió que no cometería los mismos errores dos veces. Obtendrás 20x {{#item:1001618}} + 20 reputación. | ||
#; [[File:EP_21_93.png]] | #; [[File:EP_21_93.png]] | ||
# Regresa a | # Regresa a Lunaphoma y habla con Tris {{#navi:jor_mbase|149|270}}. Él saluda a todas las nuevas personas que escaparon del culto. Están un poco inseguras del lugar, pero Tris hizo un discurso claro sobre el lugar y su propósito. Los antiguos Believers piden justicia por la traición de Charmigand, por lo que Tris decidió hablar en privado mientras Ivan les muestra las tierras aquí. | ||
#; [[File:EP_21_94.png]] | #; [[File:EP_21_94.png]] | ||
# Regresa al cuartel central {{#navi:jor_mbase|203|190}}. Entra al portal. | # Regresa al cuartel central {{#navi:jor_mbase|203|190}}. Entra al portal. | ||
| Line 280: | Line 280: | ||
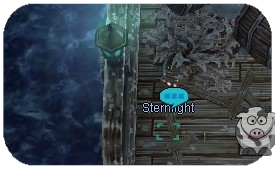
# Camina a la izquierda, mata a la tripulación del Barco Fantasma y aparecerá un Sternlight. Te resultará familiar, pero no es lo mismo que María recuerda. | # Camina a la izquierda, mata a la tripulación del Barco Fantasma y aparecerá un Sternlight. Te resultará familiar, pero no es lo mismo que María recuerda. | ||
#; [[File:EP_21_102.png]] | #; [[File:EP_21_102.png]] | ||
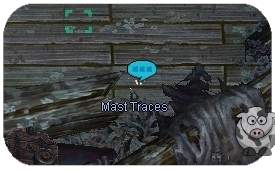
# Camina a la derecha y haz clic en las | # Camina a la derecha y haz clic en las 'Mast Traces'. María encuentra marcas de cuando era más joven. | ||
#; [[File:EP_21_103.png]] | #; [[File:EP_21_103.png]] | ||
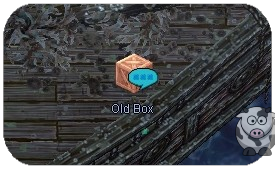
# Camina hacia arriba por el lado derecho y haz clic en la | # Camina hacia arriba por el lado derecho y haz clic en la 'Old Box'. Dentro de la caja encuentras juguetes de madera antiguos, que son de Howell para su hija. | ||
#; [[File:EP_21_104.png]] | #; [[File:EP_21_104.png]] | ||
# Camina hacia abajo y mata nuevamente a la tripulación del Barco Fantasma, aparecerá un portal. | # Camina hacia abajo y mata nuevamente a la tripulación del Barco Fantasma, aparecerá un portal. | ||
#; [[File:EP_21_105.png]] | #; [[File:EP_21_105.png]] | ||
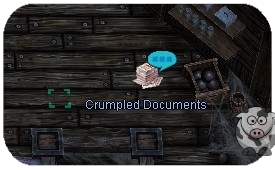
# Mata nuevamente a la tripulación del Barco Fantasma y haz clic en los | # Mata nuevamente a la tripulación del Barco Fantasma y haz clic en los 'Crumpled Documents', que son ilegibles. Ni Yohan puede leer lo que está en los papeles, que están manchados por el agua de mar. ¡ANTES DE ENTRAR AL PORTAL! | ||
#; [[File:EP_21_106.png]] | #; [[File:EP_21_106.png]] | ||
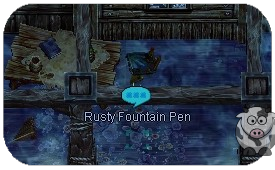
# Encuentra la | # Encuentra la 'Rusty Fountain Pen' en {{#navi:1@wtgs|184|121}}. Yohan reconoce esa pluma y con eso es seguro que este barco trata sobre eso. | ||
#; [[File:EP_21_107.png]] | #; [[File:EP_21_107.png]] | ||
# Mata a la tripulación del Barco Fantasma al otro lado. | # Mata a la tripulación del Barco Fantasma al otro lado. | ||
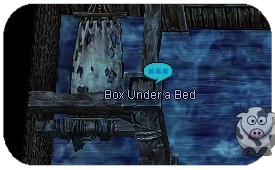
# Sigue el camino hasta que encuentres la | # Sigue el camino hasta que encuentres la 'Box Under a Bed'. {{#navi:1@wtgs|149|127}}. Encuentras un diario donde dice que después de que María escapa, aparece una extraña figura que concede un deseo. Después de ese deseo, todo se convirtió en este barco, las memorias se desvanecen y los miembros de la tripulación se convierten en monstruos. Ahora sabemos que este barco es el barco que María estaba buscando. | ||
#; [[File:EP_21_BOX_UNDER.png]] | #; [[File:EP_21_BOX_UNDER.png]] | ||
# Busca al resto de la tripulación del Barco Fantasma y mátalos. | # Busca al resto de la tripulación del Barco Fantasma y mátalos. | ||
| Line 310: | Line 310: | ||
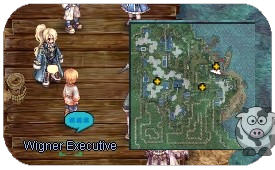
# Aparecerá el Ejecutivo Wigner, habla con él. Él te dice que tiene los bienes que Heine nos envió. Ahora que hemos terminado, deberíamos regresar a Lunaphoma y hablar nuevamente con la tableta. Obtendrás 70x {{#item:1001618}} + 90 reputación. | # Aparecerá el Ejecutivo Wigner, habla con él. Él te dice que tiene los bienes que Heine nos envió. Ahora que hemos terminado, deberíamos regresar a Lunaphoma y hablar nuevamente con la tableta. Obtendrás 70x {{#item:1001618}} + 90 reputación. | ||
#; [[File:EP_21_113.png]] | #; [[File:EP_21_113.png]] | ||
#;* Se desbloquea la instancia diaria | #;* Se desbloquea la instancia diaria 'Ghost Ship'. | ||
# Regresa al cuartel central {{#navi:jor_mbase|203|190}}. Entra al portal. | # Regresa al cuartel central {{#navi:jor_mbase|203|190}}. Entra al portal. | ||
#; [[File:EP21_9.png]] | #; [[File:EP21_9.png]] | ||
| Line 350: | Line 350: | ||
# Dentro, habla con Nayado. Ellos se prepararon para algo dentro de la iglesia, una habitación que ni Reinhard conoce. Así que antes de regresar a Tris, vamos con ellos a la iglesia para verificarla o buscar más evidencia sobre la serpiente gigante. | # Dentro, habla con Nayado. Ellos se prepararon para algo dentro de la iglesia, una habitación que ni Reinhard conoce. Así que antes de regresar a Tris, vamos con ellos a la iglesia para verificarla o buscar más evidencia sobre la serpiente gigante. | ||
#; [[File:EP_21_122.png]] | #; [[File:EP_21_122.png]] | ||
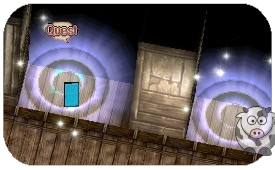
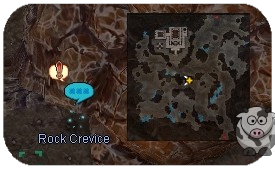
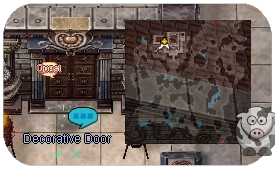
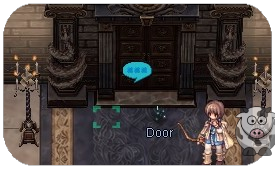
# Debes verificar la | # Debes verificar la 'Decorative Door' en {{#navi:jor_raise1|128|323}}. | ||
#; [[File:EP_21_123.png]] | #; [[File:EP_21_123.png]] | ||
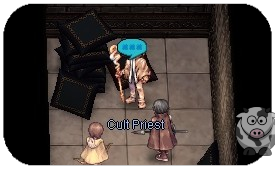
# Dentro del edificio, habla con | # Dentro del edificio, habla con 'Cult Priest'. El sacerdote confirma nuestro temor, algo está comiendo personas al absorber su mana para volverse más y más fuerte. Tan y Reinhard quieren ir adelante y enfrentarlo mientras nosotros y Nadoyo regresamos y le informamos a Tris. | ||
#; [[File:EP_21_124.png]] | #; [[File:EP_21_124.png]] | ||
# Habla con Nayado, ella te llevará de vuelta a Lunaform. | # Habla con Nayado, ella te llevará de vuelta a Lunaform. | ||
| Line 366: | Line 366: | ||
# Deja el mapa por el portal superior. | # Deja el mapa por el portal superior. | ||
#; [[File:EP_21_53.png]] | #; [[File:EP_21_53.png]] | ||
# Debes ingresar nuevamente a la | # Debes ingresar nuevamente a la 'Decorative Door' en {{#navi:jor_raise1|128|323}}. | ||
#; [[File:EP_21_123.png]] | #; [[File:EP_21_123.png]] | ||
# Habla con Nayado. Tris y Nadoyo se sorprenden de verte allí, pero Heine interviene y explica que necesita ayuda y solo nosotros podemos hacerlo. | # Habla con Nayado. Tris y Nadoyo se sorprenden de verte allí, pero Heine interviene y explica que necesita ayuda y solo nosotros podemos hacerlo. | ||
| Line 383: | Line 383: | ||
#; [[File:EP_21_132.png]] | #; [[File:EP_21_132.png]] | ||
# Fuera de la instancia, habla nuevamente con Nyan, quien nos lleva a una nueva área. | # Fuera de la instancia, habla nuevamente con Nyan, quien nos lleva a una nueva área. | ||
#; <span style="color: rgb(205, 38, 38);" >Nota: Si fallas la instancia o te teletransportas por accidente, usa este navilink para volver aquí: {{#navi:jor_tmple1|170|307}} Habla con la Puerta Decorativa para entrar.</span> | |||
#; [[File:EP_21_133.png]] | #; [[File:EP_21_133.png]] | ||
# Serás teletransportado, habla nuevamente con Nyan. Nillem y Lehar encuentran una habitación sospechosa con un libro. Nillen nos recuerda por qué estamos aquí y debemos investigar presionando este libro primero. | # Serás teletransportado, habla nuevamente con Nyan. Nillem y Lehar encuentran una habitación sospechosa con un libro. Nillen nos recuerda por qué estamos aquí y debemos investigar presionando este libro primero. | ||
| Line 429: | Line 430: | ||
# Al hablar con Mandel en {{#navi:jor_mbase|210|173}}, puedes desbloquear las misiones diarias para el Abastecimiento de Suministros. | # Al hablar con Mandel en {{#navi:jor_mbase|210|173}}, puedes desbloquear las misiones diarias para el Abastecimiento de Suministros. | ||
==Lugenburg Brothers== | <div lang="en" dir="ltr" class="mw-content-ltr"> | ||
=Main Quest= | |||
# At {{#navi:jor_tail|233|41}} you will find Shufapa. He explains to us, that they plan to investigate Scale Island and asks you to come along. The reason for that is an unusual mana wavelength on the island. | |||
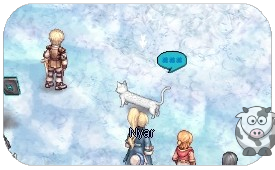
#; [[File:EP21_1.png]] | |||
# {{#navi:jor_crk|137|137}} A dialogue opens and Nillen confirms that the wavelength is really unusual. Lehar spotted Nyar on the island so everyone decides to see what's up with her. | |||
#; [[File:EP_21_2.png]] | |||
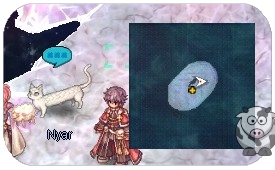
# {{#navi:jor_crk|107|112}} Talk to Nyar. Aurelie, Lehar, and Nillem will appear. The reason for the mana wavelength comes from a rift that opened. Not only that, the dimensional boundaries and time and parallel dimensions are collapsing because of the rift. Nyar points out that this rift leads to the past, which gives us a way to deal with Lasgand. Nyar will connect the rift to a specific point in time, where Lasgand got his power. The option you pick doesn't matter in the end. | |||
#; [[File:EP_21_3.png]] | |||
# You get warped to {{#navi:jor_crk_p|108|106}}. Talk to Nyar again. Lehar and Nillem will appear. Nillem points out that we are indeed in the past where the rift opened. It's the time where the foundation of Rune-Midgarts happens. This is also the time where Lasgand got the power inherited and a plan gets created how to alter the past to stop Lasgand. Lehar spots people and everyone decides to approach them as volunteers for the resistance against the Jormungandr Cult. | |||
#; [[File:EP_21_3A.png]] | |||
# In {{#navi:jor_crk_p|104|95}} people appear who found out about the rift. Those are against the cult, but they spotted you. He ask us what we are doing here, so were telling him that "We're Adventurers". After clearing up that we are on their side, the stranger introduces himself as Ivan from the Wigner family. So we follow him. | |||
# You will be warped to a Safe Place in {{#navi:luna_sf1|258|147}}. Talk to Ivan, he tells us that we are near the cult, in the Raised Land. But instead of attacking the cult, we are on the way to the base of Gaebolg, Lunaphoma. You follow the soldier to the commander. | |||
#; [[File:EP_21_4.png]] | |||
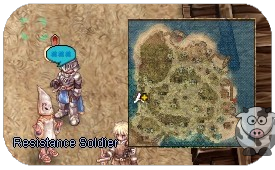
# Talk to the Resistance Soldier in {{#navi:jor_mbase|38|152}} who introduces you to Lunaphoma. Before going to the headquarters, he needs to report something to the commander and vice-commander. Followers of Freya are complaining and Lehar suggested to listen in to hear what's the fuss. | |||
#; [[File:EP_21_5.png]] | |||
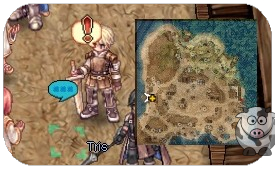
# Talk to Tris. You hear that the people of Freya complain that the fight against the cult is lead in the name of Odin and they want Freya to be included as well. Tris explains the difficult time and that they didn't forget about the people of Freya, but also mentions that they need more time because the war against the cult is top priority. But the people of Freya are unhappy and decide to leave the resistance. | |||
#; [[File:EP_21_6.png]] | |||
# Talk to the Resistance Soldier again who introduce us to the captains. After explaining the situation, Tris wants to send you to the Richard Mercenary Group, because people with combat skills are always needed there. | |||
#; [[File:EP_21_5.png]] | |||
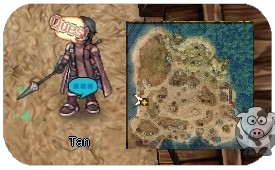
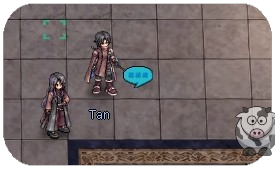
# Talk to Tan who got ordered to bring you to the Richard Mercenary Group. He is clearly against us being part of the resistance. Tell him that "We'll go right away." | |||
#; [[File:EP_21_7.png]] | |||
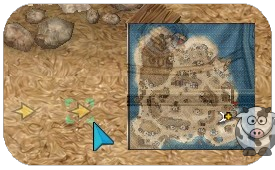
# Follow the navi {{#navi:jor_mbase|305|102}} until everyone appears. Tan shows us where the mercenary group's office is and that we need to find a Richard there. | |||
#; [[File:EP_21_MISSING.png]] | |||
# You have to go to the mercenary group's office, but no one is here. Suddenly you find a mysterious man. Lehar sends you to speak to him. | |||
# Walk into the portal above those NPCs. | |||
#; [[File:EP21_Mercenary.png]] | |||
# Talk to ???. We tell him that we are here to see the Mercenary King Richard. We also add that Tan sent us to this place. According to the mysterious man, Richard is not here and that we need to go to the Central Barracks where Richard's room is. | |||
#; [[File:EP_21_8.png]] | |||
# You have to search for Richard's room {{#navi:jor_mbase|203|190}}. Check his room. | |||
#; [[File:EP21_9.png]] | |||
# Go upstairs and right and enter the second to last portal where Richard room lies. But no ones here, so we check the next door. After a warning a woman appears and asks us what brings us to Richard. We explain that Tan sent us. | |||
#; [[File:EP21_10.png]] [[File:EP21_10A.png]] | |||
# They will sent you back to the Mercenary Group's Office {{#navi:jor_mbase|313|121}}. | |||
#; [[File:EP21_Mercenary.png]] | |||
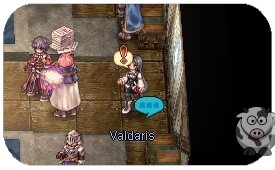
# When entering the office, a dialogue will start. You hear that Richard is not here. The lady, Valdaris, explains that we need to go through the registration process first. | |||
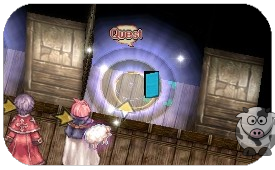
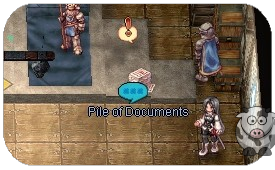
# Talk to the documents where you find the papers for the applications. You get explained that they are still using the old forms and they are not for applying to only one mercenary group. | |||
#; [[File:EP_21_12.png]] | |||
# Talk to Valdaris to give her your form. After reviewing the forms we get welcomed to the the Richard Mercenary Group. | |||
#; [[File:EP_21_13.png]] | |||
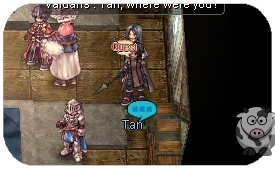
# Talk to Tan, who is talking to Valdaris about us being suspicious. He is still concerned about if we are good or not. Valdaris is taking us to a simple tour around the area. | |||
#; [[File:EP_21_14.png]] | |||
# When leaving the office another dialogue will start where Valdaris tells us that this base was build in a rush. | |||
# Walk a little bit down. You learn that there are supplies stored from the Wigner Merchant Group. | |||
#; [[File:EP_21_15.png]] | |||
# Laura Valdaris tells us that this an area for temporary visitors. | |||
# At {{#navi:jor_mbase|245|128}} some kids appear and want to play with their Sister Valdaris. She explains that the children are rescued from the Jormungandr Cult. After explaining everything about the kids she asks us to go to the training ground. | |||
#; [[File:EP_21_16.png]] | |||
# Valdaris is waiting for you at {{#navi:jor_mbase|147|108}}. She explains the training grounds and that it is open for everyone. You hear something strange from the soldiers, so Valdaris gets angry and wants to investigate it. | |||
#; [[File:EP_21_17.png]] | |||
# Go near the soldiers where you see someone getting beaten up so bad that he nearly dies. It's Richard who gets beaten up, so Valdaris decides to bring him back to his room to treat his wounds. | |||
#; [[File:EP_21_18.png]] | |||
# Go back to the center {{#navi:jor_mbase|202|191}}. | |||
#; [[File:EP21 9.png]] | |||
# Go upstairs enter the second to last portal on the right side. | |||
#; [[File:EP21_10.png]] | |||
# Talk to Valdaris who is REALLY UPSET about the situation. Nerius tells her that Richard wanted to be attacked. | |||
#; [[File:EP_21_19.png]] | |||
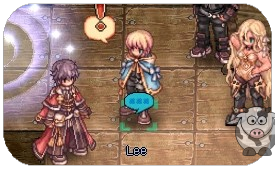
# Talk to Richard who explains that he wants to create books for battle. Getting hit by Nerius was necessary to show proper combat stances which are better shown in real-life examples. Lee should draw the illustration for the book. | |||
#; [[File:EP_21_20.png]] | |||
# Talk to Lee who instantly shows you the illustration he has drawn. After some talking about the book, you get introduced to Richard. Lee gets ordered to show us the rest while Richard and Valdaris have a talk. | |||
#; [[File:EP_21_21.png]] | |||
# Leave the room, enter the last portal. | |||
#; [[File:EP21_10A.png]] | |||
# Talk to Lee again. He tells us the full story of how they met Galaxia, where she destroyed nearly the entire mercenary group alone. After clearing the armor, Lee is willing to show us the rest of the base. | |||
#; [[File:EP_21_22.png]] | |||
# Leave the center and walk a little bit left {{#navi:jor_mbase|168|195}} where Lee explains the rest of the base. Tan will appear and tell us that this should be enough and you should go and see Tris. You will be rewarded with 30x {{#item:1001618}} and 30 reputation. | |||
#; [[File:EP_21_23.png]] | |||
# Talk to Tris. He asks us how everything went. After some explaining, he tells us that Alberta needs a wizard and Nillem should join them. Lehar will be sent to the Wigner Merchant Group, who are involved in relief efforts for people who escaped the cult. For us, we need to meet someone first. We meet Heine through a magic Tablet (Insert mobile phone joke here). Learning from Heine, our task will be to go to Alberta and receive the goods Heine sent to the resistance. Heine wishes to get a special Bright Eye from us. It must be from us and a fresh one, so not a single one from the storage. There are 4 dialogs in total and you need to click specific options: <br> | |||
#;* First Dialogue: Bearable. | |||
#;* Second dialogue: Is that person you, Tris? | |||
#;* Third Dialogue: Enjoy the text. | |||
#;* Fourth dialogue: Get kill quest 10x {{#linkmob:22319}} and collect 1x {{#item:1001641}}. | |||
#; [[File:EP_21_24.png]] | |||
# Talk to Walter Sailor {{#navi:jor_mbase|161|341}} and go to the Raised Land. Here you can do the kill quest. | |||
#; [[File:EP_21_25.png]] | |||
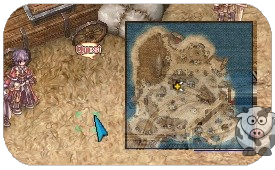
# To return you can talk to the Hidden Boat on the bottom left of the map {{#navi:jor_raise2|100|26}}. | |||
#; [[File:EP_21_25A.png]] | |||
# Go back to Tris. You will be rewarded with 30x {{#item:1001618}} and 35 reputation. | |||
#; <nowiki>You have unlocked: Volunteer Vallen Wok Daily Quest</nowiki> | |||
#; <nowiki>You have unlocked: Counselor Wool Daily Quest</nowiki> | |||
# Go to the other Walter Sailor {{#navi:jor_mbase|333|148}}, he will take you to the Alberta. | |||
#; [[File:EP_21_26.png]] | |||
# Walk up a little bit and talk to Nillem. You watch how Nillem gets overloaded with work from the Sailor. After entering the discussion, the Sailor introduces himself as Megas. He forces you to go to the beach to find work, ignoring your request. | |||
#; [[File:EP_21_27.png]] | |||
# {{#navi:jor_albe|227|117}} Walk into the quest sign, Yohan will appear. He assigns you with moving the cargo to specific areas. Those are marked on the map. | |||
#; [[File:EP_21_28.png]] [[File:EP_21_29.png]] | |||
# Visit Walter Sailor at {{#navi:jor_albe|146|224}}. He explains to you that everyone needs to do those tasks, it's like a ladder where everyone begins the same. | |||
#; [[File:EP_21_30.png]] | |||
# There is another Walter Sailor waiting inside a building {{#navi:jor_albe|120|145}}. | |||
#; [[File:EP_21_31.png]] | |||
# Enter the building, walk up, and talk to Walter Sailor. | |||
#; [[File:EP_21_32.png]] | |||
# Go back to Yohan {{#navi:jor_albe|227|117}}. With all the goods coming and going there is dirt in the town. You have to clean up 4 dirt piles. | |||
#; [[File:EP_21_29.png]] | |||
# The 4 dirt pile locations are: | |||
#; {{#navi:jor_albe|205|132}} | |||
#; [[File:EP_21_33.png]] | |||
#; {{#navi:jor_albe|189|166}} | |||
#; [[File:EP_21_34.png]] | |||
#; {{#navi:jor_albe|174|139}} | |||
#; [[File:EP_21_35.png]] | |||
#; {{#navi:jor_albe|143|210}} | |||
#; [[File:EP_21_36.png]] | |||
# Go back to Yohan {{#navi:jor_albe|227|117}}. He will give you the next job in the warehouse you were before. | |||
# Go back to the previous building {{#navi:jor_albe|120|145}}. | |||
#; [[File:EP_21_31.png]] | |||
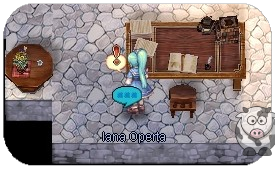
# Enter the building and walk down. You will meet Iana Operta. She wants you to deliver 2 letters. | |||
#; [[File:EP_21_37.png]] | |||
# First letter: Enter the building at {{#navi:jor_albe|200|107}}. | |||
#; [[File:EP_21_38.png]] | |||
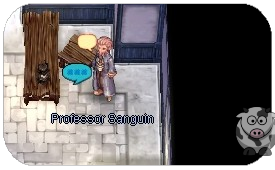
# Talk to Professor Sanguin. He takes the letter and mentions that your name is mentioned in the letter too. After some waiting, he gives you a written reply. | |||
#; [[File:EP_21_39.png]] | |||
# Second letter: Enter the building at {{#navi:jor_albe|60|237}}. | |||
#; [[File:EP_21_40.png]] | |||
# Talk to Patissier Edel. She introduces herself and asks about your business. Choose the second option (First Option would mean trouble!) and hear her reply. | |||
#; [[File:EP_21_41.png]] | |||
# Go back to Iana {{#navi:jor_albe|120|145}}. Enter the building, walk down and talk to Iana. You bring her both replies and she tells you that those aren't basic trivial errands. You get introduced to Mariastella Walter and start talking about the stories of the ghost ship. We are told that Maria's father, Walter, might be on the ship and we need to gather information about it's location. | |||
#; [[File:EP_21_31.png]] [[File:EP_21_31A.png]] | |||
# You will be rewarded with 40x {{#item:1001618}} and 40 reputation. | |||
# Go back to Lunaforma, talk to the Walter Sailor at {{#navi:jor_albe|194|200}}. | |||
#; [[File:EP_21_42.png]] | |||
# Talk to Ivan at {{#navi:jor_mbase|240|277}}. Ask about the ghost ship. But instead of getting information, you will get assigned to helping with the meal. | |||
#; [[File:EP_21_43.png]] | |||
# Talk to Lehar in {{#navi:jor_mbase|214|306}} several times. You decide to help him with the meals for the Wigner groups. Everyone is enjoying Lehar's rice a lot. Lehar mentions that he heard people mention a ghost ship. | |||
#; [[File:EP_21_44.png]] | |||
# Talk to Ivan at {{#navi:jor_mbase|193|287}} who tells you how many people saw the ghost ship. He gives you the name of who you should ask first, because he saw most of the stuff happening. | |||
#; [[File:EP_21_45.png]] | |||
# Talk to Lyriq at {{#navi:jor_mbase|191|306}}, who gets introduced by Lehar. After some small talk he gets more comfy around you and begins to tell you the story of what happened on that day with the ghost ship. We decide to go back to Ivan. | |||
#; [[File:EP_21_46.png]] | |||
# Talk to Ivan at {{#navi:jor_mbase|237|281}}. He tells us that he wants to join us on the ghost ship mission. But we need to deliver a package to his sister in Alberta first. | |||
#; [[File:EP_21_47.png]] | |||
# Talk to Walter Sailor {{#navi:jor_mbase|333|148}}, he will take you to Alberta again. | |||
#; [[File:EP_21_26.png]] | |||
# Enter the building at {{#navi:jor_albe|100|238}} | |||
#; [[File:EP_21_48.png]] | |||
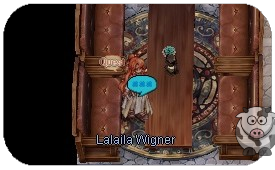
# Talk to Lalaila Wigner, who is surprised about Ivan's package. She explains to you that she sends others to look over Ivan. We should take something he left behind and bring it to him. | |||
#; [[File:EP_21_49.png]] | |||
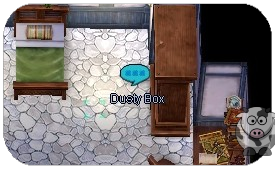
# Enter the portal at the top and check the dusty box. It contains well maintained knuckles which get cleaned and everything by Lalaila. She confirms that Ivan wanted those knuckles to be thrown away but Lalaila refused. She also gives you a letter for Maria Walter. | |||
#; [[File:EP_21_50.png]] | |||
# Leave the building and go to the next one at {{#navi:jor_albe|120|146}}. | |||
#; [[File:EP_21_51.png]] | |||
# Talk to Maristella Walter and give her the letter. She doesn't say anything and just smiles. You will be rewarded with 10x {{#item:1001618}} and 5 reputation. | |||
#; [[File:EP_21_52.png]] | |||
# Go back to Lunaforma, talk to the Walter Sailor at {{#navi:jor_albe|194|200}}. | |||
#; [[File:EP_21_42.png]] | |||
# Talk to Ivan at {{#navi:jor_mbase|237|281}}. He suggests to infiltrate through the north of the Raised Land and to meet there. You will be rewarded with 40x {{#item:1001618}} and 40 reputation. | |||
#; [[File:EP_21_47.png]] | |||
# Talk to Walter Sailor {{#navi:jor_mbase|161|341}} and go to the Raised Land. | |||
#; [[File:EP_21_25.png]] | |||
# Leave the map through the top portal. | |||
#; [[File:EP_21_53.png]] | |||
# Walk into the bushes at {{#navi:jor_raise1|322|64}} <br> '''Note''': {{#linkmob:22315}} on this map drops {{#item:1001643}}. 2 are required for step 166 | |||
#; [[File:EP_21_54.png]] | |||
# You will be ported to another map. Talk to Ivan. A plan is made to infiltrate the temple. Why is there a temple and why does it look like it's made by human? This question is asked and the only way to find out is to go inside. | |||
#; [[File:EP_21_55.png]] | |||
#; Unlocked Jormungand Church Temple. | |||
# Enter the dungeon at {{#navi:jor_raise1|152|316}} | |||
#; [[File:EP_21_56.png]] | |||
# Enter the safe spot at {{#navi:jor_tmple1|170|62}} | |||
#; [[File:EP_21_57.png]] | |||
# Talk to Ivan. Ivan sorts out a plan out to find any humans who are looking to escape. Top priority is gathering information about the ghost ship though, so we go with Tan to gather information. | |||
#; [[File:EP_21_58.png]] | |||
# Go to the next safe spot at {{#navi:jor_tmple1|103|180}} | |||
#; [[File:EP_21_59.png]] | |||
# Talk to the believer. After asking, they can't give any information about the ghost ship. Because of their strong faith Tan decides not to ask about escaping. | |||
#; [[File:EP_21_60.png]] | |||
# Go to the next safe spot at {{#navi:jor_tmple1|181|235}} | |||
#; [[File:EP_21_61.png]] | |||
# Talk to another believer. They are unhappy, but after asking about escaping, they think we want to capture them and bring them to the 2nd floor, where humans get taken away by the guards. Tan suggested to go there for potential information. | |||
#; [[File:EP_21_62.png]] | |||
# Go to the next safe spot at {{#navi:jor_tmple1|229|270}} | |||
#; [[File:EP_21_63.png]] | |||
# Talk to the next believer. You get told to go to the 2nd floor, but you need to be registered by the priests as a believer first. But currently they have disappeared, so Tan suggests to go back to the gathering point. | |||
#; [[File:EP_21_64.png]] | |||
# Go back to the first safe spot at {{#navi:jor_tmple1|170|62}} | |||
#; [[File:EP_21_57.png]] | |||
# Talk to Ivan. Ivan and Yohan came to the same conclusion and without any information. It's said that we need more information about the place first before we can get more. | |||
#; [[File:EP_21_58.png]] | |||
# Go back to Lunaforma. | |||
# Talk to Tris at {{#navi:jor_mbase|142|264}}. Tris is bit frustrated that we couldn't find any humans who wanted to escape or any information about the ghost ship. But someone will arrive soon with potential inside information, so we will meet him and maybe he can guide us to the second floor! You will be rewarded with 15x {{#item:1001618}} and 15 reputation. | |||
#; [[File:EP_21_65.png]] | |||
# Visit the small boat at {{#navi:jor_mbase|124|33}}. | |||
#; [[File:EP_21_66.png]] | |||
# Talk to Tan at {{#navi:jor_crk_p|72|76}}. The informant, Nadoyo, explains that there is someone who wants to escape from the temple and has every information we need. But to get there safely we need someone tall with long black hair similar to Tan. | |||
#; [[File:EP_21_67.png]] | |||
# Talk to Ivan who has an idea which person fits the description perfectly, but he is afraid of that thought. | |||
#; [[File:EP_21_68.png]] | |||
# Go back to Lunaform, by talking to the small boat. | |||
#; [[File:EP_21_69.png]] | |||
# Talk to Ivan at {{#navi:jor_mbase|163|295}}. We're meeting Wilhelm who doesn't want to join the mission. After Tan mentions the reason why Wilhelm is working there and after some convincing, he agrees to come along to infiltrate the temple for information about the ghost ship and finding people who want to escape. | |||
#; [[File:EP_21_70.png]] | |||
# Talk to Walter Sailor {{#navi:jor_mbase|161|341}} and go to the Raised Land. | |||
#; [[File:EP_21_25.png]] | |||
# Leave the map through the top portal. | |||
#; [[File:EP_21_53.png]] | |||
# Walk into the bushes at {{#navi:jor_raise1|322|64}} | |||
#; [[File:EP_21_54.png]] | |||
# You will be ported to another map. Talk to Tan. Nadoyo explains the plan. Wilhelm will disguise as a High Rank Priest so we can enter the restricted area of the church, in hopes to find information or people who want to escape. Wilhelm made it clear that he wants to find one person and that's the only reason why he is doing it. Nadoyo mentions that the high priest we disguised into wants to escape from the cult too. You will be rewarded with 15x {{#item:1001618}} and 15 reputation. | |||
#; [[File:EP_21_71.png]] | |||
# Enter the dungeon at {{#navi:jor_raise1|152|316}} | |||
#; [[File:EP_21_56.png]] | |||
# Enter the safe spot at {{#navi:jor_tmple1|229|266}} | |||
#; [[File:EP_21_72.png]] | |||
# Talk to Nadoyo, who explains the plan. Wilhelm will pose as high priest Carmigand, a key figure in the cult. We just have to follow him and everything should work out fine, but Wilhelm is skeptical about the plan. | |||
#; [[File:EP_21_73.png]] | |||
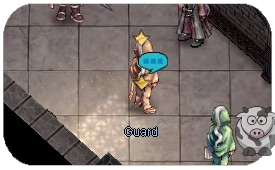
# Talk to the Guard who registers our party with mostly fake names. Nadoyo will go ahead. Talk to the guard again to start the Gimli Infiltration instance. NOTE EVERYONE CAN OPEN INSTANCE FROM PARTY. | |||
#; [[File:EP_21_74.png]] | |||
# Talk to Nadoyo who tells us that Carmigand's plan to escape got leaked. Now we need to act fast in to find and rescue him from the cult, because he has all information we need. | |||
#; [[File:EP_21_X74.png]] | |||
# Talk to Tan who teleports you into a new room. | |||
#; [[File:EP_21_75.png]] | |||
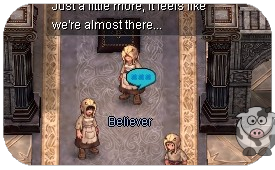
# Talk to Wilhelm who asks the believers about Carmigand. They don't know where he is, but they tell us to look for him at the inner payer room. Wilhelm uses the time to ask about someone named Reinhard, the guy who he is looking for. After the dialog you get warped out. | |||
#; [[File:EP_21_76.png]] | |||
# Talk to Tan at the new location. | |||
#; [[File:EP_21_77.png]] | |||
# Talk to Tan to get warped to another prayer room. | |||
#; [[File:EP_21_78.png]] | |||
# Talk to the Believer, who are complaining about their time at the temple. They want to escape and Wilhelm offers them the way out. But guards appear who are suspicious about the loud noises and forbid meeting in groups bigger than 2. They start attacking you. | |||
#; [[File:EP_21_79.png]] | |||
# Kill the guards. | |||
# Talk to the Believer again. They agree to escape, but don't know anything about Reinhard either. You get warped out. | |||
#; [[File:EP_21_80.png]] | |||
# Talk to Tan to get the next location. | |||
#; [[File:EP_21_81.png]] | |||
# Talk to the guard who is surprised to see Carmigand. Wilhelm, who pretends to be Carmigand, uses this time to surprise attack the guards. | |||
#; [[File:EP_21_82.png]] | |||
# Kill the guards. | |||
# Enter the portal, which appears after killing both guards. | |||
#; [[File:EP_21_83.png]] | |||
# Talk to the Believer at the top of the room. They are happy to be rescued by us and are willing to trust us to escape. But no one knows anything about Reinhard. One of them suggests that he died from the suffering at the temple. | |||
#; [[File:EP_21_84.png]] | |||
# You have to search for another prayer room {{#navi:1@mdtem|117|38}}. | |||
# Talk to Tan. Guards will appear. They claim that Wilhelm is Carmigand and try to capture him. You have to kill both guards again. | |||
#; [[File:EP_21_85.png]] | |||
# After killing the guards, more guards appear. Talk to the yellow guard and even more guards appear. Wilhelm suggest to be captured so they bring us to the real Carmigand. This would be more efficient than wandering around. | |||
#; [[File:EP_21_86.png]] | |||
# You will be warped to a preacher room. Talk to Wilhelm. Carmigand will appear and you will learn that he is actually Reinhardt, the guy Wilhelm is looking for. They are brothers and their parents died. Reinhardt is happy that he has finally found him, but he is also disappointed that he became a high priest for this temple. Carmigand explains that there is a secret passage in the room, that no Rgan knows about and we need to find it to escape. | |||
#; [[File:EP_21_87.png]] | |||
# Suspicious Places will appear. Click on all of them, until you hit the right one and get warped out. | |||
#; [[File:EP_21_88.png]] | |||
# Talk to Wilhelm, who is confused why the passage is like a mace. Carmigand explains that each prayer room is connected to the mace and we need to find the right one to escape. | |||
#; [[File:EP_21_89.png]] | |||
# Two guards appear and want to re-capture Carmigand and Wilhelm. Kill both of them. After Killing the guards talk to Wilhelm again, who teleports you to a new place. | |||
# Talk to Tan. Wilhelm finds it funny that he, who was weaker as a kid is now protecting his brother. | |||
#; [[File:EP_21_90.png]] | |||
# 4 Guards will appear to capture us. Kill them. | |||
# Talk to Tan again. Carmigand doesn't know where the exit is exactly. You get ported to a new location | |||
# Talk to Wilhelm. Hyasagand appears with guards and explains that she is happy to see Carmigand's downfall. Carmigand tells her what he thinks of the church and how big of a lie it is. She sends the guard to capture him, even with force. | |||
#; [[File:EP_21_91.png]] | |||
# Kill the 3 guards that Hyasagand sends out to capture Carmigand. | |||
# Talk to Wilhelm. Believers witness what happens and Hyasagand twists the words to make Carmigand look like the bad guy. Kill all 9 guards in order to progress. | |||
#; [[File:EP_21_92.png]] | |||
# Talk to Tan. Ivan and the others appear with believers to escape. Hyasagand retreats for now. Carmigand makes a speech to his people to follow him, even when he caused a lot of pain. A portal will appear, enter it to leave the instance. | |||
#; [[File:EP_21_93.png]] | |||
# You will be warped back to the safe spot. Enter the bushes. You will meet Nadoyo and the others inside. Ivan explains what happened inside of the temple and Nadoyo is not surprised that it turned out this way. Carmigand promises to her that he will not make the same mistake twice. You will be rewarded with 20x {{#item:1001618}} and 20 reputation. | |||
#; [[File:EP_21_94.png]] | |||
# Go back to Lunaforma and talk to Tris {{#navi:jor_mbase|149|270}}. He greets all the newly escaped people from the cult. They are a bit unsure of the place, but Tris makes a clear speech about the place and it's purpose. The old believers wish for justice over Carmigand's betrayal, so Tris decides to speak in private while Ivan shows them the lands here. | |||
#; [[File:EP_21_95.png]] | |||
# Go back to the center barracks {{#navi:jor_mbase|203|190}}. Enter the portal. | |||
#; [[File:EP21_9.png]] | |||
# Go straight up into the portal at the top. | |||
#; [[File:EP_21_96.png]] | |||
# Talk to Wilhelm. They clear up why they brought Carmigand up here. He wishes to be called by his old name, Reinhard Lugenburg. He is willing to give us any information needed to defeat the cult. | |||
#; [[File:EP_21_97.png]] | |||
# Talk to Reinhardt. He tells us about the Ghost Ship, which fits everything we know so far. He also mentions that the cult uses a new route in fear of the ship. We also learn, that the cult has weakened over time because of the humans leaving, but we don't know anything about their main force. Because Reinhard is human, he did not get all the information. You will be rewarded with 30x {{#item:1001618}} and 30 reputation. | |||
#; [[File:EP_21_98.png]] | |||
# Talk to Wilhelm. He starts explaining about how their parents died and begins to rant about how Reinhard betrayed their family by becoming something they are fighting against. | |||
#; [[File:EP_21_97.png]] | |||
# Talk to Reinhardt, who explains that he wanted to help everyone, believing the church was the answer. Wilhelm leaves disappointed , even saying that he buried his feelings for his brother because of what he did. | |||
#; [[File:EP_21_98.png]] | |||
#;* Unlocks Side Quest: Lugenburg Brothers. | |||
# Enter the building at {{#navi:jor_albe|120|146}}. | |||
#; [[File:EP_21_51.png]] | |||
# Talk to Maristella Walter. She asks you to meet her at the harbor for the journey to the ship, now knowing the location where to find it. | |||
#; [[File:EP_21_52.png]] | |||
# Leave the building and go to {{#navi:jor_albe|191|180}}. | |||
#; [[File:EP_21_99.png]] | |||
# Talk to Maristella Walter. Enter the Ghost Ship instance. | |||
# Talk to Maristella inside. It is planned to move with caution and check if it's really the ship of the Walter. | |||
#; [[File:EP_21_100.png]] | |||
# Walk left, kill the ghost ship crew and a Sternlight will appear. It feels familiar, but it's not the same as the one Maria remembers. | |||
#; [[File:EP_21_102.png]] | |||
# Walk right and click on the Mast Traces. Maria finds marks from back then, when she was younger. | |||
#; [[File:EP_21_103.png]] | |||
# Walk up to the right side and click on the Old Box. Inside the box you find old wooden toys, which are by Howell for his daughter. | |||
#; [[File:EP_21_104.png]] | |||
# Walk down and kill the ghost ship crew again, a portal will appear. | |||
#; [[File:EP_21_105.png]] | |||
# Kill the ghost ship crew again and click on the Crumpled Documents which are unreadable. Even Yohan can't read whats on the papers which are smudged by the seawater. BEFORE ENTERING THE PORTAL!! | |||
#; [[File:EP_21_106.png]] | |||
# Find the Rusty Fountain Pen at {{#navi:1@wtgs|184|121}}. Yohan recognizes the pen and with that it's certain what this ship is about. | |||
#; [[File:EP_21_107.png]] | |||
# Kill the ghost ship crew on the other side. | |||
# Follow the way till you find the Box under a Bed. {{#navi:1@wtgs|149|127}}. You find a journal. It says, that after Maria escaped a strange woman appeared on the deck, who granted a wish to the captain. When the captain answered everything on the ship changed; memories were fading and crew members turned into monsters. Now we know, that this is the ship Maria was looking for. | |||
#; [[File:EP_21_BOX_UNDER.png]] | |||
# Search for the rest of the ghost ship Crew and kill them. | |||
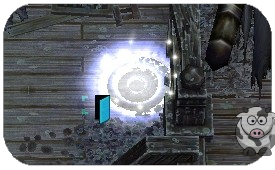
# After killing them all, a portal will appear at {{#navi:1@wtgs|109|114}}. Before entering Maria gives a short speech confirming that this ship is the missing Walter and that every answer must lie in the Captains Quarter. | |||
#; [[File:EP_21_108.png]] | |||
# Upstairs you will meet the Ghostship Captain. | |||
#; [[File:EP_21_109.png]] | |||
# Talk to him to start the fight after Maria gives a speech to bolster morale. | |||
# Talk to him after his death. He will turn into human form for a while to explain what happened in the past. His wish was to sink every cult ship, even in death. He is glad that he could at least see everyone one last time before dying. | |||
# Leave the room on the right side {{#navi:1@wtgs|331|27}}. | |||
#; [[File:EP_21_110.png]] | |||
# Outside of the ship talk to Maristella. She summarizes what happened and that they need to leave before the ship disappears. | |||
#; [[File:EP_21_111.png]] | |||
# Leave the instance through the portal, which appears next to Maristella. | |||
#; [[File:EP_21_112.png]] | |||
# Talk to Maristella Walter who reports to Megas what happened on the ghost ship. | |||
#; [[File:EP_21_100A.png]] | |||
# Wigner Executive will appear, talk to him. He tells you that he has the goods Heine sent us. Now that we're done, we should return to Lunaforma and speak to the tablet again. You will be rewarded with 70x {{#item:1001618}} and 90 reputation. | |||
#; [[File:EP_21_113.png]] | |||
#;* Unlocks Mysterious Ghost Ship daily instance. | |||
# Go back to the center barracks {{#navi:jor_mbase|203|190}}. Enter the portal. | |||
#; [[File:EP21_9.png]] | |||
# Talk to Tris. He asks us about what happened on the ghost ship. After some time he tries to call Heine again, but the connection to him is bad. Speak to him again, the connection is stable now. The entire tablet needs an overhaul and Heine wants us to help him with that. Tris made a spare room ready for us and we should head there with the tablet ASAP. | |||
#; [[File:EP_21_114.png]] | |||
# Go upstairs and into the first portal on the left side. Talk to Heine's Tablet {{#navi:mbase_in|71|126}}. | |||
#; [[File:EP_21_115.png]] [[File:EP_21_115A.png]] | |||
# Speak to the tablet. Heine tells you that the connection is really stable. Choose the second option: "I'll do as you order." and he tells you to get materials for maintenance.You have to farm 2x {{#item:1001643}}. Vellelopy drops from {{#linkmob:22315}} in jor_raise1. <br> Note: If you already have the Vellelopy, skip to step 166 | |||
# Talk to Walter Sailor {{#navi:jor_mbase|161|341}} and go to the Raised Land. | |||
#; [[File:EP_21_25.png]] | |||
# Leave the map through the top portal. You can find the Velellings here. | |||
#; [[File:EP_21_53.png]] | |||
# Go back to the center barracks {{#navi:jor_mbase|203|190}}. Enter the portal. | |||
#; [[File:EP21_9.png]] | |||
# Go upstairs and into the first portal on the left side to deliver the Vellelopies to Heine's Tablet {{#navi:mbase_in|71|126}}. | |||
#; [[File:EP_21_115.png]] | |||
# Talk to the tablet. It will begin to absorb the materials you brought along. While waiting, Heine asks to tell an old story, you Choose "Please tell me. " and he explains us why he began helping Tan and Tris but then starts ranting about them as well! | |||
# Talk to the tablet again and Heine complains about how annoying it is that it didn't work the first time. After we ask ( choose "How old is it?") he tries to explains how old this tablet is. He also mentions that he added 2 new features to the tablet as well. | |||
# Talk a third time with the tablet. Heine is happy that it works for the second time, so you ask and choose "Is that good?", and he starts to complain that it's bad that it's only working for the second time. But then he points out that we're from the future by reading our mana, so he asks us why we came. Choose "To completely eliminate the Rgans" and we explain what happened in our time and that the Rgans are a really big problem. Heine is happy about our answer and wants to help us. You will get 1x {{#item:1001627}}. | |||
# Exit the room and talk to Tris. Tris plans to attack the cult with the information Aurelie provided. After more information from Heine all agree to attack ASAP to end the war before the cult can regroup, but something happened outside. You will be rewarded with 50x {{#item:1001618}} and 50 reputation. | |||
#; [[File:EP_21_114.png]] | |||
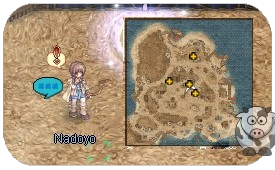
# Exit the barracks through the portal and talk to Nadoyo. He explains that the cult plans to resurrect Jormungandr! Nadoyo even saw the shadow of a Serpent, so we need to contact our allies and gather all the information we can get. | |||
#; [[File:EP_21_116.png]] | |||
# Gather 3 reports: | |||
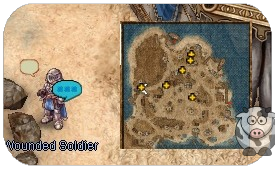
#;* Wounded Soldier {{#navi:jor_mbase|62|194}} | |||
#; [[File:EP_21_117.png]] | |||
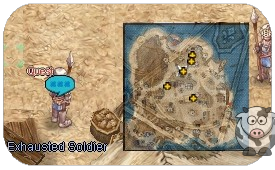
#;* Exhausted Soldier {{#navi:jor_mbase|186|250}} | |||
#; [[File:EP_21_118.png]] | |||
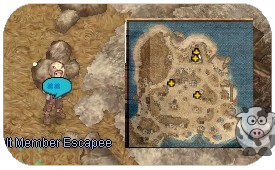
#;* Cult Member Escapee {{#navi:jor_mbase|216|297}} | |||
#; [[File:EP_21_119.png]] | |||
# Go back to Tris who is in front of the center barracks {{#navi:jor_mbase|203|186}}. We give him all information we gathered. But Tan and Nadoyo are missing so we need to check on them! | |||
#; [[File:EP_21_120.png]] | |||
# Talk to Walter Sailor {{#navi:jor_mbase|161|341}} and go to the Raised Land. | |||
#; [[File:EP_21_25.png]] | |||
# Leave the map through the top portal. | |||
#; [[File:EP_21_53.png]] | |||
# At {{#navi:jor_raise1|198|189}} you will find a Rock Crevice, enter it. | |||
#; [[File:EP_21_121.png]] | |||
# Inside talk to Nadoyo. They prepared for something inside the church, a room even Reinhard didn't know. So before going back to Tris we are going with them into the church to check it out and to find more evidence of the giant serpent. | |||
#; [[File:EP_21_122.png]] | |||
# Check the Decorative Door at {{#navi:jor_raise1|128|323}}. | |||
#; [[File:EP_21_123.png]] | |||
# Inside the building talk to the Cult Priest. The Priest confirms our fear, something eats people by absorbing their mana to get stronger and stronger. Tan and Reinhard want to go ahead and deal with it while we and Nadoyo go back and report to Tris. | |||
#; [[File:EP_21_124.png]] | |||
# Talk to Nadoyo, she will warp you back to Lunaphoma. | |||
#; [[File:EP_21_125.png]] | |||
# Go back to Tris who is in front of the center barracks {{#navi:jor_mbase|203|186}}. We report back with what happened and what Tan's plan is. Tris will exclude normal soldiers and us from the battle and we should unite back with our friends on the 2nd floor. | |||
#; [[File:EP_21_120.png]] | |||
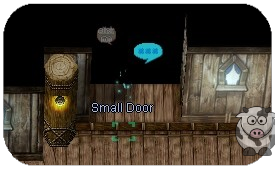
# Enter the barracks and go into the Small Door. | |||
#; [[File:EP_21_126.png]] | |||
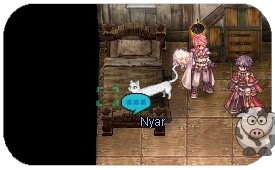
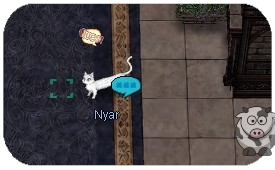
# Talk to Nyar. Heine explains that we can't erase events from the past but that we could join Tris in the battle with Heine's help. You will be rewarded with 10x {{#item:1001618}} and 50 reputation. | |||
#; [[File:EP_21_127.png]] | |||
# Talk to Walter Sailor {{#navi:jor_mbase|161|341}} and go to the Raised Land. | |||
#; [[File:EP_21_25.png]] | |||
# Leave the map through the top portal. | |||
#; [[File:EP_21_53.png]] | |||
# You have to enter the Decorative Door at {{#navi:jor_raise1|128|323}} again. | |||
#; [[File:EP_21_123.png]] | |||
# Talk to Nadoyo. Tris and Nadoyo are surprised to see you here, but Heine stops him and explains that he needs help and only we can do that. | |||
#; [[File:EP_21_128.png]] | |||
# Talk to the door. | |||
#; [[File:EP_21_129.png]] | |||
# Talk to the Heine Tablet. Everyone is gathered here and some are unsure if this is the right call. After a vote it's decided to proceed and Heine wants to share his new spell with everyone. | |||
#; [[File:EP_21_130.png]] | |||
# You will start the instance "Final Battle". | |||
# Inside choose "Use the tablet" and Heine tries to find every location. | |||
# Enjoy the dialogues ~ | |||
# After everyone has channeled their mana into the egg, click on the big egg. | |||
#; [[File:EP_21_131.png]] | |||
# Kill Corrupted Tan. After a long battle the Serpent tries to convince Tris to save his life while Tan shouts to finish it. Tris finishes the Serpent off and Tan dies with him.... | |||
# Talk to Nyar. Heine suggests to leave first to track down the cult's movement and give Tris some time to gather his thoughts. You will be rewarded with 90x {{#item:1001618}} and 110 reputation. | |||
#; [[File:EP_21_132.png]] | |||
# Outside the instance talk to Nyar again who brings us to a new area. | |||
#; <span style="color: rgb(205, 38, 38);" >Note: If you fail the instance or accidently teleport away use this navilink to get back here: {{#navi:jor_tmple1|170|307}} Talk to the Decorative Door to enter.</span> | |||
#; [[File:EP_21_133.png]] | |||
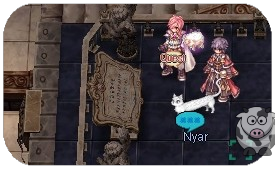
# You will be warped, talk to Nyar again. Nillem and Lehar find a suspicious room with a book. Nillen reminds us why we are here and that we should investigate by using this book first. | |||
#; [[File:EP_21_134.png]] | |||
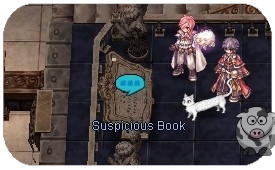
# Click on the Suspicious Book to start the Instance Secret Altar. | |||
#; [[File:EP_21_135.png]] | |||
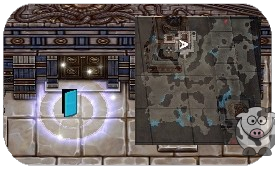
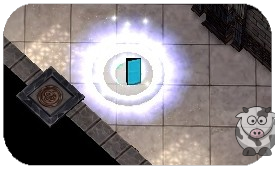
# A shining door will appear, enter it. | |||
#; [[File:EP_21_136.png]] | |||
# Inside talk to Lehar. Nillem explains that ahead is a big power and with the death of the giant serpent they start their next plan of concentrating their remaining power into Lasgand. You need to kill all monsters. | |||
#; [[File:EP_21_137.png]] | |||
# At the end of the corridor there will be a Door, click on it. | |||
#; [[File:EP_21_138.png]] | |||
# Talk to Lehar. This place looks familiar, like the place where the High Rank Rgans live. You continue the way. | |||
#; [[File:EP_21_139.png]] | |||
# Follow the way and kill all Cult Priests. | |||
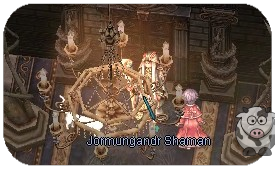
# Talk to Jormungandr Shaman, who is cursing everyone who was part of the battle, like it is told in the stories back then. Kill him and click on the door to continue. | |||
#; [[File:EP_21_140.png]] | |||
# Walk into the Cult Shaman, who explains that with the curse they will persist eternally. Monster are spawning, kill all big Serpents. | |||
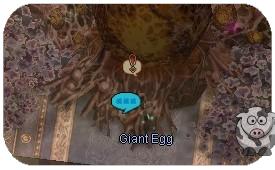
# Click on the Giant Egg. Tris transfers the curse onto himself. Aurelie and Tris will watch over the egg until it's withered away and Tris children in the future will fight back what ever hatches there. You will get ported back to the island. You will be rewarded with 60x {{#item:1001618}} and 50 reputation. | |||
#; [[File:EP_21_141.png]] | |||
# Outside talk to Nyar. Talk about what happened, now that Nyar reclaimed some of his power, Lasgand should be weakened by a lot now. But before we go, we need to swap the tablet with something on the docks, that Heine hid for us. | |||
#; [[File:EP_21_142.png]] | |||
# Go back to Lunaforma by talking to the small boat. | |||
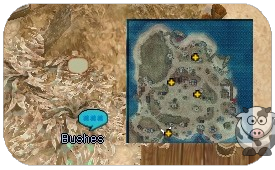
# Talk to the Bushes to receive a new Heine Tablet. Heine says his goodbye and warps us back to the island. | |||
#; [[File:EP_21_143.png]] | |||
# Talk to Nyar again and choose to return to our own time. | |||
#; [[File:EP_21_142.png]] | |||
# Walk to {{#navi:jor_crk|137|138}}. Aurelie already senses the sudden change in magic and we report what happened. Now Nillen and Nyar will seal the rift while we'll go and see what happened to Lasgand in the Seal. | |||
#; [[File:EP_21_144.png]] | |||
# Talk to Nyar Clone. Lehar and his aunt will go on to lift the curse from Lasgand. You can't join them, so you need to wait until they are done. You have to wait 10 minutes to open the instance. Grab a coffee, visit the toilet, touch some grass. After the 10 minutes Lehar and Voglinde will re-appear, telling us that the curse is broken but Lasgand is still resurrecting. Now we think it's the work of the Heart Piece of Ymir and we need to check it out, remembering what happened in Bio Labs back then. | |||
#; [[File:EP_21_145.png]] | |||
# Open the instance. | |||
# Inside the instance talk to Aurelie. The insane power of Lasgand that was there before is gone now, but the mana is going wild. We need to confirm who this Lasgand is. | |||
#; [[File:EP_21_146.png]] | |||
# Talk to Lasgand who is acting weird for some reason. You need to kill him multiple times. | |||
#; [[File:EP_21_147.png]] | |||
# Talk to Aurelie who confirms that this Lasgand is acting the same as the first time and it is really the Heart Piece of Ymir. She will warp you out of the instance. | |||
#; [[File:EP_21_148.png]] | |||
# Talk to Nyar Clone. We confirm what he is still dangerous and his power is still creating new Rgans. The curse is lifted but Lehar and Voglinde are staying to fight back the Rgan. Now Nillem wants to see us where the rift was, you get warped there. | |||
#; [[File:EP_21_145.png]] | |||
# Talk to Nyar. Nillem and Nyar failed to seal the rift. The time is now repeating itself over and over, but we're free to travel there from time to time. Not only that, but now YOUR name is mentioned in the history books as well. You will be rewarded with 70x {{#item:1001618}} and 60 reputation. | |||
#; [[File:EP_21_149.png]] | |||
</div> | |||
=Quests Secundarias= | |||
==Adquisición de suministros== | |||
# Hablando con Mandel en {{#navi:jor_mbase|210|173}} puedes desbloquear las diarias de Supply Procurement. | |||
==Hermanos Lugenburg== | |||
# Habla con Reinhardt dentro de los Barracones Centrales en {{#navi:mbase_in|118|186}}. Únete al portal directamente. | # Habla con Reinhardt dentro de los Barracones Centrales en {{#navi:mbase_in|118|186}}. Únete al portal directamente. | ||
# Visita a Wilhelm en {{#navi:jor_mbase|140|201}}. | # Visita a Wilhelm en {{#navi:jor_mbase|140|201}}. | ||
| Line 439: | Line 873: | ||
# Ahora tendrás acceso a las misiones de caza "Clear Rising Lands". | # Ahora tendrás acceso a las misiones de caza "Clear Rising Lands". | ||
==Comida Insuficiente (Recolección de Hierbas/Peces)== | |||
# Habla con Volunteer Vallen Wok en {{#navi:jor_mbase|211|280}}. | |||
# | # Te pedirá 10 de la misma hierba o 10 del mismo pez, que aparecen por todo el mapa. | ||
# | # Si te pide hierbas, lleva 10x {{#item:1001625}}. No aceptará {{#item:1001624}}. | ||
# | # Si te pide peces, lleva 10x {{#item:1001619}} o 10x {{#item:1001620}} o 10x {{#item:1001621}} o 10x {{#item:1001622}}. No aceptará {{#item:1001623}}. | ||
< | <span id="Mercenary_Tasks"></span> | ||
== | ==Tareas de Mercenario== | ||
# Habla con Valdaris {{#navi:mbase_in|302|123}} | |||
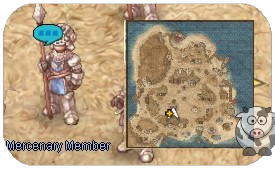
# | # Habla con Miembro Mercenario {{#navi:jor_mbase|300|151}} | ||
# | # Habla con Miembro Mercenario {{#navi:jor_mbase|198|251}} | ||
# | # Habla con Miembro Mercenario {{#navi:jor_mbase|133|128}} | ||
# | # Habla con Miembro Mercenario {{#navi:jor_mbase|248|103}} | ||
# | # Habla con Valdaris {{#navi:mbase_in|302|123}} | ||
# | # Recibirás 10x {{#item:1001618}} y 5 de reputación. | ||
# | # Ahora tienes acceso a las misiones diarias de tareas de mercenario. | ||
# | |||
<div | <div class="mw-translate-fuzzy"> | ||
= | =Quest Diarias= | ||
{| class="wikitable" style="background: transparent; width: 100%;" | {| class="wikitable" style="background: transparent; width: 100%;" | ||
|- | |- | ||
|NPC | |NPC | ||
|Quest | |Quest | ||
| | |Recompensa | ||
| | |Reputación | ||
|- | |- | ||
| rowspan="7" |Mandel | | rowspan="7" |Mandel en {{#navi:jor_mbase|210|173}} | ||
|Gaebolg: | |Gaebolg: Recolecta 10x {{#item:1001629}} (caza Yormi/Yormi Missionary) | ||
| rowspan="7" | | | rowspan="7" |¡1x Supply Procurement diaria! | ||
10x {{#item:1001618}} | 10x {{#item:1001618}} | ||
| rowspan="7" | | | rowspan="7" |Aumenta la Reputación de la familia que elijas en 100. | ||
|- | |- | ||
|Nerius: | |Nerius: Recolecta 10x {{#item:1001648}} (caza Ice Seahorse) | ||
|- | |- | ||
|Heine: | |Heine: Recolecta 10x {{#item:1001639}} (caza Yortus Bishop/Yortus Conjurator) | ||
|- | |- | ||
|Lugenburg: | |Lugenburg: Recolecta 10x {{#item:1001637}} (caza Yormi/Yormi Missionary) | ||
|- | |- | ||
|Walter: | |Walter: Recolecta 10x {{#item:1001646}} (caza Cliolima) | ||
|- | |- | ||
|Wigner: | |Wigner: Recolecta 10x {{#item:1001642}} (caza Seawind) | ||
|- | |- | ||
|Richard: | |Richard: Recolecta 10x {{#item:1001645}} (caza Letterster) | ||
|- | |- | ||
| rowspan="2" |Wilhelm | | rowspan="2" |Wilhelm en {{#navi:jor_mbase|140|201}} | ||
| | |Caza 300x monstruos en Northern Rising Lands. | ||
| rowspan="2" |10x {{#item:1001618}} | | rowspan="2" |10x {{#item:1001618}} | ||
| rowspan="2" |10 | | rowspan="2" |10 | ||
|- | |- | ||
| | |Caza 300x monstruos en Southern Rising Lands. | ||
|- | |- | ||
| rowspan="6" |Valdaris {{#navi:mbase_in|302|123}} | | rowspan="6" |Valdaris {{#navi:mbase_in|302|123}} | ||
| | |Cualquier tipo de ayuda: Recluta los Mercenarios correctos para Valdaris. No todos son adecuados. | ||
|2x {{#item:1001618}} | |2x {{#item:1001618}} | ||
|2 | |2 | ||
|- | |- | ||
| | |Comida fresca: Recolecta 10x {{#item:1001644}} y 10x {{#item:1001647}} | ||
|5x {{#item:1001618}} | |5x {{#item:1001618}} | ||
|5 | |5 | ||
|- | |- | ||
| | |Conchas para heridas: Caza 50x Scalleg | ||
|5x {{#item:1001618}} | |5x {{#item:1001618}} | ||
|5 | |5 | ||
|- | |- | ||
| | |Para los niños: Caza 50x Velelling | ||
|5x {{#item:1001618}} | |5x {{#item:1001618}} | ||
|5 | |5 | ||
|- | |- | ||
| | |Final limpio (1): Caza 300x monstruos en el primer piso de Jormungandr Temple | ||
|10x {{#item:1001618}} | |10x {{#item:1001618}} | ||
|10 | |10 | ||
|- | |- | ||
| | |Final limpio (2): Caza 300x monstruos en el segundo piso de Jormungandr Temple | ||
|10x {{#item:1001618}} | |10x {{#item:1001618}} | ||
|10 | |10 | ||
|- | |- | ||
|Heine Tablet {{#navi:mbase_in|21|168}} | |Heine Tablet {{#navi:mbase_in|21|168}} | ||
| | |Recolecta 3x {{#item:1001641}} | ||
|5x {{#item:1001618}} | |5x {{#item:1001618}} | ||
|3 | |3 | ||
| Line 527: | Line 957: | ||
|Conselor Wool | |Conselor Wool | ||
{{#navi:jor_albe|160|137}} | {{#navi:jor_albe|160|137}} | ||
| | |Habla con él, ve al siguiente NPC en {{#navi:jor_albe|50|241}}, regresa con Wool. | ||
|3x {{#item:1001618}} | |3x {{#item:1001618}} | ||
|2 | |2 | ||
|- | |- | ||
|Libra {{#navi:jor_base|314|137}} | |Libra {{#navi:jor_base|314|137}} | ||
|Libra | |Libra te dará 1x {{#item:1001626}}, entrégaselo a Parex | ||
|2x {{#item:1001618}} | |2x {{#item:1001618}} | ||
|2 | |2 | ||
| Line 538: | Line 968: | ||
</div> | </div> | ||
=Reputaciones de las Familias= | |||
Tenemos un total de 7 reputaciones familiares para completar. La reputación máxima que puedes alcanzar es 1.000 por familia. La reputación de Gaebolg se llena parcialmente a través de la quest principal, mientras que las otras familias deben completarse con la [[21_Age_of_Heroes#Daily_Quests|quest diaria de Mandel.]] | |||
Después de alcanzar 1.000 de reputación con una familia, puedes pagar 5 {{#item:1001618}} a Mandel para recibir un buff de 1 hora a tu elección. | |||
Nota: Los buffs se acumulan, pero pierdes todos los buffs al morir. | |||
{| class="wikitable" style="background: transparent; width: 100%;" | |||
{| class="wikitable | |||
|- | |- | ||
| | |Familia | ||
|Buff | |||
|- | |- | ||
| | |Gaebolg Blessing | ||
|Aumenta ATK y MATK% en un 10%. | |||
|- | |- | ||
| | |Nerius Blessing | ||
|Reduce el Variable Cast Time en un 10% y aumenta la velocidad de ataque en un 10%. | |||
|- | |- | ||
| | |Heine Blessing | ||
|Aumenta el daño contra enemigos Dragon y Plant en un 15%. | |||
|- | |- | ||
| | |Lugenburg Blessing | ||
|Aumenta el daño contra enemigos Demon y Undead en un 15%. | |||
|- | |- | ||
| | |Walter Blessing | ||
|Aumenta el daño contra enemigos Formless y Fish en un 15%. | |||
|- | |- | ||
| | |Wigner Blessing | ||
| | |Aumenta el daño contra enemigos Brute y Angel en un 15%. | ||
|- | |- | ||
|Richard Blessing | |||
|Aumenta el daño contra enemigos Demihuman e Insect en un 15%. | |||
|} | |||
<div lang="en" dir="ltr" class="mw-content-ltr"> | |||
Note: After reaching 1k reputation with all families, you will be able to start the Final Battle Instance on hard mode, as well as buy the +11 Gaebolg Refine Hammer. | |||
</div> | |||
<span id="Fields/Dungeons"></span> | |||
= Zonas/Dungeons = | |||
{| class="wikitable mw-collapsible mw-collapsed" style="text-align: center;" | |||
|- style="background: #B2C6D7;" | |||
| Map || colspan="4" | Monster | |||
|- style="background: #BFEFFF;" | |||
| rowspan="2" | Northern Rising Lands <br> jor_raise1 <br> [[File:jor_raise1.png|150px]] || {{#mob:22313}} | |||
|{{#mob:22315}} | |||
|{{#mob:22317}} | |||
|{{#mob:22325}} | |||
|- style="background: #BFEFFF;" | |||
| {{#mob:22314}} | |||
|{{#mob:22316}} | |||
|{{#mob:22323}} | |||
|{{#mob:22327}} | |||
|- style="background: #B0E2FF;" | |||
| rowspan="2" | Southern Rising Lands <br> jor_raise2 <br> [[File:jor_raise2.png|150px]]|| {{#mob:22313}} | |||
|{{#mob:22319}} | |||
| colspan="2" rowspan="2" |'''MVP''' <br> {{#mob:22362}} | |||
|- style="background: #B0E2FF;" | |||
| {{#mob:22318}} | | {{#mob:22318}} | ||
|{{#mob:22320}} | |||
| {{#mob: | |- style="background: #BFEFFF;" | ||
|- | | rowspan="2" | Jornville <br> jor_base <br> [[File:jor_base.png|150px]]|| {{#mob:22313}} | ||
|{{#mob:22322}} | |||
| colspan="2" rowspan="2" |{{#mob:22326}} | |||
|- style="background: #BFEFFF;" | |||
| rowspan=" | |||
|- | |||
| {{#mob:22321}} | | {{#mob:22321}} | ||
|- | |{{#mob:22324}} | ||
| {{#mob: | |- style="background: #B0E2FF;" | ||
|- | | rowspan="3" | Jormungand Church Temple F1 <br> jor_tmple1 <br> [[File:jor_tmple1.png|150px]]|| {{#mob:22323}} | ||
|{{#mob:22325}} | |||
|{{#mob:22327}} | |||
|{{#mob:22354}} | |||
|- style="background: #B0E2FF;" | |||
| {{#mob:22324}} | | {{#mob:22324}} | ||
|{{#mob:22326}} | |||
| {{#mob:22326}} | |{{#mob:22353}} | ||
|{{#mob:22355}} | |||
|- style="background: #B0E2FF;" | |||
| {{#mob: | |||
|- | |||
| {{#mob:22356}} | | {{#mob:22356}} | ||
|{{#mob:22357}} | |||
| {{#mob:22357}} | | colspan="2" |'''MVP''' <br> {{#mob:22363}} | ||
| | |- style="background: #BFEFFF;" | ||
| '''MVP''' <br> {{#mob:22363}} | | rowspan="2" | Jormungand Church Temple F2 <br> jor_tmple2 <br> [[File:jor_tmple2.png|150px]]|| {{#mob:22355}} | ||
|- | |{{#mob:22357}} | ||
| rowspan=" | |{{#mob:22359}} | ||
|- | |{{#mob:22361}} | ||
|- style="background: #BFEFFF;" | |||
| {{#mob:22356}} | | {{#mob:22356}} | ||
|{{#mob:22358}} | |||
|{{#mob:22360}} | |||
|'''MVP''' <br> {{#mob:22364}} | |||
| {{#mob:22358}} | |||
| {{#mob:22360}} | |||
| '''MVP''' <br> {{#mob:22364}} | |||
|} | |} | ||
< | <span id="Instances"></span> | ||
=Instancias= | |||
* [[Mysterious Ghost Ship]] | |||
* [[Final Battle]] | |||
=Equipment= | =Equipment= | ||
{{:Gaebolg Equipment}} | {{:Gaebolg Equipment}} | ||
{{:Yorscalp Equipment}} | {{:Yorscalp Equipment}} | ||
=Cartas= | |||
{| class="wikitable" style="background: transparent; width: 100%;" | {| class="wikitable" style="background: transparent; width: 100%;" | ||
|- | |- | ||
| Line 667: | Line 1,108: | ||
|{{#item:300532}} <br> {{#itemDesc:300532}} | |{{#item:300532}} <br> {{#itemDesc:300532}} | ||
|{{#item:300533}} <br> {{#itemDesc:300533}} | |{{#item:300533}} <br> {{#itemDesc:300533}} | ||
| | |||
|} | |||
<span id="Past_Heroes_Cards"></span> | |||
= Cartas Past Heroes = | |||
<div class="mw-translate-fuzzy"> | |||
Puedes obtener los fragmentos de carta necesarios para fabricar las cartas usando {{#item:103512}}, que se obtiene en la instancia [[https://wiki.muhro.eu/Final_Battle|Final Battle]]. Puedes fabricarlas en la Tienda de Wigner usando | |||
{{#navi:jor_mbase|222|260}} | |||
{| class="wikitable" style="background: transparent; width: 100%;" | |||
|- | |||
|{{#item:300585}} <br> {{#itemDesc:300585}} | |||
|{{#item:300586}} <br> {{#itemDesc:300586}} | |||
|{{#item:300587}} <br> {{#itemDesc:300587}} | |||
|{{#item:300588}} <br> {{#itemDesc:300588}} | |||
|{{#item:300589}} <br> {{#itemDesc:300589}} | |||
|- | |||
|{{#item:300590}} <br> {{#itemDesc:300590}} | |||
|{{#item:300591}} <br> {{#itemDesc:300591}} | |||
|{{#item:300592}} <br> {{#itemDesc:300592}} | |||
|{{#item:300593}} <br> {{#itemDesc:300593}} | |||
|{{#item:300594}} <br> {{#itemDesc:300594}} | |||
|- | |||
|{{#item:300595}} <br> {{#itemDesc:300595}} | |||
|{{#item:300596}} <br> {{#itemDesc:300596}} | |||
|{{#item:300597}} <br> {{#itemDesc:300597}} | |||
|{{#item:300598}} <br> {{#itemDesc:300598}} | |||
|{{#item:300599}} <br> {{#itemDesc:300599}} | |||
|- | |||
|{{#item:300600}} <br> {{#itemDesc:300600}} | |||
|{{#item:300601}} <br> {{#itemDesc:300601}} | |||
|{{#item:300602}} <br> {{#itemDesc:300602}} | |||
| | | | ||
|} | |} | ||
| Line 672: | Line 1,145: | ||
<div lang="en" dir="ltr" class="mw-content-ltr"> | <div lang="en" dir="ltr" class="mw-content-ltr"> | ||
= | {| class="wikitable" style="background: transparent; width: 100%;" | ||
|- | |||
|{{#item:300585}} <br> {{#itemDesc:300585}} | |||
|{{#item:300586}} <br> {{#itemDesc:300586}} | |||
|{{#item:300587}} <br> {{#itemDesc:300587}} | |||
|{{#item:300588}} <br> {{#itemDesc:300588}} | |||
|{{#item:300589}} <br> {{#itemDesc:300589}} | |||
|- | |||
|{{#item:300590}} <br> {{#itemDesc:300590}} | |||
|{{#item:300591}} <br> {{#itemDesc:300591}} | |||
|{{#item:300592}} <br> {{#itemDesc:300592}} | |||
|{{#item:300593}} <br> {{#itemDesc:300593}} | |||
|{{#item:300594}} <br> {{#itemDesc:300594}} | |||
|- | |||
|{{#item:300595}} <br> {{#itemDesc:300595}} | |||
|{{#item:300596}} <br> {{#itemDesc:300596}} | |||
|{{#item:300597}} <br> {{#itemDesc:300597}} | |||
|{{#item:300598}} <br> {{#itemDesc:300598}} | |||
|{{#item:300599}} <br> {{#itemDesc:300599}} | |||
|- | |||
|{{#item:300600}} <br> {{#itemDesc:300600}} | |||
|{{#item:300601}} <br> {{#itemDesc:300601}} | |||
|{{#item:300602}} <br> {{#itemDesc:300602}} | |||
| | |||
|} | |||
</div> | </div> | ||
Latest revision as of 12:59, 14 August 2025
Quest Principal
- En (jor_tail 233, 41) encuentras a Shufapa. Él explica que planeaban investigar el Scale y te pide que los acompañes. La razón es una inusual longitud de onda de maná en esa isla.
- Se abren diálogos en (jor_crk 137, 137) y Nillen confirma que la longitud de onda es realmente inusual. Lehar vio a Nyar en la isla, así que todos deciden ver qué sucede con ella.
- (jor_crk 107, 112) Habla con Nyar. Aparecen Aurelie, Lehar y Nillem. La razón de la longitud de onda proviene de una grieta que se abre. No solo eso, los límites dimensionales, el tiempo y las dimensiones paralelas están colapsando debido a la grieta. Nyar señala que esta grieta lleva al pasado, lo cual nos da una forma de tratar con Lasgand. Nyar conectará la grieta a un punto específico donde Lasgand obtuvo su poder. La opción que elijas no afecta el resultado.
- Serás transportado a (jor_crk_p 108, 106). Habla nuevamente con Nyar. Lehar y Nillem aparecerán otra vez. Nillem señala que, efectivamente, estamos en el pasado cuando la grieta se abrió. Es la época en que se funda Rune-Midgarts. También es el momento donde Lasgand heredó su poder, y se crea un plan para alterar el pasado y detener a Lasgand. Lehar vio a unas personas y todos deciden acercarse como voluntarios para la resistencia contra el Culto de Jormungandr.
- En (jor_crk_p 104, 95) aparecen personas que descubrieron la grieta. Ellos están en contra del culto, pero te detectan. Nos preguntan qué hacemos aquí, y respondemos que "Somos Aventureros". Después de aclarar que estamos de su lado, el extraño se presenta como Ivan de la familia Wigner. Lo seguimos.
- Serás transportado a un lugar seguro en (luna_sf1 258, 147). Habla con Ivan, quien nos cuenta que estamos cerca del culto en la tierra de Raisend. Pero en lugar de atacar al culto, vamos hacia la base de Gaebolg Lunaphoma. Sigues al soldado hacia el comandante.
- Habla con el Resistance Soldier en (jor_mbase 38, 152) quien te introduce en Lunaphoma. Antes de ir al cuartel general, necesita informar algo al comandante y vicecomandante. Seguidores de Freya se están quejando, y Lehar sugiere escuchar para ver cuál es el problema.
- Habla con Tris. Escucharás que los seguidores de Freya se quejan de que la lucha contra el culto se lleva a cabo en nombre de Odín, y quieren que Freya también sea incluida. Tris explica los tiempos difíciles y que no se han olvidado de la gente de Freya, pero también menciona que necesitan más tiempo porque la guerra contra el culto es la máxima prioridad. Aun así, los seguidores de Freya están descontentos y deciden abandonar la resistencia.
- Habla de nuevo con el Resistance Soldier, quien nos presenta a los capitanes. Después de explicar la situación, Tris quiere enviarnos al Richard Mercenary Group porque siempre necesitan personas con habilidades de combate.
- Habla con Tan, quien fue ordenado para llevarte al Richard Mercenary Group. Está claramente en contra de que seamos parte de la resistencia. Dile que "Iremos de inmediato."
- Sigue el navi hasta (jor_mbase 305, 102). Hasta que aparezcan todos. Tan nos muestra dónde está la oficina del grupo de mercenarios y que necesitamos encontrar a Richard allí. | HAZ SCREENSHOT ANTES DE ENTRAR!!
- Debes ir a la oficina del grupo de mercenarios, donde no hay nadie. De repente encuentras a un hombre misterioso. Lehar te envía a hablar con él.
- Camina hacia el portal encima de esos NPCs.
- Habla con ???, le decimos que estamos aquí para ver al Rey Mercenario Richard. También añadimos que Tan nos envió a este lugar. Según el hombre misterioso, Richard no está aquí y debemos ir a los barracones centrales donde está la habitación de Richard.
- Debes buscar la habitación de Richard en (jor_mbase 203, 190). Revísala.
- Sube por la derecha y entra en el penúltimo portal donde está la habitación de Richard. Pero no hay nadie, así que revisamos la siguiente puerta. Después de una advertencia, aparece una mujer que nos pregunta qué queremos con Richard. Le explicamos que Tan nos envió.
- Te enviarán de regreso a la oficina del grupo de mercenarios (jor_mbase 313, 121).
- Al entrar en la oficina se activará un diálogo. Escucharás que Richard no está aquí, sino alguien llamado Nerius. La dama Valdaris explica que primero debemos pasar por el proceso de registro.
- Habla con los documentos donde encuentras los papeles de aplicación. Te explican que todavía usan el formulario antiguo, así que no es solo para unirte al grupo de mercenarios.
- Habla con Valdaris para entregarle tu formulario. Tras revisarlo, nos da la bienvenida al grupo de Richard Mercenary.
- Habla con Tan, quien habla con Valdaris sobre sus sospechas respecto a nosotros. Valdaris decide darnos un pequeño tour por el área.
- Al salir de la oficina se activará otro diálogo donde Valdaris nos cuenta que esta base fue construida apresuradamente.
- Camina un poco hacia abajo. Aprendes que aquí se almacenan suministros del Wigner Merchant Group.
- Laura Valdaris nos explica que esta es un área para visitantes temporales.
- (jor_mbase 245, 128) aparecerán unos niños que quieren jugar con su hermana Valdaris. Ella explica que esos niños fueron rescatados del Culto de Jormungandr. Después de explicarlo, nos pide ir al campo de entrenamiento.
- Valdaris te espera en (jor_mbase 147, 108). Explica sobre el campo de entrenamiento que está abierto para todos. Escuchas algo extraño de los soldados, y Valdaris se enfada y quiere investigarlo.
- Acércate a los soldados donde ves a alguien siendo brutalmente golpeado casi hasta morir. Es Richard quien recibe la paliza, así que Valdaris decide llevarlo de regreso a su habitación para curarlo.
- Regresa al centro (jor_mbase 202, 191).
- Sube las escaleras y entra en el penúltimo portal a la derecha.
- Habla con Valdaris, quien está MUY MOLESTA por la situación. Nerius le dice que Richard quería ser atacado.
- Habla con Richard, quien explica que quiere crear libros de combate. Ser golpeado por Nerius era necesario para mostrar posturas de combate reales que son mejores con ejemplos prácticos. Lee debe hacer las ilustraciones del libro.
- Habla con Lee, quien inmediatamente muestra la ilustración que hizo. Luego de hablar sobre el libro, te presentan a Richard. Lee recibe la orden de mostrarnos el resto del recorrido mientras Richard y Valdaris hablan.
- Sal de la habitación, entra en el último portal.
- Habla con Lee otra vez. Te cuenta toda la historia de cómo conocieron a Galaxia, quien casi destruye todo el grupo mercenario sola. Luego de limpiar la armadura, Lee está dispuesto a mostrarnos el resto de la base.
- Sal del centro y camina un poco a la izquierda (jor_mbase 168, 195) donde Lee explica el resto de la base. Aparece Tan diciendo que ya es suficiente y que debes ir a ver a Tris. Recibirás 30x
 Wigner Merchant Guild Voucher (1001618) + 30 de reputación.
- Habla con Tris. Nos pregunta cómo nos fue. Después de explicar, nos dice que Alberta necesita un mago y que Nillem debería unirse a ellos. A Lehar lo enviarán al Grupo Mercante Wigner, que está ayudando a los refugiados que escaparon del culto. En nuestro caso, primero debemos conocer a alguien. Conocemos a Heine a través de una Tablet mágica (inserte broma sobre Handy aquí). Al conocer a Heine, nuestra tarea será ir a Alberta y recibir mercancías que Heine envió a la resistencia. Además, Heine quiere obtener de nosotros un Ojo Brillante especial. Debe ser uno fresco, recolectado por nosotros, no uno sacado del almacén. Hay 4 diálogos en total y debes seleccionar opciones específicas:
- Primer diálogo
- "Bearable."
- Segundo diálogo: "Is that person you, Tris?"
- Tercer diálogo: "Enjoy the text."
- Cuarto diálogo: Se activa misión de matar 10x Skipskipper y recolectar 1x
 Bright Eye (1001641) .
- Ve con el Walter Sailor en (jor_mbase 161, 341) y dirígete a Raised Land. Ahí puedes realizar la misión de matar.
- Para volver, puedes hablar con 'Hidden Boat' en la esquina inferior izquierda del mapa.
- Regresa con Tris y recibirás como recompensa 30x
 Wigner Merchant Guild Voucher (1001618) + 35 de reputación.
- Desbloqueas las misiones diarias de Volunteer Vallen Wok y de Counselor Wool.
- Ve al otro Walter Sailor en (jor_mbase 333, 148), él te llevará a Alberta.
- Camina un poco hacia arriba y habla con Nillem. Verás cómo Nillem es sobrecargado de trabajo por el marinero. Luego de intervenir en la conversación, el marinero se presenta como Megas. Nos obliga a buscar trabajo en la playa, ignorando nuestras peticiones.
- (jor_albe 227, 117) Entra en el símbolo de misión, aparecerá Yohan. Él te asignará mover cargas a lugares específicos marcados en el mapa.
- Visita al Walter Sailor en (jor_albe 146, 224). Él te explica que todos deben hacer estos trabajos, como un sistema de jerarquía donde todos empiezan igual.
- Hay otro Walter Sailor esperando dentro de un edificio en (jor_albe 120, 145).
- Entra en el edificio, sube, y habla con el Walter Sailor.
- Regresa con Yohan (jor_albe 227, 117). Con tanto movimiento de mercancías, la ciudad se ha ensuciado. Debes limpiar 4 montones de suciedad.
- Las ubicaciones de los 4 montones de suciedad son:
- Regresa con Yohan (jor_albe 227, 117). Él te asignará trabajo en el almacén donde estuviste antes.
- Regresa al edificio anterior (jor_albe 120, 145).
- Entra al edificio y camina hacia abajo. Conocerás a Iana Operta, quien te pedirá entregar 2 cartas.
- Primera carta: (jor_albe 200, 107), ¡entra al edificio!
- Habla con el Profesor Sanguin, quien recibe la carta y menciona que tu nombre aparece en ella. Después de esperar un momento, te da una respuesta escrita.
- Segunda carta: (jor_albe 60, 237), ¡entra al edificio!
- Habla con la Pastelera Edel. Se presenta y pregunta por tu propósito. Elige la segunda opción (¡la primera causaría problemas!) y escucha su respuesta.
- Regresa con Iana (jor_albe 120, 145). Entra al edificio, baja y habla con Iana. Le entregas ambas respuestas. Ella confirma que no eran tareas triviales. Luego te presentan a Mariastella Walter y comienzan a hablar sobre historias del barco fantasma. Se menciona que el padre de Maria, Walter, podría estar en ese barco y necesitamos reunir información sobre su ubicación.
- Recompensa: 40x
 Wigner Merchant Guild Voucher (1001618) + 40 de reputación.
 - Regresa a Lunaphoma y habla con el Walter Sailor en (jor_albe 194, 200).
- Habla con Ivan en (jor_mbase 240, 277). Pregunta sobre el barco fantasma, pero en lugar de información, te asignan ayudar con la comida.
- Habla con Lehar en (jor_mbase 214, 306) (debes hablarle varias veces). Deciden ayudar a llevar la comida al grupo Wigner. Todos disfrutan mucho del arroz de Lehar. Lehar menciona que escuchó rumores sobre el barco fantasma.
- Habla con Ivan en (jor_mbase 193, 287). Él comenta que varios han visto el barco fantasma y te da el nombre de alguien que sabe más detalles.
- Habla con Lyriq en (jor_mbase 191, 306), presentado por Lehar. Después de un poco de charla, se siente más cómodo contigo y comienza a contar lo que ocurrió ese día con el barco fantasma. Decides regresar con Ivan.
- Habla con Ivan en (jor_mbase 237, 281). Él menciona que quiere unirse a la misión del barco fantasma, pero primero debes entregar un paquete a su hermana en Alberta.
- Ve con el Walter Sailor (jor_mbase 333, 148) para viajar de nuevo a Alberta.
- Entra en el edificio en (jor_albe 100, 238).
- Habla con Lalaila Wigner, quien se sorprende de recibir un paquete de Ivan. Ella te explica que envió personas a cuidar de Ivan. Además, te entrega un objeto que Ivan dejó atrás.
- Entra en el portal de arriba y revisa la caja polvorienta. Contiene unos nudillos bien mantenidos que Lalaila limpia. Ivan quería desecharlos, pero Lalaila se negó. También te da una carta para Maristella Walter.
- Sal del edificio y entra en el siguiente en (jor_albe 120, 146).
- Habla con Maristella Walter y entrégale la carta. Ella solo sonríe. Recompensa: 10x
 Wigner Merchant Guild Voucher (1001618) + 5 de reputación.
- Regresa a Lunaphoma y habla con el Walter Sailor en (jor_albe 194, 200).
- Habla con Ivan en (jor_mbase 237, 281). Él sugiere infiltrarse por el norte de Raised Land y encontrarse allí. Recompensa: 40x
 Wigner Merchant Guild Voucher (1001618) + 40 de reputación.
- Ve al Walter Sailor (jor_mbase 161, 341) para ir a Raised Land.
- Sal del mapa por el portal superior.
- Camina hacia el arbusto en (jor_raise1 322, 64).
- Nota: Velelling (22315) en este mapa deja caer
 Vellelopy (1001643) , necesitas 2 para el paso 162.
- Serás transportado a otro mapa, habla con Ivan. Planean infiltrarse en el templo. Se preguntan por qué hay un templo de apariencia humana aquí, y la única forma de saberlo es entrar.
- Entra en el calabozo en (jor_raise1 152, 316).
- Entra al refugio seguro en (jor_tmple1 170, 62).
- Habla con Ivan. Él organiza un plan para encontrar humanos que buscan escapar. La prioridad es recopilar información sobre el barco fantasma, por lo que vamos junto a Tan a investigar.
- Ve al siguiente punto seguro en (jor_tmple1 103, 180).
- Habla con el creyente. Después de preguntar, no pueden dar información sobre el barco fantasma y debido a su fuerte fe, Tan decidió no preguntar sobre escapar.
- Ve al siguiente punto seguro en (jor_tmple1 181, 235).
- Habla con otro creyente. Están descontentos, pero al preguntar sobre escapar, piensan que queremos capturarlos y llevarlos al segundo piso, donde los humanos son tomados por los guardias. Tan sugiere ir allí para obtener información.
- Ve al siguiente punto seguro en (jor_tmple1 229, 270).
- Habla con el siguiente creyente. Te dicen que para ir al segundo piso debes estar registrado por los sacerdotes como creyente. Pero actualmente han desaparecido, así que Tan sugiere regresar al punto de reunión.
- Regresa al primer punto seguro en (jor_tmple1 170, 62).
- Habla con Ivan. Ivan y Yohan llegaron a la misma conclusión: sin información no podemos avanzar. Se dice que primero necesitamos más información sobre el lugar.
- Regresa a Lunaphoma (posiblemente usando @go).
- Habla con Tris en (jor_mbase 142, 264). Tris está un poco frustrado porque no encontramos humanos que quisieran escapar ni información sobre el barco fantasma. Pero pronto llegará alguien con información interna, así que nos reuniremos con él. Recompensa: 15x
 Wigner Merchant Guild Voucher (1001618) + 15 reputación.
- Visita el bote pequeño en (jor_mbase 124, 33).
- Habla con Tan en (jor_crk_p 72, 76). El informante Nadaya explica que hay alguien que quiere escapar del templo y tiene toda la información que necesitamos. Pero para llegar hasta él de manera segura, necesitamos a alguien alto, con cabello largo y negro, similar a Tan.
- Habla con Ivan, quien tiene una idea de qué persona encaja perfectamente con las condiciones, pero le preocupa ese pensamiento.
- Regresa a Lunaphoma, hablando con el bote pequeño.
- Habla con Ivan en (jor_mbase 163, 295). Nos reunimos con Wilhelm, quien no quiere unirse a la misión. Después de que Tan menciona la razón por la que Wilhelm trabaja allí y con algo de persuasión, acepta infiltrarse en el templo para conseguir información sobre el barco fantasma y encontrar personas que quieran escapar.
- Ve con el Walter Sailor en (jor_mbase 161, 341) y viaja a Raised Land.
- Sal del mapa por el portal superior.
- Camina hacia el arbusto en (jor_raise1 322, 64).
- Serás transportado a otro mapa, habla con Tan. Nadaya explica el plan: Wilhelm se disfrazará de un Sacerdote de Alto Rango para poder ingresar al área restringida de la iglesia, con la esperanza de encontrar información o personas que quieran escapar. Wilhelm deja claro que solo lo hace porque busca a una persona específica. Nadaya también menciona que el sacerdote al que suplantan también quiere escapar del culto. Recompensa: 15x
 Wigner Merchant Guild Voucher (1001618) + 15 reputación.
- Entra en la mazmorra en (jor_raise1 152, 316).
- Entra en el punto seguro en (jor_tmple1 229, 266).
- Habla con Nadaya, quien explica que Wilhelm debe actuar como el Sumo Sacerdote Charmigand. Solo necesitamos seguirlo y todo debería salir bien, aunque Wilhelm está escéptico sobre el plan.
- Habla con el guardia para registrarte con un nombre falso. Nadaya se adelantará. Habla nuevamente con el guardia para iniciar la instancia de Infiltración de Gimli. NOTA: Cualquiera del grupo puede abrir la instancia.
- Habla con Nadaya, quien te informa que el plan de escape de Charmigand fue filtrado. Ahora debemos actuar rápido para encontrarlo y rescatarlo del culto, ya que tiene toda la información que necesitamos.
- Habla con Tan, quien te teletransportará a una nueva sala.
- Habla con Wilhelm, quien pregunta a los Believers por Charmigand. No saben dónde está, pero dan pistas para buscar en la sala interior de oración. Wilhelm aprovecha para preguntar por alguien llamado Reinhard, la persona que está buscando. Después del diálogo, serás transportado afuera.
- Habla con Tan en la nueva ubicación.
- Habla con Tan para ser transportado a otra sala de oración.
- Habla con los Believers que se quejan de su tiempo en el templo. Quieren escapar y Wilhelm les ofrece una salida. Pero aparecen guardias sospechando del ruido y prohibiendo reuniones de más de dos personas. Te atacarán.
- Mata a los guardianes.
- Habla nuevamente con el creyente que accede a escapar. Pero tampoco sabe nada sobre Reinhard después de que Wilhelm le pregunte. Serás transportado fuera.
- Habla con Tan para obtener nuevas ubicaciones.
- Habla con el guardia, quien se sorprende al ver a Charmigand. Wilhelm, quien fingió ser Charmigand, aprovecha este momento para atacar a los guardias por sorpresa.
- Mata a los guardianes.
- Entra al portal, que aparece después de matar a ambos guardianes.
- Habla con el creyente en la parte superior de la sala. Están felices de ser rescatados por nosotros y están dispuestos a confiar en nosotros para escapar. Pero nadie sabe nada sobre Reinhard, uno de ellos ya sugirió que murió debido al sufrimiento en el templo.
- Tienes que buscar otra sala de oración en (1@mdtem 117, 38).
- Habla con Tan. Aparecerán guardias que afirmarán que Wilhelm es Charmigand e intentarán capturarlo. Tendrás que matar a ambos guardianes nuevamente.
- Después de matar a los guardias, aparecerán otros guardianes. Habla con el guardia amarillo, y más guardias aparecerán. Wilhelm sugiere ser capturado para que nos lleven con el verdadero Charmigand. Esto sería más eficiente que andar dando vueltas.
- Serás transportado nuevamente a una sala de predicadores, habla con Wilhelm (¿o camina un poco hacia arriba?). Charmigand aparecerá y aprenderás que Charmigand es en realidad Reinhardt, el chico que Wilhelm está buscando. Ambos son hermanos, sus padres murieron, y Wilhelm está feliz de encontrarlo finalmente, pero también decepcionado de que se haya convertido en un alto sacerdote de este templo. Charmigand explica que en esa sala hay un pasaje secreto que nadie de la iglesia conoce y necesitamos encontrarlo para escapar.
- Aparecerán 'Suspicious Place'. Haz clic en todos ellos hasta dar con el correcto y ser transportado fuera.
- Habla con Wilhelm, quien está confundido sobre por qué el pasaje es como una maza. Charmigand explica que cada sala de oración está conectada y necesitamos encontrar la correcta para escapar.
- Aparecerán dos guardianes que intentarán recapturar a Charmigand y Wilhelm. Mátalos a ambos. Después de matarlos, habla nuevamente con Wilhelm, quien te teletransportará a un nuevo lugar.
- Habla con Tan. Wilhelm encuentra gracioso que él, que era más débil cuando niño, ahora esté protegiendo a su hermano.
- Aparecerán 4 guardianes para capturarnos. Mátalos.
- Habla nuevamente con Tan. Charmigand no sabe dónde está exactamente la salida. Serás transportado a una nueva ubicación.
- Habla con Wilhelm. Aparecerá Hyasagand con guardias, quien explica que está feliz de ver la caída de Charmigand. Charmigand le cuenta cómo piensa sobre la iglesia y cuán grande es la mentira. Ella manda a los guardias a capturarlo, incluso por la fuerza.
- Mata a los 3 guardianes que Hyasagand manda para capturar a Charmigand.
- Habla con Wilhelm. Los Believers son testigos de lo que sucede, y Hyasagand distorsiona las palabras para que Charmigand parezca el villano. Mata a los 9 guardianes para progresar.
- Habla con Tan. Ivan y los demás aparecen con los Believers para escapar. Hyasagand se retira por ahora. Charmigand da un discurso a su gente para que lo sigan, aunque haya causado mucho dolor. Aparecerá un portal, entra en él para salir de la instancia.
- Serás transportado de vuelta al punto seguro, entra en el arbusto y encontrarás a Nayado y los demás dentro. Ivan explica lo que sucedió dentro y Nadoyo no está sorprendida de cómo resultó todo. Charmigand le prometió que no cometería los mismos errores dos veces. Obtendrás 20x
 Wigner Merchant Guild Voucher (1001618) + 20 reputación.
- Regresa a Lunaphoma y habla con Tris (jor_mbase 149, 270). Él saluda a todas las nuevas personas que escaparon del culto. Están un poco inseguras del lugar, pero Tris hizo un discurso claro sobre el lugar y su propósito. Los antiguos Believers piden justicia por la traición de Charmigand, por lo que Tris decidió hablar en privado mientras Ivan les muestra las tierras aquí.
- Regresa al cuartel central (jor_mbase 203, 190). Entra al portal.
- Ve directamente hacia arriba, al portal en la parte superior.
- Habla con Wilhelm. Aclararon que trajeron a Charmigand aquí. Él deseaba ser llamado por su viejo nombre, Reinhard Lugenburg. Está dispuesto a darnos cualquier información solo para derrotar al culto.
- Habla con Reinhardt. Él nos habla sobre el Barco Fantasma, lo cual encaja con todo lo que sabemos hasta ahora. También mencionó que el culto usa una nueva ruta por miedo al barco. También aprendemos que el culto se está debilitando con el tiempo debido a la salida de humanos, pero no sabemos nada sobre su fuerza principal. Debido a que Reinhard es humano, no tiene toda la información. Obtendrás 30x
 Wigner Merchant Guild Voucher (1001618) + 30 reputación.
- Habla con Wilhelm. Comienza a explicar cómo murieron sus padres y empieza a despotricar sobre cómo Reinhard traicionó a su familia al convertirse en algo contra lo que están luchando.
- Habla con Reinhardt, quien explica que quería ayudar a todos, creyendo que la iglesia era la respuesta. Wilhelm, decepcionado, se va, incluso diciendo que enterró sus sentimientos por su hermano debido a lo que hizo.
- Se desbloquea la misión secundaria
- Hermanos Lugenburg.
- Entra al edificio en (jor_albe 120, 146).
- Habla con Maristella Walter. Ella te pide que te encuentres en el puerto para el viaje al barco, ahora que sabe la ubicación donde encontrarlo.
- Deja el edificio y ve a (jor_albe 191, 180).
- Habla con Maristella Walter. Entra a la instancia del Barco Fantasma.
- Habla con Maristella adentro. Se planea avanzar con cautela y comprobar si realmente es el barco de Walter.
- Camina a la izquierda, mata a la tripulación del Barco Fantasma y aparecerá un Sternlight. Te resultará familiar, pero no es lo mismo que María recuerda.
- Camina a la derecha y haz clic en las 'Mast Traces'. María encuentra marcas de cuando era más joven.
- Camina hacia arriba por el lado derecho y haz clic en la 'Old Box'. Dentro de la caja encuentras juguetes de madera antiguos, que son de Howell para su hija.
- Camina hacia abajo y mata nuevamente a la tripulación del Barco Fantasma, aparecerá un portal.
- Mata nuevamente a la tripulación del Barco Fantasma y haz clic en los 'Crumpled Documents', que son ilegibles. Ni Yohan puede leer lo que está en los papeles, que están manchados por el agua de mar. ¡ANTES DE ENTRAR AL PORTAL!
- Encuentra la 'Rusty Fountain Pen' en (1@wtgs 184, 121). Yohan reconoce esa pluma y con eso es seguro que este barco trata sobre eso.
- Mata a la tripulación del Barco Fantasma al otro lado.
- Sigue el camino hasta que encuentres la 'Box Under a Bed'. (1@wtgs 149, 127). Encuentras un diario donde dice que después de que María escapa, aparece una extraña figura que concede un deseo. Después de ese deseo, todo se convirtió en este barco, las memorias se desvanecen y los miembros de la tripulación se convierten en monstruos. Ahora sabemos que este barco es el barco que María estaba buscando.
- Busca al resto de la tripulación del Barco Fantasma y mátalos.
- Si los mataste a todos, aparecerá un portal en (1@wtgs 109, 114). Antes de entrar, María hará un pequeño discurso confirmando que este barco es el Walter perdido y que todas las respuestas deben estar en la Cámara del Capitán.
- Arriba, conocerás al Capitán del Barco Fantasma.
- Habla con él para iniciar la pelea después de que María haga un discurso moral.
- Habla con él después de su muerte. Se transformará en una forma humana por un momento para explicar lo que sucedió en el pasado. Su deseo era enviar los barcos del culto, incluso en la muerte. Está contento de poder ver a todos una vez más antes de morir.
- Deja la sala por el lado derecho (1@wtgs 331, 27).
- Afuera en el barco, habla con Maristella. Resume lo que sucedió y que necesitan irse antes de que el barco desaparezca.
- Deja la instancia a través del portal que aparece junto a Maristella.
- Habla con Maristella Walter, quien le reporta a Mega lo que sucedió en el barco fantasma.
- Aparecerá el Ejecutivo Wigner, habla con él. Él te dice que tiene los bienes que Heine nos envió. Ahora que hemos terminado, deberíamos regresar a Lunaphoma y hablar nuevamente con la tableta. Obtendrás 70x
 Wigner Merchant Guild Voucher (1001618) + 90 reputación.
- Se desbloquea la instancia diaria 'Ghost Ship'.
- Regresa al cuartel central (jor_mbase 203, 190). Entra al portal.
- Habla con Tris, él nos pregunta qué pasó con el barco fantasma. Después de un tiempo, intentó llamar a Heine nuevamente, pero la conexión con él es mala. Habla con él otra vez, ahora la conexión es estable. Toda la mesa necesita una revisión y Heine quiere que nosotros lo ayudemos con eso. Tris preparó una habitación de repuesto para nosotros y debemos ir allí lo antes posible con la tableta.
- Sube por el primer portal a la izquierda para hablar con la Tableta de Heine (mbase_in 71, 126).
- Habla con la tableta, Heine te dice que la conexión es muy estable. Elige la segunda opción: "Haré lo que ordenes." y él te dice que consigas materiales para el mantenimiento. Debes conseguir 2x
 Vellelopy (1001643) . Vellelopy se obtiene de Velelling en el mapa jor_raise1.
nota: si ya tienes la Vellelopy, salta al paso 166. - Ve a Walter Sailor (jor_mbase 161, 341) y ve a Raised Land.
- Deja el mapa por el portal superior. Aquí están los Velellings.
- Regresa al cuartel central (jor_mbase 203, 190). Entra al portal.
- Sube por el primer portal a la izquierda para entregar las Vellelopy a la Tableta de Heine (mbase_in 71, 126).
- Habla con la tableta, comenzará a absorber los materiales que trajiste. Mientras esperas, Heine te pide contar una vieja historia. Elige "Por favor, cuéntame." y luego te explica por qué comenzó a ayudar a Tan y Tris, ¡pero luego empieza a quejarse de ellos también!
- Habla de nuevo con la tableta y Heine se queja de lo molesto que es que no haya funcionado la primera vez. Después de que preguntas (elige "¿Cuántos años tiene?"), él trata de explicar lo viejo que es esta tableta. También menciona que agregó 2 nuevas características a la tableta.
- Habla por tercera vez con la tableta y Heine está feliz de que funcione por segunda vez, así que preguntas "¿Es eso bueno?", y él comienza a quejarse de que está mal que solo haya funcionado por segunda vez. Pero luego señala que somos del futuro al leer nuestra mana, así que nos pregunta por qué vinimos. Elige "Para eliminar completamente a los Rgans" y explicamos lo que sucedió en nuestro tiempo, que los Rgans son un gran problema en nuestro tiempo. Heine está feliz con nuestra respuesta y quiere ayudarnos, por supuesto. Obtendrás 1x
 Heine's Tablet (1001627) .
 - Sal de la habitación y habla con Tris nuevamente. Tris planea atacar al culto con la información proporcionada por Aurelie. Después de más información de Heine, todos acuerdan atacar lo antes posible para terminar la guerra antes de que el culto pueda reagruparse, pero algo sucedió afuera. Obtendrás 50x
 Wigner Merchant Guild Voucher (1001618) + 50 reputación.
- Sal del cuartel a través del portal y habla con Nayado, quien explica que el culto planea Jörmungandr. Nadoyo incluso vio una sombra de una serpiente en las sombras, así que necesitamos contactar a aliados y reunir toda la información que podamos obtener.
- Reúne 3 informes:
- Soldado herido (jor_mbase 62, 194)
- Soldado exhausto (jor_mbase 186, 250)
- Miembro del culto fugitivo (jor_mbase 216, 297)
- Regresa a Tris, que está frente al cuartel central (jor_mbase 203, 186). Le entregamos toda la información que reunimos. Pero Tan y Nadoyo no aparecieron, así que necesitamos revisarlos.
- Ve a Walter Sailor (jor_mbase 161, 341) y ve a Raised Land.
- Deja el mapa por el portal superior.
- En (jor_raise1 198, 189) encontrarás una grieta en la roca, entra en ella.
- Dentro, habla con Nayado. Ellos se prepararon para algo dentro de la iglesia, una habitación que ni Reinhard conoce. Así que antes de regresar a Tris, vamos con ellos a la iglesia para verificarla o buscar más evidencia sobre la serpiente gigante.
- Debes verificar la 'Decorative Door' en (jor_raise1 128, 323).
- Dentro del edificio, habla con 'Cult Priest'. El sacerdote confirma nuestro temor, algo está comiendo personas al absorber su mana para volverse más y más fuerte. Tan y Reinhard quieren ir adelante y enfrentarlo mientras nosotros y Nadoyo regresamos y le informamos a Tris.
- Habla con Nayado, ella te llevará de vuelta a Lunaform.
- Regresa a Tris, quien está frente al cuartel central (jor_mbase 203, 186). Le informamos lo que sucedió y el plan de Tan. Tris excluirá a los soldados normales y a nosotros de la batalla, y debemos reunirnos con nuestros amigos en el segundo piso.
- Entra al cuartel y pasa por la pequeña puerta.
- Habla con Nyar. Heine explica que no podemos borrar los eventos del pasado, pero que podemos unirnos a Tris en la batalla con la ayuda de Heine. Obtendrás 10x
 Wigner Merchant Guild Voucher (1001618) + 50 reputación.
- Ve a Walter Sailor (jor_mbase 161, 341) y ve a Raised Land.
- Deja el mapa por el portal superior.
- Debes ingresar nuevamente a la 'Decorative Door' en (jor_raise1 128, 323).
- Habla con Nayado. Tris y Nadoyo se sorprenden de verte allí, pero Heine interviene y explica que necesita ayuda y solo nosotros podemos hacerlo.
- Habla con la puerta.
- Habla con la Tableta de Heine. Todos se han reunido aquí y algunos no están seguros si es la decisión correcta. Después de una votación, se decide proceder y Heine quiere compartir su nuevo hechizo con todos.
- Comenzarás la instancia "Batalla Final".
- Dentro, elige "Usar la tableta" y Heine intentará encontrar cada ubicación.
- Disfruta de los diálogos ~
- Después de que todos canalicen su mana en el huevo, haz clic en el gran huevo.
- Mata a Tan Corrupto. Después de una larga batalla, la Serpiente intentó convencer a Tris de que salvara su vida mientras Tan gritaba que lo matara. Tris terminó con la Serpiente y Tan murió con ella...
- Habla con Nyan. Heine sugiere salir primero para rastrear los movimientos del culto y darle a Tris algo de tiempo para organizar sus pensamientos. Obtendrás 90x
 Wigner Merchant Guild Voucher (1001618) + 110 reputación.
- Fuera de la instancia, habla nuevamente con Nyan, quien nos lleva a una nueva área.
- Serás teletransportado, habla nuevamente con Nyan. Nillem y Lehar encuentran una habitación sospechosa con un libro. Nillen nos recuerda por qué estamos aquí y debemos investigar presionando este libro primero.
- Haz clic en el Libro Sospechoso para comenzar la Instancia "Alter Secreto".
- Aparecerá una puerta brillante, entra en ella.
- Dentro, habla con Lehar, Nillem explica que adelante hay un gran poder y que con la muerte de la serpiente gigante comenzaron su siguiente plan concentrando su poder restante en Lasgand. Necesitas matar a todos los monstruos.
- Al final del pasillo habrá una puerta, haz clic en ella.
- Habla con Lehar. Este lugar parece familiar, como el lugar donde viven los Rgans de alto rango. Continúas por el camino.
- Sigue el camino y mata a todos los sacerdotes del culto.
- Habla con el Chamán de Jörmungandr, quien está maldiciendo a todos los que formaron parte de la batalla, como se cuenta en las historias de antaño. Mátalo y haz clic en la puerta para continuar.
- Camina hacia el Chamán del Culto, quien explica que con la maldición persistirán eternamente. Los monstruos están apareciendo, mata todas las Serpientes grandes.
- Haz clic en el Huevo Gigante. Tris está transfiriendo la maldición a sí mismo. Aurelie y Tris vigilarán el huevo hasta que se marchite y los hijos de Tris en el futuro lucharán contra lo que salga de allí. Serás transportado de vuelta a la isla. Obtendrás 60x
 Wigner Merchant Guild Voucher (1001618) + 50 reputación.
- Fuera de la instancia, habla con Nyar. Hablan sobre lo sucedido. Ahora que Nyar ha recuperado algo de su poder, Lasgand debería estar mucho más debilitado. Pero antes de irnos, necesitamos intercambiar la tableta por algo que Heine escondió para nosotros en el muelle.
- Regresa a Lunaform, hablando con el pequeño bote.
- Habla con los Arbustos para recibir una nueva Tableta de Heine. Heine dice su despedida y nos teletransporta de vuelta a la isla.
- Habla con Nyar nuevamente y elige regresar al tiempo normal.
- Camina hacia (jor_crk 137, 138). Aurelie ya siente el cambio repentino en la magia y le informamos lo sucedido. Ahora Nillen y Nyar sellarán la grieta mientras nosotros vemos qué pasa con Lasgand en el Sello.
- Habla con el Clon de Nyar. Lehar y su tía entrarán para levantar la maldición de Lasgand. No puedes unirte a ellos, así que debes esperar hasta que terminen. Debes esperar 10 minutos para abrir la instancia. Tómate un café, visita el baño, toca algo de césped. Después de los 10 minutos, Lehar y Voglinde reaparecerán, diciendo que la maldición está rota, pero Lasgand aún está resucitando. Ahora pensamos que es obra de la Pieza del Corazón de Ymir y necesitamos investigarlo, recordando lo que sucedió en los Laboratorios Biológicos en ese entonces.
- Abre la instancia.
- Dentro de la instancia, habla con Aurelie. El poder insano de Lasgand ya se ha ido, pero el mana está descontrolado. Necesitamos confirmar quién es este Lasgand.
- Habla con Lasgand, quien está actuando extraño por alguna razón. Necesitarás matarlo varias veces.
- Habla con Aurelie, quien confirma que este Lasgand está actuando de la misma manera que la primera vez y que realmente es la Pieza del Corazón de Ymir. Ella te teletransportará fuera de la instancia.
- Habla con el Clon de Nyar. Confirmamos lo que es y aún sigue siendo peligroso, su poder sigue creando nuevos Rgans. La maldición ha sido levantada, pero Lehat y Voglinde se quedan para luchar contra los Rgans. Ahora Nillen quiere vernos donde estaba la grieta, serás transportado allí.
- Habla con Nyar. Nillen y Nyar no lograron sellar la grieta, pero el tiempo ahora se repite una y otra vez, aunque podemos viajar libremente allí de vez en cuando. No solo eso, ahora TU nombre también se menciona en los libros de historia. Obtendrás 70x
 Wigner Merchant Guild Voucher (1001618) + 60 reputación.
Misiones secundarias
Abastecimiento de Suministros
- Al hablar con Mandel en (jor_mbase 210, 173), puedes desbloquear las misiones diarias para el Abastecimiento de Suministros.
Main Quest
- At (jor_tail 233, 41) you will find Shufapa. He explains to us, that they plan to investigate Scale Island and asks you to come along. The reason for that is an unusual mana wavelength on the island.
- (jor_crk 137, 137) A dialogue opens and Nillen confirms that the wavelength is really unusual. Lehar spotted Nyar on the island so everyone decides to see what's up with her.
- (jor_crk 107, 112) Talk to Nyar. Aurelie, Lehar, and Nillem will appear. The reason for the mana wavelength comes from a rift that opened. Not only that, the dimensional boundaries and time and parallel dimensions are collapsing because of the rift. Nyar points out that this rift leads to the past, which gives us a way to deal with Lasgand. Nyar will connect the rift to a specific point in time, where Lasgand got his power. The option you pick doesn't matter in the end.
- You get warped to (jor_crk_p 108, 106). Talk to Nyar again. Lehar and Nillem will appear. Nillem points out that we are indeed in the past where the rift opened. It's the time where the foundation of Rune-Midgarts happens. This is also the time where Lasgand got the power inherited and a plan gets created how to alter the past to stop Lasgand. Lehar spots people and everyone decides to approach them as volunteers for the resistance against the Jormungandr Cult.
- In (jor_crk_p 104, 95) people appear who found out about the rift. Those are against the cult, but they spotted you. He ask us what we are doing here, so were telling him that "We're Adventurers". After clearing up that we are on their side, the stranger introduces himself as Ivan from the Wigner family. So we follow him.
- You will be warped to a Safe Place in (luna_sf1 258, 147). Talk to Ivan, he tells us that we are near the cult, in the Raised Land. But instead of attacking the cult, we are on the way to the base of Gaebolg, Lunaphoma. You follow the soldier to the commander.
- Talk to the Resistance Soldier in (jor_mbase 38, 152) who introduces you to Lunaphoma. Before going to the headquarters, he needs to report something to the commander and vice-commander. Followers of Freya are complaining and Lehar suggested to listen in to hear what's the fuss.
- Talk to Tris. You hear that the people of Freya complain that the fight against the cult is lead in the name of Odin and they want Freya to be included as well. Tris explains the difficult time and that they didn't forget about the people of Freya, but also mentions that they need more time because the war against the cult is top priority. But the people of Freya are unhappy and decide to leave the resistance.
- Talk to the Resistance Soldier again who introduce us to the captains. After explaining the situation, Tris wants to send you to the Richard Mercenary Group, because people with combat skills are always needed there.
- Talk to Tan who got ordered to bring you to the Richard Mercenary Group. He is clearly against us being part of the resistance. Tell him that "We'll go right away."
- Follow the navi (jor_mbase 305, 102) until everyone appears. Tan shows us where the mercenary group's office is and that we need to find a Richard there.
- You have to go to the mercenary group's office, but no one is here. Suddenly you find a mysterious man. Lehar sends you to speak to him.
- Walk into the portal above those NPCs.
- Talk to ???. We tell him that we are here to see the Mercenary King Richard. We also add that Tan sent us to this place. According to the mysterious man, Richard is not here and that we need to go to the Central Barracks where Richard's room is.
- You have to search for Richard's room (jor_mbase 203, 190). Check his room.
- Go upstairs and right and enter the second to last portal where Richard room lies. But no ones here, so we check the next door. After a warning a woman appears and asks us what brings us to Richard. We explain that Tan sent us.
- They will sent you back to the Mercenary Group's Office (jor_mbase 313, 121).
- When entering the office, a dialogue will start. You hear that Richard is not here. The lady, Valdaris, explains that we need to go through the registration process first.
- Talk to the documents where you find the papers for the applications. You get explained that they are still using the old forms and they are not for applying to only one mercenary group.
- Talk to Valdaris to give her your form. After reviewing the forms we get welcomed to the the Richard Mercenary Group.
- Talk to Tan, who is talking to Valdaris about us being suspicious. He is still concerned about if we are good or not. Valdaris is taking us to a simple tour around the area.
- When leaving the office another dialogue will start where Valdaris tells us that this base was build in a rush.
- Walk a little bit down. You learn that there are supplies stored from the Wigner Merchant Group.
- Laura Valdaris tells us that this an area for temporary visitors.
- At (jor_mbase 245, 128) some kids appear and want to play with their Sister Valdaris. She explains that the children are rescued from the Jormungandr Cult. After explaining everything about the kids she asks us to go to the training ground.
- Valdaris is waiting for you at (jor_mbase 147, 108). She explains the training grounds and that it is open for everyone. You hear something strange from the soldiers, so Valdaris gets angry and wants to investigate it.
- Go near the soldiers where you see someone getting beaten up so bad that he nearly dies. It's Richard who gets beaten up, so Valdaris decides to bring him back to his room to treat his wounds.
- Go back to the center (jor_mbase 202, 191).
- Go upstairs enter the second to last portal on the right side.
- Talk to Valdaris who is REALLY UPSET about the situation. Nerius tells her that Richard wanted to be attacked.
- Talk to Richard who explains that he wants to create books for battle. Getting hit by Nerius was necessary to show proper combat stances which are better shown in real-life examples. Lee should draw the illustration for the book.
- Talk to Lee who instantly shows you the illustration he has drawn. After some talking about the book, you get introduced to Richard. Lee gets ordered to show us the rest while Richard and Valdaris have a talk.
- Leave the room, enter the last portal.
- Talk to Lee again. He tells us the full story of how they met Galaxia, where she destroyed nearly the entire mercenary group alone. After clearing the armor, Lee is willing to show us the rest of the base.
- Leave the center and walk a little bit left (jor_mbase 168, 195) where Lee explains the rest of the base. Tan will appear and tell us that this should be enough and you should go and see Tris. You will be rewarded with 30x
 Wigner Merchant Guild Voucher (1001618) and 30 reputation.
- Talk to Tris. He asks us how everything went. After some explaining, he tells us that Alberta needs a wizard and Nillem should join them. Lehar will be sent to the Wigner Merchant Group, who are involved in relief efforts for people who escaped the cult. For us, we need to meet someone first. We meet Heine through a magic Tablet (Insert mobile phone joke here). Learning from Heine, our task will be to go to Alberta and receive the goods Heine sent to the resistance. Heine wishes to get a special Bright Eye from us. It must be from us and a fresh one, so not a single one from the storage. There are 4 dialogs in total and you need to click specific options:
- First Dialogue
- Bearable.
- Second dialogue: Is that person you, Tris?
- Third Dialogue: Enjoy the text.
- Fourth dialogue: Get kill quest 10x Skipskipper (22319) and collect 1x
 Bright Eye (1001641) .
- Talk to Walter Sailor (jor_mbase 161, 341) and go to the Raised Land. Here you can do the kill quest.
- To return you can talk to the Hidden Boat on the bottom left of the map (jor_raise2 100, 26).
- Go back to Tris. You will be rewarded with 30x
 Wigner Merchant Guild Voucher (1001618) and 35 reputation.
- You have unlocked: Volunteer Vallen Wok Daily Quest
- You have unlocked: Counselor Wool Daily Quest
- Go to the other Walter Sailor (jor_mbase 333, 148), he will take you to the Alberta.
- Walk up a little bit and talk to Nillem. You watch how Nillem gets overloaded with work from the Sailor. After entering the discussion, the Sailor introduces himself as Megas. He forces you to go to the beach to find work, ignoring your request.
- (jor_albe 227, 117) Walk into the quest sign, Yohan will appear. He assigns you with moving the cargo to specific areas. Those are marked on the map.
- Visit Walter Sailor at (jor_albe 146, 224). He explains to you that everyone needs to do those tasks, it's like a ladder where everyone begins the same.
- There is another Walter Sailor waiting inside a building (jor_albe 120, 145).
- Enter the building, walk up, and talk to Walter Sailor.
- Go back to Yohan (jor_albe 227, 117). With all the goods coming and going there is dirt in the town. You have to clean up 4 dirt piles.
- The 4 dirt pile locations are:
- Go back to Yohan (jor_albe 227, 117). He will give you the next job in the warehouse you were before.
- Go back to the previous building (jor_albe 120, 145).
- Enter the building and walk down. You will meet Iana Operta. She wants you to deliver 2 letters.
- First letter: Enter the building at (jor_albe 200, 107).
- Talk to Professor Sanguin. He takes the letter and mentions that your name is mentioned in the letter too. After some waiting, he gives you a written reply.
- Second letter: Enter the building at (jor_albe 60, 237).
- Talk to Patissier Edel. She introduces herself and asks about your business. Choose the second option (First Option would mean trouble!) and hear her reply.
- Go back to Iana (jor_albe 120, 145). Enter the building, walk down and talk to Iana. You bring her both replies and she tells you that those aren't basic trivial errands. You get introduced to Mariastella Walter and start talking about the stories of the ghost ship. We are told that Maria's father, Walter, might be on the ship and we need to gather information about it's location.
- You will be rewarded with 40x
 Wigner Merchant Guild Voucher (1001618) and 40 reputation.
 - Go back to Lunaforma, talk to the Walter Sailor at (jor_albe 194, 200).
- Talk to Ivan at (jor_mbase 240, 277). Ask about the ghost ship. But instead of getting information, you will get assigned to helping with the meal.
- Talk to Lehar in (jor_mbase 214, 306) several times. You decide to help him with the meals for the Wigner groups. Everyone is enjoying Lehar's rice a lot. Lehar mentions that he heard people mention a ghost ship.
- Talk to Ivan at (jor_mbase 193, 287) who tells you how many people saw the ghost ship. He gives you the name of who you should ask first, because he saw most of the stuff happening.
- Talk to Lyriq at (jor_mbase 191, 306), who gets introduced by Lehar. After some small talk he gets more comfy around you and begins to tell you the story of what happened on that day with the ghost ship. We decide to go back to Ivan.
- Talk to Ivan at (jor_mbase 237, 281). He tells us that he wants to join us on the ghost ship mission. But we need to deliver a package to his sister in Alberta first.
- Talk to Walter Sailor (jor_mbase 333, 148), he will take you to Alberta again.
- Enter the building at (jor_albe 100, 238)
- Talk to Lalaila Wigner, who is surprised about Ivan's package. She explains to you that she sends others to look over Ivan. We should take something he left behind and bring it to him.
- Enter the portal at the top and check the dusty box. It contains well maintained knuckles which get cleaned and everything by Lalaila. She confirms that Ivan wanted those knuckles to be thrown away but Lalaila refused. She also gives you a letter for Maria Walter.
- Leave the building and go to the next one at (jor_albe 120, 146).
- Talk to Maristella Walter and give her the letter. She doesn't say anything and just smiles. You will be rewarded with 10x
 Wigner Merchant Guild Voucher (1001618) and 5 reputation.
- Go back to Lunaforma, talk to the Walter Sailor at (jor_albe 194, 200).
- Talk to Ivan at (jor_mbase 237, 281). He suggests to infiltrate through the north of the Raised Land and to meet there. You will be rewarded with 40x
 Wigner Merchant Guild Voucher (1001618) and 40 reputation.
- Talk to Walter Sailor (jor_mbase 161, 341) and go to the Raised Land.
- Leave the map through the top portal.
- Walk into the bushes at (jor_raise1 322, 64)
Note: Velelling (22315) on this map drops Vellelopy (1001643) . 2 are required for step 166
- You will be ported to another map. Talk to Ivan. A plan is made to infiltrate the temple. Why is there a temple and why does it look like it's made by human? This question is asked and the only way to find out is to go inside.
- Enter the dungeon at (jor_raise1 152, 316)
- Enter the safe spot at (jor_tmple1 170, 62)
- Talk to Ivan. Ivan sorts out a plan out to find any humans who are looking to escape. Top priority is gathering information about the ghost ship though, so we go with Tan to gather information.
- Go to the next safe spot at (jor_tmple1 103, 180)
- Talk to the believer. After asking, they can't give any information about the ghost ship. Because of their strong faith Tan decides not to ask about escaping.
- Go to the next safe spot at (jor_tmple1 181, 235)
- Talk to another believer. They are unhappy, but after asking about escaping, they think we want to capture them and bring them to the 2nd floor, where humans get taken away by the guards. Tan suggested to go there for potential information.
- Go to the next safe spot at (jor_tmple1 229, 270)
- Talk to the next believer. You get told to go to the 2nd floor, but you need to be registered by the priests as a believer first. But currently they have disappeared, so Tan suggests to go back to the gathering point.
- Go back to the first safe spot at (jor_tmple1 170, 62)
- Talk to Ivan. Ivan and Yohan came to the same conclusion and without any information. It's said that we need more information about the place first before we can get more.
- Go back to Lunaforma.
- Talk to Tris at (jor_mbase 142, 264). Tris is bit frustrated that we couldn't find any humans who wanted to escape or any information about the ghost ship. But someone will arrive soon with potential inside information, so we will meet him and maybe he can guide us to the second floor! You will be rewarded with 15x
 Wigner Merchant Guild Voucher (1001618) and 15 reputation.
- Visit the small boat at (jor_mbase 124, 33).
- Talk to Tan at (jor_crk_p 72, 76). The informant, Nadoyo, explains that there is someone who wants to escape from the temple and has every information we need. But to get there safely we need someone tall with long black hair similar to Tan.
- Talk to Ivan who has an idea which person fits the description perfectly, but he is afraid of that thought.
- Go back to Lunaform, by talking to the small boat.
- Talk to Ivan at (jor_mbase 163, 295). We're meeting Wilhelm who doesn't want to join the mission. After Tan mentions the reason why Wilhelm is working there and after some convincing, he agrees to come along to infiltrate the temple for information about the ghost ship and finding people who want to escape.
- Talk to Walter Sailor (jor_mbase 161, 341) and go to the Raised Land.
- Leave the map through the top portal.
- Walk into the bushes at (jor_raise1 322, 64)
- You will be ported to another map. Talk to Tan. Nadoyo explains the plan. Wilhelm will disguise as a High Rank Priest so we can enter the restricted area of the church, in hopes to find information or people who want to escape. Wilhelm made it clear that he wants to find one person and that's the only reason why he is doing it. Nadoyo mentions that the high priest we disguised into wants to escape from the cult too. You will be rewarded with 15x
 Wigner Merchant Guild Voucher (1001618) and 15 reputation.
- Enter the dungeon at (jor_raise1 152, 316)
- Enter the safe spot at (jor_tmple1 229, 266)
- Talk to Nadoyo, who explains the plan. Wilhelm will pose as high priest Carmigand, a key figure in the cult. We just have to follow him and everything should work out fine, but Wilhelm is skeptical about the plan.
- Talk to the Guard who registers our party with mostly fake names. Nadoyo will go ahead. Talk to the guard again to start the Gimli Infiltration instance. NOTE EVERYONE CAN OPEN INSTANCE FROM PARTY.
- Talk to Nadoyo who tells us that Carmigand's plan to escape got leaked. Now we need to act fast in to find and rescue him from the cult, because he has all information we need.
- Talk to Tan who teleports you into a new room.
- Talk to Wilhelm who asks the believers about Carmigand. They don't know where he is, but they tell us to look for him at the inner payer room. Wilhelm uses the time to ask about someone named Reinhard, the guy who he is looking for. After the dialog you get warped out.
- Talk to Tan at the new location.
- Talk to Tan to get warped to another prayer room.
- Talk to the Believer, who are complaining about their time at the temple. They want to escape and Wilhelm offers them the way out. But guards appear who are suspicious about the loud noises and forbid meeting in groups bigger than 2. They start attacking you.
- Kill the guards.
- Talk to the Believer again. They agree to escape, but don't know anything about Reinhard either. You get warped out.
- Talk to Tan to get the next location.
- Talk to the guard who is surprised to see Carmigand. Wilhelm, who pretends to be Carmigand, uses this time to surprise attack the guards.
- Kill the guards.
- Enter the portal, which appears after killing both guards.
- Talk to the Believer at the top of the room. They are happy to be rescued by us and are willing to trust us to escape. But no one knows anything about Reinhard. One of them suggests that he died from the suffering at the temple.
- You have to search for another prayer room (1@mdtem 117, 38).
- Talk to Tan. Guards will appear. They claim that Wilhelm is Carmigand and try to capture him. You have to kill both guards again.
- After killing the guards, more guards appear. Talk to the yellow guard and even more guards appear. Wilhelm suggest to be captured so they bring us to the real Carmigand. This would be more efficient than wandering around.
- You will be warped to a preacher room. Talk to Wilhelm. Carmigand will appear and you will learn that he is actually Reinhardt, the guy Wilhelm is looking for. They are brothers and their parents died. Reinhardt is happy that he has finally found him, but he is also disappointed that he became a high priest for this temple. Carmigand explains that there is a secret passage in the room, that no Rgan knows about and we need to find it to escape.
- Suspicious Places will appear. Click on all of them, until you hit the right one and get warped out.
- Talk to Wilhelm, who is confused why the passage is like a mace. Carmigand explains that each prayer room is connected to the mace and we need to find the right one to escape.
- Two guards appear and want to re-capture Carmigand and Wilhelm. Kill both of them. After Killing the guards talk to Wilhelm again, who teleports you to a new place.
- Talk to Tan. Wilhelm finds it funny that he, who was weaker as a kid is now protecting his brother.
- 4 Guards will appear to capture us. Kill them.
- Talk to Tan again. Carmigand doesn't know where the exit is exactly. You get ported to a new location
- Talk to Wilhelm. Hyasagand appears with guards and explains that she is happy to see Carmigand's downfall. Carmigand tells her what he thinks of the church and how big of a lie it is. She sends the guard to capture him, even with force.
- Kill the 3 guards that Hyasagand sends out to capture Carmigand.
- Talk to Wilhelm. Believers witness what happens and Hyasagand twists the words to make Carmigand look like the bad guy. Kill all 9 guards in order to progress.
- Talk to Tan. Ivan and the others appear with believers to escape. Hyasagand retreats for now. Carmigand makes a speech to his people to follow him, even when he caused a lot of pain. A portal will appear, enter it to leave the instance.
- You will be warped back to the safe spot. Enter the bushes. You will meet Nadoyo and the others inside. Ivan explains what happened inside of the temple and Nadoyo is not surprised that it turned out this way. Carmigand promises to her that he will not make the same mistake twice. You will be rewarded with 20x
 Wigner Merchant Guild Voucher (1001618) and 20 reputation.
- Go back to Lunaforma and talk to Tris (jor_mbase 149, 270). He greets all the newly escaped people from the cult. They are a bit unsure of the place, but Tris makes a clear speech about the place and it's purpose. The old believers wish for justice over Carmigand's betrayal, so Tris decides to speak in private while Ivan shows them the lands here.
- Go back to the center barracks (jor_mbase 203, 190). Enter the portal.
- Go straight up into the portal at the top.
- Talk to Wilhelm. They clear up why they brought Carmigand up here. He wishes to be called by his old name, Reinhard Lugenburg. He is willing to give us any information needed to defeat the cult.
- Talk to Reinhardt. He tells us about the Ghost Ship, which fits everything we know so far. He also mentions that the cult uses a new route in fear of the ship. We also learn, that the cult has weakened over time because of the humans leaving, but we don't know anything about their main force. Because Reinhard is human, he did not get all the information. You will be rewarded with 30x
 Wigner Merchant Guild Voucher (1001618) and 30 reputation.
- Talk to Wilhelm. He starts explaining about how their parents died and begins to rant about how Reinhard betrayed their family by becoming something they are fighting against.
- Talk to Reinhardt, who explains that he wanted to help everyone, believing the church was the answer. Wilhelm leaves disappointed , even saying that he buried his feelings for his brother because of what he did.
- Unlocks Side Quest
- Lugenburg Brothers.
- Enter the building at (jor_albe 120, 146).
- Talk to Maristella Walter. She asks you to meet her at the harbor for the journey to the ship, now knowing the location where to find it.
- Leave the building and go to (jor_albe 191, 180).
- Talk to Maristella Walter. Enter the Ghost Ship instance.
- Talk to Maristella inside. It is planned to move with caution and check if it's really the ship of the Walter.
- Walk left, kill the ghost ship crew and a Sternlight will appear. It feels familiar, but it's not the same as the one Maria remembers.
- Walk right and click on the Mast Traces. Maria finds marks from back then, when she was younger.
- Walk up to the right side and click on the Old Box. Inside the box you find old wooden toys, which are by Howell for his daughter.
- Walk down and kill the ghost ship crew again, a portal will appear.
- Kill the ghost ship crew again and click on the Crumpled Documents which are unreadable. Even Yohan can't read whats on the papers which are smudged by the seawater. BEFORE ENTERING THE PORTAL!!
- Find the Rusty Fountain Pen at (1@wtgs 184, 121). Yohan recognizes the pen and with that it's certain what this ship is about.
- Kill the ghost ship crew on the other side.
- Follow the way till you find the Box under a Bed. (1@wtgs 149, 127). You find a journal. It says, that after Maria escaped a strange woman appeared on the deck, who granted a wish to the captain. When the captain answered everything on the ship changed; memories were fading and crew members turned into monsters. Now we know, that this is the ship Maria was looking for.
- Search for the rest of the ghost ship Crew and kill them.
- After killing them all, a portal will appear at (1@wtgs 109, 114). Before entering Maria gives a short speech confirming that this ship is the missing Walter and that every answer must lie in the Captains Quarter.
- Upstairs you will meet the Ghostship Captain.
- Talk to him to start the fight after Maria gives a speech to bolster morale.
- Talk to him after his death. He will turn into human form for a while to explain what happened in the past. His wish was to sink every cult ship, even in death. He is glad that he could at least see everyone one last time before dying.
- Leave the room on the right side (1@wtgs 331, 27).
- Outside of the ship talk to Maristella. She summarizes what happened and that they need to leave before the ship disappears.
- Leave the instance through the portal, which appears next to Maristella.
- Talk to Maristella Walter who reports to Megas what happened on the ghost ship.
- Wigner Executive will appear, talk to him. He tells you that he has the goods Heine sent us. Now that we're done, we should return to Lunaforma and speak to the tablet again. You will be rewarded with 70x
 Wigner Merchant Guild Voucher (1001618) and 90 reputation.
- Unlocks Mysterious Ghost Ship daily instance.
- Go back to the center barracks (jor_mbase 203, 190). Enter the portal.
- Talk to Tris. He asks us about what happened on the ghost ship. After some time he tries to call Heine again, but the connection to him is bad. Speak to him again, the connection is stable now. The entire tablet needs an overhaul and Heine wants us to help him with that. Tris made a spare room ready for us and we should head there with the tablet ASAP.
- Go upstairs and into the first portal on the left side. Talk to Heine's Tablet (mbase_in 71, 126).
- Speak to the tablet. Heine tells you that the connection is really stable. Choose the second option: "I'll do as you order." and he tells you to get materials for maintenance.You have to farm 2x
 Vellelopy (1001643) . Vellelopy drops from Velelling (22315) in jor_raise1.
Note: If you already have the Vellelopy, skip to step 166 - Talk to Walter Sailor (jor_mbase 161, 341) and go to the Raised Land.
- Leave the map through the top portal. You can find the Velellings here.
- Go back to the center barracks (jor_mbase 203, 190). Enter the portal.
- Go upstairs and into the first portal on the left side to deliver the Vellelopies to Heine's Tablet (mbase_in 71, 126).
- Talk to the tablet. It will begin to absorb the materials you brought along. While waiting, Heine asks to tell an old story, you Choose "Please tell me. " and he explains us why he began helping Tan and Tris but then starts ranting about them as well!
- Talk to the tablet again and Heine complains about how annoying it is that it didn't work the first time. After we ask ( choose "How old is it?") he tries to explains how old this tablet is. He also mentions that he added 2 new features to the tablet as well.
- Talk a third time with the tablet. Heine is happy that it works for the second time, so you ask and choose "Is that good?", and he starts to complain that it's bad that it's only working for the second time. But then he points out that we're from the future by reading our mana, so he asks us why we came. Choose "To completely eliminate the Rgans" and we explain what happened in our time and that the Rgans are a really big problem. Heine is happy about our answer and wants to help us. You will get 1x
 Heine's Tablet (1001627) .
 - Exit the room and talk to Tris. Tris plans to attack the cult with the information Aurelie provided. After more information from Heine all agree to attack ASAP to end the war before the cult can regroup, but something happened outside. You will be rewarded with 50x
 Wigner Merchant Guild Voucher (1001618) and 50 reputation.
- Exit the barracks through the portal and talk to Nadoyo. He explains that the cult plans to resurrect Jormungandr! Nadoyo even saw the shadow of a Serpent, so we need to contact our allies and gather all the information we can get.
- Gather 3 reports:
- Wounded Soldier (jor_mbase 62, 194)
- Exhausted Soldier (jor_mbase 186, 250)
- Cult Member Escapee (jor_mbase 216, 297)
- Go back to Tris who is in front of the center barracks (jor_mbase 203, 186). We give him all information we gathered. But Tan and Nadoyo are missing so we need to check on them!
- Talk to Walter Sailor (jor_mbase 161, 341) and go to the Raised Land.
- Leave the map through the top portal.
- At (jor_raise1 198, 189) you will find a Rock Crevice, enter it.
- Inside talk to Nadoyo. They prepared for something inside the church, a room even Reinhard didn't know. So before going back to Tris we are going with them into the church to check it out and to find more evidence of the giant serpent.
- Check the Decorative Door at (jor_raise1 128, 323).
- Inside the building talk to the Cult Priest. The Priest confirms our fear, something eats people by absorbing their mana to get stronger and stronger. Tan and Reinhard want to go ahead and deal with it while we and Nadoyo go back and report to Tris.
- Talk to Nadoyo, she will warp you back to Lunaphoma.
- Go back to Tris who is in front of the center barracks (jor_mbase 203, 186). We report back with what happened and what Tan's plan is. Tris will exclude normal soldiers and us from the battle and we should unite back with our friends on the 2nd floor.
- Enter the barracks and go into the Small Door.
- Talk to Nyar. Heine explains that we can't erase events from the past but that we could join Tris in the battle with Heine's help. You will be rewarded with 10x
 Wigner Merchant Guild Voucher (1001618) and 50 reputation.
- Talk to Walter Sailor (jor_mbase 161, 341) and go to the Raised Land.
- Leave the map through the top portal.
- You have to enter the Decorative Door at (jor_raise1 128, 323) again.
- Talk to Nadoyo. Tris and Nadoyo are surprised to see you here, but Heine stops him and explains that he needs help and only we can do that.
- Talk to the door.
- Talk to the Heine Tablet. Everyone is gathered here and some are unsure if this is the right call. After a vote it's decided to proceed and Heine wants to share his new spell with everyone.
- You will start the instance "Final Battle".
- Inside choose "Use the tablet" and Heine tries to find every location.
- Enjoy the dialogues ~
- After everyone has channeled their mana into the egg, click on the big egg.
- Kill Corrupted Tan. After a long battle the Serpent tries to convince Tris to save his life while Tan shouts to finish it. Tris finishes the Serpent off and Tan dies with him....
- Talk to Nyar. Heine suggests to leave first to track down the cult's movement and give Tris some time to gather his thoughts. You will be rewarded with 90x
 Wigner Merchant Guild Voucher (1001618) and 110 reputation.
- Outside the instance talk to Nyar again who brings us to a new area.
- You will be warped, talk to Nyar again. Nillem and Lehar find a suspicious room with a book. Nillen reminds us why we are here and that we should investigate by using this book first.
- Click on the Suspicious Book to start the Instance Secret Altar.
- A shining door will appear, enter it.
- Inside talk to Lehar. Nillem explains that ahead is a big power and with the death of the giant serpent they start their next plan of concentrating their remaining power into Lasgand. You need to kill all monsters.
- At the end of the corridor there will be a Door, click on it.
- Talk to Lehar. This place looks familiar, like the place where the High Rank Rgans live. You continue the way.
- Follow the way and kill all Cult Priests.
- Talk to Jormungandr Shaman, who is cursing everyone who was part of the battle, like it is told in the stories back then. Kill him and click on the door to continue.
- Walk into the Cult Shaman, who explains that with the curse they will persist eternally. Monster are spawning, kill all big Serpents.
- Click on the Giant Egg. Tris transfers the curse onto himself. Aurelie and Tris will watch over the egg until it's withered away and Tris children in the future will fight back what ever hatches there. You will get ported back to the island. You will be rewarded with 60x
 Wigner Merchant Guild Voucher (1001618) and 50 reputation.
- Outside talk to Nyar. Talk about what happened, now that Nyar reclaimed some of his power, Lasgand should be weakened by a lot now. But before we go, we need to swap the tablet with something on the docks, that Heine hid for us.
- Go back to Lunaforma by talking to the small boat.
- Talk to the Bushes to receive a new Heine Tablet. Heine says his goodbye and warps us back to the island.
- Talk to Nyar again and choose to return to our own time.
- Walk to (jor_crk 137, 138). Aurelie already senses the sudden change in magic and we report what happened. Now Nillen and Nyar will seal the rift while we'll go and see what happened to Lasgand in the Seal.
- Talk to Nyar Clone. Lehar and his aunt will go on to lift the curse from Lasgand. You can't join them, so you need to wait until they are done. You have to wait 10 minutes to open the instance. Grab a coffee, visit the toilet, touch some grass. After the 10 minutes Lehar and Voglinde will re-appear, telling us that the curse is broken but Lasgand is still resurrecting. Now we think it's the work of the Heart Piece of Ymir and we need to check it out, remembering what happened in Bio Labs back then.
- Open the instance.
- Inside the instance talk to Aurelie. The insane power of Lasgand that was there before is gone now, but the mana is going wild. We need to confirm who this Lasgand is.
- Talk to Lasgand who is acting weird for some reason. You need to kill him multiple times.
- Talk to Aurelie who confirms that this Lasgand is acting the same as the first time and it is really the Heart Piece of Ymir. She will warp you out of the instance.
- Talk to Nyar Clone. We confirm what he is still dangerous and his power is still creating new Rgans. The curse is lifted but Lehar and Voglinde are staying to fight back the Rgan. Now Nillem wants to see us where the rift was, you get warped there.
- Talk to Nyar. Nillem and Nyar failed to seal the rift. The time is now repeating itself over and over, but we're free to travel there from time to time. Not only that, but now YOUR name is mentioned in the history books as well. You will be rewarded with 70x
 Wigner Merchant Guild Voucher (1001618) and 60 reputation.
Quests Secundarias
Adquisición de suministros
- Hablando con Mandel en (jor_mbase 210, 173) puedes desbloquear las diarias de Supply Procurement.
Hermanos Lugenburg
- Habla con Reinhardt dentro de los Barracones Centrales en (mbase_in 118, 186). Únete al portal directamente.
- Visita a Wilhelm en (jor_mbase 140, 201).
- Regresa a hablar con Reinhardt dentro de los Barracones Centrales.
- Fuera de los barracones, Tris te está esperando en (jor_mbase 197, 277).
- Habla con Reinhardt junto a él.
- Habla con Wilhelm.
- Habla una vez más con Tris. Serás recompensado con 10x
 Wigner Merchant Guild Voucher (1001618) y 5 reputación.
 - Ahora tendrás acceso a las misiones de caza "Clear Rising Lands".
Comida Insuficiente (Recolección de Hierbas/Peces)
- Habla con Volunteer Vallen Wok en (jor_mbase 211, 280).
- Te pedirá 10 de la misma hierba o 10 del mismo pez, que aparecen por todo el mapa.
- Si te pide hierbas, lleva 10x
 Wide Grass (1001625) . No aceptará
  Long Grass (1001624) .
 - Si te pide peces, lleva 10x
 Lunaforma Shrimp (1001619) o 10x
  Lunaforma Calamari (1001620) o 10x
  Lunaforma Seaweed (1001621) o 10x
  Lunaforma Fish (1001622) . No aceptará
  Lunaforma Oyster (1001623) .
Tareas de Mercenario
- Habla con Valdaris (mbase_in 302, 123)
- Habla con Miembro Mercenario (jor_mbase 300, 151)
- Habla con Miembro Mercenario (jor_mbase 198, 251)
- Habla con Miembro Mercenario (jor_mbase 133, 128)
- Habla con Miembro Mercenario (jor_mbase 248, 103)
- Habla con Valdaris (mbase_in 302, 123)
- Recibirás 10x
 Wigner Merchant Guild Voucher (1001618) y 5 de reputación.
 - Ahora tienes acceso a las misiones diarias de tareas de mercenario.
Quest Diarias
| NPC | Quest | Recompensa | Reputación |
| Mandel en (jor_mbase 210, 173) | Gaebolg: Recolecta 10x |
¡1x Supply Procurement diaria!
10x |
Aumenta la Reputación de la familia que elijas en 100. |
| Nerius: Recolecta 10x | |||
| Heine: Recolecta 10x | |||
| Lugenburg: Recolecta 10x | |||
| Walter: Recolecta 10x | |||
| Wigner: Recolecta 10x | |||
| Richard: Recolecta 10x | |||
| Wilhelm en (jor_mbase 140, 201) | Caza 300x monstruos en Northern Rising Lands. | 10x |
10 |
| Caza 300x monstruos en Southern Rising Lands. | |||
| Valdaris (mbase_in 302, 123) | Cualquier tipo de ayuda: Recluta los Mercenarios correctos para Valdaris. No todos son adecuados. | 2x |
2 |
| Comida fresca: Recolecta 10x |
5x |
5 | |
| Conchas para heridas: Caza 50x Scalleg | 5x |
5 | |
| Para los niños: Caza 50x Velelling | 5x |
5 | |
| Final limpio (1): Caza 300x monstruos en el primer piso de Jormungandr Temple | 10x |
10 | |
| Final limpio (2): Caza 300x monstruos en el segundo piso de Jormungandr Temple | 10x |
10 | |
| Heine Tablet (mbase_in 21, 168) | Recolecta 3x |
5x |
3 |
| Conselor Wool
(jor_albe 160, 137) |
Habla con él, ve al siguiente NPC en (jor_albe 50, 241), regresa con Wool. | 3x |
2 |
| Libra (jor_base 314, 137) | Libra te dará 1x |
2x |
2 |
Reputaciones de las Familias
Tenemos un total de 7 reputaciones familiares para completar. La reputación máxima que puedes alcanzar es 1.000 por familia. La reputación de Gaebolg se llena parcialmente a través de la quest principal, mientras que las otras familias deben completarse con la quest diaria de Mandel.
Después de alcanzar 1.000 de reputación con una familia, puedes pagar 5 ![]() Wigner Merchant Guild Voucher (1001618) a Mandel para recibir un buff de 1 hora a tu elección.
Wigner Merchant Guild Voucher (1001618) a Mandel para recibir un buff de 1 hora a tu elección.
Nota: Los buffs se acumulan, pero pierdes todos los buffs al morir.
| Familia | Buff |
| Gaebolg Blessing | Aumenta ATK y MATK% en un 10%. |
| Nerius Blessing | Reduce el Variable Cast Time en un 10% y aumenta la velocidad de ataque en un 10%. |
| Heine Blessing | Aumenta el daño contra enemigos Dragon y Plant en un 15%. |
| Lugenburg Blessing | Aumenta el daño contra enemigos Demon y Undead en un 15%. |
| Walter Blessing | Aumenta el daño contra enemigos Formless y Fish en un 15%. |
| Wigner Blessing | Aumenta el daño contra enemigos Brute y Angel en un 15%. |
| Richard Blessing | Aumenta el daño contra enemigos Demihuman e Insect en un 15%. |
Note: After reaching 1k reputation with all families, you will be able to start the Final Battle Instance on hard mode, as well as buy the +11 Gaebolg Refine Hammer.
Zonas/Dungeons
| Map | Monster | |||
| Northern Rising Lands jor_raise1  |
 Seawind (22313) |
 Velelling (22315) |
 Rockstriker (22317) |
 Yoster Collector (22325) |
 Scalleg (22314) |
 Letterster (22316) |
 Yoster Cleaner (22323) |
 Yoster Cooker (22327) | |
| Southern Rising Lands jor_raise2 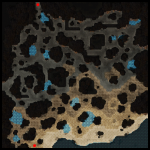 |
 Seawind (22313) |
 Skipskipper (22319) |
MVP  Icehorn (22362) | |
 Ice Seahorse (22318) |
 Cliolima (22320) | |||
| Jornville jor_base 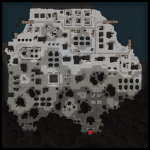 |
 Seawind (22313) |
 Yorker Religious Worker (22322) |
 Yoster Negotiator (22326) | |
 Yorker Worker (22321) |
 Yoster Fixer (22324) | |||
| Jormungand Church Temple F1 jor_tmple1 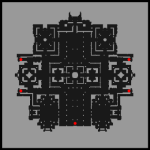 |
 Yoster Cleaner (22323) |
 Yoster Collector (22325) |
 Yoster Cooker (22327) |
 Yormi Missionary (22354) |
 Yoster Fixer (22324) |
 Yoster Negotiator (22326) |
 Yormi (22353) |
 Yordos Investigator (22355) | |
 Yordos Judge (22356) |
 Yordos Executor (22357) |
MVP  Yortus Arbiter (22363) | ||
| Jormungand Church Temple F2 jor_tmple2 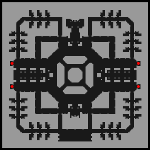 |
 Yordos Investigator (22355) |
 Yordos Executor (22357) |
 Yoscopus Sorcerer (22359) |
 Yortus Conjurator (22361) |
 Yordos Judge (22356) |
 Yoscopus Guardian (22358) |
 Yortus Bishop (22360) |
MVP  Yortus Bailiff (22364) | |
Instancias
Equipment
Descripción General de Gaebolg
Puedes obtener el equipo de Gaebolg del NPC Wigner Merchant Popo en (mbase_in 220, 123) por 100x ![]() Wigner Merchant Guild Voucher (1001618) cada uno.
Wigner Merchant Guild Voucher (1001618) cada uno.
An armor given to members of the Resistance. _______________________ Atk +130 _______________________ For each 2 Refine Levels: Atk +15 Def +15 _______________________ Refine Level +7: Increases Physical Damage by 3%. _______________________ Refine Level +9: P.Atk +5 Decreases Variable Casting Time by 10%. _______________________ Refine Level +10: Increases Physical Damage by additional 5%. _______________________ Refine Level +12: Decreases After Skill Delay by 5%. _______________________ When equipped with Gaebolg Manteau: Increases Physical Damage against enemies of every element by 10%. _______________________ When equipped with Gaebolg Manteau and Gaebolg Boots: Increases Physical Damage against enemies of every race, except Players, by 10%. _______________________ [Bonus by Grade] [Grade D]: POW +3 CON +3 Decreases After Skill Delay by 5%. _______________________ [Grade C]: Atk +3% P.Atk +2 _______________________ [Grade B]: POW +4 CON +4 P.Atk +3 _______________________ [Grade A]: Atk +4% P.Atk +5 _______________________ Type: Armor Position: Armor Defense: 198 Armor Level: 2 Refinable / Gradable Weight: 240 Required Level: 245 |
A robe given to members of the Resistance. _______________________ Matk +130 _______________________ For each 2 Refine Levels: Matk +15 Def +15 _______________________ Refine Level +7: Increases Magical Damage with every element by 3%. _______________________ Refine Level +9: S.Matk +5 Decreases Variable Casting Time by 10%. _______________________ Refine Level +10: Increases Magical Damage with every element by additional 5%. _______________________ Refine Level +12: Decreases After Skill Delay by 5%. _______________________ When equipped with Gaebolg Muffler: Increases Magical Damage against enemies of every element by 10%. _______________________ When equipped with Gaebolg Muffler and Gaebolg Shoes: Increases Magical Damage against enemies of every race, except Players, by 10%. _______________________ [Bonus by Grade] [Grade D]: SPL +3 CON +3 Decreases After Skill Delay by 5%. _______________________ [Grade C]: Matk +3% S.Matk +2 _______________________ [Grade B]: SPL +4 CON +4 S.Matk +3 _______________________ [Grade A]: Matk +4% S.Matk +5 _______________________ Type: Armor Position: Armor Defense: 130 Armor Level: 2 Refinable / Gradable Weight: 120 Required Level: 245 |
A pair of boots given to members of the Resistance. _______________________ MaxHP +10%, MaxSP +4%. _______________________ For each 2 Refine Levels: MaxSP +1%, Def +10. _______________________ Refine Level +7: Increases Attack Speed (decreases After Attack Delay by 10%). _______________________ Refine Level +9: P.Atk +5. Increases Physical Damage by 5%. _______________________ Refine Level +10: Def +100 Atk +20 _______________________ Refine Level +12: Increases Physical Damage by additional 5%. _______________________ When equipped with Gaebolg Armor: Increases Physical Damage against enemies of every element by 10%. _______________________ [Bonus by Grade] [Grade D]: POW +2 CON +2 Atk +10 _______________________ [Grade C]: Atk +2% P.Atk +2 _______________________ [Grade B]: Fixed Casting Time -1 second. _______________________ [Grade A]: Atk +3% P.Atk +3 _______________________ Type: Armor Position: Shoes Defense: 128 Armor Level: 2 Refinable / Gradable Weight: 200 Required Level: 245 |
A pair of shoes given to members of the Resistance. _______________________ MaxHP +10% MaxSP +4% _______________________ For each 2 Refine Levels: MaxSP +1% Def +10. _______________________ Refine Level +7: Increases Attack Speed (decreases After Attack Delay by 10%). _______________________ Refine Level +9: S.Matk +5 Increases Magical Damage with every element by 5%. _______________________ Refine Level +10: Def +100 Matk +20 _______________________ Refine Level +12: Increases Magical Damage with every element by additional 5%. _______________________ When equipped with Gaebolg Robe: Increases Magical Damage against enemies of every element by 10%. _______________________ [Bonus by Grade] [Grade D]: SPL +2 CON +2 Matk +10 _______________________ [Grade C]: Matk +2% S.Matk +2 _______________________ [Grade B]: Fixed Casting Time -1 second. _______________________ [Grade A]: Matk +3% S.Matk +3 _______________________ Type: Armor Position: Shoes Defense: 80 Armor Level: 2 Refinable / Gradable Weight: 100 Required Level: 245 |
A manteau given to a member of the Resistance. _______________________ POW +3 CON +3 _______________________ For each 2 Refine Levels: Atk +1% Def +10 _______________________ Refine Level +7: Decreases After Skill Delay by 5%. _______________________ Refine Level +9: Increases Physical Damage by 5%. _______________________ Refine Level +10: P.Atk +3 Atk +20 _______________________ Refine Level +12: Decreases After Skill Delay by additional 5%. _______________________ When equipped with Gaebolg Boots: Increases Physical Damage against enemies of every race, except Players, by 10%. _______________________ [Bonus by Grade] [Grade D]: Atk +3% P.Atk +2 _______________________ [Grade C]: P.Atk +3 _______________________ [Grade B]: Atk +2% P.Atk +5 _______________________ [Grade A]: Atk +4%, P.Atk +7 Decreases After Skill Delay by 5%. _______________________ Type: Armor Position: Garment Defense: 142 Armor Level: 2 Refinable / Gradable Weight: 160 Required Level: 245 |
A muffler given to members of the Resistance. _______________________ SPL +3 CON +3 _______________________ For each 2 Refine Levels: Matk +1% Def +10 _______________________ Refine Level +7: Decreases After Skill Delay by 5%. _______________________ Refine Level +9: Increases Magical Damage with every element by 5%. _______________________ Refine Level +10: S.Matk +3 Matk +20 _______________________ Refine Level +12: Decreases After Skill Delay by additional 5%. _______________________ When equipped with Gaebolg Shoes: Increases Magical Damage against enemies of every race, except Players, by 10%. _______________________ [Bonus by Grade] [Grade D]: Matk +3% S.Matk +2 _______________________ [Grade C]: S.Matk +3 _______________________ [Grade B]: Matk +2% S.Matk +5 _______________________ [Grade A]: Matk +4% S.Matk +7 Decreases After Skill Delay by 5%. _______________________ Type: Armor Position: Garment Defense: 90 Armor Level: 2 Refinable / Gradable Weight: 80 Required Level: 245 |
A ring given to a member of the resistance. _______________________ Atk +8% P.Atk +3 Increased Attack Speed (decreases After Attack Delay by 10%). _______________________ When equipped with Gaebolg Gloves: Decreases Variable Casting Time by 10%. Decreases After Skill Delay 5%. _______________________ Type: Armor Position: Left Accessory Armor Level: 2 Weight: 10 Required Level: 245 |
A glove given to a member of the resistance. _______________________ Atk +8% P.Atk +3 Increased Attack Speed (decreases After Attack Delay by 5%). Decreases Variable Casting Time by 5%. _______________________ Type: Armor Position: Right Accessory Armor Level: 2 Weight: 10 Required Level: 245 |
An earring given to a member of the resistance. _______________________ Matk +8% S.Matk +3 Increased Attack Speed (decreases After Attack Delay by 10%). _______________________ When equipped with Gaebolg Necklace: Decreases Variable Casting Time by 10%. Decreases After Skill Delay 5%. _______________________ Type: Armor Position: Left Accessory Armor Level: 2 Weight: 10 Required Level: 245 |
A necklace given to a member of the resistance. _______________________ Matk +8% S.Matk +3 Increased Attack Speed (decreases After Attack Delay by 5%). Decreases Variable Casting Time by 5%. _______________________ Type: Armor Position: Right Accessory Armor Level: 2 Weight: 10 Required Level: 245 |
Reformar Equipo
Para obtener el equipo Yorscalp debes transformar el equipo Gaebolg
Item Reform
To get Yorscalp gear you need to transform the Gaebolg gear.
Hablar con Blacksmith Sansan en (mbase_in 230, 125).
Para cada pieza del equipo necesitarás:
200x ![]() Wigner Merchant Guild Voucher (1001618)
Wigner Merchant Guild Voucher (1001618)
10x ![]() Shape of Fallen Serpent (1001834)
Shape of Fallen Serpent (1001834)
50x ![]() Symbol of Curse (1001835)
Symbol of Curse (1001835)
200x ![]() Spirit of Yorscalp (1001836)
Spirit of Yorscalp (1001836)
NPCs de encantamiento
Para encantar el equipo Gaebolg, habla con Mage Lobelia en (mbase_in 228, 129).
Para transformar tu equipo Gaebolg en equipo Yorscalp, además de encantar tu equipo Yorscalp, habla con Blacksmith Sansan en (mbase_in 230, 125).

Enchant NPCs
To enchant Gaebolg gear, talk to Mage Lobelia at (mbase_in 228, 129).

To transform gaebolg gear into yorscalp gear, also to enchant yorscalp gear, talk to Blacksmith Sansan at (mbase_in 230, 125).

Armor Enchants
| Target Items | Slot Order | Minimum Requirements | Line Options | Reset Process | |
| Grade | Refine | ||||
| 4→3→2 | No Grade | 0 | allowed | No Reset | |
| 4→3→2 | No Grade | 0 | allowed | No Reset | |
Perfect Enchant Slot 4
| Slot 4 Enchant | Description | Materials | Zeny |
| Def +125 Res +15 _______________________ Refine Level +7: Def +25 Res +5 _______________________ Refine Level +9: Def +25 Res +5 _______________________ Refine Level +11: Def +50 Res +10 _______________________ Type: Enchant Position: Unknown |
20x |
1,000,000z | |
| Mdef +30 Mres +15 _______________________ Refine Level +7: Mdef +5 Mres +3 _______________________ Refine Level +9: Mdef +5 Mres +3 _______________________ Refine Level +11: Mdef +10 Mres +6 _______________________ Type: Enchant Position: Unknown |
20x |
1,000,000z | |
| Atk +30 P.Atk +5 _______________________ Refine Level +7: Increases Melee Physical Damage by 3%. _______________________ Refine Level +9: Increases Melee Physical Damage by additional 4%. _______________________ Refine Level +11: Increases Melee Physical Damage by additional 5%. _______________________ Type: Enchant Position: Unknown |
20x |
1,000,000z | |
| Atk +30 P.Atk +5 _______________________ Refine Level +7: Increases Ranged Physical Damage by 3%. _______________________ Refine Level +9: Increases Ranged Physical Damage by additional 4%. _______________________ Refine Level +11: Increases Ranged Physical Damage by additional 5%. _______________________ Type: Enchant Position: Unknown |
20x |
1,000,000z | |
| Atk +20 Critical +2 P.Atk +5 _______________________ Refine Level +7: Increases Critical Damage by 3%. _______________________ Refine Level +9: Increases Critical Damage by additional 4%. _______________________ Refine Level +11: Increases Critical Damage by additional 5%. _______________________ Type: Enchant Position: Unknown |
20x |
1,000,000z | |
| Matk +30 S.Matk +5 _______________________ Refine Level +7: Increases all property damage by 3%. _______________________ Refine Level +9: Increases all property damage by additional 4%. _______________________ Refine Level +11: Increases all property damage by additional 5%. _______________________ Type: Enchant Position: Unknown |
20x |
1,000,000z |
Perfect Enchant Slot 3
| Slot 3 Enchant | Description | Materials | Zeny |
| Atk +5% Atk +50 P.Atk +7 _______________________ Refine Level +7: Increases Melee Physical Damage by 5%. _______________________ Refine Level +9: Increases Melee Physical Damage by additional 5%. _______________________ [Bonus by Grade] [Grade D]: Increases Melee Physical Damage by 5%. _______________________ [Grade C]: Increases Melee Physical Damage by additional 5%. _______________________ [Grade B]: Increases Melee Physical Damage by additional 5%. _______________________ [Grade A]: Increases Melee Physical Damage by additional 5%. _______________________ Type: Enchant Position: Unknown |
30x |
2,000,000z | |
| Atk +5% Atk +50 P.Atk +7 _______________________ Refine Level +7: Increases Ranged Physical Damage by 5%. _______________________ Refine Level +9: Increases Ranged Physical Damage by additional 5%. _______________________ [Bonus by Grade] [Grade D]: Increases Ranged Physical Damage by 5%. _______________________ [Grade C]: Increases Ranged Physical Damage by additional 5%. _______________________ [Grade B]: Increases Ranged Physical Damage by additional 5%. _______________________ [Grade A]: Increases Ranged Physical Damage by additional 5%. _______________________ Type: Enchant Position: Unknown |
30x |
2,000,000z | |
| Atk +3% Atk +30 Critical +5 P.Atk +7 _______________________ Refine Level +7: Increases Critical Damage by 5%. _______________________ Refine Level +9: Increases Critical Damage by additional 5%. _______________________ [Bonus by Grade] [Grade D]: Increases Critical Damage by 5%. _______________________ [Grade C]: Increases Critical Damage by additional 5%. _______________________ [Grade B]: Increases Critical Damage by additional 5%. _______________________ [Grade A]: Increases Critical Damage by additional 5%. _______________________ Type: Enchant Position: Unknown |
30x |
2,000,000z | |
| Matk +5% Matk +50 S.Matk +7 _______________________ Refine Level +7: Increases Magical Damage with every element by 5%. _______________________ Refine Level +9: Increases Magical Damage with every element by additional 5%. _______________________ [Bonus by Grade] [Grade D]: Increases Magical Damage with every element by 5%. _______________________ [Grade C]: Increases Magical Damage with every element by additional 5%. _______________________ [Grade B]: Increases Magical Damage with every element by additional 5%. _______________________ [Grade A]: Increases Magical Damage with every element by additional 5%. _______________________ Type: Enchant Position: Unknown |
30x |
2,000,000z |
Perfect Enchant Slot 2
| Slot 2 Enchant | Description | Materials | Zeny |
| Atk +2% _______________________ Refine Level +7: Additional Atk +3% _______________________ Refine Level +9: Additional Atk +4% _______________________ Refine Level +11: P.Atk +3 _______________________ [Bonus by Grade] [Grade D]: Atk +2% _______________________ [Grade C]: Additional Atk +3% _______________________ [Grade B]: Additional Atk +4% _______________________ [Grade A]: P.Atk +5 _______________________ Type: Enchant Position: Unknown |
40x |
3,000,000z | |
| Matk +2% _______________________ Refine Level +7: Additional Matk +3% _______________________ Refine Level +9: Additional Matk +4% _______________________ Refine Level +11: S.Matk +3 _______________________ [Bonus by Grade] [Grade D]: Matk +2% _______________________ [Grade C]: Additional Matk +3% _______________________ [Grade B]: Additional Matk +4% _______________________ [Grade A]: S.Matk +5 _______________________ Type: Enchant Position: Unknown |
40x |
3,000,000z | |
| Decreases After Skill Delay by 3%. _______________________ Refine Level +7: Decreases After Skill Delay by additional 3%. _______________________ Refine Level +9: Decreases After Skill Delay by additional 2%. _______________________ Refine Level +11: Decreases After Skill Delay by additional 2%. _______________________ Type: Enchant Position: Unknown |
40x |
3,000,000z |
Garment Enchants
| Target Items | Slot Order | Minimum Requirements | Line Options | Reset Process | |
| Grade | Refine | ||||
| 4→3→2 | No Grade | 0 | allowed | No Reset | |
| 4→3→2 | No Grade | 0 | allowed | No Reset | |
Perfect Enchant Slot 4
| Slot 4 Enchant | Description | Materials | Zeny |
| Def +125 Res +15 _______________________ Refine Level +7: Def +25 Res +5 _______________________ Refine Level +9: Def +25 Res +5 _______________________ Refine Level +11: Def +50 Res +10 _______________________ Type: Enchant Position: Unknown |
20x |
1,000,000z | |
| Mdef +30 Mres +15 _______________________ Refine Level +7: Mdef +5 Mres +3 _______________________ Refine Level +9: Mdef +5 Mres +3 _______________________ Refine Level +11: Mdef +10 Mres +6 _______________________ Type: Enchant Position: Unknown |
20x |
1,000,000z |
Perfect Enchant Slot 3
| Slot 3 Enchant | Description | Materials | Zeny |
| Increases Attack Speed (decreases After Attack Delay by 5%). _______________________ Refine Level +7: Increases Attack Speed (decreases After Attack Delay by additional 5%). _______________________ Refine Level +9: Increases Attack Speed (decreases After Attack Delay by additional 5%). _______________________ Refine Level +11: Increases Attack Speed (decreases After Attack Delay by additional 10%). _______________________ Type: Enchant Position: Unknown |
30x |
2,000,000z | |
| Reduces variable casting time by 5%. _______________________ Refine Level +7: Reduces Variable Casting Time by additional 5%. _______________________ Refine Level +9: Reduces Variable Casting Time by additional 5%. _______________________ Refine Level +11: Reduces Variable Casting Time by additional 10%. _______________________ Type: Enchant Position: Unknown |
30x |
2,000,000z |
Perfect Enchant Slot 2
| Slot 2 Enchant | Description | Materials | Zeny |
| Increases Melee Physical Damage by 3%. _______________________ Refine Level +7: Increases Melee Physical Damage by additional 3%. _______________________ Refine Level +9: Increases Melee Physical Damage by additional 3%. _______________________ [Bonus by Grade] [Grade D]: Increases Melee Physical Damage by 3%. Perfect Hit +5 _______________________ [Grade C]: Increases Melee Physical Damage by additional 3%. Additional Perfect Hit +6 _______________________ [Grade B]: Increases Melee Physical Damage by additional 5%. Additional Perfect Hit +7 _______________________ [Grade A]: Increases Melee Physical Damage by additional 5%. Additional Perfect Hit +8 _______________________ Type: Enchant Position: Unknown |
40x |
3,000,000z | |
| Increases Ranged Physical Damage by 3%. _______________________ Refine Level +7: Increases Ranged Physical Damage by additional 3%. _______________________ Refine Level +9: Increases Ranged Physical Damage by additional 3%. _______________________ [Bonus by Grade] [Grade D]: Increases Ranged Physical Damage by 3%. Perfect Hit +5 _______________________ [Grade C]: Increases Ranged Physical Damage by additional 3%. Additional Perfect Hit +6 _______________________ [Grade B]: Increases Ranged Physical Damage by additional 5%. Additional Perfect Hit +7 _______________________ [Grade A]: Increases Ranged Physical Damage by additional 5%. Additional Perfect Hit +8 _______________________ Type: Enchant Position: Unknown |
40x |
3,000,000z | |
| Increases Critical Damage by 3%. _______________________ Refine Level +7: Increases Critical Damage by additional 3%. _______________________ Refine Level +9: Increases Critical Damage by additional 3%. _______________________ [Bonus by Grade] [Grade D]: Critical +2 Increases Critical Damage by additional 3%. _______________________ [Grade C]: Additional Critical +3 Increases Critical Damage by additional 3%. _______________________ [Grade B]: Additional Critical +5 Increases Critical Damage by additional 5%. _______________________ [Grade A]: Increases Critical Damage by additional 5% C.Rate +5 _______________________ Type: Enchant Position: Unknown |
40x |
3,000,000z | |
| Increases Magical Damage with every element by 3%. _______________________ Refine Level +7: Increases Magical Damage with every element by additional 3%. _______________________ Refine Level +9: Increases Magical Damage with every element by additional 3%. _______________________ [Bonus by Grade] [Grade D]: Increases Magical Damage with every element by additional 3% MaxSP +2% _______________________ [Grade C]: Increases Magical Damage with every element by 3% Additional MaxSP +3% _______________________ [Grade B]: Increases Magical Damage with every element by additional 5% Additional MaxSP +4% _______________________ [Grade A]: Increases Magical Damage with every element by additional 5% Additional MaxSP +5% _______________________ Type: Enchant Position: Unknown |
40x 40x |
3,000,000z | |
| Reduces damage taken from all property and all size enemies by 3%. _______________________ Refine Level +7: Reduces damage taken from all property enemies by additional 4%. _______________________ Refine Level +9: Reduces damage taken from all size enemies by additional 4%. _______________________ Refine Level +11: Reduces damage taken from all race monsters (except players) by 7%. _______________________ Type: Enchant Position: Unknown |
40x 40x |
3,000,000z |
Footgear Enchants
| Target Items | Slot Order | Minimum Requirements | Line Options | Reset Process | |
| Grade | Refine | ||||
| 4→3→2 | No Grade | 0 | allowed | No Reset | |
| 4→3→2 | No Grade | 0 | allowed | No Reset | |
Perfect Enchant Slot 4
| Slot 4 Enchant | Description | Materials | Zeny |
| MaxHP +4000 _______________________ Refine Level +7: MaxHP +3% _______________________ Refine Level +9: Additional MaxHP +5% _______________________ Refine Level +11: Additional MaxHP +7% _______________________ Type: Enchant Position: Unknown |
20x |
1,000,000z | |
| MaxSP +600 _______________________ Refine Level +7: MaxSP +3% _______________________ Refine Level +9: Additional MaxSP +5% _______________________ Refine Level +11: Additional MaxSP +7% _______________________ Type: Enchant Position: Unknown |
20x 20x |
1,000,000z | |
| Atk +10 _______________________ Refine Level +7: Additional Atk +10 _______________________ Refine Level +9: Additional Atk +10 _______________________ Refine Level +11: Additional Atk +20 Atk +5% _______________________ Type: Enchant Position: Unknown |
20x 20x |
1,000,000z | |
| Matk +10 _______________________ Refine Level +7: Additional Matk +10 _______________________ Refine Level +9: Additional Matk +10 _______________________ Refine Level +11: Additional Matk +20 Matk +5% _______________________ Type: Enchant Position: Unknown |
20x 20x |
1,000,000z |
Perfect Enchant Slot 3
| Slot 3 Enchant | Description | Materials | Zeny |
| Increases Physical Damage against enemies of all sizes by 5%. _______________________ Refine Level +7: Increases Physical Damage against enemies of all sizes by additional 3%. _______________________ Refine Level +9: Increases Physical Damage against enemies of all sizes by additional 2%. _______________________ Refine Level +11: Increases Physical Damage against enemies of all sizes by additional 10%. _______________________ Type: Enchant Position: Unknown |
30x |
2,000,000z | |
| Increases Magical Damage against enemies of all sizes by 5%. _______________________ Refine Level +7: Increases Magical Damage against enemies of all sizes by additional 3%. _______________________ Refine Level +9: Increases Magical Damage against enemies of all sizes by additional 2%. _______________________ Refine Level +11: Increases Magical Damage against enemies of all sizes by additional 10%. _______________________ Type: Enchant Position: Unknown |
30x |
2,000,000z |
Perfect Enchant Slot 2
| Slot 2 Enchant | Description | Materials | Zeny |
| P.Atk +5 _______________________ [Bonus by Grade] [Grade D]: Increases Melee Physical Damage by 5%. _______________________ [Grade C]: Increases Melee Physical Damage by additional 5%. _______________________ [Grade B]: Atk +2% P.Atk +5 _______________________ [Grade A]: Additional Atk +3% Additional P.Atk +5 _______________________ Type: Enchant Position: Unknown |
40x |
3,000,000z | |
| P.Atk +5 _______________________ [Bonus by Grade] [Grade D]: Increases Ranged Physical Damage by 5%. _______________________ [Grade C]: Increases Ranged Physical Damage by additional 5%. _______________________ [Grade B]: Atk +2% P.Atk +5 _______________________ [Grade A]: Additional Atk +3% Additional P.Atk +5 _______________________ Type: Enchant Position: Unknown |
40x |
3,000,000z | |
| P.Atk +5 _______________________ [Bonus by Grade] [Grade D]: Increases Critical Damage by 5%. _______________________ [Grade C]: Increases Critical Damage by additional 5%. _______________________ [Grade B]: Atk +2% C.Rate +3 _______________________ [Grade A]: Additional Atk +3% Additional C.Rate +5 _______________________ Type: Enchant Position: Unknown |
40x |
3,000,000z | |
| S.Matk +5 _______________________ [Bonus by Grade] [Grade D]: Increases Magical Damage with every element by 5%. _______________________ [Grade C]: Increases Magical Damage with every element by additional 5%. _______________________ [Grade B]: Matk +2% S.Matk +5 _______________________ [Grade A]: Additional Matk +3% Additional S.Matk +5 _______________________ Type: Enchant Position: Unknown |
40x 40x |
3,000,000z |
Accessory Enchants
| Target Items | Slot Order | Minimum Requirements | Line Options | Reset Process | |
| Grade | Refine | ||||
| 4→3→2 | No Grade | 0 | allowed | No Reset | |
| 4→3→2 | No Grade | 0 | allowed | No Reset | |
Perfect Enchant Slot 4
| Slot 4 Enchant | Description | Materials | Zeny |
| Atk +25 Increases Melee Physical Damage by 12%. _______________________ Type: Enchant Position: Unknown |
35x |
1,500,000z | |
| Atk +25 Increases Ranged Physical Damage by 12%. _______________________ Type: Enchant Position: Unknown |
35x |
1,500,000z | |
| Critical +8 Increases Critical Damage by 12%. _______________________ Type: Enchant Position: Unknown |
35x |
1,500,000z | |
| Matk +25 Increases Magical Damage with every element by 12%. _______________________ Type: Enchant Position: Unknown |
35x |
1,500,000z |
Perfect Enchant Slot 3
| Slot 3 Enchant | Description | Materials | Zeny |
| Atk +35 Increases Melee Physical Damage by 15%. _______________________ Type: Enchant Position: Unknown |
45x |
3,000,000z | |
| Atk +35 Increases Ranged Physical Damage by 15%. _______________________ Type: Enchant Position: Unknown |
45x |
3,000,000z | |
| Critical +12 Increases Critical Damage by 15%. _______________________ Type: Enchant Position: Unknown |
45x |
3,000,000z | |
| Matk +35 Increases Magical Damage with every element by 15%. _______________________ Type: Enchant Position: Unknown |
45x |
3,000,000z |
Perfect Enchant Slot 2
| Slot 2 Enchant | Description | Materials | Zeny |
| P.Atk +5 Increases Physical Damage against enemies of every element by 5%. _______________________ Type: Enchant Position: Unknown |
65x |
4,500,000z | |
| S.Matk +5 Increases Magical Damage against enemies of every element by 5%. _______________________ Type: Enchant Position: Unknown |
65x |
4,500,000z |
Overview Gaebolg
You can obtain Gaebolg gear at NPC Wigner Merchant Popo at (mbase_in 220, 123) for 100x ![]() Wigner Merchant Guild Voucher (1001618) each.
Wigner Merchant Guild Voucher (1001618) each.

An armor given to members of the Resistance. _______________________ Atk +130 _______________________ For each 2 Refine Levels: Atk +15 Def +15 _______________________ Refine Level +7: Increases Physical Damage by 3%. _______________________ Refine Level +9: P.Atk +5 Decreases Variable Casting Time by 10%. _______________________ Refine Level +10: Increases Physical Damage by additional 5%. _______________________ Refine Level +12: Decreases After Skill Delay by 5%. _______________________ When equipped with Gaebolg Manteau: Increases Physical Damage against enemies of every element by 10%. _______________________ When equipped with Gaebolg Manteau and Gaebolg Boots: Increases Physical Damage against enemies of every race, except Players, by 10%. _______________________ [Bonus by Grade] [Grade D]: POW +3 CON +3 Decreases After Skill Delay by 5%. _______________________ [Grade C]: Atk +3% P.Atk +2 _______________________ [Grade B]: POW +4 CON +4 P.Atk +3 _______________________ [Grade A]: Atk +4% P.Atk +5 _______________________ Type: Armor Position: Armor Defense: 198 Armor Level: 2 Refinable / Gradable Weight: 240 Required Level: 245 |
A robe given to members of the Resistance. _______________________ Matk +130 _______________________ For each 2 Refine Levels: Matk +15 Def +15 _______________________ Refine Level +7: Increases Magical Damage with every element by 3%. _______________________ Refine Level +9: S.Matk +5 Decreases Variable Casting Time by 10%. _______________________ Refine Level +10: Increases Magical Damage with every element by additional 5%. _______________________ Refine Level +12: Decreases After Skill Delay by 5%. _______________________ When equipped with Gaebolg Muffler: Increases Magical Damage against enemies of every element by 10%. _______________________ When equipped with Gaebolg Muffler and Gaebolg Shoes: Increases Magical Damage against enemies of every race, except Players, by 10%. _______________________ [Bonus by Grade] [Grade D]: SPL +3 CON +3 Decreases After Skill Delay by 5%. _______________________ [Grade C]: Matk +3% S.Matk +2 _______________________ [Grade B]: SPL +4 CON +4 S.Matk +3 _______________________ [Grade A]: Matk +4% S.Matk +5 _______________________ Type: Armor Position: Armor Defense: 130 Armor Level: 2 Refinable / Gradable Weight: 120 Required Level: 245 |
A pair of boots given to members of the Resistance. _______________________ MaxHP +10%, MaxSP +4%. _______________________ For each 2 Refine Levels: MaxSP +1%, Def +10. _______________________ Refine Level +7: Increases Attack Speed (decreases After Attack Delay by 10%). _______________________ Refine Level +9: P.Atk +5. Increases Physical Damage by 5%. _______________________ Refine Level +10: Def +100 Atk +20 _______________________ Refine Level +12: Increases Physical Damage by additional 5%. _______________________ When equipped with Gaebolg Armor: Increases Physical Damage against enemies of every element by 10%. _______________________ [Bonus by Grade] [Grade D]: POW +2 CON +2 Atk +10 _______________________ [Grade C]: Atk +2% P.Atk +2 _______________________ [Grade B]: Fixed Casting Time -1 second. _______________________ [Grade A]: Atk +3% P.Atk +3 _______________________ Type: Armor Position: Shoes Defense: 128 Armor Level: 2 Refinable / Gradable Weight: 200 Required Level: 245 |
A pair of shoes given to members of the Resistance. _______________________ MaxHP +10% MaxSP +4% _______________________ For each 2 Refine Levels: MaxSP +1% Def +10. _______________________ Refine Level +7: Increases Attack Speed (decreases After Attack Delay by 10%). _______________________ Refine Level +9: S.Matk +5 Increases Magical Damage with every element by 5%. _______________________ Refine Level +10: Def +100 Matk +20 _______________________ Refine Level +12: Increases Magical Damage with every element by additional 5%. _______________________ When equipped with Gaebolg Robe: Increases Magical Damage against enemies of every element by 10%. _______________________ [Bonus by Grade] [Grade D]: SPL +2 CON +2 Matk +10 _______________________ [Grade C]: Matk +2% S.Matk +2 _______________________ [Grade B]: Fixed Casting Time -1 second. _______________________ [Grade A]: Matk +3% S.Matk +3 _______________________ Type: Armor Position: Shoes Defense: 80 Armor Level: 2 Refinable / Gradable Weight: 100 Required Level: 245 |
A manteau given to a member of the Resistance. _______________________ POW +3 CON +3 _______________________ For each 2 Refine Levels: Atk +1% Def +10 _______________________ Refine Level +7: Decreases After Skill Delay by 5%. _______________________ Refine Level +9: Increases Physical Damage by 5%. _______________________ Refine Level +10: P.Atk +3 Atk +20 _______________________ Refine Level +12: Decreases After Skill Delay by additional 5%. _______________________ When equipped with Gaebolg Boots: Increases Physical Damage against enemies of every race, except Players, by 10%. _______________________ [Bonus by Grade] [Grade D]: Atk +3% P.Atk +2 _______________________ [Grade C]: P.Atk +3 _______________________ [Grade B]: Atk +2% P.Atk +5 _______________________ [Grade A]: Atk +4%, P.Atk +7 Decreases After Skill Delay by 5%. _______________________ Type: Armor Position: Garment Defense: 142 Armor Level: 2 Refinable / Gradable Weight: 160 Required Level: 245 |
A muffler given to members of the Resistance. _______________________ SPL +3 CON +3 _______________________ For each 2 Refine Levels: Matk +1% Def +10 _______________________ Refine Level +7: Decreases After Skill Delay by 5%. _______________________ Refine Level +9: Increases Magical Damage with every element by 5%. _______________________ Refine Level +10: S.Matk +3 Matk +20 _______________________ Refine Level +12: Decreases After Skill Delay by additional 5%. _______________________ When equipped with Gaebolg Shoes: Increases Magical Damage against enemies of every race, except Players, by 10%. _______________________ [Bonus by Grade] [Grade D]: Matk +3% S.Matk +2 _______________________ [Grade C]: S.Matk +3 _______________________ [Grade B]: Matk +2% S.Matk +5 _______________________ [Grade A]: Matk +4% S.Matk +7 Decreases After Skill Delay by 5%. _______________________ Type: Armor Position: Garment Defense: 90 Armor Level: 2 Refinable / Gradable Weight: 80 Required Level: 245 |
A ring given to a member of the resistance. _______________________ Atk +8% P.Atk +3 Increased Attack Speed (decreases After Attack Delay by 10%). _______________________ When equipped with Gaebolg Gloves: Decreases Variable Casting Time by 10%. Decreases After Skill Delay 5%. _______________________ Type: Armor Position: Left Accessory Armor Level: 2 Weight: 10 Required Level: 245 |
A glove given to a member of the resistance. _______________________ Atk +8% P.Atk +3 Increased Attack Speed (decreases After Attack Delay by 5%). Decreases Variable Casting Time by 5%. _______________________ Type: Armor Position: Right Accessory Armor Level: 2 Weight: 10 Required Level: 245 |
An earring given to a member of the resistance. _______________________ Matk +8% S.Matk +3 Increased Attack Speed (decreases After Attack Delay by 10%). _______________________ When equipped with Gaebolg Necklace: Decreases Variable Casting Time by 10%. Decreases After Skill Delay 5%. _______________________ Type: Armor Position: Left Accessory Armor Level: 2 Weight: 10 Required Level: 245 |
A necklace given to a member of the resistance. _______________________ Matk +8% S.Matk +3 Increased Attack Speed (decreases After Attack Delay by 5%). Decreases Variable Casting Time by 5%. _______________________ Type: Armor Position: Right Accessory Armor Level: 2 Weight: 10 Required Level: 245 |
Refine Hammer
You can safelly refine your Gaebolg Equipment from +9 to +12 using a Gaebolg Equipment Refine Hammer. Go to (jor_mbase 222, 262) to buy the hammers.
| Hammer | Description | How to obtain |
|---|---|---|
| A hammer imbued with a special power that can refine a Gaebolg equipments. _______________________ Increases the refinement level by +1 to a +9 Gaebolg equipment. _______________________ [Available Equipments] +9 Gaebolg Armor +9 Gaebolg Robe +9 Gaebolg Cloak +9 Gaebolg Muffler +9 Gaebolg Boots +9 Gaebolg Shoes _______________________ [Material Requirement] Zelunium 150 Turquoise Magic Stone 20 Sunset Magic Stone 20 Crimson Magic Stone 20 Livid Magic Stone 20 _______________________ Type: DelayConsume Position: Unknown Weight: 10 Required Level: 245 |
It can ONLY be used on a +9 equipment. Can be bought with Wigner Merchant Popo at (mbase_in 220, 127). It costs 50x | |
| A hammer imbued with a special power that can refine a Gaebolg equipments. _______________________ Increases the refinement level by +1 to a +10 Gaebolg equipment. _______________________ [Available Equipments] +10 Gaebolg Armor +10 Gaebolg Robe +10 Gaebolg Cloak +10 Gaebolg Muffler +10 Gaebolg Boots +10 Gaebolg Shoes _______________________ [Material Requirement] Zelunium 200 Shining Turquoise Magic Stone 7 Shining Sunset Magic Stone 7 Shining Crimson Magic Stone 7 Shining Livid Magic Stone 7 _______________________ Type: DelayConsume Position: Unknown Weight: 10 Required Level: 245 |
It can ONLY be used on a +10 equipment. Can be bought with Wigner Merchant Popo at (mbase_in 220, 127). It costs 4m zenys, 100x | |
| A hammer imbued with a special power that can refine a Gaebolg equipments. _______________________ Increases the refinement level by +1 to a +11 Gaebolg equipment. _______________________ [Available Equipments] +11 Gaebolg Armor +11 Gaebolg Robe +11 Gaebolg Cloak +11 Gaebolg Muffler +11 Gaebolg Boots +11 Gaebolg Shoes _______________________ [Material Requirement] Zelunium 250 Brilliant Turquoise Magic Stone 5 Brilliant Sunset Magic Stone 5 Brilliant Crimson Magic Stone 5 Brilliant Livid Magic Stone 5 _______________________ Type: DelayConsume Position: Unknown Weight: 10 Required Level: 245 |
It can ONLY be used on a +11 equipment. Can be bought with Brave Dog at (jor_mbase 217, 263) after reaching 1k reputation with every family. It costs 7m zenys and 200x |
Reformar Equipo
Para obtener el equipo Yorscalp debes transformar el equipo Gaebolg
Item Reform
To get Yorscalp gear you need to transform the Gaebolg gear.
Hablar con Blacksmith Sansan en (mbase_in 230, 125).

Para cada pieza del equipo necesitarás:
200x ![]() Wigner Merchant Guild Voucher (1001618)
Wigner Merchant Guild Voucher (1001618)
10x ![]() Shape of Fallen Serpent (1001834)
Shape of Fallen Serpent (1001834)
50x ![]() Symbol of Curse (1001835)
Symbol of Curse (1001835)
200x ![]() Spirit of Yorscalp (1001836)
Spirit of Yorscalp (1001836)
NPCs de encantamiento
Para encantar el equipo Gaebolg, habla con Mage Lobelia en (mbase_in 228, 129).

Para transformar tu equipo Gaebolg en equipo Yorscalp, además de encantar tu equipo Yorscalp, habla con Blacksmith Sansan en (mbase_in 230, 125).

Enchant NPCs
To enchant Gaebolg gear, talk to Mage Lobelia at (mbase_in 228, 129).

To transform gaebolg gear into yorscalp gear, also to enchant yorscalp gear, talk to Blacksmith Sansan at (mbase_in 230, 125).

Armor Enchants
| Target Items | Slot Order | Minimum Requirements | Line Options | Reset Process | |
| Grade | Refine | ||||
| 4→3→2 | No Grade | 0 | allowed | No Reset | |
| 4→3→2 | No Grade | 0 | allowed | No Reset | |
Perfect Enchant Slot 4
| Slot 4 Enchant | Description | Materials | Zeny |
| Def +125 Res +15 _______________________ Refine Level +7: Def +25 Res +5 _______________________ Refine Level +9: Def +25 Res +5 _______________________ Refine Level +11: Def +50 Res +10 _______________________ Type: Enchant Position: Unknown |
20x |
1,000,000z | |
| Mdef +30 Mres +15 _______________________ Refine Level +7: Mdef +5 Mres +3 _______________________ Refine Level +9: Mdef +5 Mres +3 _______________________ Refine Level +11: Mdef +10 Mres +6 _______________________ Type: Enchant Position: Unknown |
20x |
1,000,000z | |
| Atk +30 P.Atk +5 _______________________ Refine Level +7: Increases Melee Physical Damage by 3%. _______________________ Refine Level +9: Increases Melee Physical Damage by additional 4%. _______________________ Refine Level +11: Increases Melee Physical Damage by additional 5%. _______________________ Type: Enchant Position: Unknown |
20x |
1,000,000z | |
| Atk +30 P.Atk +5 _______________________ Refine Level +7: Increases Ranged Physical Damage by 3%. _______________________ Refine Level +9: Increases Ranged Physical Damage by additional 4%. _______________________ Refine Level +11: Increases Ranged Physical Damage by additional 5%. _______________________ Type: Enchant Position: Unknown |
20x |
1,000,000z | |
| Atk +20 Critical +2 P.Atk +5 _______________________ Refine Level +7: Increases Critical Damage by 3%. _______________________ Refine Level +9: Increases Critical Damage by additional 4%. _______________________ Refine Level +11: Increases Critical Damage by additional 5%. _______________________ Type: Enchant Position: Unknown |
20x |
1,000,000z | |
| Matk +30 S.Matk +5 _______________________ Refine Level +7: Increases all property damage by 3%. _______________________ Refine Level +9: Increases all property damage by additional 4%. _______________________ Refine Level +11: Increases all property damage by additional 5%. _______________________ Type: Enchant Position: Unknown |
20x |
1,000,000z |
Perfect Enchant Slot 3
| Slot 3 Enchant | Description | Materials | Zeny |
| Atk +5% Atk +50 P.Atk +7 _______________________ Refine Level +7: Increases Melee Physical Damage by 5%. _______________________ Refine Level +9: Increases Melee Physical Damage by additional 5%. _______________________ [Bonus by Grade] [Grade D]: Increases Melee Physical Damage by 5%. _______________________ [Grade C]: Increases Melee Physical Damage by additional 5%. _______________________ [Grade B]: Increases Melee Physical Damage by additional 5%. _______________________ [Grade A]: Increases Melee Physical Damage by additional 5%. _______________________ Type: Enchant Position: Unknown |
30x |
2,000,000z | |
| Atk +5% Atk +50 P.Atk +7 _______________________ Refine Level +7: Increases Ranged Physical Damage by 5%. _______________________ Refine Level +9: Increases Ranged Physical Damage by additional 5%. _______________________ [Bonus by Grade] [Grade D]: Increases Ranged Physical Damage by 5%. _______________________ [Grade C]: Increases Ranged Physical Damage by additional 5%. _______________________ [Grade B]: Increases Ranged Physical Damage by additional 5%. _______________________ [Grade A]: Increases Ranged Physical Damage by additional 5%. _______________________ Type: Enchant Position: Unknown |
30x |
2,000,000z | |
| Atk +3% Atk +30 Critical +5 P.Atk +7 _______________________ Refine Level +7: Increases Critical Damage by 5%. _______________________ Refine Level +9: Increases Critical Damage by additional 5%. _______________________ [Bonus by Grade] [Grade D]: Increases Critical Damage by 5%. _______________________ [Grade C]: Increases Critical Damage by additional 5%. _______________________ [Grade B]: Increases Critical Damage by additional 5%. _______________________ [Grade A]: Increases Critical Damage by additional 5%. _______________________ Type: Enchant Position: Unknown |
30x |
2,000,000z | |
| Matk +5% Matk +50 S.Matk +7 _______________________ Refine Level +7: Increases Magical Damage with every element by 5%. _______________________ Refine Level +9: Increases Magical Damage with every element by additional 5%. _______________________ [Bonus by Grade] [Grade D]: Increases Magical Damage with every element by 5%. _______________________ [Grade C]: Increases Magical Damage with every element by additional 5%. _______________________ [Grade B]: Increases Magical Damage with every element by additional 5%. _______________________ [Grade A]: Increases Magical Damage with every element by additional 5%. _______________________ Type: Enchant Position: Unknown |
30x |
2,000,000z |
Perfect Enchant Slot 2
| Slot 2 Enchant | Description | Materials | Zeny |
| Atk +2% _______________________ Refine Level +7: Additional Atk +3% _______________________ Refine Level +9: Additional Atk +4% _______________________ Refine Level +11: P.Atk +3 _______________________ [Bonus by Grade] [Grade D]: Atk +2% _______________________ [Grade C]: Additional Atk +3% _______________________ [Grade B]: Additional Atk +4% _______________________ [Grade A]: P.Atk +5 _______________________ Type: Enchant Position: Unknown |
40x |
3,000,000z | |
| Matk +2% _______________________ Refine Level +7: Additional Matk +3% _______________________ Refine Level +9: Additional Matk +4% _______________________ Refine Level +11: S.Matk +3 _______________________ [Bonus by Grade] [Grade D]: Matk +2% _______________________ [Grade C]: Additional Matk +3% _______________________ [Grade B]: Additional Matk +4% _______________________ [Grade A]: S.Matk +5 _______________________ Type: Enchant Position: Unknown |
40x |
3,000,000z | |
| Decreases After Skill Delay by 3%. _______________________ Refine Level +7: Decreases After Skill Delay by additional 3%. _______________________ Refine Level +9: Decreases After Skill Delay by additional 2%. _______________________ Refine Level +11: Decreases After Skill Delay by additional 2%. _______________________ Type: Enchant Position: Unknown |
40x |
3,000,000z |
Garment Enchants
| Target Items | Slot Order | Minimum Requirements | Line Options | Reset Process | |
| Grade | Refine | ||||
| 4→3→2 | No Grade | 0 | allowed | No Reset | |
| 4→3→2 | No Grade | 0 | allowed | No Reset | |
Perfect Enchant Slot 4
| Slot 4 Enchant | Description | Materials | Zeny |
| Def +125 Res +15 _______________________ Refine Level +7: Def +25 Res +5 _______________________ Refine Level +9: Def +25 Res +5 _______________________ Refine Level +11: Def +50 Res +10 _______________________ Type: Enchant Position: Unknown |
20x |
1,000,000z | |
| Mdef +30 Mres +15 _______________________ Refine Level +7: Mdef +5 Mres +3 _______________________ Refine Level +9: Mdef +5 Mres +3 _______________________ Refine Level +11: Mdef +10 Mres +6 _______________________ Type: Enchant Position: Unknown |
20x |
1,000,000z |
Perfect Enchant Slot 3
| Slot 3 Enchant | Description | Materials | Zeny |
| Increases Attack Speed (decreases After Attack Delay by 5%). _______________________ Refine Level +7: Increases Attack Speed (decreases After Attack Delay by additional 5%). _______________________ Refine Level +9: Increases Attack Speed (decreases After Attack Delay by additional 5%). _______________________ Refine Level +11: Increases Attack Speed (decreases After Attack Delay by additional 10%). _______________________ Type: Enchant Position: Unknown |
30x |
2,000,000z | |
| Reduces variable casting time by 5%. _______________________ Refine Level +7: Reduces Variable Casting Time by additional 5%. _______________________ Refine Level +9: Reduces Variable Casting Time by additional 5%. _______________________ Refine Level +11: Reduces Variable Casting Time by additional 10%. _______________________ Type: Enchant Position: Unknown |
30x |
2,000,000z |
Perfect Enchant Slot 2
| Slot 2 Enchant | Description | Materials | Zeny |
| Increases Melee Physical Damage by 3%. _______________________ Refine Level +7: Increases Melee Physical Damage by additional 3%. _______________________ Refine Level +9: Increases Melee Physical Damage by additional 3%. _______________________ [Bonus by Grade] [Grade D]: Increases Melee Physical Damage by 3%. Perfect Hit +5 _______________________ [Grade C]: Increases Melee Physical Damage by additional 3%. Additional Perfect Hit +6 _______________________ [Grade B]: Increases Melee Physical Damage by additional 5%. Additional Perfect Hit +7 _______________________ [Grade A]: Increases Melee Physical Damage by additional 5%. Additional Perfect Hit +8 _______________________ Type: Enchant Position: Unknown |
40x |
3,000,000z | |
| Increases Ranged Physical Damage by 3%. _______________________ Refine Level +7: Increases Ranged Physical Damage by additional 3%. _______________________ Refine Level +9: Increases Ranged Physical Damage by additional 3%. _______________________ [Bonus by Grade] [Grade D]: Increases Ranged Physical Damage by 3%. Perfect Hit +5 _______________________ [Grade C]: Increases Ranged Physical Damage by additional 3%. Additional Perfect Hit +6 _______________________ [Grade B]: Increases Ranged Physical Damage by additional 5%. Additional Perfect Hit +7 _______________________ [Grade A]: Increases Ranged Physical Damage by additional 5%. Additional Perfect Hit +8 _______________________ Type: Enchant Position: Unknown |
40x |
3,000,000z | |
| Increases Critical Damage by 3%. _______________________ Refine Level +7: Increases Critical Damage by additional 3%. _______________________ Refine Level +9: Increases Critical Damage by additional 3%. _______________________ [Bonus by Grade] [Grade D]: Critical +2 Increases Critical Damage by additional 3%. _______________________ [Grade C]: Additional Critical +3 Increases Critical Damage by additional 3%. _______________________ [Grade B]: Additional Critical +5 Increases Critical Damage by additional 5%. _______________________ [Grade A]: Increases Critical Damage by additional 5% C.Rate +5 _______________________ Type: Enchant Position: Unknown |
40x |
3,000,000z | |
| Increases Magical Damage with every element by 3%. _______________________ Refine Level +7: Increases Magical Damage with every element by additional 3%. _______________________ Refine Level +9: Increases Magical Damage with every element by additional 3%. _______________________ [Bonus by Grade] [Grade D]: Increases Magical Damage with every element by additional 3% MaxSP +2% _______________________ [Grade C]: Increases Magical Damage with every element by 3% Additional MaxSP +3% _______________________ [Grade B]: Increases Magical Damage with every element by additional 5% Additional MaxSP +4% _______________________ [Grade A]: Increases Magical Damage with every element by additional 5% Additional MaxSP +5% _______________________ Type: Enchant Position: Unknown |
40x 40x |
3,000,000z | |
| Reduces damage taken from all property and all size enemies by 3%. _______________________ Refine Level +7: Reduces damage taken from all property enemies by additional 4%. _______________________ Refine Level +9: Reduces damage taken from all size enemies by additional 4%. _______________________ Refine Level +11: Reduces damage taken from all race monsters (except players) by 7%. _______________________ Type: Enchant Position: Unknown |
40x 40x |
3,000,000z |
Footgear Enchants
| Target Items | Slot Order | Minimum Requirements | Line Options | Reset Process | |
| Grade | Refine | ||||
| 4→3→2 | No Grade | 0 | allowed | No Reset | |
| 4→3→2 | No Grade | 0 | allowed | No Reset | |
Perfect Enchant Slot 4
| Slot 4 Enchant | Description | Materials | Zeny |
| MaxHP +4000 _______________________ Refine Level +7: MaxHP +3% _______________________ Refine Level +9: Additional MaxHP +5% _______________________ Refine Level +11: Additional MaxHP +7% _______________________ Type: Enchant Position: Unknown |
20x |
1,000,000z | |
| MaxSP +600 _______________________ Refine Level +7: MaxSP +3% _______________________ Refine Level +9: Additional MaxSP +5% _______________________ Refine Level +11: Additional MaxSP +7% _______________________ Type: Enchant Position: Unknown |
20x 20x |
1,000,000z | |
| Atk +10 _______________________ Refine Level +7: Additional Atk +10 _______________________ Refine Level +9: Additional Atk +10 _______________________ Refine Level +11: Additional Atk +20 Atk +5% _______________________ Type: Enchant Position: Unknown |
20x 20x |
1,000,000z | |
| Matk +10 _______________________ Refine Level +7: Additional Matk +10 _______________________ Refine Level +9: Additional Matk +10 _______________________ Refine Level +11: Additional Matk +20 Matk +5% _______________________ Type: Enchant Position: Unknown |
20x 20x |
1,000,000z |
Perfect Enchant Slot 3
| Slot 3 Enchant | Description | Materials | Zeny |
| Increases Physical Damage against enemies of all sizes by 5%. _______________________ Refine Level +7: Increases Physical Damage against enemies of all sizes by additional 3%. _______________________ Refine Level +9: Increases Physical Damage against enemies of all sizes by additional 2%. _______________________ Refine Level +11: Increases Physical Damage against enemies of all sizes by additional 10%. _______________________ Type: Enchant Position: Unknown |
30x |
2,000,000z | |
| Increases Magical Damage against enemies of all sizes by 5%. _______________________ Refine Level +7: Increases Magical Damage against enemies of all sizes by additional 3%. _______________________ Refine Level +9: Increases Magical Damage against enemies of all sizes by additional 2%. _______________________ Refine Level +11: Increases Magical Damage against enemies of all sizes by additional 10%. _______________________ Type: Enchant Position: Unknown |
30x |
2,000,000z |
Perfect Enchant Slot 2
| Slot 2 Enchant | Description | Materials | Zeny |
| P.Atk +5 _______________________ [Bonus by Grade] [Grade D]: Increases Melee Physical Damage by 5%. _______________________ [Grade C]: Increases Melee Physical Damage by additional 5%. _______________________ [Grade B]: Atk +2% P.Atk +5 _______________________ [Grade A]: Additional Atk +3% Additional P.Atk +5 _______________________ Type: Enchant Position: Unknown |
40x |
3,000,000z | |
| P.Atk +5 _______________________ [Bonus by Grade] [Grade D]: Increases Ranged Physical Damage by 5%. _______________________ [Grade C]: Increases Ranged Physical Damage by additional 5%. _______________________ [Grade B]: Atk +2% P.Atk +5 _______________________ [Grade A]: Additional Atk +3% Additional P.Atk +5 _______________________ Type: Enchant Position: Unknown |
40x |
3,000,000z | |
| P.Atk +5 _______________________ [Bonus by Grade] [Grade D]: Increases Critical Damage by 5%. _______________________ [Grade C]: Increases Critical Damage by additional 5%. _______________________ [Grade B]: Atk +2% C.Rate +3 _______________________ [Grade A]: Additional Atk +3% Additional C.Rate +5 _______________________ Type: Enchant Position: Unknown |
40x |
3,000,000z | |
| S.Matk +5 _______________________ [Bonus by Grade] [Grade D]: Increases Magical Damage with every element by 5%. _______________________ [Grade C]: Increases Magical Damage with every element by additional 5%. _______________________ [Grade B]: Matk +2% S.Matk +5 _______________________ [Grade A]: Additional Matk +3% Additional S.Matk +5 _______________________ Type: Enchant Position: Unknown |
40x 40x |
3,000,000z |
Accessory Enchants
| Target Items | Slot Order | Minimum Requirements | Line Options | Reset Process | |
| Grade | Refine | ||||
| 4→3→2 | No Grade | 0 | allowed | No Reset | |
| 4→3→2 | No Grade | 0 | allowed | No Reset | |
Perfect Enchant Slot 4
| Slot 4 Enchant | Description | Materials | Zeny |
| Atk +25 Increases Melee Physical Damage by 12%. _______________________ Type: Enchant Position: Unknown |
35x |
1,500,000z | |
| Atk +25 Increases Ranged Physical Damage by 12%. _______________________ Type: Enchant Position: Unknown |
35x |
1,500,000z | |
| Critical +8 Increases Critical Damage by 12%. _______________________ Type: Enchant Position: Unknown |
35x |
1,500,000z | |
| Matk +25 Increases Magical Damage with every element by 12%. _______________________ Type: Enchant Position: Unknown |
35x |
1,500,000z |
Perfect Enchant Slot 3
| Slot 3 Enchant | Description | Materials | Zeny |
| Atk +35 Increases Melee Physical Damage by 15%. _______________________ Type: Enchant Position: Unknown |
45x |
3,000,000z | |
| Atk +35 Increases Ranged Physical Damage by 15%. _______________________ Type: Enchant Position: Unknown |
45x |
3,000,000z | |
| Critical +12 Increases Critical Damage by 15%. _______________________ Type: Enchant Position: Unknown |
45x |
3,000,000z | |
| Matk +35 Increases Magical Damage with every element by 15%. _______________________ Type: Enchant Position: Unknown |
45x |
3,000,000z |
Perfect Enchant Slot 2
| Slot 2 Enchant | Description | Materials | Zeny |
| P.Atk +5 Increases Physical Damage against enemies of every element by 5%. _______________________ Type: Enchant Position: Unknown |
65x |
4,500,000z | |
| S.Matk +5 Increases Magical Damage against enemies of every element by 5%. _______________________ Type: Enchant Position: Unknown |
65x |
4,500,000z |
Overview Yorscalp
Crowns
Crowns are obtainable at NPC Wigner Merchant Operato at (mbase_in 231, 122).

You need for one crown following items:
5x ![]() Corruped Fruit (103523)
Corruped Fruit (103523)
100x ![]() Spirit of Yorscalp (1001836)
Spirit of Yorscalp (1001836)
30x ![]() Symbol of Curse (1001835)
Symbol of Curse (1001835)
The crown of an executor who worships the snake god Jormungand. _______________________ For each 2 Refine Levels: MaxHP +300 MaxSP +50 _______________________ For each 3 Refine Levels: Increases Physical Damage against enemies of every size by 5%. _______________________ For each 4 Refine Levels: Atk +5% _______________________ Refine Level +7: Increases Physical Damage by 10%. _______________________ Refine Level +9: P.Atk +8 _______________________ Refine Level +10: Increases Attack Speed (decreases After Attack Delay by 10%). _______________________ Refine Level +11: Critical +10 Decreases Fixed Casting Time by 0.5 seconds. _______________________ When equipped with Yorscalp Armor: MaxHP +10% _______________________ When equipped with Yorscalp Manteau: Decreases After Skill Delay by 10%. _______________________ When equipped with Yorscalp Boots: Increases Physical Damage by additional 10%. _______________________ When equipped with Yorscalp Ring: P.Atk +10 _______________________ When equipped with Yorscalp Glove: Atk +10% _______________________ [Bonus by Grade] [Grade D]: P.Atk +7 _______________________ [Grade C]: Ignores 5% physical resistance of monsters of every race, except Players. _______________________ [Grade B]: Increases Physical Damage against all races, except Players, by 15%. _______________________ [Grade A]: Ignores additional 5% physical resistance of monsters of every race, except Players. _______________________ Type: Armor Position: Head Top Defense: 50 Armor Level: 2 Refinable / Gradable Required Level: 250 |
A circlet of a judge who worships the snake god Jormungand. _______________________ For each 2 Refine Levels: MaxHP +300 MaxSP +50 _______________________ For each 3 Refine Levels: Increases Magical Damage against enemies of every size by 5%. _______________________ For each 4 Refine Levels: Matk +5% _______________________ Refine Level +7: Increases Magical Damage with every element by 10%. _______________________ Refine Level +9: S.Matk +8 _______________________ Refine Level +10: Increases Attack Speed (decreases After Attack Delay by 10%). _______________________ Refine Level +11: Decreases Variable Casting Time by 10%. Decreases Fixed Casting Time by 0.5 seconds. _______________________ When equipped with Yorscalp Robe: MaxHP +10% _______________________ When equipped with Yorscalp Muffler: Decreases After Skill Delay by 10%. _______________________ When equipped with Yorscalp Shoes: Increases Magical Damage with every element by additional 10%. _______________________ When equipped with Yorscalp Earring: S.Matk +10 _______________________ When equipped with Yorscalp Necklace: Matk +10% _______________________ [Bonus by Grade] [Grade D]: S.Matk +7 _______________________ [Grade C]: Ignores magical resistance of enemies of all race, except Players, by 5%. _______________________ [Grade B]: Increases Magical Damage against all races, except Players, by 15%. _______________________ [Grade A]: Additionally ignores magical resistance of enemies of all race, except Players, by 5%. _______________________ Type: Armor Position: Head Top Defense: 50 Armor Level: 2 Refinable / Gradable Required Level: 250 |
Equipment
Armor whose power is amplified by the snake's curse. _______________________ Atk +130 _______________________ For every 2 Refine Levels: Atk +20 Def +20 _______________________ Refine Level +7: Increases Melee and Ranged Physical Damage by 5%. _______________________ Refine Level +9: P.Atk +5 Decreases Variable Casting Time by 10%. _______________________ Refine Level +10: Increases Melee and Ranged Physical Damage by additional 10%. _______________________ Refine Level +12: Decreases After Skill Delay by 5%. _______________________ When equipped with Yorscalp Manteau: Increases Physical Damage with every element by 15%. _______________________ When equipped with Yorscalp Manteau and Yorscalp Boots: Increases Physical Damage against every race, except Players, by 15%. _______________________ [Bonus by Grade] [Grade D] POW +5 CON +5 Decreases After Skill Delay by 5%. _______________________ [Grade C] Atk +5% P.Atk +3 _______________________ [Grade B] Additional POW +5 CON +5 P.Atk +3 _______________________ [Grade A] Additional Atk +5% P.Atk +5 _______________________ Type: Armor Position: Armor Defense: 198 Armor Level: 2 Refinable / Gradable Weight: 240 Required Level: 250 |
A robe whose strength is amplified by the snake's curse. _______________________ Matk +130 _______________________ For every 2 Refine Levels: Matk +20 Def +20 _______________________ Refine Level +7: Increases Magical Damage with every element by 5%. _______________________ Refine Level +9: S.Matk +5 Decreases Variable Casting Time by 10%. _______________________ Refine Level +10: Increases Magical Damage with every element by additional 10%. _______________________ Refine Level +12: Decreases After Skill Delay by 5%. _______________________ When equipped with Yorscalp Muffler: Increases Magical Damage against enemies of every element by 15%. _______________________ When equipped with Yorscalp Muffler and Yorscalp Shoes: Increases Magical Damage against every race, except Players, by 15%. _______________________ [Bonus by Grade] [Grade D] SPL +5 CON +5 Decreases After Skill Delay by 5%. _______________________ [Grade C] Matk +5% S.Matk +3 _______________________ [Grade B] Additional SPL +5 CON +5 S.Matk +3 _______________________ [Grade A] Additional Matk +5% S.Matk +5 _______________________ Type: Armor Position: Armor Defense: 130 Armor Level: 2 Refinable / Gradable Weight: 120 Required Level: 250 |
Boots whose strength is amplified by the snake's curse. _______________________ MaxHP +10% MaxSP +4% _______________________ For every 2 Refine Levels: MaxSP +1% Def +15 _______________________ Refine Level +7: Increased Attack Speed (decreases After Attack Delay by 10%). _______________________ Refine Level +9: P.Atk +5 increases melee / long ranged physical damage 5%. _______________________ Refine Level +10: Def +100 Atk +20 _______________________ Refine Level +12: Increases Melee and Ranged Physical Damage by additional 8%. _______________________ When equipped with Yorscalp Armor: Increases Physical Damage with every element by 15%. _______________________ [Bonus by Grade] [Grade D] POW +2 CON +2 Atk +10 _______________________ [Grade C] Atk +4% P.Atk +4 _______________________ [Grade B] Decreases Fixed Casting Time by 1 seconds. _______________________ [Grade A] Additional Atk +5% P.Atk +5 _______________________ Type: Armor Position: Shoes Defense: 128 Armor Level: 2 Refinable / Gradable Weight: 200 Required Level: 250 |
Shoes whose strength is amplified by the snake's curse. _______________________ MaxHP +10% MaxSP +4% _______________________ For every 2 Refine Levels: MaxSP +1% Def +15 _______________________ Refine Level +7: Increased Attack Speed (decreases After Attack Delay by 10%). _______________________ Refine Level +9: S.Matk +5 Increases Magical Damage with every element 5%. _______________________ Refine Level +10: Def +100 Matk +20 _______________________ Refine Level +12: Increases Magical Damage with every element by additional 8%. _______________________ When equipped with Yorscalp Robe: Increases Magical Damage against enemies of every element by 15%. _______________________ [Bonus by Grade] [Grade D] SPL +2 CON +2 Matk +10 _______________________ [Grade C] Matk +4% S.Matk +4 _______________________ [Grade B] Decreases Fixed Casting Time by 1 seconds. _______________________ [Grade A] Additional Matk +5% S.Matk +5 _______________________ Type: Armor Position: Shoes Defense: 80 Armor Level: 2 Refinable / Gradable Weight: 100 Required Level: 250 |
Manteau whose strength is amplified by the snake's curse. _______________________ POW +5 CON +5 _______________________ For every 2 Refine Levels: Atk +1% Def +10 _______________________ Refine Level +7: Decreases After Skill Delay by 5%. _______________________ Refine Level +9: Increases Melee and Ranged Physical Damage by 10%. _______________________ Refine Level +10: P.Atk +3 Atk +50 _______________________ Refine Level +12: Decreases After Skill Delay by additional 5%. _______________________ When equipped with Yorscalp Boots: increases physical damage against all race monsters (except players) by 15%. _______________________ [Bonus by Grade] [Grade D] Atk +3% P.Atk +3 _______________________ [Grade C] Additional P.Atk +5 _______________________ [Grade B] Additional Atk +3% P.Atk +5 _______________________ [Grade A] Additional Atk +4% P.Atk +7 Decreases After Skill Delay by 5%. _______________________ Type: Armor Position: Garment Defense: 142 Armor Level: 2 Refinable / Gradable Weight: 160 Required Level: 250 |
Muffler whose strength is amplified by the snake's curse. _______________________ SPL +5 CON +5 _______________________ For every 2 Refine Levels: Matk +1% Def +15 _______________________ Refine Level +7: Decreases After Skill Delay by 5%. _______________________ Refine Level +9: Increases Magical Damage with every element by 10%. _______________________ Refine Level +10: S.Matk +3 Matk +50 _______________________ Refine Level +12: Decreases After Skill Delay by additional 5%. _______________________ When equipped with Yorscalp Shoes: Increases Magical Damage against every race, except Players, by 15%. _______________________ [Bonus by Grade] [Grade D] Matk +3% S.Matk +3 _______________________ [Grade C] Additional S.Matk +5 _______________________ [Grade B] Additional Matk +3% S.Matk +5 _______________________ [Grade A] Additional Matk +4% S.Matk +7 Decreases After Skill Delay by 5%. _______________________ Type: Armor Position: Garment Defense: 90 Armor Level: 2 Refinable / Gradable Weight: 80 Required Level: 250 |
A ring whose power is amplified by the snake's curse. _______________________ Atk +10% P.Atk +5 Increased Attack Speed (decreases After Attack Delay by 10%). _______________________ When equipped with Yorscalp Glove: Reduces Variable Casting Time by 10%. Decreases After Cast Delay by 10%. _______________________ Type: Armor Position: Left Accessory Armor Level: 2 Weight: 10 Required Level: 250 |
A glove whose power is amplified by the snake's curse. _______________________ Atk +10% P.Atk +10 Increased Attack Speed (decreases After Attack Delay by 5%). Reduces Variable Casting Time by 5%. _______________________ Type: Armor Position: Right Accessory Armor Level: 2 Weight: 10 Required Level: 250 |
An earring whose power is amplified by the snake's curse. _______________________ Matk +10% S.Matk +5 Increased Attack Speed (decreases After Attack Delay by 10%). _______________________ When equipped with Yorscalp Necklace: Reduces Variable Casting Time by 10%. Decreases After Cast Delay by 10%. _______________________ Type: Armor Position: Left Accessory Armor Level: 2 Weight: 10 Required Level: 250 |
A necklace whose power is amplified by the snake's curse. _______________________ Matk +10% S.Matk +10 Increased Attack Speed (decreases After Attack Delay by 5%). Reduces Variable Casting Time by 5%. _______________________ Type: Armor Position: Right Accessory Armor Level: 2 Weight: 10 Required Level: 250 |
Enchants for Yorscalp Gear are the same as for Gaebolg, follow this link: Gaebolg/Yorscalp Enchants
Crown Enchants
| Target Items | Slot Order | Minimum Requirements | Line Options | Reset Process | Reset Chance | |
| Grade | Refine | |||||
| 3→2→1 | No Grade | 0 | allowed | 20x 20x 20x |
100%, no fail | |
Normal Enchants
Perfect Enchants - Slot 1
| Slot 1 Enchant | Enchantment Process | |
|---|---|---|
| Materials | Zeny | |
| 20x 100x |
5,000,000z | |
| 20x 100x |
5,000,000z | |
Cartas
Atk +8% _______________________ Refine Level +7: Increases Physical Damage against enemies of Brute race by 12%. _______________________ Refine Level +9: Increases Physical Damage against enemies of Brute race by additional 8%. _______________________ Type: Card Compound on: Shoes Weight: 1 |
Increases Physical Damage against enemies of Small size by 10%. _______________________ When Weapon Level of compounded equipment is 5: Increases Physical Damage against enemies of Small size by additional 10%. _______________________ Type: Card Compound on: Right Hand Weight: 1 |
Increases Magical Damage against enemies of Small size by 10%. _______________________ When Weapon Level of compounded equipment is 5: Increases Magical Damage against enemies of Small size by additional 10%. _______________________ Type: Card Compound on: Right Hand Weight: 1 |
Matk +5% _______________________ Refine Level +7: Increases Magical Damage against enemies of Undead element by 10%. _______________________ Refine Level +9: Increases Magical Damage against enemies of Undead element by additional 7%. _______________________ Type: Card Compound on: Shoes Weight: 1 |
Atk +8% _______________________ Refine Level +7: Increases Physical Damage against monsters of Insect race by 12%. _______________________ Refine Level +9: Increases Physical Damage against monsters of Insect race by additional 8%. _______________________ Type: Card Compound on: Shoes Weight: 1 |
Atk +8% _______________________ Refine Level +7: Increases Physical Damage against monsters of Demon race by 12%. _______________________ Refine Level +9: Increases Physical Damage against monsters of Demon race by additional 8%. _______________________ Type: Card Compound on: Shoes Weight: 1 |
Atk +8%. _______________________ Refine Level +7: Increases Physical Damage against enemies of Undead element by 12%. _______________________ Refine Level +9: Increases Physical Damage against enemies of Undead element by additional 8%. _______________________ Type: Card Compound on: Shoes Weight: 1 |
Matk +5%. _______________________ Refine Level +7: Increases Magical Damage against monsters of Formless race by 10%. _______________________ Refine Level +9: Increases Magical Damage against monsters of Formless race by additional 7%. _______________________ Type: Card Compound on: Shoes Weight: 1 |
Increases SP Consumption by 10%. _______________________ For each Refine Level: Increases Magical Damage with Water element by 3%. _______________________ Type: Card Compound on: Shoes Weight: 1 |
Atk +8%. _______________________ Refine Level +7: Increases Physical Damage against monsters of Dragon race by 12%. _______________________ Refine Level +9: Increases Physical Damage against monsters of Dragon race by additional 8%. _______________________ Type: Card Compound on: Shoes Weight: 1 |
Flee +30 Critical -15 Increases Melee Physical Damage by 10%. _______________________ For each 3 Refine Levels: Increases Melee Physical Damage by 7%. _______________________ When equipped with Yoscopus Guardian Card or Yoscopus Sorcerer Card: Increases Melee Physical Damage by 15%. Increases Physical Damage against enemies of every element by 15%. _______________________ Type: Card Compound on: Garment Weight: 1 |
Atk +8% _______________________ Refine Level +7: Increases Physical Damage against monsters of Formless race by 12%. _______________________ Refine Level +9: Increases Physical Damage against monsters of Formless race by additional 8%. _______________________ Type: Card Compound on: Shoes Weight: 1 |
Flee +30 Critical -15 Increases Ranged Physical Damage by 10%. _______________________ For each 3 Refine Levels: Increases Ranged Physical Damage by 7%. _______________________ When equipped with Yoscopus Sorcerer Card or Yoscopus Guardian Card: Increases Ranged Physical Damage by 15%. Increases Physical Damage against enemies of every element by 15%. _______________________ Type: Card Compound on: Garment Weight: 1 |
Matk +5%. _______________________ Refine Level +7: Increases Magical Damage against monsters of Dragon race by 10%. _______________________ Refine Level +9: Increases Magical Damage against monsters of Dragon race by additional 7%. _______________________ Type: Card Compound on: Shoes Weight: 1 |
Increases Physical Damage against enemies of Medium and Large size by 10%. _______________________ When Weapon Level of compounded equipment is 5: Increases Physical Damage against enemies of Medium and Large size by additional 10%. _______________________ When equipped with Scalleg Card: Increases Physical Damage against enemies of all sizes by 15%. When Weapon Level of compounded equipment is 5 and Two-Handed class weapon: P.Atk +5 Increases Physical Damage against enemies of all sizes by additional 25%. _______________________ Type: Card Compound on: Right Hand Weight: 1 |
Increases Magical Damage against enemies of Medium and Large size by 10%. _______________________ When Weapon Level of compounded equipment is 5: Increases Magical Damage against enemies of Medium and Large size by additional 10%. _______________________ When equipped with Velelling Card: Increases Magical Damage against enemies of all sizes by 15%. When Weapon Level of compounded equipment is 5 and Two-Handed class weapon: S.Matk +5 Increases Magical Damage against enemies of all sizes by additional 25%. _______________________ Type: Card Compound on: Right Hand Weight: 1 |
Flee +30 Increases Variable Casting Time by 15%. Increases Magical Damage with Fire, Neutral, Holy, Shadow, and Ghost element by 10%. _______________________ For each 3 Refine Levels: Increases Magical Damage with Fire, Neutral, Holy, Shadow, and Ghost element by 7%. _______________________ When equipped with Yortus Conjurator Card: Increases Magical Damage with Fire, Neutral, Holy, Shadow, and Ghost element by 15%. Increases Magical Damage against every element by 15%. _______________________ Type: Card Compound on: Garment Weight: 1 |
Flee +30 Increases Variable Casting Time by 15%. Increases Magical Damage with Wind, Water, Earth, Poison, and Undead element by 10%. _______________________ For each 3 Refine Levels: Increases Magical Damage with Wind, Water, Earth, Poison, and Undead element by 7%. _______________________ When equipped with Yortus Conjurator Card: Increases Magical Damage with Wind, Water, Earth, Poison, and Undead element by 15%. Increases Magical Damage against every element by 15%. _______________________ Type: Card Compound on: Garment Weight: 1 |
Critical +5 Increases Critical Damage by 12%. _______________________ Refine Level +9: Additional Critical +5 _______________________ Refine Level +11: Additional Critical +6 _______________________ Type: Card Compound on: Armor Weight: 1 |
P.Atk +10 MaxHP -7% Flee +30 _______________________ Increases Atk by 2% for every 10 base STR. _______________________ Decreases Critical by 3 for every 10 base LUK. _______________________ Type: Card Compound on: Armor Weight: 1 |
P.Atk +10 MaxHP -7% Flee +30 _______________________ Increases Atk by 2% for every 10 base DEX. _______________________ Decreases Critical by 3 for every 10 base LUK. _______________________ Type: Card Compound on: Armor Weight: 1 |
Critical +5 Reduces Variable Casting Time by 7%. _______________________ Type: Card Compound on: Right Accessory Weight: 1 |
Critical +5 Reduces Variable Casting Time by 7%. _______________________ When equipped with Yorker Worker Card: C.Rate +2 Increases Critical Damage by 12%. _______________________ Type: Card Compound on: Left Accessory Weight: 1 |
MaxHP +7% _______________________ Refine Level +10: Additional MaxHP +3% _______________________ Refine Level +14: Additional MaxHP +2% _______________________ Type: Card Compound on: Head Top Weight: 1 |
S.Matk +10 MaxHP -7% Flee +30 _______________________ Increases Matk by 2% for every 10 base INT. _______________________ Increases SP Consumption by 3% for every 10 base DEX. _______________________ Type: Card Compound on: Armor Weight: 1 |
Critical +25, C.RATE +5, MaxSP -15%. _______________________ Base LUK at least 120: Critical +10 _______________________ Base CRT at least 100: Increases Critical Damage by 50%, C.RATE +5. _______________________ Type: Card Compound on: Garment Weight: 1 |
Increases SP Consumption by 10%. _______________________ For each Refine Level: Increases Magical Damage with Ghost element by 3%. _______________________ Type: Card Compound on: Shoes Weight: 1 |
Increases Physical Damage against enemies of Boss class by 20%. _______________________ When Weapon Level of compounded equipment is 5: Increases Physical Damage against enemies of Boss class by additional 10%. _______________________ Type: Card Compound on: Right Hand Weight: 1 |
Increases Physical Damage against enemies of Normal class by 30%. Increases Physical Damage against enemies of Boss class by 30%. MaxHP -15% _______________________ For each Refine Level: Atk +1% P.Atk +1 _______________________ Type: Card Compound on: Armor Weight: 1 |
Cartas Past Heroes
Puedes obtener los fragmentos de carta necesarios para fabricar las cartas usando ![]() Past Heroes Box (103512) , que se obtiene en la instancia [Battle]. Puedes fabricarlas en la Tienda de Wigner usando
(jor_mbase 222, 260)
Past Heroes Box (103512) , que se obtiene en la instancia [Battle]. Puedes fabricarlas en la Tienda de Wigner usando
(jor_mbase 222, 260)
Increases Hack and Slasher and Storm Slash damage by (the refine level of the compounded weapon)%. _______________________ When equipped with Yorscalp Crown of Execution: If the Headgear's Grade is A: For every Refine Level above +10: Increases Hack and Slasher and Storm Slash damage by 12%. _______________________ Type: Card Compound on: Right Hand Weight: 1 |
Increases Imperial Cross and Overslash damage by (the refine level of the compounded weapon)%. _______________________ When equipped with Yorscalp Crown of Execution: If the Headgear's Grade is A: For every Refine Level above +10: Increases Imperial Cross and Overslash damage by 12%. _______________________ Type: Card Compound on: Right Hand Weight: 1 |
Increases Explosion Blaster and Blazing Flame Blast damage by (the refine level of the compounded weapon)%. _______________________ When equipped with Yorscalp Crown of Execution: If the Headgear's Grade is A: For every Refine Level above +10: Increases Explosion Blaster and Blazing Flame Blast damage by 12%. _______________________ Type: Card Compound on: Right Hand Weight: 1 |
Increases Arbitrium and Divinus Flos damage by (the refine level of the compounded weapon)%. _______________________ When equipped with Yorscalp Crown of Judgment: If the Headgear's Grade is A: For every Refine Level above +10: Increases Arbitrium and Divinus Flos damage by 12%. _______________________ Type: Card Compound on: Right Hand Weight: 1 |
Increases Energy Cannonade and Spark Blaster damage by (the refine level of the compounded weapon)%. _______________________ When equipped with Yorscalp Crown of Execution: If the Headgear's Grade is A: For every Refine Level above +10: Increases Energy Cannonade and Spark Blaster damage by 12%. _______________________ Type: Card Compound on: Right Hand Weight: 1 |
Increases Mystery Powder and Dust Explosion damage by (the refine level of the compounded weapon)%. _______________________ When equipped with Yorscalp Crown of Execution: If the Headgear's Grade is A: For every Refine Level above +10: Increases Mystery Powder and Dust Explosion damage by 12%. _______________________ Type: Card Compound on: Right Hand Weight: 1 |
Increases Cross Slash and Eternal Slash damage by (the refine level of the compounded weapon)%. _______________________ When equipped with Yorscalp Crown of Execution: If the Headgear's Grade is A: For every Refine Level above +10: Increases Cross Slash and Eternal Slash damage by 12%. _______________________ Type: Card Compound on: Right Hand Weight: 1 |
Increases Abyss Flame and Abyss Square damage by (the refine level of the compounded weapon)%. _______________________ When equipped with Yorscalp Crown of Judgment: If the Headgear's Grade is A: For every Refine Level above +10: Increases Abyss Flame and Abyss Square damage by 12%. _______________________ Type: Card Compound on: Right Hand Weight: 1 |
Increases All Bloom and Destructive Hurricane damage by (the refine level of the compounded weapon)%. _______________________ When equipped with Yorscalp Crown of Judgment: If the Headgear's Grade is A: For every Refine Level above +10: Increases All Bloom and Destructive Hurricane damage by 12%. _______________________ Type: Card Compound on: Right Hand Weight: 1 |
Increases Lightning Land and Terra Drive damage by (the refine level of the compounded weapon)%. _______________________ When equipped with Yorscalp Crown of Judgment: If the Headgear's Grade is A: For every Refine Level above +10: Increases Lightning Land and Terra Drive damage by 12%. _______________________ Type: Card Compound on: Right Hand Weight: 1 |
Increases Crescive Bolt and Wild Walk damage by (the refine level of the compounded weapon)%. _______________________ When equipped with Yorscalp Crown of Execution: If the Headgear's Grade is A: For every Refine Level above +10: Increases Crescive Bolt and Wild Walk damage by 12%. _______________________ Type: Card Compound on: Right Hand Weight: 1 |
Increases Rose Blossom and Rhythm Shooting damage by (the refine level of the compounded weapon)%. _______________________ When equipped with Yorscalp Crown of Execution: If the Headgear's Grade is A: For every Refine Level above +10: Increases Rose Blossom and Rhythm Shooting damage by 12%. _______________________ Type: Card Compound on: Right Hand Weight: 1 |
Increases Noon Blast and All in the Sky damage by (the refine level of the compounded weapon)%. _______________________ When equipped with Yorscalp Crown of Execution: If the Headgear's Grade is A: For every Refine Level above +10: Increases Noon Blast and All in the Sky damage by 12%. _______________________ Type: Card Compound on: Right Hand Weight: 1 |
Increases Magazine for One and Wild Shot damage by (the refine level of the compounded weapon)%. _______________________ When equipped with Yorscalp Crown of Execution: If the Headgear's Grade is A: For every Refine Level above +10: Increases Magazine for One and Wild Shot damage by 12%. _______________________ Type: Card Compound on: Right Hand Weight: 1 |
Increases Darkening Cannon and Dark Dragon - Nightmare damage by (the refine level of the compounded weapon)%. _______________________ When equipped with Yorscalp Crown of Judgment: If the Headgear's Grade is A: For every Refine Level above +10: Increases Darkening Cannon and Dark Dragon - Nightmare damage by 12%. _______________________ Type: Card Compound on: Right Hand Weight: 1 |
Increases Talisman of Red Phoenix and Talisman of Four Bearing God damage by (the refine level of the compounded weapon)%. _______________________ When equipped with Yorscalp Crown of Judgment: If the Headgear's Grade is A: For every Refine Level above +10: Increases Talisman of Red Phoenix and Talisman of Four Bearing God damage by 12%. _______________________ Type: Card Compound on: Right Hand Weight: 1 |
Increases Jupitel Thunderstorm and Jack Frost Nova damage by (the refine level of the compounded weapon)%. _______________________ When equipped with Yorscalp Crown of Judgment: If the Headgear's Grade is A: For every Refine Level above +10: Increases Jupitel Thunderstorm and Jack Frost Nova damage by 12%. _______________________ Type: Card Compound on: Right Hand Weight: 1 |
Increases Hyunrok Cannon and Hyunrok Spirit Power damage by (the refine level of the compounded weapon)%. _______________________ When equipped with Yorscalp Crown of Judgment: If the Headgear's Grade is A: For every Refine Level above +10: Increases Hyunrok Cannon and Hyunrok Spirit Power damage by 12%. _______________________ Type: Card Compound on: Right Hand Weight: 1 |
