Wind Hawk Guide by Hurt Locker: Difference between revisions
Jump to navigation
Jump to search
Hurt Locker (talk | contribs) No edit summary |
Hurt Locker (talk | contribs) No edit summary |
||
| Line 8: | Line 8: | ||
<div style="float:left;">__TOC__</div> | <div style="float:left;">__TOC__</div> | ||
{| class="wikitable" style="margin-left: 20px; margin-right:0;border-style: solid; border-width: 1px; border-color:#ffffff00; float:right; " | {| class="wikitable" style="margin-left: 20px; margin-right:0;border-style: solid; border-width: 1px; border-color:#ffffff00; float:right; " | ||
! colspan="6" style="background-color:#7DCEA0; " |[[File:WH15.png|31px]] WindHawk | ! colspan="6" style="background-color:#7DCEA0; " |[[File:WH15.png|thumb|31px]] WindHawk | ||
|- | |- | ||
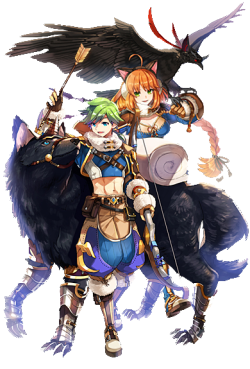
| colspan="6" |[[File:WindHawk.png|250px]] <div style="text-align: right;"> | | colspan="6" |[[File:WindHawk.png|250px]] <div style="text-align: right;"> | ||
| | |||
|- | |- | ||
| colspan="6" style="background-color:#7DCEA0;" | | | colspan="6" style="background-color:#7DCEA0;" | | ||
| Line 17: | Line 18: | ||
| colspan="4" |<div style="text-align: center;"> Ranger </div> | | colspan="4" |<div style="text-align: center;"> Ranger </div> | ||
</div> | </div> | ||
| colspan="4" |<div style="text-align: center;"> Hurt Locker </div> <center>[[File: | | colspan="4" |<div style="text-align: center;"> Hurt Locker </div> <center>[[File:HurtLocker.png|thumb|150px]]</center> | ||
|- | |- | ||
| colspan="6" style="background-color:#7DCEA0;" | | | colspan="6" style="background-color:#7DCEA0;" | | ||
Revision as of 02:56, 4 August 2025
| This guide is still in development | |
|---|---|
| Check it out on the #archer channel and good luck with your build. |
 |
|||||||||
Job Base:
|
Ranger
|
Hurt Locker  | |||||||
4th Job Bonus
| |||||||||
POW
|
STA
|
WIS
|
SPL
|
CON
|
CRT
|
||||
| 7 | 4 | 5 | 4 | 9 | 4 | ||||
Introduction
Hello! Some of you may already know me (from previous servers), but if not, you will. My name is Hurt Locker, I'm a WH main, been in MuhRO for a long time. I designed this guide not only to update previous guides, but also to offer a fresh perspective on the job based on my experience and acquired knowledge. I hope you find it useful and... enjoy it!
Note:Always check the market (prices may vary) and the final damage depends on your build and equipment (progress is different and everyone goes at their own pace, you have to support each other).
Hidden Tips/Damage Boost
There are ways to increase your damage, do you know which ones? Even some old stuff still works
| Gears/Consumables | Note |
|---|---|
|
It's all you need to boost your damage (the best arsenal at your disposal). |
|
If you lack critical rate, these are your options (if you lack it you can use a |
|
|
It doesn't have much mystery, more damage for a few seconds (if the PC allows it; if not, skip) |
|
We have alternatives to choose from before having at least one |
|
If you have no problem taking off the |
Hidden Tips/Damage Boost
There are ways to increase your damage, do you know which ones? Even some old stuff still works
| Gear | Note |
|---|---|
|
If you ask me, this is the best hat to date in terms of damage and ignoring res (10%). It's a huge investment and is only focused on CB, the only compatible build (GS can do it too, if you don't mind losing some spam).
|
|
It's a good hat, even if you're just starting out late game. It grants you crit rate, fixed damage, and combos with your weapon (either dimension or time gap). It's RECOMMENDED to have this hat before starting with the Yorscap Crown.
|
|
|
|
you can change it for the |
|
The best armor for a long time, you can use different cards like (from best to worst)
|