21 Age of Heroes/de: Difference between revisions
No edit summary |
(Updating to match new version of source page) Tags: Mobile edit Mobile web edit |
||
| Line 1: | Line 1: | ||
<languages/> | <languages/> | ||
<div class="mw-translate-fuzzy"> | |||
=Hauptquest= | =Hauptquest= | ||
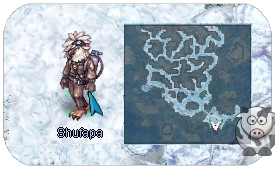
# In {{#navi:jor_tail|233|41}} triffst du Shufapa. Er erklärt, dass sie die Schuppe untersuchen wollen und bittet dich, mitzukommen. Grund dafür ist eine ungewöhnliche Mana-Wellenlänge auf der Insel. | # In {{#navi:jor_tail|233|41}} triffst du Shufapa. Er erklärt, dass sie die Schuppe untersuchen wollen und bittet dich, mitzukommen. Grund dafür ist eine ungewöhnliche Mana-Wellenlänge auf der Insel. | ||
| Line 426: | Line 427: | ||
# Sprich mit Nyar. Nillem und Nyar konnten den Riss nicht versiegeln, doch die Zeit wiederholt sich immer wieder, obwohl wir immer wieder ungehindert dorthin reisen konnten. Nicht nur das, jetzt steht auch DEIN Name in den Geschichtsbüchern. Du erhältst 70x {{#item:1001618}} + 60 Rufpunkte. | # Sprich mit Nyar. Nillem und Nyar konnten den Riss nicht versiegeln, doch die Zeit wiederholt sich immer wieder, obwohl wir immer wieder ungehindert dorthin reisen konnten. Nicht nur das, jetzt steht auch DEIN Name in den Geschichtsbüchern. Du erhältst 70x {{#item:1001618}} + 60 Rufpunkte. | ||
#; [[File:EP_21_149.png]] | #; [[File:EP_21_149.png]] | ||
</div> | |||
<div lang="en" dir="ltr" class="mw-content-ltr"> | |||
=Main Quest= | |||
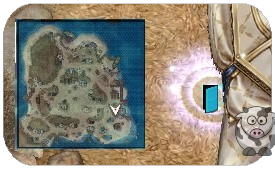
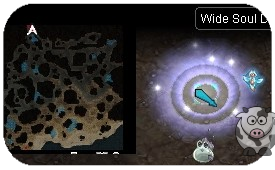
# At {{#navi:jor_tail|233|41}} you will find Shufapa. He explains to us, that they plan to investigate Scale Island and asks you to come along. The reason for that is an unusual mana wavelength on the island. | |||
#; [[File:EP21_1.png]] | |||
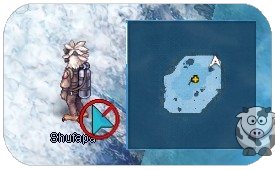
# {{#navi:jor_crk|137|137}} A dialogue opens and Nillen confirms that the wavelength is really unusual. Lehar spotted Nyar on the island so everyone decides to see what's up with her. | |||
#; [[File:EP_21_2.png]] | |||
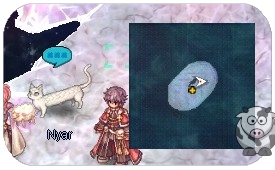
# {{#navi:jor_crk|107|112}} Talk to Nyar. Aurelie, Lehar, and Nillem will appear. The reason for the mana wavelength comes from a rift that opened. Not only that, the dimensional boundaries and time and parallel dimensions are collapsing because of the rift. Nyar points out that this rift leads to the past, which gives us a way to deal with Lasgand. Nyar will connect the rift to a specific point in time, where Lasgand got his power. The option you pick doesn't matter in the end. | |||
#; [[File:EP_21_3.png]] | |||
# You get warped to {{#navi:jor_crk_p|108|106}}. Talk to Nyar again. Lehar and Nillem will appear. Nillem points out that we are indeed in the past where the rift opened. It's the time where the foundation of Rune-Midgarts happens. This is also the time where Lasgand got the power inherited and a plan gets created how to alter the past to stop Lasgand. Lehar spots people and everyone decides to approach them as volunteers for the resistance against the Jormungandr Cult. | |||
#; [[File:EP_21_3A.png]] | |||
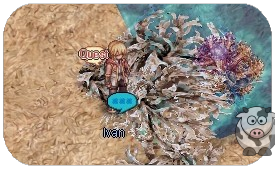
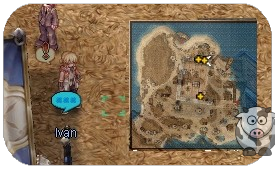
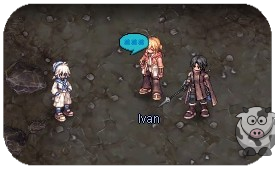
# In {{#navi:jor_crk_p|104|95}} people appear who found out about the rift. Those are against the cult, but they spotted you. He ask us what we are doing here, so were telling him that "We're Adventurers". After clearing up that we are on their side, the stranger introduces himself as Ivan from the Wigner family. So we follow him. | |||
# You will be warped to a Safe Place in {{#navi:luna_sf1|258|147}}. Talk to Ivan, he tells us that we are near the cult, in the Raised Land. But instead of attacking the cult, we are on the way to the base of Gaebolg, Lunaphoma. You follow the soldier to the commander. | |||
#; [[File:EP_21_4.png]] | |||
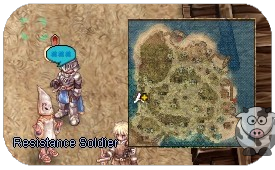
# Talk to the Resistance Soldier in {{#navi:jor_mbase|38|152}} who introduces you to Lunaphoma. Before going to the headquarters, he needs to report something to the commander and vice-commander. Followers of Freya are complaining and Lehar suggested to listen in to hear what's the fuss. | |||
#; [[File:EP_21_5.png]] | |||
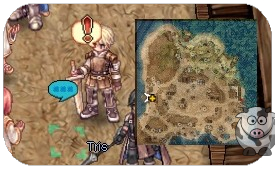
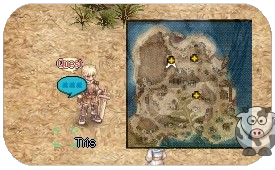
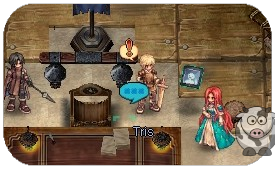
# Talk to Tris. You hear that the people of Freya complain that the fight against the cult is lead in the name of Odin and they want Freya to be included as well. Tris explains the difficult time and that they didn't forget about the people of Freya, but also mentions that they need more time because the war against the cult is top priority. But the people of Freya are unhappy and decide to leave the resistance. | |||
#; [[File:EP_21_6.png]] | |||
# Talk to the Resistance Soldier again who introduce us to the captains. After explaining the situation, Tris wants to send you to the Richard Mercenary Group, because people with combat skills are always needed there. | |||
#; [[File:EP_21_5.png]] | |||
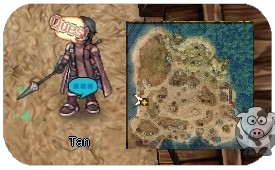
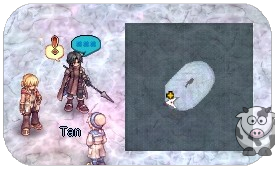
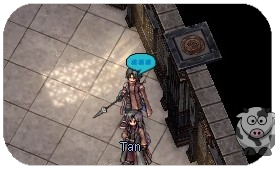
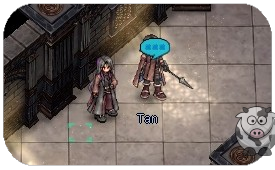
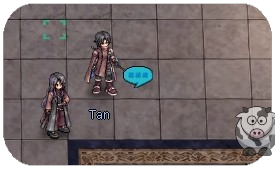
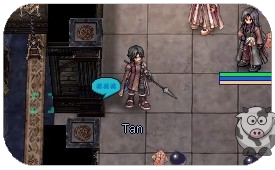
# Talk to Tan who got ordered to bring you to the Richard Mercenary Group. He is clearly against us being part of the resistance. Tell him that "We'll go right away." | |||
#; [[File:EP_21_7.png]] | |||
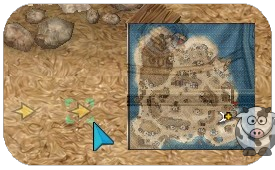
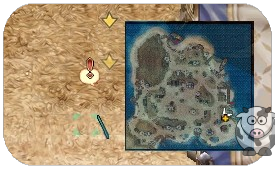
# Follow the navi {{#navi:jor_mbase|305|102}} until everyone appears. Tan shows us where the mercenary group's office is and that we need to find a Richard there. | |||
#; [[File:EP_21_MISSING.png]] | |||
# You have to go to the mercenary group's office, but no one is here. Suddenly you find a mysterious man. Lehar sends you to speak to him. | |||
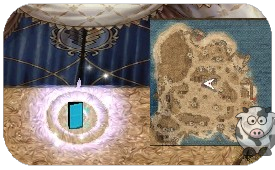
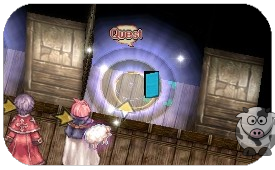
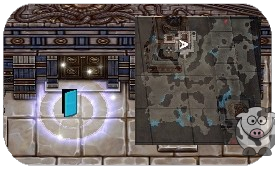
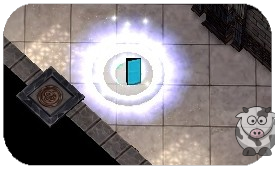
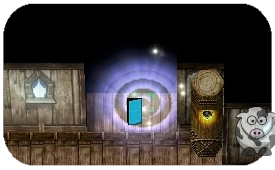
# Walk into the portal above those NPCs. | |||
#; [[File:EP21_Mercenary.png]] | |||
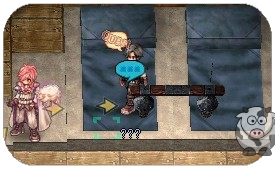
# Talk to ???. We tell him that we are here to see the Mercenary King Richard. We also add that Tan sent us to this place. According to the mysterious man, Richard is not here and that we need to go to the Central Barracks where Richard's room is. | |||
#; [[File:EP_21_8.png]] | |||
# You have to search for Richard's room {{#navi:jor_mbase|203|190}}. Check his room. | |||
#; [[File:EP21_9.png]] | |||
# Go upstairs and right and enter the second to last portal where Richard room lies. But no ones here, so we check the next door. After a warning a woman appears and asks us what brings us to Richard. We explain that Tan sent us. | |||
#; [[File:EP21_10.png]] [[File:EP21_10A.png]] | |||
# They will sent you back to the Mercenary Group's Office {{#navi:jor_mbase|313|121}}. | |||
#; [[File:EP21_Mercenary.png]] | |||
# When entering the office, a dialogue will start. You hear that Richard is not here. The lady, Valdaris, explains that we need to go through the registration process first. | |||
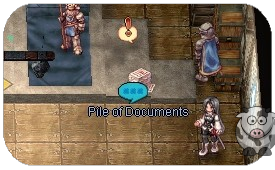
# Talk to the documents where you find the papers for the applications. You get explained that they are still using the old forms and they are not for applying to only one mercenary group. | |||
#; [[File:EP_21_12.png]] | |||
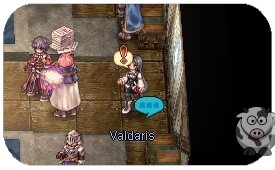
# Talk to Valdaris to give her your form. After reviewing the forms we get welcomed to the the Richard Mercenary Group. | |||
#; [[File:EP_21_13.png]] | |||
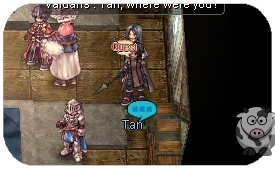
# Talk to Tan, who is talking to Valdaris about us being suspicious. He is still concerned about if we are good or not. Valdaris is taking us to a simple tour around the area. | |||
#; [[File:EP_21_14.png]] | |||
# When leaving the office another dialogue will start where Valdaris tells us that this base was build in a rush. | |||
# Walk a little bit down. You learn that there are supplies stored from the Wigner Merchant Group. | |||
#; [[File:EP_21_15.png]] | |||
# Laura Valdaris tells us that this an area for temporary visitors. | |||
# At {{#navi:jor_mbase|245|128}} some kids appear and want to play with their Sister Valdaris. She explains that the children are rescued from the Jormungandr Cult. After explaining everything about the kids she asks us to go to the training ground. | |||
#; [[File:EP_21_16.png]] | |||
# Valdaris is waiting for you at {{#navi:jor_mbase|147|108}}. She explains the training grounds and that it is open for everyone. You hear something strange from the soldiers, so Valdaris gets angry and wants to investigate it. | |||
#; [[File:EP_21_17.png]] | |||
# Go near the soldiers where you see someone getting beaten up so bad that he nearly dies. It's Richard who gets beaten up, so Valdaris decides to bring him back to his room to treat his wounds. | |||
#; [[File:EP_21_18.png]] | |||
# Go back to the center {{#navi:jor_mbase|202|191}}. | |||
#; [[File:EP21 9.png]] | |||
# Go upstairs enter the second to last portal on the right side. | |||
#; [[File:EP21_10.png]] | |||
# Talk to Valdaris who is REALLY UPSET about the situation. Nerius tells her that Richard wanted to be attacked. | |||
#; [[File:EP_21_19.png]] | |||
# Talk to Richard who explains that he wants to create books for battle. Getting hit by Nerius was necessary to show proper combat stances which are better shown in real-life examples. Lee should draw the illustration for the book. | |||
#; [[File:EP_21_20.png]] | |||
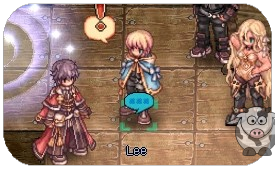
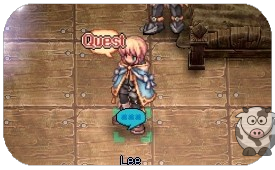
# Talk to Lee who instantly shows you the illustration he has drawn. After some talking about the book, you get introduced to Richard. Lee gets ordered to show us the rest while Richard and Valdaris have a talk. | |||
#; [[File:EP_21_21.png]] | |||
# Leave the room, enter the last portal. | |||
#; [[File:EP21_10A.png]] | |||
# Talk to Lee again. He tells us the full story of how they met Galaxia, where she destroyed nearly the entire mercenary group alone. After clearing the armor, Lee is willing to show us the rest of the base. | |||
#; [[File:EP_21_22.png]] | |||
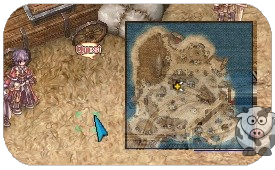
# Leave the center and walk a little bit left {{#navi:jor_mbase|168|195}} where Lee explains the rest of the base. Tan will appear and tell us that this should be enough and you should go and see Tris. You will be rewarded with 30x {{#item:1001618}} and 30 reputation. | |||
#; [[File:EP_21_23.png]] | |||
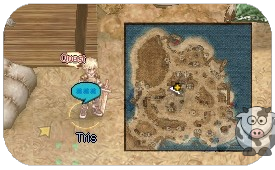
# Talk to Tris. He asks us how everything went. After some explaining, he tells us that Alberta needs a wizard and Nillem should join them. Lehar will be sent to the Wigner Merchant Group, who are involved in relief efforts for people who escaped the cult. For us, we need to meet someone first. We meet Heine through a magic Tablet (Insert mobile phone joke here). Learning from Heine, our task will be to go to Alberta and receive the goods Heine sent to the resistance. Heine wishes to get a special Bright Eye from us. It must be from us and a fresh one, so not a single one from the storage. There are 4 dialogs in total and you need to click specific options: <br> | |||
#;* First Dialogue: Bearable. | |||
#;* Second dialogue: Is that person you, Tris? | |||
#;* Third Dialogue: Enjoy the text. | |||
#;* Fourth dialogue: Get kill quest 10x {{#linkmob:22319}} and collect 1x {{#item:1001641}}. | |||
#; [[File:EP_21_24.png]] | |||
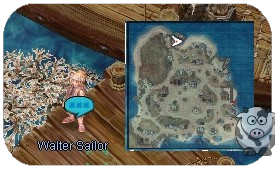
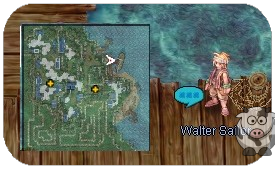
# Talk to Walter Sailor {{#navi:jor_mbase|161|341}} and go to the Raised Land. Here you can do the kill quest. | |||
#; [[File:EP_21_25.png]] | |||
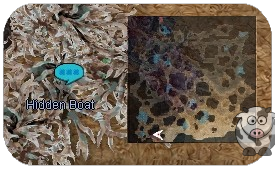
# To return you can talk to the Hidden Boat on the bottom left of the map {{#navi:jor_raise2|100|26}}. | |||
#; [[File:EP_21_25A.png]] | |||
# Go back to Tris. You will be rewarded with 30x {{#item:1001618}} and 35 reputation. | |||
#; <nowiki>You have unlocked: Volunteer Vallen Wok Daily Quest</nowiki> | |||
#; <nowiki>You have unlocked: Counselor Wool Daily Quest</nowiki> | |||
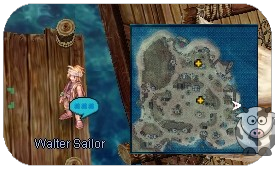
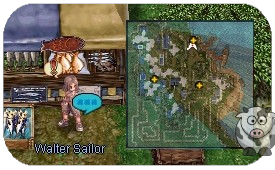
# Go to the other Walter Sailor {{#navi:jor_mbase|333|148}}, he will take you to the Alberta. | |||
#; [[File:EP_21_26.png]] | |||
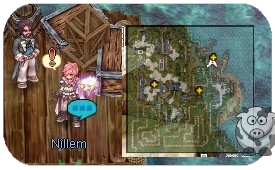
# Walk up a little bit and talk to Nillem. You watch how Nillem gets overloaded with work from the Sailor. After entering the discussion, the Sailor introduces himself as Megas. He forces you to go to the beach to find work, ignoring your request. | |||
#; [[File:EP_21_27.png]] | |||
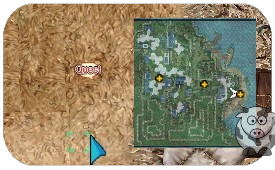
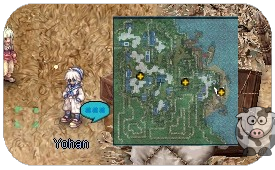
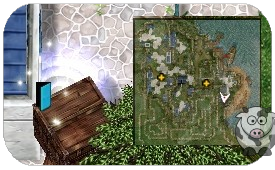
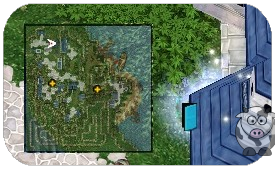
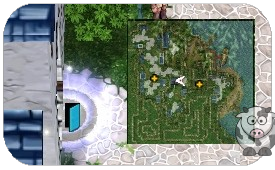
# {{#navi:jor_albe|227|117}} Walk into the quest sign, Yohan will appear. He assigns you with moving the cargo to specific areas. Those are marked on the map. | |||
#; [[File:EP_21_28.png]] [[File:EP_21_29.png]] | |||
# Visit Walter Sailor at {{#navi:jor_albe|146|224}}. He explains to you that everyone needs to do those tasks, it's like a ladder where everyone begins the same. | |||
#; [[File:EP_21_30.png]] | |||
# There is another Walter Sailor waiting inside a building {{#navi:jor_albe|120|145}}. | |||
#; [[File:EP_21_31.png]] | |||
# Enter the building, walk up, and talk to Walter Sailor. | |||
#; [[File:EP_21_32.png]] | |||
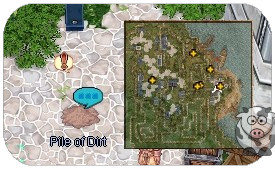
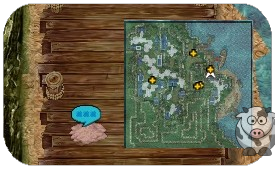
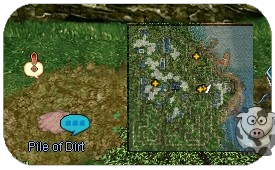
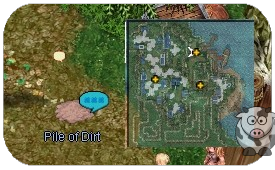
# Go back to Yohan {{#navi:jor_albe|227|117}}. With all the goods coming and going there is dirt in the town. You have to clean up 4 dirt piles. | |||
#; [[File:EP_21_29.png]] | |||
# The 4 dirt pile locations are: | |||
#; {{#navi:jor_albe|205|132}} | |||
#; [[File:EP_21_33.png]] | |||
#; {{#navi:jor_albe|189|166}} | |||
#; [[File:EP_21_34.png]] | |||
#; {{#navi:jor_albe|174|139}} | |||
#; [[File:EP_21_35.png]] | |||
#; {{#navi:jor_albe|143|210}} | |||
#; [[File:EP_21_36.png]] | |||
# Go back to Yohan {{#navi:jor_albe|227|117}}. He will give you the next job in the warehouse you were before. | |||
# Go back to the previous building {{#navi:jor_albe|120|145}}. | |||
#; [[File:EP_21_31.png]] | |||
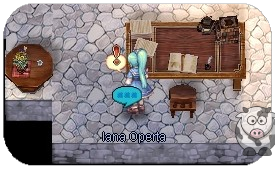
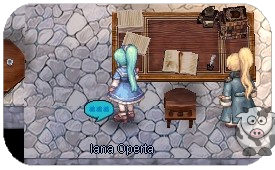
# Enter the building and walk down. You will meet Iana Operta. She wants you to deliver 2 letters. | |||
#; [[File:EP_21_37.png]] | |||
# First letter: Enter the building at {{#navi:jor_albe|200|107}}. | |||
#; [[File:EP_21_38.png]] | |||
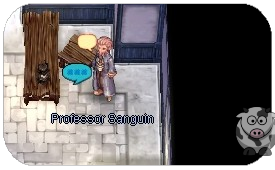
# Talk to Professor Sanguin. He takes the letter and mentions that your name is mentioned in the letter too. After some waiting, he gives you a written reply. | |||
#; [[File:EP_21_39.png]] | |||
# Second letter: Enter the building at {{#navi:jor_albe|60|237}}. | |||
#; [[File:EP_21_40.png]] | |||
# Talk to Patissier Edel. She introduces herself and asks about your business. Choose the second option (First Option would mean trouble!) and hear her reply. | |||
#; [[File:EP_21_41.png]] | |||
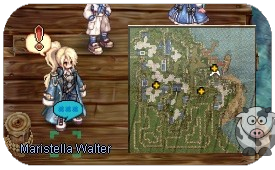
# Go back to Iana {{#navi:jor_albe|120|145}}. Enter the building, walk down and talk to Iana. You bring her both replies and she tells you that those aren't basic trivial errands. You get introduced to Mariastella Walter and start talking about the stories of the ghost ship. We are told that Maria's father, Walter, might be on the ship and we need to gather information about it's location. | |||
#; [[File:EP_21_31.png]] [[File:EP_21_31A.png]] | |||
# You will be rewarded with 40x {{#item:1001618}} and 40 reputation. | |||
# Go back to Lunaforma, talk to the Walter Sailor at {{#navi:jor_albe|194|200}}. | |||
#; [[File:EP_21_42.png]] | |||
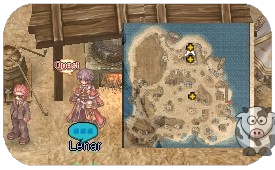
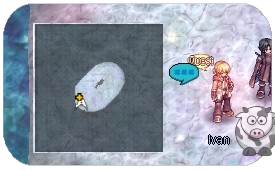
# Talk to Ivan at {{#navi:jor_mbase|240|277}}. Ask about the ghost ship. But instead of getting information, you will get assigned to helping with the meal. | |||
#; [[File:EP_21_43.png]] | |||
# Talk to Lehar in {{#navi:jor_mbase|214|306}} several times. You decide to help him with the meals for the Wigner groups. Everyone is enjoying Lehar's rice a lot. Lehar mentions that he heard people mention a ghost ship. | |||
#; [[File:EP_21_44.png]] | |||
# Talk to Ivan at {{#navi:jor_mbase|193|287}} who tells you how many people saw the ghost ship. He gives you the name of who you should ask first, because he saw most of the stuff happening. | |||
#; [[File:EP_21_45.png]] | |||
# Talk to Lyriq at {{#navi:jor_mbase|191|306}}, who gets introduced by Lehar. After some small talk he gets more comfy around you and begins to tell you the story of what happened on that day with the ghost ship. We decide to go back to Ivan. | |||
#; [[File:EP_21_46.png]] | |||
# Talk to Ivan at {{#navi:jor_mbase|237|281}}. He tells us that he wants to join us on the ghost ship mission. But we need to deliver a package to his sister in Alberta first. | |||
#; [[File:EP_21_47.png]] | |||
# Talk to Walter Sailor {{#navi:jor_mbase|333|148}}, he will take you to Alberta again. | |||
#; [[File:EP_21_26.png]] | |||
# Enter the building at {{#navi:jor_albe|100|238}} | |||
#; [[File:EP_21_48.png]] | |||
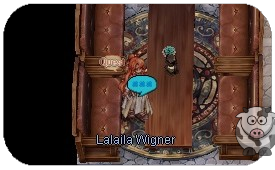
# Talk to Lalaila Wigner, who is surprised about Ivan's package. She explains to you that she sends others to look over Ivan. We should take something he left behind and bring it to him. | |||
#; [[File:EP_21_49.png]] | |||
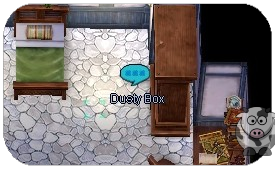
# Enter the portal at the top and check the dusty box. It contains well maintained knuckles which get cleaned and everything by Lalaila. She confirms that Ivan wanted those knuckles to be thrown away but Lalaila refused. She also gives you a letter for Maria Walter. | |||
#; [[File:EP_21_50.png]] | |||
# Leave the building and go to the next one at {{#navi:jor_albe|120|146}}. | |||
#; [[File:EP_21_51.png]] | |||
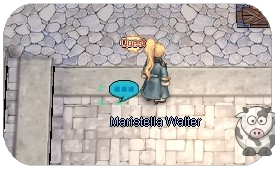
# Talk to Maristella Walter and give her the letter. She doesn't say anything and just smiles. You will be rewarded with 10x {{#item:1001618}} and 5 reputation. | |||
#; [[File:EP_21_52.png]] | |||
# Go back to Lunaforma, talk to the Walter Sailor at {{#navi:jor_albe|194|200}}. | |||
#; [[File:EP_21_42.png]] | |||
# Talk to Ivan at {{#navi:jor_mbase|237|281}}. He suggests to infiltrate through the north of the Raised Land and to meet there. You will be rewarded with 40x {{#item:1001618}} and 40 reputation. | |||
#; [[File:EP_21_47.png]] | |||
# Talk to Walter Sailor {{#navi:jor_mbase|161|341}} and go to the Raised Land. | |||
#; [[File:EP_21_25.png]] | |||
# Leave the map through the top portal. | |||
#; [[File:EP_21_53.png]] | |||
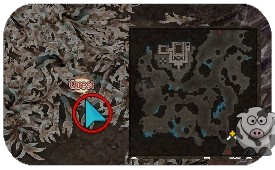
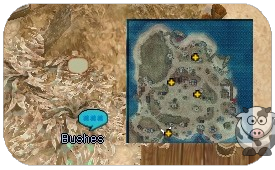
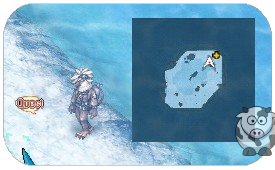
# Walk into the bushes at {{#navi:jor_raise1|322|64}} <br> '''Note''': {{#linkmob:22315}} on this map drops {{#item:1001643}}. 2 are required for step 166 | |||
#; [[File:EP_21_54.png]] | |||
# You will be ported to another map. Talk to Ivan. A plan is made to infiltrate the temple. Why is there a temple and why does it look like it's made by human? This question is asked and the only way to find out is to go inside. | |||
#; [[File:EP_21_55.png]] | |||
#; Unlocked Jormungand Church Temple. | |||
# Enter the dungeon at {{#navi:jor_raise1|152|316}} | |||
#; [[File:EP_21_56.png]] | |||
# Enter the safe spot at {{#navi:jor_tmple1|170|62}} | |||
#; [[File:EP_21_57.png]] | |||
# Talk to Ivan. Ivan sorts out a plan out to find any humans who are looking to escape. Top priority is gathering information about the ghost ship though, so we go with Tan to gather information. | |||
#; [[File:EP_21_58.png]] | |||
# Go to the next safe spot at {{#navi:jor_tmple1|103|180}} | |||
#; [[File:EP_21_59.png]] | |||
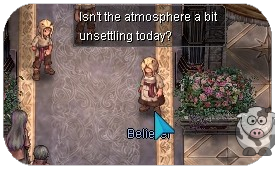
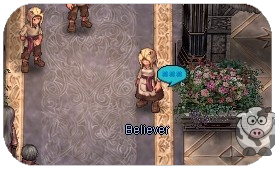
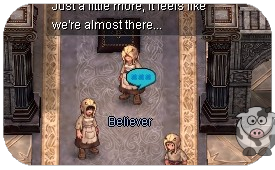
# Talk to the believer. After asking, they can't give any information about the ghost ship. Because of their strong faith Tan decides not to ask about escaping. | |||
#; [[File:EP_21_60.png]] | |||
# Go to the next safe spot at {{#navi:jor_tmple1|181|235}} | |||
#; [[File:EP_21_61.png]] | |||
# Talk to another believer. They are unhappy, but after asking about escaping, they think we want to capture them and bring them to the 2nd floor, where humans get taken away by the guards. Tan suggested to go there for potential information. | |||
#; [[File:EP_21_62.png]] | |||
# Go to the next safe spot at {{#navi:jor_tmple1|229|270}} | |||
#; [[File:EP_21_63.png]] | |||
# Talk to the next believer. You get told to go to the 2nd floor, but you need to be registered by the priests as a believer first. But currently they have disappeared, so Tan suggests to go back to the gathering point. | |||
#; [[File:EP_21_64.png]] | |||
# Go back to the first safe spot at {{#navi:jor_tmple1|170|62}} | |||
#; [[File:EP_21_57.png]] | |||
# Talk to Ivan. Ivan and Yohan came to the same conclusion and without any information. It's said that we need more information about the place first before we can get more. | |||
#; [[File:EP_21_58.png]] | |||
# Go back to Lunaforma. | |||
# Talk to Tris at {{#navi:jor_mbase|142|264}}. Tris is bit frustrated that we couldn't find any humans who wanted to escape or any information about the ghost ship. But someone will arrive soon with potential inside information, so we will meet him and maybe he can guide us to the second floor! You will be rewarded with 15x {{#item:1001618}} and 15 reputation. | |||
#; [[File:EP_21_65.png]] | |||
# Visit the small boat at {{#navi:jor_mbase|124|33}}. | |||
#; [[File:EP_21_66.png]] | |||
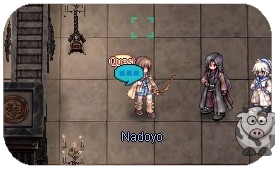
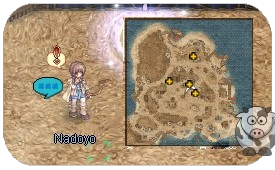
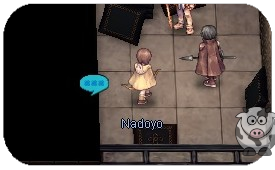
# Talk to Tan at {{#navi:jor_crk_p|72|76}}. The informant, Nadoyo, explains that there is someone who wants to escape from the temple and has every information we need. But to get there safely we need someone tall with long black hair similar to Tan. | |||
#; [[File:EP_21_67.png]] | |||
# Talk to Ivan who has an idea which person fits the description perfectly, but he is afraid of that thought. | |||
#; [[File:EP_21_68.png]] | |||
# Go back to Lunaform, by talking to the small boat. | |||
#; [[File:EP_21_69.png]] | |||
# Talk to Ivan at {{#navi:jor_mbase|163|295}}. We're meeting Wilhelm who doesn't want to join the mission. After Tan mentions the reason why Wilhelm is working there and after some convincing, he agrees to come along to infiltrate the temple for information about the ghost ship and finding people who want to escape. | |||
#; [[File:EP_21_70.png]] | |||
# Talk to Walter Sailor {{#navi:jor_mbase|161|341}} and go to the Raised Land. | |||
#; [[File:EP_21_25.png]] | |||
# Leave the map through the top portal. | |||
#; [[File:EP_21_53.png]] | |||
# Walk into the bushes at {{#navi:jor_raise1|322|64}} | |||
#; [[File:EP_21_54.png]] | |||
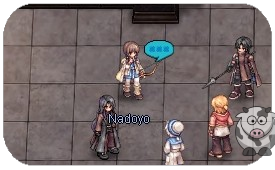
# You will be ported to another map. Talk to Tan. Nadoyo explains the plan. Wilhelm will disguise as a High Rank Priest so we can enter the restricted area of the church, in hopes to find information or people who want to escape. Wilhelm made it clear that he wants to find one person and that's the only reason why he is doing it. Nadoyo mentions that the high priest we disguised into wants to escape from the cult too. You will be rewarded with 15x {{#item:1001618}} and 15 reputation. | |||
#; [[File:EP_21_71.png]] | |||
# Enter the dungeon at {{#navi:jor_raise1|152|316}} | |||
#; [[File:EP_21_56.png]] | |||
# Enter the safe spot at {{#navi:jor_tmple1|229|266}} | |||
#; [[File:EP_21_72.png]] | |||
# Talk to Nadoyo, who explains the plan. Wilhelm will pose as high priest Carmigand, a key figure in the cult. We just have to follow him and everything should work out fine, but Wilhelm is skeptical about the plan. | |||
#; [[File:EP_21_73.png]] | |||
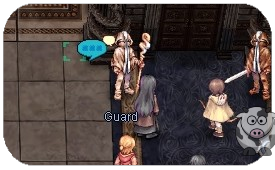
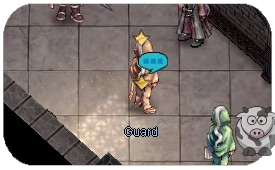
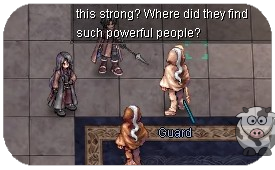
# Talk to the Guard who registers our party with mostly fake names. Nadoyo will go ahead. Talk to the guard again to start the Gimli Infiltration instance. NOTE EVERYONE CAN OPEN INSTANCE FROM PARTY. | |||
#; [[File:EP_21_74.png]] | |||
# Talk to Nadoyo who tells us that Carmigand's plan to escape got leaked. Now we need to act fast in to find and rescue him from the cult, because he has all information we need. | |||
#; [[File:EP_21_X74.png]] | |||
# Talk to Tan who teleports you into a new room. | |||
#; [[File:EP_21_75.png]] | |||
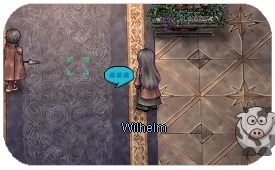
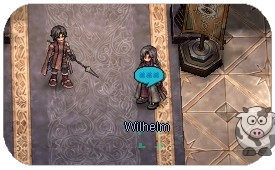
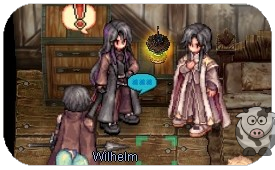
# Talk to Wilhelm who asks the believers about Carmigand. They don't know where he is, but they tell us to look for him at the inner payer room. Wilhelm uses the time to ask about someone named Reinhard, the guy who he is looking for. After the dialog you get warped out. | |||
#; [[File:EP_21_76.png]] | |||
# Talk to Tan at the new location. | |||
#; [[File:EP_21_77.png]] | |||
# Talk to Tan to get warped to another prayer room. | |||
#; [[File:EP_21_78.png]] | |||
# Talk to the Believer, who are complaining about their time at the temple. They want to escape and Wilhelm offers them the way out. But guards appear who are suspicious about the loud noises and forbid meeting in groups bigger than 2. They start attacking you. | |||
#; [[File:EP_21_79.png]] | |||
# Kill the guards. | |||
# Talk to the Believer again. They agree to escape, but don't know anything about Reinhard either. You get warped out. | |||
#; [[File:EP_21_80.png]] | |||
# Talk to Tan to get the next location. | |||
#; [[File:EP_21_81.png]] | |||
# Talk to the guard who is surprised to see Carmigand. Wilhelm, who pretends to be Carmigand, uses this time to surprise attack the guards. | |||
#; [[File:EP_21_82.png]] | |||
# Kill the guards. | |||
# Enter the portal, which appears after killing both guards. | |||
#; [[File:EP_21_83.png]] | |||
# Talk to the Believer at the top of the room. They are happy to be rescued by us and are willing to trust us to escape. But no one knows anything about Reinhard. One of them suggests that he died from the suffering at the temple. | |||
#; [[File:EP_21_84.png]] | |||
# You have to search for another prayer room {{#navi:1@mdtem|117|38}}. | |||
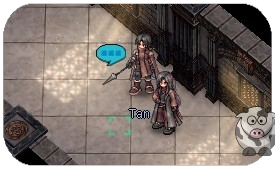
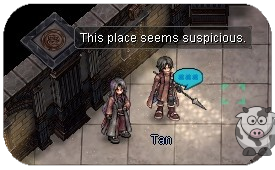
# Talk to Tan. Guards will appear. They claim that Wilhelm is Carmigand and try to capture him. You have to kill both guards again. | |||
#; [[File:EP_21_85.png]] | |||
# After killing the guards, more guards appear. Talk to the yellow guard and even more guards appear. Wilhelm suggest to be captured so they bring us to the real Carmigand. This would be more efficient than wandering around. | |||
#; [[File:EP_21_86.png]] | |||
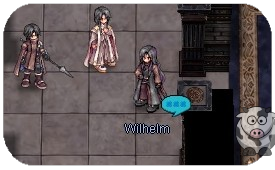
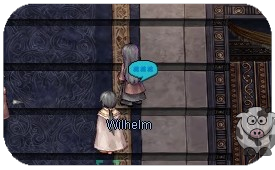
# You will be warped to a preacher room. Talk to Wilhelm. Carmigand will appear and you will learn that he is actually Reinhardt, the guy Wilhelm is looking for. They are brothers and their parents died. Reinhardt is happy that he has finally found him, but he is also disappointed that he became a high priest for this temple. Carmigand explains that there is a secret passage in the room, that no Rgan knows about and we need to find it to escape. | |||
#; [[File:EP_21_87.png]] | |||
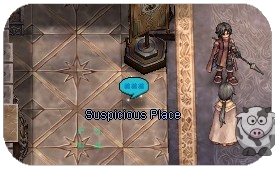
# Suspicious Places will appear. Click on all of them, until you hit the right one and get warped out. | |||
#; [[File:EP_21_88.png]] | |||
# Talk to Wilhelm, who is confused why the passage is like a mace. Carmigand explains that each prayer room is connected to the mace and we need to find the right one to escape. | |||
#; [[File:EP_21_89.png]] | |||
# Two guards appear and want to re-capture Carmigand and Wilhelm. Kill both of them. After Killing the guards talk to Wilhelm again, who teleports you to a new place. | |||
# Talk to Tan. Wilhelm finds it funny that he, who was weaker as a kid is now protecting his brother. | |||
#; [[File:EP_21_90.png]] | |||
# 4 Guards will appear to capture us. Kill them. | |||
# Talk to Tan again. Carmigand doesn't know where the exit is exactly. You get ported to a new location | |||
# Talk to Wilhelm. Hyasagand appears with guards and explains that she is happy to see Carmigand's downfall. Carmigand tells her what he thinks of the church and how big of a lie it is. She sends the guard to capture him, even with force. | |||
#; [[File:EP_21_91.png]] | |||
# Kill the 3 guards that Hyasagand sends out to capture Carmigand. | |||
# Talk to Wilhelm. Believers witness what happens and Hyasagand twists the words to make Carmigand look like the bad guy. Kill all 9 guards in order to progress. | |||
#; [[File:EP_21_92.png]] | |||
# Talk to Tan. Ivan and the others appear with believers to escape. Hyasagand retreats for now. Carmigand makes a speech to his people to follow him, even when he caused a lot of pain. A portal will appear, enter it to leave the instance. | |||
#; [[File:EP_21_93.png]] | |||
# You will be warped back to the safe spot. Enter the bushes. You will meet Nadoyo and the others inside. Ivan explains what happened inside of the temple and Nadoyo is not surprised that it turned out this way. Carmigand promises to her that he will not make the same mistake twice. You will be rewarded with 20x {{#item:1001618}} and 20 reputation. | |||
#; [[File:EP_21_94.png]] | |||
# Go back to Lunaforma and talk to Tris {{#navi:jor_mbase|149|270}}. He greets all the newly escaped people from the cult. They are a bit unsure of the place, but Tris makes a clear speech about the place and it's purpose. The old believers wish for justice over Carmigand's betrayal, so Tris decides to speak in private while Ivan shows them the lands here. | |||
#; [[File:EP_21_95.png]] | |||
# Go back to the center barracks {{#navi:jor_mbase|203|190}}. Enter the portal. | |||
#; [[File:EP21_9.png]] | |||
# Go straight up into the portal at the top. | |||
#; [[File:EP_21_96.png]] | |||
# Talk to Wilhelm. They clear up why they brought Carmigand up here. He wishes to be called by his old name, Reinhard Lugenburg. He is willing to give us any information needed to defeat the cult. | |||
#; [[File:EP_21_97.png]] | |||
# Talk to Reinhardt. He tells us about the Ghost Ship, which fits everything we know so far. He also mentions that the cult uses a new route in fear of the ship. We also learn, that the cult has weakened over time because of the humans leaving, but we don't know anything about their main force. Because Reinhard is human, he did not get all the information. You will be rewarded with 30x {{#item:1001618}} and 30 reputation. | |||
#; [[File:EP_21_98.png]] | |||
# Talk to Wilhelm. He starts explaining about how their parents died and begins to rant about how Reinhard betrayed their family by becoming something they are fighting against. | |||
#; [[File:EP_21_97.png]] | |||
# Talk to Reinhardt, who explains that he wanted to help everyone, believing the church was the answer. Wilhelm leaves disappointed , even saying that he buried his feelings for his brother because of what he did. | |||
#; [[File:EP_21_98.png]] | |||
#;* Unlocks Side Quest: Lugenburg Brothers. | |||
# Enter the building at {{#navi:jor_albe|120|146}}. | |||
#; [[File:EP_21_51.png]] | |||
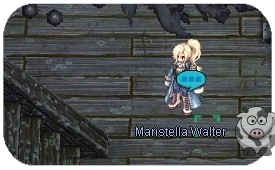
# Talk to Maristella Walter. She asks you to meet her at the harbor for the journey to the ship, now knowing the location where to find it. | |||
#; [[File:EP_21_52.png]] | |||
# Leave the building and go to {{#navi:jor_albe|191|180}}. | |||
#; [[File:EP_21_99.png]] | |||
# Talk to Maristella Walter. Enter the Ghost Ship instance. | |||
# Talk to Maristella inside. It is planned to move with caution and check if it's really the ship of the Walter. | |||
#; [[File:EP_21_100.png]] | |||
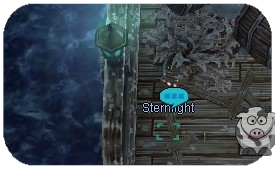
# Walk left, kill the ghost ship crew and a Sternlight will appear. It feels familiar, but it's not the same as the one Maria remembers. | |||
#; [[File:EP_21_102.png]] | |||
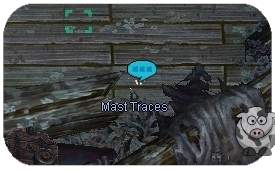
# Walk right and click on the Mast Traces. Maria finds marks from back then, when she was younger. | |||
#; [[File:EP_21_103.png]] | |||
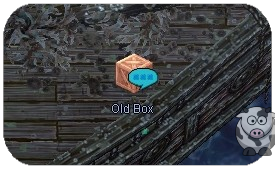
# Walk up to the right side and click on the Old Box. Inside the box you find old wooden toys, which are by Howell for his daughter. | |||
#; [[File:EP_21_104.png]] | |||
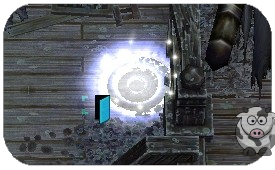
# Walk down and kill the ghost ship crew again, a portal will appear. | |||
#; [[File:EP_21_105.png]] | |||
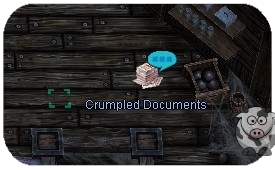
# Kill the ghost ship crew again and click on the Crumpled Documents which are unreadable. Even Yohan can't read whats on the papers which are smudged by the seawater. BEFORE ENTERING THE PORTAL!! | |||
#; [[File:EP_21_106.png]] | |||
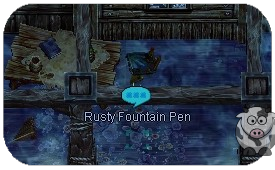
# Find the Rusty Fountain Pen at {{#navi:1@wtgs|184|121}}. Yohan recognizes the pen and with that it's certain what this ship is about. | |||
#; [[File:EP_21_107.png]] | |||
# Kill the ghost ship crew on the other side. | |||
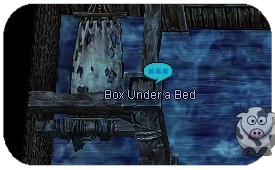
# Follow the way till you find the Box under a Bed. {{#navi:1@wtgs|149|127}}. You find a journal. It says, that after Maria escaped a strange woman appeared on the deck, who granted a wish to the captain. When the captain answered everything on the ship changed; memories were fading and crew members turned into monsters. Now we know, that this is the ship Maria was looking for. | |||
#; [[File:EP_21_BOX_UNDER.png]] | |||
# Search for the rest of the ghost ship Crew and kill them. | |||
# After killing them all, a portal will appear at {{#navi:1@wtgs|109|114}}. Before entering Maria gives a short speech confirming that this ship is the missing Walter and that every answer must lie in the Captains Quarter. | |||
#; [[File:EP_21_108.png]] | |||
# Upstairs you will meet the Ghostship Captain. | |||
#; [[File:EP_21_109.png]] | |||
# Talk to him to start the fight after Maria gives a speech to bolster morale. | |||
# Talk to him after his death. He will turn into human form for a while to explain what happened in the past. His wish was to sink every cult ship, even in death. He is glad that he could at least see everyone one last time before dying. | |||
# Leave the room on the right side {{#navi:1@wtgs|331|27}}. | |||
#; [[File:EP_21_110.png]] | |||
# Outside of the ship talk to Maristella. She summarizes what happened and that they need to leave before the ship disappears. | |||
#; [[File:EP_21_111.png]] | |||
# Leave the instance through the portal, which appears next to Maristella. | |||
#; [[File:EP_21_112.png]] | |||
# Talk to Maristella Walter who reports to Megas what happened on the ghost ship. | |||
#; [[File:EP_21_100A.png]] | |||
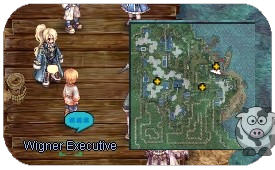
# Wigner Executive will appear, talk to him. He tells you that he has the goods Heine sent us. Now that we're done, we should return to Lunaforma and speak to the tablet again. You will be rewarded with 70x {{#item:1001618}} and 90 reputation. | |||
#; [[File:EP_21_113.png]] | |||
#;* Unlocks Mysterious Ghost Ship daily instance. | |||
# Go back to the center barracks {{#navi:jor_mbase|203|190}}. Enter the portal. | |||
#; [[File:EP21_9.png]] | |||
# Talk to Tris. He asks us about what happened on the ghost ship. After some time he tries to call Heine again, but the connection to him is bad. Speak to him again, the connection is stable now. The entire tablet needs an overhaul and Heine wants us to help him with that. Tris made a spare room ready for us and we should head there with the tablet ASAP. | |||
#; [[File:EP_21_114.png]] | |||
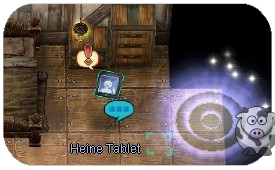
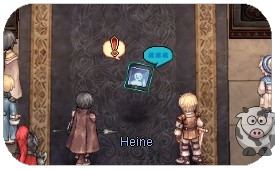
# Go upstairs and into the first portal on the left side. Talk to Heine's Tablet {{#navi:mbase_in|71|126}}. | |||
#; [[File:EP_21_115.png]] [[File:EP_21_115A.png]] | |||
# Speak to the tablet. Heine tells you that the connection is really stable. Choose the second option: "I'll do as you order." and he tells you to get materials for maintenance.You have to farm 2x {{#item:1001643}}. Vellelopy drops from {{#linkmob:22315}} in jor_raise1. <br> Note: If you already have the Vellelopy, skip to step 166 | |||
# Talk to Walter Sailor {{#navi:jor_mbase|161|341}} and go to the Raised Land. | |||
#; [[File:EP_21_25.png]] | |||
# Leave the map through the top portal. You can find the Velellings here. | |||
#; [[File:EP_21_53.png]] | |||
# Go back to the center barracks {{#navi:jor_mbase|203|190}}. Enter the portal. | |||
#; [[File:EP21_9.png]] | |||
# Go upstairs and into the first portal on the left side to deliver the Vellelopies to Heine's Tablet {{#navi:mbase_in|71|126}}. | |||
#; [[File:EP_21_115.png]] | |||
# Talk to the tablet. It will begin to absorb the materials you brought along. While waiting, Heine asks to tell an old story, you Choose "Please tell me. " and he explains us why he began helping Tan and Tris but then starts ranting about them as well! | |||
# Talk to the tablet again and Heine complains about how annoying it is that it didn't work the first time. After we ask ( choose "How old is it?") he tries to explains how old this tablet is. He also mentions that he added 2 new features to the tablet as well. | |||
# Talk a third time with the tablet. Heine is happy that it works for the second time, so you ask and choose "Is that good?", and he starts to complain that it's bad that it's only working for the second time. But then he points out that we're from the future by reading our mana, so he asks us why we came. Choose "To completely eliminate the Rgans" and we explain what happened in our time and that the Rgans are a really big problem. Heine is happy about our answer and wants to help us. You will get 1x {{#item:1001627}}. | |||
# Exit the room and talk to Tris. Tris plans to attack the cult with the information Aurelie provided. After more information from Heine all agree to attack ASAP to end the war before the cult can regroup, but something happened outside. You will be rewarded with 50x {{#item:1001618}} and 50 reputation. | |||
#; [[File:EP_21_114.png]] | |||
# Exit the barracks through the portal and talk to Nadoyo. He explains that the cult plans to resurrect Jormungandr! Nadoyo even saw the shadow of a Serpent, so we need to contact our allies and gather all the information we can get. | |||
#; [[File:EP_21_116.png]] | |||
# Gather 3 reports: | |||
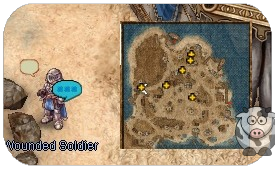
#;* Wounded Soldier {{#navi:jor_mbase|62|194}} | |||
#; [[File:EP_21_117.png]] | |||
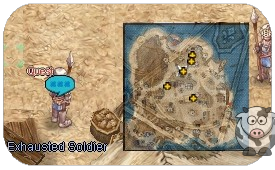
#;* Exhausted Soldier {{#navi:jor_mbase|186|250}} | |||
#; [[File:EP_21_118.png]] | |||
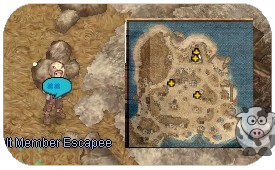
#;* Cult Member Escapee {{#navi:jor_mbase|216|297}} | |||
#; [[File:EP_21_119.png]] | |||
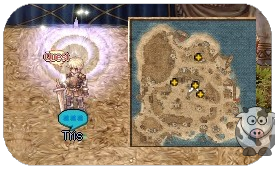
# Go back to Tris who is in front of the center barracks {{#navi:jor_mbase|203|186}}. We give him all information we gathered. But Tan and Nadoyo are missing so we need to check on them! | |||
#; [[File:EP_21_120.png]] | |||
# Talk to Walter Sailor {{#navi:jor_mbase|161|341}} and go to the Raised Land. | |||
#; [[File:EP_21_25.png]] | |||
# Leave the map through the top portal. | |||
#; [[File:EP_21_53.png]] | |||
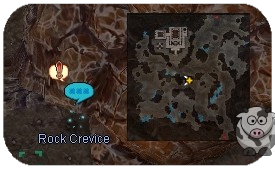
# At {{#navi:jor_raise1|198|189}} you will find a Rock Crevice, enter it. | |||
#; [[File:EP_21_121.png]] | |||
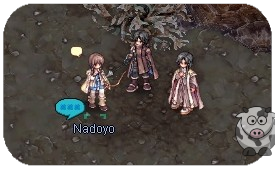
# Inside talk to Nadoyo. They prepared for something inside the church, a room even Reinhard didn't know. So before going back to Tris we are going with them into the church to check it out and to find more evidence of the giant serpent. | |||
#; [[File:EP_21_122.png]] | |||
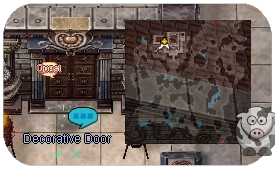
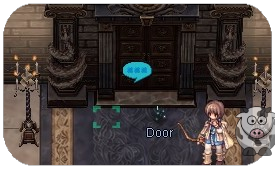
# Check the Decorative Door at {{#navi:jor_raise1|128|323}}. | |||
#; [[File:EP_21_123.png]] | |||
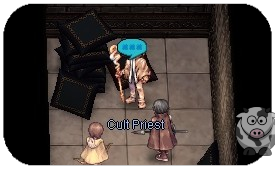
# Inside the building talk to the Cult Priest. The Priest confirms our fear, something eats people by absorbing their mana to get stronger and stronger. Tan and Reinhard want to go ahead and deal with it while we and Nadoyo go back and report to Tris. | |||
#; [[File:EP_21_124.png]] | |||
# Talk to Nadoyo, she will warp you back to Lunaphoma. | |||
#; [[File:EP_21_125.png]] | |||
# Go back to Tris who is in front of the center barracks {{#navi:jor_mbase|203|186}}. We report back with what happened and what Tan's plan is. Tris will exclude normal soldiers and us from the battle and we should unite back with our friends on the 2nd floor. | |||
#; [[File:EP_21_120.png]] | |||
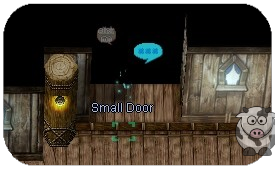
# Enter the barracks and go into the Small Door. | |||
#; [[File:EP_21_126.png]] | |||
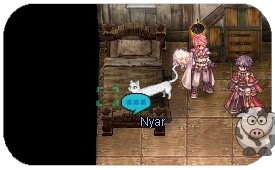
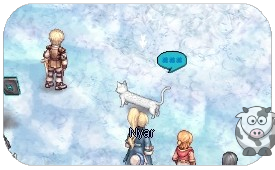
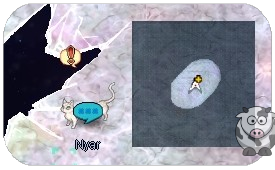
# Talk to Nyar. Heine explains that we can't erase events from the past but that we could join Tris in the battle with Heine's help. You will be rewarded with 10x {{#item:1001618}} and 50 reputation. | |||
#; [[File:EP_21_127.png]] | |||
# Talk to Walter Sailor {{#navi:jor_mbase|161|341}} and go to the Raised Land. | |||
#; [[File:EP_21_25.png]] | |||
# Leave the map through the top portal. | |||
#; [[File:EP_21_53.png]] | |||
# You have to enter the Decorative Door at {{#navi:jor_raise1|128|323}} again. | |||
#; [[File:EP_21_123.png]] | |||
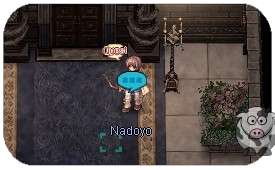
# Talk to Nadoyo. Tris and Nadoyo are surprised to see you here, but Heine stops him and explains that he needs help and only we can do that. | |||
#; [[File:EP_21_128.png]] | |||
# Talk to the door. | |||
#; [[File:EP_21_129.png]] | |||
# Talk to the Heine Tablet. Everyone is gathered here and some are unsure if this is the right call. After a vote it's decided to proceed and Heine wants to share his new spell with everyone. | |||
#; [[File:EP_21_130.png]] | |||
# You will start the instance "Final Battle". | |||
# Inside choose "Use the tablet" and Heine tries to find every location. | |||
# Enjoy the dialogues ~ | |||
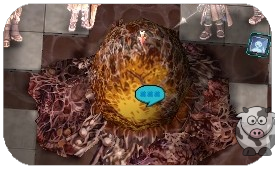
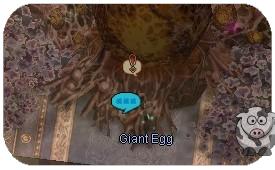
# After everyone has channeled their mana into the egg, click on the big egg. | |||
#; [[File:EP_21_131.png]] | |||
# Kill Corrupted Tan. After a long battle the Serpent tries to convince Tris to save his life while Tan shouts to finish it. Tris finishes the Serpent off and Tan dies with him.... | |||
# Talk to Nyar. Heine suggests to leave first to track down the cult's movement and give Tris some time to gather his thoughts. You will be rewarded with 90x {{#item:1001618}} and 110 reputation. | |||
#; [[File:EP_21_132.png]] | |||
# Outside the instance talk to Nyar again who brings us to a new area. | |||
#; <span style="color: rgb(205, 38, 38);" >Note: If you fail the instance or accidently teleport away use this navilink to get back here: {{#navi:jor_tmple1|170|307}} Talk to the Decorative Door to enter.</span> | |||
#; [[File:EP_21_133.png]] | |||
# You will be warped, talk to Nyar again. Nillem and Lehar find a suspicious room with a book. Nillen reminds us why we are here and that we should investigate by using this book first. | |||
#; [[File:EP_21_134.png]] | |||
# Click on the Suspicious Book to start the Instance Secret Altar. | |||
#; [[File:EP_21_135.png]] | |||
# A shining door will appear, enter it. | |||
#; [[File:EP_21_136.png]] | |||
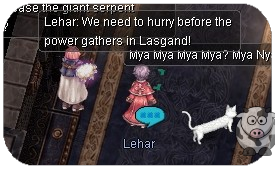
# Inside talk to Lehar. Nillem explains that ahead is a big power and with the death of the giant serpent they start their next plan of concentrating their remaining power into Lasgand. You need to kill all monsters. | |||
#; [[File:EP_21_137.png]] | |||
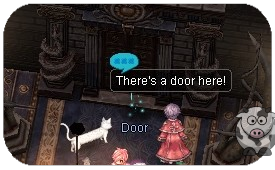
# At the end of the corridor there will be a Door, click on it. | |||
#; [[File:EP_21_138.png]] | |||
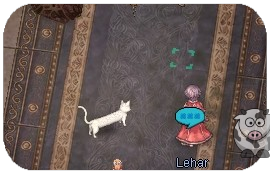
# Talk to Lehar. This place looks familiar, like the place where the High Rank Rgans live. You continue the way. | |||
#; [[File:EP_21_139.png]] | |||
# Follow the way and kill all Cult Priests. | |||
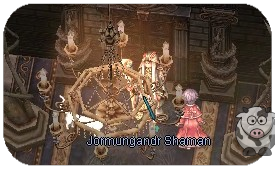
# Talk to Jormungandr Shaman, who is cursing everyone who was part of the battle, like it is told in the stories back then. Kill him and click on the door to continue. | |||
#; [[File:EP_21_140.png]] | |||
# Walk into the Cult Shaman, who explains that with the curse they will persist eternally. Monster are spawning, kill all big Serpents. | |||
# Click on the Giant Egg. Tris transfers the curse onto himself. Aurelie and Tris will watch over the egg until it's withered away and Tris children in the future will fight back what ever hatches there. You will get ported back to the island. You will be rewarded with 60x {{#item:1001618}} and 50 reputation. | |||
#; [[File:EP_21_141.png]] | |||
# Outside talk to Nyar. Talk about what happened, now that Nyar reclaimed some of his power, Lasgand should be weakened by a lot now. But before we go, we need to swap the tablet with something on the docks, that Heine hid for us. | |||
#; [[File:EP_21_142.png]] | |||
# Go back to Lunaforma by talking to the small boat. | |||
# Talk to the Bushes to receive a new Heine Tablet. Heine says his goodbye and warps us back to the island. | |||
#; [[File:EP_21_143.png]] | |||
# Talk to Nyar again and choose to return to our own time. | |||
#; [[File:EP_21_142.png]] | |||
# Walk to {{#navi:jor_crk|137|138}}. Aurelie already senses the sudden change in magic and we report what happened. Now Nillen and Nyar will seal the rift while we'll go and see what happened to Lasgand in the Seal. | |||
#; [[File:EP_21_144.png]] | |||
# Talk to Nyar Clone. Lehar and his aunt will go on to lift the curse from Lasgand. You can't join them, so you need to wait until they are done. You have to wait 10 minutes to open the instance. Grab a coffee, visit the toilet, touch some grass. After the 10 minutes Lehar and Voglinde will re-appear, telling us that the curse is broken but Lasgand is still resurrecting. Now we think it's the work of the Heart Piece of Ymir and we need to check it out, remembering what happened in Bio Labs back then. | |||
#; [[File:EP_21_145.png]] | |||
# Open the instance. | |||
# Inside the instance talk to Aurelie. The insane power of Lasgand that was there before is gone now, but the mana is going wild. We need to confirm who this Lasgand is. | |||
#; [[File:EP_21_146.png]] | |||
# Talk to Lasgand who is acting weird for some reason. You need to kill him multiple times. | |||
#; [[File:EP_21_147.png]] | |||
# Talk to Aurelie who confirms that this Lasgand is acting the same as the first time and it is really the Heart Piece of Ymir. She will warp you out of the instance. | |||
#; [[File:EP_21_148.png]] | |||
# Talk to Nyar Clone. We confirm what he is still dangerous and his power is still creating new Rgans. The curse is lifted but Lehar and Voglinde are staying to fight back the Rgan. Now Nillem wants to see us where the rift was, you get warped there. | |||
#; [[File:EP_21_145.png]] | |||
# Talk to Nyar. Nillem and Nyar failed to seal the rift. The time is now repeating itself over and over, but we're free to travel there from time to time. Not only that, but now YOUR name is mentioned in the history books as well. You will be rewarded with 70x {{#item:1001618}} and 60 reputation. | |||
#; [[File:EP_21_149.png]] | |||
</div> | |||
=Nebenquests= | =Nebenquests= | ||
| Line 431: | Line 862: | ||
# Indem du mit Mandel bei {{#navi:jor_mbase|210|173}} sprichst, kannst du die Tagesaufgaben für die Vorratsbeschaffung freischalten. | # Indem du mit Mandel bei {{#navi:jor_mbase|210|173}} sprichst, kannst du die Tagesaufgaben für die Vorratsbeschaffung freischalten. | ||
<div class="mw-translate-fuzzy"> | |||
==Lugenburg-Brüder== | ==Lugenburg-Brüder== | ||
# Sprich mit Reinhardt in der Kaserne bei {{#navi:mbase_in|118|186}}. Gehe geradeaus durch das Portal. | # Sprich mit Reinhardt in der Kaserne bei {{#navi:mbase_in|118|186}}. Gehe geradeaus durch das Portal. | ||
| Line 440: | Line 872: | ||
# Sprich noch einmal, Tris. Du erhältst 10x {{#item:1001618}} und 5 Rufpunkte. | # Sprich noch einmal, Tris. Du erhältst 10x {{#item:1001618}} und 5 Rufpunkte. | ||
# Du hast jetzt Zugriff auf die Jagdquests „Clear Rising Lands“. | # Du hast jetzt Zugriff auf die Jagdquests „Clear Rising Lands“. | ||
</div> | |||
==Nicht genügend Nahrung (Kräuter sammeln/Angeln)== | ==Nicht genügend Nahrung (Kräuter sammeln/Angeln)== | ||
| Line 632: | Line 1,065: | ||
{{:Yorscalp Equipment}} | {{:Yorscalp Equipment}} | ||
<div class="mw-translate-fuzzy"> | |||
=Cards= | =Cards= | ||
{| class="wikitable" style="background: transparent; width: 100%;" | {| class="wikitable" style="background: transparent; width: 100%;" | ||
| Line 666: | Line 1,100: | ||
|- | |- | ||
|{{#item:300530}} <br> Cri + 25, C.Rate + 5, MaxSP - 15%. | |{{#item:300530}} <br> Cri + 25, C.Rate + 5, MaxSP - 15%. | ||
</div> | |||
<div lang="en" dir="ltr" class="mw-content-ltr"> | |||
= Past Heroes Cards = | |||
</div> | |||
= | <div lang="en" dir="ltr" class="mw-content-ltr"> | ||
You can get the card fragments needed to craft the cards using {{#item:103512}} which is obtainable in the [[https://wiki.muhro.eu/Final_Battle| Final Battle]] instance. You can craft them in the Wigner Shop using | |||
{{#navi:jor_mbase|222|260}} | {{#navi:jor_mbase|222|260}} | ||
{| class="wikitable" style="background: transparent; width: 100%;" | {| class="wikitable" style="background: transparent; width: 100%;" | ||
| Line 691: | Line 1,120: | ||
|{{#item:300591}} <br> {{#itemDesc:300591}} | |{{#item:300591}} <br> {{#itemDesc:300591}} | ||
|{{#item:300592}} <br> {{#itemDesc:300592}} | |{{#item:300592}} <br> {{#itemDesc:300592}} | ||
|{{#item:300593}} <br> {{#itemDesc:300594}} | |{{#item:300593}} <br> {{#itemDesc:300593}} | ||
|{{#item:300594}} <br> {{#itemDesc:300594}} | |||
|- | |||
|{{#item:300595}} <br> {{#itemDesc:300595}} | |{{#item:300595}} <br> {{#itemDesc:300595}} | ||
|{{#item:300596}} <br> {{#itemDesc:300596}} | |{{#item:300596}} <br> {{#itemDesc:300596}} | ||
|{{#item:300597}} <br> {{#itemDesc:300597}} | |{{#item:300597}} <br> {{#itemDesc:300597}} | ||
|{{#item:300598}} <br> {{#itemDesc:300598}} | |{{#item:300598}} <br> {{#itemDesc:300598}} | ||
|{{#item:300599}} <br> {{#itemDesc:300599}} | |{{#item:300599}} <br> {{#itemDesc:300599}} | ||
|- | |||
|{{#item:300600}} <br> {{#itemDesc:300600}} | |{{#item:300600}} <br> {{#itemDesc:300600}} | ||
|{{#item:300601}} <br> {{#itemDesc:300601}} | |{{#item:300601}} <br> {{#itemDesc:300601}} | ||
|{{#item:300602}} <br> {{#itemDesc:300602}} | |{{#item:300602}} <br> {{#itemDesc:300602}} | ||
| | | | ||
|} | |} | ||
</div> | |||
Revision as of 14:27, 4 July 2025
Hauptquest
- In (jor_tail 233, 41) triffst du Shufapa. Er erklärt, dass sie die Schuppe untersuchen wollen und bittet dich, mitzukommen. Grund dafür ist eine ungewöhnliche Mana-Wellenlänge auf der Insel.
- (jor_crk 137, 137) Dialoge öffnen sich und Nillen bestätigt, dass die Wellenlänge wirklich ungewöhnlich ist. Lehar hat Nyar auf der Insel entdeckt, also beschlossen alle, nach ihr zu sehen.
- (jor_crk 107, 112) Sprich mit Nyar. Aurelie, Lehar und Nillem erscheinen. Der Grund für die Mana-Wellenlänge ist ein Riss, der sich öffnet. Darüber hinaus kollabieren die Dimensionsgrenzen sowie die Zeit- und Paralleldimensionen durch den Riss. Nyar weist darauf hin, dass dieser Riss in die Vergangenheit führt, was uns einen Weg aufzeigt, mit Lasgand umzugehen. Nyar wird den Riss mit einem bestimmten Punkt verbinden, an dem Lasgand seine Macht erlangte. Die gewählte Option spielt letztendlich keine Rolle.
- Du wirst nach (jor_crk_p 108, 106) teleportiert. Sprich erneut mit Nyar. Lehar und Nillem erscheinen erneut. Nillem weist darauf hin, dass wir uns tatsächlich in der Vergangenheit befanden, als sich der Riss öffnete. Es ist die Zeit, in der Rune-Midgarts gegründet wurde. Dies ist auch die Zeit, in der Lasgand die Macht erbte und ein Plan entwickelt wurde, die Vergangenheit zu ändern und Lasgand aufzuhalten. Lehar entdeckte Menschen, und alle beschlossen, sie als Freiwillige für den Widerstand gegen den Jormungandr-Kult zu gewinnen.
- In (jor_crk_p 104, 95) erscheinen Menschen, die von dem Riss erfahren haben. Sie sind gegen den Kult, aber sie haben dich entdeckt. Er fragt uns, was wir hier machen, und wir sagen ihm, dass wir „Abenteurer“ sind. Nachdem wir uns auf unserer Seite befinden, stellt sich der Fremde als Ivan aus der Wigner-Familie vor. Wir folgen ihm.
- Ihr werdet zu einem sicheren Ort in (luna_sf1 258, 147) teleportiert. Sprecht mit Ivan. Er erzählt uns, dass wir uns in der Nähe des Kults im Raisend Land befinden. Doch anstatt den Kult anzugreifen, sind wir auf dem Weg zur Basis von Gaebolg Lunaphoma. Ihr folgt dem Soldaten zum Kommandanten.
- Sprich mit dem Widerstandskämpfer in (jor_mbase 38, 152), der dich in Lunaphoma vorstellt. Bevor er zum Hauptquartier geht, muss er dem Kommandanten und dem Vizekommandanten etwas melden. Anhänger Freyas beschweren sich, und Lehar schlägt vor, mitzuhören, was los ist.
- Sprich mit Tris. Du hörst, wie sich die Bewohner Freyas darüber beschweren, dass der Kampf gegen den Kult im Namen Odins geführt wird und sie Freya ebenfalls einbeziehen wollen. Tris erklärt die schwierige Zeit und dass sie die Bewohner Freyas nicht vergessen, erwähnt aber auch, dass sie mehr Zeit brauchen, da der Krieg gegen den Kult oberste Priorität hat. Doch die Bewohner Freyas sind unzufrieden und beschließen, den Widerstand zu verlassen.
- Sprich erneut mit dem Widerstandssoldaten, der uns den Hauptleuten vorstellt. Nachdem er die Situation erklärt hat, möchte Trist dich zur Richard-Söldnergruppe schicken, da dort immer Leute mit Kampffähigkeiten benötigt werden.
- Sprich mit Tan, der den Auftrag erhalten hat, dich zur Richard-Söldnergruppe zu bringen. Er ist eindeutig gegen unsere Mitgliedschaft im Widerstand. Sag ihm: „Wir gehen sofort.“
- Folge dem Navi (jor_mbase 305, 102), bis alle erscheinen. Tan zeigt uns das Büro der Söldnergruppe und sagt, dass wir dort Richard finden müssen.
- Du musst zum Büro der Söldnergruppe gehen, wo niemand ist. Plötzlich triffst du auf einen mysteriösen Mann. Lehar schickt dich, um mit ihm zu sprechen.
- Gehe durch das Portal über den NPCs.
- Sprich mit ???. Wir erzählen ihm, dass wir hier sind, um den Söldner Richard zu sehen. Wir fügen hinzu, dass Tan uns hierher geschickt hat. Laut dem mysteriösen Mann ist Richard nicht hier und wir müssen zur Zentralkaserne gehen, wo sich Richards Zimmer befindet.
- Du musst nach Richards Zimmer (jor_mbase 203, 190) suchen. Durchsuche sein Zimmer.
- Gehe rechts nach oben und betritt das vorletzte Portal, wo Richards Zimmer liegt. Da aber niemand da ist, überprüfen wir die nächste Tür. Nach einer Warnung erscheint eine Frau und fragt uns, was uns zu Richard führt. Wir erklären, dass Tan uns geschickt hat.
- Sie werden zurück zum Büro der Söldnergruppe geschickt (jor_mbase 313, 121).
- Beim Betreten des Büros beginnt der Dialog. Du hörst, dass Richard nicht als jemand namens Nerius hier ist. Die Dame Valdaris erklärt, dass wir zuerst den Registrierungsprozess durchlaufen müssen.
- Gehe zu den Dokumenten, wo du die Bewerbungsunterlagen findest. Du erfährst, dass immer noch das alte Formular verwendet wird und es sich daher nicht nur um eine Bewerbung für die Söldnergruppe handelt.
- Sprich mit Valdaris, um ihr dein Formular zu geben. Nach der Überprüfung der Formulare werden wir in der Gruppe der Richard-Söldner willkommen geheißen.
- Sprich mit Tan, die Valdaris erzählt, dass wir misstrauisch sind und sich immer noch Sorgen machen, ob wir gut sind oder nicht. Valdaris führt uns auf einer kurzen Tour durch die Gegend.
- Beim Verlassen des Büros beginnt ein weiterer Dialog, in dem Valdaris uns erzählt, dass diese Basis in aller Eile errichtet wurde.
- Gehe ein Stück hinunter. Du erfährst, dass dort Vorräte der Wigner Merchant Group gelagert sind.
- Laura Valdris erklärt uns, dass dies ein Bereich für vorübergehende Besucher ist.
- (jor_mbase 245, 128) Es erscheinen einige Kinder, die mit ihrer Schwester Valdaris spielen wollen. Sie erklärt, dass diese Kinder vom Jormungandr-Kult gerettet wurden. Nachdem sie alles über die Kinder erklärt hat, bittet sie uns, zum Trainingsgelände zu gehen.
- Valdaris erwartet dich bei (jor_mbase 147, 108). Sie erklärt dir das Trainingsgelände und erklärt, dass es für alle zugänglich ist. Du hörst etwas Seltsames von den Soldaten, woraufhin Valdaris wütend wird und der Sache auf den Grund gehen will.
- Gehe in die Nähe der Soldaten, wo du siehst, wie jemand so schwer verprügelt wird, dass er fast stirbt. Es ist Richard, der verprügelt wurde, deshalb beschließt Valdaris, ihn in sein Zimmer zurückzubringen, um seine Wunden zu versorgen.
- Gehe zurück zum Zentrum (jor_mbase 202, 191).
- Gehe nach oben und betritt das vorletzte Portal rechts.
- Sprich mit Valdaris, die über die Situation SEHR VERÄRGERT ist. Nerius erzählt ihr, dass Richard angegriffen werden wollte.
- Sprich mit Richard, der erklärt, dass er Bücher für den Kampf schreiben möchte. Nerius‘ Treffer waren notwendig, um angemessene Kampfhaltungen zu zeigen, die sich besser anhand realer Beispiele darstellen lassen. Lee sollte die Illustration für das Buch zeichnen.
- Sprich mit Lee, der dir sofort die Illustration zeigt, die er gezeichnet hat. Nach einigem Gespräch über das Buch wirst du Richard vorgestellt. Lee wurde beauftragt, uns den Rest zu zeigen, während Richard und Valdaris sich unterhalten.
- Verlasse den Raum und betrete das letzte Portal.
- Sprich erneut mit Lee. Er erzählt uns die ganze Geschichte ihrer Begegnung mit Galaxia, die fast die gesamte Söldnergruppe im Alleingang vernichtet. Nachdem Lee die Rüstung entfernt hat, ist er bereit, uns den Rest der Basis zu zeigen.
- Verlasse das Zentrum und gehe ein Stück nach links (jor_mbase 168, 195), wo Lee dir den Rest der Basis erklärt. Tan erscheint und sagt, dass das genug sei und du zu Tris gehen sollst. Du erhältst 30x
 Wigner Merchant Guild Voucher (1001618) + 30 Rufpunkte.
- Sprich mit Tris. Er fragt uns, wie alles gelaufen ist. Nach einigen Erklärungen erzählt er uns, dass Alberta einen Zauberer braucht und Nillem sich ihnen anschließen sollte. Lehar wird zur Wigner Merchant Group geschickt, die sich für die Unterstützung von Menschen einsetzt, die dem Kult entkommen sind. Wir müssen zuerst jemanden treffen. Wir treffen Heine von einer magischen Tafel (hier bitte einen kleinen Witz einfügen). Nachdem wir Heine kennengelernt haben, besteht unsere Aufgabe darin, nach Alberta zu reisen und Waren abzuholen, die Heine an den Widerstand geschickt hat. Heine möchte ein besonderes Strahlendes Auge von uns bekommen. Es muss von uns sein und ein frisches, also kein einzelnes aus dem Lager. Es gibt insgesamt 4 Dialoge, und du musst bestimmte Optionen anklicken:
- Erster Dialog
- Option „Erträglich“.
- Zweiter Dialog: Bist du diese Person, Tris?
- Dritter Dialog: Viel Spaß mit dem Text.
- Vierter Dialog: Killquest für 10x Skipskipper erhalten und 1x
 Bright Eye (1001641) sammeln.
- Gehe zu Walter Sailor (jor_mbase 161, 341) und begib dich nach Raised Land. Hier kannst du die Killquest abschließen.
- Um zurückzukehren, kannst du mit dem versteckten Boot unten links auf der Karte sprechen.
- Gehe zurück zu Tris. Du erhältst 30x
 Wigner Merchant Guild Voucher (1001618) + 35 Rufpunkte.
- Du schaltest die tägliche Quest „Freiwilliger Vallen Wok“ frei.
- Tägliche Quest „Berater Wool“
- Gehe zum anderen Walter Sailor (jor_mbase 333, 148). Er bringt dich zur Alberta.
- Gehe ein Stück nach oben und sprich mit Nillem. Du siehst, wie Nillem vom Seemann mit Arbeit überhäuft wird. Nachdem du ins Gespräch eingestiegen bist, stellt dich der Seemann als Megas vor. Er zwingt dich, an den Strand zu gehen, um Arbeit zu finden, und ignoriert deine Bitte.
- (jor_albe 227, 117) Gehe zum Questschild, Yohan erscheint. Er weist dir die Aufgabe zu, die Fracht an bestimmte Orte zu transportieren. Diese sind auf der Karte markiert.
- Besuche Walter Seemann in (jor_albe 146, 224). Er erklärt dir, dass jeder diese Aufgaben erledigen muss, es ist wie eine Leiter, bei der jeder gleich beginnt.
- Ein weiterer Walter Sailor wartet in einem Gebäude (jor_albe 120, 145).
- Betritt das Gebäude, geh hinauf und sprich mit Walter Sailor.
- Geh zurück zu Yohan (jor_albe 227, 117). Bei all den Waren, die kommen und gehen, liegt Dreck in der Stadt. Du musst vier Dreckhaufen beseitigen.
- Die vier Dreckhaufen befinden sich hier:
- Gehe zurück zu Yohan (jor_albe 227, 117). Er gibt dir die nächste Arbeit im Lagerhaus, in dem du vorher warst.
- Gehe zurück zum vorherigen Gebäude (jor_albe 120, 145).
- Betritt das Gebäude und gehe nach unten. Dort triffst du Iana Operta. Sie möchte, dass du zwei Briefe überbringst.
- Erster Brief: (jor_albe 200, 107), betritt das Gebäude!
- Sprich mit Professor Sanguin, der den Brief entgegennimmt und dir sagt, dass dein Name auch im Brief steht. Nach einer Weile gibt er dir eine schriftliche Antwort.
- Zweiter Buchstabe: (jor_albe 60, 237), betritt das Gebäude!
- Sprich mit Patissier Edel. Sie stellt dich vor und fragt nach deinem Anliegen. Wähle die zweite Option (die erste Option würde Ärger bedeuten!) und höre ihre Antwort.
- Geh zurück zu Iana. (jor_albe 120, 145). Betritt das Gebäude, gehe nach unten und sprich mit Iana. Du bringst ihr beide Antworten, und sie bestätigt, dass es sich nicht um triviale Besorgungen handelt. Du lernst Mariastella Walter kennen und sprichst über die Geschichten vom Geisterschiff. Wir haben gehört, dass Marias Vater Walter sich möglicherweise auf diesem Schiff befindet und wir Informationen über seinen Standort sammeln müssen.
- Du erhältst 40x
 Wigner Merchant Guild Voucher (1001618) + 40 Rufpunkte.
 - Geh zurück nach Lunaforma und sprich mit Walter Sailor in (jor_albe 194, 200).
- Sprich mit Ivan in (jor_mbase 240, 277). Frage nach dem Geisterschiff. Doch statt Informationen erhältst du Hilfe beim Essen.
- Sprich mit Lehar in (jor_mbase 214, 306) (du musst öfter mit ihm reden) und du entscheidest, ihm beim Essen für die Wigner-Gruppen zu helfen. Alle genießen Lehars Reis sehr. Lehar erwähnt, dass er Leute von einem Geisterschiff sprechen hörte.
- Sprecht mit Ivan bei (jor_mbase 193, 287). Er erzählt euch, wie viele Leute das Geisterschiff gesehen haben. Er nennt euch einen Namen, nach dem ihr zuerst fragen solltet, da er die meisten Dinge gesehen hat.
- Sprecht mit Lyriq bei (jor_mbase 191, 306), der von Lehar vorgestellt wird. Nach etwas Smalltalk fühlt er sich in eurer Gegenwart wohler und beginnt, euch die Geschichte zu erzählen, was an diesem Tag mit dem Geisterschiff passiert ist. Wir beschließen, zu Ivan zurückzukehren.
- Sprecht mit Ivan bei (jor_mbase 237, 281). Er erzählt uns, dass er uns bei der Geisterschiff-Mission begleiten möchte. Aber wir müssen seiner Schwester in Alberta ein Paket bringen.
- Gehe zu Walter Sailor (jor_mbase 333, 148), er bringt dich wieder nach Alberta.
- Betritt das Gebäude bei (jor_albe 100, 238)
- Sprich mit Lalaila Wigner, die überrascht über Ivans Paket ist. Sie erklärt dir, dass sie andere geschickt hat, um nach Ivan zu sehen. Wir sollten ihm etwas bringen, das er zurückgelassen hat.
- Betritt das Portal oben und überprüfe die staubige Kiste. Sie enthält gut erhaltene Knöchel, die Lalaila reinigt. Sie bestätigt, dass Ivan die Knöchel wegwerfen wollte, aber Lalaila lehnt ab. Sie gibt außerdem einen Brief für Maria Walter.
- Verlasse das Gebäude und gehe zum nächsten bei (jor_albe 120, 146).
- Sprich mit Maristella Walter und gib ihr den Brief. Sie lächelt nur. Du erhältst 10x
 Wigner Merchant Guild Voucher (1001618) + 5 Rufpunkte.
- Geh zurück nach Lunaforma und sprich mit dem Matrosen Walter bei (jor_albe 194, 200).
- Sprich mit Ivan bei (jor_mbase 237, 281). Er schlägt direkt vor, durch den Norden des Hochlandes zu infiltrieren, wo wir uns treffen. Du erhältst 40x
 Wigner Merchant Guild Voucher (1001618) + 40 Rufpunkte.
- Gehe zu Walter Sailor (jor_mbase 161, 341) und begib dich zum Hochland.
- Lass die Karte auf dem oberen Portal liegen.
- Gehe in den Busch bei (jor_raise1 322, 64)
Hinweis: Velelling (22315) auf dieser Karte droppt Vellelopy (1001643) , 2 werden für Schritt 162 benötigt.
- Du wirst auf eine andere Karte teleportiert. Sprich mit Ivan. Es gibt einen Plan, den Tempel zu infiltrieren. Warum gibt es dort einen Tempel und warum sieht er aus, als wäre er von Menschenhand erschaffen worden? Diese Frage wird gestellt, und der einzige Weg, sie herauszufinden, ist, hineinzugehen.
- Betritt den Kerker bei (jor_raise1 152, 316)
- Betritt den sicheren Ort bei (jor_tmple1 170, 62)
- Sprich mit Ivan. Ivan hat einen Plan ausgeheckt, um Menschen zu finden, die fliehen wollen. Oberste Priorität hat auch das Sammeln von Informationen über das Geisterschiff, also gehen wir mit Tan los, um Informationen zu sammeln.
- Gehe zum nächsten sicheren Ort bei (jor_tmple1 103, 180)
- Sprich mit einem Gläubigen. Auf Nachfrage konnte er keine Informationen über das Geisterschiff geben, und aufgrund seines starken Glaubens entschied Tan, nicht nach einer Fluchtmöglichkeit zu fragen.
- Gehe zum nächsten sicheren Ort bei (jor_tmple1 181, 235)
- Sprich mit einem anderen Gläubigen. Diese sind unglücklich, aber nachdem wir nach einer Fluchtmöglichkeit gefragt haben, glauben sie, wir wollten sie gefangen nehmen und in den 2. Stock bringen, wo die Wachen Menschen verschleppen. Tan schlug vor, dorthin zu gehen, um mögliche Informationen zu erhalten.
- Gehe zum nächsten sicheren Ort bei (jor_tmple1 229, 270)
- Sprich mit dem nächsten Gläubigen. Du wirst aufgefordert, in den 2. Stock zu gehen, um dich dort von den Priestern als Gläubiger registrieren zu lassen. Da sie jedoch verschwunden sind, schlug Tan vor, zum Sammelpunkt zurückzukehren.
- Gehe zurück zum ersten sicheren Ort bei (jor_tmple1 170, 62)
- Sprich mit Ivan. Ivan und Yohan kamen zu demselben Schluss, ohne Informationen zu haben. Es heißt, wir bräuchten erst mehr Informationen über den Ort, bevor wir mehr erfahren können.
- Geh zurück zur Lunaform (ich denke, wir werden hier @go haben)
- Sprich mit Tris bei (jor_mbase 142, 264). Tris ist etwas frustriert, dass wir keine Menschen finden konnten, die fliehen wollen, oder Informationen über das Geisterschiff. Aber bald wird jemand mit potenziellen Insiderinformationen eintreffen, also treffen wir ihn und vielleicht kann er uns in den zweiten Stock führen! Du erhältst 15x
 Wigner Merchant Guild Voucher (1001618) + 15 Rufpunkte.
- Besuche das kleine Boot bei (jor_mbase 124, 33).
- Sprich mit Tan bei (jor_crk_p 72, 76). Die Informantin Nadaya erklärt, dass jemand aus dem Tempel fliehen und alle Informationen haben will, die wir brauchen. Um sicher dorthin zu gelangen, brauchen wir aber jemanden mit großen, langen, schwarzen Haaren, ähnlich wie Tan.
- Sprich mit Ivan, der eine Idee hat, welche Person perfekt zu der Bedingung passt, aber er hat Angst vor diesem Gedanken.
- Gehe zurück zur Lunaform, indem du mit dem kleinen Boot sprichst.
- Sprich mit Ivan bei (jor_mbase 163, 295). Wir treffen Wilhelm, der sich der Mission nicht anschließen möchte. Nachdem Tan den Grund für Wilhelms Arbeit dort erwähnt und sich nach einiger Überlegung bereit erklärt hat, mitzukommen, um den Tempel zu infiltrieren, Informationen über das Geisterschiff zu sammeln und Menschen zu finden, die fliehen wollen.
- Gehe zu Walter Sailor (jor_mbase 161, 341) und begib dich zum erhöhten Land.
- Lass die Karte auf dem oberen Portal liegen.
- Gehe in den Busch bei (jor_raise1 322, 64)
- Du wirst auf eine andere Karte teleportiert. Sprich mit Tan. Nadoyo erklärt den Plan, dass Wilhelm sich als hochrangiger Priester verkleidet, damit wir den Sperrbereich der Kirche betreten können, in der Hoffnung, Informationen oder fliehende Personen zu finden. Wilhelm machte deutlich, dass er eine Person finden will, das ist der einzige Grund, warum er das tut. Nadoyo erwähnte auch, dass der Hohepriester, als der wir uns verkleidet haben, ebenfalls dem Kult entkommen will. Du erhältst 15x
 Wigner Merchant Guild Voucher (1001618) + 15 Rufpunkte.
- Betritt den Dungeon bei (jor_raise1 152, 316)
- Betritt den sicheren Ort bei (jor_tmple1 229, 266)
- Sprich mit Nadoyo, die uns den Plan erklärt, dass Wilhelm sich als Hohepriester von Charmigand ausgeben soll. Wir müssen ihm nur folgen, dann sollte alles gut gehen, doch Wilhelm ist skeptisch.
- Sprich mit dem Wachmann, der sich mit meist falschen Namen bei den Wachen anmeldet. Nadoyo wird weitermachen. Sprich erneut mit dem Wachmann, um die Instanz „Gimli-Infiltration“ zu starten. HINWEIS: JEDER KANN DIE INSTANZEN AUS DER GRUPPE ÖFFNEN.
- Sprich mit Nadoyo, die uns erzählt, dass Charmigands Fluchtplan durchgesickert ist. Jetzt müssen wir schnell handeln, ihn so schnell wie möglich finden und aus den Fängen des Kults befreien, denn er hat alle Informationen, die wir brauchen.
- Sprich mit Tan, der dich in einen neuen Raum teleportiert.
- Sprich mit Wilhelm, der die Gläubigen nach Charmigand fragt. Sie wissen nicht, wo er ist, geben aber Tipps zur Suche nach dem inneren Gebetsraum. Wilhelm nutzt die Zeit, um nach Reinhard zu fragen, dem Mann, den er sucht. Nach dem Dialog wirst du hinausgebeamt.
- Sprich mit Tan zum neuen Ort.
- Sprich mit Tan, um in einen anderen Gebetsraum zu gelangen.
- Sprich mit Gläubigen, die sich über ihre Zeit im Tempel beschweren. Sie wollen fliehen, und Wilhelm bietet ihnen einen Ausweg an. Doch Wachen erscheinen, die den Lärm misstrauisch machen und Treffen in Gruppen von mehr als zwei Personen verbieten. Sie greifen dich an.
- Töte die Wächter.
- Sprich erneut mit Gläubigen, die der Flucht zustimmen. Auch sie wissen nichts über Reinhard, nachdem Wilhelm sie gefragt hat. Du wirst hinausgewarpt.
- Sprich mit Tan, um neue Standorte zu erfahren.
- Sprich mit dem Wachmann, der überrascht ist, Charmigand zu sehen. Wilhelm, der sich als Charmigand ausgab, nutzte die Zeit für einen Überraschungsangriff auf die Wachen.
- Töte die Wächter.
- Betritt das Portal, das erscheint, nachdem du beide Wächter getötet hast.
- Sprich mit den Gläubigen oben im Raum. Sie sind froh, von uns gerettet worden zu sein und vertrauen uns ihre Flucht an. Aber niemand weiß etwas über Reinhard. Einer von ihnen hat bereits vermutet, dass er an den Leiden im Tempel gestorben ist.
- Du musst nach einem anderen Gebetsraum suchen (1@mdtem 117, 38).
- Sprich mit Tan. Wachen werden erscheinen und behaupten, Wilhelm sei Charmigand und versuchen, ihn gefangen zu nehmen. Du musst beide Wächter erneut töten.
- Nachdem du die Wachen getötet hast, erscheinen weitere Wächter. Sprich mit dem gelben Wächter, weitere Wachen erscheinen. Wilhelm schlägt vor, sich gefangen nehmen zu lassen, damit sie uns zum echten Charmigand bringen. Das wäre effizienter, als herumzuirren.
- Du wirst erneut in einen Predigerraum teleportiert. Sprich mit Wilhelm (oder geh ein Stück nach oben?). Charmigand erscheint und du erfährst, dass Charmigand der echte Reinhardt ist, der Mann, den Wilhelm sucht. Beide sind Brüder, ihre Eltern sind gestorben, und er ist glücklich, ihn endlich gefunden zu haben, aber auch enttäuscht, dass er Hohepriester dieses Tempels geworden ist. Charmigand erklärt, dass sich in diesem Raum ein Geheimgang befindet, von dem kein Rgan weiß, und dass wir ihn finden müssen, um zu entkommen.
- Verdächtige Orte erscheinen. Klicke alle an, bis du den richtigen findest und hinausgetellt wirst.
- Sprich mit Wilhelm, der verwirrt ist, warum der Durchgang wie eine Keule aussieht. Charmigand erklärt, dass alle Gebetsräume miteinander verbunden sind und wir den richtigen finden müssen, um zu entkommen.
- Zwei Wächter erscheinen und wollen Charmigand und Wilhelm wieder einfangen. Töte beide. Sprich nach dem Töten erneut mit Wilhelm, der dich an einen neuen Ort teleportiert.
- Sprich mit Tan. Wilhelm findet es lustig, dass er, der als Kind schwächer war, jetzt seinen Bruder beschützt.
- 4 Wächter erscheinen, um uns gefangen zu nehmen. Töte sie.
- Sprich erneut mit Tan. Charmigand weiß nicht genau, wo der Ausgang ist. Du wirst an einen neuen Ort gebracht.
- Sprich mit Wilhelm. Hyasagand erscheint mit Wachen und erklärt, dass sie sich über Charmigands Untergang freut. Charmigand erzählt ihr, was er von der Kirche hält und was für eine Lüge sie ist. Sie schickt die Wache, um ihn gefangen zu nehmen, sogar mit Gewalt.
- Töte die 3 Wächter, die Hyasagand schickt, um Charmigand gefangen zu nehmen.
- Sprich mit Wilhelm. Gläubige werden Zeugen des Geschehens, und Hyasagand verdreht die Worte, sodass Charmigand als der Bösewicht dasteht. Töte alle 9 Wächter, um weiterzukommen.
- Sprich mit Tan. Ivan und die anderen erscheinen mit Gläubigen, um zu fliehen. Hyasagand zieht sich vorerst zurück. Charmigand hält eine Rede an sein Volk, ihm zu folgen, auch wenn er viel Leid verursacht hat. Ein Portal erscheint, betritt es aus der Instanz heraus.
- Du wirst zurück zum sicheren Ort teleportiert. Betritt den Busch und triffst dort Nayado und die anderen. Ivan erklärt, was drinnen passiert ist, und Nadoyo ist nicht überrascht, warum es so gekommen ist. Charmigand hat ihr versprochen, dieselben Fehler nicht zweimal zu machen. Du erhältst 20x
 Wigner Merchant Guild Voucher (1001618) + 20 Rufpunkte.
- Geh zurück nach Lunaforma und sprich mit Tris (jor_mbase 149, 270). Er begrüßt alle neuen Flüchtlinge des Kults. Sie sind sich des Ortes etwas unsicher, aber Tris hat eine klare Rede über ihn und seinen Zweck gehalten. Die alten Gläubigen wünschen sich Gerechtigkeit für Charmigands Verrat, also beschloss Trist, unter vier Augen zu sprechen, während Ivan ihnen das Land hier zeigt.
- Gehe zurück zur mittleren Baracke (jor_mbase 203, 190). Betritt das Portal.
- Gehe geradeaus durch das Portal oben.
- Sprich mit Wilhelm. Sie haben geklärt, dass sie Charmigand hierhergebracht haben. Er wollte bei seinem alten Namen Reinhard Lugenburg genannt werden. Er ist bereit, uns alle Informationen zu geben, nur um den Kult zu besiegen.
- Sprich mit Reinhardt. Er erzählt uns vom Geisterschiff, was zu allem passt, was sie bisher wissen. Er erwähnt auch, dass der Kult aus Angst vor dem Schiff eine neue Route einschlägt. Wir erfahren außerdem, dass der Kult durch den Abzug der Menschen mit der Zeit schwächer wird, aber wir wissen nichts über ihre Hauptmacht. Da Reinhard ein Mensch ist, hat er nicht alle Informationen erhalten. Du erhältst 30x
 Wigner Merchant Guild Voucher (1001618) + 30 Rufpunkte.
- Sprich mit Wilhelm. Er erzählt vom Tod ihrer Eltern und schimpft darüber, wie Reinhard ihre Familie verraten hat, indem er zu etwas wurde, gegen das sie kämpfen.
- Sprich mit Reinhardt, der erklärt, dass er allen helfen wollte und glaubte, die Kirche sei die Lösung. Wilhelm geht enttäuscht und sagt sogar, dass er seine Gefühle für seinen Bruder wegen dessen Tat verdrängt.
- Schaltet die Nebenquest „Lugenburg-Brüder“ frei.
- Betritt das Gebäude bei (jor_albe 120, 146).
- Sprich mit Maristella Walter. Sie bittet dich, dich am Hafen zu treffen, um zum Schiff zu reisen, da sie nun weiß, wo es zu finden ist.
- Verlasse das Gebäude und gehe zu (jor_albe 191, 180).
- Sprich mit Maristella Walter. Betritt die Ghostship-Instanz.
- Sprich mit Maristella im Inneren. Es ist geplant, sich vorsichtig zu bewegen und zu prüfen, ob es sich wirklich um Walters Schiff handelt.
- Gehe nach links und töte die Geisterschiff-Besatzung. Ein Hecklicht erscheint. Es kam mir bekannt vor, aber es ist nicht dasselbe, wie Maria es in Erinnerung hatte.
- Gehe nach rechts und klicke auf die Mastspuren. Maria findet Spuren aus ihrer Kindheit.
- Gehe nach rechts und klicke auf die alte Kiste. Darin findest du altes Holzspielzeug, das Howell für seine Tochter gemacht hat.
- Gehe nach unten und töte erneut die Geisterschiff-Besatzung. Ein Portal erscheint.
- Töte erneut die Geisterschiff-Besatzung und klicke auf die zerknitterten Dokumente, die unleserlich sind. Selbst Yohan kann die vom Meerwasser verschmierten Papiere nicht lesen. BEVOR DU DAS PORTAL BETRITTST!!
- Finde den rostigen Füllfederhalter bei (1@wtgs 184, 121). Yohan erkennt den Stift wieder und weiß nun, worum es bei diesem Schiff geht.
- Töte die Besatzung des Geisterschiffs auf der anderen Seite.
- Folge dem Weg, bis du die Kiste unter einem Bett findest. (1@wtgs 149, 127). Du findest ein Tagebuch, in dem steht, dass nach Marias Flucht eine seltsame Erscheinung erscheint, die einen Wunsch erfüllt. Nach diesem Wunsch verwandelt sich alles in dieses Schiff, Erinnerungen verblassen und Besatzungsmitglieder verwandeln sich in Monster. Jetzt wissen wir, dass dieses Schiff das Schiff ist, nach dem Maria gesucht hat.
- Suche nach dem Rest der Besatzung des Geisterschiffs und töte sie.
- Wenn du sie alle getötet hast, erscheint ein Portal bei (1@wtgs 109, 114). Bevor es betrat, hielt Maria eine kleine Rede, in der sie bestätigte, dass dieses Schiff der vermisste Walter ist und dass die Antwort im Kapitänsquartier zu finden sein muss.
- Oben triffst du den Kapitän des Geisterschiffs.
- Sprich mit ihm, um den Kampf zu beginnen, nachdem Maria eine moralische Rede gehalten hat.
- Sprich nach seinem Tod mit ihm. Er wird für eine Weile menschliche Gestalt annehmen, um zu erklären, was in der Vergangenheit passiert ist. Sein Wunsch war es, auch im Tod alle Kultschiffe zu sehen. Er ist froh, dass er alle noch einmal sehen konnte, bevor er starb.
- Verlasse den Raum auf der rechten Seite (1@wtgs 331, 27).
- Sprich draußen auf dem Schiff mit Maristella. Fass zusammen, was passiert ist und dass sie gehen müssen, bevor das Schiff verschwindet.
- Verlasse die Instanz durch das Portal, das neben Maristella erscheint.
- Sprich mit Maristella Walter, die Mega berichtet hat, was auf dem Geisterschiff passiert ist.
- Wigner Executive erscheint. Sprich mit ihm. Er sagt dir, dass er die Waren hat, die Heine uns geschickt hat. Nachdem wir das erledigt haben, sollten wir nach Lunaphoma zurückkehren und erneut mit der Tafel sprechen. Du erhältst 70x
 Wigner Merchant Guild Voucher (1001618) + 90 Ruf.
- Schaltet die tägliche Instanz „Mysteriöses Geisterschiff“ frei.
- Gehe zurück zur mittleren Barake (jor_mbase 203, 190). Betritt das Portal.
- Sprich mit Tris. Er fragt uns, was mit dem Geisterschiff passiert ist. Nach einiger Zeit versucht er erneut, Heine anzurufen, aber die Verbindung ist schlecht. Sprich erneut mit ihm. Die Verbindung ist jetzt stabil. Der gesamte Tisch muss überholt werden, und Heine möchte, dass wir ihm dabei helfen. Tris hat ein Gästezimmer für uns vorbereitet, und wir sollten so schnell wie möglich mit dem Tablet dorthin gehen.
- Gehe durch das erste Portal links nach oben, um mit Heines Tablet (mbase_in 71, 126) zu sprechen.
- Sprich mit der Tafel. Heine bestätigt dir, dass die Verbindung stabil ist. Wähle die zweite Option: „Ich führe deinen Befehl aus.“ Er fordert dich auf, Materialien für die Wartung zu besorgen. Du musst 2x
 Vellelopy (1001643) farmen. Velelling erhält Velellopy auf der Karte jor_raise1.
Hinweis: Wenn du Velellopy bereits besitzt, gehe zu Schritt 166. - Gehe zu Walter Sailor (jor_mbase 161, 341) und begib dich zum erhöhten Land.
- Lass die Karte auf dem oberen Portal liegen. Hier sind die Velellings.
- Gehe zurück zur mittleren Baracke (jor_mbase 203, 190). Betritt das Portal.
- Gehe durch das erste Portal links nach oben, um die Vellelopies zu Heines Tafel (mbase_in 71, 126) zu bringen.
- Sprich mit der Tafel, sie beginnt, die Materialien aufzunehmen, die du mitbringst. Während du wartest, bittet Heine darum, eine alte Geschichte zu erzählen. Du wählst „Bitte erzähl es mir.“ und dann erklärt er uns, warum er angefangen hat, Tan und Tris zu helfen, fängt dann aber auch an, darüber zu schimpfen!
- Sprich erneut mit der Tafel, und Heine beschwert sich darüber, wie ärgerlich es ist, dass sie beim ersten Mal nicht funktioniert. Nachdem wir gefragt haben (wähle „Wie alt ist sie?“), versucht er zu erklären, wie alt die Tafel ist. Er erwähnt auch, dass er ihr zwei neue Funktionen hinzugefügt hat.
- Sprich ein drittes Mal mit der Tafel. Heine ist froh, dass sie zum zweiten Mal funktioniert. Du fragst und wählst „Ist das gut?“. Er beschwert sich, dass es schlecht ist und nur zum zweiten Mal funktioniert. Doch dann weist er darauf hin, dass wir aus der Zukunft kommen, indem er unser Mana liest, und fragt uns, warum wir gekommen sind. Wähle „Um die Rgans vollständig zu eliminieren“ und wir erklären, was in unserer Zeit passiert ist und dass die Rgans ein wirklich großes Problem darstellen. Heine ist froh über unsere Antwort und möchte uns natürlich helfen. Du erhältst 1x
 Heine's Tablet (1001627) .
 - Verlasse den Raum und sprich erneut mit Tris. Tris plante, den Kult mit Informationen von Aurelie anzugreifen. Nach weiteren Informationen von Heine stimmen alle zu, so schnell wie möglich anzugreifen, um den Krieg zu beenden, bevor sich der Kult neu formieren kann. Doch draußen ist etwas passiert. Du erhältst 50x
 Wigner Merchant Guild Voucher (1001618) + 50 Ruf.
- Verlasse die Baracke durch das Portal und sprich mit Nayado, der erklärt, dass die Kulte Jormungandr planen! Nadoyo hat sogar den Schatten einer Schlange im Schatten gesehen. Wir müssen daher Verbündete kontaktieren und alle Informationen sammeln, die wir bekommen können.
- Sammle 3 Berichte:
- Verwundeter Soldat (jor_mbase 62, 194)
- Erschöpfter Soldat (jor_mbase 186, 250)
- Entflohenes Kultmitglied (jor_mbase 216, 297)
- Geh zurück zu Tris, der vor der zentralen Baracke (jor_mbase 203, 186) steht. Wir haben ihm alle gesammelten Informationen gegeben. Aber Tan und Nadoyo sind nicht aufgetaucht, also müssen wir nach ihnen sehen!
- Geh zu Walter Sailor (jor_mbase 161, 341) und begib dich zum erhöhten Land.
- Lass die Karte auf dem oberen Portal liegen.
- Bei (jor_raise1 198, 189) findest du eine Felsspalte. Betritt sie.
- Sprich drinnen mit Nayado. Sie haben in der Kirche etwas vorbereitet, einen Raum, den selbst Reinhard nicht kennt. Bevor wir also zu Tris zurückkehren, gehen wir mit ihnen in die Kirche, um sie oder andere Beweise für die Riesenschlange zu untersuchen.
- Ihr müsst die dekorative Tür bei (jor_raise1 128, 323) überprüfen.
- Sprecht im Gebäude mit dem Kultpriester. Der Priester bestätigt unsere Befürchtung: Etwas frisst Menschen, indem es ihnen Mana entzieht, um immer stärker zu werden. Tan und Reinhard wollen sich darum kümmern, während wir und Nadoyo zurückgehen und Tris Bericht erstatten.
- Sprich mit Nayado, sie wird dich zurück in die Lunaform teleportieren.
- Geh zurück zu Tris, die vor der zentralen Baracke (jor_mbase 203, 186) steht. Wir berichten, was passiert ist und was Tans Plan ist. Tris wird normale Soldaten und uns vom Kampf ausschließen, und wir sollten uns wieder mit unseren Freunden im 2. Stock treffen.
- Betritt die Baracke und gehe durch die kleine Tür.
- Sprich mit Nyar. Heine erklärt, dass wir die Ereignisse der Vergangenheit nicht löschen können, aber dass wir uns Tris mit Heines Hilfe im Kampf anschließen könnten. Du erhältst 10x
 Wigner Merchant Guild Voucher (1001618) + 50 Rufpunkte.
- Gehe zu Walter Sailor (jor_mbase 161, 341) und begib dich zum erhöhten Land.
- Lass die Karte auf dem oberen Portal liegen.
- Du musst die dekorative Tür bei (jor_raise1 128, 323) erneut betreten.
- Sprich mit Nayado. Tris und Nadoyo sind überrascht, dich dort zu sehen, aber Heine hat ihn übergangen und erklärt, dass er Hilfe braucht und nur wir das können.
- Sprich mit der Tür.
- Sprich mit der Heine-Tafel. Alle haben sich hier versammelt, und einige sind sich nicht sicher, ob das die richtige Entscheidung ist. Nach einer Abstimmung wird entschieden, ob der Zauberspruch angewendet wird, und Heine möchte seinen neuen Zauber mit allen teilen.
- Du startest die Instanz „Letzter Kampf“.
- Wähle darin „Tafel benutzen“ und Heine versucht, alle Orte zu finden.
- Viel Spaß mit den Dialogen ~
- Nachdem alle ihr Mana in das Ei kanalisiert haben, klicke auf das große Ei.
- Töte den verdorbenen Tan. Nach einem langen Kampf versuchte die Schlange, Tris zu überzeugen, sein Leben zu retten, während Tan schrie, sie zu töten. Tris vernichtete die Schlange, und Tan starb mit ihm....
- Sprich mit Nyan. Heine schlug vor, zuerst aufzubrechen, um die Kultbewegung aufzuspüren und Tris etwas Zeit zu geben, seine Gedanken zu sammeln. Du erhältst 90x
 Wigner Merchant Guild Voucher (1001618) + 110 Ruf.
- Sprich außerhalb der Instanz erneut mit Nyan, der uns in ein neues Gebiet führt.
- Du wirst verzerrt. Sprich erneut mit Nyan. Nillem und Lehar finden einen verdächtigen Raum mit einem Buch. Nillem erinnert uns daran, warum wir hier sind, und wir sollten ihn untersuchen, indem wir zuerst auf dieses Buch drücken.
- Klicke auf das verdächtige Buch, um den geheimen Altar der Instanz zu öffnen.
- Eine glänzende Tür erscheint. Betritt sie.
- Sprich drinnen mit Lehar. Nillem erklärt, dass weiter vorne eine große Macht lauert und dass sie mit dem Tod der Riesenschlange ihren nächsten Plan gestartet haben, ihre verbleibende Macht in Lasgand zu konzentrieren. Du musst alle Monster töten.
- Am Ende des Korridors befindet sich eine Tür. Klicke darauf.
- Sprich mit Lehar. Dieser Ort kommt dir bekannt vor, als ob er der Ort wäre, an dem die hochrangigen Rgans leben. Setze deinen Weg fort.
- Folge dem Weg und töte alle Kultpriester.
- Sprich mit dem Schamanen Jormungandr, der alle verflucht, die an der Schlacht beteiligt waren, wie es in den damaligen Geschichten erzählt wird. Töte ihn und klicke auf die Tür, um fortzufahren.
- Gehe zum Kultschamanen, der erklärt, dass sie mit dem Fluch ewig bestehen bleiben. Monster erscheinen, töte alle großen Schlangen.
- Klicke auf das Riesenei. Tris überträgt den Fluch auf sich. Aurelie und Tris werden das Ei bewachen, bis es verwelkt ist, und Tris Kinder werden in Zukunft alles bekämpfen, was darin schlüpft. Du wirst zurück auf die Insel gebracht. Du erhältst 60x
 Wigner Merchant Guild Voucher (1001618) + 50 Rufpunkte.
- Sprich draußen mit Nyar. Wir sprechen darüber, was passiert ist. Nachdem Nyar einen Teil seiner Macht zurückerlangt hat, sollte Lasgand nun deutlich geschwächt sein. Aber bevor wir gehen, müssen wir die Tafel mit etwas auf dem Dock tauschen, das Heine für uns hat.
- Gehe zurück zu Lunaform, indem du mit dem kleinen Boot sprichst.
- Sprich mit den Büschen, um eine neue Heine-Tafel zu erhalten. Heine verabschiedet sich und teleportiert uns zurück zur Insel.
- Sprich erneut mit Nyar und wähle die Rückkehr zur normalen Zeit.
- Gehe zu (jor_crk 137, 138). Aurelie spürt bereits die plötzliche Veränderung der Magie, und wir berichten, was passiert ist. Nun werden Nillen und Nyar den Riss versiegeln, während wir sehen, was mit Lasgand im Siegel passiert.
- Sprich mit Nyar Clone. Lehar und seine Tante werden hineingehen, um den Fluch von Lasgand zu nehmen. Du kannst dich ihnen nicht anschließen, also musst du warten, bis sie fertig sind. Du musst 10 Minuten warten, um die Instanz zu öffnen. Hol dir einen Kaffee, geh auf die Toilette und berühre etwas Gras. Nach 10 Minuten erscheinen Lehar und Voglinde wieder und erzählen, dass der Fluch gebrochen ist, Lasgand aber immer noch wieder aufersteht. Wir vermuten, dass Ymirs Herzstück daran schuld ist, und müssen es überprüfen, da wir uns an die damaligen Ereignisse im Biolabor erinnern.
- Öffne die Instanz.
- Sprich in der Instanz mit Aurelie. Die wahnsinnige Macht von Lasgand ist verschwunden, aber das Mana rauscht außer Kontrolle. Wir müssen herausfinden, wer dieser Lasgand ist.
- Sprich mit Lasgand, der sich aus irgendeinem Grund seltsam verhält. Du musst ihn mehrmals töten.
- Sprich mit Aurelie, die bestätigt, dass sich dieser Lasgand genauso verhält wie beim ersten Mal und dass es sich tatsächlich um Ymirs Herzstück handelt. Sie wird dich aus der Instanz teleportieren.
- Sprich mit Nyar Clone. Wir bestätigen seine Identität. Er ist immer noch gefährlich und seine Macht erschafft weiterhin neue Rgans. Der Fluch ist aufgehoben, aber Lehat und Voglinde bleiben, um den Rgan zu bekämpfen. Nillem will uns nun zum Riss führen. Du wirst dorthin teleportiert.
- Sprich mit Nyar. Nillem und Nyar konnten den Riss nicht versiegeln, doch die Zeit wiederholt sich immer wieder, obwohl wir immer wieder ungehindert dorthin reisen konnten. Nicht nur das, jetzt steht auch DEIN Name in den Geschichtsbüchern. Du erhältst 70x
 Wigner Merchant Guild Voucher (1001618) + 60 Rufpunkte.
Main Quest
- At (jor_tail 233, 41) you will find Shufapa. He explains to us, that they plan to investigate Scale Island and asks you to come along. The reason for that is an unusual mana wavelength on the island.
- (jor_crk 137, 137) A dialogue opens and Nillen confirms that the wavelength is really unusual. Lehar spotted Nyar on the island so everyone decides to see what's up with her.
- (jor_crk 107, 112) Talk to Nyar. Aurelie, Lehar, and Nillem will appear. The reason for the mana wavelength comes from a rift that opened. Not only that, the dimensional boundaries and time and parallel dimensions are collapsing because of the rift. Nyar points out that this rift leads to the past, which gives us a way to deal with Lasgand. Nyar will connect the rift to a specific point in time, where Lasgand got his power. The option you pick doesn't matter in the end.
- You get warped to (jor_crk_p 108, 106). Talk to Nyar again. Lehar and Nillem will appear. Nillem points out that we are indeed in the past where the rift opened. It's the time where the foundation of Rune-Midgarts happens. This is also the time where Lasgand got the power inherited and a plan gets created how to alter the past to stop Lasgand. Lehar spots people and everyone decides to approach them as volunteers for the resistance against the Jormungandr Cult.
- In (jor_crk_p 104, 95) people appear who found out about the rift. Those are against the cult, but they spotted you. He ask us what we are doing here, so were telling him that "We're Adventurers". After clearing up that we are on their side, the stranger introduces himself as Ivan from the Wigner family. So we follow him.
- You will be warped to a Safe Place in (luna_sf1 258, 147). Talk to Ivan, he tells us that we are near the cult, in the Raised Land. But instead of attacking the cult, we are on the way to the base of Gaebolg, Lunaphoma. You follow the soldier to the commander.
- Talk to the Resistance Soldier in (jor_mbase 38, 152) who introduces you to Lunaphoma. Before going to the headquarters, he needs to report something to the commander and vice-commander. Followers of Freya are complaining and Lehar suggested to listen in to hear what's the fuss.
- Talk to Tris. You hear that the people of Freya complain that the fight against the cult is lead in the name of Odin and they want Freya to be included as well. Tris explains the difficult time and that they didn't forget about the people of Freya, but also mentions that they need more time because the war against the cult is top priority. But the people of Freya are unhappy and decide to leave the resistance.
- Talk to the Resistance Soldier again who introduce us to the captains. After explaining the situation, Tris wants to send you to the Richard Mercenary Group, because people with combat skills are always needed there.
- Talk to Tan who got ordered to bring you to the Richard Mercenary Group. He is clearly against us being part of the resistance. Tell him that "We'll go right away."
- Follow the navi (jor_mbase 305, 102) until everyone appears. Tan shows us where the mercenary group's office is and that we need to find a Richard there.
- You have to go to the mercenary group's office, but no one is here. Suddenly you find a mysterious man. Lehar sends you to speak to him.
- Walk into the portal above those NPCs.
- Talk to ???. We tell him that we are here to see the Mercenary King Richard. We also add that Tan sent us to this place. According to the mysterious man, Richard is not here and that we need to go to the Central Barracks where Richard's room is.
- You have to search for Richard's room (jor_mbase 203, 190). Check his room.
- Go upstairs and right and enter the second to last portal where Richard room lies. But no ones here, so we check the next door. After a warning a woman appears and asks us what brings us to Richard. We explain that Tan sent us.
- They will sent you back to the Mercenary Group's Office (jor_mbase 313, 121).
- When entering the office, a dialogue will start. You hear that Richard is not here. The lady, Valdaris, explains that we need to go through the registration process first.
- Talk to the documents where you find the papers for the applications. You get explained that they are still using the old forms and they are not for applying to only one mercenary group.
- Talk to Valdaris to give her your form. After reviewing the forms we get welcomed to the the Richard Mercenary Group.
- Talk to Tan, who is talking to Valdaris about us being suspicious. He is still concerned about if we are good or not. Valdaris is taking us to a simple tour around the area.
- When leaving the office another dialogue will start where Valdaris tells us that this base was build in a rush.
- Walk a little bit down. You learn that there are supplies stored from the Wigner Merchant Group.
- Laura Valdaris tells us that this an area for temporary visitors.
- At (jor_mbase 245, 128) some kids appear and want to play with their Sister Valdaris. She explains that the children are rescued from the Jormungandr Cult. After explaining everything about the kids she asks us to go to the training ground.
- Valdaris is waiting for you at (jor_mbase 147, 108). She explains the training grounds and that it is open for everyone. You hear something strange from the soldiers, so Valdaris gets angry and wants to investigate it.
- Go near the soldiers where you see someone getting beaten up so bad that he nearly dies. It's Richard who gets beaten up, so Valdaris decides to bring him back to his room to treat his wounds.
- Go back to the center (jor_mbase 202, 191).
- Go upstairs enter the second to last portal on the right side.
- Talk to Valdaris who is REALLY UPSET about the situation. Nerius tells her that Richard wanted to be attacked.
- Talk to Richard who explains that he wants to create books for battle. Getting hit by Nerius was necessary to show proper combat stances which are better shown in real-life examples. Lee should draw the illustration for the book.
- Talk to Lee who instantly shows you the illustration he has drawn. After some talking about the book, you get introduced to Richard. Lee gets ordered to show us the rest while Richard and Valdaris have a talk.
- Leave the room, enter the last portal.
- Talk to Lee again. He tells us the full story of how they met Galaxia, where she destroyed nearly the entire mercenary group alone. After clearing the armor, Lee is willing to show us the rest of the base.
- Leave the center and walk a little bit left (jor_mbase 168, 195) where Lee explains the rest of the base. Tan will appear and tell us that this should be enough and you should go and see Tris. You will be rewarded with 30x
 Wigner Merchant Guild Voucher (1001618) and 30 reputation.
- Talk to Tris. He asks us how everything went. After some explaining, he tells us that Alberta needs a wizard and Nillem should join them. Lehar will be sent to the Wigner Merchant Group, who are involved in relief efforts for people who escaped the cult. For us, we need to meet someone first. We meet Heine through a magic Tablet (Insert mobile phone joke here). Learning from Heine, our task will be to go to Alberta and receive the goods Heine sent to the resistance. Heine wishes to get a special Bright Eye from us. It must be from us and a fresh one, so not a single one from the storage. There are 4 dialogs in total and you need to click specific options:
- First Dialogue
- Bearable.
- Second dialogue: Is that person you, Tris?
- Third Dialogue: Enjoy the text.
- Fourth dialogue: Get kill quest 10x Skipskipper (22319) and collect 1x
 Bright Eye (1001641) .
- Talk to Walter Sailor (jor_mbase 161, 341) and go to the Raised Land. Here you can do the kill quest.
- To return you can talk to the Hidden Boat on the bottom left of the map (jor_raise2 100, 26).
- Go back to Tris. You will be rewarded with 30x
 Wigner Merchant Guild Voucher (1001618) and 35 reputation.
- You have unlocked: Volunteer Vallen Wok Daily Quest
- You have unlocked: Counselor Wool Daily Quest
- Go to the other Walter Sailor (jor_mbase 333, 148), he will take you to the Alberta.
- Walk up a little bit and talk to Nillem. You watch how Nillem gets overloaded with work from the Sailor. After entering the discussion, the Sailor introduces himself as Megas. He forces you to go to the beach to find work, ignoring your request.
- (jor_albe 227, 117) Walk into the quest sign, Yohan will appear. He assigns you with moving the cargo to specific areas. Those are marked on the map.
- Visit Walter Sailor at (jor_albe 146, 224). He explains to you that everyone needs to do those tasks, it's like a ladder where everyone begins the same.
- There is another Walter Sailor waiting inside a building (jor_albe 120, 145).
- Enter the building, walk up, and talk to Walter Sailor.
- Go back to Yohan (jor_albe 227, 117). With all the goods coming and going there is dirt in the town. You have to clean up 4 dirt piles.
- The 4 dirt pile locations are:
- Go back to Yohan (jor_albe 227, 117). He will give you the next job in the warehouse you were before.
- Go back to the previous building (jor_albe 120, 145).
- Enter the building and walk down. You will meet Iana Operta. She wants you to deliver 2 letters.
- First letter: Enter the building at (jor_albe 200, 107).
- Talk to Professor Sanguin. He takes the letter and mentions that your name is mentioned in the letter too. After some waiting, he gives you a written reply.
- Second letter: Enter the building at (jor_albe 60, 237).
- Talk to Patissier Edel. She introduces herself and asks about your business. Choose the second option (First Option would mean trouble!) and hear her reply.
- Go back to Iana (jor_albe 120, 145). Enter the building, walk down and talk to Iana. You bring her both replies and she tells you that those aren't basic trivial errands. You get introduced to Mariastella Walter and start talking about the stories of the ghost ship. We are told that Maria's father, Walter, might be on the ship and we need to gather information about it's location.
- You will be rewarded with 40x
 Wigner Merchant Guild Voucher (1001618) and 40 reputation.
 - Go back to Lunaforma, talk to the Walter Sailor at (jor_albe 194, 200).
- Talk to Ivan at (jor_mbase 240, 277). Ask about the ghost ship. But instead of getting information, you will get assigned to helping with the meal.
- Talk to Lehar in (jor_mbase 214, 306) several times. You decide to help him with the meals for the Wigner groups. Everyone is enjoying Lehar's rice a lot. Lehar mentions that he heard people mention a ghost ship.
- Talk to Ivan at (jor_mbase 193, 287) who tells you how many people saw the ghost ship. He gives you the name of who you should ask first, because he saw most of the stuff happening.
- Talk to Lyriq at (jor_mbase 191, 306), who gets introduced by Lehar. After some small talk he gets more comfy around you and begins to tell you the story of what happened on that day with the ghost ship. We decide to go back to Ivan.
- Talk to Ivan at (jor_mbase 237, 281). He tells us that he wants to join us on the ghost ship mission. But we need to deliver a package to his sister in Alberta first.
- Talk to Walter Sailor (jor_mbase 333, 148), he will take you to Alberta again.
- Enter the building at (jor_albe 100, 238)
- Talk to Lalaila Wigner, who is surprised about Ivan's package. She explains to you that she sends others to look over Ivan. We should take something he left behind and bring it to him.
- Enter the portal at the top and check the dusty box. It contains well maintained knuckles which get cleaned and everything by Lalaila. She confirms that Ivan wanted those knuckles to be thrown away but Lalaila refused. She also gives you a letter for Maria Walter.
- Leave the building and go to the next one at (jor_albe 120, 146).
- Talk to Maristella Walter and give her the letter. She doesn't say anything and just smiles. You will be rewarded with 10x
 Wigner Merchant Guild Voucher (1001618) and 5 reputation.
- Go back to Lunaforma, talk to the Walter Sailor at (jor_albe 194, 200).
- Talk to Ivan at (jor_mbase 237, 281). He suggests to infiltrate through the north of the Raised Land and to meet there. You will be rewarded with 40x
 Wigner Merchant Guild Voucher (1001618) and 40 reputation.
- Talk to Walter Sailor (jor_mbase 161, 341) and go to the Raised Land.
- Leave the map through the top portal.
- Walk into the bushes at (jor_raise1 322, 64)
Note: Velelling (22315) on this map drops Vellelopy (1001643) . 2 are required for step 166
- You will be ported to another map. Talk to Ivan. A plan is made to infiltrate the temple. Why is there a temple and why does it look like it's made by human? This question is asked and the only way to find out is to go inside.
- Enter the dungeon at (jor_raise1 152, 316)
- Enter the safe spot at (jor_tmple1 170, 62)
- Talk to Ivan. Ivan sorts out a plan out to find any humans who are looking to escape. Top priority is gathering information about the ghost ship though, so we go with Tan to gather information.
- Go to the next safe spot at (jor_tmple1 103, 180)
- Talk to the believer. After asking, they can't give any information about the ghost ship. Because of their strong faith Tan decides not to ask about escaping.
- Go to the next safe spot at (jor_tmple1 181, 235)
- Talk to another believer. They are unhappy, but after asking about escaping, they think we want to capture them and bring them to the 2nd floor, where humans get taken away by the guards. Tan suggested to go there for potential information.
- Go to the next safe spot at (jor_tmple1 229, 270)
- Talk to the next believer. You get told to go to the 2nd floor, but you need to be registered by the priests as a believer first. But currently they have disappeared, so Tan suggests to go back to the gathering point.
- Go back to the first safe spot at (jor_tmple1 170, 62)
- Talk to Ivan. Ivan and Yohan came to the same conclusion and without any information. It's said that we need more information about the place first before we can get more.
- Go back to Lunaforma.
- Talk to Tris at (jor_mbase 142, 264). Tris is bit frustrated that we couldn't find any humans who wanted to escape or any information about the ghost ship. But someone will arrive soon with potential inside information, so we will meet him and maybe he can guide us to the second floor! You will be rewarded with 15x
 Wigner Merchant Guild Voucher (1001618) and 15 reputation.
- Visit the small boat at (jor_mbase 124, 33).
- Talk to Tan at (jor_crk_p 72, 76). The informant, Nadoyo, explains that there is someone who wants to escape from the temple and has every information we need. But to get there safely we need someone tall with long black hair similar to Tan.
- Talk to Ivan who has an idea which person fits the description perfectly, but he is afraid of that thought.
- Go back to Lunaform, by talking to the small boat.
- Talk to Ivan at (jor_mbase 163, 295). We're meeting Wilhelm who doesn't want to join the mission. After Tan mentions the reason why Wilhelm is working there and after some convincing, he agrees to come along to infiltrate the temple for information about the ghost ship and finding people who want to escape.
- Talk to Walter Sailor (jor_mbase 161, 341) and go to the Raised Land.
- Leave the map through the top portal.
- Walk into the bushes at (jor_raise1 322, 64)
- You will be ported to another map. Talk to Tan. Nadoyo explains the plan. Wilhelm will disguise as a High Rank Priest so we can enter the restricted area of the church, in hopes to find information or people who want to escape. Wilhelm made it clear that he wants to find one person and that's the only reason why he is doing it. Nadoyo mentions that the high priest we disguised into wants to escape from the cult too. You will be rewarded with 15x
 Wigner Merchant Guild Voucher (1001618) and 15 reputation.
- Enter the dungeon at (jor_raise1 152, 316)
- Enter the safe spot at (jor_tmple1 229, 266)
- Talk to Nadoyo, who explains the plan. Wilhelm will pose as high priest Carmigand, a key figure in the cult. We just have to follow him and everything should work out fine, but Wilhelm is skeptical about the plan.
- Talk to the Guard who registers our party with mostly fake names. Nadoyo will go ahead. Talk to the guard again to start the Gimli Infiltration instance. NOTE EVERYONE CAN OPEN INSTANCE FROM PARTY.
- Talk to Nadoyo who tells us that Carmigand's plan to escape got leaked. Now we need to act fast in to find and rescue him from the cult, because he has all information we need.
- Talk to Tan who teleports you into a new room.
- Talk to Wilhelm who asks the believers about Carmigand. They don't know where he is, but they tell us to look for him at the inner payer room. Wilhelm uses the time to ask about someone named Reinhard, the guy who he is looking for. After the dialog you get warped out.
- Talk to Tan at the new location.
- Talk to Tan to get warped to another prayer room.
- Talk to the Believer, who are complaining about their time at the temple. They want to escape and Wilhelm offers them the way out. But guards appear who are suspicious about the loud noises and forbid meeting in groups bigger than 2. They start attacking you.
- Kill the guards.
- Talk to the Believer again. They agree to escape, but don't know anything about Reinhard either. You get warped out.
- Talk to Tan to get the next location.
- Talk to the guard who is surprised to see Carmigand. Wilhelm, who pretends to be Carmigand, uses this time to surprise attack the guards.
- Kill the guards.
- Enter the portal, which appears after killing both guards.
- Talk to the Believer at the top of the room. They are happy to be rescued by us and are willing to trust us to escape. But no one knows anything about Reinhard. One of them suggests that he died from the suffering at the temple.
- You have to search for another prayer room (1@mdtem 117, 38).
- Talk to Tan. Guards will appear. They claim that Wilhelm is Carmigand and try to capture him. You have to kill both guards again.
- After killing the guards, more guards appear. Talk to the yellow guard and even more guards appear. Wilhelm suggest to be captured so they bring us to the real Carmigand. This would be more efficient than wandering around.
- You will be warped to a preacher room. Talk to Wilhelm. Carmigand will appear and you will learn that he is actually Reinhardt, the guy Wilhelm is looking for. They are brothers and their parents died. Reinhardt is happy that he has finally found him, but he is also disappointed that he became a high priest for this temple. Carmigand explains that there is a secret passage in the room, that no Rgan knows about and we need to find it to escape.
- Suspicious Places will appear. Click on all of them, until you hit the right one and get warped out.
- Talk to Wilhelm, who is confused why the passage is like a mace. Carmigand explains that each prayer room is connected to the mace and we need to find the right one to escape.
- Two guards appear and want to re-capture Carmigand and Wilhelm. Kill both of them. After Killing the guards talk to Wilhelm again, who teleports you to a new place.
- Talk to Tan. Wilhelm finds it funny that he, who was weaker as a kid is now protecting his brother.
- 4 Guards will appear to capture us. Kill them.
- Talk to Tan again. Carmigand doesn't know where the exit is exactly. You get ported to a new location
- Talk to Wilhelm. Hyasagand appears with guards and explains that she is happy to see Carmigand's downfall. Carmigand tells her what he thinks of the church and how big of a lie it is. She sends the guard to capture him, even with force.
- Kill the 3 guards that Hyasagand sends out to capture Carmigand.
- Talk to Wilhelm. Believers witness what happens and Hyasagand twists the words to make Carmigand look like the bad guy. Kill all 9 guards in order to progress.
- Talk to Tan. Ivan and the others appear with believers to escape. Hyasagand retreats for now. Carmigand makes a speech to his people to follow him, even when he caused a lot of pain. A portal will appear, enter it to leave the instance.
- You will be warped back to the safe spot. Enter the bushes. You will meet Nadoyo and the others inside. Ivan explains what happened inside of the temple and Nadoyo is not surprised that it turned out this way. Carmigand promises to her that he will not make the same mistake twice. You will be rewarded with 20x
 Wigner Merchant Guild Voucher (1001618) and 20 reputation.
- Go back to Lunaforma and talk to Tris (jor_mbase 149, 270). He greets all the newly escaped people from the cult. They are a bit unsure of the place, but Tris makes a clear speech about the place and it's purpose. The old believers wish for justice over Carmigand's betrayal, so Tris decides to speak in private while Ivan shows them the lands here.
- Go back to the center barracks (jor_mbase 203, 190). Enter the portal.
- Go straight up into the portal at the top.
- Talk to Wilhelm. They clear up why they brought Carmigand up here. He wishes to be called by his old name, Reinhard Lugenburg. He is willing to give us any information needed to defeat the cult.
- Talk to Reinhardt. He tells us about the Ghost Ship, which fits everything we know so far. He also mentions that the cult uses a new route in fear of the ship. We also learn, that the cult has weakened over time because of the humans leaving, but we don't know anything about their main force. Because Reinhard is human, he did not get all the information. You will be rewarded with 30x
 Wigner Merchant Guild Voucher (1001618) and 30 reputation.
- Talk to Wilhelm. He starts explaining about how their parents died and begins to rant about how Reinhard betrayed their family by becoming something they are fighting against.
- Talk to Reinhardt, who explains that he wanted to help everyone, believing the church was the answer. Wilhelm leaves disappointed , even saying that he buried his feelings for his brother because of what he did.
- Unlocks Side Quest
- Lugenburg Brothers.
- Enter the building at (jor_albe 120, 146).
- Talk to Maristella Walter. She asks you to meet her at the harbor for the journey to the ship, now knowing the location where to find it.
- Leave the building and go to (jor_albe 191, 180).
- Talk to Maristella Walter. Enter the Ghost Ship instance.
- Talk to Maristella inside. It is planned to move with caution and check if it's really the ship of the Walter.
- Walk left, kill the ghost ship crew and a Sternlight will appear. It feels familiar, but it's not the same as the one Maria remembers.
- Walk right and click on the Mast Traces. Maria finds marks from back then, when she was younger.
- Walk up to the right side and click on the Old Box. Inside the box you find old wooden toys, which are by Howell for his daughter.
- Walk down and kill the ghost ship crew again, a portal will appear.
- Kill the ghost ship crew again and click on the Crumpled Documents which are unreadable. Even Yohan can't read whats on the papers which are smudged by the seawater. BEFORE ENTERING THE PORTAL!!
- Find the Rusty Fountain Pen at (1@wtgs 184, 121). Yohan recognizes the pen and with that it's certain what this ship is about.
- Kill the ghost ship crew on the other side.
- Follow the way till you find the Box under a Bed. (1@wtgs 149, 127). You find a journal. It says, that after Maria escaped a strange woman appeared on the deck, who granted a wish to the captain. When the captain answered everything on the ship changed; memories were fading and crew members turned into monsters. Now we know, that this is the ship Maria was looking for.
- Search for the rest of the ghost ship Crew and kill them.
- After killing them all, a portal will appear at (1@wtgs 109, 114). Before entering Maria gives a short speech confirming that this ship is the missing Walter and that every answer must lie in the Captains Quarter.
- Upstairs you will meet the Ghostship Captain.
- Talk to him to start the fight after Maria gives a speech to bolster morale.
- Talk to him after his death. He will turn into human form for a while to explain what happened in the past. His wish was to sink every cult ship, even in death. He is glad that he could at least see everyone one last time before dying.
- Leave the room on the right side (1@wtgs 331, 27).
- Outside of the ship talk to Maristella. She summarizes what happened and that they need to leave before the ship disappears.
- Leave the instance through the portal, which appears next to Maristella.
- Talk to Maristella Walter who reports to Megas what happened on the ghost ship.
- Wigner Executive will appear, talk to him. He tells you that he has the goods Heine sent us. Now that we're done, we should return to Lunaforma and speak to the tablet again. You will be rewarded with 70x
 Wigner Merchant Guild Voucher (1001618) and 90 reputation.
- Unlocks Mysterious Ghost Ship daily instance.
- Go back to the center barracks (jor_mbase 203, 190). Enter the portal.
- Talk to Tris. He asks us about what happened on the ghost ship. After some time he tries to call Heine again, but the connection to him is bad. Speak to him again, the connection is stable now. The entire tablet needs an overhaul and Heine wants us to help him with that. Tris made a spare room ready for us and we should head there with the tablet ASAP.
- Go upstairs and into the first portal on the left side. Talk to Heine's Tablet (mbase_in 71, 126).
- Speak to the tablet. Heine tells you that the connection is really stable. Choose the second option: "I'll do as you order." and he tells you to get materials for maintenance.You have to farm 2x
 Vellelopy (1001643) . Vellelopy drops from Velelling (22315) in jor_raise1.
Note: If you already have the Vellelopy, skip to step 166 - Talk to Walter Sailor (jor_mbase 161, 341) and go to the Raised Land.
- Leave the map through the top portal. You can find the Velellings here.
- Go back to the center barracks (jor_mbase 203, 190). Enter the portal.
- Go upstairs and into the first portal on the left side to deliver the Vellelopies to Heine's Tablet (mbase_in 71, 126).
- Talk to the tablet. It will begin to absorb the materials you brought along. While waiting, Heine asks to tell an old story, you Choose "Please tell me. " and he explains us why he began helping Tan and Tris but then starts ranting about them as well!
- Talk to the tablet again and Heine complains about how annoying it is that it didn't work the first time. After we ask ( choose "How old is it?") he tries to explains how old this tablet is. He also mentions that he added 2 new features to the tablet as well.
- Talk a third time with the tablet. Heine is happy that it works for the second time, so you ask and choose "Is that good?", and he starts to complain that it's bad that it's only working for the second time. But then he points out that we're from the future by reading our mana, so he asks us why we came. Choose "To completely eliminate the Rgans" and we explain what happened in our time and that the Rgans are a really big problem. Heine is happy about our answer and wants to help us. You will get 1x
 Heine's Tablet (1001627) .
 - Exit the room and talk to Tris. Tris plans to attack the cult with the information Aurelie provided. After more information from Heine all agree to attack ASAP to end the war before the cult can regroup, but something happened outside. You will be rewarded with 50x
 Wigner Merchant Guild Voucher (1001618) and 50 reputation.
- Exit the barracks through the portal and talk to Nadoyo. He explains that the cult plans to resurrect Jormungandr! Nadoyo even saw the shadow of a Serpent, so we need to contact our allies and gather all the information we can get.
- Gather 3 reports:
- Wounded Soldier (jor_mbase 62, 194)
- Exhausted Soldier (jor_mbase 186, 250)
- Cult Member Escapee (jor_mbase 216, 297)
- Go back to Tris who is in front of the center barracks (jor_mbase 203, 186). We give him all information we gathered. But Tan and Nadoyo are missing so we need to check on them!
- Talk to Walter Sailor (jor_mbase 161, 341) and go to the Raised Land.
- Leave the map through the top portal.
- At (jor_raise1 198, 189) you will find a Rock Crevice, enter it.
- Inside talk to Nadoyo. They prepared for something inside the church, a room even Reinhard didn't know. So before going back to Tris we are going with them into the church to check it out and to find more evidence of the giant serpent.
- Check the Decorative Door at (jor_raise1 128, 323).
- Inside the building talk to the Cult Priest. The Priest confirms our fear, something eats people by absorbing their mana to get stronger and stronger. Tan and Reinhard want to go ahead and deal with it while we and Nadoyo go back and report to Tris.
- Talk to Nadoyo, she will warp you back to Lunaphoma.
- Go back to Tris who is in front of the center barracks (jor_mbase 203, 186). We report back with what happened and what Tan's plan is. Tris will exclude normal soldiers and us from the battle and we should unite back with our friends on the 2nd floor.
- Enter the barracks and go into the Small Door.
- Talk to Nyar. Heine explains that we can't erase events from the past but that we could join Tris in the battle with Heine's help. You will be rewarded with 10x
 Wigner Merchant Guild Voucher (1001618) and 50 reputation.
- Talk to Walter Sailor (jor_mbase 161, 341) and go to the Raised Land.
- Leave the map through the top portal.
- You have to enter the Decorative Door at (jor_raise1 128, 323) again.
- Talk to Nadoyo. Tris and Nadoyo are surprised to see you here, but Heine stops him and explains that he needs help and only we can do that.
- Talk to the door.
- Talk to the Heine Tablet. Everyone is gathered here and some are unsure if this is the right call. After a vote it's decided to proceed and Heine wants to share his new spell with everyone.
- You will start the instance "Final Battle".
- Inside choose "Use the tablet" and Heine tries to find every location.
- Enjoy the dialogues ~
- After everyone has channeled their mana into the egg, click on the big egg.
- Kill Corrupted Tan. After a long battle the Serpent tries to convince Tris to save his life while Tan shouts to finish it. Tris finishes the Serpent off and Tan dies with him....
- Talk to Nyar. Heine suggests to leave first to track down the cult's movement and give Tris some time to gather his thoughts. You will be rewarded with 90x
 Wigner Merchant Guild Voucher (1001618) and 110 reputation.
- Outside the instance talk to Nyar again who brings us to a new area.
- You will be warped, talk to Nyar again. Nillem and Lehar find a suspicious room with a book. Nillen reminds us why we are here and that we should investigate by using this book first.
- Click on the Suspicious Book to start the Instance Secret Altar.
- A shining door will appear, enter it.
- Inside talk to Lehar. Nillem explains that ahead is a big power and with the death of the giant serpent they start their next plan of concentrating their remaining power into Lasgand. You need to kill all monsters.
- At the end of the corridor there will be a Door, click on it.
- Talk to Lehar. This place looks familiar, like the place where the High Rank Rgans live. You continue the way.
- Follow the way and kill all Cult Priests.
- Talk to Jormungandr Shaman, who is cursing everyone who was part of the battle, like it is told in the stories back then. Kill him and click on the door to continue.
- Walk into the Cult Shaman, who explains that with the curse they will persist eternally. Monster are spawning, kill all big Serpents.
- Click on the Giant Egg. Tris transfers the curse onto himself. Aurelie and Tris will watch over the egg until it's withered away and Tris children in the future will fight back what ever hatches there. You will get ported back to the island. You will be rewarded with 60x
 Wigner Merchant Guild Voucher (1001618) and 50 reputation.
- Outside talk to Nyar. Talk about what happened, now that Nyar reclaimed some of his power, Lasgand should be weakened by a lot now. But before we go, we need to swap the tablet with something on the docks, that Heine hid for us.
- Go back to Lunaforma by talking to the small boat.
- Talk to the Bushes to receive a new Heine Tablet. Heine says his goodbye and warps us back to the island.
- Talk to Nyar again and choose to return to our own time.
- Walk to (jor_crk 137, 138). Aurelie already senses the sudden change in magic and we report what happened. Now Nillen and Nyar will seal the rift while we'll go and see what happened to Lasgand in the Seal.
- Talk to Nyar Clone. Lehar and his aunt will go on to lift the curse from Lasgand. You can't join them, so you need to wait until they are done. You have to wait 10 minutes to open the instance. Grab a coffee, visit the toilet, touch some grass. After the 10 minutes Lehar and Voglinde will re-appear, telling us that the curse is broken but Lasgand is still resurrecting. Now we think it's the work of the Heart Piece of Ymir and we need to check it out, remembering what happened in Bio Labs back then.
- Open the instance.
- Inside the instance talk to Aurelie. The insane power of Lasgand that was there before is gone now, but the mana is going wild. We need to confirm who this Lasgand is.
- Talk to Lasgand who is acting weird for some reason. You need to kill him multiple times.
- Talk to Aurelie who confirms that this Lasgand is acting the same as the first time and it is really the Heart Piece of Ymir. She will warp you out of the instance.
- Talk to Nyar Clone. We confirm what he is still dangerous and his power is still creating new Rgans. The curse is lifted but Lehar and Voglinde are staying to fight back the Rgan. Now Nillem wants to see us where the rift was, you get warped there.
- Talk to Nyar. Nillem and Nyar failed to seal the rift. The time is now repeating itself over and over, but we're free to travel there from time to time. Not only that, but now YOUR name is mentioned in the history books as well. You will be rewarded with 70x
 Wigner Merchant Guild Voucher (1001618) and 60 reputation.
Nebenquests
Vorratsbeschaffung
- Indem du mit Mandel bei (jor_mbase 210, 173) sprichst, kannst du die Tagesaufgaben für die Vorratsbeschaffung freischalten.
Lugenburg-Brüder
- Sprich mit Reinhardt in der Kaserne bei (mbase_in 118, 186). Gehe geradeaus durch das Portal.
- Besuche Wilhelm bei (jor_mbase 140, 201).
- Gehe wieder zu Reinhardt in der Kaserne.
- Draußen wartet Tris bei (jor_mbase 197, 277).
- Sprich mit Reinhardt neben ihm.
- Sprich mit Wilhelm.
- Sprich noch einmal, Tris. Du erhältst 10x
 Wigner Merchant Guild Voucher (1001618) und 5 Rufpunkte.
 - Du hast jetzt Zugriff auf die Jagdquests „Clear Rising Lands“.
Nicht genügend Nahrung (Kräuter sammeln/Angeln)
- Sprich mit dem Freiwilligen Vallen Wok in (jor_mbase 211, 280).
- Er wird dich um 10 gleiche Kräuter oder 10 gleiche Fische bitten, die über die ganze Karte verteilt erscheinen.
- Wenn du die Kräuteranfrage erhalten hast, bringe 10x
 Wide Grass (1001625) mit. Er wird
  Long Grass (1001624) nicht annehmen.
 - Wenn du die Fischanfrage erhalten hast, bringe 10x
 Lunaforma Shrimp (1001619) oder 10x
  Lunaforma Calamari (1001620) oder 10x
  Lunaforma Seaweed (1001621) oder 10x
  Lunaforma Fish (1001622) mit. Er wird
  Lunaforma Oyster (1001623) nicht annehmen.
Söldneraufgaben
- Sprich mit Valdaris (mbase_in 302, 123)
- Sprich mit Söldnermitglied (jor_mbase 300, 151)
- Sprich mit Söldnermitglied (jor_mbase 198, 251)
- Sprich mit Söldnermitglied (jor_mbase 133, 128)
- Sprich mit Söldnermitglied (jor_mbase 248, 103)
- Sprich mit Valdaris (mbase_in 302, 123)
- Du erhältst 10x
 Wigner Merchant Guild Voucher (1001618) und 5 Rufpunkte.
 - Du hast jetzt Zugriff auf die täglichen Söldneraufgaben.
Daily Quests
| NPC | Quest | Reward | Reputation |
| Mandel at (jor_mbase 210, 173) | Gaebolg: Collect 10x |
1x Supply Porcurement daily!
10x |
Increase Reputation of the family you chose by 100. |
| Nerius: Collect 10x | |||
| Heine: Collect 10x | |||
| Lugenburg: Collect 10x | |||
| Walter: Collect 10x | |||
| Wigner: Collect 10x | |||
| Richard: Collect 10x | |||
| Wilhelm at (jor_mbase 140, 201) | Hunt 300x monsters in Nothern Rising Lands. | 10x |
10 |
| Hunt 300x monsters in Southern Rising Lands. | |||
| Valdaris (mbase_in 302, 123) | Any kind of help: Recruit the right Mercenerys for Valdris. Not everyone is suitable. | 2x |
2 |
| Fresh food: Collect 10x |
5x |
5 | |
| Clamshell for injuries: Hunt 50x Scalleg | 5x |
5 | |
| For the children: Hunt 50x Velelling | 5x |
5 | |
| Clean Finish (1): Hunt 300x monsters in Jormungandr Temple first floor | 10x |
10 | |
| Clean Finish (2): Hunt 300x monsters in Jormungandr Temple second floor | 10x |
10 | |
| Heine Tablet (mbase_in 21, 168) | Collect 3x |
5x |
3 |
| Conselor Wool
(jor_albe 160, 137) |
Talk to him, go to next npc at (jor_albe 50, 241), return to wool. | 3x |
2 |
| Libra (jor_base 314, 137) | Libra will give you 1x |
2x |
2 |
Familienruf
Wir müssen insgesamt 7 Familienrufe abschließen. Der maximale Ruf, den ihr pro Familie erreichen könnt, beträgt 1.000. Der Ruf bei Gaebolg wird teilweise durch die Hauptquest aufgefüllt, während die anderen Familien mit Mandel's daily quest. abgeschlossen werden müssen.
Nachdem ihr 1.000 Ruf bei einer Familie erreicht habt, könnt ihr 5 ![]() Wigner Merchant Guild Voucher (1001618) an Mandel zahlen, um einen einstündigen Buff eurer Wahl zu erhalten.
Wigner Merchant Guild Voucher (1001618) an Mandel zahlen, um einen einstündigen Buff eurer Wahl zu erhalten.
Hinweis: Buffs sind stapelbar, aber beim Tod verlieren Sie alle Buffs.
| Familien- | Buff |
| Gaebolg-Segen | Erhöht ANG und MATK% um 10 %. |
| Nerius-Segen | Verringert die variable Zauberzeit um 10 % und erhöht die Angriffsgeschwindigkeit um 10 %. |
| Heine-Segen | Erhöht den Schaden an Drachen- und Pflanzengegnern um 15 %. |
| Lugenburg-Segen | Erhöht den Schaden an Dämonen- und Untotengegnern um 15 %. |
| Walter-Segen | Erhöht den Schaden an Formlosen und Fischgegnern um 15 %. |
| Wigner-Segen | Erhöht den Schaden an Rohlingen und Engeln um 15 %. |
| Richard Blessing | Erhöht den Schaden an Halbmenschen und Insekten um 15 %. |
Fields/Dungeons
| Map | Monster | |||
| Northern Rising Lands jor_raise1  |
 Seawind (22313) |
 Velelling (22315) |
 Rockstriker (22317) |
 Yoster Collector (22325) |
 Scalleg (22314) |
 Letterster (22316) |
 Yoster Cleaner (22323) |
 Yoster Cooker (22327) | |
| Southern Rising Lands jor_raise2  |
 Seawind (22313) |
 Skipskipper (22319) |
MVP  Icehorn (22362) | |
 Ice Seahorse (22318) |
 Cliolima (22320) | |||
| Jornville jor_base  |
 Seawind (22313) |
 Yorker Religious Worker (22322) |
 Yoster Negotiator (22326) | |
 Yorker Worker (22321) |
 Yoster Fixer (22324) | |||
| Jormungand Church Temple F1 jor_tmple1 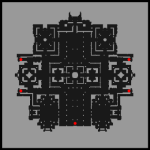 |
 Yoster Cleaner (22323) |
 Yoster Collector (22325) |
 Yoster Cooker (22327) |
 Yormi Missionary (22354) |
 Yoster Fixer (22324) |
 Yoster Negotiator (22326) |
 Yormi (22353) |
 Yordos Investigator (22355) | |
 Yordos Judge (22356) |
 Yordos Executor (22357) |
MVP  Yortus Arbiter (22363) | ||
| Jormungand Church Temple F2 jor_tmple2 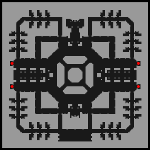 |
 Yordos Investigator (22355) |
 Yordos Executor (22357) |
 Yoscopus Sorcerer (22359) |
 Yortus Conjurator (22361) |
 Yordos Judge (22356) |
 Yoscopus Guardian (22358) |
 Yortus Bishop (22360) |
MVP  Yortus Bailiff (22364) | |
Instanzen
Equipment
Übersicht Gaebolg
Gaebolg-Ausrüstung erhalten Sie beim NPC Wigner Merchant Popo bei (mbase_in 220, 123) für jeweils 100x ![]() Wigner Merchant Guild Voucher (1001618) .
Wigner Merchant Guild Voucher (1001618) .
An armor given to members of the Resistance. _______________________ Atk +130 _______________________ For each 2 Refine Levels: Atk +15 Def +15 _______________________ Refine Level +7: Increases Physical Damage by 3%. _______________________ Refine Level +9: P.Atk +5 Decreases Variable Casting Time by 10%. _______________________ Refine Level +10: Increases Physical Damage by additional 5%. _______________________ Refine Level +12: Decreases After Skill Delay by 5%. _______________________ When equipped with Gaebolg Manteau: Increases Physical Damage against enemies of every element by 10%. _______________________ When equipped with Gaebolg Manteau and Gaebolg Boots: Increases Physical Damage against enemies of every race, except Players, by 10%. _______________________ [Bonus by Grade] [Grade D]: POW +3 CON +3 Decreases After Skill Delay by 5%. _______________________ [Grade C]: Atk +3% P.Atk +2 _______________________ [Grade B]: POW +4 CON +4 P.Atk +3 _______________________ [Grade A]: Atk +4% P.Atk +5 _______________________ Type: Armor Position: Armor Defense: 198 Armor Level: 2 Refinable / Gradable Weight: 240 Required Level: 245 |
A robe given to members of the Resistance. _______________________ Matk +130 _______________________ For each 2 Refine Levels: Matk +15 Def +15 _______________________ Refine Level +7: Increases Magical Damage with every element by 3%. _______________________ Refine Level +9: S.Matk +5 Decreases Variable Casting Time by 10%. _______________________ Refine Level +10: Increases Magical Damage with every element by additional 5%. _______________________ Refine Level +12: Decreases After Skill Delay by 5%. _______________________ When equipped with Gaebolg Muffler: Increases Magical Damage against enemies of every element by 10%. _______________________ When equipped with Gaebolg Muffler and Gaebolg Shoes: Increases Magical Damage against enemies of every race, except Players, by 10%. _______________________ [Bonus by Grade] [Grade D]: SPL +3 CON +3 Decreases After Skill Delay by 5%. _______________________ [Grade C]: Matk +3% S.Matk +2 _______________________ [Grade B]: SPL +4 CON +4 S.Matk +3 _______________________ [Grade A]: Matk +4% S.Matk +5 _______________________ Type: Armor Position: Armor Defense: 130 Armor Level: 2 Refinable / Gradable Weight: 120 Required Level: 245 |
A pair of boots given to members of the Resistance. _______________________ MaxHP +10%, MaxSP +4%. _______________________ For each 2 Refine Levels: MaxSP +1%, Def +10. _______________________ Refine Level +7: Increases Attack Speed (decreases After Attack Delay by 10%). _______________________ Refine Level +9: P.Atk +5. Increases Physical Damage by 5%. _______________________ Refine Level +10: Def +100 Atk +20 _______________________ Refine Level +12: Increases Physical Damage by additional 5%. _______________________ When equipped with Gaebolg Armor: Increases Physical Damage against enemies of every element by 10%. _______________________ [Bonus by Grade] [Grade D]: POW +2 CON +2 Atk +10 _______________________ [Grade C]: Atk +2% P.Atk +2 _______________________ [Grade B]: Fixed Casting Time -1 second. _______________________ [Grade A]: Atk +3% P.Atk +3 _______________________ Type: Armor Position: Shoes Defense: 128 Armor Level: 2 Refinable / Gradable Weight: 200 Required Level: 245 |
A pair of shoes given to members of the Resistance. _______________________ MaxHP +10% MaxSP +4% _______________________ For each 2 Refine Levels: MaxSP +1% Def +10. _______________________ Refine Level +7: Increases Attack Speed (decreases After Attack Delay by 10%). _______________________ Refine Level +9: S.Matk +5 Increases Magical Damage with every element by 5%. _______________________ Refine Level +10: Def +100 Matk +20 _______________________ Refine Level +12: Increases Magical Damage with every element by additional 5%. _______________________ When equipped with Gaebolg Robe: Increases Magical Damage against enemies of every element by 10%. _______________________ [Bonus by Grade] [Grade D]: SPL +2 CON +2 Matk +10 _______________________ [Grade C]: Matk +2% S.Matk +2 _______________________ [Grade B]: Fixed Casting Time -1 second. _______________________ [Grade A]: Matk +3% S.Matk +3 _______________________ Type: Armor Position: Shoes Defense: 80 Armor Level: 2 Refinable / Gradable Weight: 100 Required Level: 245 |
A manteau given to a member of the Resistance. _______________________ POW +3 CON +3 _______________________ For each 2 Refine Levels: Atk +1% Def +10 _______________________ Refine Level +7: Decreases After Skill Delay by 5%. _______________________ Refine Level +9: Increases Physical Damage by 5%. _______________________ Refine Level +10: P.Atk +3 Atk +20 _______________________ Refine Level +12: Decreases After Skill Delay by additional 5%. _______________________ When equipped with Gaebolg Boots: Increases Physical Damage against enemies of every race, except Players, by 10%. _______________________ [Bonus by Grade] [Grade D]: Atk +3% P.Atk +2 _______________________ [Grade C]: P.Atk +3 _______________________ [Grade B]: Atk +2% P.Atk +5 _______________________ [Grade A]: Atk +4%, P.Atk +7 Decreases After Skill Delay by 5%. _______________________ Type: Armor Position: Garment Defense: 142 Armor Level: 2 Refinable / Gradable Weight: 160 Required Level: 245 |
A muffler given to members of the Resistance. _______________________ SPL +3 CON +3 _______________________ For each 2 Refine Levels: Matk +1% Def +10 _______________________ Refine Level +7: Decreases After Skill Delay by 5%. _______________________ Refine Level +9: Increases Magical Damage with every element by 5%. _______________________ Refine Level +10: S.Matk +3 Matk +20 _______________________ Refine Level +12: Decreases After Skill Delay by additional 5%. _______________________ When equipped with Gaebolg Shoes: Increases Magical Damage against enemies of every race, except Players, by 10%. _______________________ [Bonus by Grade] [Grade D]: Matk +3% S.Matk +2 _______________________ [Grade C]: S.Matk +3 _______________________ [Grade B]: Matk +2% S.Matk +5 _______________________ [Grade A]: Matk +4% S.Matk +7 Decreases After Skill Delay by 5%. _______________________ Type: Armor Position: Garment Defense: 90 Armor Level: 2 Refinable / Gradable Weight: 80 Required Level: 245 |
A ring given to a member of the resistance. _______________________ Atk +8% P.Atk +3 Increased Attack Speed (decreases After Attack Delay by 10%). _______________________ When equipped with Gaebolg Gloves: Decreases Variable Casting Time by 10%. Decreases After Skill Delay 5%. _______________________ Type: Armor Position: Left Accessory Armor Level: 2 Weight: 10 Required Level: 245 |
A glove given to a member of the resistance. _______________________ Atk +8% P.Atk +3 Increased Attack Speed (decreases After Attack Delay by 5%). Decreases Variable Casting Time by 5%. _______________________ Type: Armor Position: Right Accessory Armor Level: 2 Weight: 10 Required Level: 245 |
An earring given to a member of the resistance. _______________________ Matk +8% S.Matk +3 Increased Attack Speed (decreases After Attack Delay by 10%). _______________________ When equipped with Gaebolg Necklace: Decreases Variable Casting Time by 10%. Decreases After Skill Delay 5%. _______________________ Type: Armor Position: Left Accessory Armor Level: 2 Weight: 10 Required Level: 245 |
A necklace given to a member of the resistance. _______________________ Matk +8% S.Matk +3 Increased Attack Speed (decreases After Attack Delay by 5%). Decreases Variable Casting Time by 5%. _______________________ Type: Armor Position: Right Accessory Armor Level: 2 Weight: 10 Required Level: 245 |
Gegenstandsreform
Um Yorscalp-Ausrüstung zu erhalten, musst du die Gaebolg-Ausrüstung umwandeln.
Item Reform
To get Yorscalp gear you need to transform the Gaebolg gear.
Sprechen Sie mit Schmied Sansan bei (mbase_in 230, 125).
Du brauchst für jedes Ausrüstungsteil:
200x ![]() Wigner Merchant Guild Voucher (1001618)
Wigner Merchant Guild Voucher (1001618)
10x ![]() Shape of Fallen Serpent (1001834)
Shape of Fallen Serpent (1001834)
50x ![]() Symbol of Curse (1001835)
Symbol of Curse (1001835)
200x ![]() Spirit of Yorscalp (1001836)
Spirit of Yorscalp (1001836)
NPCs Verzauberungen
Um Gaebolg-Ausrüstung zu verzaubern, sprich mit Magierin Lobelia unter (mbase_in 228, 129).
Um Gaebolg-Ausrüstung in Yorscalp-Ausrüstung zu verwandeln und Yorscalp-Ausrüstung zu verzaubern, sprich mit Schmied Sansan unter (mbase_in 230, 125).

Enchant NPCs
To enchant Gaebolg gear, talk to Mage Lobelia at (mbase_in 228, 129).

To transform gaebolg gear into yorscalp gear, also to enchant yorscalp gear, talk to Blacksmith Sansan at (mbase_in 230, 125).

Armor Enchants
| Target Items | Slot Order | Minimum Requirements | Line Options | Reset Process | |
| Grade | Refine | ||||
| 4→3→2 | No Grade | 0 | allowed | No Reset | |
| 4→3→2 | No Grade | 0 | allowed | No Reset | |
Perfect Enchant Slot 4
| Slot 4 Enchant | Description | Materials | Zeny |
| Def +125 Res +15 _______________________ Refine Level +7: Def +25 Res +5 _______________________ Refine Level +9: Def +25 Res +5 _______________________ Refine Level +11: Def +50 Res +10 _______________________ Type: Enchant Position: Unknown |
20x |
1,000,000z | |
| Mdef +30 Mres +15 _______________________ Refine Level +7: Mdef +5 Mres +3 _______________________ Refine Level +9: Mdef +5 Mres +3 _______________________ Refine Level +11: Mdef +10 Mres +6 _______________________ Type: Enchant Position: Unknown |
20x |
1,000,000z | |
| Atk +30 P.Atk +5 _______________________ Refine Level +7: Increases Melee Physical Damage by 3%. _______________________ Refine Level +9: Increases Melee Physical Damage by additional 4%. _______________________ Refine Level +11: Increases Melee Physical Damage by additional 5%. _______________________ Type: Enchant Position: Unknown |
20x |
1,000,000z | |
| Atk +30 P.Atk +5 _______________________ Refine Level +7: Increases Ranged Physical Damage by 3%. _______________________ Refine Level +9: Increases Ranged Physical Damage by additional 4%. _______________________ Refine Level +11: Increases Ranged Physical Damage by additional 5%. _______________________ Type: Enchant Position: Unknown |
20x |
1,000,000z | |
| Atk +20 Critical +2 P.Atk +5 _______________________ Refine Level +7: Increases Critical Damage by 3%. _______________________ Refine Level +9: Increases Critical Damage by additional 4%. _______________________ Refine Level +11: Increases Critical Damage by additional 5%. _______________________ Type: Enchant Position: Unknown |
20x |
1,000,000z | |
| Matk +30 S.Matk +5 _______________________ Refine Level +7: Increases all property damage by 3%. _______________________ Refine Level +9: Increases all property damage by additional 4%. _______________________ Refine Level +11: Increases all property damage by additional 5%. _______________________ Type: Enchant Position: Unknown |
20x |
1,000,000z |
Perfect Enchant Slot 3
| Slot 3 Enchant | Description | Materials | Zeny |
| Atk +5% Atk +50 P.Atk +7 _______________________ Refine Level +7: Increases Melee Physical Damage by 5%. _______________________ Refine Level +9: Increases Melee Physical Damage by additional 5%. _______________________ [Bonus by Grade] [Grade D]: Increases Melee Physical Damage by 5%. _______________________ [Grade C]: Increases Melee Physical Damage by additional 5%. _______________________ [Grade B]: Increases Melee Physical Damage by additional 5%. _______________________ [Grade A]: Increases Melee Physical Damage by additional 5%. _______________________ Type: Enchant Position: Unknown |
30x |
2,000,000z | |
| Atk +5% Atk +50 P.Atk +7 _______________________ Refine Level +7: Increases Ranged Physical Damage by 5%. _______________________ Refine Level +9: Increases Ranged Physical Damage by additional 5%. _______________________ [Bonus by Grade] [Grade D]: Increases Ranged Physical Damage by 5%. _______________________ [Grade C]: Increases Ranged Physical Damage by additional 5%. _______________________ [Grade B]: Increases Ranged Physical Damage by additional 5%. _______________________ [Grade A]: Increases Ranged Physical Damage by additional 5%. _______________________ Type: Enchant Position: Unknown |
30x |
2,000,000z | |
| Atk +3% Atk +30 Critical +5 P.Atk +7 _______________________ Refine Level +7: Increases Critical Damage by 5%. _______________________ Refine Level +9: Increases Critical Damage by additional 5%. _______________________ [Bonus by Grade] [Grade D]: Increases Critical Damage by 5%. _______________________ [Grade C]: Increases Critical Damage by additional 5%. _______________________ [Grade B]: Increases Critical Damage by additional 5%. _______________________ [Grade A]: Increases Critical Damage by additional 5%. _______________________ Type: Enchant Position: Unknown |
30x |
2,000,000z | |
| Matk +5% Matk +50 S.Matk +7 _______________________ Refine Level +7: Increases Magical Damage with every element by 5%. _______________________ Refine Level +9: Increases Magical Damage with every element by additional 5%. _______________________ [Bonus by Grade] [Grade D]: Increases Magical Damage with every element by 5%. _______________________ [Grade C]: Increases Magical Damage with every element by additional 5%. _______________________ [Grade B]: Increases Magical Damage with every element by additional 5%. _______________________ [Grade A]: Increases Magical Damage with every element by additional 5%. _______________________ Type: Enchant Position: Unknown |
30x |
2,000,000z |
Perfect Enchant Slot 2
| Slot 2 Enchant | Description | Materials | Zeny |
| Atk +2% _______________________ Refine Level +7: Additional Atk +3% _______________________ Refine Level +9: Additional Atk +4% _______________________ Refine Level +11: P.Atk +3 _______________________ [Bonus by Grade] [Grade D]: Atk +2% _______________________ [Grade C]: Additional Atk +3% _______________________ [Grade B]: Additional Atk +4% _______________________ [Grade A]: P.Atk +5 _______________________ Type: Enchant Position: Unknown |
40x |
3,000,000z | |
| Matk +2% _______________________ Refine Level +7: Additional Matk +3% _______________________ Refine Level +9: Additional Matk +4% _______________________ Refine Level +11: S.Matk +3 _______________________ [Bonus by Grade] [Grade D]: Matk +2% _______________________ [Grade C]: Additional Matk +3% _______________________ [Grade B]: Additional Matk +4% _______________________ [Grade A]: S.Matk +5 _______________________ Type: Enchant Position: Unknown |
40x |
3,000,000z | |
| Decreases After Skill Delay by 3%. _______________________ Refine Level +7: Decreases After Skill Delay by additional 3%. _______________________ Refine Level +9: Decreases After Skill Delay by additional 2%. _______________________ Refine Level +11: Decreases After Skill Delay by additional 2%. _______________________ Type: Enchant Position: Unknown |
40x |
3,000,000z |
Garment Enchants
| Target Items | Slot Order | Minimum Requirements | Line Options | Reset Process | |
| Grade | Refine | ||||
| 4→3→2 | No Grade | 0 | allowed | No Reset | |
| 4→3→2 | No Grade | 0 | allowed | No Reset | |
Perfect Enchant Slot 4
| Slot 4 Enchant | Description | Materials | Zeny |
| Def +125 Res +15 _______________________ Refine Level +7: Def +25 Res +5 _______________________ Refine Level +9: Def +25 Res +5 _______________________ Refine Level +11: Def +50 Res +10 _______________________ Type: Enchant Position: Unknown |
20x |
1,000,000z | |
| Mdef +30 Mres +15 _______________________ Refine Level +7: Mdef +5 Mres +3 _______________________ Refine Level +9: Mdef +5 Mres +3 _______________________ Refine Level +11: Mdef +10 Mres +6 _______________________ Type: Enchant Position: Unknown |
20x |
1,000,000z |
Perfect Enchant Slot 3
| Slot 3 Enchant | Description | Materials | Zeny |
| Increases Attack Speed (decreases After Attack Delay by 5%). _______________________ Refine Level +7: Increases Attack Speed (decreases After Attack Delay by additional 5%). _______________________ Refine Level +9: Increases Attack Speed (decreases After Attack Delay by additional 5%). _______________________ Refine Level +11: Increases Attack Speed (decreases After Attack Delay by additional 10%). _______________________ Type: Enchant Position: Unknown |
30x |
2,000,000z | |
| Reduces variable casting time by 5%. _______________________ Refine Level +7: Reduces Variable Casting Time by additional 5%. _______________________ Refine Level +9: Reduces Variable Casting Time by additional 5%. _______________________ Refine Level +11: Reduces Variable Casting Time by additional 10%. _______________________ Type: Enchant Position: Unknown |
30x |
2,000,000z |
Perfect Enchant Slot 2
| Slot 2 Enchant | Description | Materials | Zeny |
| Increases Melee Physical Damage by 3%. _______________________ Refine Level +7: Increases Melee Physical Damage by additional 3%. _______________________ Refine Level +9: Increases Melee Physical Damage by additional 3%. _______________________ [Bonus by Grade] [Grade D]: Increases Melee Physical Damage by 3%. Perfect Hit +5 _______________________ [Grade C]: Increases Melee Physical Damage by additional 3%. Additional Perfect Hit +6 _______________________ [Grade B]: Increases Melee Physical Damage by additional 5%. Additional Perfect Hit +7 _______________________ [Grade A]: Increases Melee Physical Damage by additional 5%. Additional Perfect Hit +8 _______________________ Type: Enchant Position: Unknown |
40x |
3,000,000z | |
| Increases Ranged Physical Damage by 3%. _______________________ Refine Level +7: Increases Ranged Physical Damage by additional 3%. _______________________ Refine Level +9: Increases Ranged Physical Damage by additional 3%. _______________________ [Bonus by Grade] [Grade D]: Increases Ranged Physical Damage by 3%. Perfect Hit +5 _______________________ [Grade C]: Increases Ranged Physical Damage by additional 3%. Additional Perfect Hit +6 _______________________ [Grade B]: Increases Ranged Physical Damage by additional 5%. Additional Perfect Hit +7 _______________________ [Grade A]: Increases Ranged Physical Damage by additional 5%. Additional Perfect Hit +8 _______________________ Type: Enchant Position: Unknown |
40x |
3,000,000z | |
| Increases Critical Damage by 3%. _______________________ Refine Level +7: Increases Critical Damage by additional 3%. _______________________ Refine Level +9: Increases Critical Damage by additional 3%. _______________________ [Bonus by Grade] [Grade D]: Critical +2 Increases Critical Damage by additional 3%. _______________________ [Grade C]: Additional Critical +3 Increases Critical Damage by additional 3%. _______________________ [Grade B]: Additional Critical +5 Increases Critical Damage by additional 5%. _______________________ [Grade A]: Increases Critical Damage by additional 5% C.Rate +5 _______________________ Type: Enchant Position: Unknown |
40x |
3,000,000z | |
| Increases Magical Damage with every element by 3%. _______________________ Refine Level +7: Increases Magical Damage with every element by additional 3%. _______________________ Refine Level +9: Increases Magical Damage with every element by additional 3%. _______________________ [Bonus by Grade] [Grade D]: Increases Magical Damage with every element by additional 3% MaxSP +2% _______________________ [Grade C]: Increases Magical Damage with every element by 3% Additional MaxSP +3% _______________________ [Grade B]: Increases Magical Damage with every element by additional 5% Additional MaxSP +4% _______________________ [Grade A]: Increases Magical Damage with every element by additional 5% Additional MaxSP +5% _______________________ Type: Enchant Position: Unknown |
40x 40x |
3,000,000z | |
| Reduces damage taken from all property and all size enemies by 3%. _______________________ Refine Level +7: Reduces damage taken from all property enemies by additional 4%. _______________________ Refine Level +9: Reduces damage taken from all size enemies by additional 4%. _______________________ Refine Level +11: Reduces damage taken from all race monsters (except players) by 7%. _______________________ Type: Enchant Position: Unknown |
40x 40x |
3,000,000z |
Footgear Enchants
| Target Items | Slot Order | Minimum Requirements | Line Options | Reset Process | |
| Grade | Refine | ||||
| 4→3→2 | No Grade | 0 | allowed | No Reset | |
| 4→3→2 | No Grade | 0 | allowed | No Reset | |
Perfect Enchant Slot 4
| Slot 4 Enchant | Description | Materials | Zeny |
| MaxHP +4000 _______________________ Refine Level +7: MaxHP +3% _______________________ Refine Level +9: Additional MaxHP +5% _______________________ Refine Level +11: Additional MaxHP +7% _______________________ Type: Enchant Position: Unknown |
20x |
1,000,000z | |
| MaxSP +600 _______________________ Refine Level +7: MaxSP +3% _______________________ Refine Level +9: Additional MaxSP +5% _______________________ Refine Level +11: Additional MaxSP +7% _______________________ Type: Enchant Position: Unknown |
20x 20x |
1,000,000z | |
| Atk +10 _______________________ Refine Level +7: Additional Atk +10 _______________________ Refine Level +9: Additional Atk +10 _______________________ Refine Level +11: Additional Atk +20 Atk +5% _______________________ Type: Enchant Position: Unknown |
20x 20x |
1,000,000z | |
| Matk +10 _______________________ Refine Level +7: Additional Matk +10 _______________________ Refine Level +9: Additional Matk +10 _______________________ Refine Level +11: Additional Matk +20 Matk +5% _______________________ Type: Enchant Position: Unknown |
20x 20x |
1,000,000z |
Perfect Enchant Slot 3
| Slot 3 Enchant | Description | Materials | Zeny |
| Increases Physical Damage against enemies of all sizes by 5%. _______________________ Refine Level +7: Increases Physical Damage against enemies of all sizes by additional 3%. _______________________ Refine Level +9: Increases Physical Damage against enemies of all sizes by additional 2%. _______________________ Refine Level +11: Increases Physical Damage against enemies of all sizes by additional 10%. _______________________ Type: Enchant Position: Unknown |
30x |
2,000,000z | |
| Increases Magical Damage against enemies of all sizes by 5%. _______________________ Refine Level +7: Increases Magical Damage against enemies of all sizes by additional 3%. _______________________ Refine Level +9: Increases Magical Damage against enemies of all sizes by additional 2%. _______________________ Refine Level +11: Increases Magical Damage against enemies of all sizes by additional 10%. _______________________ Type: Enchant Position: Unknown |
30x |
2,000,000z |
Perfect Enchant Slot 2
| Slot 2 Enchant | Description | Materials | Zeny |
| P.Atk +5 _______________________ [Bonus by Grade] [Grade D]: Increases Melee Physical Damage by 5%. _______________________ [Grade C]: Increases Melee Physical Damage by additional 5%. _______________________ [Grade B]: Atk +2% P.Atk +5 _______________________ [Grade A]: Additional Atk +3% Additional P.Atk +5 _______________________ Type: Enchant Position: Unknown |
40x |
3,000,000z | |
| P.Atk +5 _______________________ [Bonus by Grade] [Grade D]: Increases Ranged Physical Damage by 5%. _______________________ [Grade C]: Increases Ranged Physical Damage by additional 5%. _______________________ [Grade B]: Atk +2% P.Atk +5 _______________________ [Grade A]: Additional Atk +3% Additional P.Atk +5 _______________________ Type: Enchant Position: Unknown |
40x |
3,000,000z | |
| P.Atk +5 _______________________ [Bonus by Grade] [Grade D]: Increases Critical Damage by 5%. _______________________ [Grade C]: Increases Critical Damage by additional 5%. _______________________ [Grade B]: Atk +2% C.Rate +3 _______________________ [Grade A]: Additional Atk +3% Additional C.Rate +5 _______________________ Type: Enchant Position: Unknown |
40x |
3,000,000z | |
| S.Matk +5 _______________________ [Bonus by Grade] [Grade D]: Increases Magical Damage with every element by 5%. _______________________ [Grade C]: Increases Magical Damage with every element by additional 5%. _______________________ [Grade B]: Matk +2% S.Matk +5 _______________________ [Grade A]: Additional Matk +3% Additional S.Matk +5 _______________________ Type: Enchant Position: Unknown |
40x 40x |
3,000,000z |
Accessory Enchants
| Target Items | Slot Order | Minimum Requirements | Line Options | Reset Process | |
| Grade | Refine | ||||
| 4→3→2 | No Grade | 0 | allowed | No Reset | |
| 4→3→2 | No Grade | 0 | allowed | No Reset | |
Perfect Enchant Slot 4
| Slot 4 Enchant | Description | Materials | Zeny |
| Atk +25 Increases Melee Physical Damage by 12%. _______________________ Type: Enchant Position: Unknown |
35x |
1,500,000z | |
| Atk +25 Increases Ranged Physical Damage by 12%. _______________________ Type: Enchant Position: Unknown |
35x |
1,500,000z | |
| Critical +8 Increases Critical Damage by 12%. _______________________ Type: Enchant Position: Unknown |
35x |
1,500,000z | |
| Matk +25 Increases Magical Damage with every element by 12%. _______________________ Type: Enchant Position: Unknown |
35x |
1,500,000z |
Perfect Enchant Slot 3
| Slot 3 Enchant | Description | Materials | Zeny |
| Atk +35 Increases Melee Physical Damage by 15%. _______________________ Type: Enchant Position: Unknown |
45x |
3,000,000z | |
| Atk +35 Increases Ranged Physical Damage by 15%. _______________________ Type: Enchant Position: Unknown |
45x |
3,000,000z | |
| Critical +12 Increases Critical Damage by 15%. _______________________ Type: Enchant Position: Unknown |
45x |
3,000,000z | |
| Matk +35 Increases Magical Damage with every element by 15%. _______________________ Type: Enchant Position: Unknown |
45x |
3,000,000z |
Perfect Enchant Slot 2
| Slot 2 Enchant | Description | Materials | Zeny |
| P.Atk +5 Increases Physical Damage against enemies of every element by 5%. _______________________ Type: Enchant Position: Unknown |
65x |
4,500,000z | |
| S.Matk +5 Increases Magical Damage against enemies of every element by 5%. _______________________ Type: Enchant Position: Unknown |
65x |
4,500,000z |
Overview Gaebolg
You can obtain Gaebolg gear at NPC Wigner Merchant Popo at (mbase_in 220, 123) for 100x ![]() Wigner Merchant Guild Voucher (1001618) each.
Wigner Merchant Guild Voucher (1001618) each.

An armor given to members of the Resistance. _______________________ Atk +130 _______________________ For each 2 Refine Levels: Atk +15 Def +15 _______________________ Refine Level +7: Increases Physical Damage by 3%. _______________________ Refine Level +9: P.Atk +5 Decreases Variable Casting Time by 10%. _______________________ Refine Level +10: Increases Physical Damage by additional 5%. _______________________ Refine Level +12: Decreases After Skill Delay by 5%. _______________________ When equipped with Gaebolg Manteau: Increases Physical Damage against enemies of every element by 10%. _______________________ When equipped with Gaebolg Manteau and Gaebolg Boots: Increases Physical Damage against enemies of every race, except Players, by 10%. _______________________ [Bonus by Grade] [Grade D]: POW +3 CON +3 Decreases After Skill Delay by 5%. _______________________ [Grade C]: Atk +3% P.Atk +2 _______________________ [Grade B]: POW +4 CON +4 P.Atk +3 _______________________ [Grade A]: Atk +4% P.Atk +5 _______________________ Type: Armor Position: Armor Defense: 198 Armor Level: 2 Refinable / Gradable Weight: 240 Required Level: 245 |
A robe given to members of the Resistance. _______________________ Matk +130 _______________________ For each 2 Refine Levels: Matk +15 Def +15 _______________________ Refine Level +7: Increases Magical Damage with every element by 3%. _______________________ Refine Level +9: S.Matk +5 Decreases Variable Casting Time by 10%. _______________________ Refine Level +10: Increases Magical Damage with every element by additional 5%. _______________________ Refine Level +12: Decreases After Skill Delay by 5%. _______________________ When equipped with Gaebolg Muffler: Increases Magical Damage against enemies of every element by 10%. _______________________ When equipped with Gaebolg Muffler and Gaebolg Shoes: Increases Magical Damage against enemies of every race, except Players, by 10%. _______________________ [Bonus by Grade] [Grade D]: SPL +3 CON +3 Decreases After Skill Delay by 5%. _______________________ [Grade C]: Matk +3% S.Matk +2 _______________________ [Grade B]: SPL +4 CON +4 S.Matk +3 _______________________ [Grade A]: Matk +4% S.Matk +5 _______________________ Type: Armor Position: Armor Defense: 130 Armor Level: 2 Refinable / Gradable Weight: 120 Required Level: 245 |
A pair of boots given to members of the Resistance. _______________________ MaxHP +10%, MaxSP +4%. _______________________ For each 2 Refine Levels: MaxSP +1%, Def +10. _______________________ Refine Level +7: Increases Attack Speed (decreases After Attack Delay by 10%). _______________________ Refine Level +9: P.Atk +5. Increases Physical Damage by 5%. _______________________ Refine Level +10: Def +100 Atk +20 _______________________ Refine Level +12: Increases Physical Damage by additional 5%. _______________________ When equipped with Gaebolg Armor: Increases Physical Damage against enemies of every element by 10%. _______________________ [Bonus by Grade] [Grade D]: POW +2 CON +2 Atk +10 _______________________ [Grade C]: Atk +2% P.Atk +2 _______________________ [Grade B]: Fixed Casting Time -1 second. _______________________ [Grade A]: Atk +3% P.Atk +3 _______________________ Type: Armor Position: Shoes Defense: 128 Armor Level: 2 Refinable / Gradable Weight: 200 Required Level: 245 |
A pair of shoes given to members of the Resistance. _______________________ MaxHP +10% MaxSP +4% _______________________ For each 2 Refine Levels: MaxSP +1% Def +10. _______________________ Refine Level +7: Increases Attack Speed (decreases After Attack Delay by 10%). _______________________ Refine Level +9: S.Matk +5 Increases Magical Damage with every element by 5%. _______________________ Refine Level +10: Def +100 Matk +20 _______________________ Refine Level +12: Increases Magical Damage with every element by additional 5%. _______________________ When equipped with Gaebolg Robe: Increases Magical Damage against enemies of every element by 10%. _______________________ [Bonus by Grade] [Grade D]: SPL +2 CON +2 Matk +10 _______________________ [Grade C]: Matk +2% S.Matk +2 _______________________ [Grade B]: Fixed Casting Time -1 second. _______________________ [Grade A]: Matk +3% S.Matk +3 _______________________ Type: Armor Position: Shoes Defense: 80 Armor Level: 2 Refinable / Gradable Weight: 100 Required Level: 245 |
A manteau given to a member of the Resistance. _______________________ POW +3 CON +3 _______________________ For each 2 Refine Levels: Atk +1% Def +10 _______________________ Refine Level +7: Decreases After Skill Delay by 5%. _______________________ Refine Level +9: Increases Physical Damage by 5%. _______________________ Refine Level +10: P.Atk +3 Atk +20 _______________________ Refine Level +12: Decreases After Skill Delay by additional 5%. _______________________ When equipped with Gaebolg Boots: Increases Physical Damage against enemies of every race, except Players, by 10%. _______________________ [Bonus by Grade] [Grade D]: Atk +3% P.Atk +2 _______________________ [Grade C]: P.Atk +3 _______________________ [Grade B]: Atk +2% P.Atk +5 _______________________ [Grade A]: Atk +4%, P.Atk +7 Decreases After Skill Delay by 5%. _______________________ Type: Armor Position: Garment Defense: 142 Armor Level: 2 Refinable / Gradable Weight: 160 Required Level: 245 |
A muffler given to members of the Resistance. _______________________ SPL +3 CON +3 _______________________ For each 2 Refine Levels: Matk +1% Def +10 _______________________ Refine Level +7: Decreases After Skill Delay by 5%. _______________________ Refine Level +9: Increases Magical Damage with every element by 5%. _______________________ Refine Level +10: S.Matk +3 Matk +20 _______________________ Refine Level +12: Decreases After Skill Delay by additional 5%. _______________________ When equipped with Gaebolg Shoes: Increases Magical Damage against enemies of every race, except Players, by 10%. _______________________ [Bonus by Grade] [Grade D]: Matk +3% S.Matk +2 _______________________ [Grade C]: S.Matk +3 _______________________ [Grade B]: Matk +2% S.Matk +5 _______________________ [Grade A]: Matk +4% S.Matk +7 Decreases After Skill Delay by 5%. _______________________ Type: Armor Position: Garment Defense: 90 Armor Level: 2 Refinable / Gradable Weight: 80 Required Level: 245 |
A ring given to a member of the resistance. _______________________ Atk +8% P.Atk +3 Increased Attack Speed (decreases After Attack Delay by 10%). _______________________ When equipped with Gaebolg Gloves: Decreases Variable Casting Time by 10%. Decreases After Skill Delay 5%. _______________________ Type: Armor Position: Left Accessory Armor Level: 2 Weight: 10 Required Level: 245 |
A glove given to a member of the resistance. _______________________ Atk +8% P.Atk +3 Increased Attack Speed (decreases After Attack Delay by 5%). Decreases Variable Casting Time by 5%. _______________________ Type: Armor Position: Right Accessory Armor Level: 2 Weight: 10 Required Level: 245 |
An earring given to a member of the resistance. _______________________ Matk +8% S.Matk +3 Increased Attack Speed (decreases After Attack Delay by 10%). _______________________ When equipped with Gaebolg Necklace: Decreases Variable Casting Time by 10%. Decreases After Skill Delay 5%. _______________________ Type: Armor Position: Left Accessory Armor Level: 2 Weight: 10 Required Level: 245 |
A necklace given to a member of the resistance. _______________________ Matk +8% S.Matk +3 Increased Attack Speed (decreases After Attack Delay by 5%). Decreases Variable Casting Time by 5%. _______________________ Type: Armor Position: Right Accessory Armor Level: 2 Weight: 10 Required Level: 245 |
Refine Hammer
You can safelly refine your Gaebolg Equipment from +9 to +12 using a Gaebolg Equipment Refine Hammer. Go to (jor_mbase 222, 262) to buy the hammers.
| Hammer | Description | How to obtain |
|---|---|---|
| A hammer imbued with a special power that can refine a Gaebolg equipments. _______________________ Increases the refinement level by +1 to a +9 Gaebolg equipment. _______________________ [Available Equipments] +9 Gaebolg Armor +9 Gaebolg Robe +9 Gaebolg Cloak +9 Gaebolg Muffler +9 Gaebolg Boots +9 Gaebolg Shoes _______________________ [Material Requirement] Zelunium 150 Turquoise Magic Stone 20 Sunset Magic Stone 20 Crimson Magic Stone 20 Livid Magic Stone 20 _______________________ Type: DelayConsume Position: Unknown Weight: 10 Required Level: 245 |
It can ONLY be used on a +9 equipment. Can be bought with Wigner Merchant Popo at (mbase_in 220, 127). It costs 50x | |
| A hammer imbued with a special power that can refine a Gaebolg equipments. _______________________ Increases the refinement level by +1 to a +10 Gaebolg equipment. _______________________ [Available Equipments] +10 Gaebolg Armor +10 Gaebolg Robe +10 Gaebolg Cloak +10 Gaebolg Muffler +10 Gaebolg Boots +10 Gaebolg Shoes _______________________ [Material Requirement] Zelunium 200 Shining Turquoise Magic Stone 7 Shining Sunset Magic Stone 7 Shining Crimson Magic Stone 7 Shining Livid Magic Stone 7 _______________________ Type: DelayConsume Position: Unknown Weight: 10 Required Level: 245 |
It can ONLY be used on a +10 equipment. Can be bought with Wigner Merchant Popo at (mbase_in 220, 127). It costs 4m zenys, 100x | |
| A hammer imbued with a special power that can refine a Gaebolg equipments. _______________________ Increases the refinement level by +1 to a +11 Gaebolg equipment. _______________________ [Available Equipments] +11 Gaebolg Armor +11 Gaebolg Robe +11 Gaebolg Cloak +11 Gaebolg Muffler +11 Gaebolg Boots +11 Gaebolg Shoes _______________________ [Material Requirement] Zelunium 250 Brilliant Turquoise Magic Stone 5 Brilliant Sunset Magic Stone 5 Brilliant Crimson Magic Stone 5 Brilliant Livid Magic Stone 5 _______________________ Type: DelayConsume Position: Unknown Weight: 10 Required Level: 245 |
It can ONLY be used on a +11 equipment. Can be bought with Brave Dog at (jor_mbase 217, 263) after reaching 1k reputation with every family. It costs 7m zenys and 200x |
Gegenstandsreform
Um Yorscalp-Ausrüstung zu erhalten, musst du die Gaebolg-Ausrüstung umwandeln.
Item Reform
To get Yorscalp gear you need to transform the Gaebolg gear.
Sprechen Sie mit Schmied Sansan bei (mbase_in 230, 125).

Du brauchst für jedes Ausrüstungsteil:
200x ![]() Wigner Merchant Guild Voucher (1001618)
Wigner Merchant Guild Voucher (1001618)
10x ![]() Shape of Fallen Serpent (1001834)
Shape of Fallen Serpent (1001834)
50x ![]() Symbol of Curse (1001835)
Symbol of Curse (1001835)
200x ![]() Spirit of Yorscalp (1001836)
Spirit of Yorscalp (1001836)
NPCs Verzauberungen
Um Gaebolg-Ausrüstung zu verzaubern, sprich mit Magierin Lobelia unter (mbase_in 228, 129).

Um Gaebolg-Ausrüstung in Yorscalp-Ausrüstung zu verwandeln und Yorscalp-Ausrüstung zu verzaubern, sprich mit Schmied Sansan unter (mbase_in 230, 125).

Enchant NPCs
To enchant Gaebolg gear, talk to Mage Lobelia at (mbase_in 228, 129).

To transform gaebolg gear into yorscalp gear, also to enchant yorscalp gear, talk to Blacksmith Sansan at (mbase_in 230, 125).

Armor Enchants
| Target Items | Slot Order | Minimum Requirements | Line Options | Reset Process | |
| Grade | Refine | ||||
| 4→3→2 | No Grade | 0 | allowed | No Reset | |
| 4→3→2 | No Grade | 0 | allowed | No Reset | |
Perfect Enchant Slot 4
| Slot 4 Enchant | Description | Materials | Zeny |
| Def +125 Res +15 _______________________ Refine Level +7: Def +25 Res +5 _______________________ Refine Level +9: Def +25 Res +5 _______________________ Refine Level +11: Def +50 Res +10 _______________________ Type: Enchant Position: Unknown |
20x |
1,000,000z | |
| Mdef +30 Mres +15 _______________________ Refine Level +7: Mdef +5 Mres +3 _______________________ Refine Level +9: Mdef +5 Mres +3 _______________________ Refine Level +11: Mdef +10 Mres +6 _______________________ Type: Enchant Position: Unknown |
20x |
1,000,000z | |
| Atk +30 P.Atk +5 _______________________ Refine Level +7: Increases Melee Physical Damage by 3%. _______________________ Refine Level +9: Increases Melee Physical Damage by additional 4%. _______________________ Refine Level +11: Increases Melee Physical Damage by additional 5%. _______________________ Type: Enchant Position: Unknown |
20x |
1,000,000z | |
| Atk +30 P.Atk +5 _______________________ Refine Level +7: Increases Ranged Physical Damage by 3%. _______________________ Refine Level +9: Increases Ranged Physical Damage by additional 4%. _______________________ Refine Level +11: Increases Ranged Physical Damage by additional 5%. _______________________ Type: Enchant Position: Unknown |
20x |
1,000,000z | |
| Atk +20 Critical +2 P.Atk +5 _______________________ Refine Level +7: Increases Critical Damage by 3%. _______________________ Refine Level +9: Increases Critical Damage by additional 4%. _______________________ Refine Level +11: Increases Critical Damage by additional 5%. _______________________ Type: Enchant Position: Unknown |
20x |
1,000,000z | |
| Matk +30 S.Matk +5 _______________________ Refine Level +7: Increases all property damage by 3%. _______________________ Refine Level +9: Increases all property damage by additional 4%. _______________________ Refine Level +11: Increases all property damage by additional 5%. _______________________ Type: Enchant Position: Unknown |
20x |
1,000,000z |
Perfect Enchant Slot 3
| Slot 3 Enchant | Description | Materials | Zeny |
| Atk +5% Atk +50 P.Atk +7 _______________________ Refine Level +7: Increases Melee Physical Damage by 5%. _______________________ Refine Level +9: Increases Melee Physical Damage by additional 5%. _______________________ [Bonus by Grade] [Grade D]: Increases Melee Physical Damage by 5%. _______________________ [Grade C]: Increases Melee Physical Damage by additional 5%. _______________________ [Grade B]: Increases Melee Physical Damage by additional 5%. _______________________ [Grade A]: Increases Melee Physical Damage by additional 5%. _______________________ Type: Enchant Position: Unknown |
30x |
2,000,000z | |
| Atk +5% Atk +50 P.Atk +7 _______________________ Refine Level +7: Increases Ranged Physical Damage by 5%. _______________________ Refine Level +9: Increases Ranged Physical Damage by additional 5%. _______________________ [Bonus by Grade] [Grade D]: Increases Ranged Physical Damage by 5%. _______________________ [Grade C]: Increases Ranged Physical Damage by additional 5%. _______________________ [Grade B]: Increases Ranged Physical Damage by additional 5%. _______________________ [Grade A]: Increases Ranged Physical Damage by additional 5%. _______________________ Type: Enchant Position: Unknown |
30x |
2,000,000z | |
| Atk +3% Atk +30 Critical +5 P.Atk +7 _______________________ Refine Level +7: Increases Critical Damage by 5%. _______________________ Refine Level +9: Increases Critical Damage by additional 5%. _______________________ [Bonus by Grade] [Grade D]: Increases Critical Damage by 5%. _______________________ [Grade C]: Increases Critical Damage by additional 5%. _______________________ [Grade B]: Increases Critical Damage by additional 5%. _______________________ [Grade A]: Increases Critical Damage by additional 5%. _______________________ Type: Enchant Position: Unknown |
30x |
2,000,000z | |
| Matk +5% Matk +50 S.Matk +7 _______________________ Refine Level +7: Increases Magical Damage with every element by 5%. _______________________ Refine Level +9: Increases Magical Damage with every element by additional 5%. _______________________ [Bonus by Grade] [Grade D]: Increases Magical Damage with every element by 5%. _______________________ [Grade C]: Increases Magical Damage with every element by additional 5%. _______________________ [Grade B]: Increases Magical Damage with every element by additional 5%. _______________________ [Grade A]: Increases Magical Damage with every element by additional 5%. _______________________ Type: Enchant Position: Unknown |
30x |
2,000,000z |
Perfect Enchant Slot 2
| Slot 2 Enchant | Description | Materials | Zeny |
| Atk +2% _______________________ Refine Level +7: Additional Atk +3% _______________________ Refine Level +9: Additional Atk +4% _______________________ Refine Level +11: P.Atk +3 _______________________ [Bonus by Grade] [Grade D]: Atk +2% _______________________ [Grade C]: Additional Atk +3% _______________________ [Grade B]: Additional Atk +4% _______________________ [Grade A]: P.Atk +5 _______________________ Type: Enchant Position: Unknown |
40x |
3,000,000z | |
| Matk +2% _______________________ Refine Level +7: Additional Matk +3% _______________________ Refine Level +9: Additional Matk +4% _______________________ Refine Level +11: S.Matk +3 _______________________ [Bonus by Grade] [Grade D]: Matk +2% _______________________ [Grade C]: Additional Matk +3% _______________________ [Grade B]: Additional Matk +4% _______________________ [Grade A]: S.Matk +5 _______________________ Type: Enchant Position: Unknown |
40x |
3,000,000z | |
| Decreases After Skill Delay by 3%. _______________________ Refine Level +7: Decreases After Skill Delay by additional 3%. _______________________ Refine Level +9: Decreases After Skill Delay by additional 2%. _______________________ Refine Level +11: Decreases After Skill Delay by additional 2%. _______________________ Type: Enchant Position: Unknown |
40x |
3,000,000z |
Garment Enchants
| Target Items | Slot Order | Minimum Requirements | Line Options | Reset Process | |
| Grade | Refine | ||||
| 4→3→2 | No Grade | 0 | allowed | No Reset | |
| 4→3→2 | No Grade | 0 | allowed | No Reset | |
Perfect Enchant Slot 4
| Slot 4 Enchant | Description | Materials | Zeny |
| Def +125 Res +15 _______________________ Refine Level +7: Def +25 Res +5 _______________________ Refine Level +9: Def +25 Res +5 _______________________ Refine Level +11: Def +50 Res +10 _______________________ Type: Enchant Position: Unknown |
20x |
1,000,000z | |
| Mdef +30 Mres +15 _______________________ Refine Level +7: Mdef +5 Mres +3 _______________________ Refine Level +9: Mdef +5 Mres +3 _______________________ Refine Level +11: Mdef +10 Mres +6 _______________________ Type: Enchant Position: Unknown |
20x |
1,000,000z |
Perfect Enchant Slot 3
| Slot 3 Enchant | Description | Materials | Zeny |
| Increases Attack Speed (decreases After Attack Delay by 5%). _______________________ Refine Level +7: Increases Attack Speed (decreases After Attack Delay by additional 5%). _______________________ Refine Level +9: Increases Attack Speed (decreases After Attack Delay by additional 5%). _______________________ Refine Level +11: Increases Attack Speed (decreases After Attack Delay by additional 10%). _______________________ Type: Enchant Position: Unknown |
30x |
2,000,000z | |
| Reduces variable casting time by 5%. _______________________ Refine Level +7: Reduces Variable Casting Time by additional 5%. _______________________ Refine Level +9: Reduces Variable Casting Time by additional 5%. _______________________ Refine Level +11: Reduces Variable Casting Time by additional 10%. _______________________ Type: Enchant Position: Unknown |
30x |
2,000,000z |
Perfect Enchant Slot 2
| Slot 2 Enchant | Description | Materials | Zeny |
| Increases Melee Physical Damage by 3%. _______________________ Refine Level +7: Increases Melee Physical Damage by additional 3%. _______________________ Refine Level +9: Increases Melee Physical Damage by additional 3%. _______________________ [Bonus by Grade] [Grade D]: Increases Melee Physical Damage by 3%. Perfect Hit +5 _______________________ [Grade C]: Increases Melee Physical Damage by additional 3%. Additional Perfect Hit +6 _______________________ [Grade B]: Increases Melee Physical Damage by additional 5%. Additional Perfect Hit +7 _______________________ [Grade A]: Increases Melee Physical Damage by additional 5%. Additional Perfect Hit +8 _______________________ Type: Enchant Position: Unknown |
40x |
3,000,000z | |
| Increases Ranged Physical Damage by 3%. _______________________ Refine Level +7: Increases Ranged Physical Damage by additional 3%. _______________________ Refine Level +9: Increases Ranged Physical Damage by additional 3%. _______________________ [Bonus by Grade] [Grade D]: Increases Ranged Physical Damage by 3%. Perfect Hit +5 _______________________ [Grade C]: Increases Ranged Physical Damage by additional 3%. Additional Perfect Hit +6 _______________________ [Grade B]: Increases Ranged Physical Damage by additional 5%. Additional Perfect Hit +7 _______________________ [Grade A]: Increases Ranged Physical Damage by additional 5%. Additional Perfect Hit +8 _______________________ Type: Enchant Position: Unknown |
40x |
3,000,000z | |
| Increases Critical Damage by 3%. _______________________ Refine Level +7: Increases Critical Damage by additional 3%. _______________________ Refine Level +9: Increases Critical Damage by additional 3%. _______________________ [Bonus by Grade] [Grade D]: Critical +2 Increases Critical Damage by additional 3%. _______________________ [Grade C]: Additional Critical +3 Increases Critical Damage by additional 3%. _______________________ [Grade B]: Additional Critical +5 Increases Critical Damage by additional 5%. _______________________ [Grade A]: Increases Critical Damage by additional 5% C.Rate +5 _______________________ Type: Enchant Position: Unknown |
40x |
3,000,000z | |
| Increases Magical Damage with every element by 3%. _______________________ Refine Level +7: Increases Magical Damage with every element by additional 3%. _______________________ Refine Level +9: Increases Magical Damage with every element by additional 3%. _______________________ [Bonus by Grade] [Grade D]: Increases Magical Damage with every element by additional 3% MaxSP +2% _______________________ [Grade C]: Increases Magical Damage with every element by 3% Additional MaxSP +3% _______________________ [Grade B]: Increases Magical Damage with every element by additional 5% Additional MaxSP +4% _______________________ [Grade A]: Increases Magical Damage with every element by additional 5% Additional MaxSP +5% _______________________ Type: Enchant Position: Unknown |
40x 40x |
3,000,000z | |
| Reduces damage taken from all property and all size enemies by 3%. _______________________ Refine Level +7: Reduces damage taken from all property enemies by additional 4%. _______________________ Refine Level +9: Reduces damage taken from all size enemies by additional 4%. _______________________ Refine Level +11: Reduces damage taken from all race monsters (except players) by 7%. _______________________ Type: Enchant Position: Unknown |
40x 40x |
3,000,000z |
Footgear Enchants
| Target Items | Slot Order | Minimum Requirements | Line Options | Reset Process | |
| Grade | Refine | ||||
| 4→3→2 | No Grade | 0 | allowed | No Reset | |
| 4→3→2 | No Grade | 0 | allowed | No Reset | |
Perfect Enchant Slot 4
| Slot 4 Enchant | Description | Materials | Zeny |
| MaxHP +4000 _______________________ Refine Level +7: MaxHP +3% _______________________ Refine Level +9: Additional MaxHP +5% _______________________ Refine Level +11: Additional MaxHP +7% _______________________ Type: Enchant Position: Unknown |
20x |
1,000,000z | |
| MaxSP +600 _______________________ Refine Level +7: MaxSP +3% _______________________ Refine Level +9: Additional MaxSP +5% _______________________ Refine Level +11: Additional MaxSP +7% _______________________ Type: Enchant Position: Unknown |
20x 20x |
1,000,000z | |
| Atk +10 _______________________ Refine Level +7: Additional Atk +10 _______________________ Refine Level +9: Additional Atk +10 _______________________ Refine Level +11: Additional Atk +20 Atk +5% _______________________ Type: Enchant Position: Unknown |
20x 20x |
1,000,000z | |
| Matk +10 _______________________ Refine Level +7: Additional Matk +10 _______________________ Refine Level +9: Additional Matk +10 _______________________ Refine Level +11: Additional Matk +20 Matk +5% _______________________ Type: Enchant Position: Unknown |
20x 20x |
1,000,000z |
Perfect Enchant Slot 3
| Slot 3 Enchant | Description | Materials | Zeny |
| Increases Physical Damage against enemies of all sizes by 5%. _______________________ Refine Level +7: Increases Physical Damage against enemies of all sizes by additional 3%. _______________________ Refine Level +9: Increases Physical Damage against enemies of all sizes by additional 2%. _______________________ Refine Level +11: Increases Physical Damage against enemies of all sizes by additional 10%. _______________________ Type: Enchant Position: Unknown |
30x |
2,000,000z | |
| Increases Magical Damage against enemies of all sizes by 5%. _______________________ Refine Level +7: Increases Magical Damage against enemies of all sizes by additional 3%. _______________________ Refine Level +9: Increases Magical Damage against enemies of all sizes by additional 2%. _______________________ Refine Level +11: Increases Magical Damage against enemies of all sizes by additional 10%. _______________________ Type: Enchant Position: Unknown |
30x |
2,000,000z |
Perfect Enchant Slot 2
| Slot 2 Enchant | Description | Materials | Zeny |
| P.Atk +5 _______________________ [Bonus by Grade] [Grade D]: Increases Melee Physical Damage by 5%. _______________________ [Grade C]: Increases Melee Physical Damage by additional 5%. _______________________ [Grade B]: Atk +2% P.Atk +5 _______________________ [Grade A]: Additional Atk +3% Additional P.Atk +5 _______________________ Type: Enchant Position: Unknown |
40x |
3,000,000z | |
| P.Atk +5 _______________________ [Bonus by Grade] [Grade D]: Increases Ranged Physical Damage by 5%. _______________________ [Grade C]: Increases Ranged Physical Damage by additional 5%. _______________________ [Grade B]: Atk +2% P.Atk +5 _______________________ [Grade A]: Additional Atk +3% Additional P.Atk +5 _______________________ Type: Enchant Position: Unknown |
40x |
3,000,000z | |
| P.Atk +5 _______________________ [Bonus by Grade] [Grade D]: Increases Critical Damage by 5%. _______________________ [Grade C]: Increases Critical Damage by additional 5%. _______________________ [Grade B]: Atk +2% C.Rate +3 _______________________ [Grade A]: Additional Atk +3% Additional C.Rate +5 _______________________ Type: Enchant Position: Unknown |
40x |
3,000,000z | |
| S.Matk +5 _______________________ [Bonus by Grade] [Grade D]: Increases Magical Damage with every element by 5%. _______________________ [Grade C]: Increases Magical Damage with every element by additional 5%. _______________________ [Grade B]: Matk +2% S.Matk +5 _______________________ [Grade A]: Additional Matk +3% Additional S.Matk +5 _______________________ Type: Enchant Position: Unknown |
40x 40x |
3,000,000z |
Accessory Enchants
| Target Items | Slot Order | Minimum Requirements | Line Options | Reset Process | |
| Grade | Refine | ||||
| 4→3→2 | No Grade | 0 | allowed | No Reset | |
| 4→3→2 | No Grade | 0 | allowed | No Reset | |
Perfect Enchant Slot 4
| Slot 4 Enchant | Description | Materials | Zeny |
| Atk +25 Increases Melee Physical Damage by 12%. _______________________ Type: Enchant Position: Unknown |
35x |
1,500,000z | |
| Atk +25 Increases Ranged Physical Damage by 12%. _______________________ Type: Enchant Position: Unknown |
35x |
1,500,000z | |
| Critical +8 Increases Critical Damage by 12%. _______________________ Type: Enchant Position: Unknown |
35x |
1,500,000z | |
| Matk +25 Increases Magical Damage with every element by 12%. _______________________ Type: Enchant Position: Unknown |
35x |
1,500,000z |
Perfect Enchant Slot 3
| Slot 3 Enchant | Description | Materials | Zeny |
| Atk +35 Increases Melee Physical Damage by 15%. _______________________ Type: Enchant Position: Unknown |
45x |
3,000,000z | |
| Atk +35 Increases Ranged Physical Damage by 15%. _______________________ Type: Enchant Position: Unknown |
45x |
3,000,000z | |
| Critical +12 Increases Critical Damage by 15%. _______________________ Type: Enchant Position: Unknown |
45x |
3,000,000z | |
| Matk +35 Increases Magical Damage with every element by 15%. _______________________ Type: Enchant Position: Unknown |
45x |
3,000,000z |
Perfect Enchant Slot 2
| Slot 2 Enchant | Description | Materials | Zeny |
| P.Atk +5 Increases Physical Damage against enemies of every element by 5%. _______________________ Type: Enchant Position: Unknown |
65x |
4,500,000z | |
| S.Matk +5 Increases Magical Damage against enemies of every element by 5%. _______________________ Type: Enchant Position: Unknown |
65x |
4,500,000z |
Übersicht Yorscalp
Kronen
Kronen sind beim NPC Wigner Merchant Operato unter (mbase_in 231, 122) erhältlich.

Für eine Krone benötigst du folgende Gegenstände:
5x ![]() Corrupted Fruit (103523)
Corrupted Fruit (103523)
100x ![]() Spirit of Yorscalp (1001836)
Spirit of Yorscalp (1001836)
30x ![]() Symbol of Curse (1001835)
Symbol of Curse (1001835)
Overview Yorscalp
Crowns
Crowns are obtainable at NPC Wigner Merchant Operato at (mbase_in 231, 122).

You need for one crown following items:
5x ![]() Corrupted Fruit (103523)
Corrupted Fruit (103523)
100x ![]() Spirit of Yorscalp (1001836)
Spirit of Yorscalp (1001836)
30x ![]() Symbol of Curse (1001835)
Symbol of Curse (1001835)
The crown of an executor who worships the snake god Jormungand. _______________________ For each 2 Refine Levels: MaxHP +300 MaxSP +50 _______________________ For each 3 Refine Levels: Increases Physical Damage against enemies of every size by 5%. _______________________ For each 4 Refine Levels: Atk +5% _______________________ Refine Level +7: Increases Physical Damage by 10%. _______________________ Refine Level +9: P.Atk +8 _______________________ Refine Level +10: Increases Attack Speed (decreases After Attack Delay by 10%). _______________________ Refine Level +11: Critical +10 Decreases Fixed Casting Time by 0.5 seconds. _______________________ When equipped with Yorscalp Armor: MaxHP +10% _______________________ When equipped with Yorscalp Manteau: Decreases After Skill Delay by 10%. _______________________ When equipped with Yorscalp Boots: Increases Physical Damage by additional 10%. _______________________ When equipped with Yorscalp Ring: P.Atk +10 _______________________ When equipped with Yorscalp Glove: Atk +10% _______________________ [Bonus by Grade] [Grade D]: P.Atk +7 _______________________ [Grade C]: Ignores 5% physical resistance of monsters of every race, except Players. _______________________ [Grade B]: Increases Physical Damage against all races, except Players, by 15%. _______________________ [Grade A]: Ignores additional 5% physical resistance of monsters of every race, except Players. _______________________ Type: Armor Position: Head Top Defense: 50 Armor Level: 2 Refinable / Gradable Required Level: 250 |
A circlet of a judge who worships the snake god Jormungand. _______________________ For each 2 Refine Levels: MaxHP +300 MaxSP +50 _______________________ For each 3 Refine Levels: Increases Magical Damage against enemies of every size by 5%. _______________________ For each 4 Refine Levels: Matk +5% _______________________ Refine Level +7: Increases Magical Damage with every element by 10%. _______________________ Refine Level +9: S.Matk +8 _______________________ Refine Level +10: Increases Attack Speed (decreases After Attack Delay by 10%). _______________________ Refine Level +11: Decreases Variable Casting Time by 10%. Decreases Fixed Casting Time by 0.5 seconds. _______________________ When equipped with Yorscalp Robe: MaxHP +10% _______________________ When equipped with Yorscalp Muffler: Decreases After Skill Delay by 10%. _______________________ When equipped with Yorscalp Shoes: Increases Magical Damage with every element by additional 10%. _______________________ When equipped with Yorscalp Earring: S.Matk +10 _______________________ When equipped with Yorscalp Necklace: Matk +10% _______________________ [Bonus by Grade] [Grade D]: S.Matk +7 _______________________ [Grade C]: Ignores magical resistance of enemies of all race, except Players, by 5%. _______________________ [Grade B]: Increases Magical Damage against all races, except Players, by 15%. _______________________ [Grade A]: Additionally ignores magical resistance of enemies of all race, except Players, by 5%. _______________________ Type: Armor Position: Head Top Defense: 50 Armor Level: 2 Refinable / Gradable Required Level: 250 |
Equipment
Armor whose power is amplified by the snake's curse. _______________________ Atk +130 _______________________ For every 2 Refine Levels: Atk +20 Def +20 _______________________ Refine Level +7: Increases Melee and Ranged Physical Damage by 5%. _______________________ Refine Level +9: P.Atk +5 Decreases Variable Casting Time by 10%. _______________________ Refine Level +10: Increases Melee and Ranged Physical Damage by additional 10%. _______________________ Refine Level +12: Decreases After Skill Delay by 5%. _______________________ When equipped with Yorscalp Manteau: Increases Physical Damage with every element by 15%. _______________________ When equipped with Yorscalp Manteau and Yorscalp Boots: Increases Physical Damage against every race, except Players, by 15%. _______________________ [Bonus by Grade] [Grade D] POW +5 CON +5 Decreases After Skill Delay by 5%. _______________________ [Grade C] Atk +5% P.Atk +3 _______________________ [Grade B] Additional POW +5 CON +5 P.Atk +3 _______________________ [Grade A] Additional Atk +5% P.Atk +5 _______________________ Type: Armor Position: Armor Defense: 198 Armor Level: 2 Refinable / Gradable Weight: 240 Required Level: 250 |
A robe whose strength is amplified by the snake's curse. _______________________ Matk +130 _______________________ For every 2 Refine Levels: Matk +20 Def +20 _______________________ Refine Level +7: Increases Magical Damage with every element by 5%. _______________________ Refine Level +9: S.Matk +5 Decreases Variable Casting Time by 10%. _______________________ Refine Level +10: Increases Magical Damage with every element by additional 10%. _______________________ Refine Level +12: Decreases After Skill Delay by 5%. _______________________ When equipped with Yorscalp Muffler: Increases Magical Damage against enemies of every element by 15%. _______________________ When equipped with Yorscalp Muffler and Yorscalp Shoes: Increases Magical Damage against every race, except Players, by 15%. _______________________ [Bonus by Grade] [Grade D] SPL +5 CON +5 Decreases After Skill Delay by 5%. _______________________ [Grade C] Matk +5% S.Matk +3 _______________________ [Grade B] Additional SPL +5 CON +5 S.Matk +3 _______________________ [Grade A] Additional Matk +5% S.Matk +5 _______________________ Type: Armor Position: Armor Defense: 130 Armor Level: 2 Refinable / Gradable Weight: 120 Required Level: 250 |
Boots whose strength is amplified by the snake's curse. _______________________ MaxHP +10% MaxSP +4% _______________________ For every 2 Refine Levels: MaxSP +1% Def +15 _______________________ Refine Level +7: Increased Attack Speed (decreases After Attack Delay by 10%). _______________________ Refine Level +9: P.Atk +5 increases melee / long ranged physical damage 5%. _______________________ Refine Level +10: Def +100 Atk +20 _______________________ Refine Level +12: Increases Melee and Ranged Physical Damage by additional 8%. _______________________ When equipped with Yorscalp Armor: Increases Physical Damage with every element by 15%. _______________________ [Bonus by Grade] [Grade D] POW +2 CON +2 Atk +10 _______________________ [Grade C] Atk +4% P.Atk +4 _______________________ [Grade B] Decreases Fixed Casting Time by 1 seconds. _______________________ [Grade A] Additional Atk +5% P.Atk +5 _______________________ Type: Armor Position: Shoes Defense: 128 Armor Level: 2 Refinable / Gradable Weight: 200 Required Level: 250 |
Shoes whose strength is amplified by the snake's curse. _______________________ MaxHP +10% MaxSP +4% _______________________ For every 2 Refine Levels: MaxSP +1% Def +15 _______________________ Refine Level +7: Increased Attack Speed (decreases After Attack Delay by 10%). _______________________ Refine Level +9: S.Matk +5 Increases Magical Damage with every element 5%. _______________________ Refine Level +10: Def +100 Matk +20 _______________________ Refine Level +12: Increases Magical Damage with every element by additional 8%. _______________________ When equipped with Yorscalp Robe: Increases Magical Damage against enemies of every element by 15%. _______________________ [Bonus by Grade] [Grade D] SPL +2 CON +2 Matk +10 _______________________ [Grade C] Matk +4% S.Matk +4 _______________________ [Grade B] Decreases Fixed Casting Time by 1 seconds. _______________________ [Grade A] Additional Matk +5% S.Matk +5 _______________________ Type: Armor Position: Shoes Defense: 80 Armor Level: 2 Refinable / Gradable Weight: 100 Required Level: 250 |
Manteau whose strength is amplified by the snake's curse. _______________________ POW +5 CON +5 _______________________ For every 2 Refine Levels: Atk +1% Def +10 _______________________ Refine Level +7: Decreases After Skill Delay by 5%. _______________________ Refine Level +9: Increases Melee and Ranged Physical Damage by 10%. _______________________ Refine Level +10: P.Atk +3 Atk +50 _______________________ Refine Level +12: Decreases After Skill Delay by additional 5%. _______________________ When equipped with Yorscalp Boots: increases physical damage against all race monsters (except players) by 15%. _______________________ [Bonus by Grade] [Grade D] Atk +3% P.Atk +3 _______________________ [Grade C] Additional P.Atk +5 _______________________ [Grade B] Additional Atk +3% P.Atk +5 _______________________ [Grade A] Additional Atk +4% P.Atk +7 Decreases After Skill Delay by 5%. _______________________ Type: Armor Position: Garment Defense: 142 Armor Level: 2 Refinable / Gradable Weight: 160 Required Level: 250 |
Muffler whose strength is amplified by the snake's curse. _______________________ SPL +5 CON +5 _______________________ For every 2 Refine Levels: Matk +1% Def +15 _______________________ Refine Level +7: Decreases After Skill Delay by 5%. _______________________ Refine Level +9: Increases Magical Damage with every element by 10%. _______________________ Refine Level +10: S.Matk +3 Matk +50 _______________________ Refine Level +12: Decreases After Skill Delay by additional 5%. _______________________ When equipped with Yorscalp Shoes: Increases Magical Damage against every race, except Players, by 15%. _______________________ [Bonus by Grade] [Grade D] Matk +3% S.Matk +3 _______________________ [Grade C] Additional S.Matk +5 _______________________ [Grade B] Additional Matk +3% S.Matk +5 _______________________ [Grade A] Additional Matk +4% S.Matk +7 Decreases After Skill Delay by 5%. _______________________ Type: Armor Position: Garment Defense: 90 Armor Level: 2 Refinable / Gradable Weight: 80 Required Level: 250 |
A ring whose power is amplified by the snake's curse. _______________________ Atk +10% P.Atk +5 Increased Attack Speed (decreases After Attack Delay by 10%). _______________________ When equipped with Yorscalp Glove: Reduces Variable Casting Time by 10%. Decreases After Cast Delay by 10%. _______________________ Type: Armor Position: Left Accessory Armor Level: 2 Weight: 10 Required Level: 250 |
A glove whose power is amplified by the snake's curse. _______________________ Atk +10% P.Atk +10 Increased Attack Speed (decreases After Attack Delay by 5%). Reduces Variable Casting Time by 5%. _______________________ Type: Armor Position: Right Accessory Armor Level: 2 Weight: 10 Required Level: 250 |
An earring whose power is amplified by the snake's curse. _______________________ Matk +10% S.Matk +5 Increased Attack Speed (decreases After Attack Delay by 10%). _______________________ When equipped with Yorscalp Necklace: Reduces Variable Casting Time by 10%. Decreases After Cast Delay by 10%. _______________________ Type: Armor Position: Left Accessory Armor Level: 2 Weight: 10 Required Level: 250 |
A necklace whose power is amplified by the snake's curse. _______________________ Matk +10% S.Matk +10 Increased Attack Speed (decreases After Attack Delay by 5%). Reduces Variable Casting Time by 5%. _______________________ Type: Armor Position: Right Accessory Armor Level: 2 Weight: 10 Required Level: 250 |
Enchants for Yorscalp Gear are the same as for Gaebolg, follow this link: Gaebolg/Yorscalp Enchants
Crown Enchants
| Target Items | Slot Order | Minimum Requirements | Line Options | Reset Process | Reset Chance | |
| Grade | Refine | |||||
| 3→2→1 | No Grade | 0 | allowed | 20x 20x 20x |
100%, no fail | |
Normal Enchants
Perfect Enchants - Slot 1
| Slot 1 Enchant | Enchantment Process | |
|---|---|---|
| Materials | Zeny | |
| 20x 100x |
5,000,000z | |
| 20x 100x |
5,000,000z | |
Cards
Atk +8% _______________________ Refine Level +7: Increases Physical Damage against enemies of Brute race by 12%. _______________________ Refine Level +9: Increases Physical Damage against enemies of Brute race by additional 8%. _______________________ Type: Card Compound on: Shoes Weight: 1 |
Increases Physical Damage against enemies of Small size by 10%. _______________________ When Weapon Level of compounded equipment is 5: Increases Physical Damage against enemies of Small size by additional 10%. _______________________ Type: Card Compound on: Right Hand Weight: 1 |
Increases Magical Damage against enemies of Small size by 10%. _______________________ When Weapon Level of compounded equipment is 5: Increases Magical Damage against enemies of Small size by additional 10%. _______________________ Type: Card Compound on: Right Hand Weight: 1 |
Matk +5% _______________________ Refine Level +7: Increases Magical Damage against enemies of Undead element by 10%. _______________________ Refine Level +9: Increases Magical Damage against enemies of Undead element by additional 7%. _______________________ Type: Card Compound on: Shoes Weight: 1 |
Atk +8% _______________________ Refine Level +7: Increases Physical Damage against monsters of Insect race by 12%. _______________________ Refine Level +9: Increases Physical Damage against monsters of Insect race by additional 8%. _______________________ Type: Card Compound on: Shoes Weight: 1 | |||||||||||||||
Atk +8% _______________________ Refine Level +7: Increases Physical Damage against monsters of Demon race by 12%. _______________________ Refine Level +9: Increases Physical Damage against monsters of Demon race by additional 8%. _______________________ Type: Card Compound on: Shoes Weight: 1 |
Atk +8%. _______________________ Refine Level +7: Increases Physical Damage against enemies of Undead element by 12%. _______________________ Refine Level +9: Increases Physical Damage against enemies of Undead element by additional 8%. _______________________ Type: Card Compound on: Shoes Weight: 1 |
Matk +5%. _______________________ Refine Level +7: Increases Magical Damage against monsters of Formless race by 10%. _______________________ Refine Level +9: Increases Magical Damage against monsters of Formless race by additional 7%. _______________________ Type: Card Compound on: Shoes Weight: 1 |
Increases SP Consumption by 10%. _______________________ For each Refine Level: Increases Magical Damage with Water element by 3%. _______________________ Type: Card Compound on: Shoes Weight: 1 |
Atk +8%. _______________________ Refine Level +7: Increases Physical Damage against monsters of Dragon race by 12%. _______________________ Refine Level +9: Increases Physical Damage against monsters of Dragon race by additional 8%. _______________________ Type: Card Compound on: Shoes Weight: 1 | |||||||||||||||
Flee +30 Critical -15 Increases Melee Physical Damage by 10%. _______________________ For each 3 Refine Levels: Increases Melee Physical Damage by 7%. _______________________ When equipped with Yoscopus Guardian Card or Yoscopus Sorcerer Card: Increases Melee Physical Damage by 15%. Increases Physical Damage against enemies of every element by 15%. _______________________ Type: Card Compound on: Garment Weight: 1 |
Atk +8% _______________________ Refine Level +7: Increases Physical Damage against monsters of Formless race by 12%. _______________________ Refine Level +9: Increases Physical Damage against monsters of Formless race by additional 8%. _______________________ Type: Card Compound on: Shoes Weight: 1 |
Flee +30 Critical -15 Increases Ranged Physical Damage by 10%. _______________________ For each 3 Refine Levels: Increases Ranged Physical Damage by 7%. _______________________ When equipped with Yoscopus Sorcerer Card or Yoscopus Guardian Card: Increases Ranged Physical Damage by 15%. Increases Physical Damage against enemies of every element by 15%. _______________________ Type: Card Compound on: Garment Weight: 1 |
Matk +5%. _______________________ Refine Level +7: Increases Magical Damage against monsters of Dragon race by 10%. _______________________ Refine Level +9: Increases Magical Damage against monsters of Dragon race by additional 7%. _______________________ Type: Card Compound on: Shoes Weight: 1 |
Increases Physical Damage against enemies of Medium and Large size by 10%. _______________________ When Weapon Level of compounded equipment is 5: Increases Physical Damage against enemies of Medium and Large size by additional 10%. _______________________ When equipped with Scalleg Card: Increases Physical Damage against enemies of all sizes by 15%. When Weapon Level of compounded equipment is 5 and Two-Handed class weapon: P.Atk +5 Increases Physical Damage against enemies of all sizes by additional 25%. _______________________ Type: Card Compound on: Right Hand Weight: 1 | |||||||||||||||
Increases Magical Damage against enemies of Medium and Large size by 10%. _______________________ When Weapon Level of compounded equipment is 5: Increases Magical Damage against enemies of Medium and Large size by additional 10%. _______________________ When equipped with Velelling Card: Increases Magical Damage against enemies of all sizes by 15%. When Weapon Level of compounded equipment is 5 and Two-Handed class weapon: S.Matk +5 Increases Magical Damage against enemies of all sizes by additional 25%. _______________________ Type: Card Compound on: Right Hand Weight: 1 |
Flee +30 Increases Variable Casting Time by 15%. Increases Magical Damage with Fire, Neutral, Holy, Shadow, and Ghost element by 10%. _______________________ For each 3 Refine Levels: Increases Magical Damage with Fire, Neutral, Holy, Shadow, and Ghost element by 7%. _______________________ When equipped with Yortus Conjurator Card: Increases Magical Damage with Fire, Neutral, Holy, Shadow, and Ghost element by 15%. Increases Magical Damage against every element by 15%. _______________________ Type: Card Compound on: Garment Weight: 1 |
Flee +30 Increases Variable Casting Time by 15%. Increases Magical Damage with Wind, Water, Earth, Poison, and Undead element by 10%. _______________________ For each 3 Refine Levels: Increases Magical Damage with Wind, Water, Earth, Poison, and Undead element by 7%. _______________________ When equipped with Yortus Conjurator Card: Increases Magical Damage with Wind, Water, Earth, Poison, and Undead element by 15%. Increases Magical Damage against every element by 15%. _______________________ Type: Card Compound on: Garment Weight: 1 |
Critical +5 Increases Critical Damage by 12%. _______________________ Refine Level +9: Additional Critical +5 _______________________ Refine Level +11: Additional Critical +6 _______________________ Type: Card Compound on: Armor Weight: 1 |
P.Atk +10 MaxHP -7% Flee +30 _______________________ Increases Atk by 2% for every 10 base STR. _______________________ Decreases Critical by 3 for every 10 base LUK. _______________________ Type: Card Compound on: Armor Weight: 1 | |||||||||||||||
P.Atk +10 MaxHP -7% Flee +30 _______________________ Increases Atk by 2% for every 10 base DEX. _______________________ Decreases Critical by 3 for every 10 base LUK. _______________________ Type: Card Compound on: Armor Weight: 1 |
Critical +5 Reduces Variable Casting Time by 7%. _______________________ Type: Card Compound on: Right Accessory Weight: 1 |
Critical +5 Reduces Variable Casting Time by 7%. _______________________ When equipped with Yorker Worker Card: C.Rate +2 Increases Critical Damage by 12%. _______________________ Type: Card Compound on: Left Accessory Weight: 1 |
MaxHP +7% _______________________ Refine Level +10: Additional MaxHP +3% _______________________ Refine Level +14: Additional MaxHP +2% _______________________ Type: Card Compound on: Head Top Weight: 1 |
S.Matk +10 MaxHP -7% Flee +30 _______________________ Increases Matk by 2% for every 10 base INT. _______________________ Increases SP Consumption by 3% for every 10 base DEX. _______________________ Type: Card Compound on: Armor Weight: 1 | |||||||||||||||
Cri + 25, C.Rate + 5, MaxSP - 15%. Past Heroes CardsYou can get the card fragments needed to craft the cards using
|
