Mango's guide to leveling and farming with SA: Difference between revisions
No edit summary |
|||
| (12 intermediate revisions by the same user not shown) | |||
| Line 1: | Line 1: | ||
[[Category:Soul Ascetic]] | |||
== Introduction == | == Introduction == | ||
Hello there! I've been playing Soul Ascetic for a while now, and I find it very fun and slighty overpowered as a farming character, so I'd like to share this guide with you all in the hopes of addressing some questions players have about when to farm what. | Hello there! I've been playing Soul Ascetic for a while now, and I find it very fun and slighty overpowered as a farming character, so I'd like to share this guide with you all in the hopes of addressing some questions players have about when to farm what. | ||
| Line 6: | Line 7: | ||
This won't be a comprehensive guide about the class, at least not for the time being, but let's hope you find the information in here useful and it helps you progress smoothly and without wasting too much time. | This won't be a comprehensive guide about the class, at least not for the time being, but let's hope you find the information in here useful and it helps you progress smoothly and without wasting too much time. | ||
== Leveling | == Leveling == | ||
*'''Important note:''' Please remember that your EXP book doesn't consume time while you're in a town, and that Main Office and Eden are buildings inside of a town and the book '''will consume time while inside a building'''. So don't waste time inside Main Office or Eden while you have a book running. This applies to bubblegums too, but that's not important for leveling. All your tinkering with stat point and skill point allocation should take place in a town, so you don't waste precious exp book time. | *'''Important note:''' Please remember that your EXP book doesn't consume time while you're in a town, and that Main Office and Eden are buildings inside of a town and the book '''will consume time while inside a building'''. So don't waste time inside Main Office or Eden while you have a book running. This applies to bubblegums too, but that's not important for leveling. All your tinkering with stat point and skill point allocation should take place in a town, so you don't waste precious exp book time. | ||
| Line 26: | Line 27: | ||
* Do Eden Board quests for Gefenia dungeon. Gefenia level 1 is directly accessible from the warper and it's one of the fastest methods to get a good amount of Eden Coins at this time. I recommend having @go eden bound to a hotkey combination through ALT+M to go back fast. Use Holy Element (lvl 7 Mild Wind). The Abysmal Knight Quest is in the 100-110 board, and the Incubus/Succubus one is in the 120-140. If you die, just go back and keep farming. Using {{#skill:463}} will keep you alive in Gefenia pretty easily. Just mind your mana and go back to use the healer when needed. | * Do Eden Board quests for Gefenia dungeon. Gefenia level 1 is directly accessible from the warper and it's one of the fastest methods to get a good amount of Eden Coins at this time. I recommend having @go eden bound to a hotkey combination through ALT+M to go back fast. Use Holy Element (lvl 7 Mild Wind). The Abysmal Knight Quest is in the 100-110 board, and the Incubus/Succubus one is in the 120-140. If you die, just go back and keep farming. Using {{#skill:463}} will keep you alive in Gefenia pretty easily. Just mind your mana and go back to use the healer when needed. | ||
* Notably, Gefenia is also a great spot to grab some early Zeny. For now, just run around with @al 100, looting everything. Just sell everything to NPC, except Eluniums, Oridecons, Eden Coins and cards. | * Notably, Gefenia is also a great spot to grab some early Zeny. For now, just run around with @al 100, looting everything. Just sell everything to NPC, except Eluniums, Oridecons, Eden Coins and cards. You can put the items you don't want to sell in the Favourites tab in your inventory, and use the NPC sale lock button that appears in the lower part of the Favourites Tab, to avoid having them show in the sell to NPC window. This is very useful to avoid selling important items, so keep it in mind. | ||
* | * Once you're done with Gefenia at lvl 150, grab your staff for 10 {{#item:25223}} from Labraham at {{#navi:moc_para01|108|83}}. It's the {{#item:640025}}. | ||
* From 150 to 180, get the Illusion of Vampire quest from the Daily Hunts NPC you can find pretty much anywhere. Make sure it's a Town, so you don't waste Exp Book time while taking and delivering the quest. You'll need {{#skill:2604}}, {{#skill:2596}} and {{#skill:2607}} maxed to farm comfortably here. | * From 150 to 180, get the Illusion of Vampire quest from the Daily Hunts NPC you can find pretty much anywhere. Make sure it's a Town, so you don't waste Exp Book time while taking and delivering the quest. You'll need {{#skill:2604}}, {{#skill:2596}}and {{#skill:2607}} maxed to farm comfortably here. To make it even easier, use a {{#item:14534}}, {{#item:23203}} and {{#item:23204}}. You can get all of those for 9 coins from the Eden Vending Machine at Eden, near the board quests. | ||
* From 180 to 200 it takes aproximately 1 minute. You just have to use the @ws command to check who sells Thanatos Fragments, buy 10 of each, and complete the quest at the Daily Hunts NPC. These are the items: {{#item:7436}}, {{#item:7437}}, {{#item:7438}} and {{#item:7439}}. | * From 180 to 200 it takes aproximately 1 minute. You just have to use the @ws command to check who sells Thanatos Fragments, buy 10 of each, and complete the quest at the Daily Hunts NPC. These are the items: {{#item:7436}}, {{#item:7437}}, {{#item:7438}} and {{#item:7439}}. | ||
| Line 35: | Line 36: | ||
[https://www.youtube.com/watch?v=%20ePVftN7kN4 Video Leveling Guide] | [https://www.youtube.com/watch?v=%20ePVftN7kN4 Video Leveling Guide] | ||
[[File:SR Skill Tree.jpg|none|thumb|Soul Reaper Skills]] | |||
'''Soul Ascetic:''' | |||
* | * At this point, your exp book should be about to expire. Try to get in another Illusion of Vampire quest, so you get enough skill points to max {{#skill:5429}}. Once you get it, your next priority is leveling to 210 using this new skill. Dump all your trait points into SPL and you'll see that you're easily doing double the damage you were doing before, and now in a big area. You can try Illusion of Teddy Bear until 210. The rest of your leveling will happen as you farm to improve your gear, so that's it for this section. | ||
== | == Skills == | ||
=== Important skills breakdown === | |||
=== Skill trees === | |||
{| class="wikitable" | |||
|+ | |||
!Class | |||
!Tree | |||
!Comments | |||
|- | |||
!Taekwon | |||
![[File:Taekwon skills.png|none|thumb]] | |||
!You can keep Sprint at 9 if you want | |||
|- | |||
|'''Soul Linker''' | |||
|[[File:SL Tree.png|none|thumb]] | |||
|Level your Ka skills and get whatever spirit skills you want. Bard spirit is useful, the rest are a bit outdated nowadays. | |||
|- | |||
|'''Soul Reaper''' | |||
|[[File:SR Tree.png|none|thumb]] | |||
|You can keep Soul Revolution low and use the extra point to level Sprint, or not. | |||
|- | |||
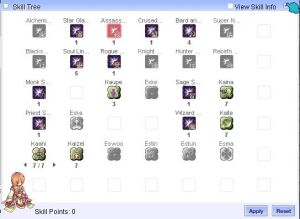
|'''Soul Ascetic''' | |||
|[[File:SA Skill.png|none|thumb]] | |||
|I prefer to spend my last 4 points in Totem of Tutelary for extra sustain, but you can level Talisman of Warrior if you tend to party a lot. | |||
|} | |||
== Gear and farming progression == | |||
Mage classes gear progression is already well covered in several guides, so in this guide I'll just give you my idea of what's best to get at every step, with the goal of getting the most bang for your buck at every turn and farming efficiently. Keep in mind that farming efficiently requires the use of {{#item:12264}}, so you'll need to get your hands on {{#item:25223}}early on. Gefenia and Old Thanatos are good places to get some, along with some very important early zeny. | |||
=== Earlygame === | === Earlygame === | ||
This is | ==== Get yourself a {{#item:550069}} ==== | ||
Enchant it with {{#item:311343}}, {{#item:311353}}, {{#item:311351}} and {{#item:311349}}'''.''' You won't be able to farm this yourself yet, but use the #trade channel to purchase one from players. Without upgrades, it's really cheap to make (should be around 3-4m). At +9 it will cost around 10m to 15m. This weapon will last you until the late midgame, so it's a great investment. Farm zeny in Gefenia or Thanatos while getting Eden Coins if you don't have enough. | |||
An easy thing to farm at this point is {{#item:985}}. The best option is to farm Istana Cave in Dewata, but you can also get a lot by converting {{#item:6223}} that you get from Illusion of Vampire, by talking to Vurewell at @go 50. Converting carries a fee, so it will eat a bit of your profit margin. | |||
==== | ==== Improve your Fixed Cast Time ==== | ||
This is such a big QoL upgrade that no matter what I say it's going to be an understatement. Keep in mind you need to be level 230 to use the recommended shoes, so you might want to dedicate some time to farming Illusion of Twins or Illusion of Labyrinth first, as suggested next. | |||
You're gonna need to get shoes with 1s FCT reduction. My recommendation nowadays is to buy {{#item:450268}} from the player market. You'll usually find a lot of them. If you can get a +10 pair for around 5m to 8m, that's ideal. If not, get at least +9. After you got the shoes, you'll need a friendly player that has already done episode 20 to help you with the enchants. Buy 20 {{#item:1000812}} and 30 {{#item:1001217}} and ask someone in #global chat to do the FCT enchant for you. | |||
You' | |||
For the other 0.5s of FCT, try to get a combination of any of these options: | |||
*{{#item:490052}} and {{#item:490053}} set with {{#item:25170}}. | |||
*{{#item:1001052}}with {{#item:25842}}. | |||
*{{#item:25170}} with {{#item:1000521}}. | |||
My recommendation is the first option, as these are good accessories that you'll need anyway, but sometimes the market just won't have what you need. Try using the #trade channel if you can't the stone you're aiming for. Also don't forget you'll need costumes to place the stones in. | |||
==== Complete some easy upgrades ==== | ==== Complete some easy upgrades ==== | ||
If you've been following what I said up until now, you should be missing a few gear pieces. To farm these, I recommend spending Eden Coins on {{#item:12264}}. As you've seen, it's not hard to get them and they'll save you a lot of time. | If you've been following what I said up until now, you should be missing a few gear pieces. To farm these, I recommend spending Eden Coins on {{#item:12264}}. As you've seen, it's not hard to get them and they'll save you a lot of time. | ||
| Line 66: | Line 96: | ||
# You'll want to do the same with a {{#item:19428}}. Farm Illusion of Labyrinth until you get it, and then a few {{#item:100423}}, so you can make it +10. | # You'll want to do the same with a {{#item:19428}}. Farm Illusion of Labyrinth until you get it, and then a few {{#item:100423}}, so you can make it +10. | ||
# Your middle and lower headgear don't provide THAT much in terms of damage. You probably want to run Poring Village and Wave Mode instances, looking for {{#item:19117}} and {{#item:23135}} respectively. That 10% drop rate will come in handy later. For Poring Village, you can just create a bunch of characters and run it repeteadly. Don't worry too much if {{#item:19117}} doesn't drop the first day, as it is a low chance. Just keep running it. Wave Mode is also a good source of Fashion Points (by recycling the costume stones the chests drop), and you'll need those later, so don't mind dedicating 1 whole hour to running it. | # Your middle and lower headgear don't provide THAT much in terms of damage. You probably want to run Poring Village and Wave Mode instances, looking for {{#item:19117}} and {{#item:23135}} respectively. That 10% drop rate will come in handy later. For Poring Village, you can just create a bunch of characters and run it repeteadly. Don't worry too much if {{#item:19117}} doesn't drop the first day, as it is a low chance. Just keep running it. Wave Mode is also a good source of Fashion Points (by recycling the costume stones the chests drop), and you'll need those later, so don't mind dedicating 1 whole hour to running it. | ||
# Finish your illusion items. Your {{#item:460018}} and {{#item:19428}} become much more powerful once you make them +11 and add double {{#item:29001}} to them. The cheapest way to make lv1 armors such as these into +11 is to | # Finish your illusion items. Your {{#item:460018}} and {{#item:19428}} become much more powerful once you make them +11 and add double {{#item:29001}} to them. The cheapest way to make lv1 armors such as these into +11 is to first make them +10 and then use {{#item:6225}} and normal refining to make them +11. You have a small risk of them breaking, but this will not destroy the item. IF they do break, you can repair them for a 5 million zeny fee. Now the cheapest way to obtain {{#item:6225}} is to acquire 4500 Muh points and buy the box of 10 from the Muh Shop, since the box will also give you back 1 {{#item:6635}}, which is pretty valuable. To get the points, either donate to the server or buy {{#item:50003}} or {{#item:50000}} from players. You can also get {{#item:50000}} from hourly events and GM sponsored events, although this will take a while. You can turn {{#item:50000}} into points using the Rich Cow NPC at Main Office. | ||
Once you made both pieces +11, you'll want to head over to {{#navi:prontera|92|114}} to enchant them. Do random enchant twice, and if you didn't get any {{#item:29001}}, reset the item completely. Once you get one {{#item:29001}}, you'll want to use the option to only reset the bad enchant, which costs more {{#item:25271}}. This can cost thousands of {{#item:25271}} to get both items finished, so you might want to settle for just 1 {{#item:29001}} per item for now, and come back to it later. | Once you made both pieces +11, you'll want to head over to {{#navi:prontera|92|114}} to enchant them. Do random enchant twice, and if you didn't get any {{#item:29001}}, reset the item completely. Once you get one {{#item:29001}}, you'll want to use the option to only reset the bad enchant, which costs more {{#item:25271}}. This can cost thousands of {{#item:25271}} to get both items finished, so you might want to settle for just 1 {{#item:29001}} per item for now, and come back to it later. | ||
| Line 75: | Line 105: | ||
=== Midgame === | === Midgame === | ||
* You'll want to get back to Oz Dungeon 2 to farm enough fragments for {{#item:450178}}. You'll need around 2500 {{#item:1000405}} and another 20m zeny to finish it. Use the random method to enchant slot 4 of the armor, since there's barely any benefit to this slot and we don't want to use the safe method for it. After that's done, use the safe method to enchant {{#item:310510}} on the 3rd slot and safe method again to enchant {{#item:310532}} on the 2nd slot. You'll need to make the armor at least +11. Use a {{#item:6994}} on it. Then, use {{#item:6225}} to get the +11. You can also go +12 here, as that will allow you to use {{#item:300376}}. It will cost quite a bit more, though. Be it +11 or +12, it will be quite a good damage spike. | |||
* You'll want to get back to Oz Dungeon 2 to farm enough fragments for {{#item:450178}}. You'll need around | |||
* Work on getting yourself a {{#item:480125}}. I won't go into too much detail about how to craft it, because there's already a very good explanation for it in [[Choi's Soul Ascetic Guide]] section Phase Three. Make it +11 at least, but also consider making it +12 so you can use {{#item:300375}}. | * Work on getting yourself a {{#item:480125}}. I won't go into too much detail about how to craft it, because there's already a very good explanation for it in [[Choi's Soul Ascetic Guide]] section Phase Three. Make it +11 at least, but also consider making it +12 so you can use {{#item:300375}}. | ||
| Line 107: | Line 111: | ||
* Put a {{#item:27385}} in your shield. It should be cheap, just buy it. You can't use the combo yet because your weapon doesn't have a slot, but we'll get there eventually. | * Put a {{#item:27385}} in your shield. It should be cheap, just buy it. You can't use the combo yet because your weapon doesn't have a slot, but we'll get there eventually. | ||
* | * Get {{#item:24655}}, {{#item:24415}} and {{#item:24315}} to ignore MDEF of Normal class enemies (eveything that's not a Boss). You'll need the following: | ||
# A total of 10 {{#item:7451}} (buy from Hwarang at {{#navi:paramk|116|96}}). | # A total of 10 {{#item:7451}} (buy from Hwarang at {{#navi:paramk|116|96}}). | ||
| Line 113: | Line 117: | ||
# 240 {{#item:50033}}. You can get these by opening {{#item:50034}}. These can be obtained from killing field and dungeon MVPs, but the most common way is to buy them from Rayja at {{#navi:main_office|88|178}} for the price of 5 {{#item:25729}}. Since opening one crate gives on average 3 {{#item:50033}}, you'll need to open around 80 crates, so you'll need around 400 {{#item:25729}}. You'll have some from your Oz Dungeon farming. If you don't have enough, just buy them. It's easier to farm the zeny in Gefenia or Old Thanatos than to farm the {{#item:25729}} at this point. | # 240 {{#item:50033}}. You can get these by opening {{#item:50034}}. These can be obtained from killing field and dungeon MVPs, but the most common way is to buy them from Rayja at {{#navi:main_office|88|178}} for the price of 5 {{#item:25729}}. Since opening one crate gives on average 3 {{#item:50033}}, you'll need to open around 80 crates, so you'll need around 400 {{#item:25729}}. You'll have some from your Oz Dungeon farming. If you don't have enough, just buy them. It's easier to farm the zeny in Gefenia or Old Thanatos than to farm the {{#item:25729}} at this point. | ||
# Get the {{#item:24655}} from Dala and the other two pieces from Clark (both are near Rayja). | # Get the {{#item:24655}} from Dala and the other two pieces from Clark (both are near Rayja). | ||
# You'll need to equip all 3 pieces and make sure your {{#skill:423}} is leveled to max. You're now ignoring 30% of Normal mob MDEF and 40% of MDEF of all races. These stack additively, so in effect it's 70% of all Normal mobs. To get the remaining 30%, you need a few upgrades. These pieces of gear can be upgraded at any refiner (for instance Leona at @go 50) with Elunium or Oridecon. Upgrade everything to the safe limit and then | # You'll need to equip all 3 pieces and make sure your {{#skill:423}} is leveled to max. You're now ignoring 30% of Normal mob MDEF and 40% of MDEF of all races. These stack additively, so in effect it's 70% of all Normal mobs. To get the remaining 30%, you need a few upgrades. These pieces of gear can be upgraded at any refiner (for instance Leona at @go 50) with Elunium or Oridecon. Upgrade everything to the safe limit and then use at least 3 {{#item:6241}} (you can check if anyone is selling with the @ws 6241 command, or you can get from the shop if you have points). Try to make the shield +7 with them. If any of the upgrade attempts fail, the shield will lose an upgrade level instead of breaking. If this happens, you'll sadly have to purchase more {{#item:6241}}. Once the shield is +7 and the other pieces are +4, you'll be ignoring practically all MDEF from Normal monsters. | ||
* | * Buy yourself a {{#item:23323}} from the rental section of the Muh Shop. This won't make you more powerful, but it's a huge QoL upgrade, not having to buy and carry fly wings anymore. When the 30 day one runs out the first time, you should be able to afford a yearly one, which is much more efficient cost wise. | ||
* Buy {{#item:1001050}} and {{#item:1001051}}. Trying to get them yourself with Fashion Points will be hard, so just buy them in #trade or with @ws. Use your Fashion Points to buy yourself some upper and medium costume that you like from the 2nd floor of Main Office so you can use the stones. | * Buy {{#item:1001050}} and {{#item:1001051}}. Trying to get them yourself with Fashion Points will be hard, so just buy them in #trade or with @ws. Use your Fashion Points to buy yourself some upper and medium costume that you like from the 2nd floor of Main Office so you can use the stones. | ||
| Line 121: | Line 125: | ||
* Get some elemental damage cards. Some examples are {{#item:300469}}, {{#item:300470}} and {{#item:300218}}. You can find a list of most magic cards in [[Madame Celery's Guide to MuhRO]]. The episode 18 cards are easily farmable at this point, but the episode 19 ones will be really hard to farm so you might want to buy them instead. | * Get some elemental damage cards. Some examples are {{#item:300469}}, {{#item:300470}} and {{#item:300218}}. You can find a list of most magic cards in [[Madame Celery's Guide to MuhRO]]. The episode 18 cards are easily farmable at this point, but the episode 19 ones will be really hard to farm so you might want to buy them instead. | ||
From this point onwards, you're strong enough to do [[19 Isgard Land of Snow Flowers|Episode 19]] easily, so alternate doing that with farming some money in Old Thanatos tower if you need Eden Coins, or in | From this point onwards, you're strong enough to do [[19 Isgard Land of Snow Flowers|Episode 19]] easily, so alternate doing that with farming some money in Old Thanatos tower if you need Eden Coins, or in Rudus F3 if you just need zeny. | ||
The other very useful thing to do with your time at this point is checking out [[Solfernia's guide to multi-client farming]]. Not everyone is into using several clients at the same time, but if you don't mind doing it I really recommend it. You'll farm Eden Coins many times faster, to the point where you'll have way more than you need. You'll also get a ton of {{#item:50001}}, which will give you {{#item:50000}} and also low chance for {{#item:6635}}. | The other very useful thing to do with your time at this point is checking out [[Solfernia's guide to multi-client farming]]. Not everyone is into using several clients at the same time, but if you don't mind doing it I really recommend it. You'll farm Eden Coins many times faster, to the point where you'll have way more than you need. You'll also get a ton of {{#item:50001}}, which will give you {{#item:50000}} and also low chance for {{#item:6635}}. | ||
You should also do a daily instance rotation at this point. Theres several easy and super quick instances that you should farm every day. Some of them give useful stuff such as {{#item:607}}, some of them give a chance to kill some free MVPs in the hopes of getting an MVP card, and most of them give {{#item:50009}}. To get {{#item:50009}}, you must first take the quests from the board in the Main Office. While you're there, check out what Doil has to offer in his shop in exchange for {{#item:50009}}. The quick instances include Buwaya Cave, Hey Sweety, Central Laboratory (need episode 15 ticket to unlock it), Bioresearch Laboratory, Poring Village and Magic Geffen Tournament (not strong enough for Night Arena at this point). It should take less than 15 minutes to run all of those. | You should also do a daily instance rotation at this point. Theres several easy and super quick instances that you should farm every day. Some of them give useful stuff such as {{#item:607}}, some of them give a chance to kill some free MVPs in the hopes of getting an MVP card, and most of them give {{#item:50009}}. To get {{#item:50009}}, you must first take the quests from the board in the Main Office. While you're there, check out what Doil has to offer in his shop in exchange for {{#item:50009}}. The quick instances include Buwaya Cave, Hey Sweety, Central Laboratory (need episode 15 ticket to unlock it), Bioresearch Laboratory, Poring Village and Magic Geffen Tournament (not strong enough for Night Arena at this point). It should take less than 15 minutes to run all of those. | ||
| Line 151: | Line 151: | ||
=== Endgame === | === Endgame === | ||
There's several things you can do at this point that will boost your damage significantly. Let's go about them in order of what I consider the best in terms of what you get compared to how much you spend on getting it. | There's several things you can do at this point that will boost your damage significantly. Let's go about them in order of what I consider the best in terms of what you get compared to how much you spend on getting it. | ||
# Complete your card set, at least for neutral element and consider earth element too, since it will be relevant later. If you don't have them yet, farm or buy your accessory cards ({{#item:300218}}, {{#item:300470}}, {{#item:300211}} and {{#item:300469}}). If you didn't bother with +12 armor and +12 garment, by now you should be using {{#item:300273}} with {{#item:4394}}, or {{#item:300123}} and {{#item:300308}}. | # Complete your card set, at least for neutral element and consider earth element too, since it will be relevant later. If you don't have them yet, farm or buy your accessory cards ({{#item:300218}}, {{#item:300470}}, {{#item:300211}} and {{#item:300469}}). If you didn't bother with +12 armor and +12 garment, by now you should be using {{#item:300273}} with {{#item:4394}}, or {{#item:300123}} and {{#item:300308}}. | ||
# Get your +12A {{#item:470204}}. Since {{#item:50052}} exists, the only RNG is grading. Therefore, I recommend making these yourself. You can get the hammer from MC Hammer in @go paramk. You'll need 56 {{#item:6635}} to get to +12A, so keep in mind it's a pricey item. Totally worth it, though. | |||
# Start farming for your {{#item:400544}}. The decision as usual is wheter you farm money to buy it, or make it yourself. My recommendation here is to make it yourself (actually you'll need a friend to make it, since it will be a while until you get enough reputation to craft one) and get it to +11C. At this point, you can sit on it and farm enough resources to upgrade to +11B and eventually +11A and +12A at your own pace. If you find someone who will sell a +12A to you though, it's a valid choice. | # Start farming for your {{#item:400544}}. The decision as usual is wheter you farm money to buy it, or make it yourself. My recommendation here is to make it yourself (actually you'll need a friend to make it, since it will be a while until you get enough reputation to craft one) and get it to +11C. At this point, you can sit on it and farm enough resources to upgrade to +11B and eventually +11A and +12A at your own pace. If you find someone who will sell a +12A to you though, it's a valid choice. | ||
# Having the +11C crown reduces your FCT by another 0.5. This will allow you to change your costume stones. At this point you can get the endgame SA set ({{#item:1001789}}, {{#item:1001050}}, {{#item:1001051}} and {{#item:25845}}. Make sure you levelled the skills required by these stones. | # Having the +11C crown reduces your FCT by another 0.5. This will allow you to change your costume stones. At this point you can get the endgame SA set ({{#item:1001789}}, {{#item:1001050}}, {{#item:1001051}} and {{#item:25845}}. Make sure you levelled the skills required by these stones. | ||
# Get your endgame shadow gear. Replace your SA shadow gear with {{#item:24665}} + {{#item:24668}}, then get {{#item:24883}}, {{#item:24884}}, {{#item:24753}} and {{#item:24754}}. Buy at least 4 {{#item:101264}} from Reyja in the Main Office basement and try your luck at enchanting the 4 pieces that can be enchanted by using it. {{#item:24883}} and {{#item:24884}} are very expensive to enchant and it's not worth getting into it just yet. If you're curious, these pieces can be enchanted by the Enchanter at @go 50. | # Get your endgame shadow gear. Replace your SA shadow gear with {{#item:24665}} + {{#item:24668}}, then get {{#item:24883}}, {{#item:24884}}, {{#item:24753}} and {{#item:24754}}. Buy at least 4 {{#item:101264}} from Reyja in the Main Office basement and try your luck at enchanting the 4 pieces that can be enchanted by using it. {{#item:24883}} and {{#item:24884}} are very expensive to enchant and it's not worth getting into it just yet. If you're curious, these pieces can be enchanted by the Enchanter at @go 50. | ||
# If you haven't yet, finish getting your crown to +12A. It will double your damage since you're suddenly autocasting a whole spell for free. | # If you haven't yet, finish getting your crown to +12A. It will double your damage since you're suddenly autocasting a whole spell for free. | ||
# Upgrade your armor to {{#item:450173}}. | |||
# Upgrade your right slot accessory to {{#item:490136}}. | |||
== Farming chart == | == Farming chart == | ||
| Line 260: | Line 258: | ||
|30-50 million | |30-50 million | ||
|1m | |1m | ||
|<div style="text-align: center;"><p>+9 {{#item:550069}} | |<div style="text-align: center;"><p>+9 {{#item:550069}}</p></div> | ||
|Great spot early. You mainly get Cor Cores to sell to NPC and some zelus/shadowdecons/elus. Doesn't need a lot of damage and doesn't get you overweight too quick. Recommended early farming spot. | |Great spot early. You mainly get Cor Cores to sell to NPC and some zelus/shadowdecons/elus. Doesn't need a lot of damage and doesn't get you overweight too quick. Recommended early farming spot. | ||
{| class="wikitable mw-collapsible mw-collapsed" style="width: 100%;" | {| class="wikitable mw-collapsible mw-collapsed" style="width: 100%;" | ||
| Line 372: | Line 370: | ||
|} | |} | ||
|} | |} | ||
== Movement == | |||
As a Soul Ascetic, moving fast through the map while killing everything is one of the most attractive and strong points of the class. It's what makes it so good at farming. Let's take a look at how this happens. | |||
=== Standard teleport and skill farming === | |||
We have pretty big AoE skills at our disposal, so the basic "spam teleport and skill" tactic is better as SA than as other classes. Our 15x15 White Tiger will cover a big chunk of the screen, so after teleporting you'll be clearing a lot of enemies and teleporting away quickly to do it again. You can also choose to use only Black Tortoise, which allows you to aim the skill at the cost of a smaller 11x11 area (which is still pretty big). This is how you'll be farming at the start, and it's pretty comfortable. So comfortable in fact, that it won't be strange if someone mistakes you for a bot once in a while. | |||
=== Leap === | |||
Leap is what makes you stand out and go fast! Master this skill as soon as you start farming seriously. | |||
The skill is deceptible simple at a glance, but it has a lot of caveats that make it interesting. Leap will have your character move in a straigh line instantly, in the direction your character is looking, by a set number of cells. Let's go over the points that make it such a good skill, and also over its limitations: | |||
# +It ignores obstacles. As long as the destination cell is something you can stand on, you'll get there no matter if there's a wall, a cliff or a river between you and your destination. | |||
# +Its fixed cast time is reduced by 0.5s with each level. Starting at lvl3, it has the same FCT as your other skills, so you'll be able to use it instantly. And of course it has no after cast delay, so you can use it as fast as your attack speed allows you. | |||
# -It can not be used in areas where teleport can't be used. This unfortunately makes it useless in instances and special maps like Depth and Garden of Time Zones. | |||
# -If the destination cell is something you can't stand on, the skill will fail and nothing will happen. This behaviour is a bit annoying until you get the hang of the skill. | |||
Let's talk about how to use the skill to farm. First of all, note that this method of farming requires that your character has good attack speed. It starts feeling real good when you hit the 186ASPD mark. At that point, you can spam the skill often enough, and there's almost no delay between the time you leap -> use WT/BT -> leap again. This is the reason most SAs will take Agilty enchant for their crowns, over Intelligence or Wisdom, even if we don't benefit from the ACD in this enchant. | |||
Let's look at some examples of how to use Leap effectively. In the following images, I'm using @lgp with square 6 and circle 10. | |||
{| | |||
![[File:Leap1.png|none|thumb|Image 1]] | |||
![[File:Leap2.png|none|thumb|Image 2]] | |||
|} | |||
One of the tricks you have to learn about Leap is that you can use different levels of the skill to Leap different distances. The most common way is to use lv3 Leap and lv5 Leap. This will allow you to jump distances of either 6 cells in front of you with lv3, or 10 cells in front with lv5. | |||
Now look at Image 1. Here, if I tried to use lv3 Leap the skill would fail, because the destination cell is not something I can stand on. On the other hand, if I were to use lvl5, I'd jump 10 cells in front and the skill would move me there, jumping over the obstacle. | |||
The opposite happens in Image 2. Using lv3 here would succeed and using lv5 would fail. | |||
The more familiar you're with a map, the easier it will be to navigate it fast using Leap. The faster you navigate the map, while killing everything in sight with WT/BT, the faster you'll farm. | |||
Another thing to keep in mind is what happens when you teleport after leaping. After teleporting, your character will always be looking north. This doesn't mean you'll leap north if you leap after teleporting. Leap remembers the last direction you leaped at, and it will use that until you click in another direction. You will want to look at your turbo setup and decide whether you like to use turbo on a Cast + Click key or a Cast only key. I definitely like Cast only better, but Cast + click can have some merits if you know what you're doing. I'd say start with Cast only and then try out Cast + click to see how it works and whether you like it or not. | |||
One last thing to consider is the use of /bingbing and /bangbang. These two commands will make your character spin either clockwise or counterclockwise, and they can be bound to your arrow keys <- ->, or maybe A D if you prefer. Why should you consider this? Well, because once you get used to it, this way of changing directions is faster than clicking, and it will allow you to control your movement better. | |||
That's about all I know about the mechanics of Leap. For this to be effective you want to be comfortably one shotting the mobs in the map you're trying to farm (even better if you can do it only with a manual cast of BT, without relying on the autocast from the crown). You also want 186ASPD (you can use Celermine Juice, transformation scrolls and Berserk Potion to help a lot with this). | |||
How much better is this than the standard teleport + skill? Around 20% better, from what I've gathered. But at first it will be like 30% worse, until you get really used to it and know the map well. It's definitely worth doing if the map has big areas and many obstacles you can jump over, like it's the case with Temple and Niff2. If it's a map with a lot of narrow corridors like Mjolnir Underground, I prefer not to do it. | |||
Now that you know all I know about Leap, go ahead and try it and do let me know how it goes. | |||
== Things I wish I knew from the start == | == Things I wish I knew from the start == | ||
Latest revision as of 19:44, 18 June 2025
Introduction
Hello there! I've been playing Soul Ascetic for a while now, and I find it very fun and slighty overpowered as a farming character, so I'd like to share this guide with you all in the hopes of addressing some questions players have about when to farm what.
The reason I think it's so good is due to access to most elements in the same skill, its big 15x15 and 13x13 main AoE skills, the movility provided by Leap with high attack speed and the great HP/SP sustain it has. Also, SA skills have no After Cast Delay, which is very nice.
This won't be a comprehensive guide about the class, at least not for the time being, but let's hope you find the information in here useful and it helps you progress smoothly and without wasting too much time.
Leveling
- Important note: Please remember that your EXP book doesn't consume time while you're in a town, and that Main Office and Eden are buildings inside of a town and the book will consume time while inside a building. So don't waste time inside Main Office or Eden while you have a book running. This applies to bubblegums too, but that's not important for leveling. All your tinkering with stat point and skill point allocation should take place in a town, so you don't waste precious exp book time.
- DO NOT skip the tutorial quest. Do it and get your free exp book. Don't use it yet, wait till you're level 39. Use the @al command to set your autoloot to 100 for now, so you loot everything.
- At level 10, register at Eden Group (@go eden) and grab your free gear from the backroom (on the right side). Grab the physical set, since leveling as taekwon is all about kicking anyway.
- Go kick ants in ant hell until level 30 or so. Your goal is to max
 Kihop,
  Flying Kick and
  Mild Wind first. You'll only need those skills for now. Put Flying Kick into a hotkey and use it to kill everything.
 - Put 20 points in DEX and the rest in STR and use the warper to go to Dungeons > Glast Heim > Monastery. Make sure you use level 7 Mild Wind to turn your kicks into Holy Element. Now is the time to use your exp book! Pop it and start killing Evil Druids and Wraiths with your Flying Kick. Once you get to job level 50, go back to Main Office and change job to Soul Linker. Before doing so, while in Malaya, spend all your skill points in
 Leap,
Leap,  Happy Break,
  Tumbling and
  Sprint. Sprint will be left at lvl 9.
 - Use the @go Malaya command to go to Malaya Town. Do the Cautious Village Quest. Once you finish it, you'll be level 99/70 and you can go change to Soul Reaper. Before then, use you skill points. Here's a skill tree you can use:
Use this skill tree for SL

Soul Reaper
- Go back to Glast Heim Monastery and kill a few enemies here until you get to job level 16. Just use autoattacks with Holy Element.
- Once you have 15 skill points, level up
 Espa to max level. You can now use Espa to farm your Advanced Paradise gear. Remember to bring at least 200
  Fly Wing (601) and 10
  Blue Potion (505) just in case.
 - Get Advanced Paradise armor set. You'll need the following items:
- Elastic Bands: Type @navi um_fild03 to be directed to the map with the most Wootan Shooters. In this map, teleport around killing the monkeys with slingshots until you collect 15 elastic bands.
- Blue Hair: @go light and then go up and up again. You'll be at a map filled with kobolds. Kill a few of the blue ones until you have 3 blue hair.
- Go to the backroom of Eden Group and talk to Louis. Use the Take Special Offer option to exchange your items for the Advanced Paradise Magic set. You can get the weapon for 10 eden coins later.
- Do Eden Board quests for Gefenia dungeon. Gefenia level 1 is directly accessible from the warper and it's one of the fastest methods to get a good amount of Eden Coins at this time. I recommend having @go eden bound to a hotkey combination through ALT+M to go back fast. Use Holy Element (lvl 7 Mild Wind). The Abysmal Knight Quest is in the 100-110 board, and the Incubus/Succubus one is in the 120-140. If you die, just go back and keep farming. Using
 Kaahi will keep you alive in Gefenia pretty easily. Just mind your mana and go back to use the healer when needed.
 - Notably, Gefenia is also a great spot to grab some early Zeny. For now, just run around with @al 100, looting everything. Just sell everything to NPC, except Eluniums, Oridecons, Eden Coins and cards. You can put the items you don't want to sell in the Favourites tab in your inventory, and use the NPC sale lock button that appears in the lower part of the Favourites Tab, to avoid having them show in the sell to NPC window. This is very useful to avoid selling important items, so keep it in mind.
- Once you're done with Gefenia at lvl 150, grab your staff for 10
 Eden Coin (25223) from Labraham at (moc_para01 108, 83). It's the
  Paradise Soul Reaper Staff (640025).
 - From 150 to 180, get the Illusion of Vampire quest from the Daily Hunts NPC you can find pretty much anywhere. Make sure it's a Town, so you don't waste Exp Book time while taking and delivering the quest. You'll need
 Eswhoo,
  Golem's Souland
  Soul Reaper maxed to farm comfortably here. To make it even easier, use a
  Small Life Potion (14534),
  Small Mana Potion (23203) and
  Brilliant Protection Scroll (23204). You can get all of those for 9 coins from the Eden Vending Machine at Eden, near the board quests.
 - From 180 to 200 it takes aproximately 1 minute. You just have to use the @ws command to check who sells Thanatos Fragments, buy 10 of each, and complete the quest at the Daily Hunts NPC. These are the items:
 Fragment of Agony (7436),
  Fragment of Misery (7437),
  Fragment of Hatred (7438) and
  Fragment of Despair (7439).
Up until this point, it can all be done in less than 40 minutes. Here's a video of me doint it with a fresh character.

Soul Ascetic:
- At this point, your exp book should be about to expire. Try to get in another Illusion of Vampire quest, so you get enough skill points to max
 Talisman of Black Tortoise. Once you get it, your next priority is leveling to 210 using this new skill. Dump all your trait points into SPL and you'll see that you're easily doing double the damage you were doing before, and now in a big area. You can try Illusion of Teddy Bear until 210. The rest of your leveling will happen as you farm to improve your gear, so that's it for this section.
Skills
Important skills breakdown
Skill trees
| Class | Tree | Comments |
|---|---|---|
| Taekwon |  |
You can keep Sprint at 9 if you want |
| Soul Linker |  |
Level your Ka skills and get whatever spirit skills you want. Bard spirit is useful, the rest are a bit outdated nowadays. |
| Soul Reaper |  |
You can keep Soul Revolution low and use the extra point to level Sprint, or not. |
| Soul Ascetic |  |
I prefer to spend my last 4 points in Totem of Tutelary for extra sustain, but you can level Talisman of Warrior if you tend to party a lot. |
Gear and farming progression
Mage classes gear progression is already well covered in several guides, so in this guide I'll just give you my idea of what's best to get at every step, with the goal of getting the most bang for your buck at every turn and farming efficiently. Keep in mind that farming efficiently requires the use of ![]() [Bound] Bubble Gum (12264), so you'll need to get your hands on
[Bound] Bubble Gum (12264), so you'll need to get your hands on ![]() Eden Coin (25223)early on. Gefenia and Old Thanatos are good places to get some, along with some very important early zeny.
Eden Coin (25223)early on. Gefenia and Old Thanatos are good places to get some, along with some very important early zeny.
Earlygame
Get yourself a  Glacier Wand (550069)
Enchant it with ![]() Glacier Flower Spell (MATK) (311343),
Glacier Flower Spell (MATK) (311343), ![]() Glacier Flower Spell (Magical-Element) (311353),
Glacier Flower Spell (Magical-Element) (311353), ![]() Glacier Flower Spell (Magical-Size) (311351) and
Glacier Flower Spell (Magical-Size) (311351) and ![]() Glacier Flower Spell (Magical-Race) (311349). You won't be able to farm this yourself yet, but use the #trade channel to purchase one from players. Without upgrades, it's really cheap to make (should be around 3-4m). At +9 it will cost around 10m to 15m. This weapon will last you until the late midgame, so it's a great investment. Farm zeny in Gefenia or Thanatos while getting Eden Coins if you don't have enough.
Glacier Flower Spell (Magical-Race) (311349). You won't be able to farm this yourself yet, but use the #trade channel to purchase one from players. Without upgrades, it's really cheap to make (should be around 3-4m). At +9 it will cost around 10m to 15m. This weapon will last you until the late midgame, so it's a great investment. Farm zeny in Gefenia or Thanatos while getting Eden Coins if you don't have enough.
An easy thing to farm at this point is ![]() Elunium (985). The best option is to farm Istana Cave in Dewata, but you can also get a lot by converting
Elunium (985). The best option is to farm Istana Cave in Dewata, but you can also get a lot by converting ![]() Carnium (6223) that you get from Illusion of Vampire, by talking to Vurewell at @go 50. Converting carries a fee, so it will eat a bit of your profit margin.
Carnium (6223) that you get from Illusion of Vampire, by talking to Vurewell at @go 50. Converting carries a fee, so it will eat a bit of your profit margin.
Improve your Fixed Cast Time
This is such a big QoL upgrade that no matter what I say it's going to be an understatement. Keep in mind you need to be level 230 to use the recommended shoes, so you might want to dedicate some time to farming Illusion of Twins or Illusion of Labyrinth first, as suggested next.
You're gonna need to get shoes with 1s FCT reduction. My recommendation nowadays is to buy ![]() Glacier Shoes [1] (450268) from the player market. You'll usually find a lot of them. If you can get a +10 pair for around 5m to 8m, that's ideal. If not, get at least +9. After you got the shoes, you'll need a friendly player that has already done episode 20 to help you with the enchants. Buy 20
Glacier Shoes [1] (450268) from the player market. You'll usually find a lot of them. If you can get a +10 pair for around 5m to 8m, that's ideal. If not, get at least +9. After you got the shoes, you'll need a friendly player that has already done episode 20 to help you with the enchants. Buy 20 ![]() Snowflower Gem (1000812) and 30
Snowflower Gem (1000812) and 30 ![]() Sacred Cat Whiskers (1001217) and ask someone in #global chat to do the FCT enchant for you.
Sacred Cat Whiskers (1001217) and ask someone in #global chat to do the FCT enchant for you.
For the other 0.5s of FCT, try to get a combination of any of these options:
 Sinful Sapphire Ring [1] (490052) and
  Sinful Sapphire Necklace [1] (490053) set with
  Minor Casting Stone (Garment) (25170).
 Soul Reaper Stone (Low) (1001052)with
  Soul Reaper Stone (Garment) (25842).
- Minor Casting Stone (Garment) (25170) with
 Minor Casting Stone (Dual) (1000521).
My recommendation is the first option, as these are good accessories that you'll need anyway, but sometimes the market just won't have what you need. Try using the #trade channel if you can't the stone you're aiming for. Also don't forget you'll need costumes to place the stones in.
Complete some easy upgrades
If you've been following what I said up until now, you should be missing a few gear pieces. To farm these, I recommend spending Eden Coins on ![]() [Bound] Bubble Gum (12264). As you've seen, it's not hard to get them and they'll save you a lot of time.
[Bound] Bubble Gum (12264). As you've seen, it's not hard to get them and they'll save you a lot of time.
- At this point, it will be easy to farm Illusion of Twins as long as you use a Brilliant Protection Scroll (23204). Go farm those ants, your target is
 Illusion Silver Guard [1] (460018). You'll probably want to farm here for a while. The idea is obtaining a few
  Twins Refinement Box (100699) along the way, so you can make your new shiny shield +10 with them (tip: make it +4 with regular upgrading before you can use the box). You'll also want to keep all the
  Illusion Stone (25271) for later.
 - You'll want to do the same with a
 Illusion Morpheus's Hood [1] (19428). Farm Illusion of Labyrinth until you get it, and then a few
  Labyrinth Refinement Box (100423), so you can make it +10.
 - Your middle and lower headgear don't provide THAT much in terms of damage. You probably want to run Poring Village and Wave Mode instances, looking for
 Poring Sunglasses (19117) and
  Poring Capsule (23135) respectively. That 10% drop rate will come in handy later. For Poring Village, you can just create a bunch of characters and run it repeteadly. Don't worry too much if Poring Sunglasses (19117) doesn't drop the first day, as it is a low chance. Just keep running it. Wave Mode is also a good source of Fashion Points (by recycling the costume stones the chests drop), and you'll need those later, so don't mind dedicating 1 whole hour to running it.
 - Finish your illusion items. Your Illusion Silver Guard [1] (460018) and Illusion Morpheus's Hood [1] (19428) become much more powerful once you make them +11 and add double
 Rune of Intellect Lv2 (29001) to them. The cheapest way to make lv1 armors such as these into +11 is to first make them +10 and then use
  HD Carnium (6225) and normal refining to make them +11. You have a small risk of them breaking, but this will not destroy the item. IF they do break, you can repair them for a 5 million zeny fee. Now the cheapest way to obtain HD Carnium (6225) is to acquire 4500 Muh points and buy the box of 10 from the Muh Shop, since the box will also give you back 1
  Blacksmith's Blessing (6635), which is pretty valuable. To get the points, either donate to the server or buy
  Muh Voucher (50003) or
  Muh Coin (50000) from players. You can also get Muh Coin (50000) from hourly events and GM sponsored events, although this will take a while. You can turn Muh Coin (50000) into points using the Rich Cow NPC at Main Office.
Once you made both pieces +11, you'll want to head over to (prontera 92, 114) to enchant them. Do random enchant twice, and if you didn't get any ![]() Rune of Intellect Lv2 (29001), reset the item completely. Once you get one
Rune of Intellect Lv2 (29001), reset the item completely. Once you get one ![]() Rune of Intellect Lv2 (29001), you'll want to use the option to only reset the bad enchant, which costs more
Rune of Intellect Lv2 (29001), you'll want to use the option to only reset the bad enchant, which costs more ![]() Illusion Stone (25271). This can cost thousands of
Illusion Stone (25271). This can cost thousands of ![]() Illusion Stone (25271) to get both items finished, so you might want to settle for just 1
Illusion Stone (25271) to get both items finished, so you might want to settle for just 1 ![]() Rune of Intellect Lv2 (29001) per item for now, and come back to it later.
Rune of Intellect Lv2 (29001) per item for now, and come back to it later.
Level up some more
Right now, one of the easiest ways to increase your performance is to get some more levels. I recommend to farm some more Illusion of Underwater 2, simply because you still need a lot of the stuff they drop there, such as ![]() Illusion Stone (25271). You'll also want as many
Illusion Stone (25271). You'll also want as many ![]() Underwater Refinement Box (100425) as you can get, alongside any of the illusion armor pieces they drop here. Why? Because later on you'll need at least 2
Underwater Refinement Box (100425) as you can get, alongside any of the illusion armor pieces they drop here. Why? Because later on you'll need at least 2 ![]() Safe to +10 Armor Certificate (6994) and this is how you get them. You can read all about how to make certificates further down in this document. Farming here to sell
Safe to +10 Armor Certificate (6994) and this is how you get them. You can read all about how to make certificates further down in this document. Farming here to sell ![]() Safe to +10 Armor Certificate (6994) to other players is also a good source of income, since they're usually in demand.
Safe to +10 Armor Certificate (6994) to other players is also a good source of income, since they're usually in demand.
You can farm here all the way to level 250 if you want. It slows down a lot after 240, but you'll get there while farming important resources. Don't forget to deliver the daily quest everytime you finish it. At this point, you should have maxed your SPL trait and started working on your CON trait. This will give you enough damage to do what you need to do next.
Midgame
- You'll want to get back to Oz Dungeon 2 to farm enough fragments for
 Grey Wolf Robe [1] (450178). You'll need around 2500
  Amethyst Fragment (1000405) and another 20m zeny to finish it. Use the random method to enchant slot 4 of the armor, since there's barely any benefit to this slot and we don't want to use the safe method for it. After that's done, use the safe method to enchant
  Wolf Orb (Mage) Lv.3 (310510) on the 3rd slot and safe method again to enchant
  Wolf Orb (Shadow Spell) (310532) on the 2nd slot. You'll need to make the armor at least +11. Use a
  Safe to +10 Armor Certificate (6994) on it. Then, use HD Carnium (6225) to get the +11. You can also go +12 here, as that will allow you to use
  Two Eyes Dollocaris (300376). It will cost quite a bit more, though. Be it +11 or +12, it will be quite a good damage spike.
- Work on getting yourself a
 Convertible Magical Wing [1] (480125). I won't go into too much detail about how to craft it, because there's already a very good explanation for it in Choi's Soul Ascetic Guide section Phase Three. Make it +11 at least, but also consider making it +12 so you can use
  One Eye Dollocaris Card (300375).
- Put a
 Mutating Khalitzburg Card (27385) in your shield. It should be cheap, just buy it. You can't use the combo yet because your weapon doesn't have a slot, but we'll get there eventually.
- Get
 Es Shadow Weapon (24655),
  Soul Reaper Shadow Shoes (24415) and
  Taekwon Shadow Shield (24315) to ignore MDEF of Normal class enemies (eveything that's not a Boss). You'll need the following:
- A total of 10
 Fire Dragon Scale (7451) (buy from Hwarang at (paramk 116, 96)).
 - 10
 Zelunium (25731) and 45
  Shadowdecon (25729).
 - 240
 Shadow (50033). You can get these by opening
  Shadow Crate (50034). These can be obtained from killing field and dungeon MVPs, but the most common way is to buy them from Rayja at (main_office 88, 178) for the price of 5 Shadowdecon (25729). Since opening one crate gives on average 3 Shadow (50033), you'll need to open around 80 crates, so you'll need around 400 Shadowdecon (25729). You'll have some from your Oz Dungeon farming. If you don't have enough, just buy them. It's easier to farm the zeny in Gefenia or Old Thanatos than to farm the Shadowdecon (25729) at this point.
 - Get the Es Shadow Weapon (24655) from Dala and the other two pieces from Clark (both are near Rayja).
- You'll need to equip all 3 pieces and make sure your Happy Break is leveled to max. You're now ignoring 30% of Normal mob MDEF and 40% of MDEF of all races. These stack additively, so in effect it's 70% of all Normal mobs. To get the remaining 30%, you need a few upgrades. These pieces of gear can be upgraded at any refiner (for instance Leona at @go 50) with Elunium or Oridecon. Upgrade everything to the safe limit and then use at least 3
 HD Elunium (6241) (you can check if anyone is selling with the @ws 6241 command, or you can get from the shop if you have points). Try to make the shield +7 with them. If any of the upgrade attempts fail, the shield will lose an upgrade level instead of breaking. If this happens, you'll sadly have to purchase more HD Elunium (6241). Once the shield is +7 and the other pieces are +4, you'll be ignoring practically all MDEF from Normal monsters.
- Buy yourself a
 Infinite Fly Wing Box (30 Days) (23323) from the rental section of the Muh Shop. This won't make you more powerful, but it's a huge QoL upgrade, not having to buy and carry fly wings anymore. When the 30 day one runs out the first time, you should be able to afford a yearly one, which is much more efficient cost wise.
- Buy
 Soul Reaper Stone (Top) (1001050) and
  Soul Reaper Stone (Mid) (1001051). Trying to get them yourself with Fashion Points will be hard, so just buy them in #trade or with @ws. Use your Fashion Points to buy yourself some upper and medium costume that you like from the 2nd floor of Main Office so you can use the stones.
- Get some elemental damage cards. Some examples are
 Melibe Iceslug Card (300469),
  Icebear Card (300470) and
  Ashhopper Card (300218). You can find a list of most magic cards in Madame Celery's Guide to MuhRO. The episode 18 cards are easily farmable at this point, but the episode 19 ones will be really hard to farm so you might want to buy them instead.
From this point onwards, you're strong enough to do Episode 19 easily, so alternate doing that with farming some money in Old Thanatos tower if you need Eden Coins, or in Rudus F3 if you just need zeny.
The other very useful thing to do with your time at this point is checking out Solfernia's guide to multi-client farming. Not everyone is into using several clients at the same time, but if you don't mind doing it I really recommend it. You'll farm Eden Coins many times faster, to the point where you'll have way more than you need. You'll also get a ton of ![]() Forgotten Heirloom (50001), which will give you
Forgotten Heirloom (50001), which will give you ![]() Muh Coin (50000) and also low chance for
Muh Coin (50000) and also low chance for ![]() Blacksmith's Blessing (6635).
Blacksmith's Blessing (6635).
You should also do a daily instance rotation at this point. Theres several easy and super quick instances that you should farm every day. Some of them give useful stuff such as ![]() Yggdrasil Berry (607), some of them give a chance to kill some free MVPs in the hopes of getting an MVP card, and most of them give
Yggdrasil Berry (607), some of them give a chance to kill some free MVPs in the hopes of getting an MVP card, and most of them give ![]() Instance Coin (50009). To get
Instance Coin (50009). To get ![]() Instance Coin (50009), you must first take the quests from the board in the Main Office. While you're there, check out what Doil has to offer in his shop in exchange for
Instance Coin (50009), you must first take the quests from the board in the Main Office. While you're there, check out what Doil has to offer in his shop in exchange for ![]() Instance Coin (50009). The quick instances include Buwaya Cave, Hey Sweety, Central Laboratory (need episode 15 ticket to unlock it), Bioresearch Laboratory, Poring Village and Magic Geffen Tournament (not strong enough for Night Arena at this point). It should take less than 15 minutes to run all of those.
Instance Coin (50009). The quick instances include Buwaya Cave, Hey Sweety, Central Laboratory (need episode 15 ticket to unlock it), Bioresearch Laboratory, Poring Village and Magic Geffen Tournament (not strong enough for Night Arena at this point). It should take less than 15 minutes to run all of those.
What you want to do now is experiment what's the best farming spot for you, or alternate between them. The objective here is to accumulate around 200m and aim for a +12A ![]() Dimensions Soul Rod [2] (550132). This will be your endgame weapon, and it's pretty cheap to get. You can either opt for buying it off someone for around 200-250m zeny, but I'll explain how to make it yourself, which is usually cheaper. You can't farm most of what's required for the weapon at this point, so just focus on farming zeny,
Dimensions Soul Rod [2] (550132). This will be your endgame weapon, and it's pretty cheap to get. You can either opt for buying it off someone for around 200-250m zeny, but I'll explain how to make it yourself, which is usually cheaper. You can't farm most of what's required for the weapon at this point, so just focus on farming zeny, ![]() Shadowdecon (25729) and
Shadowdecon (25729) and ![]() Zelunium (25731) if you're going to attempt this.
Zelunium (25731) if you're going to attempt this.
|
Farm yourself a ![]() Copo Card (300455) and buy a
Copo Card (300455) and buy a ![]() Mutating White Knight Card (27384) to complete your weapon, equip it, and then feel good cause you just doubled your damage. You can also get a
Mutating White Knight Card (27384) to complete your weapon, equip it, and then feel good cause you just doubled your damage. You can also get a ![]() Icewind Card (300458) for your shoes. The transition to endgame is one big step closer.
Icewind Card (300458) for your shoes. The transition to endgame is one big step closer.
Endgame
There's several things you can do at this point that will boost your damage significantly. Let's go about them in order of what I consider the best in terms of what you get compared to how much you spend on getting it.
- Complete your card set, at least for neutral element and consider earth element too, since it will be relevant later. If you don't have them yet, farm or buy your accessory cards ( Ashhopper Card (300218), Icebear Card (300470),
 Ash Toad Card (300211) and Melibe Iceslug Card (300469)). If you didn't bother with +12 armor and +12 garment, by now you should be using
  Smile Card (300273) with
  Solace Card (4394), or
  Purple Pitaya Card (300123) and
  Meyer Lugenburg Card (300308).
 - Get your +12A
 Moan of Corruption [1] (470204). Since
  MVP Equip Refine Hammer (50052) exists, the only RNG is grading. Therefore, I recommend making these yourself. You can get the hammer from MC Hammer in @go paramk. You'll need 56 Blacksmith's Blessing (6635) to get to +12A, so keep in mind it's a pricey item. Totally worth it, though.
 - Start farming for your
 Time Dimensions Rune Crown (Soul Ascetic) [1] (400544). The decision as usual is wheter you farm money to buy it, or make it yourself. My recommendation here is to make it yourself (actually you'll need a friend to make it, since it will be a while until you get enough reputation to craft one) and get it to +11C. At this point, you can sit on it and farm enough resources to upgrade to +11B and eventually +11A and +12A at your own pace. If you find someone who will sell a +12A to you though, it's a valid choice.
 - Having the +11C crown reduces your FCT by another 0.5. This will allow you to change your costume stones. At this point you can get the endgame SA set (
 Soul Ascetic Stone (Garment) (1001789), Soul Reaper Stone (Top) (1001050), Soul Reaper Stone (Mid) (1001051) and
  Soul Linker Stone (Low) (25845). Make sure you levelled the skills required by these stones.
 - Get your endgame shadow gear. Replace your SA shadow gear with
 Full Tempest Shadow Earring (24665) +
  Full Tempest Shadow Pendant (24668), then get
  Full Spell Shadow Armor (24883),
  Full Spell Shadow Shoes (24884),
  Magical Spell Shadow Weapon (24753) and
  Magical Spell Shadow Shield (24754). Buy at least 4
  Advanced Shadow Spellbook (Magic) (101264) from Reyja in the Main Office basement and try your luck at enchanting the 4 pieces that can be enchanted by using it. Full Spell Shadow Armor (24883) and Full Spell Shadow Shoes (24884) are very expensive to enchant and it's not worth getting into it just yet. If you're curious, these pieces can be enchanted by the Enchanter at @go 50.
 - If you haven't yet, finish getting your crown to +12A. It will double your damage since you're suddenly autocasting a whole spell for free.
- Upgrade your armor to
 Nebula Robe of Spell [1] (450173).
 - Upgrade your right slot accessory to
 Spell Signet of Star [1] (490136).
Farming chart
(WIP, haven't had much time to update values and gear lately)
Here is a list of farming spots that I have used in the past or use currently when trying to make zeny. I tried to include useful information as well as autoloot setups for the places that need it. If you have trouble with any of these, or you're not meeting the amount of zeny I propose at some spot, feel free to hit me up so we can discuss what's wrong.
| Farming location | Expected zeny per bubblegum | Required damage | Recommended gear to farm comfortably | Observations | |
| Gefenia | 10-30 million | 30k | Eden gear will do | Gefenia can be a very good farming spot, but SA is not the right class for it. That being said, you'll make good use of this dungeon at the start. Great for Eden Coins early game.
| |
Istana Cave
|
10-30 million
|
30k
|
Eden gear will do
|
Income totally depending on selling Elunium to other players. | |
Illusion Underwater
|
10-40 million
|
3m
|
Grace set + Glacial weapon
|
Most of your zeny will come from making +10 certificates and raw zeny from killing mobs. Deliver the quest everytime up until 15 times a day, to get extra illusion stones. Illusion dungeons have been unnerfed!
| |
Old Thanatos 7-12
|
20-30 million
|
50k
|
Eden gear will do
|
Great for early zeny, great for early Eden Coins. One of my favourite spots to farm the first day or two of playtime. Use guyak (check @whosells 12710) to farm here and try to minimize the time you spend in town. You can use kafra cards from the eden vending machine and @storeall to speed up the farming a lot.
| |
Oz Dungeon 2
|
20-40 million
|
5m
|
+9 +12 |
Main source of zeny is Amethyst Fragments, so the income is not instantaneous, as you'll have to sell them to players in #trade or via merchant shop. Good spot to start building up some Shadowdecon and Zelunium, although not great for it. Possible to skip guyak if you just teleport + Leap. The more fragments you get per bbg, the more income, but you'll start at around 400 only, so there's a big range. Money made also depends on fragment price, but it should always oscillate close to 40k.
| |
Snake's Nest
|
25-45 million
|
15m
|
+9 midgame gear |
Here you can get Etel Dust, Dim Glacier Weapon Box and Flower Petals, mostly. You can either sell the weapon boxes directly to NPC, or recycle the weapons to get Dim Glacier materials to sell to other players. Materials net you more zeny, but selling directly to NPC is faster. | |
New Thanatos 12
|
30-45 million
|
5m
|
+9 +12 |
Great spot if there's not many people, but unfortunately it tends to get toxic in here as it's a very small map. Mostly raw zeny, with some Shadowdecon and Zelunium drops. Guyak mandatory because of enemies casting Agi Down. Don't go to town and walk back every time you have to sell, or half of your time is wasted. Use kafra cards + @storeall or a Tool Dealer Bell from the Muh Shop.
| |
| Rudus F3 | 30-50 million | 1m | +9 |
Great spot early. You mainly get Cor Cores to sell to NPC and some zelus/shadowdecons/elus. Doesn't need a lot of damage and doesn't get you overweight too quick. Recommended early farming spot.
| |
| Rudus F4 | 50-80 million | 15m | Midgame gear | Very good spot for raw zeny. Your main source of income is the gear that drops, which you sell to NPC for 60k+ a piece. A big downside is that it gets you overweight super fast. If you want to maximize the potential of this place you need to deal with overweight efficiently. The best option is to quickly store it it all with a kafra bell/kafra card and @storeall, then sell everything after you're done farming.
| |
Clock Tower Basement
|
30-50 million
|
45m
|
+12A +12A +9 +11 |
This is one of the first great spots to farm Shadowdecon and Zelunium. Equipment dropped here also sells for decent amounts to NPC.
| |
Niffleheim Dungeon 1
|
25-50+ million (I haven't checked properly since changes to relapse gear - DM me if got data)
|
15m
|
Dimensions combo + Ignore MDEF shadow gear + midgame armor
|
Main source of income here will be selling of equipment the monsters here drop, and then some extra from Etel Dust, Shadowdecons and Zeluniums. Very quick overweight. Use kafra cards or Tool Dealer Bell.
| |
Niffleheim Dungeon 2
|
30-60+ million (I haven't checked properly since changes to relapse gear... I've been told upper limit is 90m+ now - DM me if got data)
|
50m
|
Dimensions combo + Ignore MDEF shadow gear + midgame armor
|
Main source of income here will be Bloody Brances and selling of equipment the monsters here drop, and then some extra from Etel Dust, Shadowdecons and Zeluniums.
| |
Biosphere A
|
40-60 million
|
250m
|
Endgame gear
|
Monsters here have 90% damage reduction, so you won't be able to farm comfortably until you have very good gear. Main income is essences, followed by equipment sold to tool dealer, raw zeny from killing mobs and Shadowdecon and Zelunium. Each Biosphere has a daily quest that you can do 15 times for extra loot, and I only recommend farming here if you're doing these. | |
Mjolnir Underground Cave
|
30-90 million
|
50m
|
Dimensions combo + Ignore MDEF shadow gear + midgame armor + pasana card
|
One of the best spots to farm. Main source of income here is Bloody Branches. All enemies that are not Timbers should be only killed as collateral damage. All you should care about killing is those little blue guys. Set up a killcount with "@kc timbers 1" before starting, and when you're done check how many Timbers you killed with "@kc status". You should be aiming for approximately 1500 Timbers per 30min. As you replace pieces of gear for increased loot gear, you'll get more out of this dungeon. Additionally you'll get around 200 Shadowdecon and Zelunium and very good zeny per monster killed.
| |
Biosphere Temple
|
35-110million
|
450m
|
Endgame gear
|
One of the best spots. Main source of income here is the high amount of Zelunium and Shadowdecon, followed by very high amounts of zeny per mob killed. As SA, you can average 600 Shadowdecon and 550 Zelunium per 30min once you have decent gear, and even more with great gear, although you'll probably start at around 300 of each. Numbers here are for 15% drop (poring sunglasses + happy balloon), as trying to wear more increased drop rate gear will mean you lose too much damage to one shot.
You can't use shadow element because of the plasma guy. Recommended earth element with earth elemental cards to do more damage on the gryphons, since they're the tankiest enemies here. Useful to have either a Normal enchant Temple Magic Ring or a Thana set with as high angel % damage as you can get.
| |
Garden of Time Zones
|
40-100m (subjected to volatile prices)
|
300m
|
Endgame gear
|
Currently great spot, as the Wrath of Polluted ???? materials are very sought after. Zone 1 also drops materials for Grading, which is a bonus. Zone 2 has better Wrath of Polluted ???? drops. Zones should only be farmed while the respective contamination event is going on.
|
Movement
As a Soul Ascetic, moving fast through the map while killing everything is one of the most attractive and strong points of the class. It's what makes it so good at farming. Let's take a look at how this happens.
Standard teleport and skill farming
We have pretty big AoE skills at our disposal, so the basic "spam teleport and skill" tactic is better as SA than as other classes. Our 15x15 White Tiger will cover a big chunk of the screen, so after teleporting you'll be clearing a lot of enemies and teleporting away quickly to do it again. You can also choose to use only Black Tortoise, which allows you to aim the skill at the cost of a smaller 11x11 area (which is still pretty big). This is how you'll be farming at the start, and it's pretty comfortable. So comfortable in fact, that it won't be strange if someone mistakes you for a bot once in a while.
Leap
Leap is what makes you stand out and go fast! Master this skill as soon as you start farming seriously.
The skill is deceptible simple at a glance, but it has a lot of caveats that make it interesting. Leap will have your character move in a straigh line instantly, in the direction your character is looking, by a set number of cells. Let's go over the points that make it such a good skill, and also over its limitations:
- +It ignores obstacles. As long as the destination cell is something you can stand on, you'll get there no matter if there's a wall, a cliff or a river between you and your destination.
- +Its fixed cast time is reduced by 0.5s with each level. Starting at lvl3, it has the same FCT as your other skills, so you'll be able to use it instantly. And of course it has no after cast delay, so you can use it as fast as your attack speed allows you.
- -It can not be used in areas where teleport can't be used. This unfortunately makes it useless in instances and special maps like Depth and Garden of Time Zones.
- -If the destination cell is something you can't stand on, the skill will fail and nothing will happen. This behaviour is a bit annoying until you get the hang of the skill.
Let's talk about how to use the skill to farm. First of all, note that this method of farming requires that your character has good attack speed. It starts feeling real good when you hit the 186ASPD mark. At that point, you can spam the skill often enough, and there's almost no delay between the time you leap -> use WT/BT -> leap again. This is the reason most SAs will take Agilty enchant for their crowns, over Intelligence or Wisdom, even if we don't benefit from the ACD in this enchant.
Let's look at some examples of how to use Leap effectively. In the following images, I'm using @lgp with square 6 and circle 10.
 |
 |
|---|
One of the tricks you have to learn about Leap is that you can use different levels of the skill to Leap different distances. The most common way is to use lv3 Leap and lv5 Leap. This will allow you to jump distances of either 6 cells in front of you with lv3, or 10 cells in front with lv5.
Now look at Image 1. Here, if I tried to use lv3 Leap the skill would fail, because the destination cell is not something I can stand on. On the other hand, if I were to use lvl5, I'd jump 10 cells in front and the skill would move me there, jumping over the obstacle.
The opposite happens in Image 2. Using lv3 here would succeed and using lv5 would fail.
The more familiar you're with a map, the easier it will be to navigate it fast using Leap. The faster you navigate the map, while killing everything in sight with WT/BT, the faster you'll farm.
Another thing to keep in mind is what happens when you teleport after leaping. After teleporting, your character will always be looking north. This doesn't mean you'll leap north if you leap after teleporting. Leap remembers the last direction you leaped at, and it will use that until you click in another direction. You will want to look at your turbo setup and decide whether you like to use turbo on a Cast + Click key or a Cast only key. I definitely like Cast only better, but Cast + click can have some merits if you know what you're doing. I'd say start with Cast only and then try out Cast + click to see how it works and whether you like it or not.
One last thing to consider is the use of /bingbing and /bangbang. These two commands will make your character spin either clockwise or counterclockwise, and they can be bound to your arrow keys <- ->, or maybe A D if you prefer. Why should you consider this? Well, because once you get used to it, this way of changing directions is faster than clicking, and it will allow you to control your movement better.
That's about all I know about the mechanics of Leap. For this to be effective you want to be comfortably one shotting the mobs in the map you're trying to farm (even better if you can do it only with a manual cast of BT, without relying on the autocast from the crown). You also want 186ASPD (you can use Celermine Juice, transformation scrolls and Berserk Potion to help a lot with this).
How much better is this than the standard teleport + skill? Around 20% better, from what I've gathered. But at first it will be like 30% worse, until you get really used to it and know the map well. It's definitely worth doing if the map has big areas and many obstacles you can jump over, like it's the case with Temple and Niff2. If it's a map with a lot of narrow corridors like Mjolnir Underground, I prefer not to do it.
Now that you know all I know about Leap, go ahead and try it and do let me know how it goes.
Things I wish I knew from the start
When I started playing on MuhRO, I was amazed at how good the wiki is! All of the things I will explain in this section are already in the wiki, but I'll explain them in the way I would have liked to have them explained to me when I started.
How to make Safe to +X certificates
Certificates are a great comodity to farm at the early and mid stages of the game, and you always need a few of them now and then to upgrade something. I'll only explain the illusion dungeon method of how to get them. If you want to know other methods, check out [to make weapon and armor tickets] or Madame Celery's Guide to MuhRO.
I'll explain this method with an example. Let's say I want to make a ![]() Safe to +10 Armor Certificate (6994). The steps I'd follow are:
Safe to +10 Armor Certificate (6994). The steps I'd follow are:
- Go farm your favourite Illusion Dungeon. If I need nothing else, I'll definitely choose Illusion Underwater 2 for this purpose, because of the mob density and potential spawn of Abysmal Witch.
- Collect as many refinement cubes as you want. On average, you'll need 12 cubes for 1 Safe to +10 Armor Certificate (6994). In the case of Illusion Underwater, the cube in question is
 Underwater Refinement Box (100425).
 - Also collect at least 3 pieces of Illusion Armor from the same Illusion dungeon you're farming. In this case, let's say I get 1
 Illusion Chain Mail [1] (450146) and 2
  Illusion Saint Robe [1] (450144).
 - Once I have everything I need from the dungeon, I'll @go 50 and upgrade the armors or weapons I'll be working with to +4 first, because the box requires them to be +4 before randomly upgrading them (always read item descriptions!).
- Now I'll upgrade my Illusion Chain Mail [1] (450146) and Illusion Saint Robe [1] (450144) by using the Underwater Refinement Box (100425). Let's say I end up with a +10 and 2 +7. That's great! What I'm looking for is exactly +10 items, since that's what is needed to make
 Safe to +9 Armor Certificate (6232). But weren't we looking for Safe to +10 Armor Certificate (6994)? Yes, we'll get there in the next step.
 - Let's pretend I had 10 cubes and I managed to roll 3 +10 pieces of Illusion gear. This would be fairly lucky, but not that uncommon. Now I'd head over to (paramk 55, 96) and talk to Red Hugo. Selecting the Exchange Hammer option, he'll show me a bunch of Refine Hammer options. In this case, I'll be buying 3
 +10 Lv1 Armor Refine Ticket Exchange Hammer (50006). The reason is, I have 3 +10 Lv1 Armors that I want to break, so I need to use +10 Lv1 Armor Refine Ticket Exchange Hammer (50006).
 - Once I've used the hammers, I'll have 3 Safe to +9 Armor Certificate (6232). I can talk to Red Hugo again, this time picking the Refine Tickets option. Here, I'll exchange 3 Safe to +9 Armor Certificate (6232) for 1 Safe to +10 Armor Certificate (6994).
That's the gist of it. Now notice that you can also make ![]() Safe to +9 Armor Certificate (6232) by combining only 2
Safe to +9 Armor Certificate (6232) by combining only 2 ![]() Safe to +8 Armor Certificate (6233), so you might want to keep +9 pieces of gear when you get them from the cubes. The drawback to this is that each hammer costs 1m zeny, so using 6 hammers instead of 3 eats your profits a bit. From here, figure out for yourself if it's worth keeping +9 pieces or rolling them again to try and hit +10.
Safe to +8 Armor Certificate (6233), so you might want to keep +9 pieces of gear when you get them from the cubes. The drawback to this is that each hammer costs 1m zeny, so using 6 hammers instead of 3 eats your profits a bit. From here, figure out for yourself if it's worth keeping +9 pieces or rolling them again to try and hit +10.
Commands
MuhRO has a lot of useful commands you should start taking advantage of from day 1! Check out Player Commands.
- You can use @storeall to quickly store everything you farmed and continue farming, to sell the stuff later and not waste precious bubblegum time.
- You can make a @restock list to quickly fish out consumables and equipment from your storage.
- You can find out whether an item is sold at NPC by using the @wn command.
- You can use a combination of @mi, @whereis and @navi to find pretty much any monster.
There's a lot more stuff to learn there, give it a thorough look!
Favourites tab in the inventory
You can put any item in this tab, and it will not be stored when you use @storeall. Very useful when you don't want to store your consumables. Also, if you look at the bottom of your inventory window while in this tab, you will see that you can lock items in this tab from being sellable to NPC. This facilitates selling quickly, since you don't have to worry about selling something you're not supposed to sell.
Turbo
Turbo makes it so that you can hold down a hotkey to spam the skill associated to that hotkey without the need to click. It also simulates very quick clicks, which will make it easier to sell stuff to NPC or equip items from your inventory. You can find the Turbo Setup in the launcher, to the left side. Default binding ingame to turn Turbo on is ALT + P. Configure it to your liking and make use of it, it's a great tool.
How to make advanced Shadow Gear
This can also be confusing the first time, so I'll do my best to provide an alternative explanation. I'm fond of doing things with examples, as you might have noticed, so let's get into it again. Let's pretend I want to make a ![]() Full Penetration Shadow Earring (24661):
Full Penetration Shadow Earring (24661):
- Go to (main_office 90, 170) and check where the base set for your advanced set is. In the case of Full Penetration, the base set is called Penetration, so it's available at Gina.
- Right click the Thump Box for your gear and check what it requires. In this case it's
 Full Penetration Shadow Thump Box (100572) and the description tells you that you need 10 items with refine of at least +7, and then lists a bunch of items. If you see, the items listed in the Thump Box are the same items that you can find in the same shop where the Thump Box is.
 - Buy the Full Penetration Shadow Thump Box (100572) for 30m zeny plus as many items as it tells you. If you haven't noticed, this is quite an expensive endeavor. Note: you can buy repeated items from the same category if you want, the box accepts duplicates.
- Upgrade all the items to +7. There's several ways to do this. You can just use
 Shadow 9 Refine Hammer (23926) to make it directly +9 with no RNG involved. You can find Shadow 9 Refine Hammer (23926) at Rayja. You can buy
  Hollgrehenn's Shadow Refine Hammer (23436) at Rayja's Enchant with zeny option and try your luck. You can also upgrade your items normally with
  Elunium (985) until +4 and then use HD Elunium (6241) until +7. From these 3 options, I usually do the Shadow 9 Refine Hammer (23926) because I feel like there's already plenty of RNG in other places of the game. This and using HD Elunium (6241) is usually close to the same price, especially with how expensive HD ores have become at the time of writing this, but feel free to check for yourself. Hollgrehenn's Shadow Refine Hammer (23436) tends to be the worst option, but you can also get very lucky.
 - Once all items are +7 and in your inventory, use the Full Penetration Shadow Thump Box (100572) and double click the items until it's full and it allows you to click the Accept button.
- Ta-da! You have yourself a shiny piece of random Advanced Shadow Gear of the type the box was for. In this case, it could be any of the Full Penetration items.
- If you didn't get the item you wanted, you can roll it for relatively cheaply using
 Shadow Exchange Ticket (1000854) (also found at Rayja's Special Shop). Talk to Rayja and use the Switch Shadow Gear option to do this.
Contact
Since this is still a WIP, if you have questions feel free to reach out to me ingame via PM at Daoist Mango or in discord @mango9001.