Airship Crash: Difference between revisions
(→Quests) |
(Marked this version for translation) |
||
| (34 intermediate revisions by 6 users not shown) | |||
| Line 1: | Line 1: | ||
<languages/> | |||
<translate> | |||
<!--T:1--> | |||
[[Category:Instances]] | [[Category:Instances]] | ||
=Overview= | =Overview= | ||
* Level Requirement: | * Level Requirement: 200 | ||
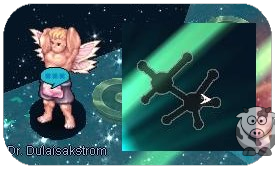
* Starting Point: {{#navi:dali02|137|86}} | * Starting Point: {{#navi:dali02|137|86}} | ||
*; [[File:Dr. Dulaisakstrom.png]] | |||
* Cooldown: 1 day | * Cooldown: 1 day | ||
* Rewards: | * Rewards: | ||
| Line 9: | Line 12: | ||
{{#item:1000364}} <br> | {{#item:1000364}} <br> | ||
{{#icon:470071}} Unknown Boots [1] <br> | {{#icon:470071}} Unknown Boots [1] <br> | ||
{{#item: | {{#item:102573}} | ||
< | <!--T:2--> | ||
=Walkthrough= | |||
* Following the Airship Raid with Captain Ferlock, the airship loses control and crashes onto an unidentified island. <br> | * Following the Airship Raid with Captain Ferlock, the airship loses control and crashes onto an unidentified island. <br> | ||
* The Ymir Stone used to power the airship breaks and scatters through out the island.<br> | * The Ymir Stone used to power the airship breaks and scatters through out the island.<br> | ||
| Line 18: | Line 22: | ||
* Through the effects from the Ymir Stone, these monsters are very powerful. <br> | * Through the effects from the Ymir Stone, these monsters are very powerful. <br> | ||
* Upon arriving on the island, you will be greeted by a scientist who tells you to head to the cave to meet up with the expedition party. <br> | * Upon arriving on the island, you will be greeted by a scientist who tells you to head to the cave to meet up with the expedition party. <br> | ||
* If you search for at least 5 injured passengers and help them, a weaker version of the boss will spawn later. | |||
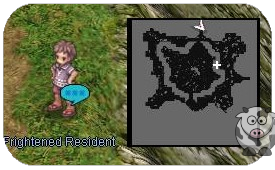
*; [[File:FrightenedResident.png]] | |||
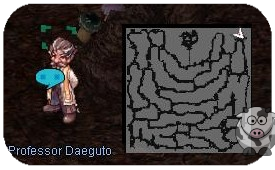
* Go the the entrance portal marked on the minimap. When you enter the cave, you will find the expedition team. <br> | * Go the the entrance portal marked on the minimap. When you enter the cave, you will find the expedition team. <br> | ||
* Talk to the Professor to receive a briefing regarding the situation and investigation process. <br> | * Talk to the Professor to receive a briefing regarding the situation and investigation process. <br> | ||
* Talk to the Professor again to join the investigation party. | *; [[File:Professor Daeguto.png]] | ||
* Talk to the Professor again to join the investigation party. <br> | |||
* Careful: When you join the investigation, monsters will now spawn including on top of you. | * Careful: When you join the investigation, monsters will now spawn including on top of you. | ||
<!--T:3--> | |||
=Quests= | =Quests= | ||
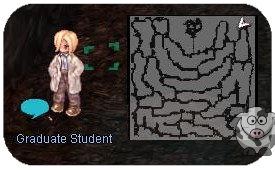
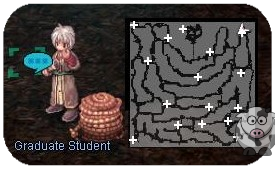
* Talk to the Student to receive a quest where you must kill monsters from the map. | * Talk to the Student to receive a quest where you must kill monsters from the map. | ||
*; [[File:GraduateStudent1.png]] | |||
* You cannot take multiple kill quests at once. | * You cannot take multiple kill quests at once. | ||
{| class="wikitable mw-collapsible" style="text-align: center;width: 25%;" | {| class="wikitable mw-collapsible" style="text-align: center;width: 25%;" | ||
|- style="background-color:#B7CDEC;text-align:center;" | |- style="background-color:#B7CDEC;text-align:center;" | ||
| Line 33: | Line 41: | ||
|- | |- | ||
|Kill 50 Monsters | |Kill 50 Monsters | ||
| | |50,000,000 / 40,000,000 exp <br> Unlocks Kill 100 Monster quest. | ||
|- | |- | ||
|Kill 100 Monsters | |Kill 100 Monsters | ||
| | |100,000,000 / 80,000,000 exp <br> Unlocks Kill 150 Monster quest. | ||
|- | |- | ||
|Kill 150 Monsters | |Kill 150 Monsters | ||
| | |150,000,000 / 120,000,000 exp | ||
|} | |} | ||
<!--T:4--> | |||
=Escape Rope Indicator= | =Escape Rope Indicator= | ||
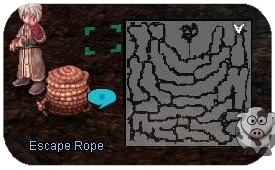
* Talk to the Student | * Talk to the Student to learn about escape ropes. | ||
*; [[File:GraduateStudent.png]] [[File:escaperope.png]] | |||
* Since you cannot teleport in instances, you can use the Rope Piles to teleport back to the investigation party. | * Since you cannot teleport in instances, you can use the Rope Piles to teleport back to the investigation party. | ||
* Select Option 2 to mark your minimap with | * Select Option 2 to mark your minimap with all rope locations. | ||
<!--T:5--> | |||
=Fragments= | =Fragments= | ||
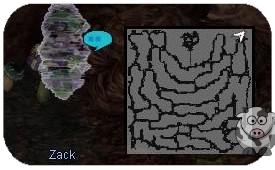
* Talk to the Ghost | * Talk to the Ghost Zack who will tell you about summoning the MVP. | ||
* Give him | *; [[File:Zack.png]] | ||
* Give him 25x {{#item:1000363}} to summon the MVP. | |||
<!--T:6--> | |||
=Monsters= | =Monsters= | ||
If you don't help the stranded people, the stronger MVP will come. | If you don't help the stranded people, the stronger MVP will come. | ||
| Line 80: | Line 93: | ||
|} | |} | ||
<!--T:7--> | |||
=Cards= | =Cards= | ||
{| class="wikitable" style="text-align: center;width: 100%;" | {| class="wikitable" style="text-align: center;width: 100%;" | ||
|- | |- | ||
| Line 94: | Line 107: | ||
|} | |} | ||
<!--T:8--> | |||
=Rewards= | =Rewards= | ||
All monsters have a chance to drop {{#item:1000364}} | All monsters have a chance to drop {{#item:1000364}} which can be converted into {{#item:1000363}}, as well as their respective cards.<br> | ||
The MVP has a chance to drop the following items at a low chance: <br> | The MVP has a chance to drop the following items at a low chance: <br> | ||
{{#item:470071}} <br> | {{#item:470071}} <br> | ||
| Line 104: | Line 118: | ||
{{#item:470077}} <br> | {{#item:470077}} <br> | ||
{{#item:100476}} <br> | {{#item:100476}} <br> | ||
{| class="wikitable | <!--T:9--> | ||
{| class="wikitable" style="text-align: center;width: 100%;" | |||
|- style="background-color:#B7CDEC;text-align:center;" | |- style="background-color:#B7CDEC;text-align:center;" | ||
| colspan=" | | colspan="3"| Boots Description | ||
|- | |- | ||
|{{#item:470071}} <br> {{#itemDesc:470071}} | |{{#item:470071}} <br> {{#itemDesc:470071}} | ||
|{{#item:470072}} <br> {{#itemDesc:470072}} | |{{#item:470072}} <br> {{#itemDesc:470072}} | ||
|{{#item:470073}} <br> {{#itemDesc:470073}} | |||
|- | |- | ||
|{{#item:470074}} <br> {{#itemDesc:470074}} | |{{#item:470074}} <br> {{#itemDesc:470074}} | ||
|{{#item:470076}} <br> {{#itemDesc:470076}} | |{{#item:470076}} <br> {{#itemDesc:470076}} | ||
|{{#item:470077}} <br> {{#itemDesc:470077}} | |{{#item:470077}} <br> {{#itemDesc:470077}} | ||
|} | |} | ||
<!--T:10--> | |||
=Item Exchange= | =Item Exchange= | ||
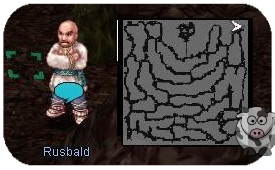
Talk to Rusbald to exchange. <br> | |||
[[File:Rusbald.png]] | |||
{| class="wikitable mw-collapsible" style="text-align: center;width: 50%;" | {| class="wikitable mw-collapsible" style="text-align: center;width: 50%;" | ||
|- style="background-color:#B7CDEC;text-align:center;" | |- style="background-color:#B7CDEC;text-align:center;" | ||
| Line 135: | Line 151: | ||
{{#item:470076}} <br> | {{#item:470076}} <br> | ||
{{#item:470077}} <br> | {{#item:470077}} <br> | ||
|185x {{#item:1000363}} | |185x {{#item:1000363}} | ||
|} | |} | ||
<!--T:11--> | |||
=Enchantment= | =Enchantment= | ||
* You use {{#item:100476}} to enchant your Unknown Stat Boots. | * You use {{#item:100476}} to enchant your Unknown Stat Boots. | ||
{| class="wikitable mw-collapsible" style="text-align: center;width: 50%;" | {| class="wikitable mw-collapsible" style="text-align: center;width: 50%;" | ||
|- style="background-color:#B7CDEC;text-align:center;" | |- style="background-color:#B7CDEC;text-align:center;" | ||
| Line 161: | Line 174: | ||
Variable Cast Time - 1% ~ 10% | Variable Cast Time - 1% ~ 10% | ||
|} | |} | ||
</translate> | |||
Latest revision as of 12:28, 2 April 2025
Overview
![]() Ymir Fragment (1000363)
Ymir Fragment (1000363)
![]() Ymir Ore (1000364)
Ymir Ore (1000364)
![]() Unknown Boots [1]
Unknown Boots [1]
![]() Antiquity Crash Site (Unidentified Creature) (102573)
Antiquity Crash Site (Unidentified Creature) (102573)
Walkthrough
- Following the Airship Raid with Captain Ferlock, the airship loses control and crashes onto an unidentified island.
- The Ymir Stone used to power the airship breaks and scatters through out the island.
- An expedition team makes their way to the crash site for observation.
- Your goal is to help the expedition team navigate through the island and investigate the monsters that inhabits the place.
- Through the effects from the Ymir Stone, these monsters are very powerful.
- Upon arriving on the island, you will be greeted by a scientist who tells you to head to the cave to meet up with the expedition party.
- If you search for at least 5 injured passengers and help them, a weaker version of the boss will spawn later.
- Go the the entrance portal marked on the minimap. When you enter the cave, you will find the expedition team.
- Talk to the Professor to receive a briefing regarding the situation and investigation process.
- Talk to the Professor again to join the investigation party.
- Careful: When you join the investigation, monsters will now spawn including on top of you.
Quests
- Talk to the Student to receive a quest where you must kill monsters from the map.
- You cannot take multiple kill quests at once.
| Quest | Reward |
| Kill 50 Monsters | 50,000,000 / 40,000,000 exp Unlocks Kill 100 Monster quest. |
| Kill 100 Monsters | 100,000,000 / 80,000,000 exp Unlocks Kill 150 Monster quest. |
| Kill 150 Monsters | 150,000,000 / 120,000,000 exp |
Escape Rope Indicator
- Talk to the Student to learn about escape ropes.
- Since you cannot teleport in instances, you can use the Rope Piles to teleport back to the investigation party.
- Select Option 2 to mark your minimap with all rope locations.
Fragments
- Talk to the Ghost Zack who will tell you about summoning the MVP.
- Give him 25x
 Ymir Fragment (1000363) to summon the MVP.
Monsters
If you don't help the stranded people, the stronger MVP will come.
| Monster | HP |
 Rotten Tree (20886) |
17,421,722 |
 Melted Poring (20887) |
13,295,524 |
 Grave Worm (20888) |
18,797,121 |
 Brain Sucker (20889) |
16,734,022 |
 Moskillro (20890) |
15,358,623 |
 Unidentified Creatures (20891) |
868,754,928 |
 Unidentified Life Forms (21062) |
1,578,754,928 |
Cards
Increases Natural HP Recovery Rate by 100%. Increases Damage against Insect race by 10%. _______________________ Type: Card Compound on: Armor Weight: 1 |
When compounded on either One-Handed Staff or Two-Handed Staff: Ignores magic defense of all race, except Players, by 10%. For each 4 Refine Levels: Ignores magic defense of enemies by additional 2% and increases received physical damage by 2%. _______________________ Type: Card Compound on: Right Hand Weight: 1 |
MaxHP -15% _______________________ Drains 2 SP on each physical attack. Physical attacks have a random chance to absorb 20% of the inflicted damage as HP. _______________________ Type: Card Compound on: Right Hand Weight: 1 |
Decreases Variable Casting Time by 7%. Decreases Attack Speed (Increases After Attack Delay by 3%). _______________________ Type: Card Compound on: Accessory Weight: 1 |
MaxHP +10% _______________________ Base VIT at least 100: Decreases damage taken from Earth and Poison elemental attacks by 1%. _______________________ Base VIT at least 130: Decreases damage taken from Earth and Poison elemental attacks by 3%. _______________________ Type: Card Compound on: Head Top Weight: 1 |
Increases Magical Damage with Poison and Shadow element by 30%. Increases damage taken from Holy elemental attacks by 10%. _______________________ Type: Card Compound on: Right Accessory Weight: 1 |
When compounded on either Two-Handed Sword or Two-Handed Axe: Increases Melee Physical Damage by 10%. ASPD +1 For each 2 Refine Levels: Increases Melee Physical Damage by additional 1%. _______________________ Type: Card Compound on: Right Hand Weight: 1 |
Rewards
All monsters have a chance to drop ![]() Ymir Ore (1000364) which can be converted into
Ymir Ore (1000364) which can be converted into ![]() Ymir Fragment (1000363) , as well as their respective cards.
Ymir Fragment (1000363) , as well as their respective cards.
The MVP has a chance to drop the following items at a low chance:
![]() Boots of Unknown Power [1] (470071)
Boots of Unknown Power [1] (470071)
![]() Boots of Unknown Dexterity [1] (470072)
Boots of Unknown Dexterity [1] (470072)
![]() Boots of Unknown Life [1] (470073)
Boots of Unknown Life [1] (470073)
![]() Boots of Unknown Magic Power [1] (470074)
Boots of Unknown Magic Power [1] (470074)
![]() Boots of Unknown Agility [1] (470076)
Boots of Unknown Agility [1] (470076)
![]() Boots of Unknown Luck [1] (470077)
Boots of Unknown Luck [1] (470077)
![]() Ymir Beads (100476)
Ymir Beads (100476)
| Boots Description | ||
Old shoes that have been eroded by an unknown force. Whenever the wearer exerts force, he can feel the boots react. _______________________ For each 2 Refine Levels: ATK +15 _______________________ For each 3 Refine Levels: MaxHP +120 MaxSP +8 _______________________ Refine Level +9: Increases Attack Speed by 7%. _______________________ Refine Level +11: Physical attacks have a random chance to increase STR by 175 for 10 seconds. _______________________ Refine Level +13: Increases Melee Physical Damage by 7%. _______________________ [Bonus by Grade] [Grade D]: STR gained from the Boots' Effect is increased by additional 25. _______________________ [Grade C]: STR gained from the Boots' Effect is increased by additional 25. _______________________ Type: Armor Position: Shoes Defense: 60 Armor Level: 2 Refinable / Gradable Weight: 70 Required Level: 230 |
Old shoes that have been eroded by an unknown force. Whenever the wearer concentrates, he can feel the boots react. _______________________ For each 2 Refine Levels: ATK +15 _______________________ For each 3 Refine Levels: MaxHP +110 MaxSP +10 _______________________ Refine Level +9: Increases Attack Speed by 7%. _______________________ Refine Level +11: Physical and magical attacks have a random chance to increase DEX by 175 for 10 seconds. _______________________ Refine Level +13: Decreases Fixed Casting Time by 0.5 seconds. _______________________ [Bonus by Grade] [Grade D]: DEX gained from the Boots' Effect is increased by additional 25. _______________________ [Grade C]: DEX gained from the Boots' Effect is increased by additional 25. _______________________ Type: Armor Position: Shoes Defense: 60 Armor Level: 2 Refinable / Gradable Weight: 70 Required Level: 230 |
Old shoes that have been eroded by an unknown force. Whenever the wearer feels pain, he can feel the boots react. _______________________ For each 2 Refine Levels: ATK +10 MATK +10 _______________________ For each 3 Refine Levels: MaxHP +150 MaxSP +15 _______________________ Refine Level +9: Decreases Variable Casting Time by 5%. Increases Attack Speed by 5%. _______________________ Refine Level +11: Physical and magical attacks have a random chance to increase VIT by 175 for 10 seconds. _______________________ Refine Level +13: Decreases After Cast Delay by 5%. _______________________ [Bonus by Grade] [Grade D]: VIT gained from the Boots' Effect is increased by additional 25. _______________________ [Grade C]: VIT gained from the Boots' Effect is increased by additional 25. _______________________ Type: Armor Position: Shoes Defense: 65 Armor Level: 2 Refinable / Gradable Weight: 75 Required Level: 230 |
Old shoes that have been eroded by an unknown force. Whenever the wearer uses magic, he can feel the boots react. _______________________ For each 2 Refine Levels: MATK +15 Increases Healing skills effectiveness by 2%. _______________________ For each 3 Refine Levels: MaxHP +80 MaxSP +20 _______________________ Refine Level +9: Decreases Variable Casting Time by 7%. _______________________ Refine Level +11: Magical attacks have a random chance to increase INT by 175 for 10 seconds. _______________________ Refine Level +13: Increases Magical Damage with every element by 7%. _______________________ [Bonus by Grade] [Grade D]: INT gained from the Boots' Effect is increased by additional 25. _______________________ [Grade C]: INT gained from the Boots' Effect is increased by additional 25. _______________________ Type: Armor Position: Shoes Defense: 50 Armor Level: 2 Refinable / Gradable Weight: 65 Required Level: 230 |
Old shoes that have been eroded by an unknown force. Whenever the wearer makes agile movements, he can feel the boots react. _______________________ For each 2 Refine Levels: ATK +15 _______________________ For each 3 Refine Levels: MaxHP +120 MaxSP +8 _______________________ Refine Level +9: Increases Attack Speed by 7%. _______________________ Refine Level +11: Physical attacks have a random chance to increase AGI by 175 for 10 seconds. _______________________ Refine Level +13: Increases melee and Ranged Physical Damage by 4%. _______________________ [Bonus by Grade] [Grade D]: AGI gained from the Boots' Effect is increased by additional 25. _______________________ [Grade C]: AGI gained from the Boots' Effect is increased by additional 25. _______________________ Type: Armor Position: Shoes Defense: 60 Armor Level: 2 Refinable / Gradable Weight: 70 Required Level: 230 |
Old shoes that have been eroded by an unknown force. Whenever the wearer is lucky, he can feel the boots react. _______________________ For each 2 Refine Levels: ATK +15 _______________________ For each 3 Refine Levels: MaxHP +100 MaxSP +8 _______________________ Refine Level +9: Increases Attack Speed by 7%. _______________________ Refine Level +11: Physical attacks have a random chance to increase LUK by 175 for 10 seconds. _______________________ Refine Level +13: CRI +7 Increases Critical Damage by 7%. ATK +7% _______________________ [Bonus by Grade] [Grade D]: LUK gained from the Boots' Effect is increased by additional 25. _______________________ [Grade C]: LUK gained from the Boots' Effect is increased by additional 25. _______________________ Type: Armor Position: Shoes Defense: 65 Armor Level: 2 Refinable / Gradable Weight: 72 Required Level: 230 |
Item Exchange
| Item | Currency Amount |
| 150,000z 17x | |
|
185x |
Enchantment
- You use
 Ymir Beads (100476) to enchant your Unknown Stat Boots.
| Line Option | Possible Enchant |
| 1 | MHP + 1% ~ 10% MSP + 1% ~ 10% |
| 2 | HP Recovery + 25% ~ 50% SP Recovery + 25% ~ 50% |
