18 Direction of Prayer: Difference between revisions
(→Part 2) |
Schuuuubiiii (talk | contribs) (Marked this version for translation) |
||
| (109 intermediate revisions by 5 users not shown) | |||
| Line 1: | Line 1: | ||
<languages/> | |||
<translate> | |||
<!--T:1--> | |||
<br> | |||
{{:Temporal Tina}} | |||
Episode 18: Direction of Prayer | |||
After succeeding in analyzing the Illusion's power in Varmundt's Mansion, your journey takes you to back to the capital of Arunafeltz to uncover a societal division among its people. Rachel was founded by the missionaries who immigrated and preached the Goddess | <!--T:2--> | ||
After succeeding in analyzing the Illusion's power in Varmundt's Mansion, your journey takes you to back to the capital of Arunafeltz to uncover a societal division among its people. Rachel was founded by the missionaries who immigrated and preached the Goddess Freya. However, faith did not resolve the conflicts between the migrants and the natives. | |||
=Requirements= | |||
* Level Required: 170 | * Level Required: 170 | ||
* Quest Prerequisite: | * Quest Prerequisite: | ||
** Episode 17.2 | ** Episode 17.2 ([[17.2_Sage_Legacy#Tracking_Illusion|Tracking Illusion]]) | ||
* Items Required: | * Items Required: | ||
** 1x {{#item:517}} | ** 1x {{#item:517}} | ||
| Line 12: | Line 17: | ||
** 1x {{#item:7197}} | ** 1x {{#item:7197}} | ||
<!--T:3--> | |||
=Main Story Quest= | |||
==Part 1== | |||
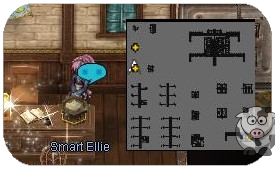
# {{#navi:ba_in01|26|266}} - Talk to Elly (Note: you might need to talk to Elly twice) in Varmundt's Mansion and receive a {{#item:400127}} and equip it for the whole quest. With this headgear, you can communicate with Elly during your investigation in Rachel for Illusion power presence. <br> | |||
# {{#navi:ba_in01|26|266}} - Talk to Elly in Varmundt's Mansion and receive a {{#item:400127}} and equip it for the whole quest. With this headgear, you can communicate with Elly during your investigation in Rachel for Illusion power presence. <br> | |||
#; [[File:Elly18.png]] | #; [[File:Elly18.png]] | ||
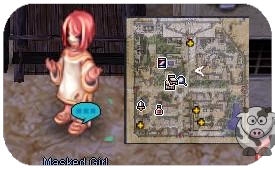
# {{#navi:rachel|182|176}} - Talk to the Masked Girl in Rachel. You and Elly will uncover an argument among its citizens. More people start to show up and protest for Arunafeltz to be united including with the natives. <br> | # {{#navi:rachel|182|176}} - Talk to the Masked Girl in Rachel. You and Elly will uncover an argument among its citizens. More people start to show up and protest for Arunafeltz to be united including with the natives. <br> | ||
#; [[File:Masked18.png]] | #; [[File:Masked18.png]] | ||
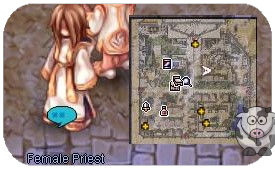
# {{#navi:rachel|183|170}} - Talk to the | # {{#navi:rachel|183|170}} - Talk to the Female Priest who shows up to calm the people. Talk to her again who asks you to find the origin of this conflict. Rewarded with 20x {{#item:1000405}}. | ||
#; [[File: | #; [[File:Female18.png]] | ||
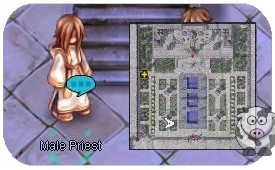
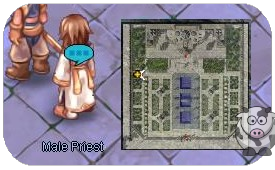
# {{#navi:ra_temp|72|54}} - Talk to the Male Priest Junok outside Rachel's Temple to ask about the arguments you witnessed in the city. He explains that there is an on-going conflict between the natives and migrants. Guard Gala explains the situation that several attempts has been made to break into Rachel's Temple. Another Guard appears to inform Junok that more intruders were just spotted from the west. <br> | # {{#navi:ra_temp|72|54}} - Talk to the Male Priest Junok outside Rachel's Temple to ask about the arguments you witnessed in the city. He explains that there is an on-going conflict between the natives and migrants. Guard Gala explains the situation that several attempts has been made to break into Rachel's Temple. Another Guard appears to inform Junok that more intruders were just spotted from the west. <br> | ||
#; [[File:Junok18.png]] | #; [[File:Junok18.png]] | ||
| Line 27: | Line 31: | ||
#; [[File:Junok218.png]] | #; [[File:Junok218.png]] | ||
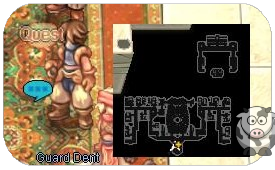
# {{#navi:ra_temin|173|40}} - Talk to Guard Dent who explains that these intrusions are getting worse. | # {{#navi:ra_temin|173|40}} - Talk to Guard Dent who explains that these intrusions are getting worse. | ||
#; [[File:Dent18. | #; [[File:Dent18.png]] | ||
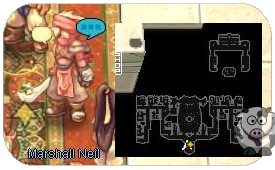
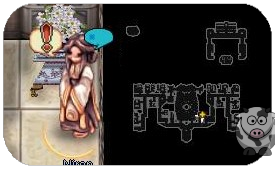
# {{#navi:ra_temin|174|38}} - Talk to Marshall Neil for his stance on the situation. | # {{#navi:ra_temin|174|38}} - Talk to Marshall Neil for his stance on the situation. | ||
#; [[File:Neil18.png]] | #; [[File:Neil18.png]] | ||
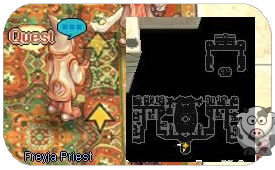
# {{#navi:ra_temin|172|36}} - Talk to | # {{#navi:ra_temin|172|36}} - Talk to Freya Priest who says that lately the people who come inside the temple are causing fights rather than praying. High Priestess Niren shows up to share her concerns about fighting in the Divine Temple. She asks to talk to you in private. | ||
#; [[File: | #; [[File:Freya18.png]] | ||
# {{#navi:ra_temin|213|87}} - Talk to High Priestess Niren in secret near the staircase. She explains she knows the Heart Hunters are after Ymir's Heart piece, but security is spread too thin with the recent uproar between the migrants and natives. | # {{#navi:ra_temin|213|87}} - Talk to High Priestess Niren in secret near the staircase. She explains she knows the Heart Hunters are after Ymir's Heart piece, but security is spread too thin with the recent uproar between the migrants and natives. | ||
#; [[File:Niren.png]] | #; [[File:Niren.png]] | ||
# {{#navi:ra_temin|174|38}} - Return to Marshall Neil who says his son Maram can help. | # {{#navi:ra_temin|174|38}} - Return to Marshall Neil who says his son Maram can help. | ||
#; [[File:Neil18.png]] | |||
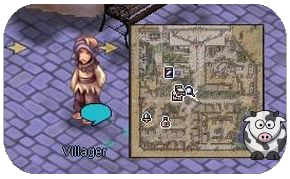
# {{#navi:rachel|137|135}} - Go ask a Villager in Rachel to see if he has seen Maram but he is no help. | # {{#navi:rachel|137|135}} - Go ask a Villager in Rachel to see if he has seen Maram but he is no help. | ||
#; [[File:Villager18.png]] | #; [[File:Villager18.png]] | ||
| Line 41: | Line 46: | ||
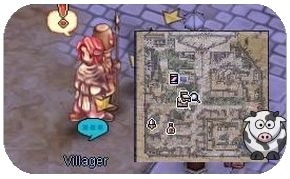
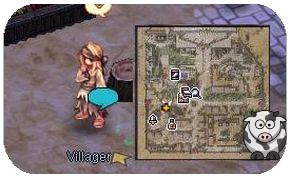
# {{#navi:rachel|69|117}} - Talk to another Villager who says he saw Maram go to a meeting just north of here. | # {{#navi:rachel|69|117}} - Talk to another Villager who says he saw Maram go to a meeting just north of here. | ||
#; [[File:3rdVillager18.png]] | #; [[File:3rdVillager18.png]] | ||
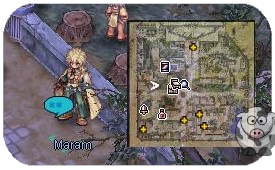
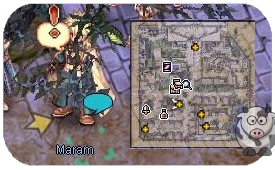
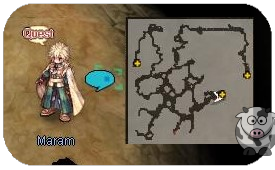
# {{#navi:rachel|70|147}} - Talk to Maram. He explains the situation of Rachel's past where believers of | # {{#navi:rachel|70|147}} - Talk to Maram. He explains the situation of Rachel's past where believers of Freya migrated here and pushed the natives away. The natives tried to stay with the Temple, but ultimate hated it and left. He also let you know that he is adopted by Niren. When his mother became a High Priest, she lead a program to encourage the wealthy immigrants of Rachel to adopt just as she did. Niren had the idea where adopting children of the natives could help bridge the gap between the two groups. Instead, the native children were outcast into discrimination known as "Gray Children". Maram asks you to wait with him so you can speak with other natives to learn the circumstance better. | ||
#; [[File:Maram18.png]] | #; [[File:Maram18.png]] | ||
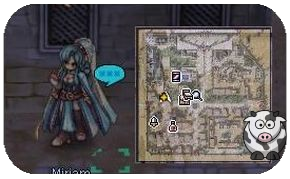
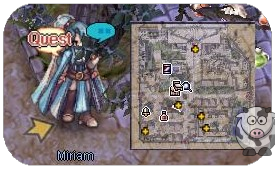
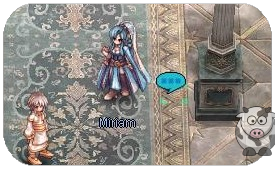
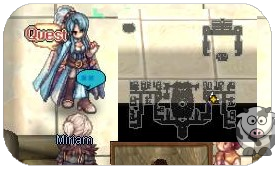
# {{#navi:rachel|62|144}} - Talk to Miriam. Miriam and Maram gives you a list of items to buy from traders in Rachel. | # {{#navi:rachel|62|144}} - Talk to Miriam. Miriam and Maram gives you a list of items to buy from traders in Rachel. | ||
#; [[File:Miriam18.png]] | #; [[File:Miriam18.png]] | ||
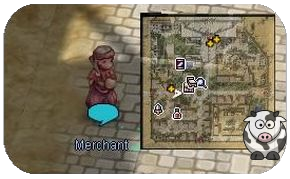
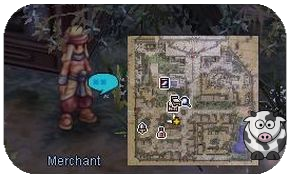
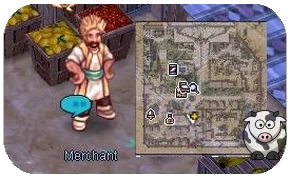
# {{#navi:rachel|87|122}} - Ask the trader if he has anything to sell, but he is too nervous to sell to you. | # {{#navi:rachel|87|122}} - Ask the trader if he has anything to sell, but he is too nervous to sell to you. | ||
#; [[File: | #; [[File:trader183.png]] | ||
# {{#navi:rachel|107|102}} - Talk with Trader Sannat. You show him the list but he doesn't have any of those items in stock. | # {{#navi:rachel|107|102}} - Talk with Trader Sannat. You show him the list but he doesn't have any of those items in stock. | ||
#; [[File:Sannat18.png]] | #; [[File:Sannat18.png]] | ||
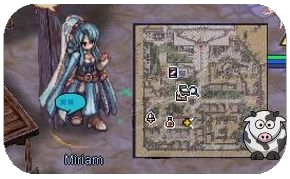
# {{#navi:rachel|117|104}} - Talk to Miriam who gets frustrated on how the merchants avoids | # {{#navi:rachel|117|104}} - Talk to Miriam who gets frustrated on how the merchants avoids "Gray Children" and suddenly cannot provide products. | ||
#; [[File:Miriam118.png]] | |||
# {{#navi:rachel|119|103}} - Talk to Maram. He has an idea where you and him will lie about your background. That way the vendors will not get suspicious. | # {{#navi:rachel|119|103}} - Talk to Maram. He has an idea where you and him will lie about your background. That way the vendors will not get suspicious. | ||
#; [[File:Maram118.png]] | |||
# {{#navi:rachel|137|85}} - Talk to the Merchant Rencia. Maram introduces you as another Merchant in an adjacent village who needs to restock. Choose: "He is in the bar." Rencia sees your list and says he can provide the items requested. However, he notices you didn't bring a cart and offers a delivery service. | # {{#navi:rachel|137|85}} - Talk to the Merchant Rencia. Maram introduces you as another Merchant in an adjacent village who needs to restock. Choose: "He is in the bar." Rencia sees your list and says he can provide the items requested. However, he notices you didn't bring a cart and offers a delivery service. | ||
#; [[File:Rencia18.png]] | #; [[File:Rencia18.png]] | ||
| Line 77: | Line 84: | ||
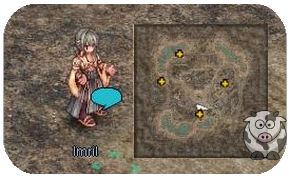
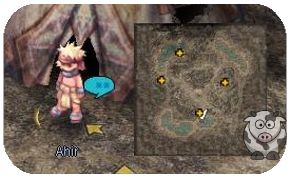
#; [[File:Imril18.png]] | #; [[File:Imril18.png]] | ||
# {{#navi:gw_fild01|35|102}} - Talk to Maram. Suad appears and Maram explains the whole situation. Fewer traders in Rachel are selling to natives. Oz Labyrinth will soon be impassable due to overflowing lava. Maram says they should considered themselves lucky to have an adventurer help. He asks Suad to give you a chance like how Niren gave him a chance. Suad finally allows you to enter the village. | # {{#navi:gw_fild01|35|102}} - Talk to Maram. Suad appears and Maram explains the whole situation. Fewer traders in Rachel are selling to natives. Oz Labyrinth will soon be impassable due to overflowing lava. Maram says they should considered themselves lucky to have an adventurer help. He asks Suad to give you a chance like how Niren gave him a chance. Suad finally allows you to enter the village. | ||
# {{#navi:wolfvill|143|113}} - Talk to Imril and Maram. They are glad that Suad allowed you to enter Gray Wolf Village. They show you how the current situation is distressing with the lack of food and harsh environment. Maram mentions that you may not be so easily allowed in Gray Wolf Village next time suggests talking to the other villagers to become more trustworthy. Rewarded with 50x {{#item:1000405}} and side quests unlocked. | |||
# {{#navi:wolfvill|143|113}} - Talk to Imril and Maram. They are glad that Suad allowed you to enter | #; [[File:Imril218.png]] | ||
<!--T:4--> | |||
==Part 2== | |||
'''In order to proceed with the main story quest, you need 900 reputation with Wolf Village which you will get if you unlock all [[Daily_Quests_Episode_18|daily quests]]. Alternatively you can repeat some daily quests until you reach the required reputation.''' | |||
<!--T:14--> | |||
''' | '''You will also need to complete the [[Daily Quests Episode 18|Investigation of Oz Labyrinth]] quest''' | ||
<!--T:5--> | |||
==Part 3== | |||
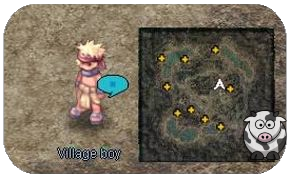
# {{#navi:wolfvill|180|179}} - Talk to Village Boy. He says the conference is starting soon. | # {{#navi:wolfvill|180|179}} - Talk to Village Boy. He says the conference is starting soon. | ||
#; [[File:VillageB18.png]] | #; [[File:VillageB18.png]] | ||
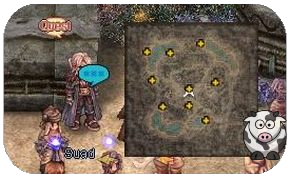
# {{#navi:wolfvill|144|151}} - Meet with Suad at the conference located at the center of Grey Wolf Village. | # {{#navi:wolfvill|144|151}} - Meet with Suad at the conference located at the center of Grey Wolf Village. | ||
#; [[File:Suad18.png]] | #; [[File:Suad18.png]] | ||
# {{#navi:wolfvill|145|146}} - Overhear the Radical Man who states that we should destroy all temples of | # {{#navi:wolfvill|145|146}} - Overhear the Radical Man who states that we should destroy all temples of Freya. | ||
# {{#navi:wolfvill|139|148}} - Listen to the Native Old Man who agrees. | # {{#navi:wolfvill|139|148}} - Listen to the Native Old Man who agrees. | ||
# {{#navi:wolfvill|150|147}} - Talk with the other attendee who asks for war. | # {{#navi:wolfvill|150|147}} - Talk with the other attendee who asks for war. | ||
# {{#navi:wolfvill|152|145}} - Listen to the Skeptical Young Man. He is worried about the shear number of Rachel Guards if the village chooses to attack. | # {{#navi:wolfvill|152|145}} - Listen to the Skeptical Young Man. He is worried about the shear number of Rachel Guards if the village chooses to attack. | ||
# {{#navi:wolfvill|144|151}} - Talk to Suad who begins the conference. He shares his concerns about crossing the Oz Gorge for supplies. The future of Grey Wolf Village looks bleak. The people start screaming and demanding war against Rachel to that the village can reclaim the land. Suad is pressured for an armed rebellion. One villager mentions to you that he will get the weapons from their hidden location. This catches Maram's attention and says we should investigate the place to see where the weapons are coming from. | # {{#navi:wolfvill|144|151}} - Talk to Suad who begins the conference. He shares his concerns about crossing the Oz Gorge for supplies. The future of Grey Wolf Village looks bleak. The people start screaming and demanding war against Rachel to that the village can reclaim the land. Suad is pressured for an armed rebellion. One villager mentions to you that he will get the weapons from their hidden location. This catches Maram's attention and says we should investigate the place to see where the weapons are coming from. | ||
| Line 105: | Line 117: | ||
#; [[File:Maramthor18.png]] | #; [[File:Maramthor18.png]] | ||
# {{#navi:que_thr|133|53}} - Talk to Maram again at the entrance of the secret base. You will enter the base as an instance (not forced solo). | # {{#navi:que_thr|133|53}} - Talk to Maram again at the entrance of the secret base. You will enter the base as an instance (not forced solo). | ||
#; [[File:Maraminsidethor.png]] | |||
# Follow your way through the instance marked as the red path. Maram will help unblock the barricades marked in purple. Becareful of the alarm crystals which will spawn guards. Upon reaching the end, collect all 5 Document Files marked in orange. | # Follow your way through the instance marked as the red path. Maram will help unblock the barricades marked in purple. Becareful of the alarm crystals which will spawn guards. Upon reaching the end, collect all 5 Document Files marked in orange. | ||
#; [[File: | #; [[File:Thormilitarybase.png]] | ||
# {{#navi:1@tcamp |34|100}} - Talk to Miriam who also found the secret base. Maram is surprised that Miriam | # {{#navi:1@tcamp |34|100}} - Talk to Miriam who also found the secret base. Maram is surprised that Miriam follows you and noticed that these weapons are very old. She mentions that this is one of the military bases once managed by her step father, Priest Amal. However, judging by the documents you found, it seems that this is a different kind of corruption for these weapons to be sold. | ||
# {{#navi:1@tcamp |32|102}} - Talk to Maram who is worried about the corruption. Miriam says she will go back to Rachel to show the evidence and you decide to go as well. Rewarded with 50x {{#item:1000405}} | # {{#navi:1@tcamp |32|102}} - Talk to Maram who is worried about the corruption. Miriam says she will go back to Rachel to show the evidence and you decide to go as well. Rewarded with 50x {{#item:1000405}} | ||
# {{#navi:wolfvill|140|112}} - Talk to Suad and let him know your findings. Elly jumps in to mention that these weapons are part of a bigger problem. Her analysis shows that with the use of old gunpowder and no maintenance, the weapons have an accuracy of 9.72%. Miriam and Maram shows up in distress about the weapons leaving the rebellion to be slaughtered. | # {{#navi:wolfvill|140|112}} - Talk to Suad and let him know your findings. Elly jumps in to mention that these weapons are part of a bigger problem. Her analysis shows that with the use of old gunpowder and no maintenance, the weapons have an accuracy of 9.72%. Miriam and Maram shows up in distress about the weapons leaving the rebellion to be slaughtered. | ||
| Line 113: | Line 126: | ||
#; [[File:Weaponbox18.png]] | #; [[File:Weaponbox18.png]] | ||
# {{#navi:wolfvill|131|252}} - Talk to the armed villager. They are now ready for the rebellion. Suad pushes on and says he will be meet you at Rachel to invade the temple. He asks Maram to stay in Grey Wolf Village in case of an emergency. Rewarded with 30x {{#item:1000405}} | # {{#navi:wolfvill|131|252}} - Talk to the armed villager. They are now ready for the rebellion. Suad pushes on and says he will be meet you at Rachel to invade the temple. He asks Maram to stay in Grey Wolf Village in case of an emergency. Rewarded with 30x {{#item:1000405}} | ||
#; [[File: | #; [[File:Lamachus18.png]] | ||
# {{#navi:rachel|169|245}} - Talk to the Ordinary Person in Rachel to enter a story instance (not forced solo). | # {{#navi:rachel|169|245}} - Talk to the Ordinary Person in Rachel to enter a story instance (not forced solo). | ||
#; [[File: | #; [[File:Ordinary18.png]] | ||
# Follow Miriam to the location of the protest. You will see the protest of the armed rebellion against the Rachel Guards. Miriam quickly disappears to go inside the temple. | # Follow Miriam to the location of the protest. You will see the protest of the armed rebellion against the Rachel Guards. Miriam quickly disappears to go inside the temple. | ||
#; [[File:Miriamfollow18.png]] | #; [[File:Miriamfollow18.png]] | ||
| Line 121: | Line 134: | ||
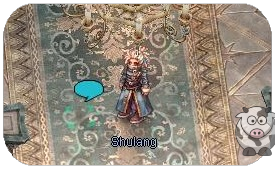
# Upon clearing all the rooms, you and Miriam find Schulang and Illusionist Bagot discussing their plan of using Illusion power in Rachel but both leave quickly. | # Upon clearing all the rooms, you and Miriam find Schulang and Illusionist Bagot discussing their plan of using Illusion power in Rachel but both leave quickly. | ||
#; [[File:Schulang18.png]] | #; [[File:Schulang18.png]] | ||
# Follow Miriam out of the temple and you will find that the rebellion has | # Follow Miriam out of the temple and you will find that the rebellion has reached the entrance of the temple. They start shooting but their faulty weapons causes many casualities. Stop the rebellion and exit the instance. Repeatable instance Sanctuary Purification unlocked. | ||
#; [[File:Rebell18.png]] | #; [[File:Rebell18.png]] | ||
# Talk to Miriam and after the conversation the guards will spawn to attack you. | # Talk to Miriam and after the conversation the guards will spawn to attack you. | ||
| Line 132: | Line 145: | ||
# {{#navi:rachel|116|200}} - Talk to High Priestess Niren. She, High Priest Zhed, Miriam, and Suad realize the severity of the situation. Suad is worried about news reaching back to Grey Wolf Village but Niren and Zhed will take care of public relations. Niren asks if Miriam is sure if her adoptive father, High Priest Amal, was involved. Miriam mentions that at a certain point, her weak father suddenly became extremely motivated for unknown reasons. Only then that the conflict between the natives and Arunafeltz immigrants started. Elly notices that this timeline matches when the Heart Hunters escaped Varmundt's Mansion. Niren concludes that the two groups are in collaboration and must be investigated. Rewarded with 60x {{#item:1000405}} | # {{#navi:rachel|116|200}} - Talk to High Priestess Niren. She, High Priest Zhed, Miriam, and Suad realize the severity of the situation. Suad is worried about news reaching back to Grey Wolf Village but Niren and Zhed will take care of public relations. Niren asks if Miriam is sure if her adoptive father, High Priest Amal, was involved. Miriam mentions that at a certain point, her weak father suddenly became extremely motivated for unknown reasons. Only then that the conflict between the natives and Arunafeltz immigrants started. Elly notices that this timeline matches when the Heart Hunters escaped Varmundt's Mansion. Niren concludes that the two groups are in collaboration and must be investigated. Rewarded with 60x {{#item:1000405}} | ||
#; [[File:highpriest18.png]] | #; [[File:highpriest18.png]] | ||
# {{#navi:oz_dun01|223|116}} - Go to the location of the Villa. You will find Maram, Miriam and | # {{#navi:oz_dun01|223|116}} - Go to the location of the Villa. You will find Maram, Miriam and Aira there. They mention that this is the spot for where Amal conducts his work. Maram has to return to Grey Wolf Village but tells you that Aira will lead the way for you. | ||
#; [[File:MaMiIra.png]] | #; [[File:MaMiIra.png]] | ||
# {{#navi:oz_dun01 219|117}} - Talk to | # {{#navi:oz_dun01|219|117}} - Talk to Aira to enter a story instance (not forced solo). | ||
#; [[File:Ayra18.png]] | #; [[File:Ayra18.png]] | ||
# Talk with Miriam and all the NPCs inside the instance. You have to clear all Heart Hunters to proceed into the next area. | # Talk with Miriam and all the NPCs inside the instance. You have to clear all Heart Hunters to proceed into the next area. | ||
| Line 146: | Line 159: | ||
# You will find Schulang who tries to stop you from entering the final chamber. Defeat him to proceed. | # You will find Schulang who tries to stop you from entering the final chamber. Defeat him to proceed. | ||
#; [[File:schulanginst18.png]] | #; [[File:schulanginst18.png]] | ||
# Meet with High Priest Amal and Illusion Bagot who says you are too late and they are recreating Goddess | # Meet with High Priest Amal and Illusion Bagot who says you are too late and they are recreating Goddess Freya with the power of Illusion. | ||
#; [[File:Priestamal.png]] | #; [[File:Priestamal.png]] | ||
# Defeat Fake Goddess | # Defeat Fake Goddess Freya and the embryo falls out of it. | ||
# Talk to Miriam. Amal is angry at you for destroying his work. Miriam tells her father that you are only here to help. The goddess that he tried to make can never come anything close to the real Goddess | # Talk to Miriam. Amal is angry at you for destroying his work. Miriam tells her father that you are only here to help. The goddess that he tried to make can never come anything close to the real Goddess Freya. Exit the instance through the south portal. | ||
# {{#navi:oz_dun01 225|119}} - Talk to Maram and explain the situation. He tell you that Amal and Miriam went to the temple. | # {{#navi:oz_dun01 225|119}} - Talk to Maram and explain the situation. He tell you that Amal and Miriam went to the temple. | ||
#; [[File:Maremexplain.png]] | #; [[File:Maremexplain.png]] | ||
# {{#navi:ra_temin|254|117}} - Unequip Mini Elly and meet with Miriam, Niren, Zhed, Suad and Maram. They are horrified about how the Ymir's heart-piece was stolen and used for this purpose. | # {{#navi:ra_temin|254|117}} - Unequip Mini Elly and meet with Miriam, Niren, Zhed, Suad and Maram. They are horrified about how the Ymir's heart-piece was stolen and used for this purpose. | ||
#; [[File:Nirenzhed.png]] | #; [[File:Nirenzhed.png]] | ||
# {{#navi:ra_temin|258|117}} - Talk to Elly. She explains to all that the samples she collected inside the villa are the same molecules used for homunculus embryos. Bagot is also born from an embryo based on the Pope's appearance. Later, Bagot became a chimera with the power of Illusion. Miriam asks Suad about the future of Grey Wolf Village. Elly also sheds light on how to resolve this issue. She explains to Niren and Zhed an idea to integrate the indigenous and migrants by giving the natives legal status and power in Rachel. Niren agrees and will immediately start the procedure of implementation. You ask where Bagot is heading with Ymir's heart-piece. Miriam says that her father and Bagot is going to the northern continent. Elly states that is the area where Jörmungandr is sealed. Bagot is interested in resurrecting other deities. Rewarded with | # {{#navi:ra_temin|258|117}} - Talk to Elly. She explains to all that the samples she collected inside the villa are the same molecules used for homunculus embryos. Bagot is also born from an embryo based on the Pope's appearance. Later, Bagot became a chimera with the power of Illusion. Miriam asks Suad about the future of Grey Wolf Village. Elly also sheds light on how to resolve this issue. She explains to Niren and Zhed an idea to integrate the indigenous and migrants by giving the natives legal status and power in Rachel. Niren agrees and will immediately start the procedure of implementation. You ask where Bagot is heading with Ymir's heart-piece. Miriam says that her father and Bagot is going to the northern continent. Elly states that is the area where Jörmungandr is sealed. Bagot is interested in resurrecting other deities. Rewarded with 500x {{#item:1000405}}. | ||
== | <!--T:6--> | ||
=Daily Questline= | |||
* [[Daily_Quests_Episode_18|Here you will find the questline to unlock all Daily Quests.]] | |||
== | =Daily Quests Table= <!--T:7--> | ||
<!--T:8--> | |||
{|class="wikitable mw-collapsible mw-collapsed" style="text-align: left; width: 100%; | {|class="wikitable mw-collapsible mw-collapsed" style="text-align: left; width: 100%; | ||
|- style="background-color:# | |- style="background-color:#E1C7C1;" | ||
| rowspan="2"| NPC | | rowspan="2"| NPC | ||
| rowspan="2"| Quest | | rowspan="2"| Quest | ||
| colspan="4" |Rewards | | colspan="4" |Rewards | ||
|- style="background-color:# | |- style="background-color:#E1C7C1;" | ||
|Amethyst Fragment | |Amethyst Fragment | ||
|Base EXP | |Base EXP | ||
| Line 334: | Line 187: | ||
|Reputation | |Reputation | ||
|- | |- | ||
|{{#navi:wolfvill|202|166}}||Inspect the traps installed for food in the trees of Grey Wolf Forest.Trees will be marked on your minimap in gw_fild01.You have a chance to acquire Trapped Bird, Trapped Lizard, or Trapped Pear.You will need 5 total sources food (Example: 2 lizards, 1 bird, 2 pears is sufficient)|| | | [[File:Daily1.jpg]] <br> {{#navi:wolfvill|202|166}}||Inspect the traps installed for food in the trees of Grey Wolf Forest.Trees will be marked on your minimap in gw_fild01.You have a chance to acquire Trapped Bird, Trapped Lizard, or Trapped Pear.You will need 5 total sources food (Example: 2 lizards, 1 bird, 2 pears is sufficient)||6||18,252,408||2,000,000||30 | ||
|- | |- | ||
| rowspan="2"|{{#navi:wolfvill|143|113}}||Lv 170 - Kill 20 Ash Toad in Oz Labyrinth Fl 1| | | rowspan="2"| [[File:Daily2.jpg]] <br> {{#navi:wolfvill|143|113}}||Lv 170 - Kill 20 Ash Toad in Oz Labyrinth Fl 1 | ||
(This quest is also available in Main Board Kill Quests.) | |||
|6||4,364,880||3,000,000||30 | |||
|- | |- | ||
|Lv 200 | |Lv 200 - Kill 20 Hot Molar in Oz Labyrinth Fl 2 | ||
(This quest is also available in Main Board Kill Quests.) | |||
|6||11,588,320||3,000,000||30 | |||
|- | |- | ||
|{{#navi:wolfvill|147|97}}||Kill 30 Firewind Kite found in gw_fild02| | | [[File:Daily3.jpg]] <br> {{#navi:wolfvill|147|97}}||Kill 30 Firewind Kite found in gw_fild02 | ||
(This quest is also available in Main Board Kill Quests.) | |||
|6||10,318,080||3,000,000||30 | |||
|- | |- | ||
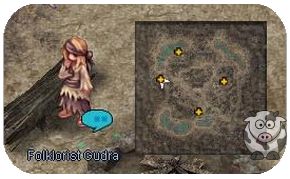
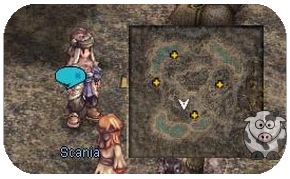
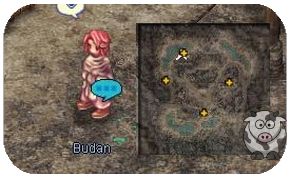
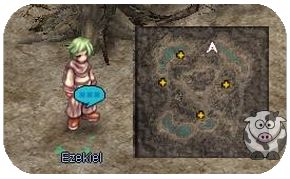
|{{#navi:wolfvill|61|170}}||Obtain a Recording Note and record folklore from three other villagers | |[[File:Daily4.jpg]] <br> {{#navi:wolfvill|61|170}}||Obtain a Recording Note and record folklore from three other villagers are marked on your minimap in wolfvill||6||18,252,408||2,000,000||30 | ||
|- | |- | ||
|{{#navi:wolfvill|117|119}}||Talk to the Grey Goat # {{#navi:gw_fild01|138|106}} <br> Kill 20 Ashring and return to the Grey Goat| | |[[File:Daily5.jpg]] <br> {{#navi:wolfvill|117|119}}||Talk to the Grey Goat # {{#navi:gw_fild01|138|106}} <br> Kill 20 Ashring and return to the Grey Goat | ||
(This quest is also available in Main Board Kill Quests.) | |||
|6||7,769,124||3,000,000||30 | |||
|- | |- | ||
|{{#navi:wolfvill|103|230}}||Purchase Water Filter from Rachel NPC # {{#navi:rachel|103|141}} for 550z <br> Obtain Purified Water by putting the filter into the water barrel located {{#navi:wolfvill|103|235}}|| | |[[File:Daily6.jpg]] <br> {{#navi:wolfvill|103|230}}||Purchase Water Filter from Rachel NPC # {{#navi:rachel|103|141}} for 550z <br> Obtain Purified Water by putting the filter into the water barrel located {{#navi:wolfvill|103|235}}||6||18,252,408||2,000,000||30 | ||
|- | |- | ||
|{{#navi:wolfvill|171|253}}||Gather 1 Steel and 10 Very Unusual Crystal <br> Very Unusual Crystals are randomly autolooted when killing Grey Wolf|| | |[[File:Daily7.jpg]] <br> {{#navi:wolfvill|171|253}}||Gather 1 Steel and 10 Very Unusual Crystal <br> Very Unusual Crystals are randomly autolooted when killing Grey Wolf||6||18,252,408||2,000,000||30 | ||
|- | |- | ||
| {{#navi:gw_fild01 32|101}}||Choose 4th option to receive quest <br> Kill 30 monsters in gw_fild01|| | | [[File:Daily8.jpg]] <br> {{#navi:gw_fild01 32|101}}||Choose 4th option to receive quest <br> Kill 30 monsters in gw_fild01||6||9,956,480||3,000,000||30 | ||
|- | |- | ||
|{{#navi:rachel|155|236}}||Talk to citizens in Rachel for information. <br> Citizens are marked on your minimap in rachel|| | |[[File:Daily9.jpg]] <br> {{#navi:rachel|155|236}}||Talk to citizens in Rachel for information. <br> Citizens are marked on your minimap in rachel||6||18,252,408||2,000,000||0 | ||
|- | |- | ||
|{{#navi:rachel|70|135}}||Pick a Half Flower corresponding to your quest log. <br> It will be highlighted in blue for which method to use: <br> | |[[File:Daily10.jpg]] <br> {{#navi:rachel|70|135}}||Pick a Half Flower corresponding to your quest log. <br> It will be highlighted in blue for which method to use: <br> | ||
# Near Rocks | # Near Rocks | ||
#; 40° Angle / 2 Leaves Left / 50ml of Water / 2g Secret Powder | #; 40° Angle / 2 Leaves Left / 50ml of Water / 2g Secret Powder | ||
| Line 364: | Line 225: | ||
#; 10° Angle / 8 Leaves Left / 20ml of Water / 8g Secret Powder | #; 10° Angle / 8 Leaves Left / 20ml of Water / 8g Secret Powder | ||
Once picked correctly, you will receive Half Flower <br> The flower has an expiration of 1 day so bring it back quickly. | Once picked correctly, you will receive Half Flower <br> The flower has an expiration of 1 day so bring it back quickly. | ||
| | |6 | ||
|18,252,408 | |18,252,408 | ||
|2,000,000 | |2,000,000 | ||
|0 | |0 | ||
|} | |} | ||
{|class="wikitable mw-collapsible | <!--T:9--> | ||
|- style="background-color:# | =Instances Table= | ||
{|class="wikitable mw-collapsible" style="text-align: left; width: 100%; | |||
|- style="background-color:#E1C7C1;" | |||
| NPC | | NPC | ||
| Instance | | Instance | ||
| Line 380: | Line 243: | ||
| Possible Rewards | | Possible Rewards | ||
|- | |- | ||
| {{# | | [[File:ordinary18.jpg]] <br> {{#navi:rachel|169|245}} | ||
| [[Sanctuary Purification]] | | [[Sanctuary Purification]] | ||
| 170 | | 170 | ||
| Line 388: | Line 251: | ||
| {{#item:1000405}} <br> EXP | | {{#item:1000405}} <br> EXP | ||
|- | |- | ||
| {{# | | [[File:Aira18.jpg]] <br> {{#navi:wolfvill|79|260}} | ||
| [[Villa of Deception (Normal) | | [[Villa of Deception]] (Normal) | ||
| 170 | | 170 | ||
|2+ | |2+ | ||
| 1 Day | | 1 Day | ||
| Episode 18 Main Story | | Episode 18 Main Story | ||
| {{#item:1000405}} <br> {{#item:100650}} <br> {{#item:100651}} <br> {{#item: | | {{#item:1000405}} <br> {{#item:100650}} <br> {{#item:100651}} <br> {{#item:1000471}} <br> [[Adulter and Vivatus Fides Weapons|Adulter Weapons]] | ||
|- | |- | ||
| {{# | | [[File:Aira18.jpg]] <br> {{#navi:wolfvill|79|260}} | ||
| [[Villa of Deception (Advanced) | | [[Villa of Deception]] (Advanced) | ||
| 200 | | 200 | ||
|2+ | |2+ | ||
| 1 Day | | 1 Day | ||
| Episode 18 Main Story <br> {{#item:1000471}} | | Episode 18 Main Story <br> {{#item:1000471}} | ||
| {{#item:1000405}} <br> {{#item:100652}} <br> {{#item:100653}} <br> {{#item:1000501}} <br> {{#item:1000503}} <br> {{#item:1000502}} <br> {{#item:100655}} <br> [[ | | {{#item:1000405}} <br> {{#item:100652}} <br> {{#item:100653}} <br> {{#item:1000501}} <br> {{#item:1000503}} <br> {{#item:1000502}} <br> {{#item:100655}} <br> [[Adulter and Vivatus Fides Weapons|Vivatus Weapons]] | ||
|} | |||
<!--T:10--> | |||
=Fields/Dungeons= | |||
{| class="wikitable mw-collapsible mw-collapsed" style="width: 50%;text-align:center;" | |||
|- style="background-color:#E1C7C1;" | |||
|Map | |||
|Monsters | |||
|- | |||
| rowspan="3" |Grey Wolf Forest <br> gw_fild01 | |||
|{{#mob:21302}} | |||
|- | |||
|{{#mob:21303}} | |||
|- | |||
|{{#mob:21304}} | |||
|- | |||
| rowspan="5" |Grey Wolf Forest <br> gw_fild02 | |||
|{{#mob:21303}} | |||
|- | |||
|{{#mob:21304}} | |||
|- | |||
|{{#mob:21305}} | |||
|- | |||
|{{#mob:21306}} | |||
|- | |||
|{{#mob:21307}} | |||
|- | |||
| rowspan="3" |Oz Labyrinth Floor 1 <br> oz_dun01 | |||
|{{#mob:21296}} | |||
|- | |||
|{{#mob:21295}} | |||
|- | |||
|{{#mob:21297}} | |||
|- | |||
| rowspan="5" |Oz Labyrinth Floor 2 <br> oz_dun02 | |||
|{{#mob:21297}} | |||
|- | |||
|{{#mob:21298}} | |||
|- | |||
|{{#mob:21299}} | |||
|- | |||
|{{#mob:21300}} | |||
|- | |||
|{{#mob:21301}} | |||
|- | |||
| rowspan="3" |Rachel Oz Gorge <br> ra_fild10 | |||
|{{#mob:21324}} | |||
|- | |||
|{{#mob:21323}} | |||
|- | |||
|{{#mob:21296}} | |||
|- | |||
| rowspan="3" |Rachel Ida Plains <br> ra_fild11 | |||
|{{#mob:21324}} | |||
|- | |||
|{{#mob:21323}} | |||
|- | |||
|{{#mob:21296}} | |||
|} | |||
<!--T:11--> | |||
=Cards= | |||
{| class="wikitable mw-collapsible mw-collapsed" style="width: 50%;text-align:center;" | |||
|- style="background-color:#E1C7C1;" | |||
|Card | |||
|Description | |||
|- | |||
|{{#item:300218}} | |||
|{{#itemDesc:300218}} | |||
|- | |||
|{{#item:300219}} | |||
|{{#itemDesc:300219}} | |||
|- | |||
|{{#item:300220}} | |||
|{{#itemDesc:300220}} | |||
|- | |||
|{{#item:300221}} | |||
|{{#itemDesc:300221}} | |||
|- | |||
|{{#item:300222}} | |||
|{{#itemDesc:300222}} | |||
|- | |||
|{{#item:300223}} | |||
|{{#itemDesc:300223}} | |||
|- | |||
|{{#item:300212}} | |||
|{{#itemDesc:300212}} | |||
|- | |||
|{{#item:300211}} | |||
|{{#itemDesc:300211}} | |||
|- | |||
|{{#item:300213}} | |||
|{{#itemDesc:300213}} | |||
|- | |||
|{{#item:300214}} | |||
|{{#itemDesc:300214}} | |||
|- | |||
|{{#item:300215}} | |||
|{{#itemDesc:300215}} | |||
|- | |||
|{{#item:300216}} | |||
|{{#itemDesc:300216}} | |||
|- | |||
|{{#item:300217}} | |||
|{{#itemDesc:300217}} | |||
|} | |||
<!--T:12--> | |||
=Reputation= | |||
Each reputation level requires 1,000 points. Points can be obtained via [[Daily_Quests_Episode_18|Daily Quests]]. | |||
{| class="wikitable mw-collapsible" | |||
|- style="background-color:#E1C7C1;" | |||
|Reputation Level | |||
|Unlock | |||
|- | |||
|1 | |||
|Able to buy {{#item:100626}} for 1050x {{#item:1000405}} from NPC Assad {{#navi:wolfvill|167|135}}. | |||
|- | |||
|2 | |||
|Able to buy {{#item:100627}} for 2250x {{#item:1000405}} from NPC Assad {{#navi:wolfvill|167|135}}. | |||
|- | |||
|3 | |||
|Daily quests from Grey Wolf Village will give additional 1x {{#item:1000405}} <br> | |||
Villa of Deception instance reward increased to 10x {{#item:1000405}} <br> | |||
Note: This does not affect Episode 18 Daily Quests that start in Rachel including [[Sanctuary Purification]] | |||
|- | |||
|4 | |||
|Able to buy [[Helms of Faith]] from NPC Assad {{#navi:wolfvill|167|135}}. | |||
|- | |||
|5 | |||
|Vivatus / Helm of Faith Refinement Hammers | |||
|} | |||
<!--T:15--> | |||
=Item Exchange= | |||
Talk to NPC Assad {{#navi:wolfvill|167|135}} to exchange Amethyst Fragments for Gray Wolf equipment, Gray Wolf Refinement Box, and Helms of Faith<br> | |||
[[File:Assad_Episode18_Dialogue.png]] <br> | |||
Gray Wolf Armor Piece Exchange (350x {{#item:1000405}} each) | |||
</translate> | |||
{| class="wikitable mw-collapsible mw-collapsed" style="width: 50%;text-align:center;" | |||
|- style="background-color:#E1C7C1;" | |||
|Item | |||
|Description | |||
|- | |||
|{{#item:450177}} | |||
|{{#itemDesc:450177}} | |||
|- | |||
|{{#item:450178}} | |||
|{{#itemDesc:450178}} | |||
|- | |||
|{{#item:480091}} | |||
|{{#itemDesc:480091}} | |||
|- | |||
|{{#item:480090}} | |||
|{{#itemDesc:480090}} | |||
|- | |||
|{{#item:470087}} | |||
|{{#itemDesc:470087}} | |||
|- | |||
|{{#item:470088}} | |||
|{{#itemDesc:470088}} | |||
|- | |||
|{{#item:490106}} | |||
|{{#itemDesc:490106}} | |||
|- | |||
|{{#item:490107}} | |||
|{{#itemDesc:490107}} | |||
|- | |||
|{{#item:490108}} | |||
|{{#itemDesc:490108}} | |||
|- | |||
|{{#item:490109}} | |||
|{{#itemDesc:490109}} | |||
|} | |||
Helm of Faith Exchange (1250x {{#item:1000405}} each) | |||
{| class="wikitable mw-collapsible mw-collapsed" style="width: 50%;text-align:center;" | |||
|- style="background-color:#E1C7C1;" | |||
|Item | |||
|Description | |||
|- | |||
|{{#item:400236}} | |||
|{{#itemDesc:400236}} | |||
|- | |||
|{{#item:400235}} | |||
|{{#itemDesc:400235}} | |||
|- | |||
|{{#item:400238}} | |||
|{{#itemDesc:400238}} | |||
|- | |||
|{{#item:400237}} | |||
|{{#itemDesc:400237}} | |||
|- | |||
|{{#item:400240}} | |||
|{{#itemDesc:400240}} | |||
|- | |||
|{{#item:400239}} | |||
|{{#itemDesc:400239}} | |||
|- | |||
|{{#item:400242}} | |||
|{{#itemDesc:400242}} | |||
|- | |||
|{{#item:400241}} | |||
|{{#itemDesc:400241}} | |||
|- | |||
|{{#item:400244}} | |||
|{{#itemDesc:400244}} | |||
|- | |||
|{{#item:400234}} | |||
|{{#itemDesc:400234}} | |||
|- | |||
|{{#item:400233}} | |||
|{{#itemDesc:400233}} | |||
|- | |||
|{{#item:400231}} | |||
|{{#itemDesc:400231}} | |||
|- | |||
|{{#item:400230}} | |||
|{{#itemDesc:400230}} | |||
|- | |||
|{{#item:400229}} | |||
|{{#itemDesc:400229}} | |||
|- | |||
|{{#item:400228}} | |||
|{{#itemDesc:400228}} | |||
|- | |||
|{{#item:400227}} | |||
|{{#itemDesc:400227}} | |||
|- | |||
|{{#item:400226}} | |||
|{{#itemDesc:400226}} | |||
|- | |||
|{{#item:400219}} | |||
|{{#itemDesc:400219}} | |||
|- | |||
|{{#item:400218}} | |||
|{{#itemDesc:400218}} | |||
|- | |||
|{{#item:400217}} | |||
|{{#itemDesc:400217}} | |||
|- | |||
|{{#item:400216}} | |||
|{{#itemDesc:400216}} | |||
|- | |||
|{{#item:400201}} | |||
|{{#itemDesc:400201}} | |||
|- | |||
|{{#item:400200}} | |||
|{{#itemDesc:400200}} | |||
|- | |||
|{{#item:400199}} | |||
|{{#itemDesc:400199}} | |||
|- | |||
|{{#item:400198}} | |||
|{{#itemDesc:400198}} | |||
|- | |||
|{{#item:400192}} | |||
|{{#itemDesc:400192}} | |||
|- | |||
|{{#item:400191}} | |||
|{{#itemDesc:400191}} | |||
|- | |||
|{{#item:400190}} | |||
|{{#itemDesc:400190}} | |||
|- | |||
|{{#item:400189}} | |||
|{{#itemDesc:400189}} | |||
|- | |||
|{{#item:400181}} | |||
|{{#itemDesc:400181}} | |||
|- | |||
|{{#item:400180}} | |||
|{{#itemDesc:400180}} | |||
|- | |||
|{{#item:400179}} | |||
|{{#itemDesc:400179}} | |||
|- | |||
|{{#item:400178}} | |||
|{{#itemDesc:400178}} | |||
|} | |} | ||
== | Vivatus / Helm of Faith Equipment Hammer (1700x {{#item:1000405}} each) | ||
{| class="wikitable mw-collapsible mw-collapsed" style="width: 50%;text-align:center;" | |||
|- style="background-color:#E1C7C1;" | |||
|Item | |||
|Description | |||
|- | |||
|{{#item:101077}} | |||
|{{#itemDesc:101077}} | |||
|- | |||
|{{#item:101389}} | |||
|{{#itemDesc:101389}} | |||
|} | |||
Gray Wolf Armor Refine Boxes | |||
{| class="wikitable mw-collapsible mw-collapsed" style="width: 50%;text-align:center;" | |||
|- style="background-color:#E1C7C1;" | |||
|Item | |||
|Description | |||
|Price | |||
|- | |||
|{{#item:100626}} | |||
|{{#itemDesc:100626}} | |||
|x1050 {{#item:1000405}} | |||
|- | |||
|{{#item:100627}} | |||
|{{#itemDesc:100627}} | |||
|x2250 {{#item:1000405}} | |||
|} | |||
{{:Gray_Wolf_Armors}} | |||
{{:Gray_Wolf_Garments}} | |||
{{:Gray_Wolf_Footgear}} | |||
{{:Gray_Wolf_Accessories}} | |||
Latest revision as of 09:49, 15 January 2025
Temporal Tina is an NPC who sells Episode Clear Tickets. She is located in Prontera (prontera 140, 174) and the Main Office (main_office 94, 59).

|

|
| (prontera 140, 174) | (main_office 94, 59) |
Episode Clear Tickets
An Episode Clear Ticket is a consumable item that allows you to skip the main quest of an episode. By using it, you will gain instant access to all NPCs, dungeons, and equipment shops that would normally require you to complete the episode or fulfill certain quests to unlock.
Please note that by using an Episode Clear Ticket, you will miss out on quest rewards such as EXP, Zeny, reputation, and items.
Some Episode Clear Tickets have prerequisites. If it's your first character on the server, you will still have to progress from Episode 17.2 to the last episode normally.
Check the table below to see the requirements and prices for each ticket.
| Episode Clear Tickets | ||
|---|---|---|
| Episode Ticket | Zeny Costs | Prerequisites |
| 1,000,000 | None | |
| 1,000,000 | None | |
| 1,000,000 | None | |
| 2,000,000 | None | |
| 4,000,000 | The current character has cleared Episode 17.1 | |
| 9,000,000 | The current character has cleared Episode 17.2 | |
| 12,000,000 | The current character has cleared Episode 18 AND one character in the master account has cleared Episode 19 and the side quests "Purification Saint" and "Frozen Sea" | |
| 16,000,000 | The current character has cleared Episode 19 AND one character in the master account has cleared Episode 20 | |
| 32,000,000 | The current character has cleared Episode 20 AND one character in the master account has cleared Episode 21 | |
How to check which episode I have unlocked?
Right now, we don't have a feature which simply tells you which episode you are.
So here's some things you can do to check it by yourself:
| Episode Quest | ||
|---|---|---|
| Episode | Steps | Description |
| Episode 15 | Click on Warper > Instances > Central Laboratory. | If you can go, you have completed the Episode 15 quest. |
| Episode 16 | Click on Warper > Instances > Heart Hunter War Base. | If you can go, you have completed the Episode 16 quest. |
| Episode 17.1 | Use @go 46. (Cor) | If you can go, you have completed the Episode 17.1 quest. |
| Episode 17.2 | Use @go 47. (Varmundt's Mansion) | If you can go, you have completed the Episode 17.2 quest. |
| Episode 18 | Use @go 51. (Gray Wolf Village) | If you can go, you have completed the Episode 18 quest. |
| Episode 19 | Use @go 53. (Ice Castle) | If you can go, you have completed the Episode 19 quest. |
| Episode 20 | Click on Warper > Instances > The Immortal. | If you can go, you have completed the Episode 20 quest. |
| Episode 21 | Click on Warper > Instances > Final Battle. | If you can go, you have completed the Episode 21 quest. |
Episode 18: Direction of Prayer
After succeeding in analyzing the Illusion's power in Varmundt's Mansion, your journey takes you to back to the capital of Arunafeltz to uncover a societal division among its people. Rachel was founded by the missionaries who immigrated and preached the Goddess Freya. However, faith did not resolve the conflicts between the migrants and the natives.
Requirements
- Level Required: 170
- Quest Prerequisite:
- Episode 17.2 (Tracking Illusion)
- Items Required:
- 1x
 Meat (517)
 - 3x
 Steel (999)
 - 1x
 Tough Vines (7197)
- 1x
Main Story Quest
Part 1
- (ba_in01 26, 266) - Talk to Elly (Note: you might need to talk to Elly twice) in Varmundt's Mansion and receive a
 Mini Elly (400127) and equip it for the whole quest. With this headgear, you can communicate with Elly during your investigation in Rachel for Illusion power presence.
- (rachel 182, 176) - Talk to the Masked Girl in Rachel. You and Elly will uncover an argument among its citizens. More people start to show up and protest for Arunafeltz to be united including with the natives.
- (rachel 183, 170) - Talk to the Female Priest who shows up to calm the people. Talk to her again who asks you to find the origin of this conflict. Rewarded with 20x
 Amethyst Fragment (1000405) .
- (ra_temp 72, 54) - Talk to the Male Priest Junok outside Rachel's Temple to ask about the arguments you witnessed in the city. He explains that there is an on-going conflict between the natives and migrants. Guard Gala explains the situation that several attempts has been made to break into Rachel's Temple. Another Guard appears to inform Junok that more intruders were just spotted from the west.
- (ra_temp 30, 142) - Follow Junok and the Guards who captured the intruders and you noticed that they were Heart Hunters. Gala takes them away into custody and asks you to meet in Rachel's Temple for a reporting. Rewarded with 30x
 Amethyst Fragment (1000405) .
- (ra_temin 173, 40) - Talk to Guard Dent who explains that these intrusions are getting worse.
- (ra_temin 174, 38) - Talk to Marshall Neil for his stance on the situation.
- (ra_temin 172, 36) - Talk to Freya Priest who says that lately the people who come inside the temple are causing fights rather than praying. High Priestess Niren shows up to share her concerns about fighting in the Divine Temple. She asks to talk to you in private.
- (ra_temin 213, 87) - Talk to High Priestess Niren in secret near the staircase. She explains she knows the Heart Hunters are after Ymir's Heart piece, but security is spread too thin with the recent uproar between the migrants and natives.
- (ra_temin 174, 38) - Return to Marshall Neil who says his son Maram can help.
- (rachel 137, 135) - Go ask a Villager in Rachel to see if he has seen Maram but he is no help.
- (rachel 105, 134) - Talk to another Villager but he is also no help.
- (rachel 69, 117) - Talk to another Villager who says he saw Maram go to a meeting just north of here.
- (rachel 70, 147) - Talk to Maram. He explains the situation of Rachel's past where believers of Freya migrated here and pushed the natives away. The natives tried to stay with the Temple, but ultimate hated it and left. He also let you know that he is adopted by Niren. When his mother became a High Priest, she lead a program to encourage the wealthy immigrants of Rachel to adopt just as she did. Niren had the idea where adopting children of the natives could help bridge the gap between the two groups. Instead, the native children were outcast into discrimination known as "Gray Children". Maram asks you to wait with him so you can speak with other natives to learn the circumstance better.
- (rachel 62, 144) - Talk to Miriam. Miriam and Maram gives you a list of items to buy from traders in Rachel.
- (rachel 87, 122) - Ask the trader if he has anything to sell, but he is too nervous to sell to you.
- (rachel 107, 102) - Talk with Trader Sannat. You show him the list but he doesn't have any of those items in stock.
- (rachel 117, 104) - Talk to Miriam who gets frustrated on how the merchants avoids "Gray Children" and suddenly cannot provide products.
- (rachel 119, 103) - Talk to Maram. He has an idea where you and him will lie about your background. That way the vendors will not get suspicious.
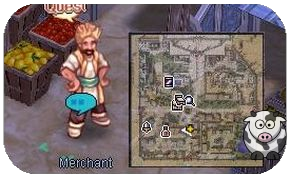
- (rachel 137, 85) - Talk to the Merchant Rencia. Maram introduces you as another Merchant in an adjacent village who needs to restock. Choose: "He is in the bar." Rencia sees your list and says he can provide the items requested. However, he notices you didn't bring a cart and offers a delivery service.
- (rachel 120, 79) - Talk to Miriam. She is worried that this lie will unfold when Rencia makes the delivery. Maram suggests disguises from a guy he knows. He will order food at a bar and his friend will contact you there.
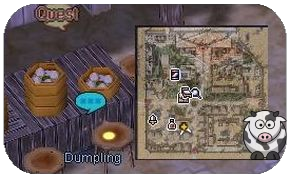
- (rachel 108, 73) - Sit at the barstool and eat the dumplings that Maram ordered for you. Tamarin appears and introduces himself. You aqcuire disguises from him. Then he asks you to meet with him at Rachel's Square to recruit Mark and Maggi on the journey.
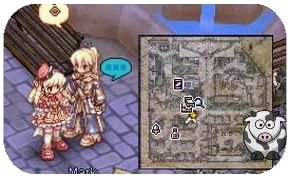
- (rachel 122, 120) - Talk to Mark at the Square. Tamarin says go to the meeting spot.
- (rachel 70, 147) - Talk to Maram. He says everything is now prepared to travel. He won't disclose where you will be heading, but to just follow his lead. He asks you to go back to Rencia to arrange the delivery time and location.
- (rachel 137, 85) - Talk to Merchant Rencia. You tell him to drop off the goods at the west side of Rachel.
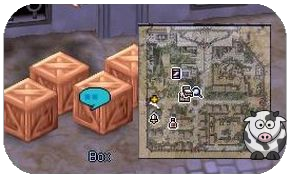
- (rachel 41, 132) - Go to the wooden boxes to collect the goods.
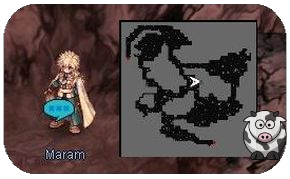
- (ra_fild11 354, 235) - Talked to Maram disguised as a Merchant. He tells you cannot join you without others getting suspicious or being followed to the destination. Maram will meet up with you and the group later to lead you the way through Oz Gorge.
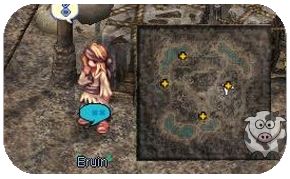
- (ra_fild10 179, 176) - Meet Maram at the entrance to Oz Labyrinth to being an instance to cross the gorge. This instance is solo only and you cannot bring any party members.
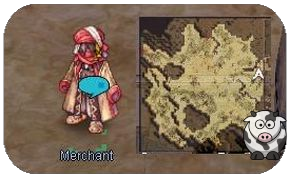
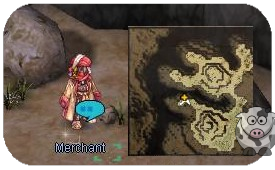
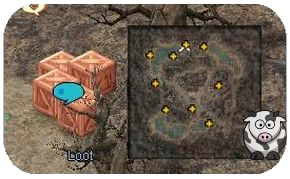
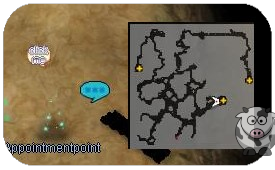
- Follow the shortest path to the exit marked in yellow on the mini map of Oz Labyrinth Floor 1 instance. You have to clear monsters on the way for the Tamarin and the others to travel safely.
- (gw_fild01 273, 339) - Talk to Maram who is glad that we all made it through. He says the village is nearby and for you to go west.
- (gw_fild01 35, 102) - Talk to Maram who says this is the entrance of the village. Imril appears.
- (gw_fild01 37, 105) - Talk to Imril. He is extremely angry at Maram for breaking the rule of no outsiders allowed (you). Maram pleads with Imril stating that you assisted the entire process of obtaining stock and crossing the Oz Gorge. Imril says Suad will have the final ruling and asks us to wait until he gets him.
- (gw_fild01 35, 102) - Talk to Maram. Suad appears and Maram explains the whole situation. Fewer traders in Rachel are selling to natives. Oz Labyrinth will soon be impassable due to overflowing lava. Maram says they should considered themselves lucky to have an adventurer help. He asks Suad to give you a chance like how Niren gave him a chance. Suad finally allows you to enter the village.
- (wolfvill 143, 113) - Talk to Imril and Maram. They are glad that Suad allowed you to enter Gray Wolf Village. They show you how the current situation is distressing with the lack of food and harsh environment. Maram mentions that you may not be so easily allowed in Gray Wolf Village next time suggests talking to the other villagers to become more trustworthy. Rewarded with 50x
 Amethyst Fragment (1000405) and side quests unlocked.
Part 2
In order to proceed with the main story quest, you need 900 reputation with Wolf Village which you will get if you unlock all daily quests. Alternatively you can repeat some daily quests until you reach the required reputation.
You will also need to complete the Investigation of Oz Labyrinth quest
Part 3
- (wolfvill 180, 179) - Talk to Village Boy. He says the conference is starting soon.
- (wolfvill 144, 151) - Meet with Suad at the conference located at the center of Grey Wolf Village.
- (wolfvill 145, 146) - Overhear the Radical Man who states that we should destroy all temples of Freya.
- (wolfvill 139, 148) - Listen to the Native Old Man who agrees.
- (wolfvill 150, 147) - Talk with the other attendee who asks for war.
- (wolfvill 152, 145) - Listen to the Skeptical Young Man. He is worried about the shear number of Rachel Guards if the village chooses to attack.
- (wolfvill 144, 151) - Talk to Suad who begins the conference. He shares his concerns about crossing the Oz Gorge for supplies. The future of Grey Wolf Village looks bleak. The people start screaming and demanding war against Rachel to that the village can reclaim the land. Suad is pressured for an armed rebellion. One villager mentions to you that he will get the weapons from their hidden location. This catches Maram's attention and says we should investigate the place to see where the weapons are coming from.
- (wolfvill 148, 153) - Talk to Miriam. She also agrees that you and Maram should find the source of the weapons. Maram brings up the plan of lying again and pretending to be part of the armed rebellion. Rewarded with 40x
 Amethyst Fragment (1000405) .
- (wolfvill 143, 145) - Lie to the Radical Man. He discloses that he got the weapon from Bearded Jack in Rachel.
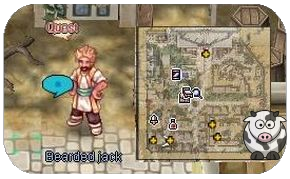
- (rachel 75, 44) - You arrive to what appears to be a Hardware Store. Talk with Bearded Jack and ask for “Smelly Dandelion”. Jack tells you to meet someone at Veins if we need weapons.
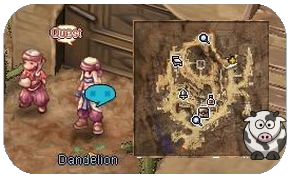
- (veins 293, 282) - Talk to Dandelion and mention “Smelly Dandelion”. He gets upset at Jack for making a bad password. Maram asks for the supplier of these weapons and Dandelion says that he acquires them at a secret base in Thor's Volcano.
- (thor_v01 169, 169) - Talk with Maram in the middle of Thor's Volcano Floor 1. He found a way into the secret base.
- (que_thr 133, 53) - Talk to Maram again at the entrance of the secret base. You will enter the base as an instance (not forced solo).
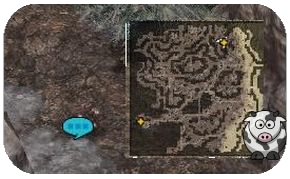
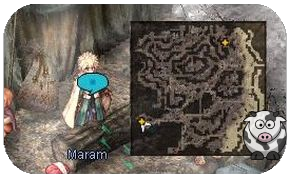
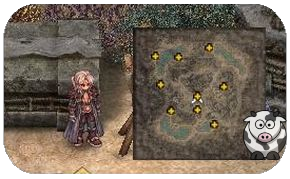
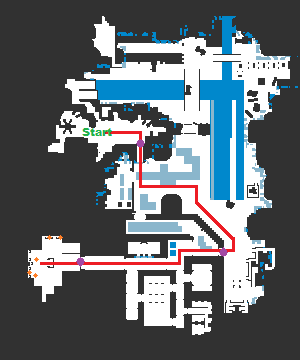
- Follow your way through the instance marked as the red path. Maram will help unblock the barricades marked in purple. Becareful of the alarm crystals which will spawn guards. Upon reaching the end, collect all 5 Document Files marked in orange.
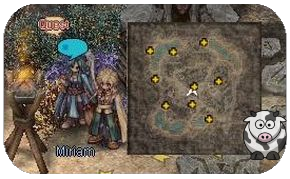
- (1@tcamp 34, 100) - Talk to Miriam who also found the secret base. Maram is surprised that Miriam follows you and noticed that these weapons are very old. She mentions that this is one of the military bases once managed by her step father, Priest Amal. However, judging by the documents you found, it seems that this is a different kind of corruption for these weapons to be sold.
- (1@tcamp 32, 102) - Talk to Maram who is worried about the corruption. Miriam says she will go back to Rachel to show the evidence and you decide to go as well. Rewarded with 50x
 Amethyst Fragment (1000405)
 - (wolfvill 140, 112) - Talk to Suad and let him know your findings. Elly jumps in to mention that these weapons are part of a bigger problem. Her analysis shows that with the use of old gunpowder and no maintenance, the weapons have an accuracy of 9.72%. Miriam and Maram shows up in distress about the weapons leaving the rebellion to be slaughtered.
- (wolfvill 131, 257) - Go to the weapon box. Miriam warns the villagers about arming with these weapons and asks Suad to do something.
- (wolfvill 131, 252) - Talk to the armed villager. They are now ready for the rebellion. Suad pushes on and says he will be meet you at Rachel to invade the temple. He asks Maram to stay in Grey Wolf Village in case of an emergency. Rewarded with 30x
 Amethyst Fragment (1000405)
- (rachel 169, 245) - Talk to the Ordinary Person in Rachel to enter a story instance (not forced solo).
- Follow Miriam to the location of the protest. You will see the protest of the armed rebellion against the Rachel Guards. Miriam quickly disappears to go inside the temple.
- Follow the navigation go to inside the temple. Miriam is surprised by your presence and she says we need to stay quiet. The instance is similar layout as Sanctuary Purification.
- Upon clearing all the rooms, you and Miriam find Schulang and Illusionist Bagot discussing their plan of using Illusion power in Rachel but both leave quickly.
- Follow Miriam out of the temple and you will find that the rebellion has reached the entrance of the temple. They start shooting but their faulty weapons causes many casualities. Stop the rebellion and exit the instance. Repeatable instance Sanctuary Purification unlocked.
- Talk to Miriam and after the conversation the guards will spawn to attack you.
- Upon clearing all the rooms follow the navigation (2@nyr 59, 104) enter the portal. Get to the group and talk to Ramachus to trigger the conversation and some guards will attack you.
- After you cleared the guards, navigate to (2@nyr 46, 55) and enter the portal.
- Continue to the next room in (2@nyr 118, 76). Keep to the left and proceed until you meet the group in (2@nyr 88, 46) talk to Ramachus to trigger another conversation and guards attacking you.
- Return to the portal where you came and follow the navigation to (2@nyr 180, 104) , get down the stair to meet the group and talk to Ramachus again.
- You and Miriam find Schulang and Illusionist Bagot discussing their plan of using Illusion power in Rachel but both leave quickly. Keep following Miriam to proceed.
- Follow Miriam out of the temple and you will find that the rebellion has reach the entrance of the temple. They start shooting but their faulty weapons causes many casualities. Stop the rebellion and exit the instance. Repeatable instance Sanctuary Purification unlocked.
- (rachel 116, 200) - Talk to High Priestess Niren. She, High Priest Zhed, Miriam, and Suad realize the severity of the situation. Suad is worried about news reaching back to Grey Wolf Village but Niren and Zhed will take care of public relations. Niren asks if Miriam is sure if her adoptive father, High Priest Amal, was involved. Miriam mentions that at a certain point, her weak father suddenly became extremely motivated for unknown reasons. Only then that the conflict between the natives and Arunafeltz immigrants started. Elly notices that this timeline matches when the Heart Hunters escaped Varmundt's Mansion. Niren concludes that the two groups are in collaboration and must be investigated. Rewarded with 60x
 Amethyst Fragment (1000405)
- (oz_dun01 223, 116) - Go to the location of the Villa. You will find Maram, Miriam and Aira there. They mention that this is the spot for where Amal conducts his work. Maram has to return to Grey Wolf Village but tells you that Aira will lead the way for you.
- (oz_dun01 219, 117) - Talk to Aira to enter a story instance (not forced solo).
- Talk with Miriam and all the NPCs inside the instance. You have to clear all Heart Hunters to proceed into the next area.
- Talk with Miriam and follow her to one of the Employee inside the inside, you must find other NPC to proceed (1@adv 101, 24) , return to Miriam. You have to clear all Heart Hunters to make Miriam move, follow her and talk to her finally. She will tell you to go to the left side of the room while she's going to the right side, kill all the Heart Hunters as you proceed.
- You will find the Silver Key at the end of the hallway by talking to the shiny spot (1@adv 68, 182). Use the Silver Key to the Locked door and enter the portal (1@adv 66, 142).
- Kill all the Heart Hunters inside and find the Golden Key. Exit the room and find Miriam on the right side of of the hallway (1@adv 181, 143) talk to her and enter the portal.
- Talk to the villa employee and get the Spare Key. Exit the room and talk to Miriam again, now you can enter the next room using the key you found.
- Kill all the Heart Hunters inside and proceed to the Colorful Door (1@adv 124, 207). The door is locked, you will notice a glowing spot in both of Knight Statue nearby the door, click it until it say "The magic of the Splendid Knight has already dissapeared", you can enter the door afterwards by clicking it.
- You will arrive in the next room, explore it until you find "Flower Shaped Device" which is a shining small clickable NPC, find the right one which can unlock the next door.
- You will find Schulang who tries to stop you from entering the final chamber. Defeat him to proceed.
- Meet with High Priest Amal and Illusion Bagot who says you are too late and they are recreating Goddess Freya with the power of Illusion.
- Defeat Fake Goddess Freya and the embryo falls out of it.
- Talk to Miriam. Amal is angry at you for destroying his work. Miriam tells her father that you are only here to help. The goddess that he tried to make can never come anything close to the real Goddess Freya. Exit the instance through the south portal.
- (oz_dun01 225 119, ) - Talk to Maram and explain the situation. He tell you that Amal and Miriam went to the temple.
- (ra_temin 254, 117) - Unequip Mini Elly and meet with Miriam, Niren, Zhed, Suad and Maram. They are horrified about how the Ymir's heart-piece was stolen and used for this purpose.
- (ra_temin 258, 117) - Talk to Elly. She explains to all that the samples she collected inside the villa are the same molecules used for homunculus embryos. Bagot is also born from an embryo based on the Pope's appearance. Later, Bagot became a chimera with the power of Illusion. Miriam asks Suad about the future of Grey Wolf Village. Elly also sheds light on how to resolve this issue. She explains to Niren and Zhed an idea to integrate the indigenous and migrants by giving the natives legal status and power in Rachel. Niren agrees and will immediately start the procedure of implementation. You ask where Bagot is heading with Ymir's heart-piece. Miriam says that her father and Bagot is going to the northern continent. Elly states that is the area where Jörmungandr is sealed. Bagot is interested in resurrecting other deities. Rewarded with 500x
 Amethyst Fragment (1000405) .
Daily Questline
Daily Quests Table
Instances Table
| NPC | Instance | Level Requirement | Party Count | Cooldown | Prerequisite | Possible Rewards |
 (rachel 169, 245) |
Sanctuary Purification | 170 | 1+ | 1 Day | Episode 18 Main Story Step 58 | EXP |
 (wolfvill 79, 260) |
Villa of Deception (Normal) | 170 | 2+ | 1 Day | Episode 18 Main Story | Adulter Weapons |
 (wolfvill 79, 260) |
Villa of Deception (Advanced) | 200 | 2+ | 1 Day | Episode 18 Main Story |
Vivatus Weapons |
Fields/Dungeons
| Map | Monsters |
| Grey Wolf Forest gw_fild01 |
 Ashhopper (21302) |
 Ashring (21303) | |
 Grey Wolf (21304) | |
| Grey Wolf Forest gw_fild02 |
 Ashring (21303) |
 Grey Wolf (21304) | |
 Tumble Ring (21305) | |
 Firewind Kite (21306) | |
 Phantom Wolf (21307) | |
| Oz Labyrinth Floor 1 oz_dun01 |
 Rakehand (21296) |
 Ash Toad (21295) | |
 Spark (21297) | |
| Oz Labyrinth Floor 2 oz_dun02 |
 Spark (21297) |
 Hot Molar (21298) | |
 Volcaring (21299) | |
 Lava Toad (21300) | |
 Burning Fang (21301) | |
| Rachel Oz Gorge ra_fild10 |
 Grey Wolf Baby (21324) |
 Grey Goat (21323) | |
 Rakehand (21296) | |
| Rachel Ida Plains ra_fild11 |
 Grey Wolf Baby (21324) |
 Grey Goat (21323) | |
 Rakehand (21296) |
Cards
| Card | Description |
| Increases Magical Damage with Neutral element by 35%. Increases SP Consumption by 10%. _______________________ Type: Card Compound on: Left Accessory Weight: 1 | |
| When compounded on either One-Handed Staff or Two-Handed Staff: Increases Magical Damage with Shadow element by 10%. Refine Level +10: Increases Magical Damage with Shadow element by additional 10%. Refine Level +14: Increases Magical Damage with Shadow element by additional 10%. _______________________ Type: Card Compound on: Right Hand Weight: 1 | |
| Increases Melee Physical Damage by 6%. _______________________ When equipped with Phantom Wolf Card: Increases Melee Physical Damage by additional 8%. _______________________ Type: Card Compound on: Left Accessory Weight: 1 | |
| Increases Magical Damage with Neutral and Shadow element by 5%. _______________________ For each 2 Refine Levels: Increases Magical Damage with Neutral and Shadow element by 1%. _______________________ Type: Card Compound on: Shoes Weight: 1 | |
| Increases Magical Damage with Wind element by 35%. Increases SP Consumption by 10%. _______________________ Type: Card Compound on: Left Accessory Weight: 1 | |
| Increases Melee Physical Damage by 6%. _______________________ Type: Card Compound on: Right Accessory Weight: 1 | |
| DEF +50 _______________________ Decreases damage taken from Shadow elemental attacks by 10%. _______________________ Type: Card Compound on: Armor Weight: 1 | |
| Increases Magical Damage with Earth element by 35%. Increases SP Consumption by 10%. _______________________ Type: Card Compound on: Left Accessory Weight: 1 | |
| ATK +5 _______________________ Increases Physical Damage against Fire elemental enemies by 10%. Increases Critical against Undead and Demon race by 15%. _______________________ Type: Card Compound on: Garment Weight: 1 | |
| When compounded on Katar: Increases Melee Physical Damage by 10%. For each 2 Refine Levels: Increases Melee Physical Damage by additional 1%. _______________________ Type: Card Compound on: Right Hand Weight: 1 | |
| Increases Magical Damage with Fire and Earth element by 5%. _______________________ For each 2 Refine Levels: Increases Magical Damage with Fire and Earth element by additional 1%. _______________________ Type: Card Compound on: Shoes Weight: 1 | |
| Increases Magical Damage with Fire element by 35%. Increases SP Consumption by 10%. _______________________ Type: Card Compound on: Left Accessory Weight: 1 | |
| Increases Melee Physical Damage by 20%. Increases damage taken from all elemental attacks by 15%. _______________________ Type: Card Compound on: Shoes Weight: 1 |
Reputation
Each reputation level requires 1,000 points. Points can be obtained via Daily Quests.
| Reputation Level | Unlock |
| 1 | Able to buy |
| 2 | Able to buy |
| 3 | Daily quests from Grey Wolf Village will give additional 1x Villa of Deception instance reward increased to 10x |
| 4 | Able to buy Helms of Faith from NPC Assad (wolfvill 167, 135). |
| 5 | Vivatus / Helm of Faith Refinement Hammers |
Item Exchange
Talk to NPC Assad (wolfvill 167, 135) to exchange Amethyst Fragments for Gray Wolf equipment, Gray Wolf Refinement Box, and Helms of Faith
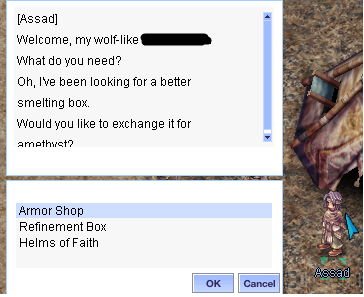
Gray Wolf Armor Piece Exchange (350x ![]() Amethyst Fragment (1000405) each)
Amethyst Fragment (1000405) each)
| Item | Description |
| A suit given to those who have been recognized by the Gray Wolf Clan. _______________________ ATK +130 _______________________ For each 2 Refine Levels: ATK +15 _______________________ Refine Level +7: Increases Attack Speed by 15%. _______________________ When equipped with Gray Wolf Manteau: ATK +50 _______________________ When equipped with Gray Wolf Muffler: Decreases After Cast Delay by 10%. _______________________ Type: Armor Position: Armor Defense: 160 Armor Level: 1 Refinable Weight: 100 Required Level: 190 | |
| A robe given to those who have been recognized by the Gray Wolf Clan. _______________________ MATK +130 _______________________ For each 2 Refine Levels: MATK +15 _______________________ Refine Level +7: Decreases Variable Casting Time by 15%. _______________________ When equipped with Gray Wolf Manteau: Increases Attack Speed by 10%. _______________________ When equipped with Gray Wolf Muffler: MATK +50 _______________________ Type: Armor Position: Armor Defense: 160 Armor Level: 1 Refinable Weight: 100 Required Level: 190 | |
| A manteau given to those who have been recognized by the Gray Wolf Clan. _______________________ MaxHP +2500 _______________________ For each 2 Refine Levels: MaxHP +150 _______________________ Refine Level +7: Increases Attack Speed by 7%. _______________________ When equipped with Gray Wolf Boots: Increases Critical Damage by 15%. _______________________ When equipped with Gray Wolf Shoes: Decreases Variable Casting Time by 15%. _______________________ Type: Armor Position: Garment Defense: 70 Armor Level: 1 Refinable Weight: 90 Required Level: 190 | |
| A scarf given to those who have been recognized by the Gray Wolf Clan. _______________________ MaxHP +1500 _______________________ For each 2 Refine Levels: MaxHP +100 _______________________ Refine Level +7: Decreases Variable Casting Time by 7%. _______________________ When equipped with Gray Wolf Boots: Increases Ranged Physical Damage by 7%. _______________________ When equipped with Gray Wolf Shoes: Increases Magical Damage with every element by 15%. _______________________ Type: Armor Position: Garment Defense: 70 Armor Level: 1 Refinable Weight: 90 Required Level: 190 | |
| A pair of boots given to those who have been recognized by the Gray Wolf Clan. _______________________ MaxSP +300 _______________________ For each 2 Refine Levels: MaxSP +50 _______________________ Refine Level +7: Increases Ranged Physical Damage by 7%. _______________________ When equipped with Gray Wolf Suit: ATK +7% _______________________ When equipped with Gray Wolf Robe: Increases Attack Speed by 7%. _______________________ Type: Armor Position: Shoes Defense: 70 Armor Level: 1 Refinable Weight: 50 Required Level: 190 | |
| A pair of shoes given to those who have been recognized by the Gray Wolf Clan. _______________________ MaxSP +250 _______________________ For each 2 Refine Levels: MaxSP +20 _______________________ Refine Level +7: Increases Magical Damage with every element by 7%. _______________________ When equipped with Gray Wolf Suit: MaxSP +7% _______________________ When equipped with Gray Wolf Robe: MATK +7% _______________________ Type: Armor Position: Shoes Defense: 70 Armor Level: 1 Refinable Weight: 50 Required Level: 190 | |
| A pendant given to those who have been recognized by the Gray Wolf Clan. _______________________ ATK +7% MaxHP +5% _______________________ Type: Armor Position: Right Accessory Armor Level: 1 Weight: 10 Required Level: 190 | |
| A ring given to those recognized by the Gray Wolf Clan. _______________________ ATK +7% MaxSP +5% _______________________ Type: Armor Position: Left Accessory Armor Level: 1 Weight: 10 Required Level: 190 | |
| Earrings given to those recognized by the Gray Wolf Clan. _______________________ MATK +7% MaxHP +5% _______________________ Type: Armor Position: Right Accessory Armor Level: 1 Weight: 10 Required Level: 190 | |
| A necklace given to those recognized by the Gray Wolf Clan. _______________________ MATK +7% MaxSP +5% _______________________ Type: Armor Position: Left Accessory Armor Level: 1 Weight: 10 Required Level: 190 |
Helm of Faith Exchange (1250x ![]() Amethyst Fragment (1000405) each)
Amethyst Fragment (1000405) each)
| Item | Description |
| A helm with the power of faith. It has the effect of amplifying the effects of Vivatus and Adulter weapons. _______________________ Base Level at least 210: POW +2, P.ATK +1. _______________________ Base Level at least 230: POW +3, P.ATK +2. _______________________ For each 2 Refine Levels: ATK +10 _______________________ For each 3 Refine Levels: Increases damage of Cross Slash by 15%. _______________________ For each 4 Refine Levels: Increases Ranged Physical Damage by 7%. _______________________ Refine Level +7: Increases Physical Damage against enemies of every size by 5%. _______________________ Refine Level +9: Decreases Fixed Casting Time by 0.2 seconds. _______________________ Refine Level +11: ATK +5% Decreases Fixed Casting Time by additional 0.3 seconds. _______________________ When equipped with Adulter Fides Cross Huuma Shuriken: Increases Ranged Physical Damage by 10%. For each 3 Refine Levels: Increases damage of Cross Slash by 5%. _______________________ When equipped with Vivatus Fides Cross Huuma Shuriken: Increases Ranged Physical Damage by 10%. For each 3 Refine Levels: Increases damage of Cross Slash by 5%. Increases damage of Kunai - Distortion by 7%. If the Weapon's Grade is C or higher: Increases damage of Kunai - Distortion by additional 15%. _______________________ Class Restrictions: Kagerou / Oboro _______________________ Type: Armor Position: Head Top Defense: 10 Armor Level: 2 Refinable Weight: 10 Required Level: 180 | |
| A helm with the power of faith. It has the effect of amplifying the effects of Vivatus and Adulter weapons. _______________________ Base Level at least 210: POW +2, P.ATK +1. _______________________ Base Level at least 230: POW +3, P.ATK +2. _______________________ For each 2 Refine Levels: ATK +10 _______________________ For each 3 Refine Levels: Increases damage of Swirling Petal by 15%. _______________________ For each 4 Refine Levels: Increases Ranged Physical Damage by 7%. _______________________ Refine Level +7: Increases Physical Damage against enemies of every size by 5%. _______________________ Refine Level +9: Decreases Fixed Casting Time by 0.2 seconds. _______________________ Refine Level +11: ATK +5% Decreases Fixed Casting Time by additional 0.3 seconds. _______________________ When equipped with Adulter Fides Huuma Shuriken: Increases Ranged Physical Damage by 10%. For each 3 Refine Levels: Increases damage of Swirling Petal by 5%. _______________________ When equipped with Vivatus Fides Huuma Shuriken: Increases Ranged Physical Damage by 10%. For each 3 Refine Levels: Increases damage of Swirling Petal by 5%. Increases damage of Huuma Shuriken - Grasp by 7%. If the Weapon's Grade is C or higher: Increases damage of Huuma Shuriken - Grasp by additional 15%. _______________________ Class Restrictions: Kagerou / Oboro _______________________ Type: Armor Position: Head Top Defense: 10 Armor Level: 2 Refinable Weight: 10 Required Level: 180 | |
| A helm with the power of faith. It has the effect of amplifying the effects of Vivatus and Adulter weapons. _______________________ Base Level at least 210: POW +2, P.ATK +1. _______________________ Base Level at least 230: POW +3, P.ATK +2. _______________________ For each 2 Refine Levels: ATK +10 _______________________ For each 3 Refine Levels: Increases damage of Hammer of God, Fire Dance and Dragon Tail by 15%. _______________________ For each 4 Refine Levels: Increases Ranged Physical Damage by 7%. _______________________ Refine Level +7: Increases Physical Damage against enemies of every size by 5%. _______________________ Refine Level +9: Decreases Fixed Casting Time by 0.2 seconds. _______________________ Refine Level +11: ATK +5% Decreases Fixed Casting Time by additional 0.3 seconds. _______________________ When equipped with Adulter Fides Shotgun: Increases Ranged Physical Damage by 10%. For each 3 Refine Levels: Increases damage of Shatter Storm by 5%. _______________________ When equipped with Adulter Fides Gatling Gun: Increases Ranged Physical Damage by 10%. For each 3 Refine Levels: Increases damage of Round Trip by 5%. _______________________ When equipped with Vivatus Fides Shotgun: Increases Ranged Physical Damage by 10%. For each 3 Refine Levels: Increases damage of Shatter Storm by 5%. Increases damage of Wildfire by 7%. If the Weapon's Grade is C or higher: Increases damage of Wildfire by additional 15%. _______________________ When equipped with Vivatus Fides Gatling Gun: Increases Ranged Physical Damage by 10%. For each 3 Refine Levels: Increases damage of Round Trip by 5%. Increases damage of The Vigilante at Night by 7%. If the Weapon's Grade is C or higher: Increases damage of The Vigilante at Night by additional 15%. _______________________ Weight: 10 _______________________ Class Restrictions: Rebellion _______________________ Type: Armor Position: Head Top Defense: 10 Armor Level: 2 Refinable Weight: 10 Required Level: 180 | |
| A helm with the power of faith. It has the effect of amplifying the effects of Vivatus and Adulter weapons. _______________________ Base Level at least 210: POW +2, P.ATK +1. _______________________ Base Level at least 230: POW +3, P.ATK +2. _______________________ For each 2 Refine Levels: ATK +10 _______________________ For each 3 Refine Levels: Increases damage of Hammer of God, Fire Dance and Dragon Tail by 15%. _______________________ For each 4 Refine Levels: Increases Ranged Physical Damage by 7%. _______________________ Refine Level +7: Increases Physical Damage against enemies of every size by 5%. _______________________ Refine Level +9: Decreases Fixed Casting Time by 0.2 seconds. _______________________ Refine Level +11: ATK +5% Decreases Fixed Casting Time by additional 0.3 seconds. _______________________ When equipped with Adulter Fides Rifle: Decreases Hammer of God skill cooldown by 10 seconds. For each 3 Refine Levels: Increases damage of Hammer of God by 5%. _______________________ When equipped with Adulter Fides Revolver: Increases Ranged Physical Damage by 10%. For each 3 Refine Levels: Increases damage of Fire Dance by 5%. _______________________ When equipped with Adulter Fides Launcher: Decreases Dragon Tail skill cooldown by 2 seconds. For each 3 Refine Levels: Increases damage of Dragon Tail by 5%. _______________________ When equipped with Vivatus Fides Rifle: Decreases Hammer of God skill cooldown by 10 seconds. For each 3 Refine Levels: Increases damage of Hammer of God by 5%. Increases damage of Only One Bullet by 7%. If the Weapon's Grade is C or higher: Increases damage of Only One Bullet by additional 15%. _______________________ When equipped with Vivatus Fides Revolver: Increases Ranged Physical Damage by 10%. For each 3 Refine Levels: Increases damage of Fire Dance by 5%. Increases damage of Magazine for One by 7%. If the Weapon's Grade is C or higher: Increases damage of Magazine for One by additional 15%. _______________________ When equipped with Vivatus Fides Launcher: Decreases Dragon Tail skill cooldown by 2 seconds. For each 3 Refine Levels: Increases damage of Dragon Tail by 5%. Increases damage of Spiral Shooting by 7%. If the Weapon's Grade is C or higher: Increases damage of Spiral Shooting by additional 15%. _______________________ Class Restrictions: Rebellion _______________________ Type: Armor Position: Head Top Defense: 10 Armor Level: 2 Refinable Weight: 10 Required Level: 180 | |
| A helm with the power of faith. It has the effect of amplifying the effects of Vivatus and Adulter weapons. _______________________ Base Level at least 210: SPL +2, S.MATK +1. _______________________ Base Level at least 230: SPL +3, S.MATK +2. _______________________ For each 2 Refine Levels: MATK +10 _______________________ For each 3 Refine Levels: Increases damage of Curse Explosion by 15%. _______________________ For each 4 Refine Levels: Increases all elemental magical damage by 7%. _______________________ Refine Level +7: Decreases Variable Casting Time by 10%. _______________________ Refine Level +9: Decreases Fixed Casting Time by 0.2 seconds. _______________________ Refine Level +11: MATK +5% Decreases Fixed Casting Time by additional 0.3 seconds. _______________________ When equipped with Adulter Fides Dark Wand: Decreases Evil Spirit's Curse skill cooldown by 2 seconds. For each 3 Refine Levels: Increases damage of Curse Explosion by 5%. _______________________ When equipped with Vivatus Fides Dark Wand: Decreases Evil Spirit's Curse skill cooldown by 2 seconds. For each 3 Refine Levels: Increases damage of Curse Explosion by 5%. Increases damage of Exorcism of Malicious Soul by 7%. If the Weapon's Grade is C or higher: Increases damage of Exorcism of Malicious Soul by additional 15%. _______________________ Class Restrictions: Soul Reaper _______________________ Type: Armor Position: Head Top Defense: 10 Armor Level: 2 Refinable Weight: 10 Required Level: 180 | |
| A helm with the power of faith. It has the effect of amplifying the effects of Vivatus and Adulter weapons. _______________________ Base Level at least 210: SPL +2, S.MATK +1. _______________________ Base Level at least 230: SPL +3, S.MATK +2. _______________________ For each 2 Refine Levels: MATK +10 _______________________ For each 3 Refine Levels: Increases damage of Eswhoo and Espa by 15%. _______________________ For each 4 Refine Levels: Increases all elemental magical damage by 7%. _______________________ Refine Level +7: Decreases Variable Casting Time by 10%. _______________________ Refine Level +9: Decreases Fixed Casting Time by 0.2 seconds. _______________________ Refine Level +11: MATK +5% Decreases Fixed Casting Time by additional 0.3 seconds. _______________________ When equipped with Adulter Fides Soul Stick: Increases all elemental magical damage by 10%. For each 3 Refine Levels: Increases damage of Eswhoo and Espa by 5%. _______________________ When equipped with Vivatus Fides Soul Stick: Increases all elemental magical damage by 10%. For each 3 Refine Levels: Increases damage of Eswhoo and Espa by 5%. Increases damage of Talisman of Red Phoenix and Talisman of Black Tortoise by 7%. If the Weapon's Grade is C or higher: Increases damage of Talisman of Red Phoenix and Talisman of Black Tortoise by additional 15%. _______________________ Class Restrictions: Soul Reaper _______________________ Type: Armor Position: Head Top Defense: 10 Armor Level: 2 Refinable Weight: 10 Required Level: 180 | |
| A helm with the power of faith. It has the effect of amplifying the effects of Vivatus and Adulter weapons. _______________________ Base Level at least 210: POW +2, P.ATK +1. _______________________ Base Level at least 230: POW +3, P.ATK +2. _______________________ For each 2 Refine Levels: ATK +10 _______________________ For each 3 Refine Levels: Increases damage of Falling Star by 15%. _______________________ For each 4 Refine Levels: Increases Melee Physical Damage by 7%. _______________________ Refine Level +7: Increases Physical Damage against enemies of every size by 5%. _______________________ Refine Level +9: Decreases Fixed Casting Time by 0.2 seconds. _______________________ Refine Level +11: ATK +5% Decreases Fixed Casting Time by additional 0.3 seconds. _______________________ When equipped with Adulter Fides Stardust Book: Increases Melee Physical Damage by 10%. For each 3 Refine Levels: Increases damage of Falling Star by 5%. _______________________ When equipped with Vivatus Fides Stardust Book: Increases Melee Physical Damage by 10%. For each 3 Refine Levels: Increases damage of Falling Star by 5%. Increases damage of Star Cannon by 7%. If the Weapon's Grade is C or higher: Increases damage of Star Cannon by additional 15%. _______________________ Class Restrictions: Star Emperor _______________________ Type: Armor Position: Head Top Defense: 10 Armor Level: 2 Refinable Weight: 10 Required Level: 180 | |
| A helm with the power of faith. It has the effect of amplifying the effects of Vivatus and Adulter weapons. _______________________ Base Level at least 210: POW +2, P.ATK +1. _______________________ Base Level at least 230: POW +3, P.ATK +2. _______________________ For each 2 Refine Levels: ATK +10 _______________________ For each 3 Refine Levels: Increases damage of New Moon Kick and Full Moon Kick by 15%. _______________________ For each 4 Refine Levels: Increases Melee Physical Damage by 7%. _______________________ Refine Level +7: Increases Physical Damage against enemies of every size by 5%. _______________________ Refine Level +9: Decreases Fixed Casting Time by 0.2 seconds. _______________________ Refine Level +11: ATK +5% Decreases Fixed Casting Time by additional 0.3 seconds. _______________________ When equipped with Adulter Fides Moon Book: Increases Melee Physical Damage by 10%. For each 3 Refine Levels: Increases damage of New Moon Kick and Full Moon Kick by 5%. _______________________ When equipped with Vivatus Fides Moon Book: Increases Melee Physical Damage by 10%. For each 3 Refine Levels: Increases damage of New Moon Kick and Full Moon Kick by 5%. Increases damage of Midnight Kick by 7%. If the Weapon's Grade is C or higher: Increases damage of Midnight Kick by additional 15%. _______________________ Class Restrictions: Star Emperor _______________________ Type: Armor Position: Head Top Defense: 10 Armor Level: 2 Refinable Weight: 10 Required Level: 180 | |
| A helm with the power of faith. It has the effect of amplifying the effects of Vivatus and Adulter weapons. _______________________ Base Level at least 210: SPL +2, S.MATK +1. _______________________ Base Level at least 230: SPL +3, S.MATK +2. _______________________ For each 2 Refine Levels: MATK +10 _______________________ For each 3 Refine Levels: Increases damage of Silvervine Stem Spear and Catnip Meteor by 15%. _______________________ For each 4 Refine Levels: Increases all elemental magical damage by 7%. _______________________ Refine Level +7: Decreases Variable Casting Time by 10%. _______________________ Refine Level +9: Decreases Fixed Casting Time by 0.2 seconds. _______________________ Refine Level +11: MATK +5% Decreases Fixed Casting Time by additional 0.3 seconds. _______________________ When equipped with Adulter Fides Foxtail Wand: Increases all elemental magical damage by 10%. For each 3 Refine Levels: Increases damage of Silvervine Stem Spear and Catnip Meteor by 5%. _______________________ When equipped with Vivatus Fides Foxtail Wand: Increases all elemental magical damage by 10%. For each 3 Refine Levels: Increases damage of Silvervine Stem Spear and Catnip Meteor by 5%. Increases damage of Hyunrok Breeze by 7%. If the Weapon's Grade is C or higher: Increases damage of Hyunrok Breeze by additional 15%. _______________________ Class Restrictions: Summoner _______________________ Type: Armor Position: Head Top Defense: 10 Armor Level: 2 Refinable Weight: 10 Required Level: 180 | |
| A helm with the power of faith. It has the effect of amplifying the effects of Vivatus and Adulter weapons. _______________________ Base Level at least 210: POW +2, P.ATK +1. _______________________ Base Level at least 230: POW +3, P.ATK +2. _______________________ For each 2 Refine Levels: ATK +10 _______________________ For each 3 Refine Levels: Increases damage of Cart Tornado by 15%. _______________________ For each 4 Refine Levels: Increases Melee Physical Damage by 7%. _______________________ Refine Level +7: Increases Physical Damage against enemies of every size by 5%. _______________________ Refine Level +9: Decreases Fixed Casting Time by 0.2 seconds. _______________________ Refine Level +11: ATK +5% Decreases Fixed Casting Time by additional 0.3 seconds. _______________________ When equipped with Adulter Fides Scepter: Decreases Cart Tornado skill cooldown by 0.15 seconds. For each 3 Refine Levels: Increases damage of Cart Tornado by 5%. _______________________ When equipped with Vivatus Fides Scepter: Decreases Cart Tornado skill cooldown by 0.3 seconds. For each 3 Refine Levels: Increases damage of Cart Tornado by 5%. Increases damage of Hell's Plant by 7%. If the Weapon's Grade is C or higher: Increases damage of Hell's Plant by additional 15%. _______________________ Class Restrictions: Genetic _______________________ Type: Armor Position: Head Top Defense: 10 Armor Level: 2 Refinable Weight: 10 Required Level: 180 | |
| A helm with the power of faith. It has the effect of amplifying the effects of Vivatus and Adulter weapons. _______________________ Base Level at least 210: POW +2, P.ATK +1. _______________________ Base Level at least 230: POW +3, P.ATK +2. _______________________ For each 2 Refine Levels: ATK +10 _______________________ For each 3 Refine Levels: Increases damage of Cart Cannon by 15%. _______________________ For each 4 Refine Levels: Increases Ranged Physical Damage by 7%. _______________________ Refine Level +7: Increases Physical Damage against enemies of every size by 5%. _______________________ Refine Level +9: Decreases Fixed Casting Time by 0.2 seconds. _______________________ Refine Level +11: ATK +5% Decreases Fixed Casting Time by additional 0.3 seconds. _______________________ When equipped with Adulter Fides Rapier: Increases Ranged Physical Damage by 10%. For each 3 Refine Levels: Increases damage of Cart Cannon by 5%. _______________________ When equipped with Vivatus Fides Rapier: Increases Ranged Physical Damage by 10%. For each 3 Refine Levels: Increases damage of Cart Cannon by 5%. Increases damage of Acidified Zone (Water/Wind/Ground/Fire) by 7%. If the Weapon's Grade is C or higher: Increases damage of Acidified Zone Water, Acidified Zone Wind, Acidified Zone Ground and Acidified Zone Fire by additional 15%. _______________________ Class Restrictions: Genetic _______________________ Type: Armor Position: Head Top Defense: 10 Armor Level: 2 Refinable Weight: 10 Required Level: 180 | |
| A helm with the power of faith. It has the effect of amplifying the effects of Vivatus and Adulter weapons. _______________________ Base Level at least 210: POW +2, P.ATK +1. _______________________ Base Level at least 230: POW +3, P.ATK +2. _______________________ For each 2 Refine Levels: ATK +10 _______________________ For each 3 Refine Levels: Increases damage of Vulcan Arm by 15%. _______________________ For each 4 Refine Levels: Increases Ranged Physical Damage by 7%. _______________________ Refine Level +7: Increases Physical Damage against enemies of every size by 5%. _______________________ Refine Level +9: Decreases Fixed Casting Time by 0.2 seconds. _______________________ Refine Level +11: ATK +5% Decreases Fixed Casting Time by additional 0.3 seconds. _______________________ When equipped with Adulter Fides Mace: Increases Ranged Physical Damage by 10%. For each 3 Refine Levels: Increases damage of Vulcan Arm by 5%. _______________________ When equipped with Vivatus Fides Mace: Increases Ranged Physical Damage by 10%. For each 3 Refine Levels: Increases damage of Vulcan Arm by 5%. Increases damage of Activation Attack Machine by 7% (only applies to yourself). If the Weapon's Grade is C or higher: Increases damage of Activation Attack Machine by additional 15% (only applies to yourself). _______________________ Class Restrictions: Mechanic _______________________ Type: Armor Position: Head Top Defense: 10 Armor Level: 2 Refinable Weight: 10 Required Level: 180 | |
| A helm with the power of faith. It has the effect of amplifying the effects of Vivatus and Adulter weapons. _______________________ Base Level at least 210: POW +2, P.ATK +1. _______________________ Base Level at least 230: POW +3, P.ATK +2. _______________________ For each 2 Refine Levels: ATK +10 _______________________ For each 3 Refine Levels: Increases damage of Axe Boomerang and Axe Tornado by 15%. _______________________ For each 4 Refine Levels: Increases Melee Physical Damage by 7%. _______________________ Refine Level +7: Increases Physical Damage against enemies of every size by 5%. _______________________ Refine Level +9: Decreases Fixed Casting Time by 0.2 seconds. _______________________ Refine Level +11: ATK +5% Decreases Fixed Casting Time by additional 0.3 seconds. _______________________ When equipped with Adulter Fides Axe: Increases Physical Damage by 10%. For each 3 Refine Levels: Increases damage of Axe Boomerang and Axe Tornado by 5%. _______________________ When equipped with Vivatus Fides Axe: Increases Physical Damage by 10%. For each 3 Refine Levels: Increases damage of Axe Boomerang and Axe Tornado by 5%. Increases damage of Axe Stomp by 7%. If the Weapon's Grade is C or higher: Increases damage of Axe Stomp by additional 15%. _______________________ Class Restrictions: Mechanic _______________________ Type: Armor Position: Head Top Defense: 10 Armor Level: 2 Refinable Weight: 10 Required Level: 180 | |
| A helm with the power of faith. It has the effect of amplifying the effects of Vivatus and Adulter weapons. _______________________ Base Level at least 210: POW +2, P.ATK +1. _______________________ Base Level at least 230: POW +3, P.ATK +2. _______________________ For each 2 Refine Levels: ATK +10 _______________________ For each 3 Refine Levels: Increases damage of Severe Rainstorm by 15%. _______________________ For each 4 Refine Levels: Increases Ranged Physical Damage by 7%. _______________________ Refine Level +7: CRI +15 _______________________ Refine Level +9: Decreases Fixed Casting Time by 0.2 seconds. _______________________ Refine Level +11: ATK +5% Decreases Fixed Casting Time by additional 0.3 seconds. _______________________ When equipped with Adulter Fides Violin or Adulter Fides Chain Rope: Increases Ranged Physical Damage by 10%. For each 3 Refine Levels: Increases damage of Severe Rainstorm by 5%. _______________________ When equipped with Vivatus Fides Violin or Vivatus Fides Chain Rope: Increases Ranged Physical Damage by 10%. For each 3 Refine Levels: Increases damage of Severe Rainstorm by 5%. Increases damage of Rythm Shooting by 7%. If the Weapon's Grade is C or higher: Increases damage of Rythm Shooting by additional 15%. _______________________ Class Restrictions: Minstrel, Wanderer _______________________ Type: Armor Position: Head Top Defense: 10 Armor Level: 2 Refinable Weight: 10 Required Level: 180 | |
| A helm with the power of faith. It has the effect of amplifying the effects of Vivatus and Adulter weapons. _______________________ Base Level at least 210: SPL +2, S.MATK +1. _______________________ Base Level at least 230: SPL +3, S.MATK +2. _______________________ For each 2 Refine Levels: MATK +10 _______________________ For each 3 Refine Levels: Increases damage of Metallic Sound by 15%. _______________________ For each 4 Refine Levels: Increases Magical Damage with Neutral element by 7%. _______________________ Refine Level +7: Decreases Variable Casting Time by 5%. _______________________ Refine Level +9: Decreases Fixed Casting Time by 0.2 seconds. _______________________ Refine Level +11: MATK +5% Decreases Fixed Casting Time by additional 0.3 seconds. _______________________ When equipped with Adulter Fides Harp or Adulter Fides Ribbon: Increases Magical Damage with Neutral element by 10%. For each 3 Refine Levels: Increases damage of Metallic Sound by 5%. _______________________ When equipped with Vivatus Fides Harp or Vivatus Fides Ribbon: Increases Magical Damage with Neutral element by 10%. For each 3 Refine Levels: Increases damage of Metallic Sound by 5%. Increases damage of Metallic Fury by 7%. If the Weapon's Grade is C or higher: Increases damage of Metallic Fury by additional 15%. _______________________ Class Restrictions: Minstrel, Wanderer _______________________ Type: Armor Position: Head Top Defense: 10 Armor Level: 2 Refinable Weight: 10 Required Level: 180 | |
| A helm with the power of faith. It has the effect of amplifying the effects of Vivatus and Adulter weapons. _______________________ Base Level at least 210: POW +2, P.ATK +1. _______________________ Base Level at least 230: POW +3, P.ATK +2. _______________________ For each 2 Refine Levels: ATK +10 _______________________ For each 3 Refine Levels: Increases damage of Hundred Spear by 15%. _______________________ For each 4 Refine Levels: Increases Ranged Physical Damage by 7%. _______________________ Refine Level +7: Increases Physical Damage against enemies of every size by 5%. _______________________ Refine Level +9: Decreases Fixed Casting Time by 0.2 seconds. _______________________ Refine Level +11: ATK +5% Decreases Fixed Casting Time by additional 0.3 seconds. _______________________ When equipped with Adulter Fides Lance: Decreases Hundred Spear skill cooldown by 0.2 seconds. For each 3 Refine Levels: Increases damage of Hundred Spear by 5%. _______________________ When equipped with Vivatus Fides Lance: Decreases Hundred Spear skill cooldown by 0.5 seconds. For each 3 Refine Levels: Increases damage of Hundred Spear by 5%. Increases damage of Madness Crusher by 7%. If the Weapon's Grade is C or higher: Increases damage of Madness Crusher by additional 15%. _______________________ Class Restrictions: Rune Knight _______________________ Type: Armor Position: Head Top Defense: 10 Armor Level: 2 Refinable Weight: 10 Required Level: 180 | |
| A helm with the power of faith. It has the effect of amplifying the effects of Vivatus and Adulter weapons. _______________________ Base Level at least 210: POW +2, P.ATK +1. _______________________ Base Level at least 230: POW +3, P.ATK +2. _______________________ For each 2 Refine Levels: ATK +10 _______________________ For each 3 Refine Levels: Increases damage of Wind Cutter and Ignition Break by 15%. _______________________ For each 4 Refine Levels: Increases Melee Physical Damage by 7%. _______________________ Refine Level +7: Increases Physical Damage against enemies of every size by 5%. _______________________ Refine Level +9: Decreases Fixed Casting Time by 0.2 seconds. _______________________ Refine Level +11: ATK +5% Decreases Fixed Casting Time by additional 0.3 seconds. _______________________ When equipped with Adulter Fides Two-Handed Sword: Decreases Ignition Break skill cooldown by 0.5 seconds. For each 3 Refine Levels: Increases damage of Wind Cutter and Ignition Break by 5%. _______________________ When equipped with Vivatus Fides Two-Handed Sword: Decreases Ignition Break skill cooldown by 1 second. For each 3 Refine Levels: Increases damage of Wind Cutter and Ignition Break by 5%. Increases damage of Storm Slash by 7%. If the Weapon's Grade is C or higher: Increases damage of Storm Slash by additional 15%. _______________________ Class Restrictions: Rune Knight _______________________ Type: Armor Position: Head Top Defense: 10 Armor Level: 2 Refinable Weight: 10 Required Level: 180 | |
| A helm with the power of faith. It has the effect of amplifying the effects of Vivatus and Adulter weapons. _______________________ Base Level at least 210: SPL +2, S.MATK +1. _______________________ Base Level at least 230: SPL +3, S.MATK +2. _______________________ For each 2 Refine Levels: MATK +10 _______________________ For each 3 Refine Levels: Increases damage of Psychic Wave by 15%. _______________________ For each 4 Refine Levels: Increases Magical Damage with Neutral, Wind and Earth element by 7%. _______________________ Refine Level +7: Decreases Variable Casting Time by 5%. _______________________ Refine Level +9: Decreases Fixed Casting Time by 0.2 seconds. _______________________ Refine Level +11: MATK +5% Decreases Fixed Casting Time by additional 0.3 seconds. _______________________ When equipped with Adulter Fides Magic Book: Increases Magical Damage with Neutral element by 10%. For each 3 Refine Levels: Increases damage of Psychic Wave by 5%. _______________________ When equipped with Vivatus Fides Magic Book: Increases Magical Damage with Neutral, Wind and Earth element by 10%. For each 3 Refine Levels: Increases damage of Psychic Wave by 5%. Increases damage of Lightning Land and Terra Drive by 7%. If the Weapon's Grade is C or higher: Increases damage of Lightning Land and Terra Drive by additional 15%. _______________________ Class Restrictions: Sorcerer _______________________ Type: Armor Position: Head Top Defense: 10 Armor Level: 2 Refinable Weight: 10 Required Level: 180 | |
| A helm with the power of faith. It has the effect of amplifying the effects of Vivatus and Adulter weapons. _______________________ Base Level at least 210: SPL +2, S.MATK +1. _______________________ Base Level at least 230: SPL +3, S.MATK +2. _______________________ For each 2 Refine Levels: MATK +10 _______________________ For each 3 Refine Levels: Increases damage of Poison Buster by 15%. _______________________ For each 4 Refine Levels: Increases Magical Damage with Fire and Poison element by 7%. _______________________ Refine Level +7: Decreases Variable Casting Time by 5%. _______________________ Refine Level +9: Decreases Fixed Casting Time by 0.2 seconds. _______________________ Refine Level +11: MATK +5% Decreases Fixed Casting Time by additional 0.3 seconds. _______________________ When equipped with Adulter Fides Poison Book: Increases Magical Damage with Poison element by 10%. For each 3 Refine Levels: Increases damage of Poison Buster by 5%. _______________________ When equipped with Vivatus Fides Poison Book: Increases Magical Damage with Fire and Poison element by 10%. For each 3 Refine Levels: Increases damage of Poison Buster by 5%. Increases damage of Conflagration and Venom Swamp by 7%. If the Weapon's Grade is C or higher: Increases damage of Conflagration and Venom Swamp by additional 15%. _______________________ Class Restrictions: Sorcerer _______________________ Type: Armor Position: Head Top Defense: 10 Armor Level: 2 Refinable Weight: 10 Required Level: 180 | |
| A helm with the power of faith. It has the effect of amplifying the effects of Vivatus and Adulter weapons. _______________________ Base Level at least 210: POW +2, P.ATK +1. _______________________ Base Level at least 230: POW +3, P.ATK +2. _______________________ For each 2 Refine Levels: ATK +10 _______________________ For each 3 Refine Levels: Increases damage of Rolling Cutter by 15%. _______________________ For each 4 Refine Levels: Increases Melee Physical Damage by 7%. _______________________ Refine Level +7: CRI +15 _______________________ Refine Level +9: Decreases Fixed Casting Time by 0.2 seconds. _______________________ Refine Level +11: ATK +5% Decreases Fixed Casting Time by additional 0.3 seconds. _______________________ When equipped with Adulter Fides Chakram: Increases Melee Physical Damage by 10%. For each 3 Refine Levels: Increases damage of Rolling Cutter by 5%. _______________________ When equipped with Vivatus Fides Chakram: Increases Melee Physical Damage by 10%. For each 3 Refine Levels: Increases damage of Rolling Cutter by 5%. Increases damage of Impact Crater by 7%. If the Weapon's Grade is C or higher: Increases damage of Impact Crater by additional 15%. _______________________ Class Restrictions: Guillotine Cross _______________________ Type: Armor Position: Head Top Defense: 10 Armor Level: 2 Refinable Weight: 10 Required Level: 180 | |
| A helm with the power of faith. It has the effect of amplifying the effects of Vivatus and Adulter weapons. _______________________ Base Level at least 210: POW +2, P.ATK +1. _______________________ Base Level at least 230: POW +3, P.ATK +2. _______________________ For each 2 Refine Levels: ATK +10 _______________________ For each 3 Refine Levels: Increases damage of Counter Slash by 15%. _______________________ For each 4 Refine Levels: Increases Melee Physical Damage by 7%. _______________________ Refine Level +7: Increases Physical Damage against enemies of every size by 5%. _______________________ Refine Level +9: Decreases Fixed Casting Time by 0.2 seconds. _______________________ Refine Level +11: ATK +5% Decreases Fixed Casting Time by additional 0.3 seconds. _______________________ When equipped with Adulter Fides Katar: Increases Melee Physical Damage by 10%. For each 3 Refine Levels: Increases damage of Counter Slash by 5%. _______________________ When equipped with Vivatus Fides Katar: Increases Melee Physical Damage by 10%. For each 3 Refine Levels: Increases damage of Counter Slash by 5%. Increases damage of Eternal Slash by 7%. If the Weapon's Grade is C or higher: Increases damage of Eternal Slash by additional 15%. _______________________ Class Restrictions: Guillotine Cross _______________________ Type: Armor Position: Head Top Defense: 10 Armor Level: 2 Refinable Weight: 10 Required Level: 180 | |
| A helm with the power of faith. It has the effect of amplifying the effects of Vivatus and Adulter weapons. _______________________ Base Level at least 210: POW +2, P.ATK +1. _______________________ Base Level at least 230: POW +3, P.ATK +2. _______________________ For each 2 Refine Levels: ATK +10 _______________________ For each 3 Refine Levels: Increases damage of Overbrand by 15%. _______________________ For each 4 Refine Levels: Increases Melee Physical Damage by 7%. _______________________ Refine Level +7: Increases Physical Damage against enemies of every size by 5%. _______________________ Refine Level +9: Decreases Fixed Casting Time by 0.2 seconds. _______________________ Refine Level +11: ATK +5% Decreases Fixed Casting Time by additional 0.3 seconds. _______________________ When equipped with Adulter Fides Guardian Spear: Increases Melee Physical Damage by 10%. For each 3 Refine Levels: Increases damage of Overbrand by 5%. _______________________ When equipped with Vivatus Fides Guardian Spear: Increases Melee Physical Damage by 10%. For each 3 Refine Levels: Increases damage of Overbrand by 5%. Increases damage of Overslash by 7%. If the Weapon's Grade is C or higher: Increases damage of Overslash by additional 15%. _______________________ Class Restrictions: Royal Guard _______________________ Type: Armor Position: Head Top Defense: 10 Armor Level: 2 Refinable Weight: 10 Required Level: 180 | |
| A helm with the power of faith. It has the effect of amplifying the effects of Vivatus and Adulter weapons. _______________________ Base Level at least 210: SPL +2, S.MATK +1. _______________________ Base Level at least 230: SPL +3, S.MATK +2. _______________________ For each 2 Refine Levels: MATK +10 _______________________ For each 3 Refine Levels: Increases damage of Genesis Ray by 15%. _______________________ For each 4 Refine Levels: Increases Magical Damage with Neutral and Holy element by 7%. _______________________ Refine Level +7: Decreases Variable Casting Time by 5%. _______________________ Refine Level +9: Decreases Fixed Casting Time by 0.2 seconds. _______________________ Refine Level +11: MATK +5% Decreases Fixed Casting Time by additional 0.3 seconds. _______________________ When equipped with Adulter Fides Guardian Sword: Increases Magical Damage with Neutral and Holy element by 10%. For each 3 Refine Levels: Increases damage of Genesis Ray by 5%. _______________________ When equipped with Vivatus Fides Guardian Sword: Increases Magical Damage with Neutral and Holy element by 10%. For each 3 Refine Levels: Increases damage of Genesis Ray by 5%. Increases damage of Cross Rain by 7%. If the Weapon's Grade is C or higher: Increases damage of Cross Rain by additional 15%. _______________________ Class Restrictions: Royal Guard _______________________ Type: Armor Position: Head Top Defense: 10 Armor Level: 2 Refinable Weight: 10 Required Level: 180 | |
| A helm with the power of faith. It has the effect of amplifying the effects of Vivatus and Adulter weapons. _______________________ Base Level at least 210: POW +2, P.ATK +1. _______________________ Base Level at least 230: POW +3, P.ATK +2. _______________________ For each 2 Refine Levels: ATK +10 _______________________ For each 3 Refine Levels: Increases damage of Aimed Bolt by 15%. _______________________ For each 4 Refine Levels: Increases Ranged Physical Damage by 7%. _______________________ Refine Level +7: CRI +15 _______________________ Refine Level +9: Decreases Fixed Casting Time by 0.2 seconds. _______________________ Refine Level +11: ATK +5% Decreases Fixed Casting Time by additional 0.3 seconds. _______________________ When equipped with Adulter Fides Aiming Bow: Increases Ranged Physical Damage by 10%. For each 3 Refine Levels: Increases damage of Aimed Bolt by 5%. _______________________ When equipped with Vivatus Fides Aiming Bow: Increases Ranged Physical Damage by 10%. For each 3 Refine Levels: Increases damage of Aimed Bolt by 5%. Increases damage of Crescive Bolt by 7%. If the Weapon's Grade is C or higher: Increases damage of Crescive Bolt by additional 15%. _______________________ Class Restrictions: Ranger _______________________ Type: Armor Position: Head Top Defense: 10 Armor Level: 2 Refinable Weight: 10 Required Level: 180 | |
| A helm with the power of faith. It has the effect of amplifying the effects of Vivatus and Adulter weapons. _______________________ Base Level at least 210: POW +2, P.ATK +1. _______________________ Base Level at least 230: POW +3, P.ATK +2. _______________________ For each 2 Refine Levels: ATK +10 _______________________ For each 3 Refine Levels: Increases damage of Arrow Storm by 15%. _______________________ For each 4 Refine Levels: Increases Ranged Physical Damage by 7%. _______________________ Refine Level +7: Increases Physical Damage against enemies of every size by 5%. _______________________ Refine Level +9: Decreases Fixed Casting Time by 0.2 seconds. _______________________ Refine Level +11: ATK +5% Decreases Fixed Casting Time by additional 0.3 seconds. _______________________ When equipped with Adulter Fides Ballista: Increases Ranged Physical Damage by 10%. For each 3 Refine Levels: Increases damage of Arrow Storm by 5%. _______________________ When equipped with Vivatus Fides Ballista: Increases Ranged Physical Damage by 10%. For each 3 Refine Levels: Increases damage of Arrow Storm by 5%. Increases damage of Gale Storm by 7%. If the Weapon's Grade is C or higher: Increases damage of Gale Storm by additional 15%. _______________________ Class Restrictions: Ranger _______________________ Type: Armor Position: Head Top Defense: 10 Armor Level: 2 Refinable Weight: 10 Required Level: 180 | |
| A helm with the power of faith. It has the effect of amplifying the effects of Vivatus and Adulter weapons. _______________________ Base Level at least 210: POW +2, P.ATK +1. _______________________ Base Level at least 230: POW +3, P.ATK +2. _______________________ For each 2 Refine Levels: ATK +10 _______________________ For each 3 Refine Levels: Increases damage of Triangle Shot by 15%. _______________________ For each 4 Refine Levels: Increases Ranged Physical Damage by 7%. _______________________ Refine Level +7: CRI +15 _______________________ Refine Level +9: Decreases Fixed Casting Time by 0.2 seconds. _______________________ Refine Level +11: ATK +5% Decreases Fixed Casting Time by additional 0.3 seconds. _______________________ When equipped with Adulter Fides Crossbow: Increases Ranged Physical Damage by 10%. For each 3 Refine Levels: Increases damage of Triangle Shot by 5%. _______________________ When equipped with Vivatus Fides Cross Bow: Increases Ranged Physical Damage by 10%. For each 3 Refine Levels: Increases damage of Triangle Shot by 5%. Increases damage of Frenzy Shot by 7%. If the Weapon's Grade is C or higher: Increases damage of Frenzy Shot by additional 15%. _______________________ Class Restrictions: Shadow Chaser _______________________ Type: Armor Position: Head Top Defense: 10 Armor Level: 2 Refinable Weight: 10 Required Level: 180 | |
| A helm with the power of faith. It has the effect of amplifying the effects of Vivatus and Adulter weapons. _______________________ Base Level at least 210: POW +2, P.ATK +1. _______________________ Base Level at least 230: POW +3, P.ATK +2. _______________________ For each 2 Refine Levels: ATK +10 _______________________ For each 3 Refine Levels: Increases damage of Fatal Menace by 15%. _______________________ For each 4 Refine Levels: Increases Melee Physical Damage by 7%. _______________________ Refine Level +7: Increases Physical Damage against enemies of every size by 5%. _______________________ Refine Level +9: Decreases Fixed Casting Time by 0.2 seconds. _______________________ Refine Level +11: ATK +5% Decreases Fixed Casting Time by additional 0.3 seconds. _______________________ When equipped with Adulter Fides Dagger: Increases Melee Physical Damage by 10%. For each 3 Refine Levels: Increases damage of Fatal Menace by 5%. _______________________ When equipped with Vivatus Fides Dagger: Increases Melee Physical Damage by 10%. For each 3 Refine Levels: Increases damage of Fatal Menace by 5%. Increases damage of Abyss Dagger by 7%. If the Weapon's Grade is C or higher: Increases damage of Abyss Dagger by additional 15%. _______________________ Class Restrictions: Shadow Chaser _______________________ Type: Armor Position: Head Top Defense: 10 Armor Level: 2 Refinable Weight: 10 Required Level: 180 | |
| A helm with the power of faith. It has the effect of amplifying the effects of Vivatus and Adulter weapons. _______________________ Base Level at least 210: POW +2, P.ATK +1. _______________________ Base Level at least 230: POW +3, P.ATK +2. _______________________ For each 2 Refine Levels: ATK +10 _______________________ For each 3 Refine Levels: Increases damage of Duple Light by 15%. _______________________ For each 4 Refine Levels: Increases Melee and Ranged Physical Damage by 7%. _______________________ Refine Level +7: CRI +15 _______________________ Refine Level +9: Decreases Fixed Casting Time by 0.2 seconds. _______________________ Refine Level +11: ATK +5% Decreases Fixed Casting Time by additional 0.3 seconds. _______________________ When equipped with Adulter Fides Bible: Increases Melee Physical Damage by 10%. For each 3 Refine Levels: Increases damage of Duple Light by 5%. _______________________ When equipped with Vivatus Fides Bible: Increases Melee Physical Damage by 10%. For each 3 Refine Levels: Increases damage of Duple Light by 5%. Increases damage of Petitio by 7%. If the Weapon's Grade is C or higher: Increases damage of Petitio by additional 15%. _______________________ Class Restrictions: Archbishop _______________________ Type: Armor Position: Head Top Defense: 10 Armor Level: 2 Refinable Weight: 10 Required Level: 180 | |
| A helm with the power of faith. It has the effect of amplifying the effects of Vivatus and Adulter weapons. _______________________ Base Level at least 210: SPL +2, S.MATK +1. _______________________ Base Level at least 230: SPL +3, S.MATK +2. _______________________ For each 2 Refine Levels: MATK +10 _______________________ For each 3 Refine Levels: Increases damage of Adoramus by 15%. _______________________ For each 4 Refine Levels: Increases Magical Damage with Neutral and Holy element by 7%. _______________________ Refine Level +7: Decreases Variable Casting Time by 5%. _______________________ Refine Level +9: Decreases Fixed Casting Time by 0.2 seconds. _______________________ Refine Level +11: MATK +5% Decreases Fixed Casting Time by additional 0.3 seconds. _______________________ When equipped with Adulter Fides Wand: Increases Magical Damage with Neutral and Holy element by 10%. For each 3 Refine Levels: Increases damage of Adoramus by 5%. _______________________ When equipped with Vivatus Fides Wand: Increases Magical Damage with Neutral and Holy element by 10%. For each 3 Refine Levels: Increases damage of Adoramus by 5%. Increases damage of Arbitrium by 7%. If the Weapon's Grade is C or higher: Increases damage of Arbitrium by additional 15%. _______________________ Class Restrictions: Archbishop _______________________ Type: Armor Position: Head Top Defense: 10 Armor Level: 2 Refinable Weight: 10 Required Level: 180 | |
| A helm with the power of faith. It has the effect of amplifying the effects of Vivatus and Adulter weapons. _______________________ Base Level at least 210: POW +2, P.ATK +1. _______________________ Base Level at least 230: POW +3, P.ATK +2. _______________________ For each 2 Refine Levels: ATK +10 _______________________ For each 3 Refine Levels: Increases damage of Rampage Blaster by 15%. _______________________ For each 4 Refine Levels: Increases Ranged Physical Damage by 7%. _______________________ Refine Level +7: MaxSP +5% _______________________ Refine Level +9: Decreases Fixed Casting Time by 0.2 seconds. _______________________ Refine Level +11: ATK +5% Decreases Fixed Casting Time by additional 0.3 seconds. _______________________ When equipped with Adulter Fides Claw: Increases Ranged Physical Damage by 10%. For each 3 Refine Levels: Increases damage of Rampage Blaster by 5%. _______________________ When equipped with Vivatus Fides Claw: Increases Ranged Physical Damage by 10%. For each 3 Refine Levels: Increases damage of Rampage Blaster by 5%. Increases damage of Explosion Blaster by 7%. If the Weapon's Grade is C or higher: Increases damage of Explosion Blaster by additional 15%. _______________________ Class Restrictions: Sura _______________________ Type: Armor Position: Head Top Defense: 10 Armor Level: 2 Refinable Weight: 10 Required Level: 180 | |
| A helm with the power of faith. It has the effect of amplifying the effects of Vivatus and Adulter weapons. _______________________ Base Level at least 210: POW +2, P.ATK +1. _______________________ Base Level at least 230: POW +3, P.ATK +2. _______________________ For each 2 Refine Levels: ATK +10 _______________________ For each 3 Refine Levels: Increases damage of Tiger Cannon by 15%. _______________________ For each 4 Refine Levels: Increases Melee Physical Damage by 7%. _______________________ Refine Level +7: MaxHP +5% _______________________ Refine Level +9: Decreases Fixed Casting Time by 0.2 seconds. _______________________ Refine Level +11: ATK +5% Decreases Fixed Casting Time by additional 0.3 seconds. _______________________ When equipped with Adulter Fides Knuckle: Increases Melee Physical Damage by 10%. For each 3 Refine Levels: Increases damage of Tiger Cannon by 5%. _______________________ When equipped with Vivatus Fides Knuckle: Increases Melee Physical Damage by 10%. For each 3 Refine Levels: Increases damage of Tiger Cannon by 5%. Increases damage of Third Flame Bomb by 7%. If the Weapon's Grade is C or higher: Increases damage of Third Flame Bomb by additional 15%. _______________________ Class Restrictions: Sura _______________________ Type: Armor Position: Head Top Defense: 10 Armor Level: 2 Refinable Weight: 10 Required Level: 180 | |
| A helm with the power of faith. It has the effect of amplifying the effects of Vivatus and Adulter weapons. _______________________ Base Level at least 210: SPL +2, S.MATK +1. _______________________ Base Level at least 230: SPL +3, S.MATK +2. _______________________ For each 2 Refine Levels: MATK +10 _______________________ For each 3 Refine Levels: Increases damage of Comet by 15%. _______________________ For each 4 Refine Levels: Increases Magical Damage with Neutral and Shadow element by 7%. _______________________ Refine Level +7: Decreases Variable Casting Time by 10%. _______________________ Refine Level +9: Decreases Fixed Casting Time by 0.2 seconds. _______________________ Refine Level +11: MATK +5% Decreases Fixed Casting Time by additional 0.3 seconds. _______________________ When equipped with Adulter Fides Two-Handed Staff: Increases Magical Damage with Neutral and Shadow element by 10%. For each 3 Refine Levels: Increases damage of Comet by 5%. _______________________ When equipped with Vivatus Fides Two-Handed Staff: Increases Magical Damage with Neutral and Shadow element by 10%. For each 3 Refine Levels: Increases damage of Comet by 5%. Increases damage of Mystery Illusion by 7%. If the Weapon's Grade is C or higher: Increases damage of Mystery Illusion by additional 15%. _______________________ Class Restrictions: Warlock _______________________ Type: Armor Position: Head Top Defense: 10 Armor Level: 2 Refinable Weight: 10 Required Level: 180 | |
| A helm with the power of faith. It has the effect of amplifying the effects of Vivatus and Adulter weapons. _______________________ Base Level at least 210: SPL +2, S.MATK +1. _______________________ Base Level at least 230: SPL +3, S.MATK +2. _______________________ For each 2 Refine Levels: MATK +10 _______________________ For each 3 Refine Levels: Increases damage of Soul Expansion by 15%. _______________________ For each 4 Refine Levels: Increases Magical Damage with Ghost element by 7%. _______________________ Refine Level +7: Decreases Variable Casting Time by 10%. _______________________ Refine Level +9: Decreases Fixed Casting Time by 0.2 seconds. _______________________ Refine Level +11: MATK +5% Decreases Fixed Casting Time by additional 0.3 seconds. _______________________ When equipped with Adulter Fides Rod: Increases Magical Damage with Ghost element by 10%. For each 3 Refine Levels: Increases damage of Soul Expansion by 5%. _______________________ When equipped with Vivatus Fides Rod: Increases Magical Damage with Ghost element by 10%. For each 3 Refine Levels: Increases damage of Soul Expansion by 5%. Increases damage of Soul Vulcan Strike by 7%. If the Weapon's Grade is C or higher: Increases damage of Soul Vulcan Strike by additional 15%. _______________________ Class Restrictions: Warlock _______________________ Type: Armor Position: Head Top Defense: 10 Armor Level: 2 Refinable Weight: 10 Required Level: 180 |
Vivatus / Helm of Faith Equipment Hammer (1700x ![]() Amethyst Fragment (1000405) each)
Amethyst Fragment (1000405) each)
| Item | Description |
| A refine hammer that increases the refinement level of a specific Vivatus Fides Weapon by +1. It can only be used on Vivatus Fides Weapon with refine level between +9 and +11. Each time it is used, 40 Holy Oil of Purification, 40 Holy Water of Purification and 40 Sbbatical Handkerchief are consumed as materials. _______________________ [Target Items] Vivatus Fides Magic Book Vivatus Fides Poison Book Vivatus Fides Bible Vivatus Fides Ribbon Vivatus Fides Harp Vivatus Fides Claw Vivatus Fides Chain Rope Vivatus Fides Violin Vivatus Fides Aiming Bow Vivatus Fides Ballista Vivatus Fides Knuckle Vivatus Fides Wand Vivatus Fides Rod Vivatus Fides Two-Handed Staff Vivatus Fides Cross Bow Vivatus Fides Chakram Vivatus Fides Scepter Vivatus Fides Dagger Vivatus Fides Katar Vivatus Fides Rapier Vivatus Fides Mace Vivatus Fides Guardian Sword Vivatus Fides Axe Vivatus Fides Guardian Spear Vivatus Fides Lance Vivatus Fides Two-Handed Sword Vivatus Fides Dark Wand Vivatus Fides Soul Stick Vivatus Fides Foxtail Wand Vivatus Fides Foxtail Model Vivatus Fides Stardust Book Vivatus Fides Moon Book Vivatus Fides Gatling Gun Vivatus Fides Launcher Vivatus Fides Rifle Vivatus Fides Shotgun Vivatus Fides Revolver Vivatus Fides Cross Huuma Shuriken Vivatus Fides Huuma Shuriken _______________________ Type: DelayConsume Position: Unknown Weight: 1 | |
| A refine hammer that increases the refinement level of Helms of Faith by +1. It can be used for Helm of Faith with refine level between +9 and +11. Each time it is used, 1500 Amethyst Fragments are consumed as materials. _______________________ This item will be consumed after performing the item reform. _______________________ [Target Items] Helm of Faith (Warlock) Helm of Faith II (Warlock) Helm of Faith (Sura) Helm of Faith II (Sura) Helm of Faith (Archbishop) Helm of Faith II (Archbishop) Helm of Faith (Shadow Chaser) Helm of Faith II (Shadow Chaser) Helm of Faith (Ranger) Helm of Faith II (Ranger) Helm of Faith (Royal Guard) Helm of Faith II (Royal Guard) Helm of Faith (Guillotine Cross) Helm of Faith II (Guillotine Cross) Helm of Faith (Sorcerer) Helm of Faith II (Sorcerer) Helm of Faith (Rune Knight) Helm of Faith II (Rune Knight) Helm of Faith (Minstrel & Wanderer) Helm of Faith II (Minstrel & Wanderer) Helm of Faith (Mechanic) Helm of Faith II (Mechanic) Helm of Faith (Genetic) Helm of Faith II (Genetic) Helm of Faith (Kagerou & Oboro) Helm of Faith II (Kagerou & Oboro) Helm of Faith (Rebellion) Helm of Faith II (Rebellion) Helm of Faith (Soul Reaper) Helm of Faith II (Soul Reaper) Helm of Faith (Star Emperor) Helm of Faith II (Star Emperor) Helm of Faith (Summoner) Helm of Faith II (Summoner) _______________________ Type: DelayConsume Position: Unknown Weight: 1 |
Gray Wolf Armor Refine Boxes
| Item | Description | Price |
| A magic box that can refine Gray Wolf equipment. If you put Gray Wolf armor, you can get +7 refined Gray Wolf armor. _______________________ [Target Items] Gray Wolf Suit, Gray Wolf Robe, Gray Wolf Manteau, Gray Wolf Muffler, Gray Wolf Boots, Gray Wolf Shoes. _______________________ Type: DelayConsume Position: Unknown Weight: 1 |
x1050 | |
| A magic box that can refine Gray Wolf equipment. If you put Gray Wolf armor, you can get +9 refined Gray Wolf armor. _______________________ [Target Items] Gray Wolf Suit, Gray Wolf Robe, Gray Wolf Manteau, Gray Wolf Muffler, Gray Wolf Boots, Gray Wolf Shoes. _______________________ Type: DelayConsume Position: Unknown Weight: 1 |
x2250 |
Gray Wolf Armor
Talk to NPC Emmett (wolfvill 164, 137) in Gray Wolf Village to enchant.
| Target Items | Slot Order | Refine | Reset Process |
A suit given to those who have been recognized by the Gray Wolf Clan. _______________________ ATK +130 _______________________ For each 2 Refine Levels: ATK +15 _______________________ Refine Level +7: Increases Attack Speed by 15%. _______________________ When equipped with Gray Wolf Manteau: ATK +50 _______________________ When equipped with Gray Wolf Muffler: Decreases After Cast Delay by 10%. _______________________ Type: Armor Position: Armor Defense: 160 Armor Level: 1 Refinable Weight: 100 Required Level: 190 |
4>3>2 | 7 | 25x 100,000z |
A robe given to those who have been recognized by the Gray Wolf Clan. _______________________ MATK +130 _______________________ For each 2 Refine Levels: MATK +15 _______________________ Refine Level +7: Decreases Variable Casting Time by 15%. _______________________ When equipped with Gray Wolf Manteau: Increases Attack Speed by 10%. _______________________ When equipped with Gray Wolf Muffler: MATK +50 _______________________ Type: Armor Position: Armor Defense: 160 Armor Level: 1 Refinable Weight: 100 Required Level: 190 |
Gray Wolf Armor Enchantments
Talk to NPC Emmett (wolfvill 164, 137) in Gray Wolf Village to enchant.

| Slot 2 | Slot 3 | Slot 4 |
| 50x 200,000z |
25x 150,000z |
15x 100,000z |
| Note: choose your desired Enchant for: 500x / 250x / 125x 10,000,000z | ||
| 100% Success Chance | ||
Decreases reflected damage taken by 2%. |
STR +1 |
STR +1 |
Decreases reflected damage taken by 3%. |
DEX +1 |
DEX +1 |
Decreases damage taken from reflected attacks by 4%. |
AGI +1 |
AGI +1 |
ATK +2%, MATK +2% |
INT +1 |
INT +1 |
Increases damage of Dragon Breath and Dragon Breath - Water by 15%. |
VIT +1 |
VIT +1 |
Increases damage of Wind Cutter and Ignition Break by 15%. |
LUK +1 |
LUK +1 |
Increases damage of Sonic Wave and Hundred Spear by 15%. |
STR +2 |
STR +2 |
Increases damage of Overbrand and Earth Drive by 15%. |
DEX +2 |
DEX +2 |
Increases damage of Banishing Point and Cannon Spear by 15%. |
AGI +2 |
AGI +2 |
Increases damage of Pressure and Genesis Ray by 15%. |
INT +2 |
INT +2 |
Increases damage of Knuckle Boost and Arms Cannon by 15%. |
VIT +2 |
VIT +2 |
Increases damage of Vulcan Arm and Axe Boomerang by 15%. |
LUK +2 |
LUK +2 |
Increases damage of Axe Tornado and Power Swing by 15%. |
STR +3 |
DEF +150 |
Increases damage of Cart Tornado and Hell's Plant by 15%. |
DEX +3 |
MDEF +15 |
Increases damage of Crazy Weed and Cart Cannon by 15%. |
AGI +3 |
DEF +200 |
Increases damage of Acid Demonstration and Spore Explosion by 15%. |
INT +3 |
MDEF +20 |
Increases damage of Sonic Blow and Cross Impact by 15%. |
VIT +3 |
Increases Ranged Physical Damage by 3%. |
Increases damage of Cross Ripper Slasher and Rolling Cutter by 15%. |
LUK +3 |
ATK +2%, ATK +25 |
Increases damage of Soul Destroyer and Counter Slash by 15%. |
DEF +150 |
MATK +2%, MATK +25 |
Increases damage of Fatal Menace and Raid by 15%. |
MDEF +15 |
Increases Ranged Physical Damage by 5%. |
Increases Magical Damage with every element by 15%. |
DEF +200 |
ATK +4%, ATK +50 |
Increases damage of Triangle Shot by 15%. |
MDEF +20 |
MATK +4%, MATK +50 |
Increases damage of Crimson Rock and Earth Strain by 15%. |
DEF +250 |
|
Increases damage of Jack Frost and Chain Lightning by 15%. |
MDEF +25 |
|
Increases damage of Comet and Tetra Vortex by 15%. |
Increases Ranged Physical Damage by 3%. |
|
Increases damage of Killing Cloud and Poison Buster by 15%. |
ATK +2%, ATK +25 |
|
Increases damage of Psychic Wave and Varetyr Spear by 15%. |
MATK +2%, MATK +25 |
|
Increases damage of Diamond Dust and Earth Grave by 15%. |
Increases Ranged Physical Damage by 5%. |
|
Increases damage of Magnus Exorcismus and Adoramus by 15%. |
ATK +4%, ATK +50 |
|
Increases damage of Judex by 15%. |
MATK +4%, MATK +50 |
|
Increases damage of Duple Light by 15%. |
Increases Ranged Physical Damage by 5%. |
|
Increases damage of Tiger Cannon and Fallen Empire by 15%. |
ATK +6%, ATK +100 |
|
Increases damage of Rampage Blaster and Ride in Lightning by 15%. |
MATK +6%, MATK +100 |
|
Increases damage of Gate of Hell and Knuckle Arrow by 15%. |
Decreases After Cast Delay by 4%. |
|
Increases damage of Cluster Bomb by 15%. |
||
Increases damage of Sharp Shooting by 15%. |
||
Increases damage of Aimed Bolt and Arrow Storm by 15%. |
||
Increases damage of Metallic Sound and Neutral elemental magical damage by 5%. |
||
Increases damage of Reverberation by 15%. |
||
Increases damage of Arrow Vulcan and Severe Rainstorm by 15%. |
||
Increases damage of Prominence Kick and Solar Burst by 15%. |
||
Increases damage of New Moon Kick and Full Moon Kick by 15%. |
||
Increases damage of Flash Kick and Falling Star by 15%. |
||
Increases damage of Esma and Eswhoo by 15%. |
||
Increases damage of Espa by 15%. |
||
Increases damage of Curse Explosion by 15%. |
||
Increases damage of Desperado, Fire Dance and Hammer of God by 15%. |
||
Increases damage of Fire Rain, Howling Mine and Dragon Tail by 15%. |
||
Increases damage of Shattering Storm, Banishing Buster and Round Trip by 15%. |
||
Increases damage of Flaming Petals, Freezing Spear and Wind Blade by 15%. |
||
Increases damage of Cross Slash and Swirling Petal by 15%. |
||
Increases damage of Exploding Dragon, Snow Flake Draft and First Wind by 15%. |
||
Decreases Tuna Party and Tasty Shrimp Party skill cooldown by 1 second. |
||
Increases damage of Silvervine Stem Spear and Catnip Meteor by 15%. |
||
Increases damage of Picky Peck and Lunatic Carrot Beat by 15%. |
||
Double Slash damage +15% |
||
Sharpen Hail damage +15% |
||
Ice Splash damage +15% |
||
Gray Wolf Garment
Talk to NPC Emmett (wolfvill 164, 137) in Gray Wolf Village and select Option 2 to enchant.

| Target Items | Slot Order | Refine | Reset Process |
A manteau given to those who have been recognized by the Gray Wolf Clan. _______________________ MaxHP +2500 _______________________ For each 2 Refine Levels: MaxHP +150 _______________________ Refine Level +7: Increases Attack Speed by 7%. _______________________ When equipped with Gray Wolf Boots: Increases Critical Damage by 15%. _______________________ When equipped with Gray Wolf Shoes: Decreases Variable Casting Time by 15%. _______________________ Type: Armor Position: Garment Defense: 70 Armor Level: 1 Refinable Weight: 90 Required Level: 190 |
4>3>2 | 7 | 25x 100,000z |
A scarf given to those who have been recognized by the Gray Wolf Clan. _______________________ MaxHP +1500 _______________________ For each 2 Refine Levels: MaxHP +100 _______________________ Refine Level +7: Decreases Variable Casting Time by 7%. _______________________ When equipped with Gray Wolf Boots: Increases Ranged Physical Damage by 7%. _______________________ When equipped with Gray Wolf Shoes: Increases Magical Damage with every element by 15%. _______________________ Type: Armor Position: Garment Defense: 70 Armor Level: 1 Refinable Weight: 90 Required Level: 190 |
Gray Wolf Garment Enchantments
Talk to NPC Emmett (wolfvill 164, 137) in Gray Wolf Village and select Option 2 to enchant.

| Slot 2 | Slot 3 | Slot 4 |
| 50x 200,000z |
25x 150,000z |
15x 100,000z |
| Note: You can also choose your desired Enchant for: 375x / 200x / 125x 10,000,000z | ||
| 100% Success Chance | ||
Decreases damage taken from Normal and Boss class by 3%. |
FLEE +10 |
STR +1 |
Decreases damage taken from Normal and Boss class by 5%. |
Decreases Variable Casting Time by 6%. |
DEX +1 |
Decreases damage taken from Normal and Boss class by 7%. |
CRI +10 |
AGI +1 |
Increases Physical Damage and Magical Damage with every element by 2%. |
HIT +20 |
INT +1 |
Increases Physical Damage and Magical Damage with every element by 2%. |
FLEE +20 |
VIT +1 |
Increases Physical Damage and Magical Damage with every element by 3%. |
Decreases Variable Casting Time by 8%. |
LUK +1 |
Decreases damage taken from reflected attacks by 2%. |
CRI +10 |
STR +2 |
Decreases damage taken from reflected attacks by 3%. |
HIT +20 |
DEX +2 |
Decreases damage taken from reflected attacks by 4%. |
FLEE +30 |
AGI +2 |
MATK +30 |
INT +2 | |
CRI +15 |
VIT +2 | |
HIT +30 |
LUK +2 | |
STR +3 | ||
DEX +3 | ||
AGI +3 | ||
INT +3 | ||
VIT +3 | ||
LUK +3 | ||
Gray Wolf Footgear
Talk to NPC Emmett (wolfvill 164, 137) in Gray Wolf Village and select Option 2 to enchant.

| Target Items | Slot Order | Refine | Reset Process |
A pair of boots given to those who have been recognized by the Gray Wolf Clan. _______________________ MaxSP +300 _______________________ For each 2 Refine Levels: MaxSP +50 _______________________ Refine Level +7: Increases Ranged Physical Damage by 7%. _______________________ When equipped with Gray Wolf Suit: ATK +7% _______________________ When equipped with Gray Wolf Robe: Increases Attack Speed by 7%. _______________________ Type: Armor Position: Shoes Defense: 70 Armor Level: 1 Refinable Weight: 50 Required Level: 190 |
4>3>2 | 7 | 25x 100,000z |
A pair of shoes given to those who have been recognized by the Gray Wolf Clan. _______________________ MaxSP +250 _______________________ For each 2 Refine Levels: MaxSP +20 _______________________ Refine Level +7: Increases Magical Damage with every element by 7%. _______________________ When equipped with Gray Wolf Suit: MaxSP +7% _______________________ When equipped with Gray Wolf Robe: MATK +7% _______________________ Type: Armor Position: Shoes Defense: 70 Armor Level: 1 Refinable Weight: 50 Required Level: 190 |
Gray Wolf Footgear Enchantments
Talk to NPC Emmett (wolfvill 164, 137) in Gray Wolf Village and select Option 2 to enchant.

| Slot 2 | Slot 3 | Slot 4 |
| 50x 200,000z |
25x 150,000z |
15x 100,000z |
| Note: You can also choose your desired Enchant for: 375x / 200x / 125x 10,000,000z | ||
| 100% Success Chance | ||
Physical attacks have a 3% chance to increase VIT by 50 and ATK by 25% for 10 seconds. _______________________ Type: Enchant Position: Unknown |
Decreases Fixed Casting Time by 0.5 seconds. _______________________ Type: Enchant Position: Unknown |
MaxHP +5%, MaxHP +1500 _______________________ Refine Level +7: MaxHP +2% _______________________ Refine Level +9: MaxHP +2% _______________________ Refine Level +11: MaxHP +3% _______________________ Type: Enchant Position: Unknown |
Magical attacks have a 3% chance to increase INT by 50 and MATK by 25% for 10 seconds. _______________________ Type: Enchant Position: Unknown |
Decreases Fixed Casting Time by 0.7 seconds. _______________________ Type: Enchant Position: Unknown |
MaxSP +5%, MaxSP +300 _______________________ Refine Level +7: MaxSP +2% _______________________ Refine Level +9: MaxSP +2% _______________________ Refine Level +11: MaxSP +3% _______________________ Type: Enchant Position: Unknown |
Physical attacks have a 3% chance to increase DEX by 50 and Ranged Physical Damage by 15% for 10 seconds. _______________________ Type: Enchant Position: Unknown |
Decreases Fixed Casting Time by 1 second. _______________________ Type: Enchant Position: Unknown |
Increases Healing skills effectiveness by 3%. _______________________ Refine Level +7: Increases Healing skills effectiveness by additional 4%. _______________________ Refine Level +9: Increases Healing skills effectiveness by additional 5%. _______________________ Refine Level +11: Increases Healing skills effectiveness by additional 5%. _______________________ Type: Enchant Position: Unknown |
Physical attacks have a 3% chance to increase STR by 50 and Melee Physical Damage by 15% for 10 seconds. _______________________ Type: Enchant Position: Unknown |
Increases Magic Damage against all sizes by 2%. _______________________ Refine Level +7: Increases Magic Damage against all sizes by additional 2%. _______________________ Refine Level +9: Increases Magic Damage against all sizes by additional 2%. _______________________ Refine Level +11: Increases Magic Damage against all sizes by additional 2%. _______________________ Type: Enchant Position: Unknown |
MaxHP +5%, MaxHP +2000 _______________________ Refine Level +7: MaxHP +3% _______________________ Refine Level +9: MaxHP +4% _______________________ Refine Level +11: MaxHP +5% _______________________ Type: Enchant Position: Unknown |
Physical attacks have a 3% chance to increase AGI by 50 and Critical Damage by 25% for 10 seconds. _______________________ Type: Enchant Position: Unknown |
Increases Physical Damage against all sizes by 2%. _______________________ Refine Level +7: Increases Physical Damage against all sizes by additional 2%. _______________________ Refine Level +9: Increases Physical Damage against all sizes by additional 2%. _______________________ Refine Level +11: Increases Physical Damage against all sizes by additional 2%. _______________________ Type: Enchant Position: Unknown |
MaxSP +5%, MaxSP +400 _______________________ Refine Level +7: MaxSP +3% _______________________ Refine Level +9: MaxSP +4% _______________________ Refine Level +11: MaxSP +5% _______________________ Type: Enchant Position: Unknown |
Physical attacks have a 3% chance to increase LUK by 50 and Magical Damage with every element by 15% for 10 seconds. _______________________ Type: Enchant Position: Unknown |
Increases Magic Damage against all sizes by 3%. _______________________ Refine Level +7: Increases Magic Damage against all sizes by additional 3%. _______________________ Refine Level +9: Increases Magic Damage against all sizes by additional 3%. _______________________ Refine Level +11: Increases Magic Damage against all sizes by additional 3%. _______________________ Type: Enchant Position: Unknown |
Increases Healing skills effectiveness by 5%. _______________________ Refine Level +7: Increases Healing skills effectiveness by additional 5%. _______________________ Refine Level +9: Increases Healing skills effectiveness by additional 5%. _______________________ Refine Level +11: Increases Healing skills effectiveness by additional 5%. _______________________ Type: Enchant Position: Unknown |
Increases Physical Damage against all sizes by 3%. _______________________ Refine Level +7: Increases Physical Damage against all sizes by additional 3%. _______________________ Refine Level +9: Increases Physical Damage against all sizes by additional 3%. _______________________ Refine Level +11: Increases Physical Damage against all sizes by additional 3%. _______________________ Type: Enchant Position: Unknown |
MaxHP +5%, MaxHP +2500 _______________________ Refine Level +7: MaxHP +5% _______________________ Refine Level +9: MaxHP +5% _______________________ Refine Level +11: MaxHP +5% _______________________ Type: Enchant Position: Unknown | |
Increases Magic Damage against all sizes by 4%. _______________________ Refine Level +7: Increases Magic Damage against all sizes by additional 4%. _______________________ Refine Level +9: Increases Magic Damage against all sizes by additional 4%. _______________________ Refine Level +11: Increases Magic Damage against all sizes by additional 4%. _______________________ Type: Enchant Position: Unknown |
MaxSP +5%, MaxSP +450 _______________________ Refine Level +7: MaxSP +5% _______________________ Refine Level +9: MaxSP +5% _______________________ Refine Level +11: MaxSP +5% _______________________ Type: Enchant Position: Unknown | |
Increases Physical Damage against all sizes by 4%. _______________________ Refine Level +7: Increases Physical Damage against all sizes by additional 4%. _______________________ Refine Level +9: Increases Physical Damage against all sizes by additional 4%. _______________________ Refine Level +11: Increases Physical Damage against all sizes by additional 4%. _______________________ Type: Enchant Position: Unknown |
Increases Healing skills effectiveness by 5%. _______________________ Refine Level +7: Increases Healing skills effectiveness by additional 5%. _______________________ Refine Level +9: Increases Healing skills effectiveness by additional 7%. _______________________ Refine Level +11: Increases Healing skills effectiveness by additional 7%. _______________________ Type: Enchant Position: Unknown | |
MaxHP +5%, MaxSP +5%, MaxHP +1200, MaxSP +250 _______________________ Refine Level +7: MaxHP +1%, MaxSP +1% _______________________ Refine Level +9: MaxHP +2%, MaxSP +2% _______________________ Refine Level +11: MaxHP +2%, MaxSP +2% _______________________ Type: Enchant Position: Unknown | ||
MaxHP +5%, MaxSP +5%, MaxHP +1500, MaxSP +300 _______________________ Refine Level +7: MaxHP +2%, MaxSP +2% _______________________ Refine Level +9: MaxHP +3%, MaxSP +3% _______________________ Refine Level +11: MaxHP +4%, MaxSP +4% _______________________ Type: Enchant Position: Unknown | ||
MaxHP +5%, MaxSP +5%, MaxHP +2000, MaxSP +350 _______________________ Refine Level +7: MaxHP +3%, MaxSP +3% _______________________ Refine Level +9: MaxHP +4%, MaxSP +4% _______________________ Refine Level +11: MaxHP +5%, MaxSP +5% _______________________ Type: Enchant Position: Unknown | ||
Gray Wolf Accessories
Talk to NPC Emmett (wolfvill 164, 137) in Gray Wolf Village and select Option 2 to enchant.

| Target Items | Slot Order | Refine | Reset Process |
| 4>3>2 | 0 | 25x 100,000z | |
| Item Description | |
A pendant given to those who have been recognized by the Gray Wolf Clan. _______________________ ATK +7% MaxHP +5% _______________________ Type: Armor Position: Right Accessory Armor Level: 1 Weight: 10 Required Level: 190 |
Earrings given to those recognized by the Gray Wolf Clan. _______________________ MATK +7% MaxHP +5% _______________________ Type: Armor Position: Right Accessory Armor Level: 1 Weight: 10 Required Level: 190 |
A necklace given to those recognized by the Gray Wolf Clan. _______________________ MATK +7% MaxSP +5% _______________________ Type: Armor Position: Left Accessory Armor Level: 1 Weight: 10 Required Level: 190 |
A ring given to those recognized by the Gray Wolf Clan. _______________________ ATK +7% MaxSP +5% _______________________ Type: Armor Position: Left Accessory Armor Level: 1 Weight: 10 Required Level: 190 |
Gray Wolf Accessories Enchantments
Talk to NPC Emmett (wolfvill 164, 137) in Gray Wolf Village and select Option 2 to enchant.

| Slot 2 | Slot 3 | Slot 4 |
| 50x 200,000z |
25x 150,000z |
15x 100,000z |
| Note: You can also choose your desired Enchant for: 500x / 250x / 125x 10,000,000z | ||
| 100% Success Chance | ||
HIT +8 Increases Ranged Physical Damage by 4%. _______________________ Type: Enchant Position: Unknown |
HIT +8 Increases Ranged Physical Damage by 4%. _______________________ Type: Enchant Position: Unknown |
STR +1 _______________________ Refine Level +7: STR +1 _______________________ Refine Level +9: STR +1 _______________________ Refine Level +11: STR +1 _______________________ Type: Enchant Position: Unknown |
CRI +6 _______________________ Increases Critical Damage by 6%. _______________________ Type: Enchant Position: Unknown |
CRI +6 _______________________ Increases Critical Damage by 6%. _______________________ Type: Enchant Position: Unknown |
DEX +1 _______________________ Refine Level +7: DEX +1 _______________________ Refine Level +9: DEX +1 _______________________ Refine Level +11: DEX +1 _______________________ Type: Enchant Position: Unknown |
Perfect HIT +2% Increases Melee Physical Damage by 4%. _______________________ Type: Enchant Position: Unknown |
Perfect HIT +2% Increases Melee Physical Damage by 4%. _______________________ Type: Enchant Position: Unknown |
AGI +1 _______________________ Refine Level +7: AGI +1 _______________________ Refine Level +9: AGI +1 _______________________ Refine Level +11: AGI +1 _______________________ Type: Enchant Position: Unknown |
MATK +18 Decreases Variable Casting Time by 4%. _______________________ Type: Enchant Position: Unknown |
MATK +18 Decreases Variable Casting Time by 4%. _______________________ Type: Enchant Position: Unknown |
INT +1 _______________________ Refine Level +7: INT +1 _______________________ Refine Level +9: INT +1 _______________________ Refine Level +11: INT +1 _______________________ Type: Enchant Position: Unknown |
ATK +22 Increases Attack Speed by 6%. _______________________ Type: Enchant Position: Unknown |
ATK +22 Increases Attack Speed by 6%. _______________________ Type: Enchant Position: Unknown |
VIT +1 _______________________ Refine Level +7: VIT +1 _______________________ Refine Level +9: VIT +1 _______________________ Refine Level +11: VIT +1 _______________________ Type: Enchant Position: Unknown |
HIT +12 Increases Ranged Physical Damage by 6%. _______________________ Type: Enchant Position: Unknown |
HIT +12 Increases Ranged Physical Damage by 6%. _______________________ Type: Enchant Position: Unknown |
LUK +1 _______________________ Refine Level +7: LUK +1 _______________________ Refine Level +9: LUK +1 _______________________ Refine Level +11: LUK +1 _______________________ Type: Enchant Position: Unknown |
CRI +9 _______________________ Increases Critical Damage by 8%. _______________________ Type: Enchant Position: Unknown |
CRI +9 _______________________ Increases Critical Damage by 8%. _______________________ Type: Enchant Position: Unknown |
STR +2 _______________________ Refine Level +7: STR +1 _______________________ Refine Level +9: STR +1 _______________________ Refine Level +11: STR +2 Increases Melee Physical Damage by 1%. _______________________ Type: Enchant Position: Unknown |
Perfect HIT +3% Increases Melee Physical Damage by 6%. _______________________ Type: Enchant Position: Unknown |
Perfect HIT +3% Increases Melee Physical Damage by 6%. _______________________ Type: Enchant Position: Unknown |
DEX +2 _______________________ Refine Level +7: DEX +1 _______________________ Refine Level +9: DEX +1 _______________________ Refine Level +11: DEX +2 Increases Ranged Physical Damage by 1%. _______________________ Type: Enchant Position: Unknown |
MATK +22 Decreases Variable Casting Time by 6%. _______________________ Type: Enchant Position: Unknown |
MATK +22 Decreases Variable Casting Time by 6%. _______________________ Type: Enchant Position: Unknown |
AGI +2 _______________________ Refine Level +7: AGI +1 _______________________ Refine Level +9: AGI +1 _______________________ Refine Level +11: AGI +2 Perfect HIT +1% _______________________ Type: Enchant Position: Unknown |
ATK +26 Increases Attack Speed by 8%. _______________________ Type: Enchant Position: Unknown |
ATK +26 Increases Attack Speed by 8%. _______________________ Type: Enchant Position: Unknown |
INT +2 _______________________ Refine Level +7: INT +1 _______________________ Refine Level +9: INT +1 _______________________ Refine Level +11: INT +2 Increases Magical Damage with every element by 1%. _______________________ Type: Enchant Position: Unknown |
HIT +16 Increases Ranged Physical Damage by 8%. _______________________ Type: Enchant Position: Unknown |
HIT +16 Increases Ranged Physical Damage by 8%. _______________________ Type: Enchant Position: Unknown |
VIT +2 _______________________ Refine Level +7: VIT +1 _______________________ Refine Level +9: VIT +1 _______________________ Refine Level +11: VIT +2 Decreases After Cast Delay by 1%. _______________________ Type: Enchant Position: Unknown |
CRI +12 Increases Critical Damage by 10%. _______________________ Type: Enchant Position: Unknown |
CRI +12 Increases Critical Damage by 10%. _______________________ Type: Enchant Position: Unknown |
LUK +2 _______________________ Refine Level +7: LUK +1 _______________________ Refine Level +9: LUK +1 _______________________ Refine Level +11: LUK +2 Increases Critical Damage by 1%. _______________________ Type: Enchant Position: Unknown |
Perfect HIT +4% Increases Melee Physical Damage by 8%. _______________________ Type: Enchant Position: Unknown |
Perfect HIT +4% Increases Melee Physical Damage by 8%. _______________________ Type: Enchant Position: Unknown |
STR +3 _______________________ Refine Level +7: STR +1 _______________________ Refine Level +9: STR +1 _______________________ Refine Level +11: STR +2 Increases Melee Physical Damage by 3%. _______________________ Type: Enchant Position: Unknown |
MATK +26 Decreases Variable Casting Time by 8%. _______________________ Type: Enchant Position: Unknown |
MATK +26 Decreases Variable Casting Time by 8%. _______________________ Type: Enchant Position: Unknown |
DEX +3 _______________________ Refine Level +7: DEX +1 _______________________ Refine Level +9: DEX +1 _______________________ Refine Level +11: DEX +2 Increases Ranged Physical Damage by 3%. _______________________ Type: Enchant Position: Unknown |
ATK +30 Increases Attack Speed by 10%. _______________________ Type: Enchant Position: Unknown |
ATK +30 Increases Attack Speed by 10%. _______________________ Type: Enchant Position: Unknown |
AGI +3 _______________________ Refine Level +7: AGI +1 _______________________ Refine Level +9: AGI +1 _______________________ Refine Level +11: AGI +2 Perfect HIT +3% _______________________ Type: Enchant Position: Unknown |
HIT +20 Increases Ranged Physical Damage by 10%. _______________________ Type: Enchant Position: Unknown |
HIT +20 Increases Ranged Physical Damage by 10%. _______________________ Type: Enchant Position: Unknown |
INT +3 _______________________ Refine Level +7: INT +1 _______________________ Refine Level +9: INT +1 _______________________ Refine Level +11: INT +2 Increases Magical Damage with every element by 3%. _______________________ Type: Enchant Position: Unknown |
CRI +15 Increases Critical Damage by 12%. _______________________ Type: Enchant Position: Unknown |
CRI +15 Increases Critical Damage by 12%. _______________________ Type: Enchant Position: Unknown |
VIT +3 _______________________ Refine Level +7: VIT +1 _______________________ Refine Level +9: VIT +1 _______________________ Refine Level +11: VIT +2 Decreases After Cast Delay by 3%. _______________________ Type: Enchant Position: Unknown |
Perfect HIT +5% Increases Melee Physical Damage by 10%. _______________________ Type: Enchant Position: Unknown |
Perfect HIT +5% Increases Melee Physical Damage by 10%. _______________________ Type: Enchant Position: Unknown |
LUK +3 _______________________ Refine Level +7: LUK +1 _______________________ Refine Level +9: LUK +1 _______________________ Refine Level +11: LUK +2 Increases Critical Damage by 3%. _______________________ Type: Enchant Position: Unknown |
MATK +30 Decreases Variable Casting Time by 10%. _______________________ Type: Enchant Position: Unknown |
MATK +30 Decreases Variable Casting Time by 10%. _______________________ Type: Enchant Position: Unknown |
|
Increases melee and Ranged Physical Damage by 7%. Increases Magical Damage with every element by 7%. _______________________ Type: Enchant Position: Unknown |
Increases HP Recovery Rate by 20%. _______________________ Type: Enchant Position: Unknown |
|
Increases SP Recovery Rate by 20%. _______________________ Type: Enchant Position: Unknown |
||
Increases HP Recovery Rate by 30%. _______________________ Type: Enchant Position: Unknown |
||
Increases SP Recovery Rate by 30%. _______________________ Type: Enchant Position: Unknown |
||
Increases HP Recovery Rate by 40%. _______________________ Type: Enchant Position: Unknown |
||
Increases SP Recovery Rate by 40%. _______________________ Type: Enchant Position: Unknown |
||
Increases HP Recovery Rate by 50%. _______________________ Type: Enchant Position: Unknown |
||
Increases SP Recovery Rate by 50%. _______________________ Type: Enchant Position: Unknown |
||
| Only Right Accessory: | ||
Physical attacks have a 4% chance to absorb 2% of the inflicted damage as HP. _______________________ Type: Enchant Position: Unknown |
||
Magical attacks have a 4% chance to recover 700 HP every 0.5 seconds for 19 times. _______________________ Type: Enchant Position: Unknown |
||
| Only Left Accessory: | ||
Physical attacks have a 1% chance to absorb 3% of the inflicted damage as SP. _______________________ Type: Enchant Position: Unknown |
||
Magical attacks have a 2% chance to recover 100 SP every 0.5 seconds for 19 times. _______________________ Type: Enchant Position: Unknown |
||
