What to do & where to go and Constellation Tower: Difference between pages

From MuhRO
(Difference between pages)
Jump to navigation Jump to search
 
 
Line 1: Line 1:
= Welcome to our what to do / where to go guide. =
=Overview=
Here we'll introduce all possibilities for you if you ever struggle to find a place to go.
* Level Requirement: 240+
 
* Starting point: {{#navi:alberta|214|77}}
* You'll find a list of possible equips you'll be able to wear for any of the steps.
* Cooldown: 3 days
* Also you'll be directed to quests, dungeons and instances that you gain access to.
* Rewards: Faint Star's and Nebula Equipment
* '''Important information: Some equipment parts are available from a lower level, but the dungeons/instances can only be entered from a higher level.'''
=Instance=
* Up to level 10 you are welcome to do our [[Beginners Guide|beginner quest]] or hunt on the field south of Prontera Porings.
Constellation Tower is the major overhaul of Endless Tower. Guided by Oscar once again, Constellation Tower reaches for the stars in terms of difficulty with its unique random difficulty system and time restriction. <br>
* <u>'''Note:'''</u> Of course, you can also simply level up with the [[Kill Quests and Item Collection Boards|board quests / item collection boards]] in @go eden.
Unlike Endless Tower where it had specific monsters and MVPs on designated floors, Constellation Tower's floors have all randomized monsters per floor. These monsters are strong and as you climb the tower, they will continue to get stronger in both health and attack.  <br>
== Level 10+ ==
A boss monster will still appear every 5 floors just like Endless Tower. However, the boss that spawns will be random. These bosses are not affected by the floor progression difficulty modifier and also not required in the kill count to complete the floor. <br>
{| style="background-color:#FFF0F5; width: 100%; border-style: none  none  none  none;" data-mce-style="background: transparent; width: 100%;"
Time management is a strong factor in the instance if you wish to reach the highest difficulty. With only 60 minutes, Constellation Tower offers an NPC every 5 floors that can quicken your climb in exchange for {{#item:1000372}}. If you pay the tribute, you will skip 4 floors (Example Floor 1 to Floor 5). The amount of Meteorite Dust increases each time you use the NPC. <br>
|- style=";text-align:center;"
Upon reaching floor 25, you can choose to fight Naght Sieger (Easy) or continue on to floor 50 to fight Betelgeuse (Hard). Choose carefully as you cannot go back to the Tower from the final boss room and you wait 3 days to try the instance again. It recommended to have atleast 30 minutes remaining for the final battle. <br>
|colspan="3" |'''Gear'''
If you did press on to fight Betelgeuse, Oscar will appear to ask you if you wish to strengthen the boss. Oscar will require 20x {{#item:1000372}} to roll randomized attributes for Betelgeuse. These attributes are Health, Attack, Recovery, Defense, and Trap. You can roll stars from 1 to 3, Sealed or No Influence. Oscar will allow you to roll as many times as you want. As the difficulty increases, so do the rewards in both quantity and type of chests.
|-
=Monsters=
| style="width: 33%" |  
* All monsters are different from the original Endless Tower and normal field mobs.
*[[Beginners Guide|Paradise Beginner Gear]]
* No monster has their original loot table.
| style="width: 33%" |
{| class="wikitable mw-collapsible mw-collapsed" style="width: 100%;text-align:center;"  
* [[Beginners Guide#Obtainable by NPC Lucy:|Beginners Shadow Gear]]
|- style="background-color:#E1C7C1;"
|
| colspan="5" | Normal Monsters
|-
|
|
|
|}<br>
{| style="background-color:#F0FFFF; width: 100%; border-style: none  none  none  none;" data-mce-style="background: transparent; width: 100%;"
|- style="text-align:center;"
| colspan="3" |'''Instances'''
|-
| style="width: 33%" |
*[[Poring Village]]
| style="width: 33%" |
| style="width: 33%" |
|}<br>
{| style="background-color:#FAF0E6; width: 100%; border-style: none  none  none  none;" data-mce-style="background: transparent; width: 100%;"
|- style="text-align:center;"
| colspan="3" |'''Quests'''
|-
| colspan="3" style="width: 33%" |
* [[Bakonawa Lake#Part 1: Cautious Village|Cautious Village]] gives good EXP, you can unlock the Bangungot Hospital and Bakonawa Lake instance, if you complete the second part of the quest. You can find more information at the [[Instances|respective instances]].
|-
|
|
|
|}
 
== Level 30+ ==
{| style="background-color:#F0FFFF; width: 100%; border-style: none  none  none none;" data-mce-style="background: transparent; width: 100%;"
|- style="text-align:center;"
| colspan="3" |'''Instances'''
|-
| style="width: 33%" |
* [[Orc's Memory]]
| style="width: 33%" |
* [[Octopus Cave]]
| style="width: 33%" |
|-
|
|
|
|}
<br>
{| style="background-color:#F0FFF0; width: 100%; border-style: none  none  none  none;" data-mce-style="background: transparent; width: 100%;"
|- style="text-align:center;"
| colspan="3" |'''Dungeons'''
|-
| style="width: 33%" |
* Payon Dungeon
| style="width: 33%" |
* Comodo Dungeon
| style="width: 33%" |
|-
|
|
|
|}
 
== Level 45+ ==
 
{| style="background-color:#FFF0F5; width: 100%; border-style: none  none  none  none;" data-mce-style="background: transparent; width: 100%;"
|- style=";text-align:center;"
|colspan="3" |'''Gear'''
|-
| style="width: 33%" |
*[[Beginners Guide|Paradise Beginner Gear]]
| style="width: 33%" |
| style="width: 33%" |
|-
|
|
|
|}
<br>
{| style="background-color:#F0FFF0; width: 100%; border-style: none  none  none  none;" data-mce-style="background: transparent; width: 100%;"
|- style="text-align:center;"
| colspan="3" |'''Dungeons'''
|-
| style="width: 33%" |
* Orc Village
| style="width: 33%" |
* Izlude Dungeon
| style="width: 33%" |
* Pyramide Dungeon
|-
|
* Geffen Dungeon
|
|
|}
 
== Level 60+ ==
{| style="background-color:#F0FFFF; width: 100%; border-style: none  none  none  none;" data-mce-style="background: transparent; width: 100%;"
|- style="text-align:center;"
| colspan="3" |'''Instances'''
|-
| style="width: 33%" |
*[[Orc's Memory]]
| style="width: 33%" |
| style="width: 33%" |
|-
|
|
|
|}
== Level 70+ ==
{| style="background-color:#F0FFFF; width: 100%; border-style: none  none  none  none;" data-mce-style="background: transparent; width: 100%;"
|- style="text-align:center;"
| colspan="3" |'''Instances'''
|-
| style="width: 33%" |
* [[Nidhoggur's Nest]]
| style="width: 33%" |
*
| style="width: 33%" |
|-
|
|
|
|}<br>
{| style="background-color:#FFF0F5; width: 100%; border-style: none  none  none  none;" data-mce-style="background: transparent; width: 100%;"
|- style=";text-align:center;"
| colspan="3" |'''Gear'''
|-
| style="width: 33%" |
* [[Crimson Weapons]]
| style="width: 33%" |
| style="width: 33%" |
|-
|
|
|
|}<br>
{| style="background-color:#F0FFF0; width: 100%; border-style: none  none  none  none;" data-mce-style="background: transparent; width: 100%;"
|- style="text-align:center;"
| colspan="3" |'''Dungeons'''
|-
| style="width: 33%" |
* Clock Tower Dungeon
| style="width: 33%" |
* Glastheim Dungeon
| style="width: 33%" |
* Einbroch Dungeon
|-
|
* Turtle Dungeon
|
* Moscovia Dungeon
|
* Louyang Dungeon
|-
|
* Amatsu Dungeon
|
* Gonryun Dungeon
|
* Ice Dungeon
|}
 
== Level 75+ ==
{| style="background-color:#F0FFFF; width: 100%; border-style: none  none  none  none;" data-mce-style="background: transparent; width: 100%;"
|- style="text-align:center;"
| colspan="3" |'''Instances'''
|-
| style="width: 33%" |
* [[Sealed Shrine]]
| style="width: 33%" |
| style="width: 33%" |
|-
|
|
|
|}
<br>
 
== Level 90+ ==
{| style="background-color:#F0FFFF; width: 100%; border-style: none  none  none  none;" data-mce-style="background: transparent; width: 100%;"
|- style="text-align:center;"
| colspan="3" |'''Instances'''
|-
| style="width: 33%" |
* [[Geffen Magic Tournament]]
| style="width: 33%" |
| style="width: 33%" |
|-
|
|
|
|}
<br>
 
== Level 99+ ==
 
{| style="background-color:#FFF0F5; width: 100%; border-style: none  none  none  none;" data-mce-style="background: transparent; width: 100%;"
|- style=";text-align:center;"
|colspan="3" |'''Gear'''
|-
| style="width: 33%" |
* [[Illusion Dungeons#Illusion of Moonlight|Illusion of Moonlight]]
| style="width: 33%" |
| style="width: 33%" |
|-
|
|
|
|}<br>
{| style="background-color:#F0FFFF; width: 100%; border-style: none  none  none  none;" data-mce-style="background: transparent; width: 100%;"
|- style="text-align:center;"
| colspan="3" |'''Instances'''
|-
| style="width: 33%" |
* [[Hazy Forest]]
| style="width: 33%" |
* [[Sarah's Memory]]
| style="width: 33%" |
|-
|
|
|
|}
<br>
 
== Level 100+ ==
 
 
{| style="background-color:#FFF0F5; width: 100%; border-style: none  none  none  none;" data-mce-style="background: transparent; width: 100%;"
|- style=";text-align:center;"
|colspan="3" |'''Gear'''
|-
| style="width: 33%" |
 
*[[Beginners Guide#Obtainable by NPC Labraham: 2|Paradise Beginner Gear Labraham]]
| style="width: 33%" |
* [[Illusion Dungeons#Illusion of Vampire|Illusion of Vampire]]
| style="width: 33%" |
* [[Illusion Dungeons#Illusion of Luanda|Illusion of Luanda]]
|-
|
* [[Beginners Guide#Obtainable by NPC Louis:|Paradise Beginner Gear Louis]]
|
* [[Beginners Guide#Obtainable by NPC Lucy: 2|Beginner Shadow Gear Lucy]]
|
* [[Noblesse set (16.1)|Noblesse Set 16.1]]
|-
|-
|
| {{#mob:20998}}
* [[Verus Gear]]
| {{#mob:20999}}
|
| {{#mob:21000}}
|
| {{#mob:21001}}
|}<br>
| {{#mob:21002}}
{| style="background-color:#FAF0E6; width: 100%; border-style: none  none  none  none;" data-mce-style="background: transparent; width: 100%;"
|- style="text-align:center;"
| colspan="3" |'''Quests'''
|-
|-
| style="width: 33%" |  
| {{#mob:21003}}
* [[16.1 Banquet for Heroes|Banquet of Heroes 16.1]] gives good EXP and JXP, you can unlock the Room of Consciousness and Sky Fortress Instance.
| {{#mob:21004}}
| {{#mob:21005}}
| {{#mob:21006}}
| {{#mob:21007}}
|-
|-
|
| {{#mob:21008}}
* [[16.2 Terra Gloria|Terra Gloria 16.2]] gives good EXP and JXP, you can unlock the Heart Hunter War Base and Werner Laboratory Central Room Instance.
| {{#mob:21009}}
| {{#mob:21010}}
| {{#mob:21011}}
| {{#mob:21012}}
|-
|-
|
| {{#mob:21013}}
* [[Bangungot Hospital#Part 2: Nurse in Port Malaya .28Base Level 100.2B.29|Nurse in Port Malaya]]  gives good EXP and JXP, you can unlock the Bangungot Hospital Instance.
| {{#mob:21014}}
|}<br>
| {{#mob:21015}}
{| style="background-color:#F0FFFF; width: 100%; border-style: none  none  none  none;" data-mce-style="background: transparent; width: 100%;"
| {{#mob:21016}}
|- style="text-align:center;"
| {{#mob:21017}}
| colspan="3" |'''Instances'''
|-
|-
| style="width: 33%" |  
| {{#mob:21018}}
* [[Bangungot Hospital#Part 3: Bangungot Hospital Instance|Bangungot Hospital]]
| {{#mob:21019}}
| style="width: 33%" |
| {{#mob:21020}}
* [[16.1 Banquet for Heroes#Room of Consciousness|Room of Consciousness]]
| {{#mob:21021}}
| style="width: 33%" |
| {{#mob:21022}}
* [[Infinite Space]]
|-
|-
|
| {{#mob:21023}}
* [[Heart Hunter War Base]]
| {{#mob:21024}}
|
| {{#mob:21025}}
* [[Werner's Laboratory]]
| {{#mob:21026}}
|
| {{#mob:21027}}
|}
<br>
{| style="background-color:#F0FFF0; width: 100%; border-style: none  none  none  none;" data-mce-style="background: transparent; width: 100%;"
|- style="text-align:center;"
| colspan="3" |'''Dungeons'''
|-
|-
| style="width: 33%" |  
| {{#mob:21028}}
* [[Nightmare Dungeons#Nightmare Glastheim 1 and 2|Nightmare Glastheim]]
| {{#mob:21029}}
| style="width: 33%" |
| {{#mob:21030}}
* [[Nightmare Dungeons#Pyramids|Nightmare Pyramids]]
| {{#mob:21031}}
| style="width: 33%" |
| {{#mob:21032}}
* Magma Dungeon
|-
|-
|
| {{#mob:21033}}
* Thanatos Tower Dungeon
| {{#mob:21034}}
|
| {{#mob:21035}}
* Juperos Dungeon
| {{#mob:21036}}
|
| {{#mob:21037}}
* [[Illusion of Moonlight]]
|}
 
== Level 110+ ==
 
 
{| style="background-color:#FFF0F5; width: 100%; border-style: none  none  none  none;" data-mce-style="background: transparent; width: 100%;"
|- style=";text-align:center;"
|colspan="3" |'''Gear'''
|-
| style="width: 33%" |
*[[Illusion|Illusion Gear 17.1]]
| style="width: 33%" |
*[[Beginners Guide|Eden Board Quests]]
| style="width: 33%" |
* [[Schwartz's Honor Token|Terra Gloria 16.2]]
|-
|
|
|
|}
 
 
{| style="background-color:#FAF0E6; width: 100%; border-style: none  none  none  none;" data-mce-style="background: transparent; width: 100%;"
|- style="text-align:center;"
| colspan="3" |'''Quests'''
|-
| colspan="3" style="width: 33%" |
* [[17.1 Illusion|Illusion 17.1]] gives good EXP and JXP, you can unlock the Cor Mission and OS Mission instance.
|-
|
|
|
|}
 
 
{| style="background-color:#F0FFFF; width: 100%; border-style: none  none  none  none;" data-mce-style="background: transparent; width: 100%;"
|- style="text-align:center;"
| colspan="3" |'''Instances'''
|-
|-
| style="width: 33%" |  
| {{#mob:21038}}
* [[Cor Mission]]
| {{#mob:21039}}
| style="width: 33%" |
| {{#mob:21040}}
* [[OS Mission#Daily quest .28Base Level 110.2B.29|OS Mission]]
| {{#mob:21041}}
| style="width: 33%" |
| {{#mob:21042}}
|-
|-
|
| {{#mob:21043}}
|
| {{#mob:21044}}
|
| {{#mob:21045}}
| {{#mob:21046}}
| {{#mob:21047}}
|}
|}
<br>
{| class="wikitable mw-collapsible mw-collapsed" style="width: 100%;text-align:center;"  
{| style="background: transparent; width: 100%; border-style: none  none  none  none;" data-mce-style="background: transparent; width: 100%;"
|- style="background-color:#E1C7C1;"
|- style="background-color:#F0FFF0;text-align:center;"
| colspan="5" | 5th Floor Bosses
| colspan="3" |'''Dungeons'''
|-
|-
| style="width: 33%" |
| {{#mob:21325}}
| style="width: 33%" |
| {{#mob:21326}}
| style="width: 33%" |
| {{#mob:21327}}
|-
| {{#mob:21328}}
|
| {{#mob:21329}}
|
|
|}
 
== Level 120+ ==
 
 
{| style="background-color:#FFF0F5; width: 100%; border-style: none  none  none  none;" data-mce-style="background: transparent; width: 100%;"
|- style=";text-align:center;"
|colspan="3" |'''Gear'''
|-
|-
| style="width: 33%" |  
| {{#mob:21330}}
*[[Illusion Dungeons#Illusion of Frozen|Illusion of Frozen]]
| {{#mob:21331}}
| style="width: 33%" |
| {{#mob:21332}}
* [[Illusion Dungeons#Illusion of Abyss|Illusion of Abyss]]
| {{#mob:21333}}
| style="width: 33%" |
| {{#mob:21334}}
* [[Illusion Dungeons#Illusion of Teddy Bear|Illusion of Teddy Bear]]
|-
|-
|
| {{#mob:21335}}
* [[Illusion Dungeons#Illusion of Labyrinth|Illusion of Labyrinth]]
| {{#mob:21336}}
|
| {{#mob:21337}}
* [[Illusion Dungeons#Illusion of Underwater|Illusion of Underwater]]
| {{#mob:21338}}
|
| {{#mob:21339}}
|}
 
 
{| style="background-color:#FAF0E6; width: 100%; border-style: none  none  none  none;" data-mce-style="background: transparent; width: 100%;"
|- style="text-align:center;"
| colspan="3" |'''Quests'''
|-
|-
| colspan="3" style="width: 33%" |  
| {{#mob:21340}}
* [[Bakonawa Lake#Bakonawa Extermination|Bakonawa Lake]] you can unlock the Bakonawa Extermination instance.
| {{#mob:21341}}
| {{#mob:21342}}
| {{#mob:21343}}
| {{#mob:21344}}
|-
|-
|
| {{#mob:21345}}
|
| {{#mob:21346}}
|
| {{#mob:21347}}
|}
| {{#mob:21348}}
 
| {{#mob:21349}}
 
{| style="background-color:#F0FFFF; width: 100%; border-style: none  none  none  none;" data-mce-style="background: transparent; width: 100%;"
|- style="text-align:center;"
| colspan="3" |'''Instances'''
|-
|-
| style="width: 33%" |
| {{#mob:21350}}
* [[Ghost Palace]]
| {{#mob:21351}}
| style="width: 33%" |
| {{#mob:21352}}
* [[Nightmaris Jitterbug#Enemies|Nightmarish Jitterbug]]
| {{#mob:21353}}
| {{#mob:21354}}
|-
|-
|
| {{#mob:21355}}
|
| {{#mob:21356}}
|
| {{#mob:21357}}
| {{#mob:21358}}
| {{#mob:21359}}
|}
|}
<br>
{| class="wikitable mw-collapsible" style="width: 100%;text-align:center;"  
{| style="background-color:#F0FFF0; width: 100%; border-style: none  none  none  none;" data-mce-style="background: transparent; width: 100%;"
|- style="background-color:#E1C7C1;"
|- style="text-align:center;"
| colspan="2" | Easy Final Bosses
| colspan="3" |'''Dungeons'''
| colspan="2" | Hard Final Bosses
|-
|-
| style="width: 33%" |
| {{#mob:20996}}
* Odin's Temple Dungeon
| {{#mob:20997}}
| style="width: 33%" |
| {{#mob:20994}}
* Abyss Lake Dungeon
| {{#mob:20995}}
| style="width: 33%" |
* Nameless Island Dungeon
|-
|
* Rachel Sanctury Dungeon
|
* Bio Laboratory Level 2 Dungeon
|
* [[Illusion of Frozen]]
|}
|}


== Level 125+ ==
=Rewards=
All monsters in the instance has a chance of dropping {{#item:1000372}}. <br>
Upon defeating the final boss, you will obtain 5 {{#item:1000373 }} and 2 {{#item:1000372}}. <br>
Defeating Betelgeuse in a higher difficulty, special treasure chests will spawn that may drop the following items:
* {{#item:1000398}}
* {{#item:1000399}}
* {{#item:1000400}}
* {{#item:1000401}}
* {{#item:1000402}}
* {{#item:1000403}}
* {{#item:1000396}}
* {{#item:1000397}}


=Item Exchange=
{| style="background-color:#FFF0F5; width: 100%; border-style: none  none  none  none;" data-mce-style="background: transparent; width: 100%;"
You can head back to the Misty Island to use the two vending machines to exchange your rewards. <br>
|- style=";text-align:center;"
The vending machine will also break down 1 {{#item:1000373}} for 40 {{#item:1000372}}.
|colspan="3" |'''Gear'''
{| class="wikitable mw-collapsible" style="width: 50%;text-align:center;"  
|- style="background-color:#E1C7C1;"
|Item
|Currency Amount
|-
|-
| style="width: 33%" |
| {{#item:1000373}}
* [[Imperial Set|Imperial Set 16.2]]
| 50x {{#item:1000372}}
| style="width: 33%" |
| style="width: 33%" |
|-
|-
|
| {{#item:450166}}
|
| 50x {{#item:1000373}} <br>
|
5x {{#item:1000396}}
|}
 
== Level 130+ ==
 
 
{| style="background-color:#FFF0F5; width: 100%; border-style: none  none  none  none;" data-mce-style="background: transparent; width: 100%;"
|- style=";text-align:center;"
|colspan="3" |'''Gear'''
|-
|-
| style="width: 33%" |
| {{#item:450167}}
* [[Illusion_Armors_(17.1)|Illusion Gear 17.1]]
| 50x {{#item:1000373}} <br>
| style="width: 33%" |
5x {{#item:1000396}}
* [[OS_/_OSAD_Weapons|OS Weapons 17.1]]
| style="width: 33%" |
* [[Fall of Glastheim#Equipment|King Schmidt's Suit and Manteau]]
|-
|-
|
| {{#item:450168}}
|
| 50x {{#item:1000373}} <br>
|
5x {{#item:1000396}}
|}<br>
{| style="background-color:#FAF0E6; width: 100%; border-style: none  none  none  none;" data-mce-style="background: transparent; width: 100%;"
|- style="text-align:center;"
| colspan="3" |'''Quests'''
|-
|-
| style="width: 33%" |  
| {{#item:450169}}
* [[17.2 Sage Legacy|Sage Legacy Episode 17.2]]
| 50x {{#item:1000373}} <br>
|
30x {{#item:1000398}} <br>
* [[Verus Gear#Excellion Gear|Excellion Gear]]
10x {{#item:1000397}} <br>
1x {{#item:450168}}
|-
|-
|
| {{#item:450170}}
|}<br>
| 50x {{#item:1000373}} <br>
{| style="background-color:#F0FFFF; width: 100%; border-style: none  none  none  none;" data-mce-style="background: transparent; width: 100%;"
30x {{#item:1000398}} <br>
|- style="text-align:center;"
10x {{#item:1000397}} <br>
| colspan="3" |'''Instances'''
1x {{#item:450168}}
|-
|-
| style="width: 33%" |
| {{#item:450171}}
* [[Buwaya Cave|Bakonawa Extermination]]
| 50x {{#item:1000373}} <br>
| style="width: 33%" |
30x {{#item:1000400}} <br>
* [[Charleston Crisis]]
10x {{#item:1000397}} <br>
| style="width: 33%" |
1x {{#item:450168}}
* [[Devil Tower]]
|-
|-
|
| {{#item:450172}}
* [[Old Glast Heim]]
| 50x {{#item:1000373}} <br>
|
30x {{#item:1000401}} <br>
* [[Fall of Glastheim|Fall of Glastheim (normal Mode)]]
10x {{#item:1000397}} <br>
|
1x {{#item:450168}}
|}
<br>
{| style="background-color:#F0FFF0; width: 100%; border-style: none  none  none  none;" data-mce-style="background: transparent; width: 100%;"
|- style="text-align:center;"
| colspan="3" |'''Dungeons'''
|-
|-
| style="width: 33%" |  
| {{#item:450173}}
* [[Nightmare Dungeons#Scaraba|Nightmare Scaraba Hole]]
| 50x {{#item:1000373}} <br>
| style="width: 33%" |
30x {{#item:1000402}} <br>
* [[Illusion of Vampire]]
10x {{#item:1000397}} <br>
| style="width: 33%" |
1x {{#item:450166}}
|-
|-
|
| {{#item:450174}}
|
| 50x {{#item:1000373}} <br>
|
30x {{#item:1000403}} <br>
10x {{#item:1000397}} <br>
1x {{#item:450166}}
|}
|}
 
==Equipment Description==
== Level 140+ ==
{| class="wikitable mw-collapsible" style="width: 50%;text-align:center;"  
{| style="background-color:#FAF0E6; width: 100%; border-style: none  none  none  none;" data-mce-style="background: transparent; width: 100%;"
|- style="background-color:#E1C7C1;"
|- style="text-align:center;"
|Item
| colspan="3" |'''Quests'''
|Description
|-
|-
| style="width: 33%" |
|{{#item:450166}}
* [[15.1 and 15.2 Phantasmagorika|Phantasmagorika Questline 15. + 15.2]] gives good EXP and JXP, you can unlock the Last Room and Central Laboratory instances.
|{{#itemDesc:450166}}
|-
|-
|
|{{#item:450167}}
|}<br>
|{{#itemDesc:450167}}
{| style="background-color:#F0FFFF; width: 100%; border-style: none  none  none  none;" data-mce-style="background: transparent; width: 100%;"
|- style="text-align:center;"
| colspan="3" |'''Instances'''
|-
|-
| style="width: 33%" |
|{{#item:450168}}
* [[Bakonawa Lake#Bakonawa Extermination|Bakonawa Extermination]]
|{{#itemDesc:450168}}
| style="width: 33%" |
* [[Central Laboratory]]
| style="width: 33%" |
* [[Faceworms Nest]]
|-
|
* [[Horror Toy Factory]]
|
* [[Malangdo Culvert]]
|
|}
<br>
 
== Level 145+ ==
{| style="background-color:#F0FFFF; width: 100%; border-style: none  none  none  none;" data-mce-style="background: transparent; width: 100%;"
|- style="text-align:center;"
| colspan="3" |'''Instances'''
|-
| style="width: 33%" |
* [[Sarah and Fenrir]]
| style="width: 33%" |
* [[Sky Fortress]]
| style="width: 33%" |
|-
|
|
|
|}
<br>
 
== Level 150+ ==
 
 
{| style="background-color:#FFF0F5; width: 100%; border-style: none  none  none  none;" data-mce-style="background: transparent; width: 100%;"
|- style=";text-align:center;"
|colspan="3" |'''Gear'''
|-
| style="width: 33%" |
* [[17.1 Illusion#Illusion Equipment|Illusion 17.1 Equipment]]
| style="width: 33%" |[[Grace Set|Grace Set 17.1]]
| style="width: 33%" |
* [[Fall of Glastheim#Equipment|King Schmidt's Insignia's]]
|-
|
|
|
|}<br>
 
{| style="background-color:#F0FFFF; width: 100%; border-style: none  none  none  none;" data-mce-style="background: transparent; width: 100%;"
|- style="text-align:center;"
| colspan="3" |'''Instances'''
|-
| style="width: 33%" |
* [[Wolfchev's Laboratory]]
| style="width: 33%" |
* [[Last Room#Instance|Last Room]]
| style="width: 33%" |
* [[Hidden Flower Garden|Hidden Flower Garden First Security]]
|-
|
|
|
|}
<br>
{| style="background: transparent; width: 100%; background-color:#F0FFF0;"" data-mce-style="background: transparent; width: 100%;"
|- style="text-align:center;"
| colspan="3" |'''Dungeons'''
|-
| style="width: 33%" |
* [[Nightmare Dungeons#Clocktower|Nightmare Clocktower]]
| style="width: 33%" |
* [[Illusion of Abyss]]
| style="width: 33%" |
* [[Illusion of Teddy Bear]]
|-
|
* [[Illusion of Underwater|Illusion of Underwater Level 1]]
|
|
|}
 
== Level 160+ ==
{| style="background-color:#FAF0E6; width: 100%; border-style: none  none  none  none;" data-mce-style="background: transparent; width: 100%;"
|- style="text-align:center;"
| colspan="3" |'''Quests'''
|-
| style="width: 33%" |
* [[Temple God#Prequest .28Base Level 160.2B.29|Fire Basin]] gives good EXP and JXP, you can unlock Bios Island, Morse Cave and Temple of the Demon God
|-
|
|}<br>
{| style="background-color:#F0FFFF; width: 100%; border-style: none  none  none  none;" data-mce-style="background: transparent; width: 100%;"
|- style="text-align:center;"
| colspan="3" |'''Instances'''
|-
| style="width: 33%" |
* [[Temple God#Bios Island|Bios Island]]
| style="width: 33%" |
* [[Temple God#Morses Cave|Morse Cave]]
| style="width: 33%" |
* [[Temple God#Temple of the Demon God|Temple of the Demon God]]
|-
|
* [[Old Glast Heim]]
|
|
|}
<br>
{| style="background-color:#F0FFF0; width: 100%; border-style: none  none  none  none;" data-mce-style="background: transparent; width: 100%;"
|- style="text-align:center;"
| colspan="3" |'''Dungeons'''
|-
| style="width: 33%" |
* [[Illusion of Luanda]]
| style="width: 33%" |
* [[Illusion of Twins]]
| style="width: 33%" |
|-
|
|
|
|}
 
== Level 170+ ==
 
 
{| style="background-color:#FFF0F5; width: 100%; border-style: none  none  none  none;" data-mce-style="background: transparent; width: 100%;"
|- style=";text-align:center;"
|colspan="3" |'''Gear'''
|-
| style="width: 33%"|
* [[Abyss Lake|Abyss Lake Dragon Plates, Manteaus and Boots]]
| style="width: 33%" |
* [[Einbech|Einbech Level 3 Weapons]]
| style="width: 33%" |
* [[Odin|Odin Temple Soutane's and Clergy's]]
|-
|
* [[Tomb of the Fallen|Tomb of the Fallen Bio 5 Headgears]]
|
* [[Memories_of_Thanatos#Sinful_Accessories|Sinful and Brilliant Light Accessories]]
|
* [[OS_/_OSAD_Weapons|OSAD Weapons]]
|}
 
 
{| style="background-color:#FAF0E6; width: 100%; border-style: none  none  none  none;" data-mce-style="background: transparent; width: 100%;"
|- style="text-align:center;"
| colspan="3" |'''Quests'''
|-
| style="width: 33%" |
* [[18_Direction_of_Prayer|Episode 18]]
|-
|
|}
<br>
{| style="background-color:#F0FFF0; width: 100%; border-style: none  none  none  none;" data-mce-style="background: transparent; width: 100%;"
|- style="text-align:center;"
| colspan="3" |'''Dungeons'''
|-
| style="width: 33%" |
* [[Illusion of Labyrinth]]
| style="width: 33%" |
| style="width: 33%" |
|-
|
|
|
|}
<br>
{| style="background-color:#F0FFFF; width: 100%; border-style: none  none  none  none;" data-mce-style="background: transparent; width: 100%;"
|- style="text-align:center;"
| colspan="3" |'''Instances'''
|-
| style="width: 33%" |
* [[Fall of Glastheim|Fall of Glastheim (Hard Mode)]]
| style="width: 33%" |
* [[Old_Glast_Heim_Challenge_Mode|Old Glastheim Challenge Mode]]
| style="width: 33%" |
* [[Sanctuary_Purification|Sanctuary Purification]]
|-
|
|
|
|}
 
== Level 175+ ==
 
 
{| style="background-color:#FFF0F5; width: 100%; border-style: none  none  none  none;" data-mce-style="background: transparent; width: 100%;"
|- style=";text-align:center;"
|colspan="3" |'''Gear'''
|-
| style="width: 33%"|
* [[Magma Dungeon Lvl 3#Obtainable Equipment|Lava Leather Set]]
| style="width: 33%" |
* [[Abyss Glast Heim#Obtainable Equipment|Abyss Glast Heim Weapons]]
| style="width: 33%" |
|-
|
|
|
|}
<br>
{| style="background-color:#F0FFF0; width: 100%; border-style: none  none  none  none;" data-mce-style="background: transparent; width: 100%;"
|- style="text-align:center;"
| colspan="3" |'''Dungeons'''
|-
| style="width: 33%" |
* [[Magma Dungeon Lvl 3|Magma Dungeon Level 3]]
| style="width: 33%" |
* [[Abyss Glast Heim]]
| style="width: 33%" |
|-
|
|
|
|}
 
== Level 180+ ==
 
{| style="background-color:#FFF0F5; width: 100%; border-style: none  none  none  none;" data-mce-style="background: transparent; width: 100%;"
|- style=";text-align:center;"
|colspan="3" |'''Gear'''
|-
| style="width: 33%"|
* [[Adulter_and_Vivatus_Fides_Weapons| Adulter and Vivatus Fides Weapons]]
| style="width: 33%" |
| style="width: 33%" |
|-
|
|
|
|}
<br>
{| style="background-color:#F0FFF0; width: 100%; border-style: none  none  none  none;" data-mce-style="background: transparent; width: 100%;"
|- style="text-align:center;"
| colspan="3" |'''Dungeons'''
|-
| style="width: 33%" |
* [[Illusion of Underwater|Illusion of Underwater Level 2]]
| style="width: 33%" |
* [[Odin| Odin's Past]]
| style="width: 33%" |
|-
|
|
|
|}
<br>
{| style="background-color:#F0FFFF; width: 100%; border-style: none  none  none  none;" data-mce-style="background: transparent; width: 100%;"
|- style="text-align:center;"
| colspan="3" |'''Instances'''
|-
| style="width: 33%" |
* [[Hidden Flower Garden|Hidden Flower Garden Second Security]]
| style="width: 33%" |
* [[Memories_of_Thanatos|Memories of Thanatos]]
| style="width: 33%" |
|-
|
|
|
|}
 
== Level 190+ ==
 
{| style="background-color:#FFF0F5; width: 100%; border-style: none  none  none  none;" data-mce-style="background: transparent; width: 100%;"
|- style=";text-align:center;"
|colspan="3" |'''Gear'''
|-
| style="width: 33%"|
* [[Tomb_of_Remorse#Thanatos_Helmet_and_LT_Version|Thanatos Helmet + LT Version]]
| style="width: 33%" |
* [[18_Direction_of_Prayer#Item_Exchange|Gray Wolf Equipment]]
| style="width: 33%" |
|-
|
|
|
|}
 
== Level 200+ ==
{| style="background-color:#FFF0F5; width: 100%; border-style: none  none  none  none;" data-mce-style="background: transparent; width: 100%;"
|- style=";text-align:center;"
|colspan="3" |'''Gear'''
|-
| style="width: 33%"|
* [[Rudus|Relapse Weapons]]
| style="width: 33%" |
* [[Niflheim|Scrap Weapons]]
| style="width: 33%" |
* [[Amicitia|Fortified Weapons]]
|-
|
|
|
|}<br>
{| style="background-color:#F0FFF0; width: 100%; border-style: none  none  none  none;" data-mce-style="background: transparent; width: 100%;"
|- style="text-align:center;"
| colspan="3" |'''Dungeons'''
|-
| style="width: 33%" |
* [[Rudus|Rudus Lvl 4]]
| style="width: 33%" |
* [[Niflheim]]
| style="width: 33%" |
|-
|
|
|
|}
 
== Level 215+ ==
{| style="background-color:#FFF0F5; width: 100%; border-style: none  none  none  none;" data-mce-style="background: transparent; width: 100%;"
|- style=";text-align:center;"
| colspan="3" |'''Gear'''
|-
| style="width: 33%" |
* [[Varmundt%27s_Biosphere#Varmundt_Rune_Equipment_2|Varmundt's Rune Equipment]]
| style="width: 33%" |
* [[Varmundt%27s_Biosphere#Engraved_Equipment|Varmundt's Engraved Equipment]]
| style="width: 33%" |
|-
|
|
|
|} <br>
{| style="background-color:#F0FFF0; width: 100%; border-style: none  none  none  none;" data-mce-style="background: transparent; width: 100%;"
|- style="text-align:center;"
| colspan="3" |'''Dungeons'''
|-
| style="width: 33%" |
* [[Amicitia]]
| style="width: 33%" |
| style="width: 33%" |
|-
|
|
|
|}
 
==Level 220+==
{| style="background-color:#FFF0F5; width: 100%; border-style: none  none  none  none;" data-mce-style="background: transparent; width: 100%;"
|- style=";text-align:center;"
| colspan="3" |'''Gear'''
|-
| style="width: 33%" |
* [[Clock_Tower_Unknown_Basement#Solid_Weapons|Solid/Wicked/Precision Weapons]]
| style="width: 33%" |
| style="width: 33%" |
|-
|
|
|
|} <br>
{| style="background-color:#F0FFFF; width: 100%; border-style: none  none  none  none;" data-mce-style="background: transparent; width: 100%;"
|- style="text-align:center;"
| colspan="3" |'''Instances'''
|-
| style="width: 33%" |
* [[Tomb of Remorse]]
| style="width: 33%" |
| style="width: 33%" |
|-
|
|
|
|}
 
== Level 230+ ==
{| style="background-color:#FFF0F5; width: 100%; border-style: none  none  none  none;" data-mce-style="background: transparent; width: 100%;"
|- style=";text-align:center;"
| colspan="3" |'''Gear'''
|-
| style="width: 33%" |
* [[Tomb_of_Remorse#Poenitentia_Gears|Poenitentia Gear]]
| style="width: 33%" |
| style="width: 33%" |
|-
|
|
|
|} <br>
{| style="background-color:#F0FFF0; width: 100%; border-style: none  none  none  none;" data-mce-style="background: transparent; width: 100%;"
|- style="text-align:center;"
| colspan="3" |'''Dungeons'''
|-
| style="width: 33%" |
* [[Varmundt%27s_Biosphere#Overview|Varmundt's Biosphere]]
| style="width: 33%" |
| style="width: 33%" |
|-
|
|
|
|}
 
== Level 240+ ==
{| style="background-color:#FFF0F5; width: 100%; border-style: none  none  none  none;" data-mce-style="background: transparent; width: 100%;"
|- style=";text-align:center;"
| colspan="3" |'''Gear'''
|-
|-
| style="width: 33%" |
|{{#item:450169}}
* [[Constellation_Tower#Equipment_Description|Nebula and Faint Star's Equipment]]
|{{#itemDesc:450169}}
| style="width: 33%" |
| style="width: 33%" |
|-
|-
|
|{{#item:450170}}
|
|{{#itemDesc:450170}}
|
|} <br>
{| style="background-color:#F0FFF0; width: 100%; border-style: none  none  none  none;" data-mce-style="background: transparent; width: 100%;"
|- style="text-align:center;"
| colspan="3" |'''Dungeons'''
|-
|-
| style="width: 33%" |
|{{#item:450171}}
* [[Clock Tower Unknown Basement]]
|{{#itemDesc:450171}}
| style="width: 33%" |
| style="width: 33%" |
|-
|-
|
|{{#item:450172}}
|
|{{#itemDesc:450172}}
|
|} <br>
{| style="background-color:#F0FFFF; width: 100%; border-style: none  none  none  none;" data-mce-style="background: transparent; width: 100%;"
|- style="text-align:center;"
| colspan="3" |'''Instances'''
|-
|-
| style="width: 33%" |
|{{#item:450173}}
* [[Constellation Tower]]
|{{#itemDesc:450173}}
| style="width: 33%" |
| style="width: 33%" |
|-
|-
|
|{{#item:450174}}
|
|{{#itemDesc:450174}}
|
|}
|}

Revision as of 17:18, 24 July 2022

Overview

  • Level Requirement: 240+
  • Starting point: (alberta 214, 77)
  • Cooldown: 3 days
  • Rewards: Faint Star's and Nebula Equipment

Instance

Constellation Tower is the major overhaul of Endless Tower. Guided by Oscar once again, Constellation Tower reaches for the stars in terms of difficulty with its unique random difficulty system and time restriction.
Unlike Endless Tower where it had specific monsters and MVPs on designated floors, Constellation Tower's floors have all randomized monsters per floor. These monsters are strong and as you climb the tower, they will continue to get stronger in both health and attack.
A boss monster will still appear every 5 floors just like Endless Tower. However, the boss that spawns will be random. These bosses are not affected by the floor progression difficulty modifier and also not required in the kill count to complete the floor.
Time management is a strong factor in the instance if you wish to reach the highest difficulty. With only 60 minutes, Constellation Tower offers an NPC every 5 floors that can quicken your climb in exchange for 1000372.png Meteorite Powder (1000372) . If you pay the tribute, you will skip 4 floors (Example Floor 1 to Floor 5). The amount of Meteorite Dust increases each time you use the NPC.
Upon reaching floor 25, you can choose to fight Naght Sieger (Easy) or continue on to floor 50 to fight Betelgeuse (Hard). Choose carefully as you cannot go back to the Tower from the final boss room and you wait 3 days to try the instance again. It recommended to have atleast 30 minutes remaining for the final battle.
If you did press on to fight Betelgeuse, Oscar will appear to ask you if you wish to strengthen the boss. Oscar will require 20x 1000372.png Meteorite Powder (1000372) to roll randomized attributes for Betelgeuse. These attributes are Health, Attack, Recovery, Defense, and Trap. You can roll stars from 1 to 3, Sealed or No Influence. Oscar will allow you to roll as many times as you want. As the difficulty increases, so do the rewards in both quantity and type of chests.

Monsters

  • All monsters are different from the original Endless Tower and normal field mobs.
  • No monster has their original loot table.
Normal Monsters
20998.gif
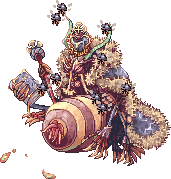
Jakk (20998)
20999.gif
Stone Shooter (20999)
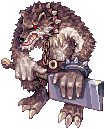
21000.gif
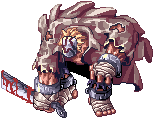
Grizzly (21000)
21001.gif
Stalactic Golem (21001)
21002.gif
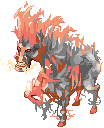
Chimera (21002)
21003.gif
Karakasa (21003)
21004.gif
Rideword (21004)
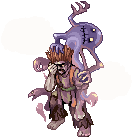
21005.gif
Parasite (21005)
21006.gif
Wraith (21006)
21007.gif
Sky Petite (21007)
21008.gif
Wind Ghost (21008)
21009.gif
Clock (21009)
21010.gif
Raydric Archer (21010)
21011.gif
Increase Soil (21011)
21012.gif
Penomena (21012)
21013.gif
Ground Petite (21013)
21014.gif
Alarm (21014)
21015.gif
Zombie Prisoner (21015)
21016.gif
Marionette (21016)
21017.gif
Permeter (21017)
21018.gif
Skeleton Prisoner (21018)
21019.gif
Owl Duke (21019)
21020.gif
Deviruchi (21020)
21021.gif
Bloody Butterfly (21021)
21022.gif
Stapo (21022)
21023.gif
Taoist Hermit (21023)
21024.gif
The Paper (21024)
21025.gif
Tengu (21025)
21026.gif
Alice (21026)
21027.gif
Anacondaq (21027)
21028.gif
Gargoyle (21028)
21029.gif
Carat (21029)
21030.gif
Sting (21030)
21031.gif
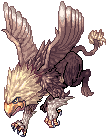
Gryphon (21031)
21032.gif
Gibbet (21032)
21033.gif
Nightmare Terror (21033)
21034.gif
Anolian (21034)
21035.gif
Bloody Murderer (21035)
21036.gif
Aliot (21036)
21037.gif
Venatu (21037)
21038.gif
Deathword (21038)
21039.gif
Plasma (21039)
21040.gif
Dimik (21040)
21041.gif
Mini Demon (21041)
21042.gif
Leib Olmai (21042)
21043.gif
Wanderer (21043)
21044.gif
Retribution (21044)
21045.gif
Flame Skull (21045)
21046.gif
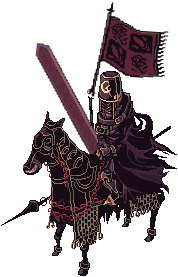
Abysmal Knight (21046)
21047.gif
Banshee (21047)
5th Floor Bosses
21325.gif
Mastering (21325)
21326.gif
Vagabond Wolf (21326)
21327.gif
Vocal (21327)
21328.gif
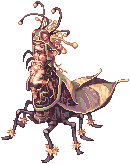
Golden Thief Bug (21328)
21329.gif
Mistress (21329)
21330.gif
Maya (21330)
21331.gif
Phreeoni (21331)
21332.gif
Drake (21332)
21333.gif
Moonlight Flower (21333)
21334.gif
Bacsojin (21334)
21335.gif
Goblin Leader (21335)
21336.gif
Kobold Leader (21336)
21337.gif
Turtle General (21337)
21338.gif
Samurai Specter (21338)
21339.gif
Toad (21339)
21340.gif
Osiris (21340)
21341.gif
Pharaoh (21341)
21342.gif
Amon Ra (21342)
21343.gif
Dark Snake Lord (21343)
21344.gif
Arc Angeling (21344)
21345.gif
Deviling (21345)
21346.gif
Angeling (21346)
21347.gif
Ghostring (21347)
21348.gif
Ygnizem Seniar (21348)
21349.gif
Doppelganger (21349)
21350.gif
Atroce (21350)
21351.gif
Orc Hero (21351)
21352.gif
Orc Lord (21352)
21353.gif
Baphomet (21353)
21354.gif
Dark Lord (21354)
21355.gif
Falling Bishop (21355)
21356.gif
Ifrit (21356)
21357.gif
Randgris (21357)
21358.gif
Beelzebub (21358)
21359.gif
Beelzebub (21359)
Easy Final Bosses Hard Final Bosses
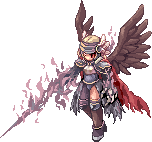
20996.gif
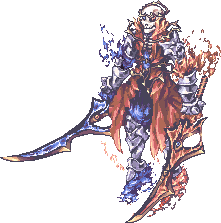
Naght Sieger (20996)
20997.gif
Thorny Skeleton (20997)
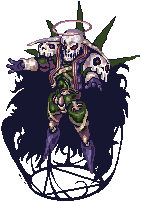
20994.gif
Betelgeuse (20994)
20995.gif
Dead Soul (20995)

Rewards

All monsters in the instance has a chance of dropping 1000372.png Meteorite Powder (1000372) .
Upon defeating the final boss, you will obtain 5 1000373.png Meteorite Fragment (1000373) and 2 1000372.png Meteorite Powder (1000372) .
Defeating Betelgeuse in a higher difficulty, special treasure chests will spawn that may drop the following items:

Item Exchange

You can head back to the Misty Island to use the two vending machines to exchange your rewards.
The vending machine will also break down 1 1000373.png Meteorite Fragment (1000373) for 40 1000372.png Meteorite Powder (1000372) .

Item Currency Amount
1000373.png Meteorite Fragment (1000373) 50x 1000372.png Meteorite Powder (1000372)
450166.png Faint Star Robe [1] (450166) 50x 1000373.png Meteorite Fragment (1000373)

5x 1000396.png Naght Sieger Soul (1000396)

450167.png Faint Star Suit [1] (450167) 50x 1000373.png Meteorite Fragment (1000373)

5x 1000396.png Naght Sieger Soul (1000396)

450168.png Faint Star Armor [1] (450168) 50x 1000373.png Meteorite Fragment (1000373)

5x 1000396.png Naght Sieger Soul (1000396)

450169.png Nebula Armor of Power [1] (450169) 50x 1000373.png Meteorite Fragment (1000373)

30x 1000398.png Power Meteorite Powder (1000398)
10x 1000397.png Betelgeuse Soul (1000397)
1x 450168.png Faint Star Armor [1] (450168)

450170.png Nebula Armor of Stamina [1] (450170) 50x 1000373.png Meteorite Fragment (1000373)

30x 1000398.png Power Meteorite Powder (1000398)
10x 1000397.png Betelgeuse Soul (1000397)
1x 450168.png Faint Star Armor [1] (450168)

450171.png Nebula Suit of Concentration [1] (450171) 50x 1000373.png Meteorite Fragment (1000373)

30x 1000400.png Agile Meteorite Powder (1000400)
10x 1000397.png Betelgeuse Soul (1000397)
1x 450168.png Faint Star Armor [1] (450168)

450172.png Nebula Suit of Creative [1] (450172) 50x 1000373.png Meteorite Fragment (1000373)

30x 1000401.png Lucky Meteorite Powder (1000401)
10x 1000397.png Betelgeuse Soul (1000397)
1x 450168.png Faint Star Armor [1] (450168)

450173.png Nebula Robe of Spell [1] (450173) 50x 1000373.png Meteorite Fragment (1000373)

30x 1000402.png Meteorite Powder of Spell (1000402)
10x 1000397.png Betelgeuse Soul (1000397)
1x 450166.png Faint Star Robe [1] (450166)

450174.png Nebula Robe of Wisdom [1] (450174) 50x 1000373.png Meteorite Fragment (1000373)

30x 1000403.png Meteorite Powder of Wisdom (1000403)
10x 1000397.png Betelgeuse Soul (1000397)
1x 450166.png Faint Star Robe [1] (450166)

Equipment Description

Item Description
450166.png Faint Star Robe [1] (450166) A robe faintly infused with the magic of stars.
_______________________
MATK +125
_______________________
For each 2 Refine Levels:
MATK +15
_______________________
Refine Level +9:
Decreases Variable Casting Time by 10%.
_______________________
Refine Level +11:
Increases Magical Damage with every element by 10%.

_______________________
Type: Armor
Position: Armor
Defense: 105
Armor Level: 2
Refinable
Weight: 50
Required Level: 240
450167.png Faint Star Suit [1] (450167) A suit faintly infused with the magic of stars.
_______________________
ATK +75, MATK +75
_______________________
For each 2 Refine Levels:
ATK +10, MATK +10
_______________________
Refine Level +9:
Increases Attach Speed (Decreases After Attack Delay by 7%).
_______________________
Refine Level +11:
Increases Ranged Physical Damage by 10%.

_______________________
Type: Armor
Position: Armor
Defense: 135
Armor Level: 2
Refinable
Weight: 150
Required Level: 240
450168.png Faint Star Armor [1] (450168) A armor faintly infused with the magic of stars.
_______________________
ATK +125
_______________________
For each 2 Refine Levels:
ATK +15
_______________________
Refine Level +9:
MaxHP +7%
_______________________
Refine Level +11:
Increases Melee Physical Damage by 10%.

_______________________
Type: Armor
Position: Armor
Defense: 175
Armor Level: 2
Refinable
Weight: 250
Required Level: 240
450169.png Nebula Armor of Power [1] (450169) A armor that received the energy of physics among the power of stars.
The physical ability will be increased.
_______________________
POW +1
ATK +125
_______________________
For each 2 Refine Levels:
ATK +15
_______________________
Refine Level +9:
ATK +5%
_______________________
Refine Level +11:
Increases Melee Physical Damage by 20%.
_______________________
[Bonus by Grade]
[Grade D]:
For each 2 Refine Levels:
ATK +2 and ATK +1%.
For each 3 Refine Levels:
Increases Melee Physical Damage by 1%.
_______________________
[Grade C]:
For each 2 Refine Levels:
ATK +3 and ATK +1%.
For each 3 Refine Levels:
Increases Melee Physical Damage by 1%.
_______________________
[Grade B]:
For each 2 Refine Levels:
ATK +2%.
For each 3 Refine Levels:
Increases Melee Physical Damage by 1%.
For each 4 Refine Levels:
P.ATK +1.
_______________________
[Grade A]:
For each 2 Refine Levels:
ATK +3%.
For each 3 Refine Levels:
Increases Melee Physical Damage by 2%.
For each 4 Refine Levels:
P.ATK +2.

_______________________
Type: Armor
Position: Armor
Defense: 175
Armor Level: 2
Refinable / Gradable
Weight: 250
Required Level: 240
450170.png Nebula Armor of Stamina [1] (450170) A armor that received the energy of stamina among the power of stars.
The physical defense and resilience will be increased.
_______________________
STA +1
MaxHP +10%
_______________________
For each 2 Refine Levels:
DEF +15
_______________________
Refine Level +9:
Increases Healing skills effectiveness by 10%.
_______________________
Refine Level +11:
MaxHP +15%
_______________________
[Bonus by Grade]
[Grade D]:
DEF +5
For each 2 Refine Levels:
Increases Healing skills effectiveness by 2%.
For each 4 Refine Levels:
RES +1
_______________________
[Grade C]:
DEF +7
For each 2 Refine Levels:
Increases Healing skills effectiveness by 3%.
For each 4 Refine Levels:
RES +2
_______________________
[Grade B]:
For each 3 Refine Levels:
MaxHP +1%
For each 4 Refine Levels:
RES +3
_______________________
[Grade A]:
For each 3 Refine Levels:
MaxHP +2%
For each 4 Refine Levels:
RES +4

_______________________
Type: Armor
Position: Armor
Defense: 175
Armor Level: 2
Refinable / Gradable
Weight: 250
Required Level: 240
450171.png Nebula Suit of Concentration [1] (450171) A suit that received the energy of agility among the power of stars.
Speed and ranged physical ability will be increased.
_______________________
CON +1
ATK +125
_______________________
For each 2 Refine Levels:
ATK +15
_______________________
Refine Level +9:
Increases Attack Speed by 10%.
_______________________
Refine Level +11:
Increases Ranged Physical Damage by 20%.
_______________________
[Bonus by Grade]
[Grade D]:
ATK +2
For each 2 Refine Levels:
Increases Attack Speed (After Attack Delay -1%).
ATK +1%
[Grade C]:
ATK +3
For each 2 Refine Levels:
Increases Attack Speed (After Attack Delay -1%).
ATK +2%
_______________________
[Grade B]:
For each 2 Refine Levels:
Increases Attack Speed (After Attack Delay -2%).
For each 3 Refine Levels:
Increases Ranged Physical Damage by 1%.
For each 4 Refine Levels:
P.ATK +1
_______________________
[Grade A]:
For each 2 Refine Levels:
Increases Attack Speed (After Attack Delay -2%).
For each 3 Refine Levels:
Increases Ranged Physical Damage by 2%.
For each 4 Refine Levels:
P.ATK +2

_______________________
Type: Armor
Position: Armor
Defense: 135
Armor Level: 2
Refinable / Gradable
Weight: 150
Required Level: 240
450172.png Nebula Suit of Creative [1] (450172) A suit that received the energy of luck among the power of stars.
Critical ability will be increased.
_______________________
CRT +1
ATK +100
_______________________
For each 2 Refine Levels:
ATK +10
_______________________
Refine Level +9:
CRI +5
_______________________
Refine Level +11:
Increases Critical Damage by 20%.
_______________________
[Bonus by Grade]
[Grade D]:
For each 2 Refine Levels:
ATK +1
For each 3 Refine Levels:
Critical Damage +2%
CRI +1
_______________________
[Grade C]:
For each 2 Refine Levels:
ATK +2
For each 3 Refine Levels:
Critical Damage +3%
CRI +2
_______________________
[Grade B]:
For each 3 Refine Levels:
Critical Damage +5%
For each 4 Refine Levels:
C.Rate +1
P.ATK +1
_______________________
[Grade A]:
For each 3 Refine Levels:
Critical Damage +7%
For each 4 Refine Levels:
C.Rate +1
P.ATK +2

_______________________
Type: Armor
Position: Armor
Defense: 135
Armor Level: 2
Refinable / Gradable
Weight: 150
Required Level: 240
450173.png Nebula Robe of Spell [1] (450173) A robe that received the energy of spell among the power of stars.
Magic ability will be increased.
_______________________
SPL +1
MATK +125
_______________________
For each 2 Refine Levels:
MATK +15
_______________________
Refine Level +9:
MATK +5%
_______________________
Refine Level +11:
Increases Magical Damage with every element by 15%.
_______________________
[Bonus by Grade]
[Grade D]:
For each 2 Refine Levels:
MATK +2
MATK +1%
For each 3 Refine Levels:
Increases Magical Damage with every element by 3%.
_______________________
[Grade C]:
For each 2 Refine Levels:
MATK +3
MATK +1%
For each 3 Refine Levels:
Increases Magical Damage with every element by 3%.
_______________________
[Grade B]:
For each 2 Refine Levels:
MATK +2%
For each 3 Refine Levels:
Increases Magical Damage with every element by 5%.
For each 4 Refine Levels:
S.MATK +1
_______________________
[Grade A]:
For each 2 Refine Levels:
MATK +3%
For each 3 Refine Levels:
Increases Magical Damage with every element by 5%.
For each 4 Refine Levels:
S.MATK +2

_______________________
Type: Armor
Position: Armor
Defense: 105
Armor Level: 2
Refinable / Gradable
Weight: 50
Required Level: 240
450174.png Nebula Robe of Wisdom [1] (450174) A robe that received the energy of wisdom among the power of stars.
Magic defense and recovery ability will be increased.
_______________________
WIS +1
MATK +125
_______________________
For each 2 Refine Levels:
MaxSP +2%
Increases Healing skills effectiveness by 1%.
_______________________
Refine Level +9:
Increases SP Recovery Rate by 30%.
_______________________
Refine Level +11:
Decreases Variable Casting Time by 10%.
_______________________
[Bonus by Grade]
[Grade D]:
For each 2 Refine Levels:
SP Recovery Rate +2%.
Increases Healing skills effectiveness by 2%.
For each 3 Refine Levels:
M.RES +1
_______________________
[Grade C]:
For each 2 Refine Levels:
SP Recovery Rate +3%.
Increases Healing skills effectiveness by 2%.
For each 3 Refine Levels:
M.RES +2
_______________________
[Grade B]:
For each 2 Refine Levels:
MaxSP +1%
For each 3 Refine Levels:
MRES +2
For each 4 Refine Levels:
H.PLUS +2
_______________________
[Grade A]:
For each 2 Refine Levels:
MaxSP +2%
For each 3 Refine Levels:
MRES +3
For each 4 Refine Levels:
H.PLUS +3

_______________________
Type: Armor
Position: Armor
Defense: 105
Armor Level: 2
Refinable / Gradable
Weight: 50
Required Level: 240